
This year was one of my busiest! Not only did my students keep me hopping, but I finished more sewing projects than I expected. Here’s a quick look at what I got done in 2015.
(Click any photo to view the full-sized image.)
Crazy-Quilted Pillow #1
Awhile back, I fell in love with crazy-quilting. In the beginning, I had a hard time with embroidering, so the first items I made were rather plain. But after mastering the art of embellishing with a crazy-quilted book cover, I decided to make a crazy-quilted throw pillow for the bedroom.
It has patches of dark purple, lavender, champagne, and gold. In addition to varying the colors, I made sure the textures were different, pairing satin charmeuse with matte satin, taffeta, and delicate point d’esprit. I added ivory lace, including a piece of fragile antique lace from my late grandmother’s stash.
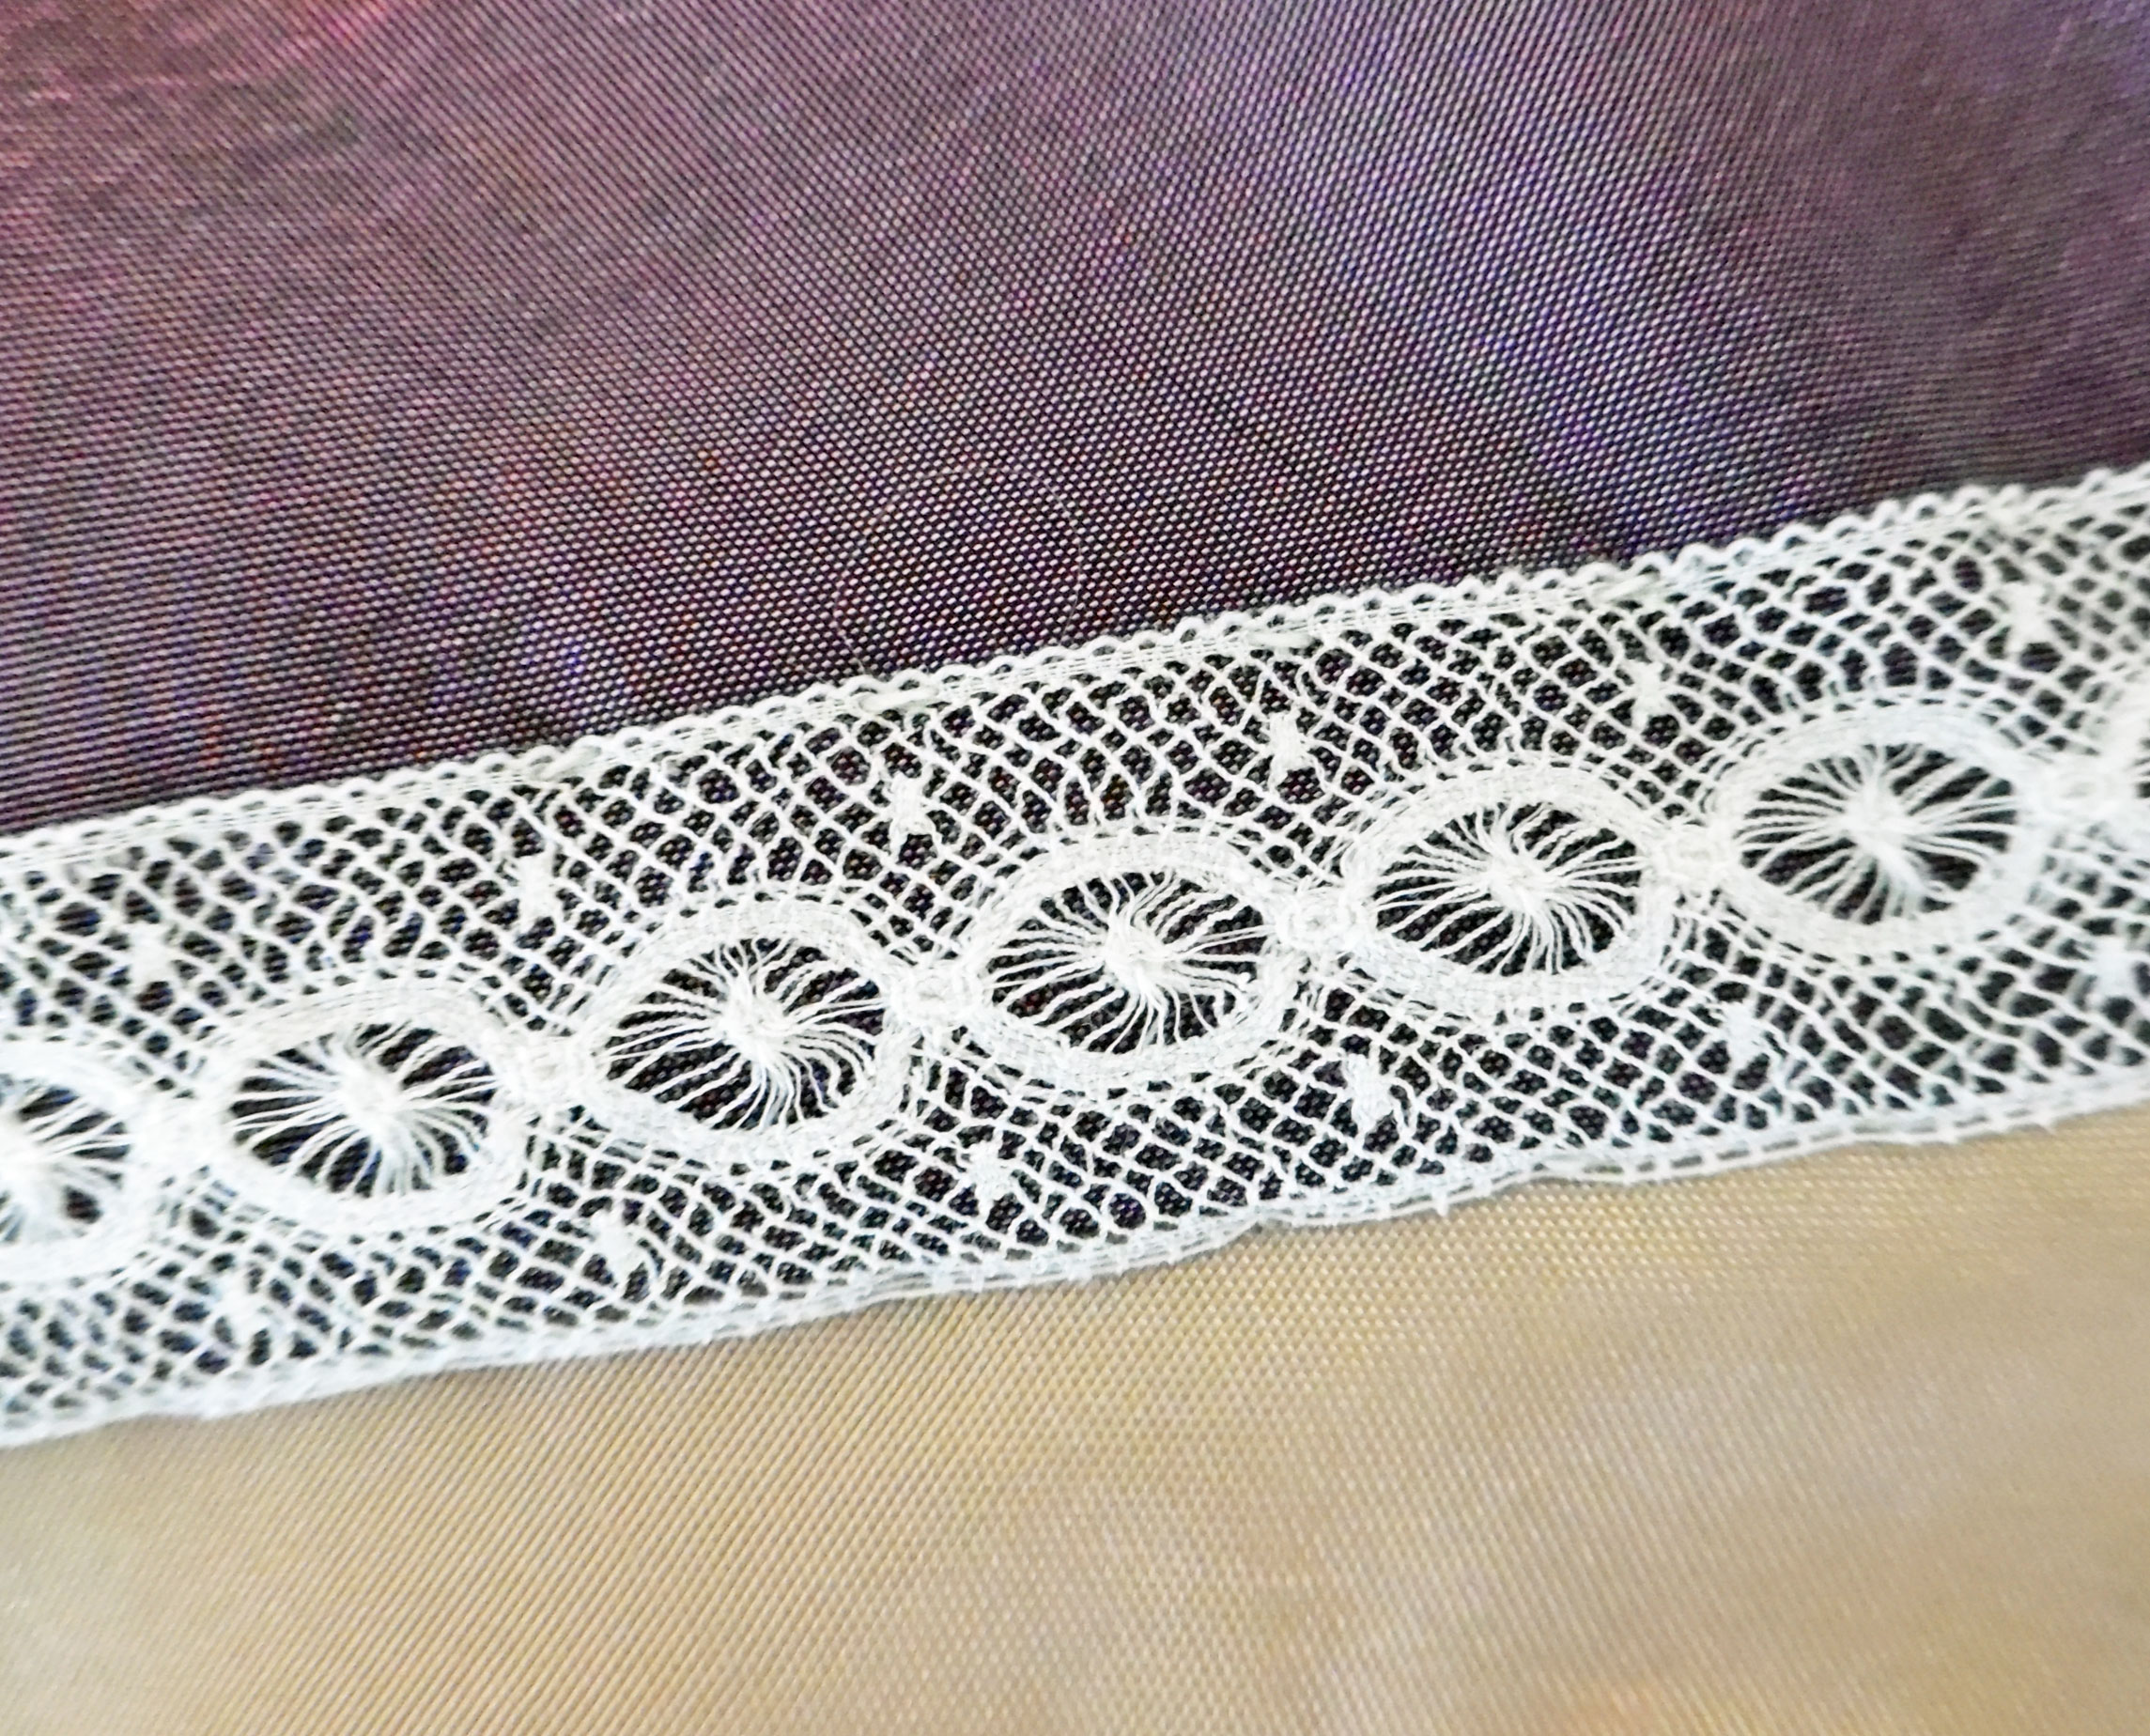
Antique Lace
After stitching the quilt top together, I embroidered along the patchwork seams, using a variety of common and not-so-common hand-stitches. I added some floral silk ribbon embroidery, which provided three-dimensional texture. Finally, for a bit of sparkle, I attached tiny seed beads and small Swarovski crystals.
I’m quite pleased with the result. The color combination isn’t my favorite; even though I love purple and it matches my bedroom, it’s a bit too sober for my taste. But I like the subtle touches of color provided by the embroidery and beading. And I love how the ivory lace looks against the purple and gold fabrics!
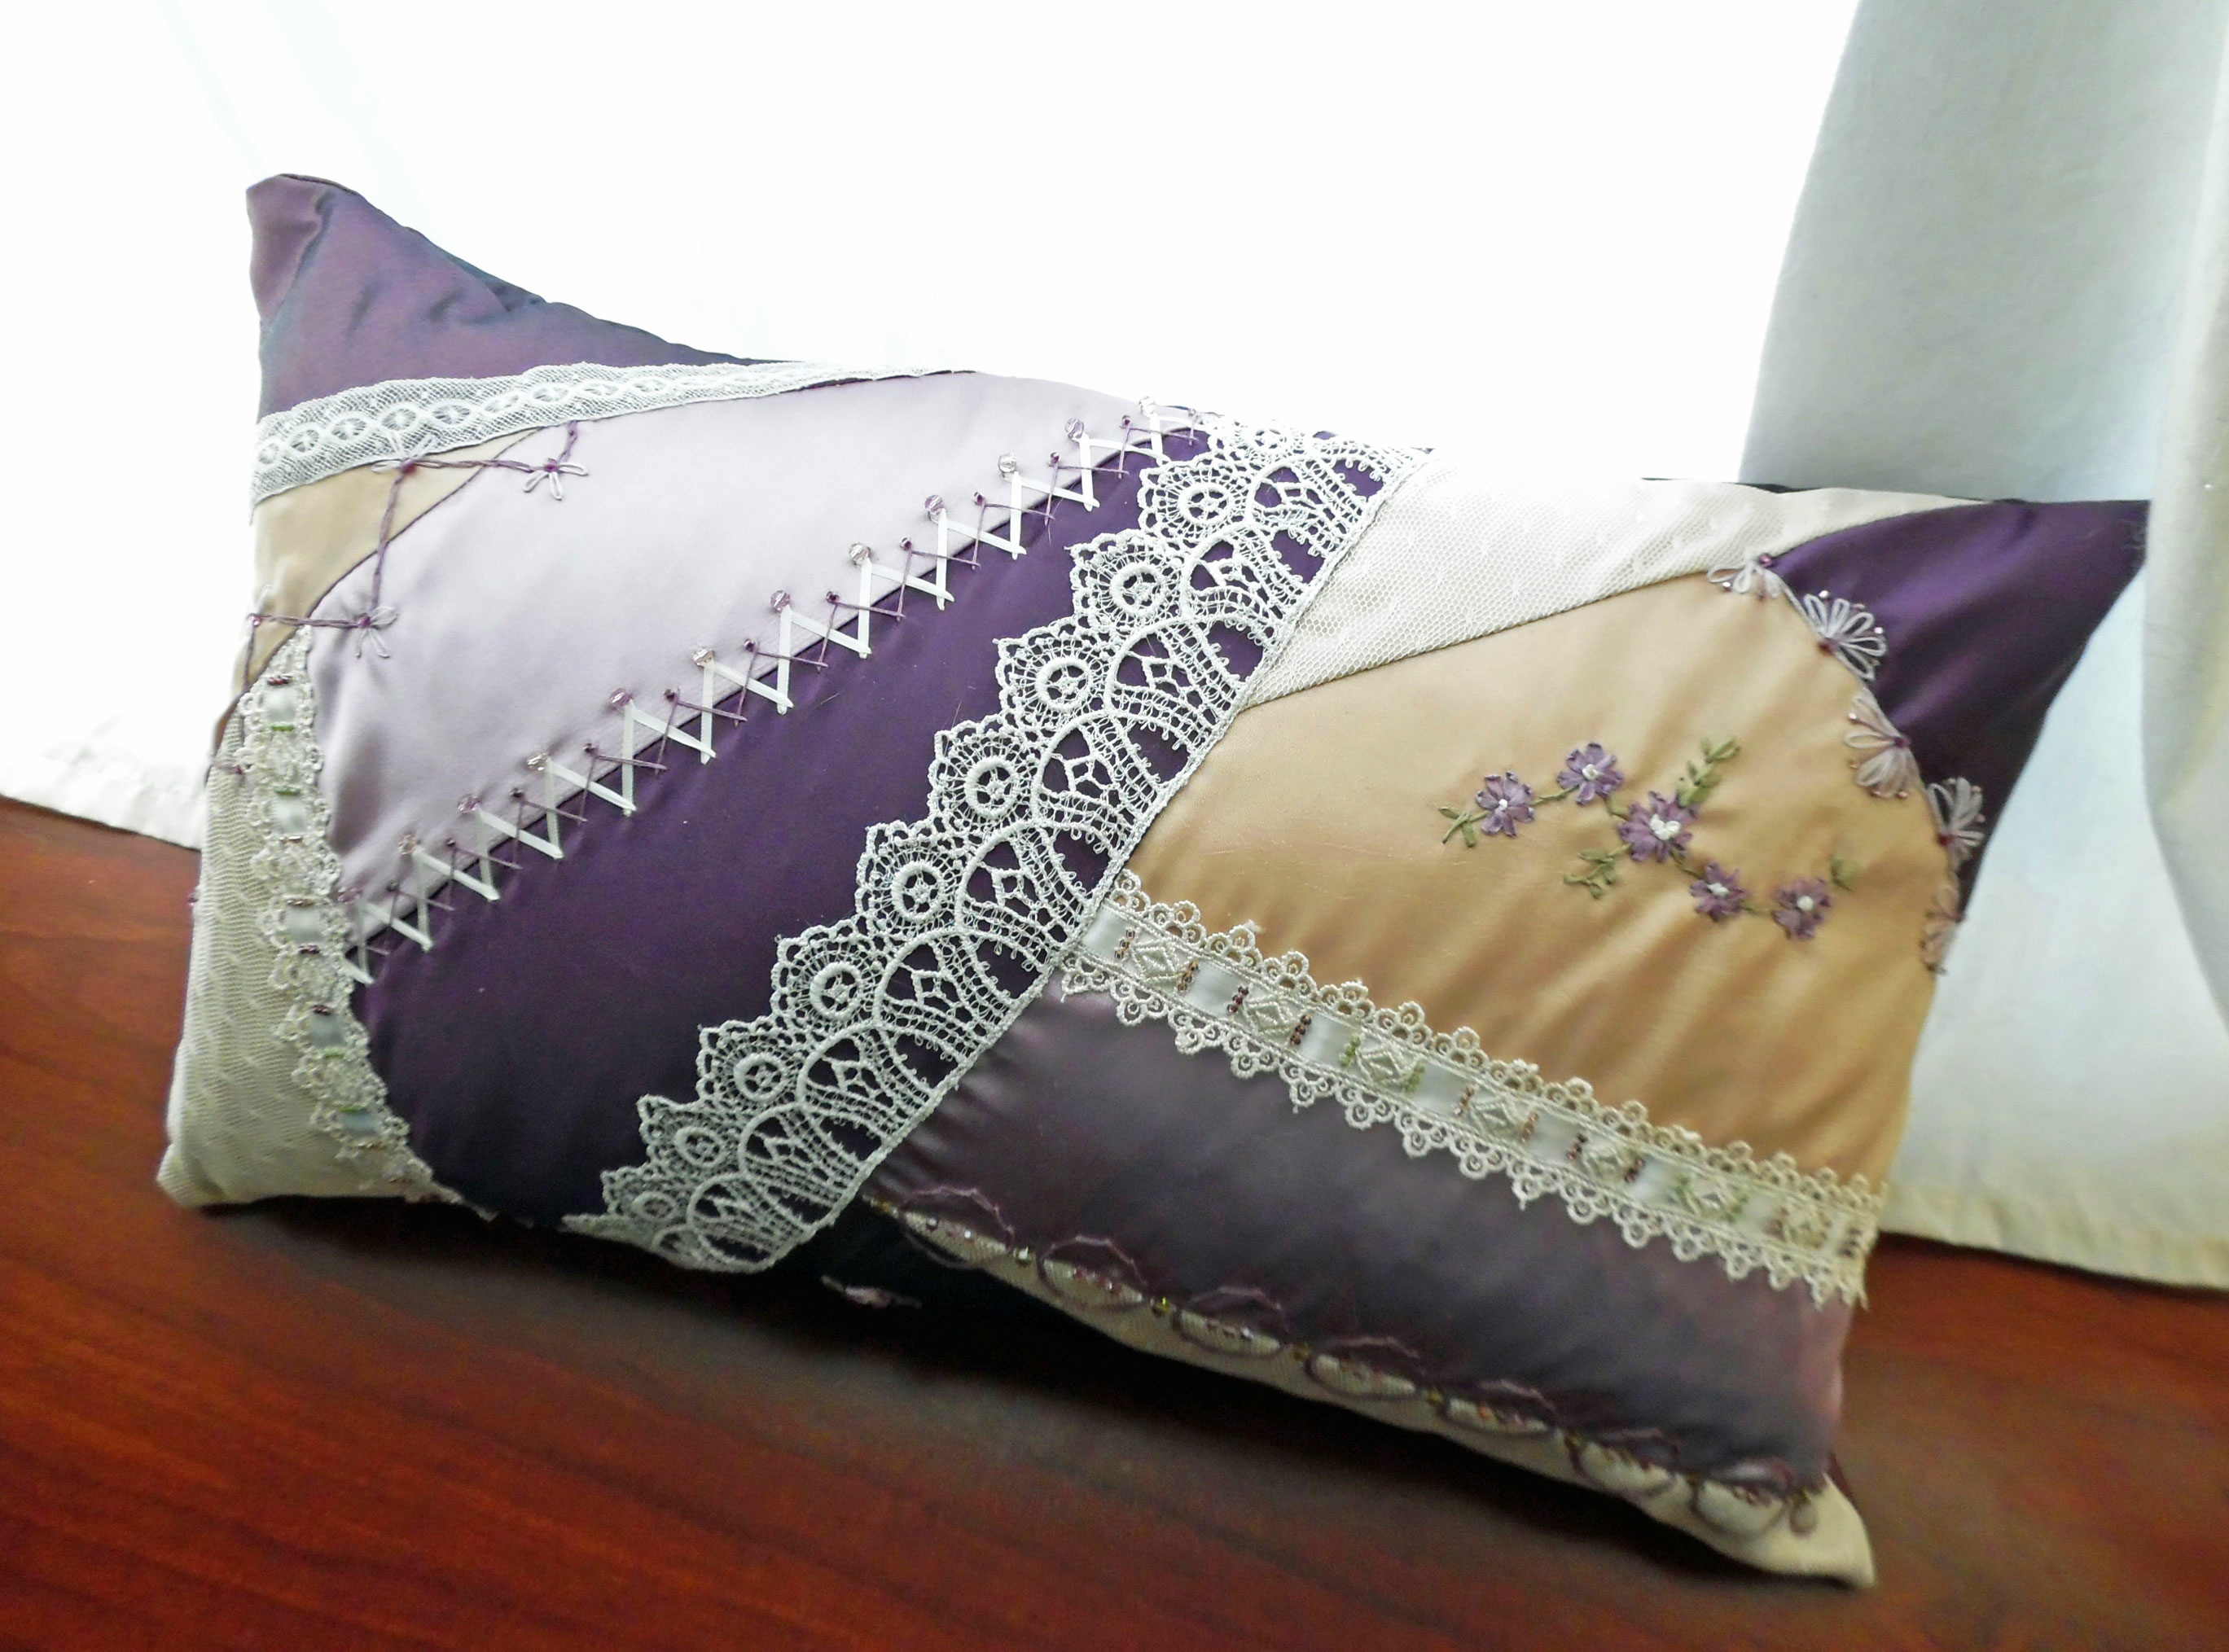
Crazy-Quilted Pillow #1
For more details, see my sewing diary: Crazy-Quilted Throw Pillow.
Crazy-Quilted Pillow #2
After the first pillow turned out so beautiful, I decided to make a crazy-quilted throw pillow for a friend. Her home’s color scheme includes dark red, beige, and olive green, so I used a deep crimson silk, along with satin and taffeta in shades of olive green, gold, and champagne. I embellished with gold-dyed Venise lace, an ivory embroidered lace, and a great deal of hand-worked embroidery and silk ribbon embroidery. I added seed beads and Swarovski crystals. And I even attached a small dragonfly, in the form of a gold lace applique, darting amongst the flowers.
This pillow turned out to be my favorite of all the crazy-quilt work I’ve done. Something about the colors and textures worked so well together. I hope I can duplicate the effect in the future!
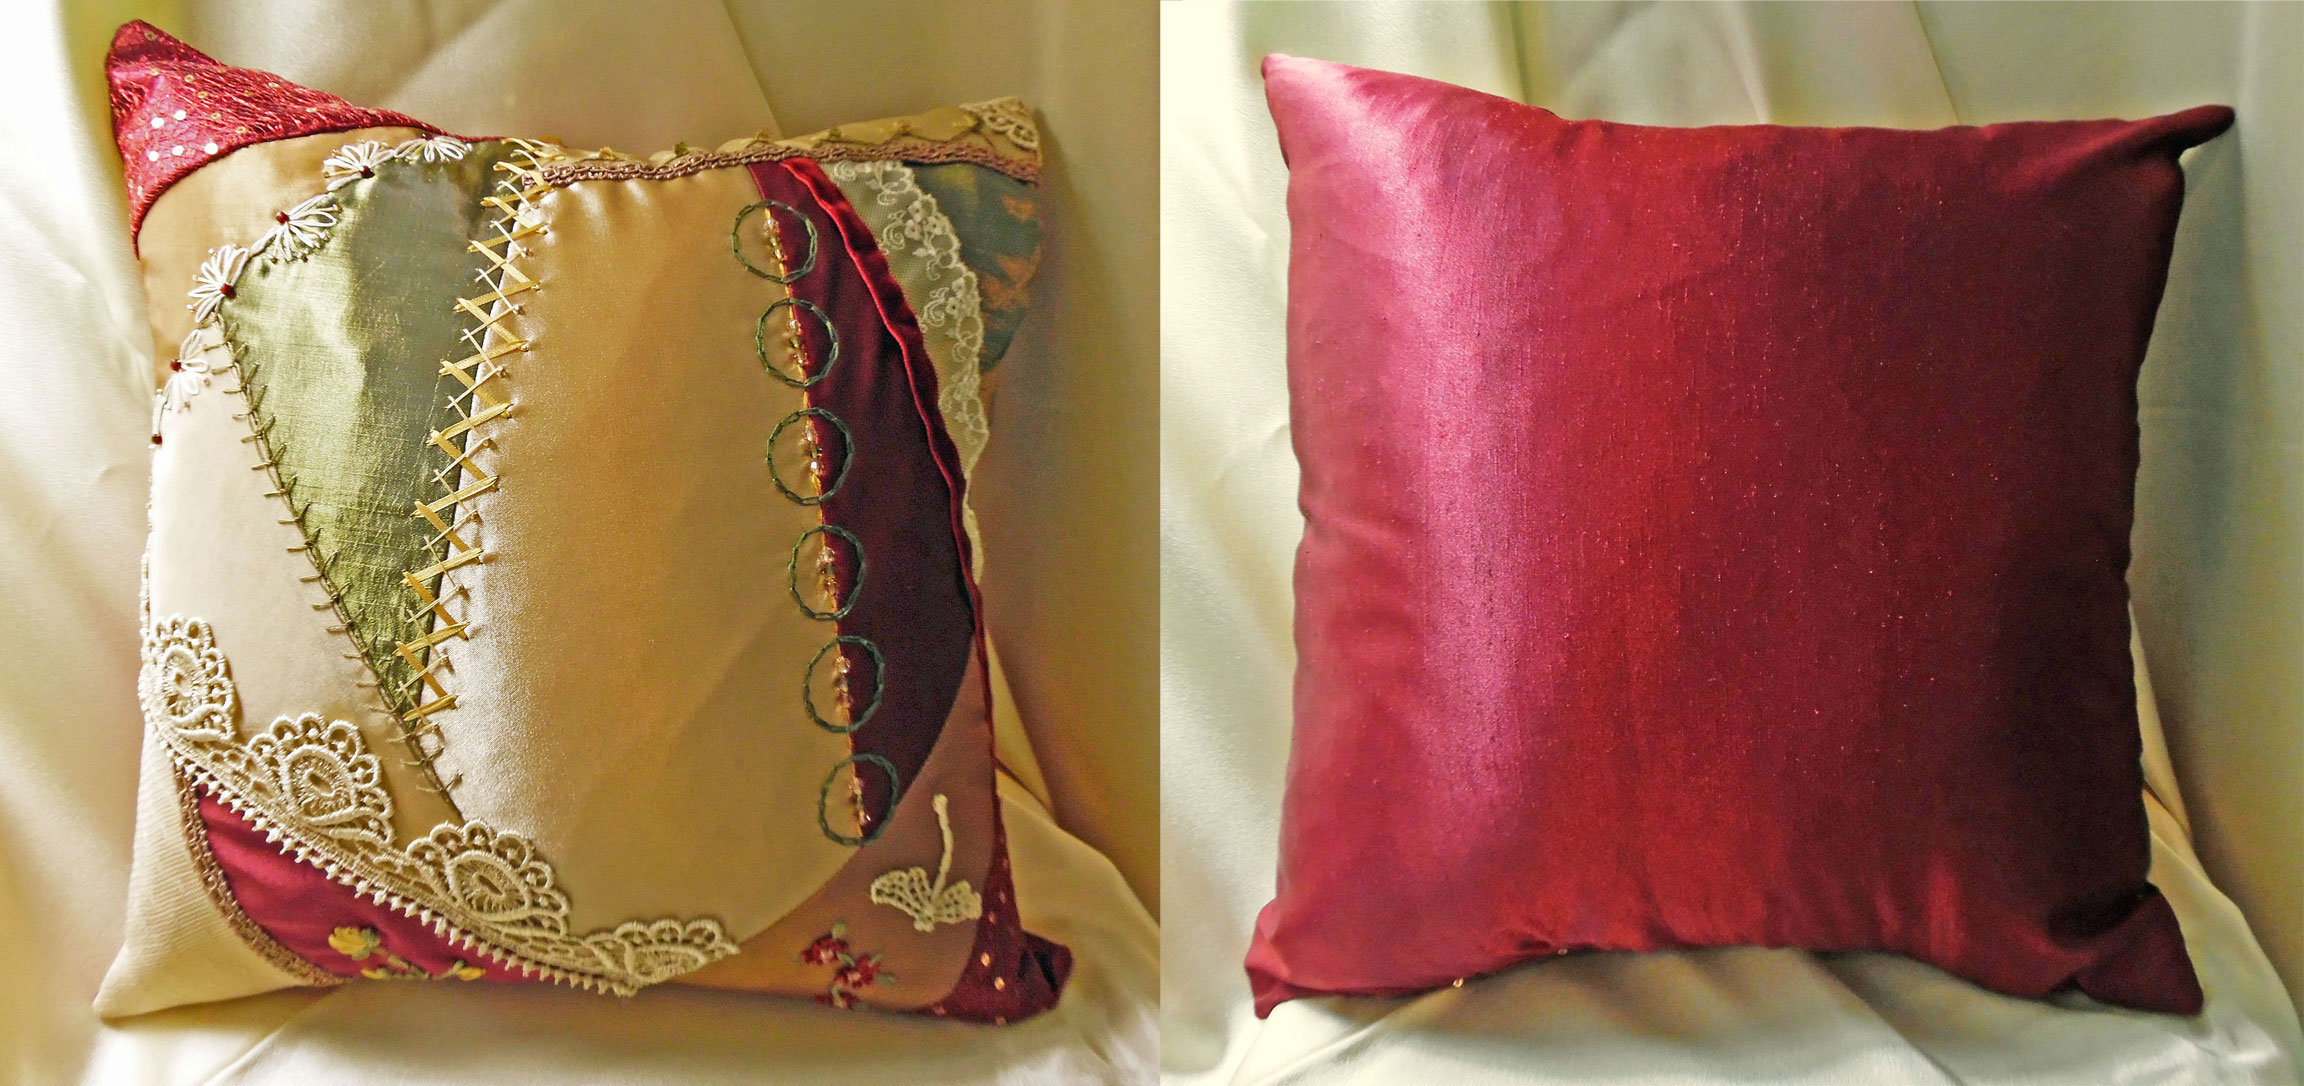
Crazy-Quilted Pillow #2
For more details, see my sewing diary: Second Crazy-Quilted Pillow.
Arwen’s Coronation Gown Renovation
While I didn’t actually create this medieval gown, I mended and embellished it, making it my own. It’s a replica of Arwen’s coronation gown, from The Lord of the Rings: Return of the King . . . and I found it at a thrift shop in California for less than $5! It was in poor shape, so I decided to fix it up. My plan was to spruce it up and then sell it on eBay for a profit.
The stretch velvet was crushed in a few places. There was nothing I could do to repair that, but I trimmed all the loose threads, carefully stitched up the torn lace, and mended the seams that were coming apart. I removed the pathetically frayed silver rickrack from the sleeves and replaced it with a fancier silver braid. I added additional silver braid to the neckline. Since the gown’s bottom edge was serged, but not actually hemmed, I pressed the edge under and used a catch-stitch to hem it.
When all was said and done, I decided it was too lovely to part with! Even though it didn’t fit me, I couldn’t bear to sell it. After all, how often do you stumble across an Elvish coronation gown at the thrift store?
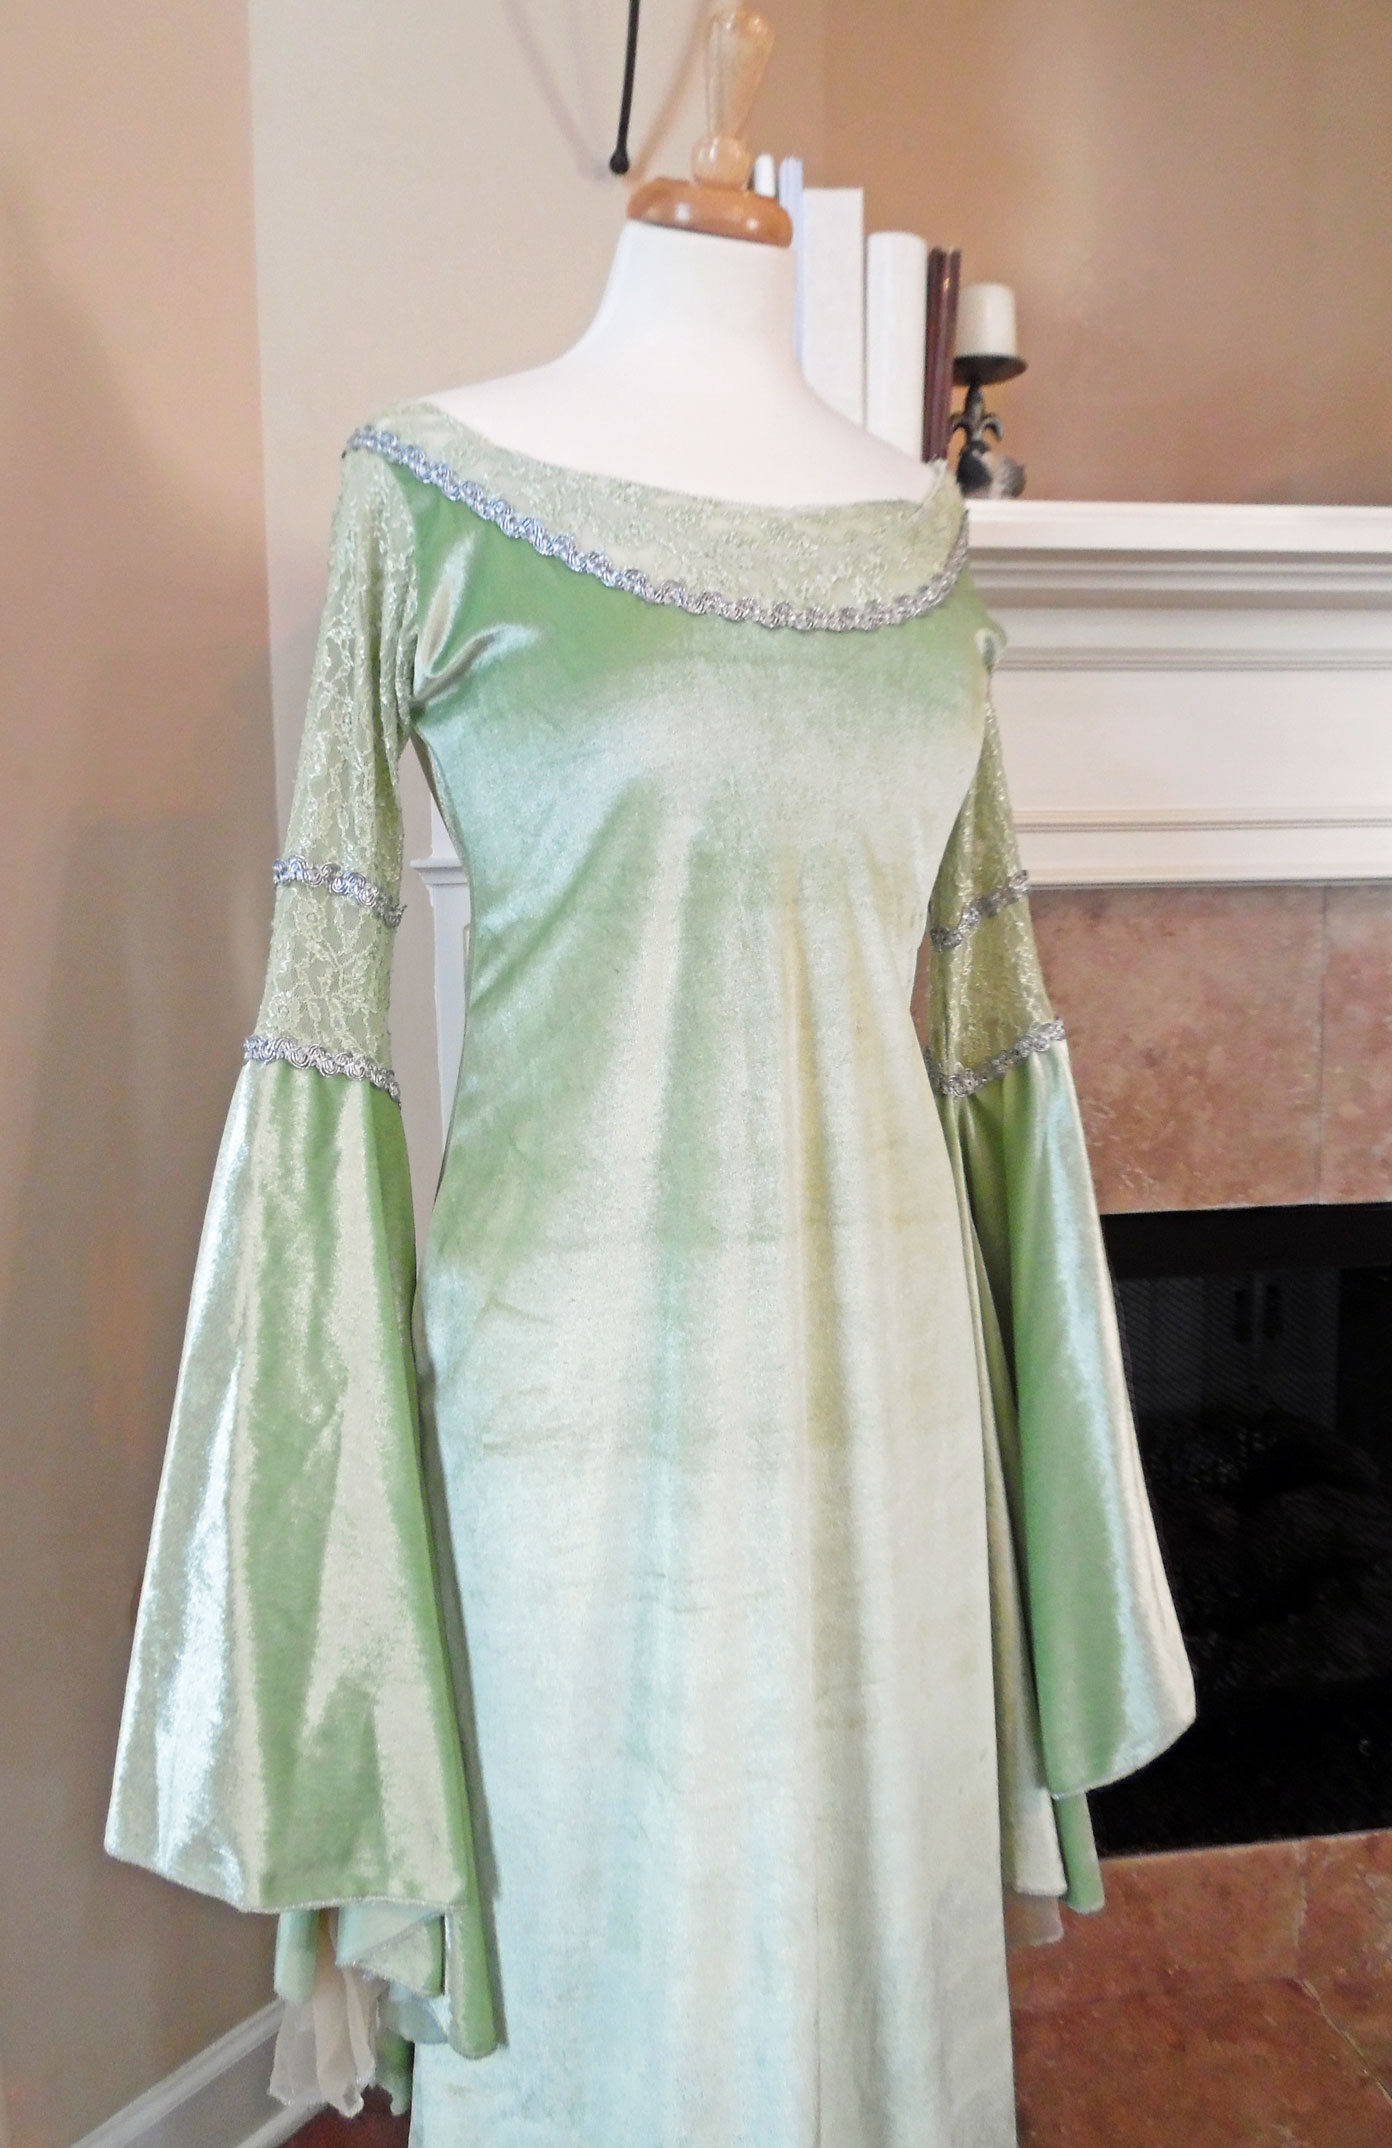
Arwen’s Coronation Gown
For more details, see my sewing diary: Lord of the Rings Makeover.
Iron Cover
When I realized that dust was collecting around the edges of my iron’s soleplate, I decided to make a protective dust-cover for it. Every iron is a different size and shape, so I couldn’t use a pre-made pattern—I had to draft my own.
I designed it to be flat across the soleplate, with shaped side pieces, and an elastic edge that grips the iron to keep the cover on. The fabric is a lavender batik, which coordinates with my ironing board cover and padded stool cover. To be honest, it isn’t the greatest thing I’ve ever sewn, but it keeps dust off the iron . . . which is what it’s made for, so in that sense, it’s a success.
Unfortunately, soon after finishing this project, I had to trade my iron in for a newer model, which is a different size and shape, so I can’t use the cover with it. I guess I’ll have to make a new one.

Iron Cover
Doll’s Steampunk Costume
In 2014, I made myself a Steampunk costume to wear to DragonCon, a sci-fi/fantasy convention that takes place every summer in Atlanta, Georgia. Several months later, I decided it would be fun to create a matching costume for a 22-inch American Model doll.
The doll version includes:
- Mid-calf length tiered skirt, made of brown voile (a very thin, semi-sheer cotton).
- Bustled overskirt of lightweight brown taffeta, trimmed with a narrow tan braid and tiny antique-bronze beads.
- Two-toned Victorian corset of brown and ivory taffeta, along with ivory point d’esprit (a fine netted lace) and antique-bronze beads. The corset is actually boned and laces up the back!
- Kimono-style shrug of brown voile, trimmed with tan braid and antique-bronze beads.
I adore this doll outfit, partly because it’s a good match for the costume I wore, and partly because the fabrics work so well together. Initially, I made a solid brown corset, but it didn’t look right—there wasn’t enough color contrast. So I made a new corset, using ivory taffeta and point d’esprit for the side panels. It looks a thousand times better!
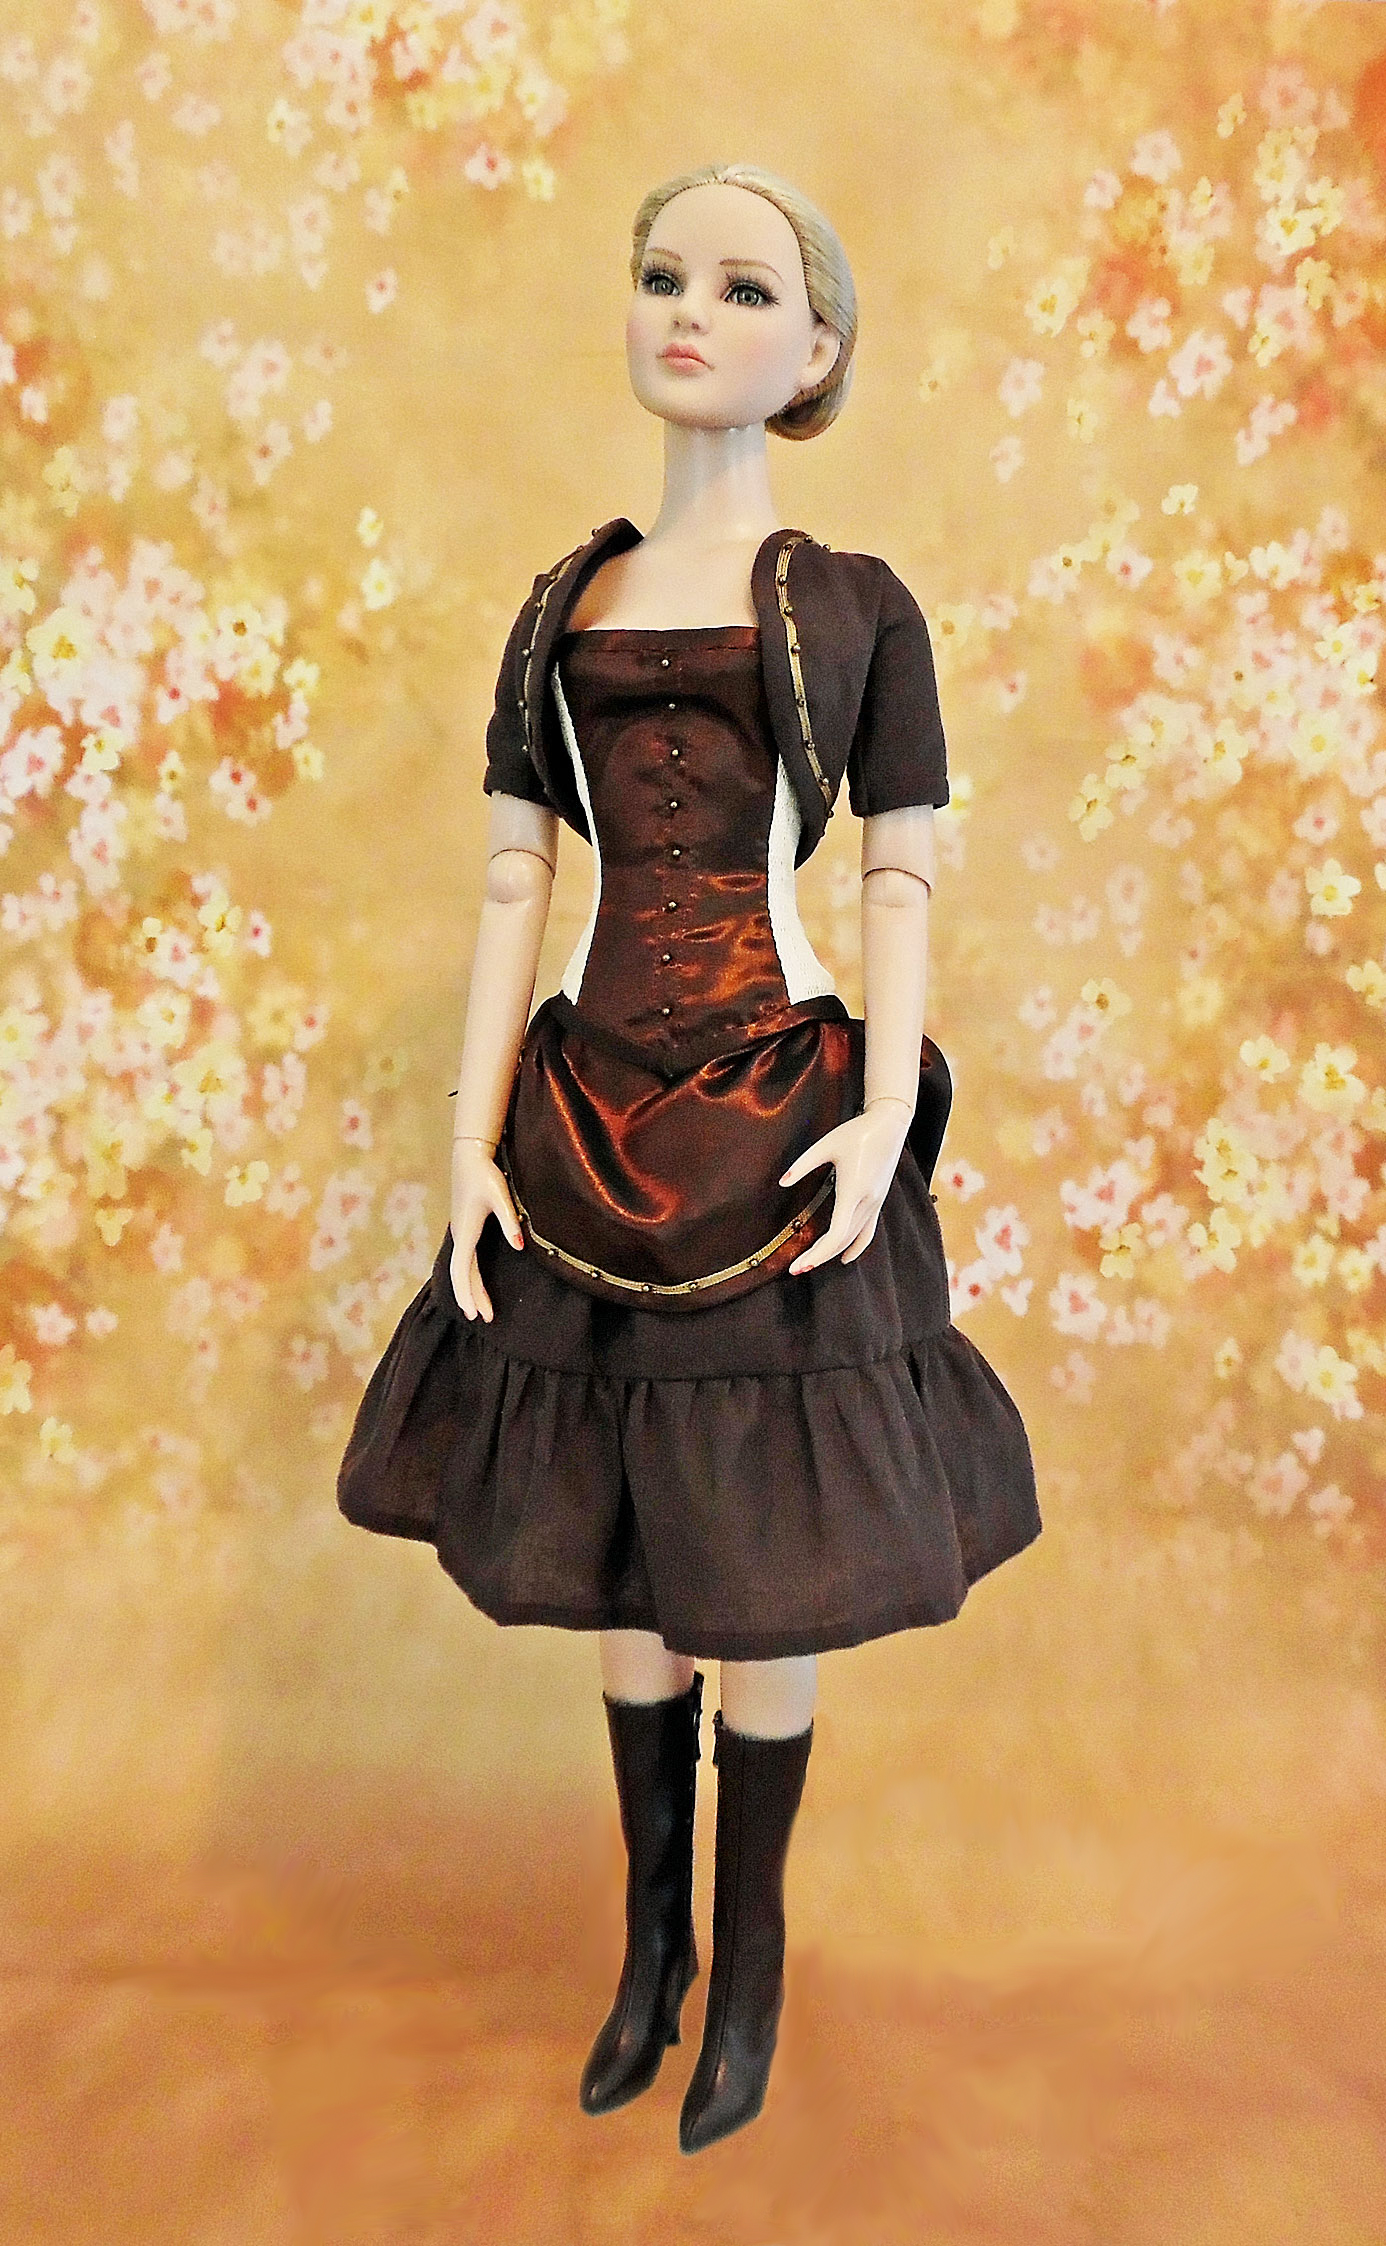
Steampunk Doll Costume
Fuchsia Kimono Top
While technically a mockup for a kimono-styled sweater (which I haven’t made yet), I went ahead and finished this top properly, so it could be worn.
It’s made from a crushed tissue knit jersey in fuchsia. The neckline is a wide scoop—a bit too wide, actually, as I had trouble keeping it on my shoulders! After taking the photo (below), I made some gathered knit jersey flowers, which I attached near the neckline on one side to add a little pizzazz. In the end, I decided the top was simply too big, so I gave it to my younger sister.
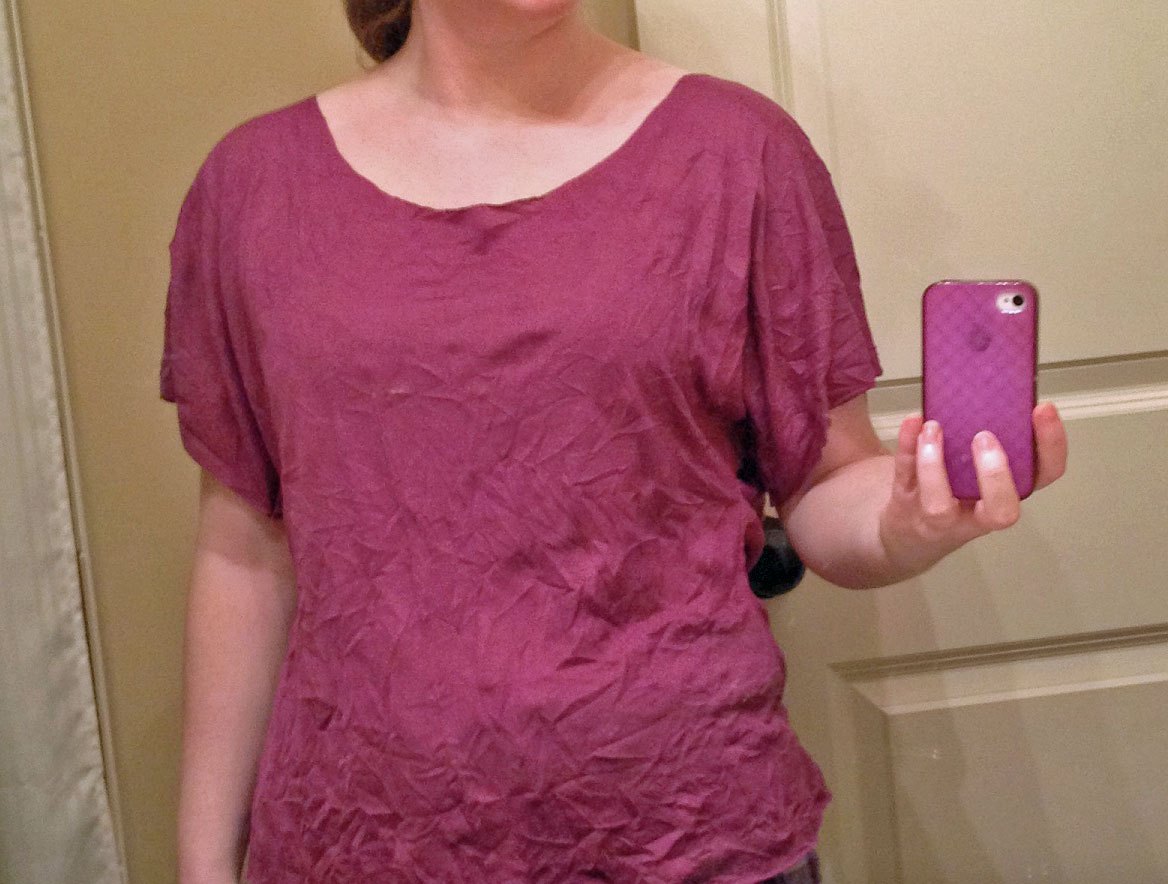
Kimono Top
Purple Leopard-Print Pillow
My sister is obsessed with animal print, and she loves bright purple, so when I found a purple leopard-print lace and coordinating sateen at the fabric store, I knew I had to make something special for her.
I chose to sew a round pillow with a ruffled flounce, using a pillow form, which is a bit more stable than simply stuffing it. One side is layered with lace over sateen, while the other side leaves the leopard-print sateen visible. The ruffle goes all the way around the edge, adding a dramatic flair. It was easy to make, and my sister absolutely loves it!
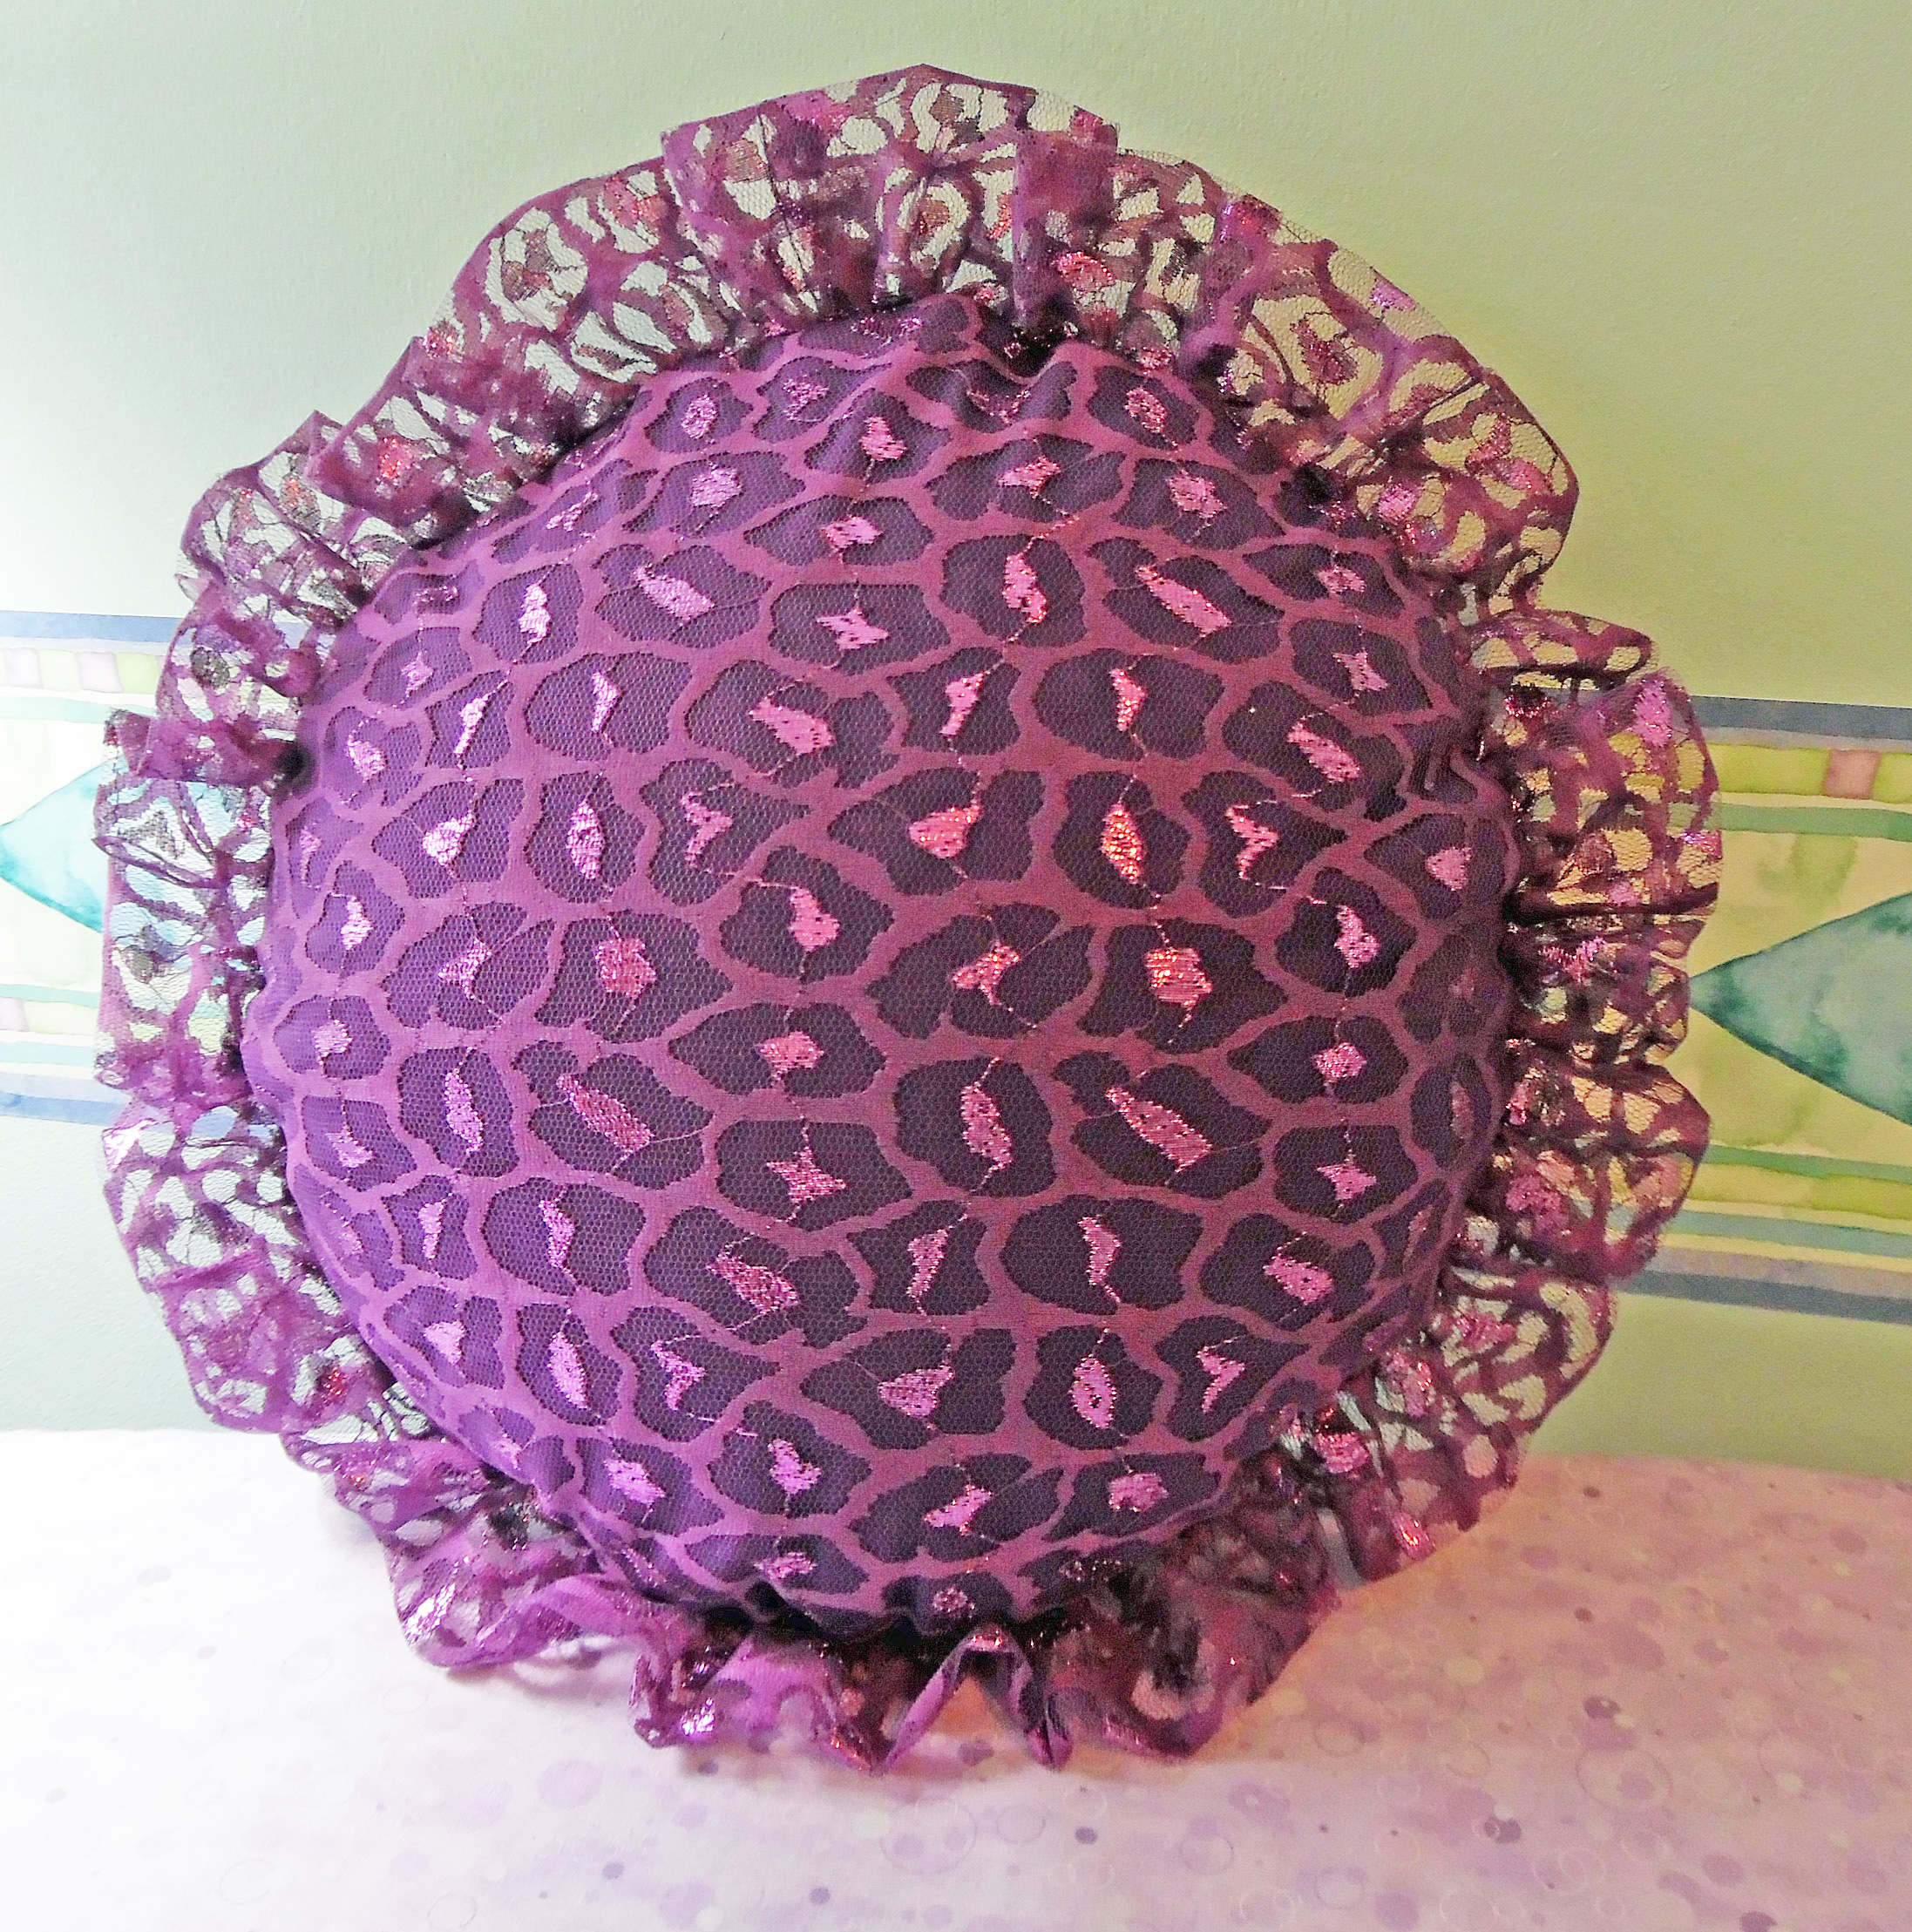
Purple Leopard-Print Pillow
For more details, see my sewing diary: Ruffled Animal-Print Pillow.
Zippered Tote Bag
One of my preteen students wanted to make a tote bag in class, so I made the pattern first, testing it to see if it had any construction issues that might be too challenging for her. It ended up being one of my favorite projects of the year! It does have a few minor issues, but I really love the colors and fabrics, and it’s so practical. (I use it for keeping yarn and crochet hooks in while traveling.)
For the main fabric, I chose a fun quilting cotton that has rows of aqua, purple, and green dots. For the outer pockets, I used a lavender cotton that’s stippled with silver dots, which ties in both the color and pattern of the first fabric. For the lining, I picked a solid aqua fabric, and for the straps, a lime green floral cotton. I edged the pockets with a narrow cluny lace (aqua), and glued three shimmery floral buttons to the front (purple and green). It closes with a lavender zipper, to which I fastened a handmade beaded pull tab. The tab makes it easier to open and close the bag, but it also adds a bit of glitz.

Tote Bag
Doll’s Jeans & T-Shirt
I needed something basic for my dolls to wear while modeling some crocheted scarves and winter accessories I’d crocheted. Wanting to expand my pattern-drafting skills, I created a pair of jeans and t-shirt from scratch, for my 22-inch American Model doll.
For the jeans, I used a dark indigo chambray, which resembles denim, but is quite a bit thinner. They’re straight-leg trousers, with side pockets. The shirt is made from a tissue knit jersey, in a peachy-tan color, similar to the doll’s skin-tone. It has a high neckline and short kimono-style sleeves, and it fastens down the back with the world’s smallest snaps.
I’m pleased with the fit of the jeans and t-shirt. The only thing I would have done differently is to interface the center back edges of the shirt, so the closure would be more stable. As it is, it’s a bit rippled, since the edges stretched when I sewed them.
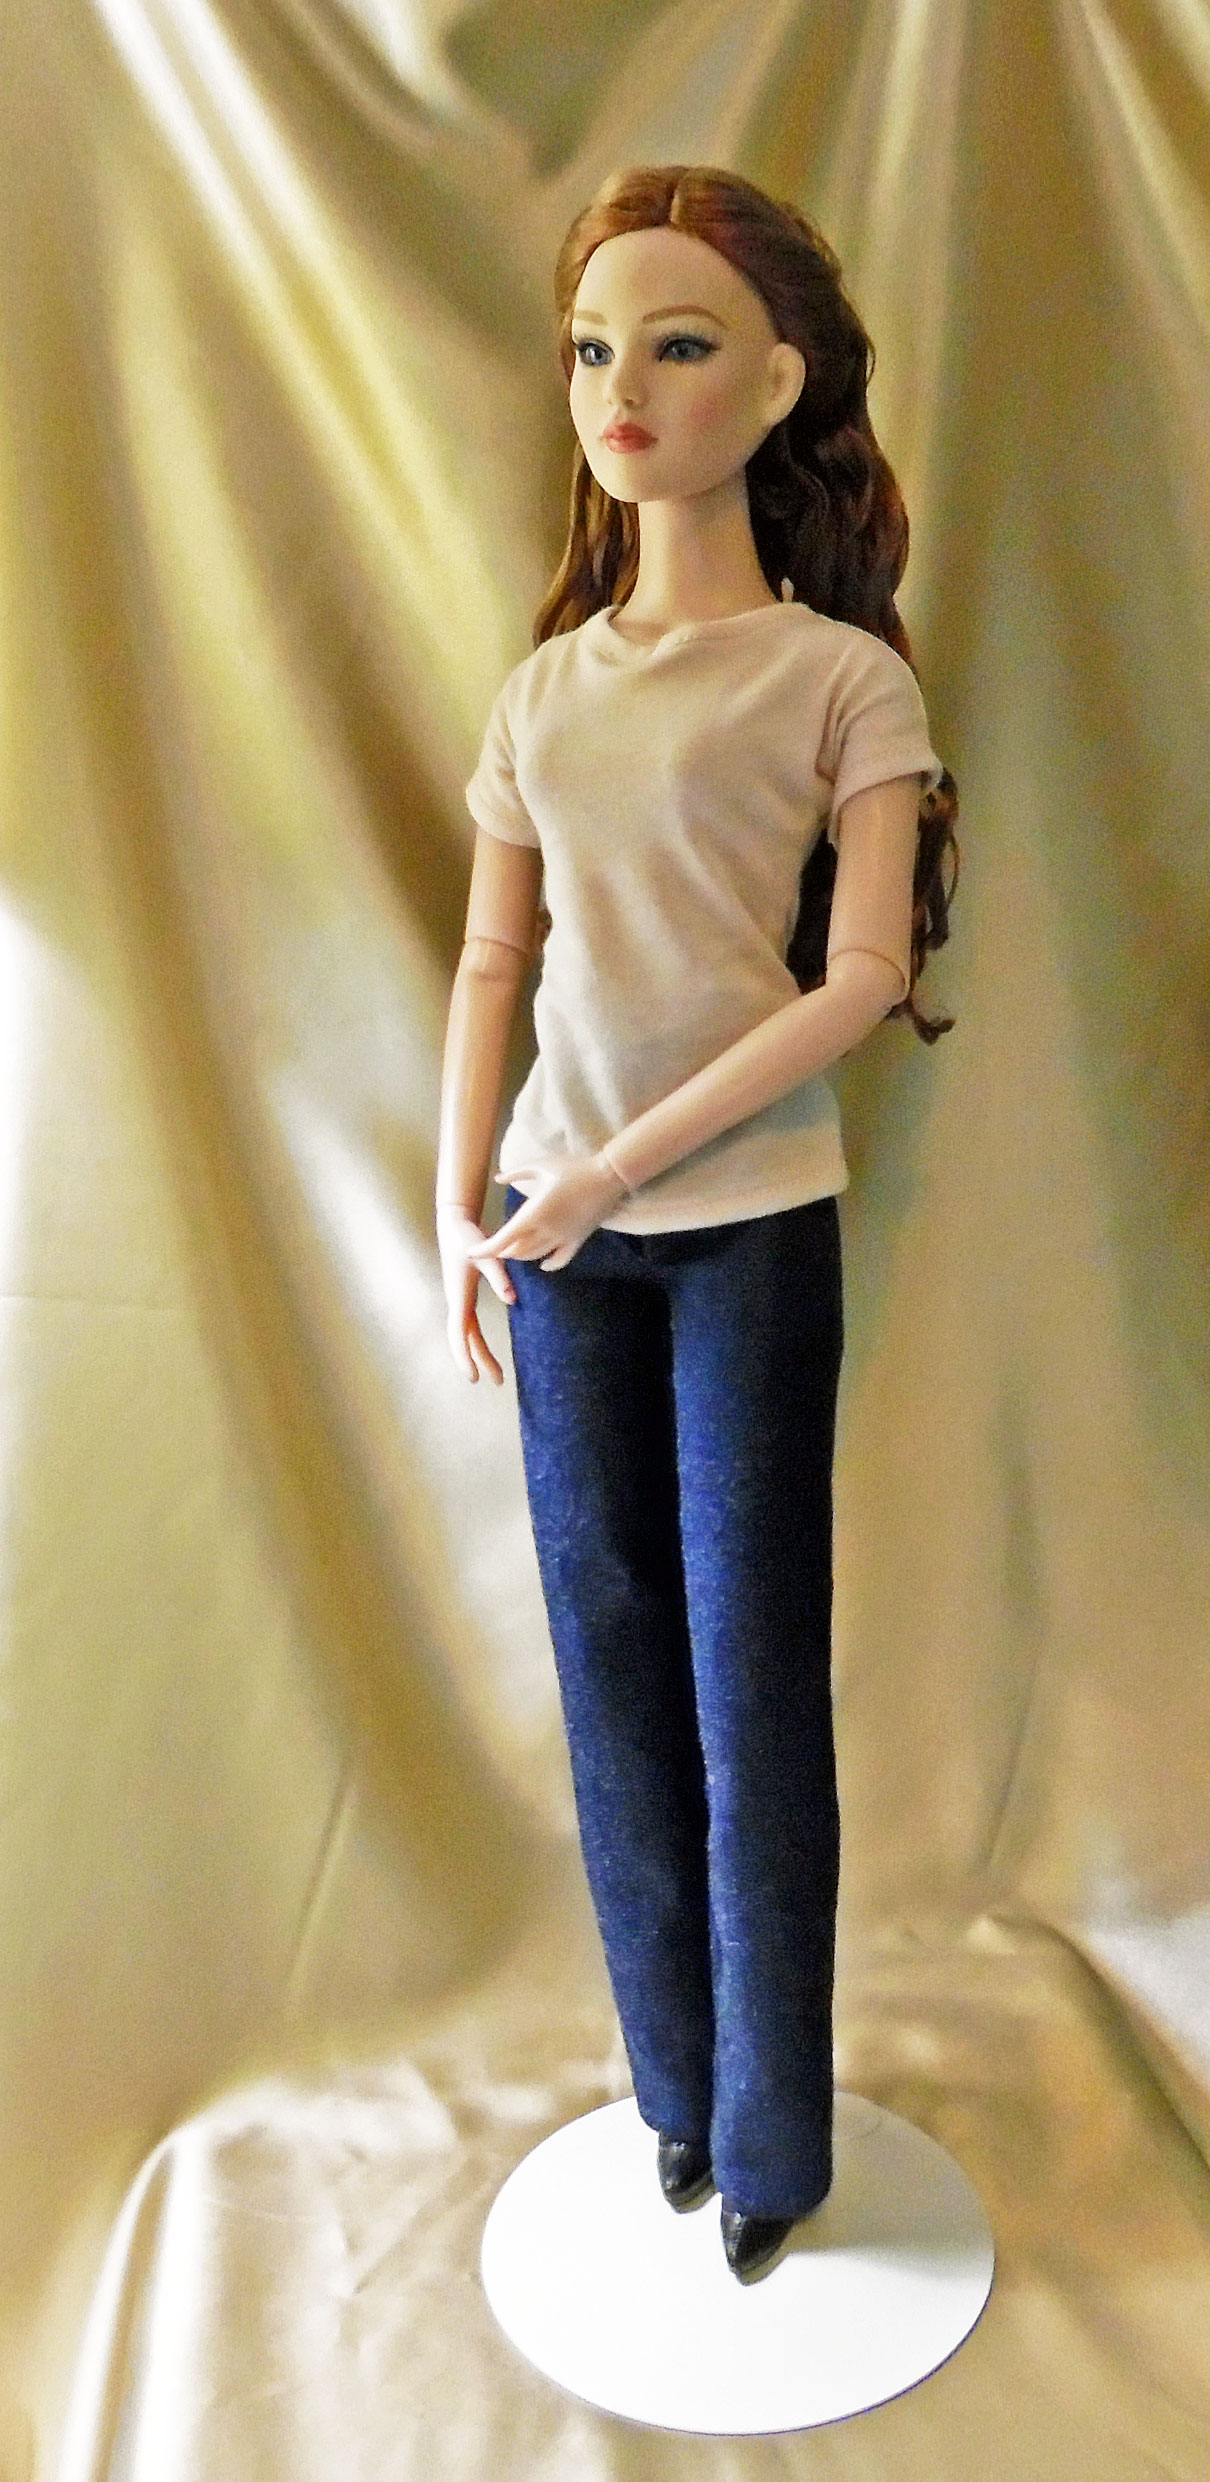
Doll Jeans & T-Shirt
Sewing Machine Pincushion
One of the first rules I teach my students is: Never sew over pins! If the needle hits a pin, it can shatter, sending bits of metal flying everywhere. It can also damage your sewing machine, messing up the timing. For the sake of convenience, you need someplace to stick your pins as you pull them from the fabric while sewing. So, I contrived a pincushion that fastens around the sewing machine.
It’s made of a basic round pincushion, with a strap that wraps all the way around the main part of the sewing machine. The pincushion came out a bit top-heavy, so I didn’t like using it, but one of my students loved it, so I let her keep it. Next year, I plan to make a new one with a modified design—most likely a more stable rectangle, like my wrist pincushion.
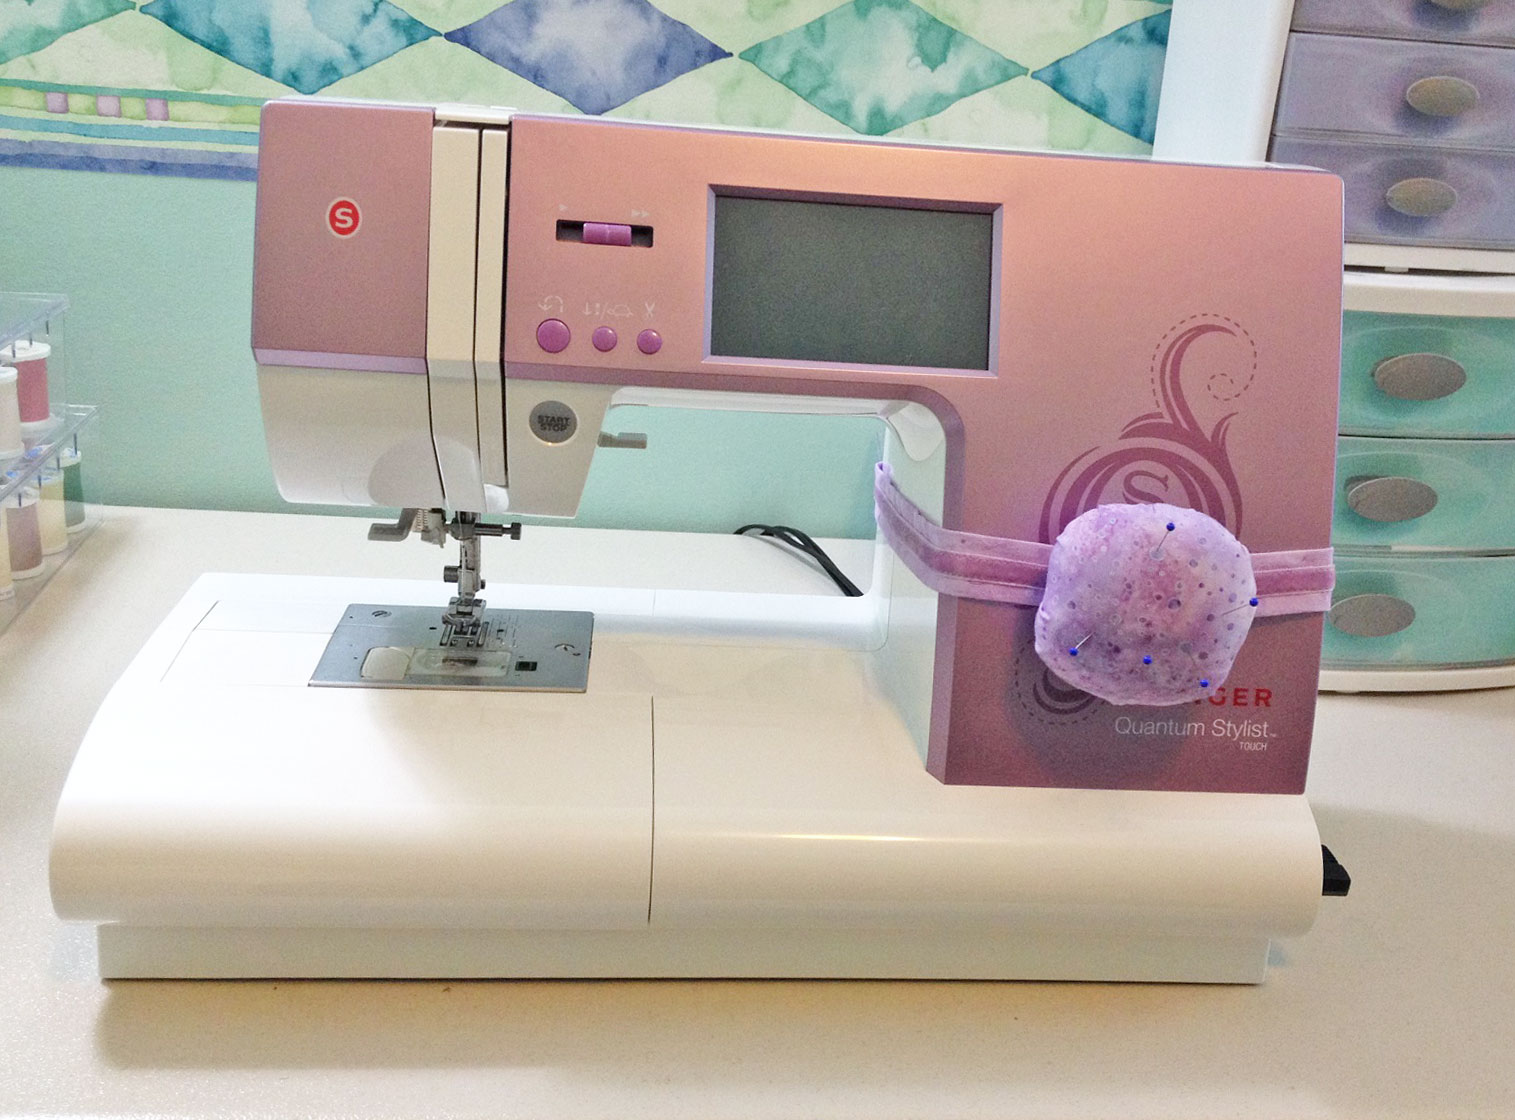
Sewing Machine Pincushion
For more details, see my blot post: Sewing Machine Pincushion.
Padded Stool Cover
While I teach, I often sit on a wooden stool to observe my students at the sewing machine. As you can imagine, it’s not the most comfortable thing in the world. So I made a padded cover for it.
I found the design somewhere on Pinterest. I used a lavender batik, which coordinates with my sewing room, and trimmed the sides with a wide strip of lavender cluny lace. The padding is a circle of quilt batting, but it wasn’t quite enough for a comfortable seat, so I later added a layer of foam, which I cut to size. The cover fits snugly over the padding and cinches with a drawstring, so I can remove it if I ever want to change my décor.
This was an easy project—and one that my backside will be eternally grateful for!
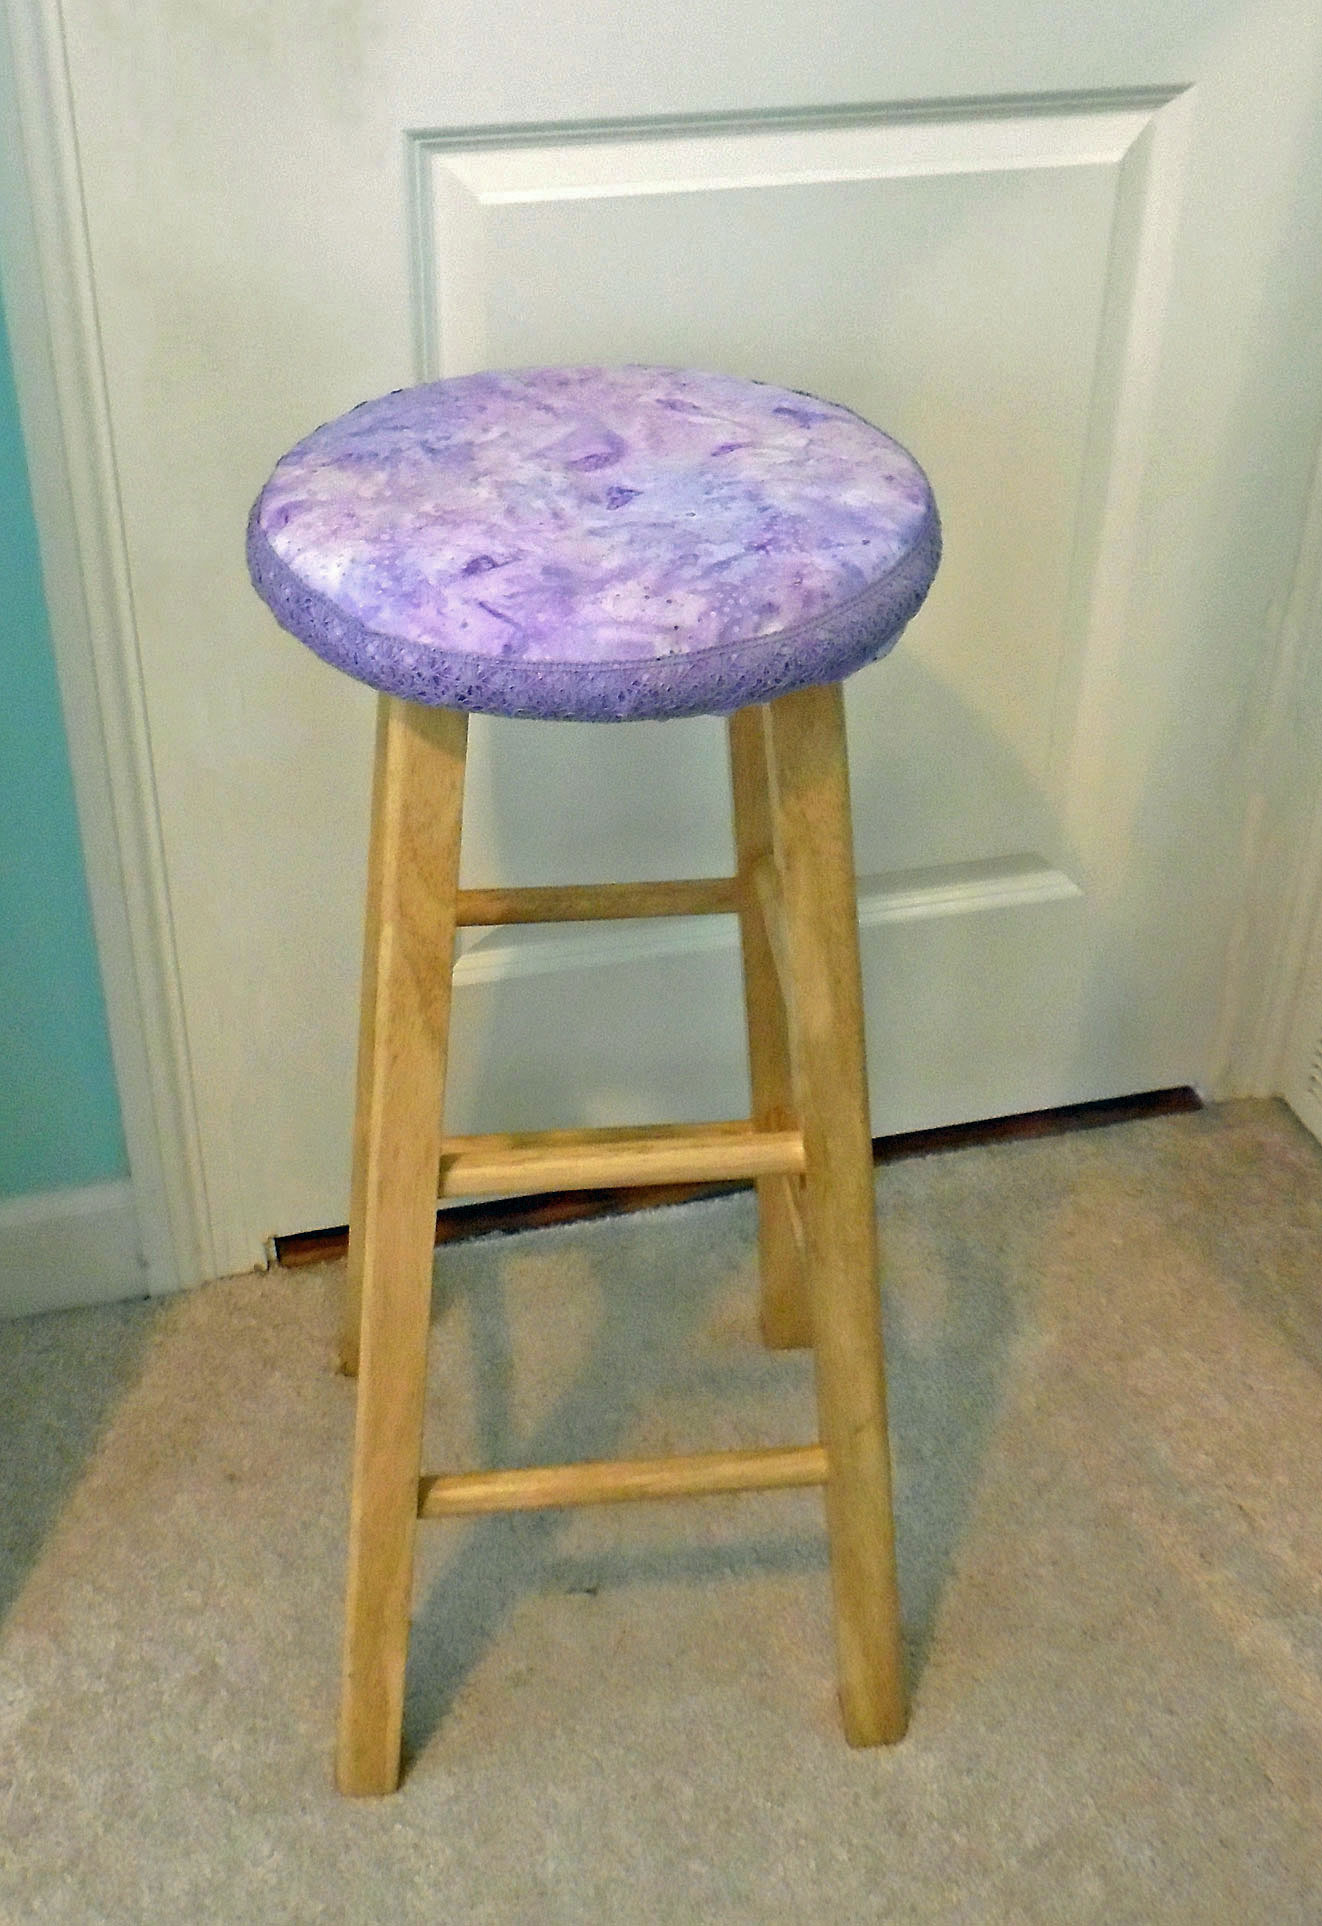
Padded Stool Cover
For more details, see my tutorial: Custom Stool Cover.
Doll’s 1915 Underpinnings
Every year, Your Wardrobe Unlock’d holds a costume competition. For 2014-2015, one of the competition’s themes was “1915,” so I browsed though my books of fashion plates and patterns from the WWI-era, looking for inspiration. I found a darling dress that I wanted to make for a 16-inch fashion doll, but first I had to make the undergarments: a petticoat, drawers, and corset cover.
In my stash, I found some white cotton voile, which is soft and super lightweight, perfect for a doll’s underthings. I also discovered some antique lace that I’d inherited from my grandmother. The corset cover fits snugly around the doll’s bust, and is gathered to a narrow waistband. This creates a slight “pigeon breast,” which was just starting to wane in 1915. The drawers are slim at the waist, then flare out, ending at the knee. There’s a row of lace around the hem of each leg.
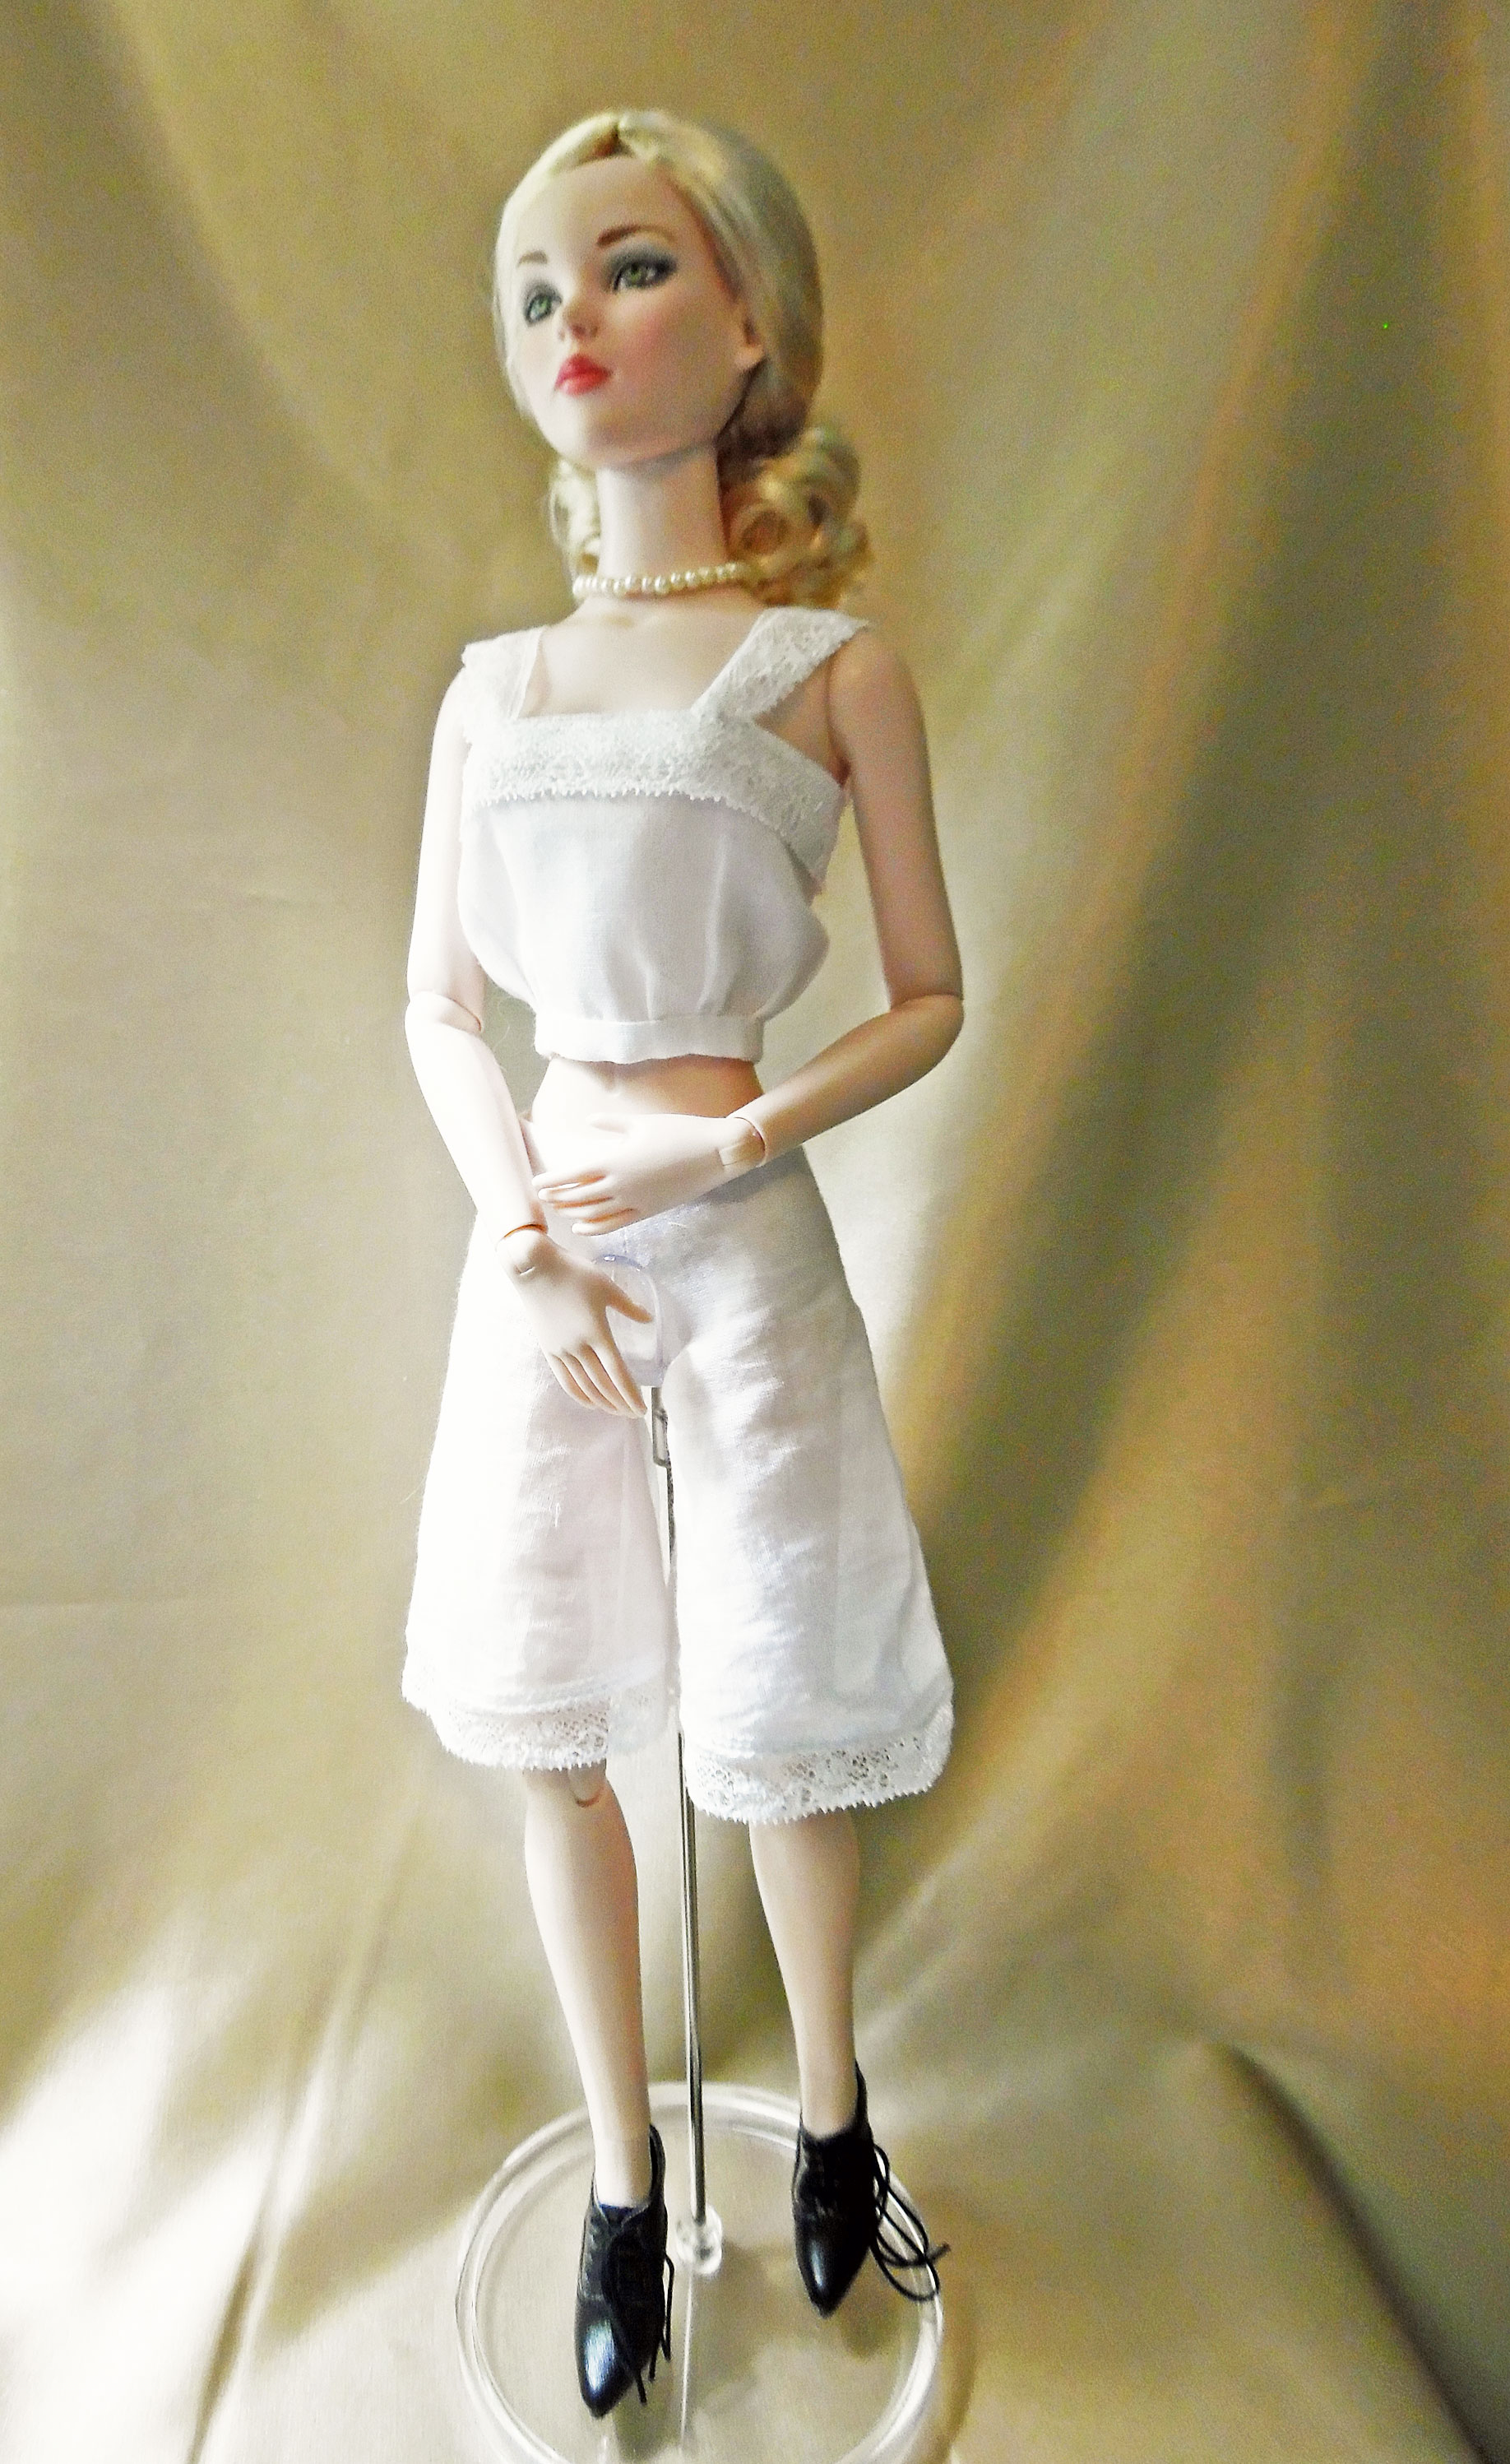
Doll’s Corset Cover & Drawers
The petticoat was more complicated. It’s fitted at the waist by means of darts and shaped seams, and then it flares out—but not too much, because the fashionable silhouette of 1915 still hadn’t quite recovered from the hobble skirts of 1910. I used a full lining, which has a ruffle under the hem to add support. This extra support is historically accurate, but usually the lining is attached at the knees, rather than extending from the waist to the hem. I made it full-length because I needed a bulk-free way to finish the waist edge. The outer layer’s hem has a triple-ruffle of lace, which matches the lace on the corset cover and drawers.
Regrettably, I wasn’t able to make the dress to go with the undergarments. I tried, but the design and proportions proved too difficult to make in miniature. After discarding several mockups in my attempt to get the dress right, I finally gave up. But, I intend to go back and make a different outfit from this era, so my doll won’t be eternally stuck in her undies!

Doll’s Corset Cover & Petticoat
For more details, see my sewing diary: 1915 Undergarments in Miniature.
Zippered Clutch
A few years ago, I made a zippered pouch for myself, following the “Gathered Clutch” tutorial found at Noodlehead’s blog. I currently use it to store my crochet hooks and other small tools needed for crocheting. My mother crochets a great deal, but seeing as how she lacks my obsessive organizational habits, I decided to make her a similar pouch for to hold her crochet hooks.
For the main part of the pouch, I used a vintage baroque quilting cotton with a pink, dusty rose, aqua, and metallic gold print. For the accent band, I used a shot cotton that’s light and dark pink. And for the lining, I used a plain, light pink cotton. To embellish the pouch, I ran a length of aqua velvet ribbon down the center of the accent band, with a narrow gold braid along each side. I love sparkle, so I sewed aqua seed beads on top of the gold braid. I was quite pleased with how it turned out, and my mother loves it!
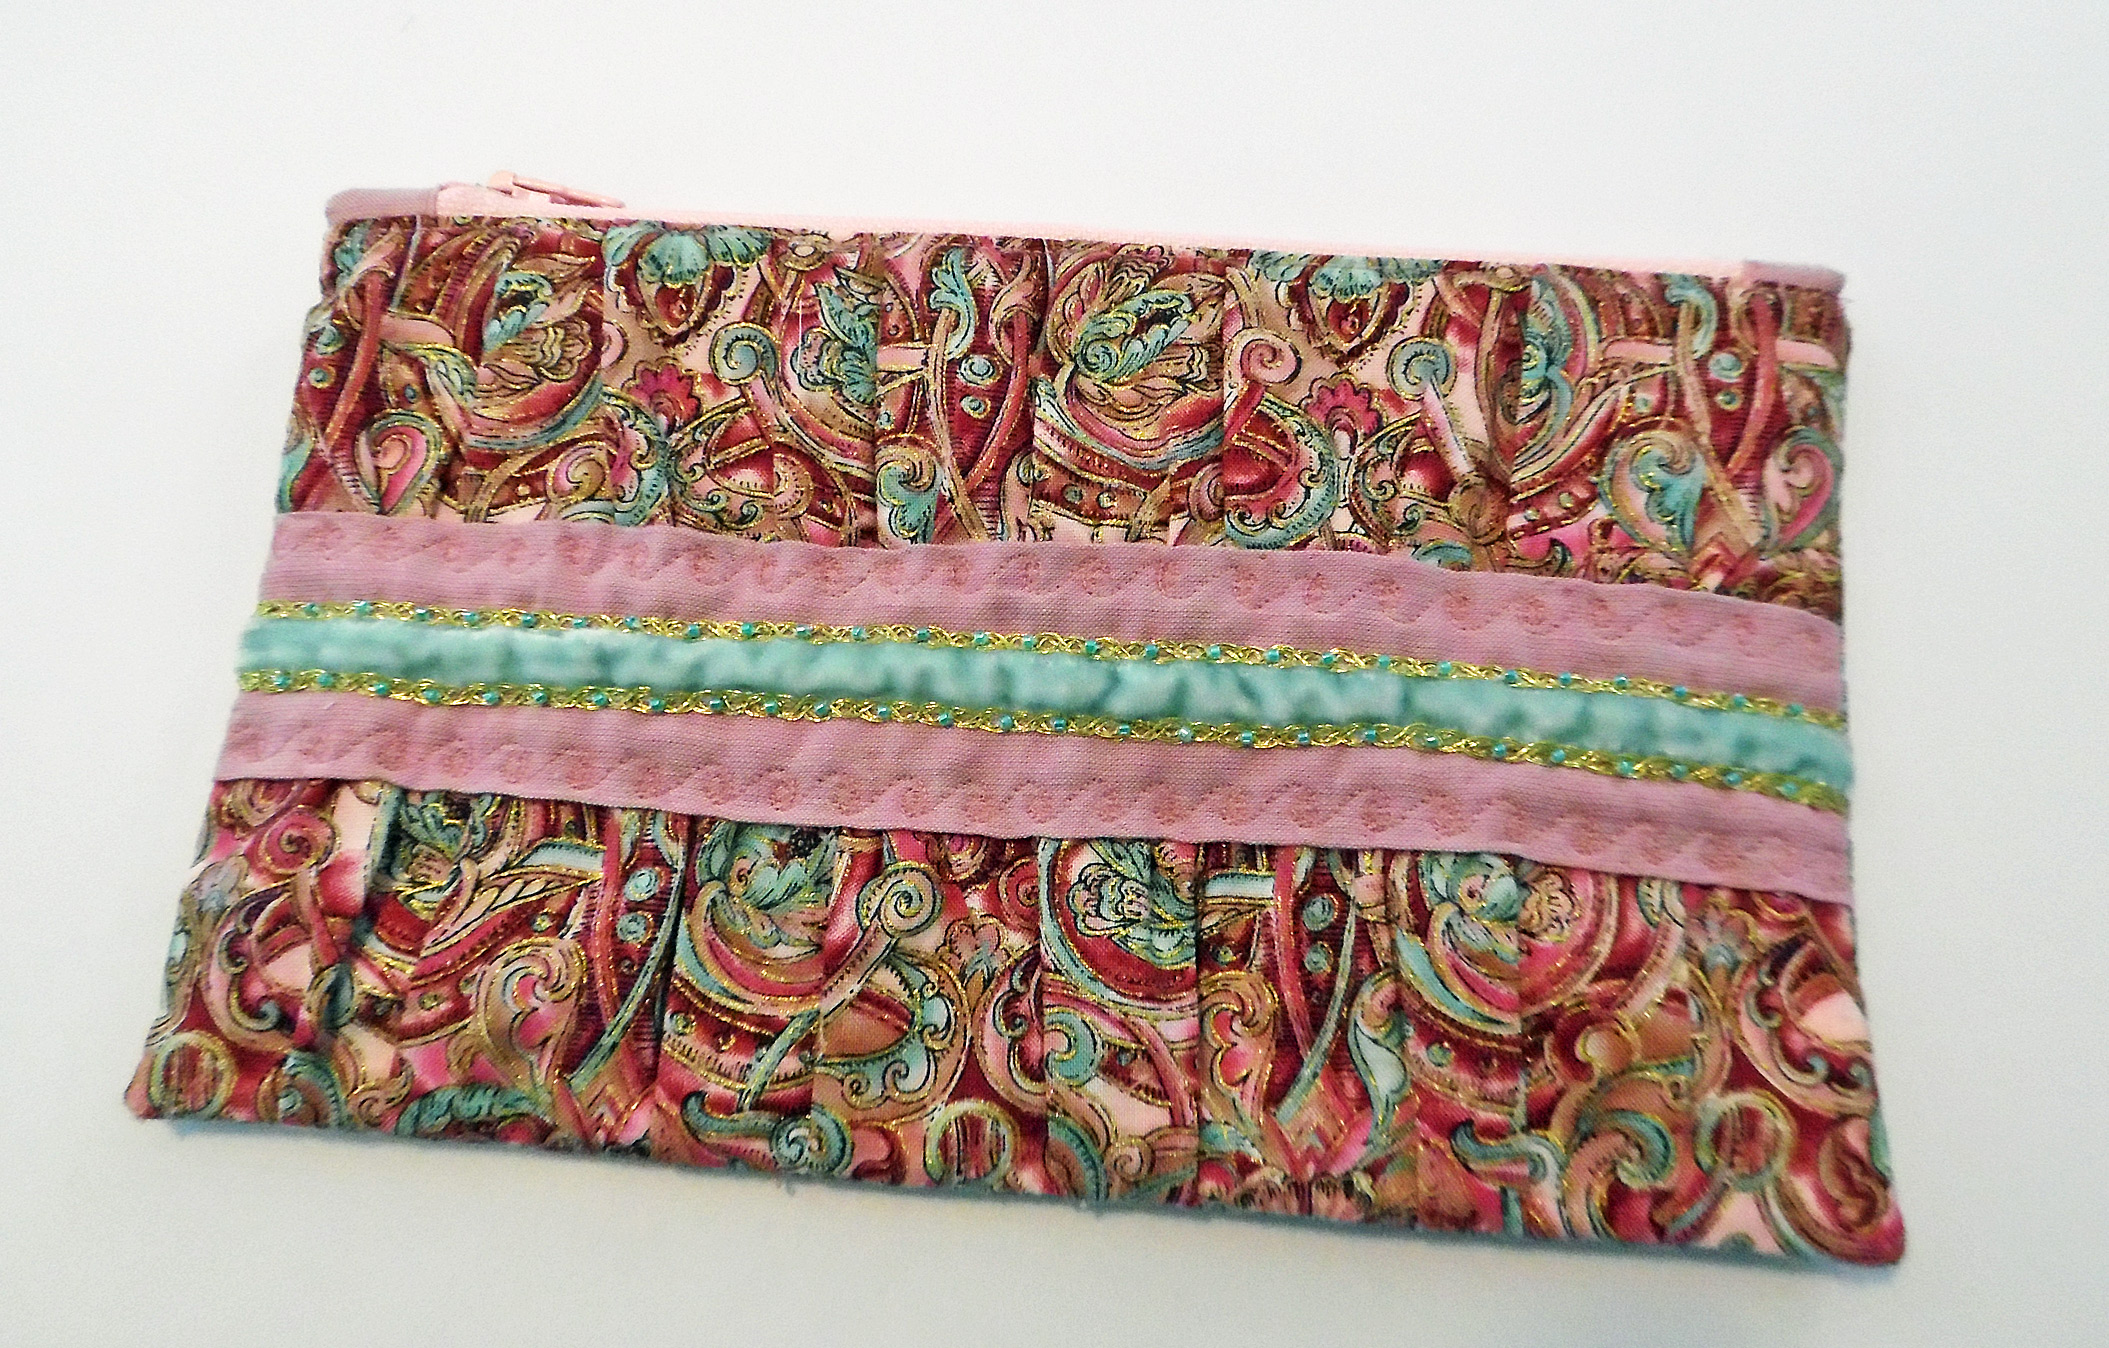
Zippered Pouch
Crocheted Accessories for Dolls
While not strictly sewing, I found time to crochet a bunch of winter accessories for my dolls. We’re talking hats, scarves, infinity scarves, hooded scarves, neck-warmers, capelets, shawls, fingerless gloves, and the like. Some still need snaps or hooks to finish them, along with decorative beads to serve as buttons, but I loved figuring out my own miniature crochet patterns!
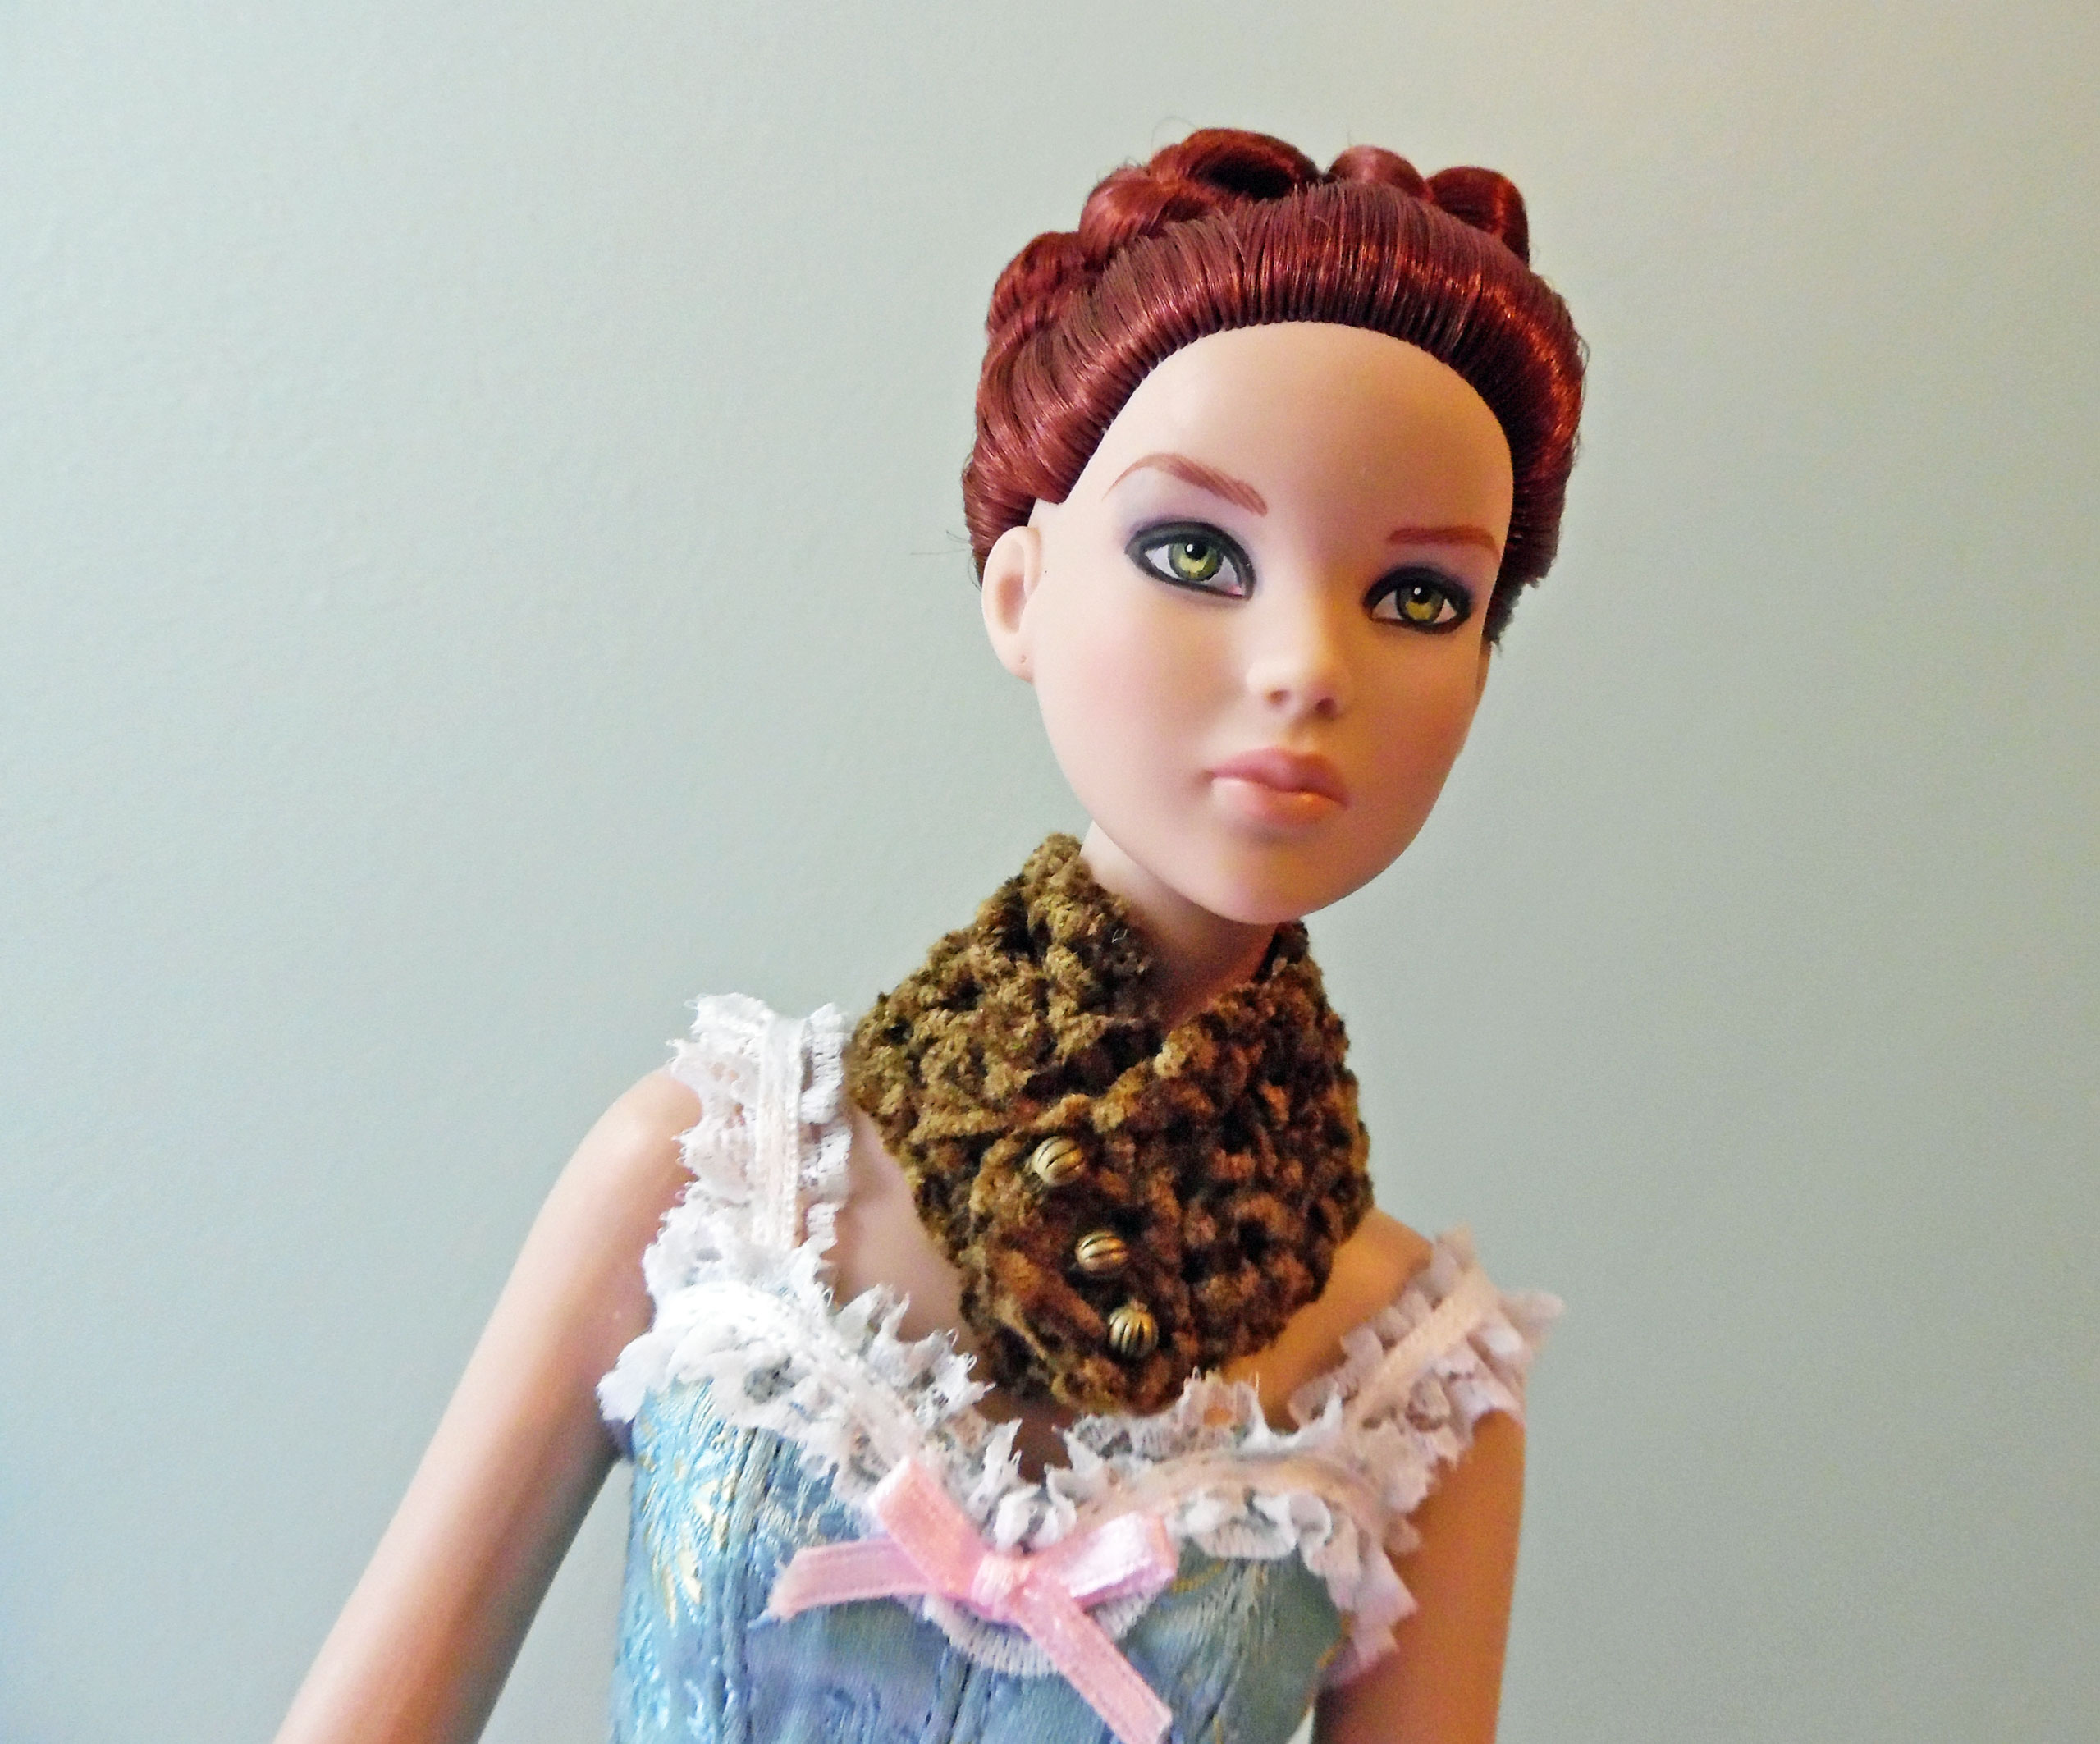
Crocheted Neck-Warmer
MedicAlert Bracelets
Again, not strictly sewing, but still a craft project I worked on this year. For some time, I’ve needed to wear a medical bracelet proclaiming my allergies and health issues. The problem was, I didn’t care for the chunky beads the original bracelet came with. So, I ordered seed beads and Swarovski crystals, along with a set of jewelry-making tools. Using a lightweight, extremely flexible jewelry wire, I came up with a double-stranded design that works well with the medical alert tag. Each bracelet has lobster clasps at both ends, so it can clip onto the ID tag.
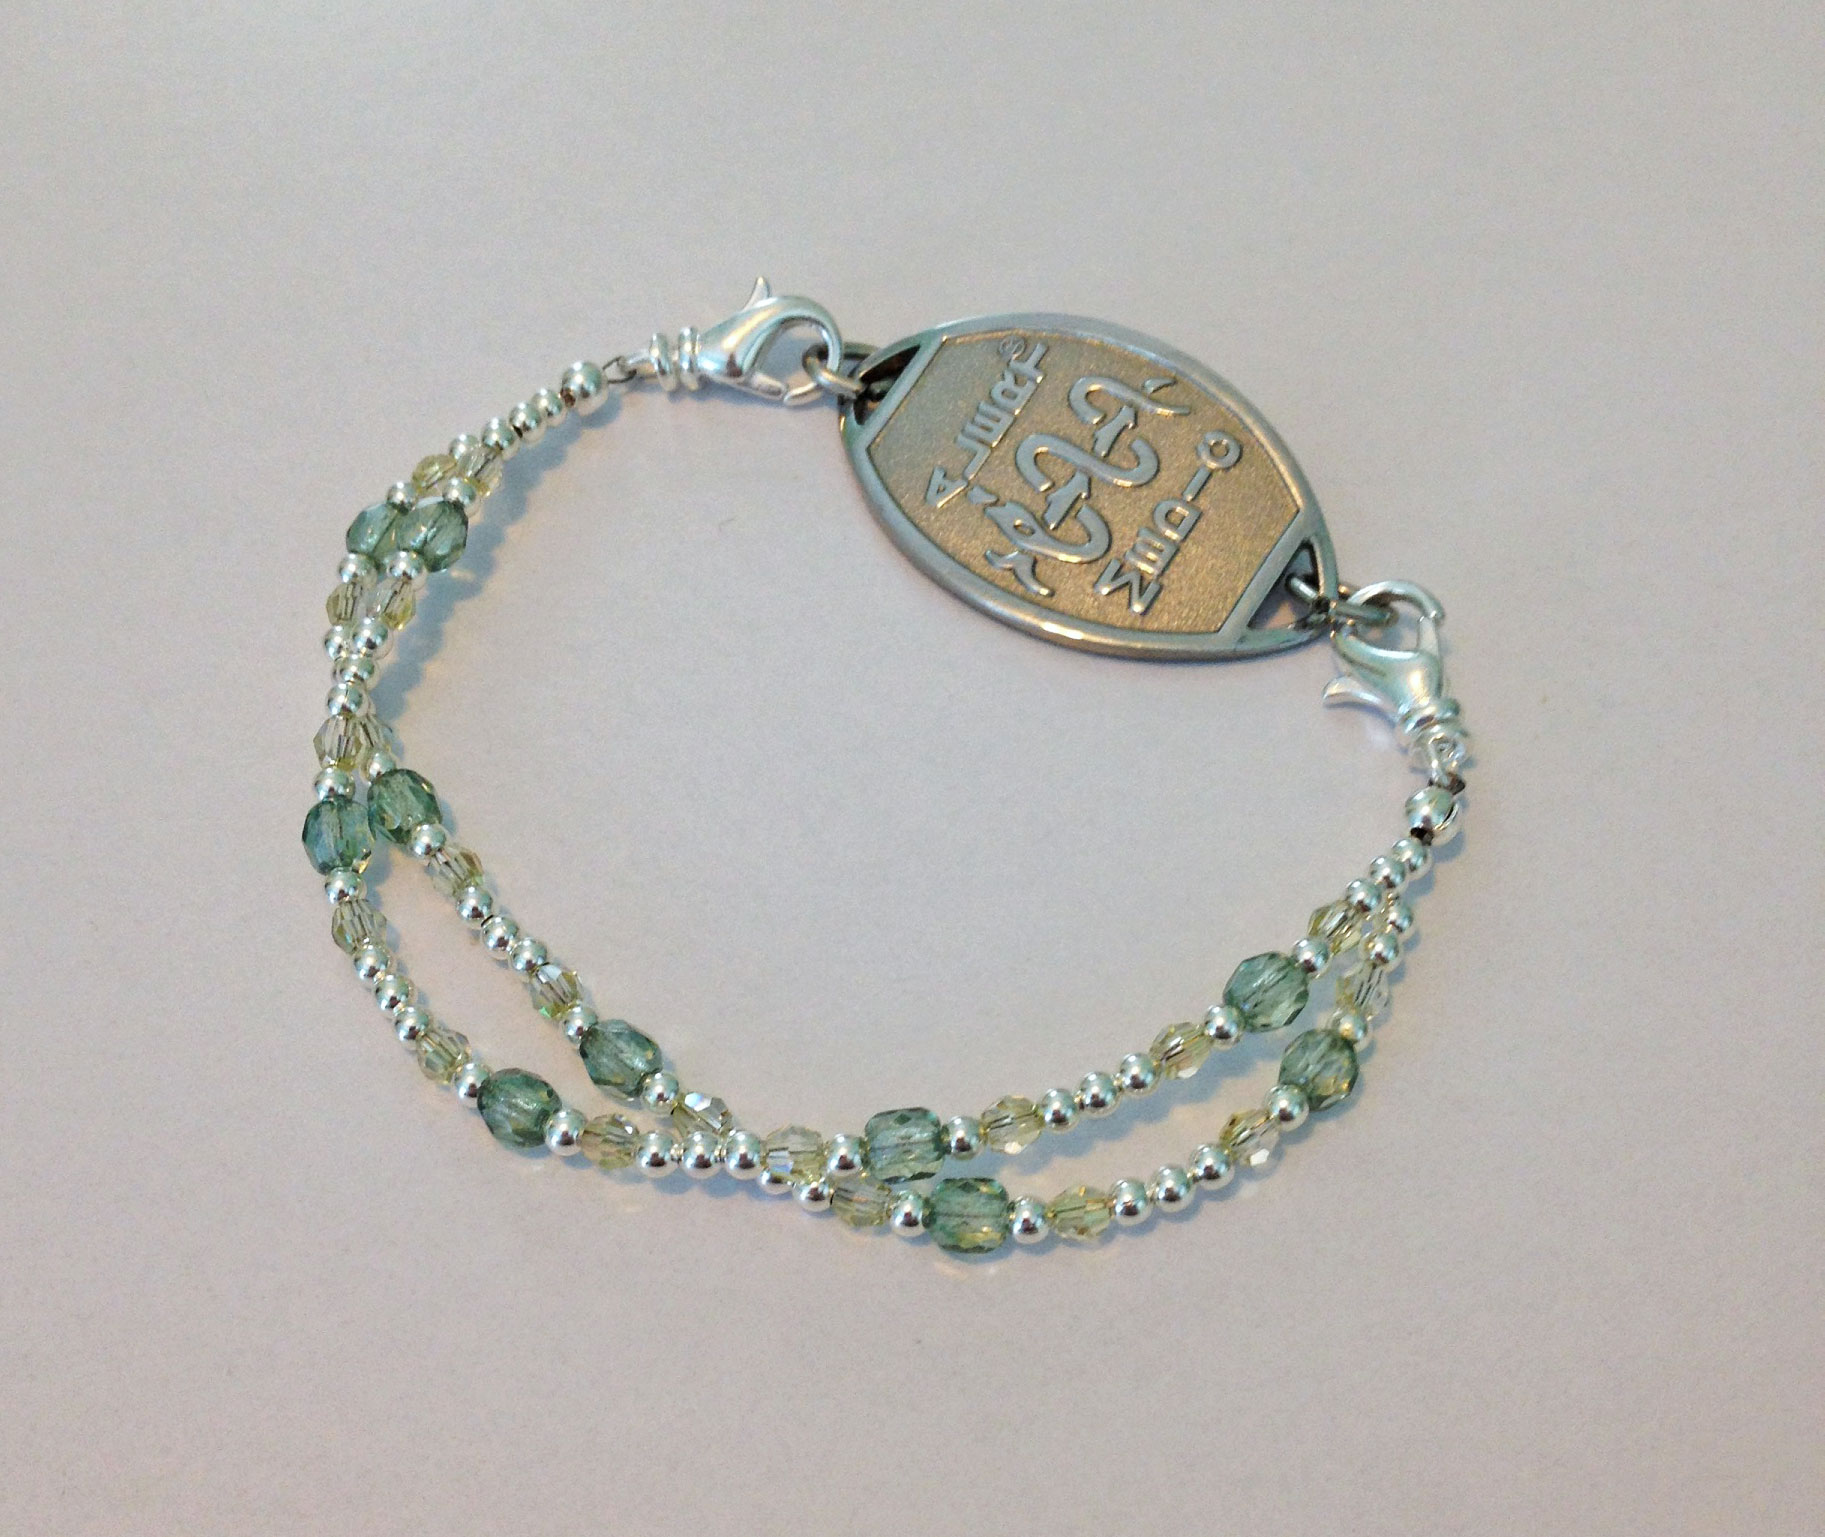
Medical Bracelet (Sea-Green & Silver)
My bracelets are all made of small beads (4mm is the largest), so they’re petite and elegant, rather than thick and clunky. The clasps swivel, so the bracelet will never get tangled or twisted on my wrist. And I only used rounded beads and crystals—there’s no sharp edges to abrade my skin. Since I wanted one to match every outfit, I ended up with quite a few bracelets!
Sadly, after a year’s wear and tear, some of the bracelets are starting to show their age. The crystals are resilient, but the finish on the metal beads is rubbing off. The clasps look pretty ragged, too. As a result, I’ve started making new bracelets to replace the ones that no longer look their best.
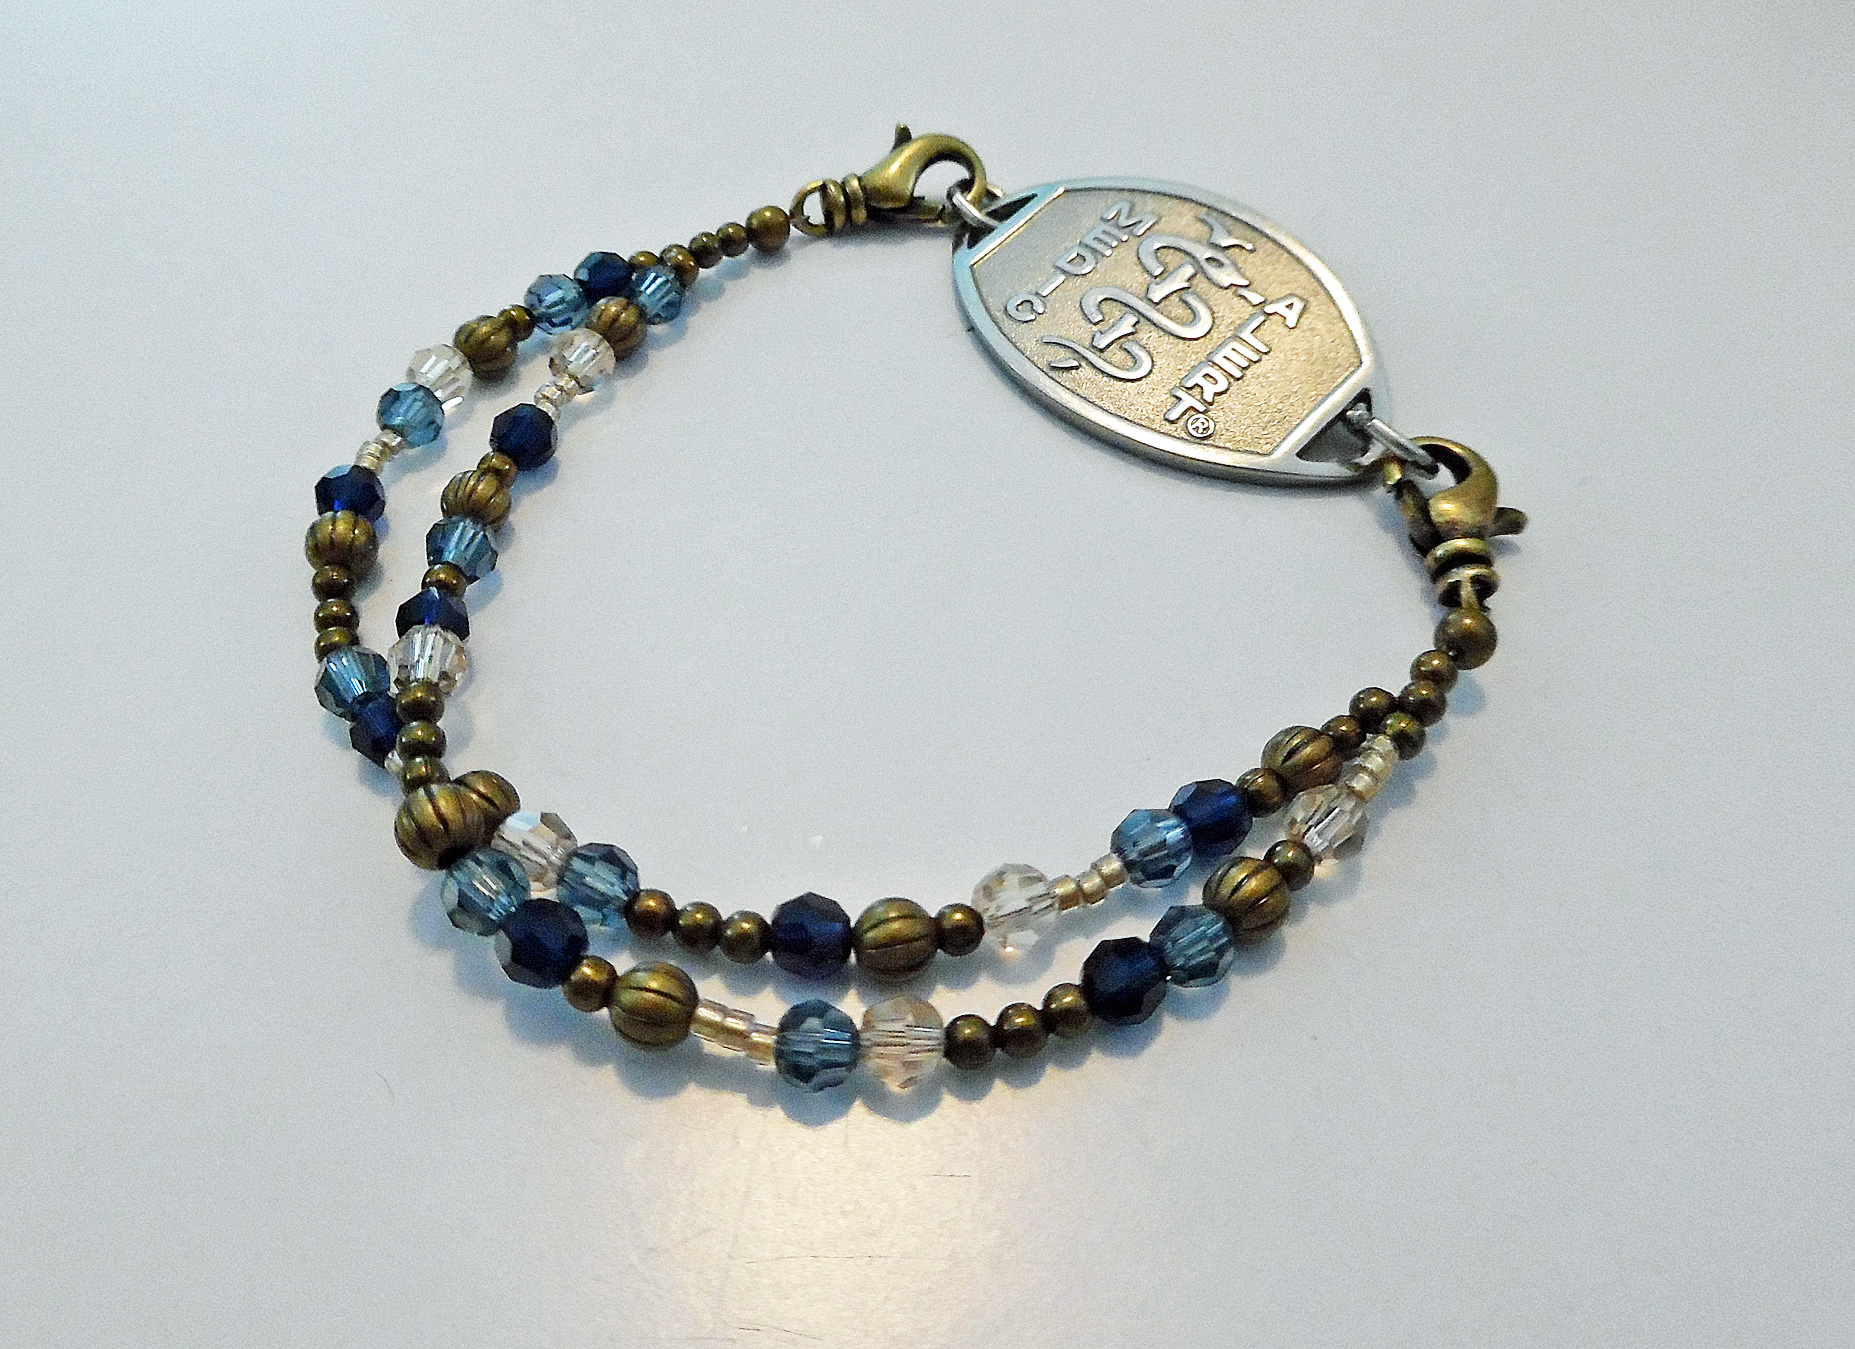
Medical Bracelet (Blue & Bronze)
~~*~~
In addition to the projects I completed, there were several that I made progress on, but didn’t manage to finish this year. That’s always disappointing, but I did pretty good, all things considered. Actually, I accomplished more this year than in several previous years put together!
Here’s hoping 2016 will be just as productive.
One Response to A Year of Sewing: 2015