
Seam finishing—do it right, and your garments will be one step closer to looking professionally sewn. It’s a vital step that, regrettably, is often overlooked. Most pattern directions don’t mention anything about it. Those that do, usually tell you to serge or zigzag the raw edges. The trouble is, not all dressmakers own a serger. And using a zigzag stitch to finish your seam allowances is almost worse than leaving them raw! (Not only does it look terrible, but it won’t do much to prevent your seams from fraying.)
Zigzagged Seam Allowance
There are several other types of seam finishes, including French seams, mock-French seams, and flat-felling. (For instructions, see: “Basics: Seven Seam Finishes.”) These can be time-consuming, however, and labor-intensive. For a quicker option, why not try overlocking your seam allowances?
Most sewing machines possess an overlock stitch, but not everyone realizes what it’s for. Until a couple of years ago, I thought you needed an industrial sewing machine to perform overlocking. I was thrilled to discover my mistake!
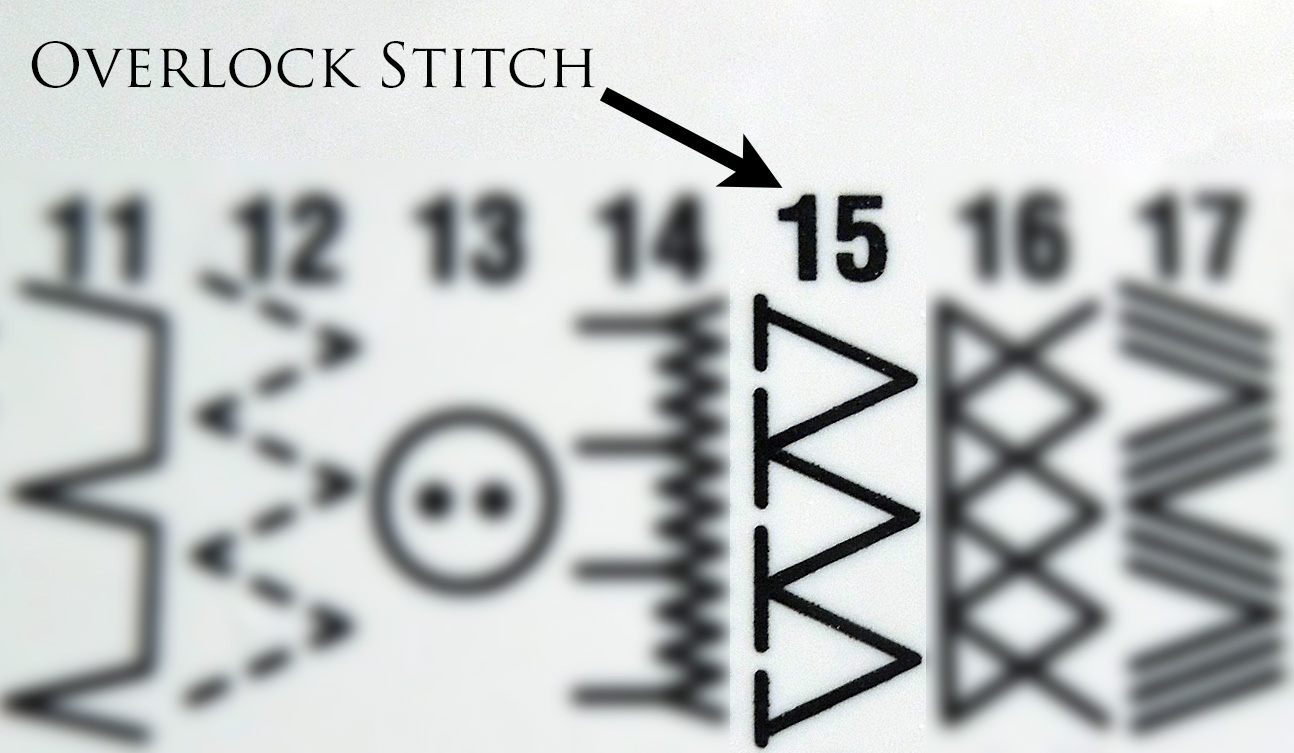
Overlock Stitch
What is the Overlock Stitch?
The overlock stitch is a combination of a straight stitch and a zigzag. It sews backwards and forwards in a straight line, but between every set of straight stitches, it sews a zigzag. If done correctly, this resembles serging, which is how most store-bought clothes are sewn. Therefore, it lends a professional finish to your handmade garments.

Overlocked Seam Allowance
Overlock Presser Foot
While the overlock stitch can be sewn with a standard zigzag presser foot, it works best in conjunction with an overlock or overcast foot, which is specifically designed for this stitch.
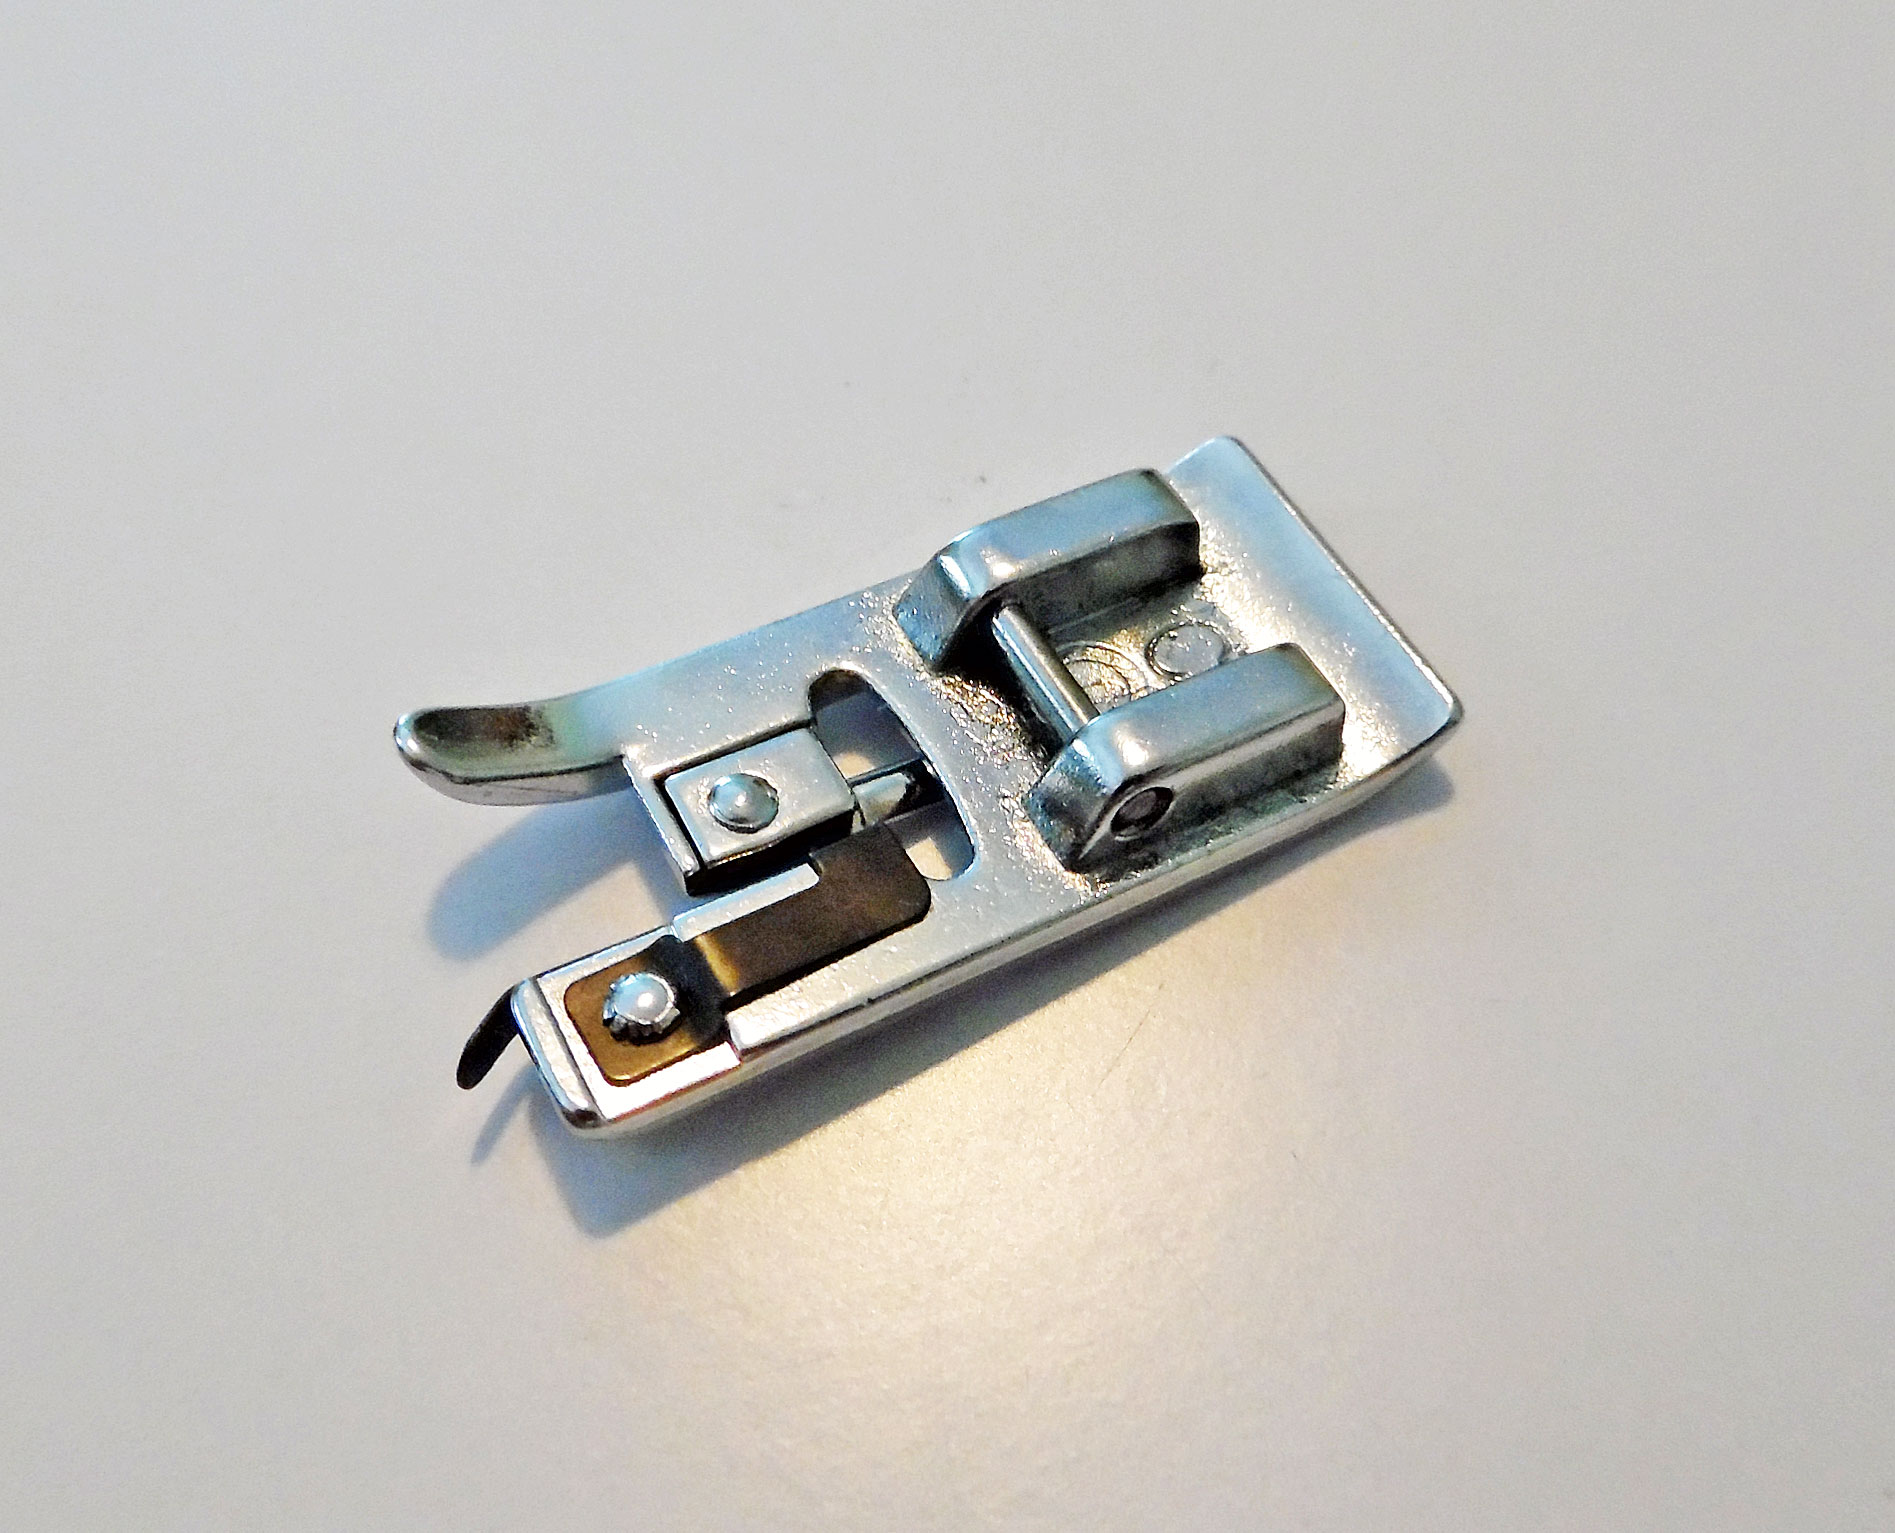
Overlock Presser Foot
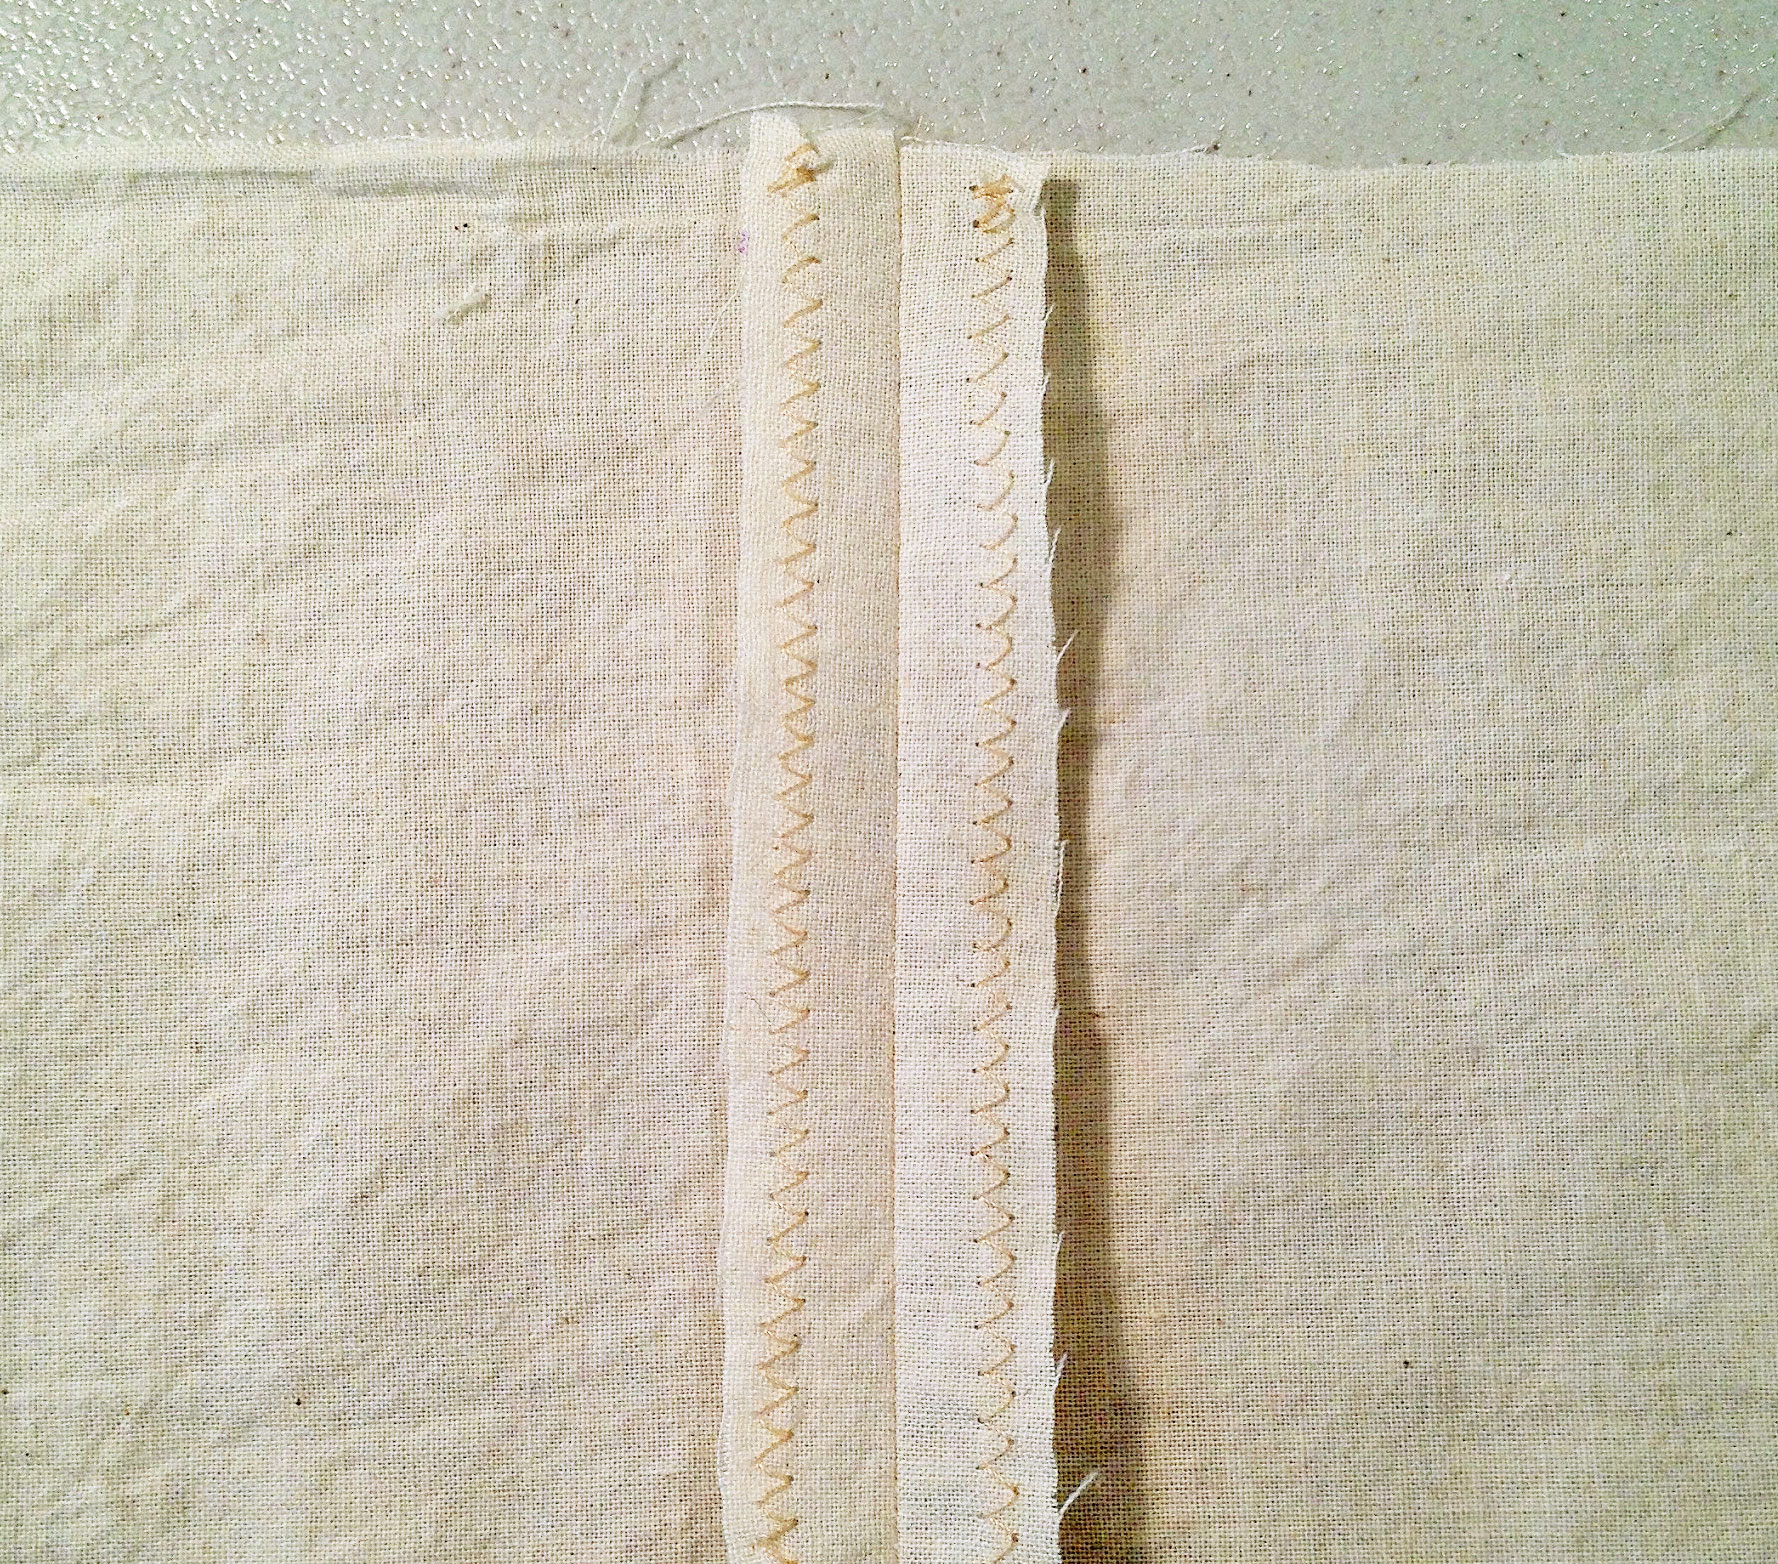
Why the special presser foot? An overlock foot has a guide bar that allows you to sew right up against the edge of the fabric, so the zigzag portion of the stitch swings off the fabric, enclosing the raw edge. This is what makes it look professionally sewn. Without the overlock food, your stitching will run parallel to the edge of the seam allowance—not enclosing it. You can cut the excess fabric off, but no matter how close you trim it, it won’t look the same as if you’d used an overlock foot.
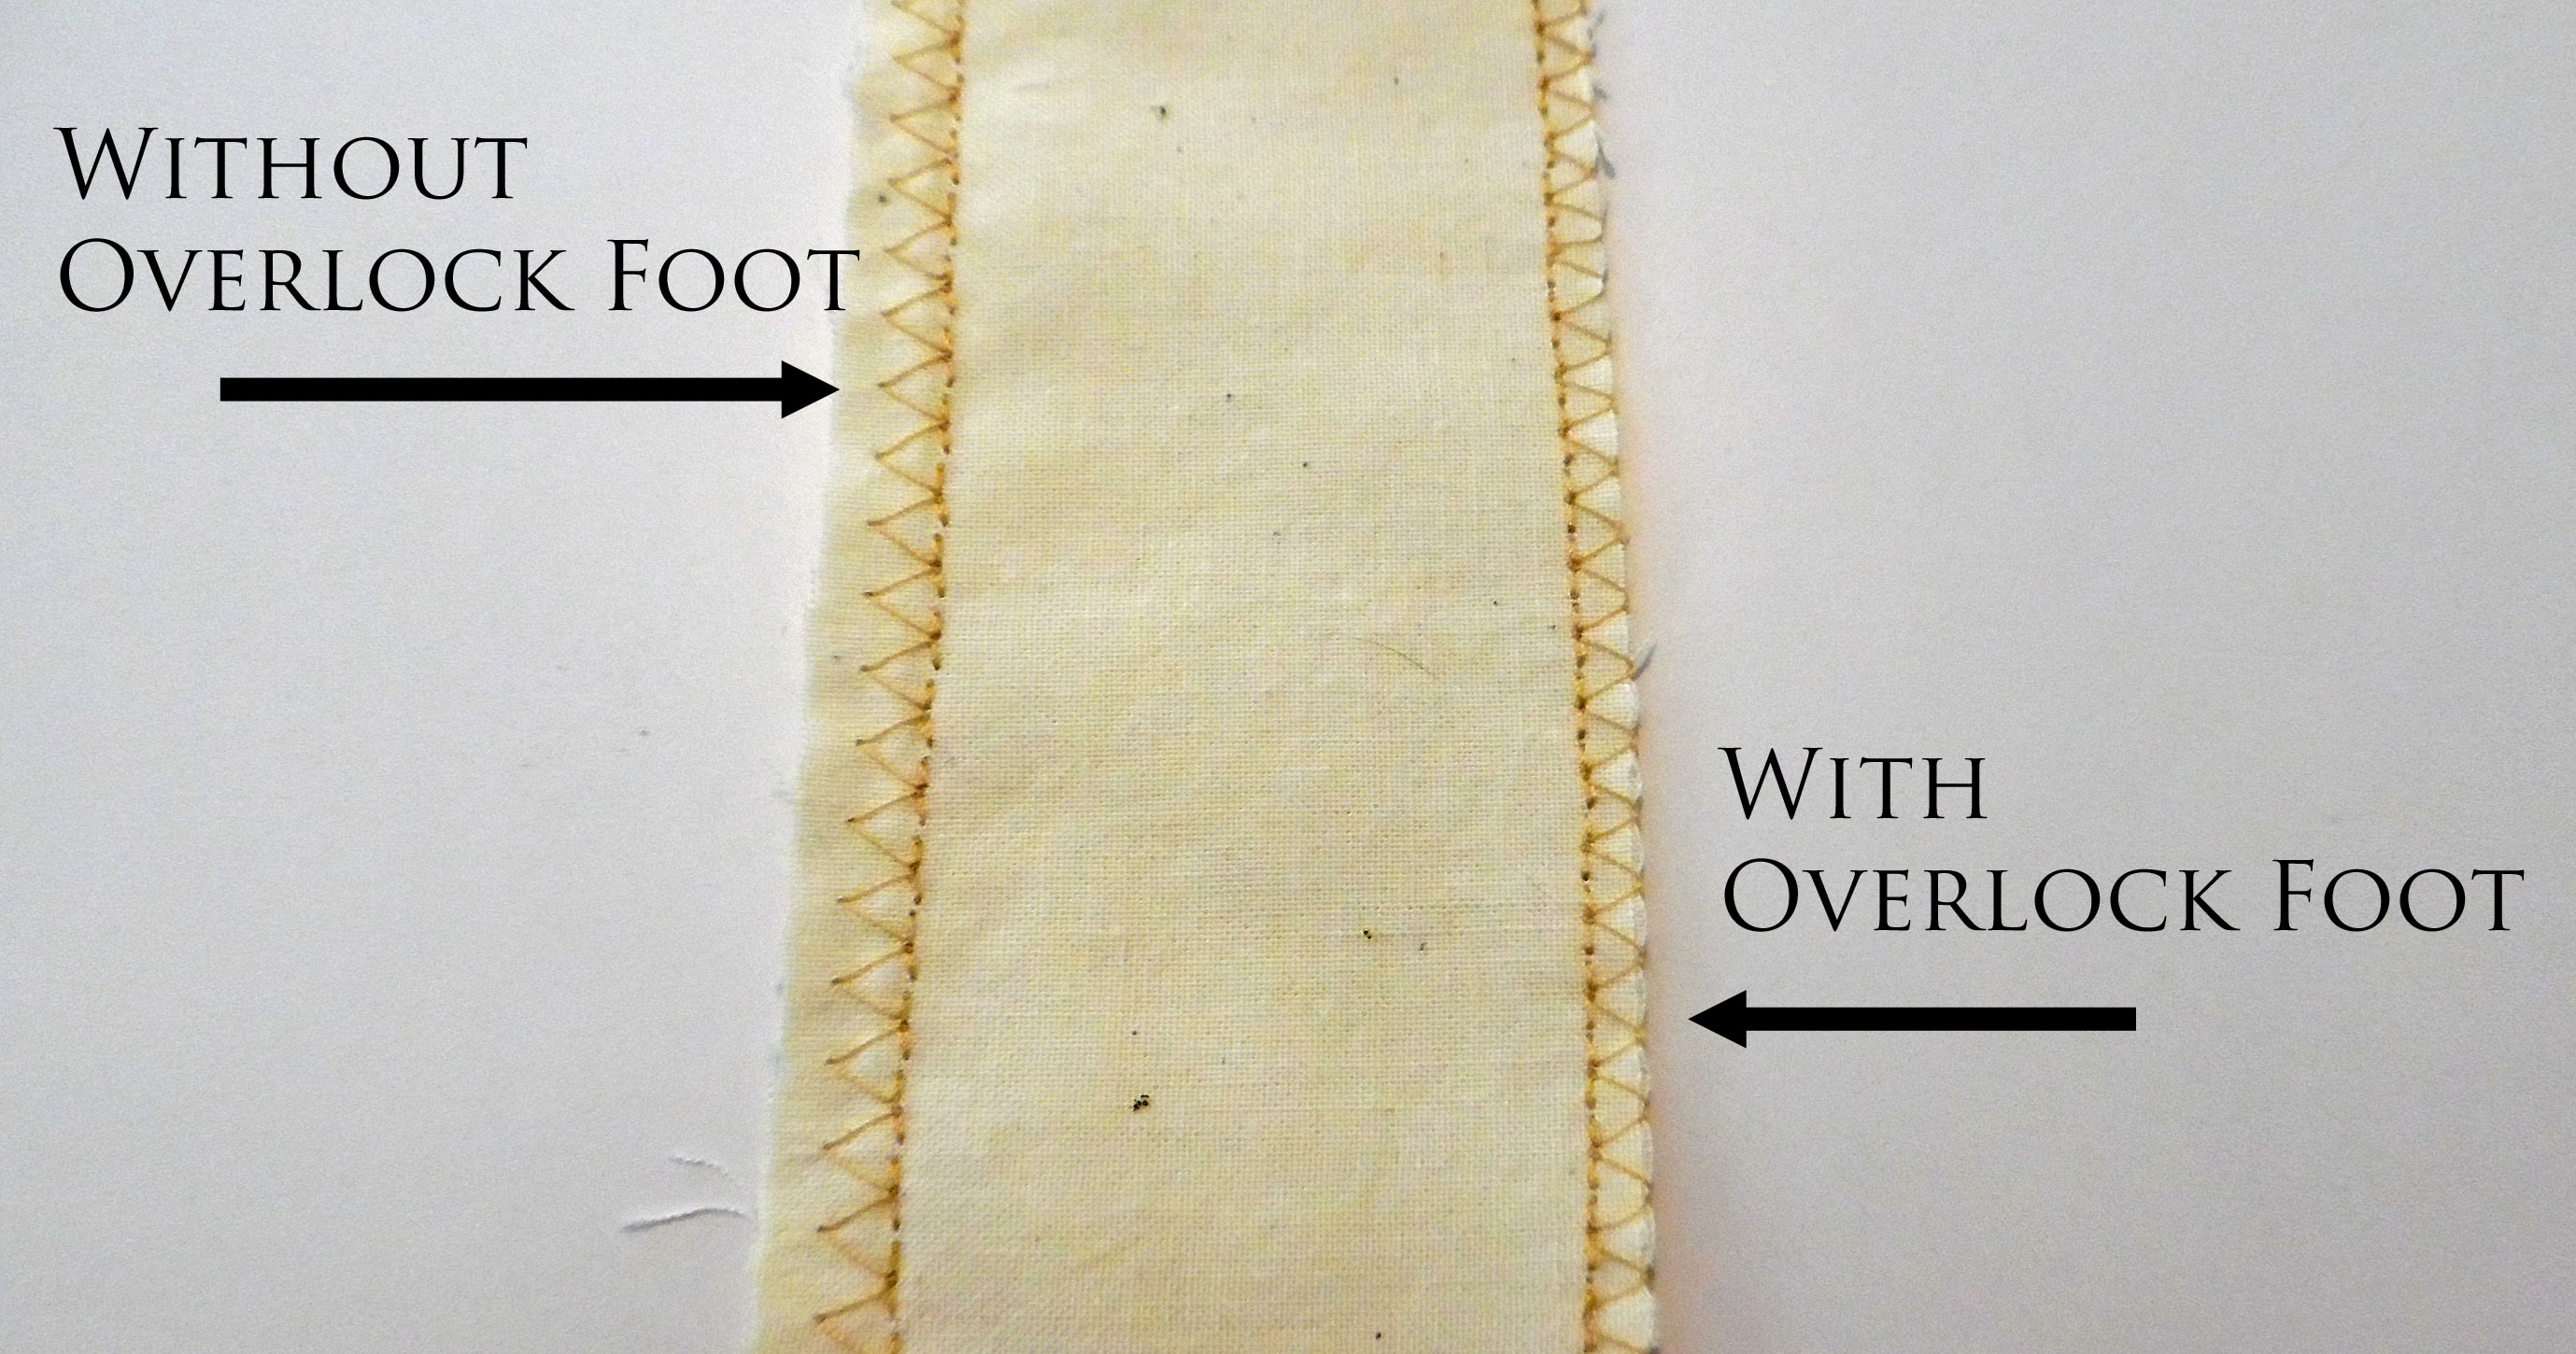
Overlocking: With & Without Overlock Foot
Tips
- Line up the edge of your fabric with the overlock foot’s guide bar and sew slowly, so you have more control.
- If you’re sewing a curved seam, stop every few stitches to pivot slightly, realigning the edge of the fabric. It’ll take longer to complete your seam this way, but the results are worth it.
- When you finish sewing, don’t pull the fabric to the left to cut it, as you’re probably used to doing. There’s a small bar on the underside of the overlock foot, which stabilizes the zigzag stitches. If you pull the fabric to the left, the last few stitches will catch on this bar, where they might get mutilated. Your fabric might even tear! Instead, pull the fabric toward the back of your sewing machine to free it. Then you can pull to the side and cut your threads, as usual.
- It can be difficult to overlock lightweight fabrics, such as chiffon, batiste, voile, organza, and so forth. If your fabric is too thin, it’ll get pulled into the feed dogs, which will chew it up. Here’s one solution—instead of pressing the seam open and overlocking each seam allowance separately, overlock your seam allowances together, as one layer, and then press them to the side. Another remedy is to stabilize the fabric with spray starch alternative before sewing. Or you could use a stabilizing agent, like tissue paper, underneath the seam while you sew.
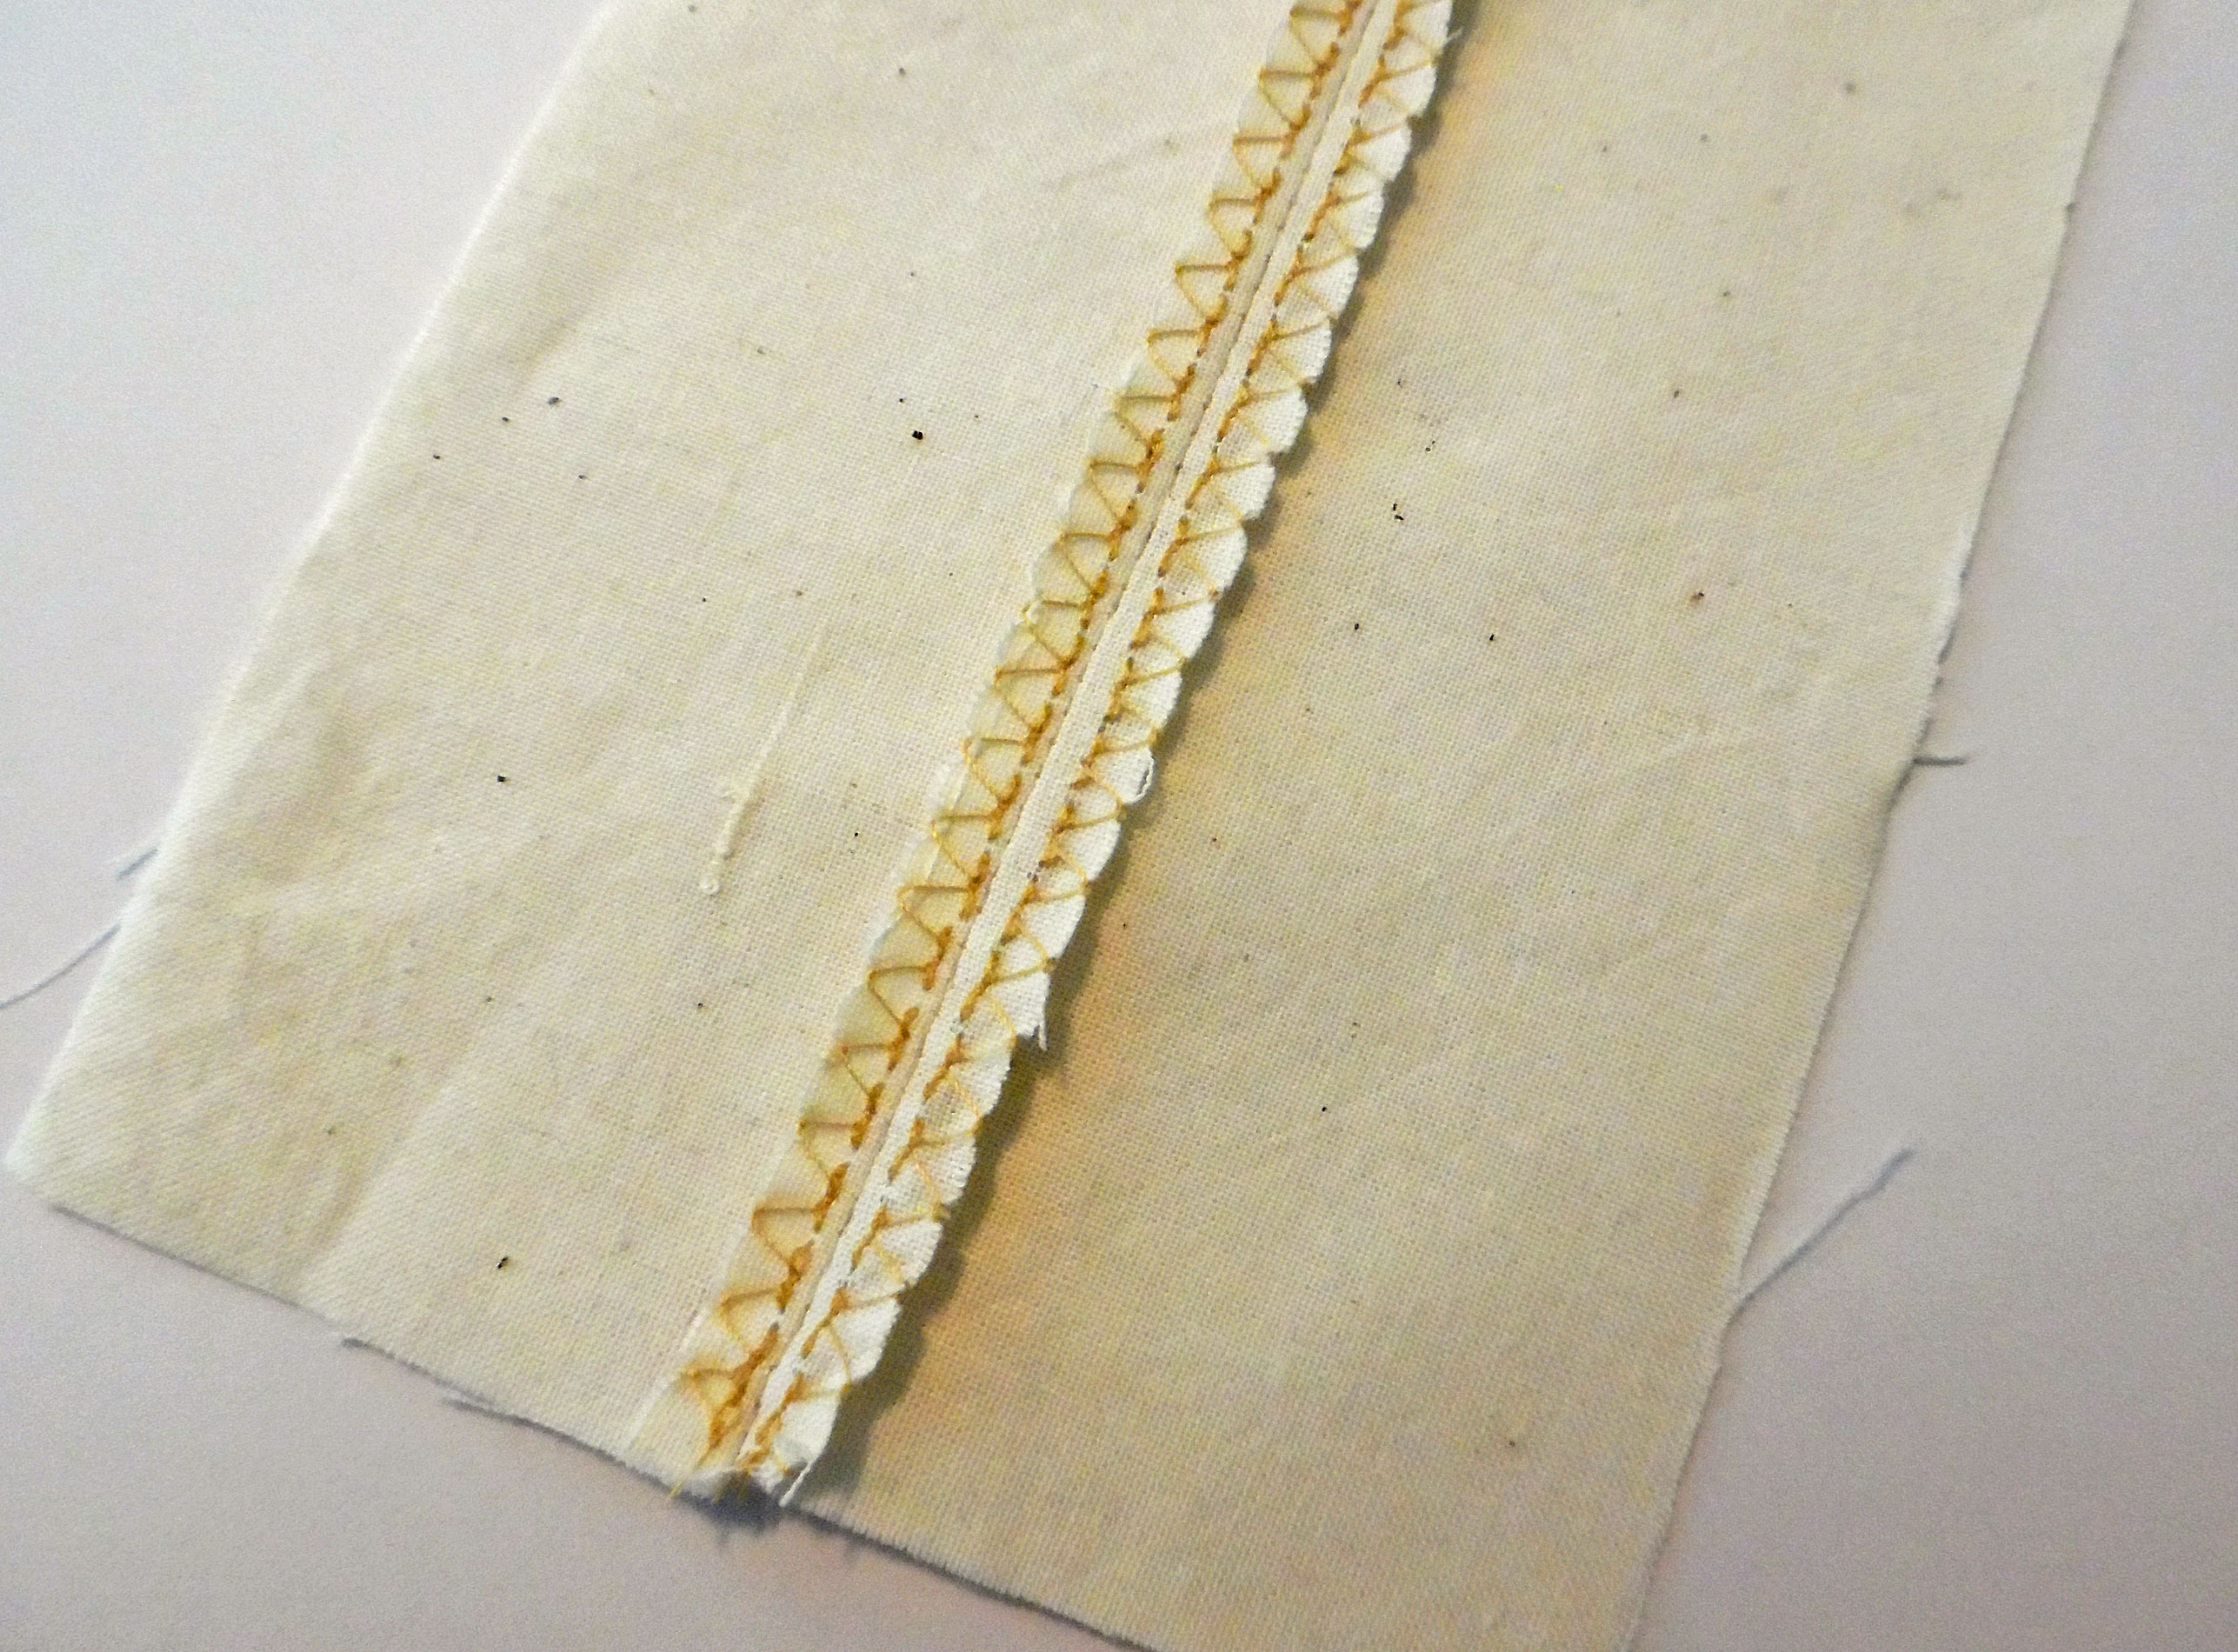
Open Seam Allowances
- Overlocking is more visible than a normal straight seam, so pick a thread color that closely matches your fabric. If you’re working with a busy print, try to match the most prominent color. If you want a surprise pop of color, you can go with a coordinating or contrasting thread, but sew a sample first, just to be sure it comes out the way you want.
- Ripping out an overlocked seam is no fun! Don’t overlock until you’re positive the seam won’t need to be adjusted. Likewise, don’t overlock a mockup’s seam allowances, since you’ll probably need to make fit alterations.
- Trim your seam allowances before overlocking them. The industry standard for home sewing patterns is a 5/8-inch seam allowance, which is considerably wider than the default setting for an overlock stitch. For a more professional-looking seam, trim your seam allowances to ¼-inch, then overlock them.
I hope you’ll give the overlocking stitch a try. It definitely deserves more recognition than it gets!
~~*~~
Looking for more sewing tips? Our Basics menu contains plenty of beginner-friendly articles! You might also find our Tutorials and Articles helpful.
Pingback: How Do You Serge On A Regular Sewing Machine? – Erickkasysavane
Pingback: Is It Worth Buying An Overlocker? – Erickkasysavane
Pingback: What is an Overlocker Sewing Machine? - Go go T Shirt