

This article was first published at Your Wardrobe Unlock’d.
Click any illustration to view the full-sized image.
If you’ve been elected to sew the costumes for an amateur theatrical production, you must find a way to create a wardrobe full of costumes that look amazing. In this three-part article, we’re discussing ways you can improve your theater costumes. First, we explored how to make sure your costumes are historically accurate. Then, we looked at sewing concepts, such as hem lengths and skirt volume, plus the importance of making mockups and perfecting the fit.
Let’s see what else you can do to improve the quality of your theater costumes!
Lining & Interlining
Victorian bodices are usually both lined and interlined. You can also add a lining and/or interlining to other garments, such as coats, cloaks, and skirts. But what is an interlining? How is it different from a lining?
- Interlining
An interlining is a fabric that’s layered behind the main fashion fabric in order to change or enhance its qualities—to make it stronger, denser, more opaque, or stiffer, for example, or to give it more body. A bodice interlining should be made from a sturdy fabric, such as canvas, twill, duck, or coutil. Its main purpose is to provide strength and stability to the garment.
To add an interlining, simply cut the pattern pieces from interlining fabric, as well as your main fabric. Lay the interlining pieces over the wrong side of the main fabric pieces and baste around the edges. They’ll be treated as if they’re one layer during the construction process.
- Lining
The lining is the innermost layer, which lies against the wearer’s skin. It adds strength, but it also makes the bodice more comfortable to wear. If it’s made of a slippery fabric, it can make it easier to put on, too, which is helpful during quick-changes.
Modern garments often have a separate lining that’s sewn with the seam allowances facing inward, so all the raw edges are concealed. This provides a neat finish, but makes it difficult to alter the bodice, should the need arise. For easy alterations, use the historical method of treating your lining as you would an interlining—basting all three fabrics together (main, interlining, lining) and sewing them as one.
If your seam allowances curve, as is often the case with a Victorian bodice, you’ll need to notch them so they’ll lay flat, without rippling. But rather than simply notching them, which isn’t very pretty or tidy, try scalloping the seam allowances, then overlock or hand overcast the raw edges. It’s an authentic technique used in the Victorian era.
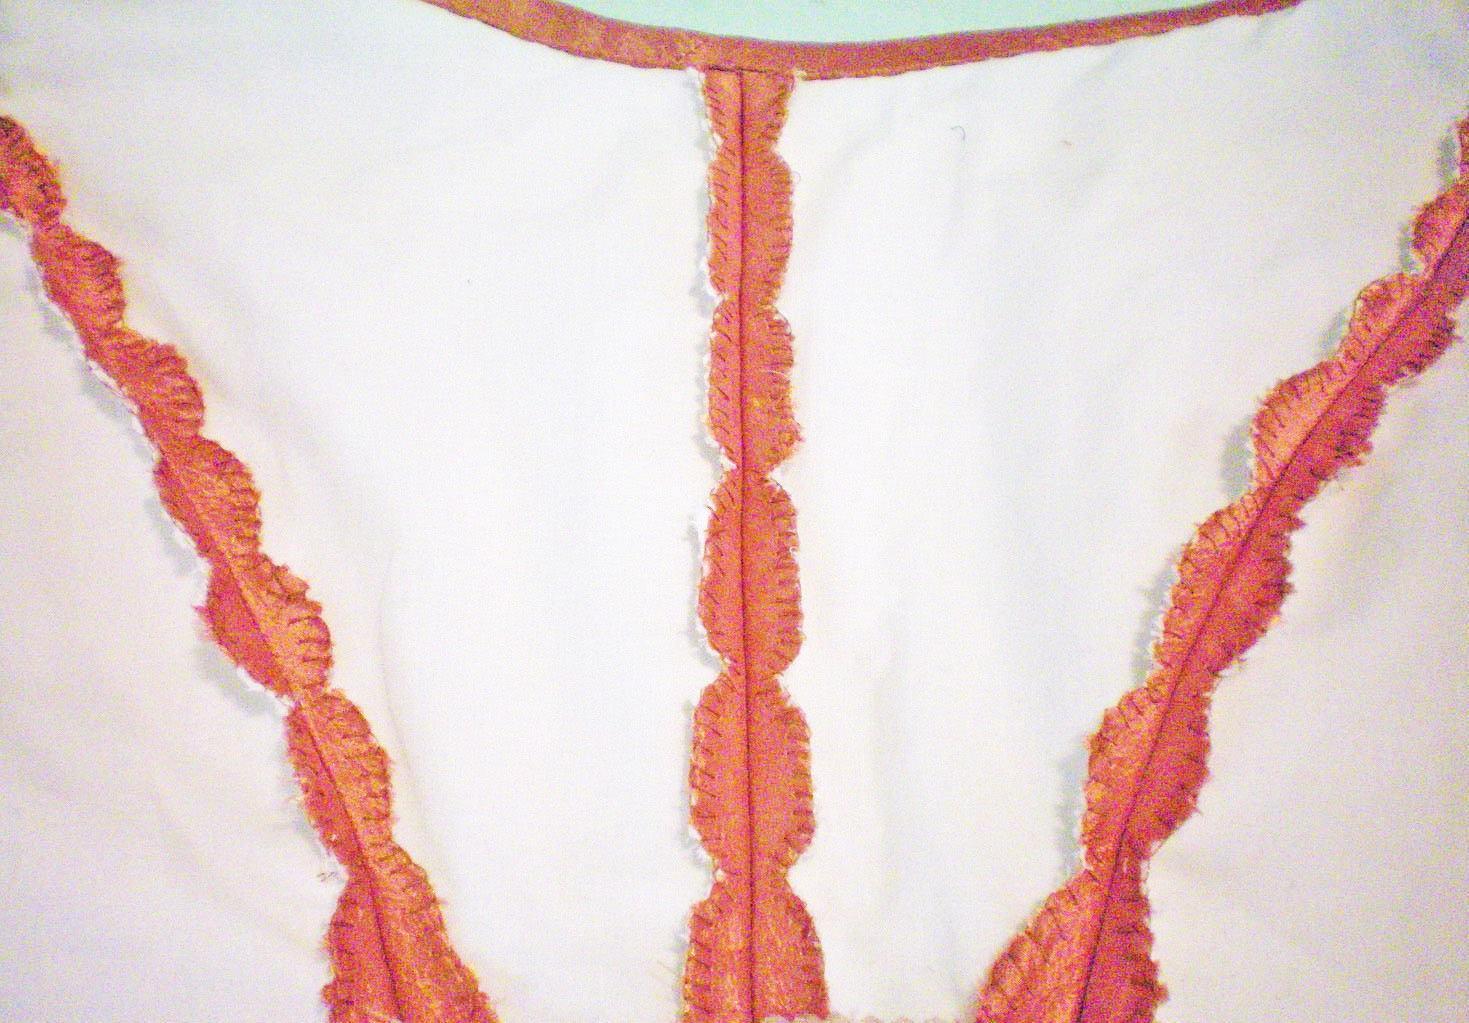
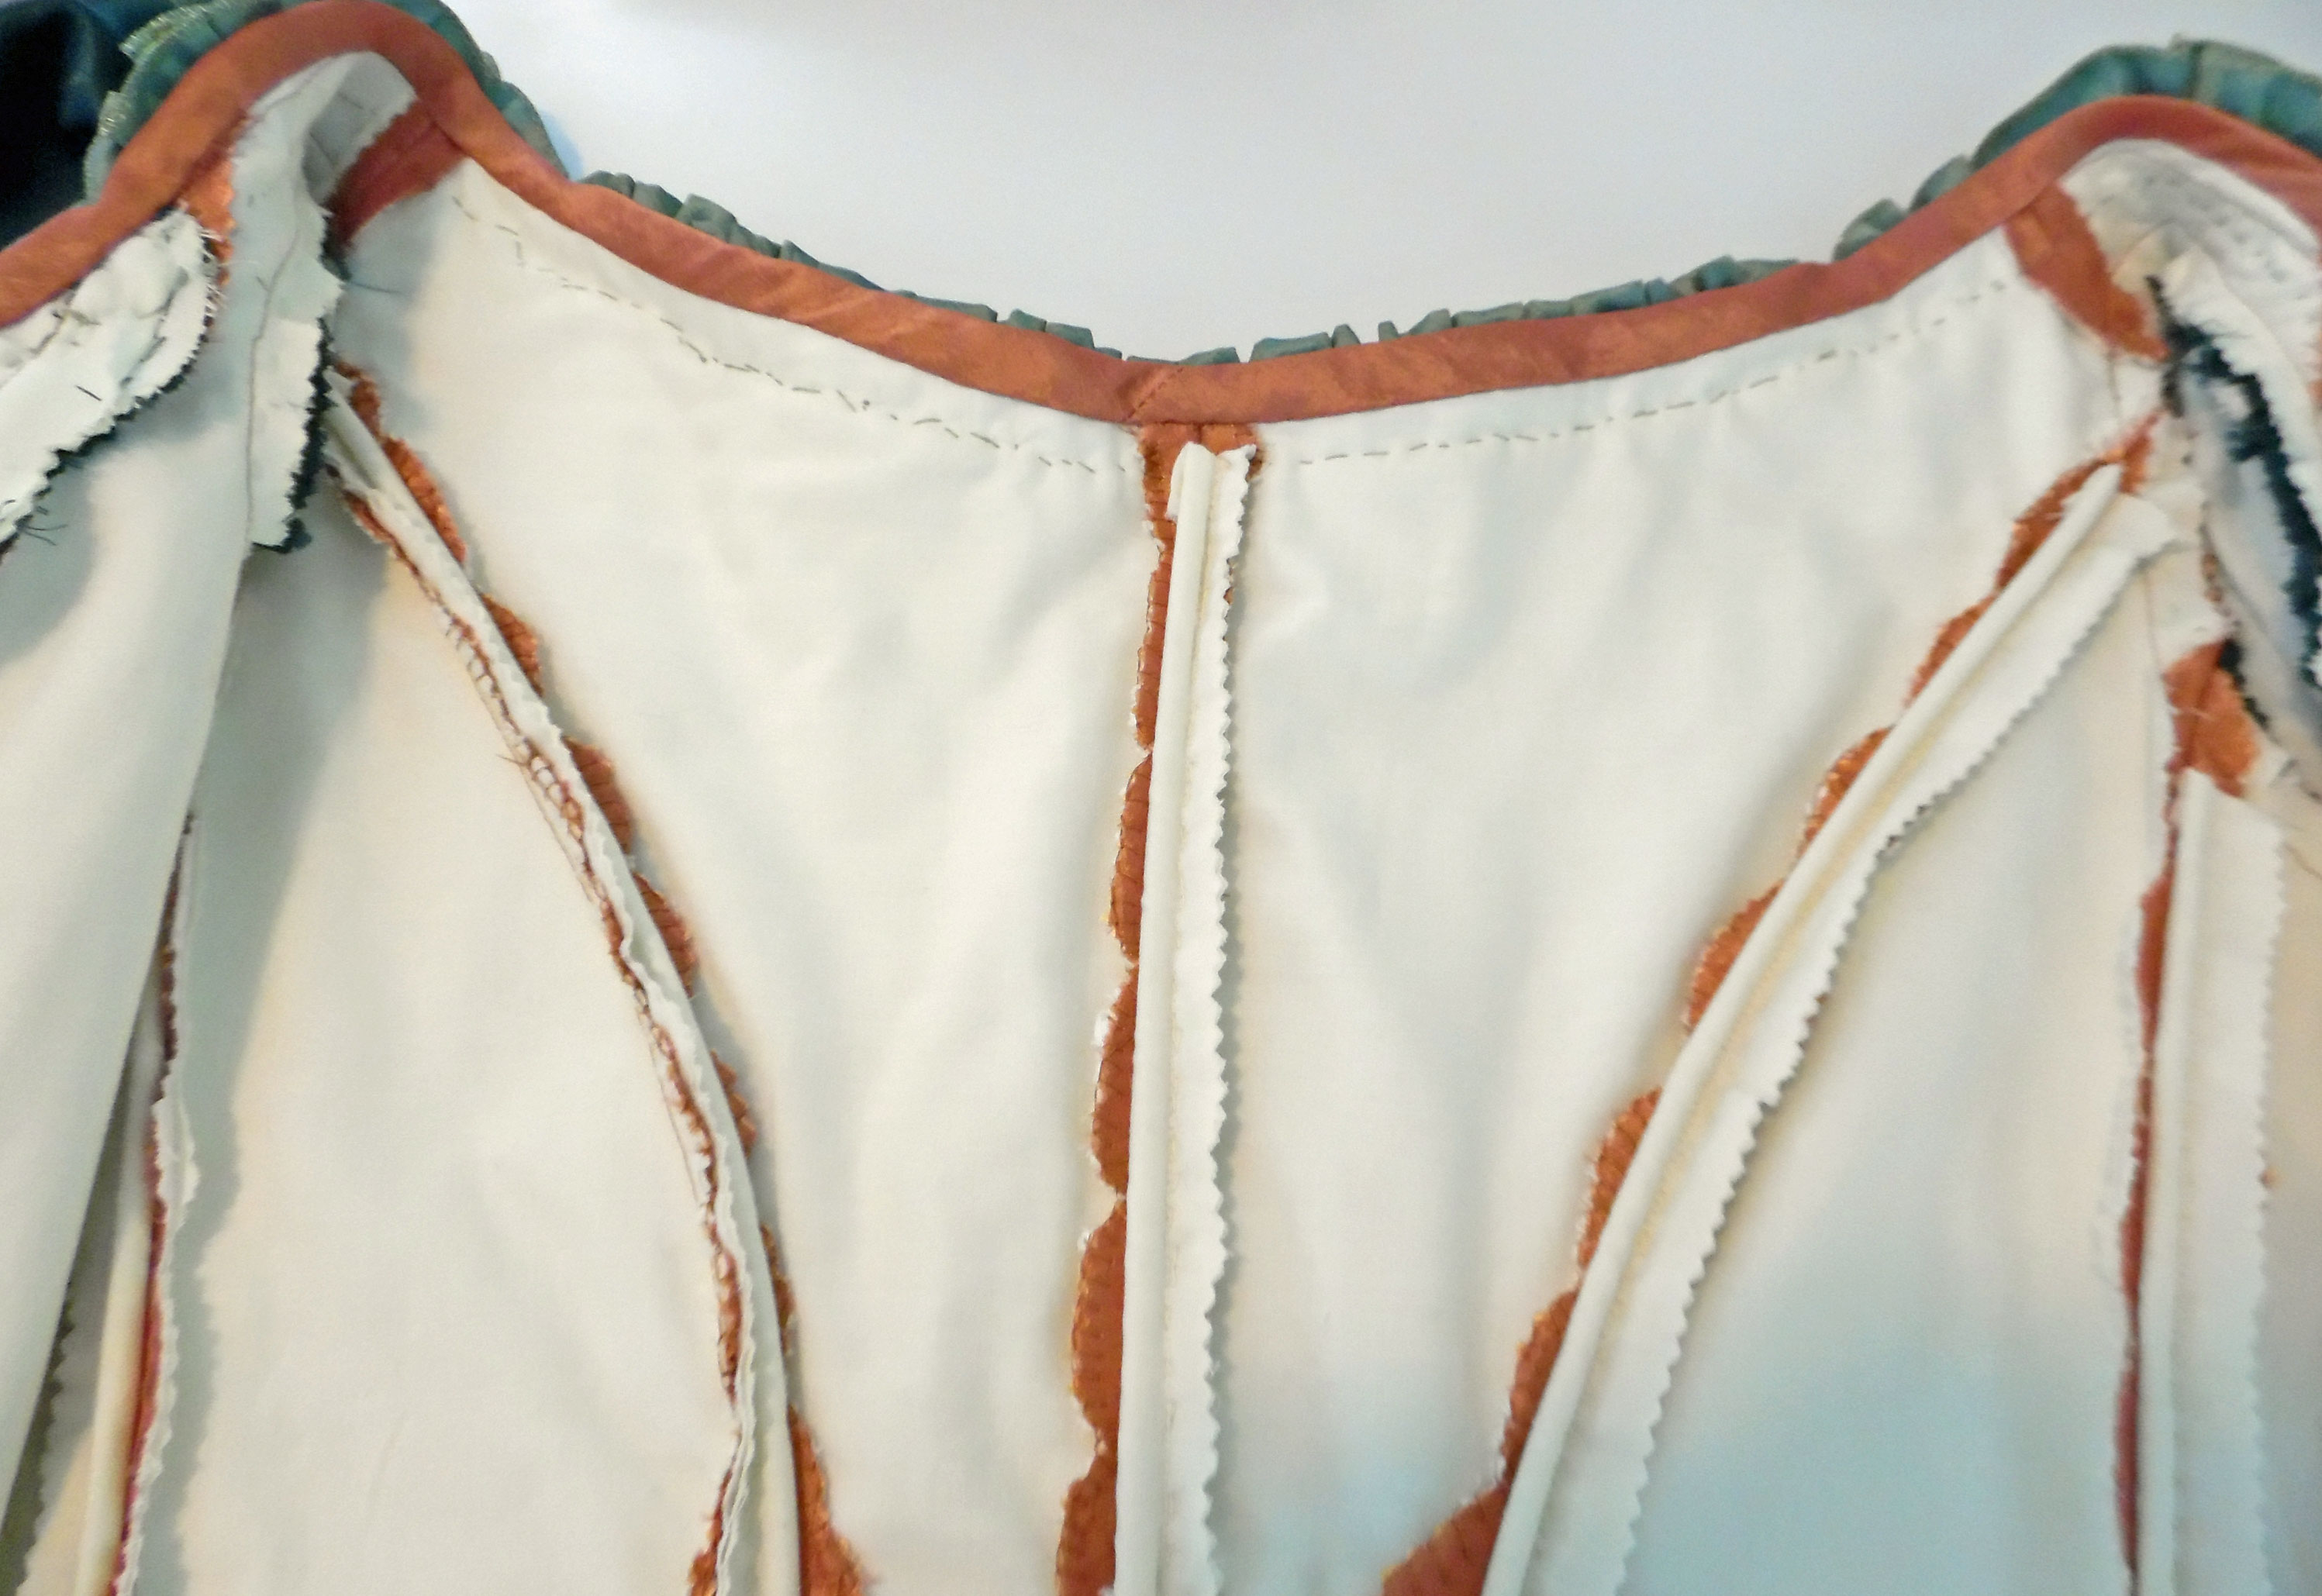
Lined & Interlined Bodice (Interior View)
Below, you can see a cross-section of a lined and interlined bodice. The photo was taken of the extra-wide seam allowances where the bodice’s false vest-front meets the main bodice. The fashion fabric is copper taffeta, while the interlining is white twill, and the lining is white batiste.
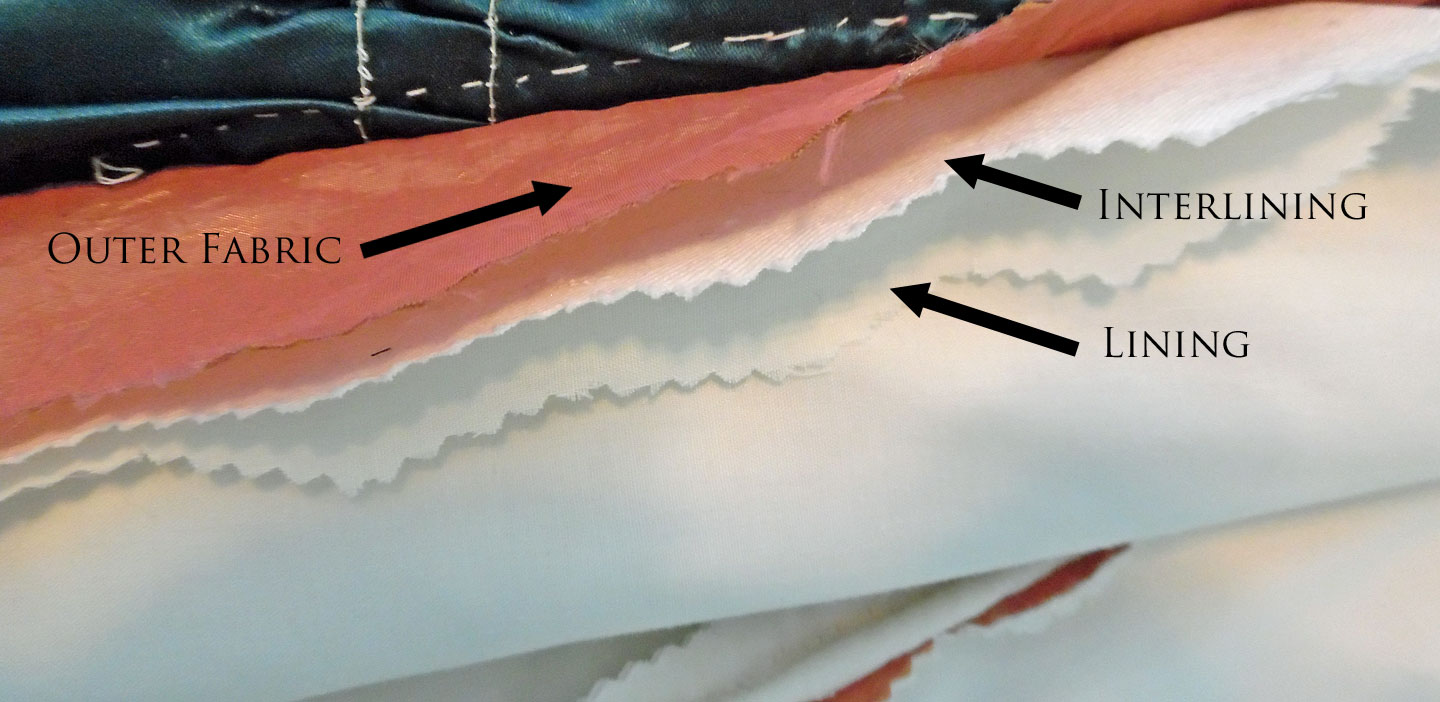
Lined & Interlined Bodice (Cross Section)
Why bother with a lining or interlining? There are several benefits. As mentioned above, they can strengthen a garment, which is important when designing a theater costume. Costumes will be put on in a hurry, especially during quick-changes, so the seams must be sturdy. You don’t want a costume ripping during a quick-change, or worse, during a scene!
Also, with all the bright lights onstage, it can get very hot. Sweat happens! A smooth cotton lining will absorb perspiration, helping to keep the outside of a costume clean. The lining can be cleaned—or even replaced, if it’s sewn separately.
If you prefer to sew your lining as one with the bodice, you might try dress shields to help keep your costumes fresh and clean. Dress shields are thin pads of flannel or muslin that are snapped or basted into the lower armscye of a bodice. They’re commonly used in professional productions—and they’re historically accurate. (If you’re a member of Your Wardrobe Unlock’d, see: Victorian Underarm Hygiene for directions.)
Dress Shields
A slippery lining, such as one made from rayon bemberg or silk habotai, will make a bodice easy to slip into, facilitating costume changes. Avoid so-called “china silk” linings, which are actually made of polyester. True, they’re quite slippery, but they fray easily and may disintegrate when put through the hardships that a theater costume must endure. It’s also a synthetic fiber, which means it won’t breathe and your actress may overheat.
Another benefit of linings and interlinings is that they’ll add stiffness and body to a costume, making fabrics seem more luxurious. This is invaluable if you must work with thin or inexpensive fabrics.
To add serious body to a costume’s fabric, use a stiffer interlining, like duck, canvas, or heavy twill. For a softer effect, especially if you don’t want the interlining to change the overall appearance of the fabric, use something soft and lightweight, like lawn, batiste, or broadcloth.
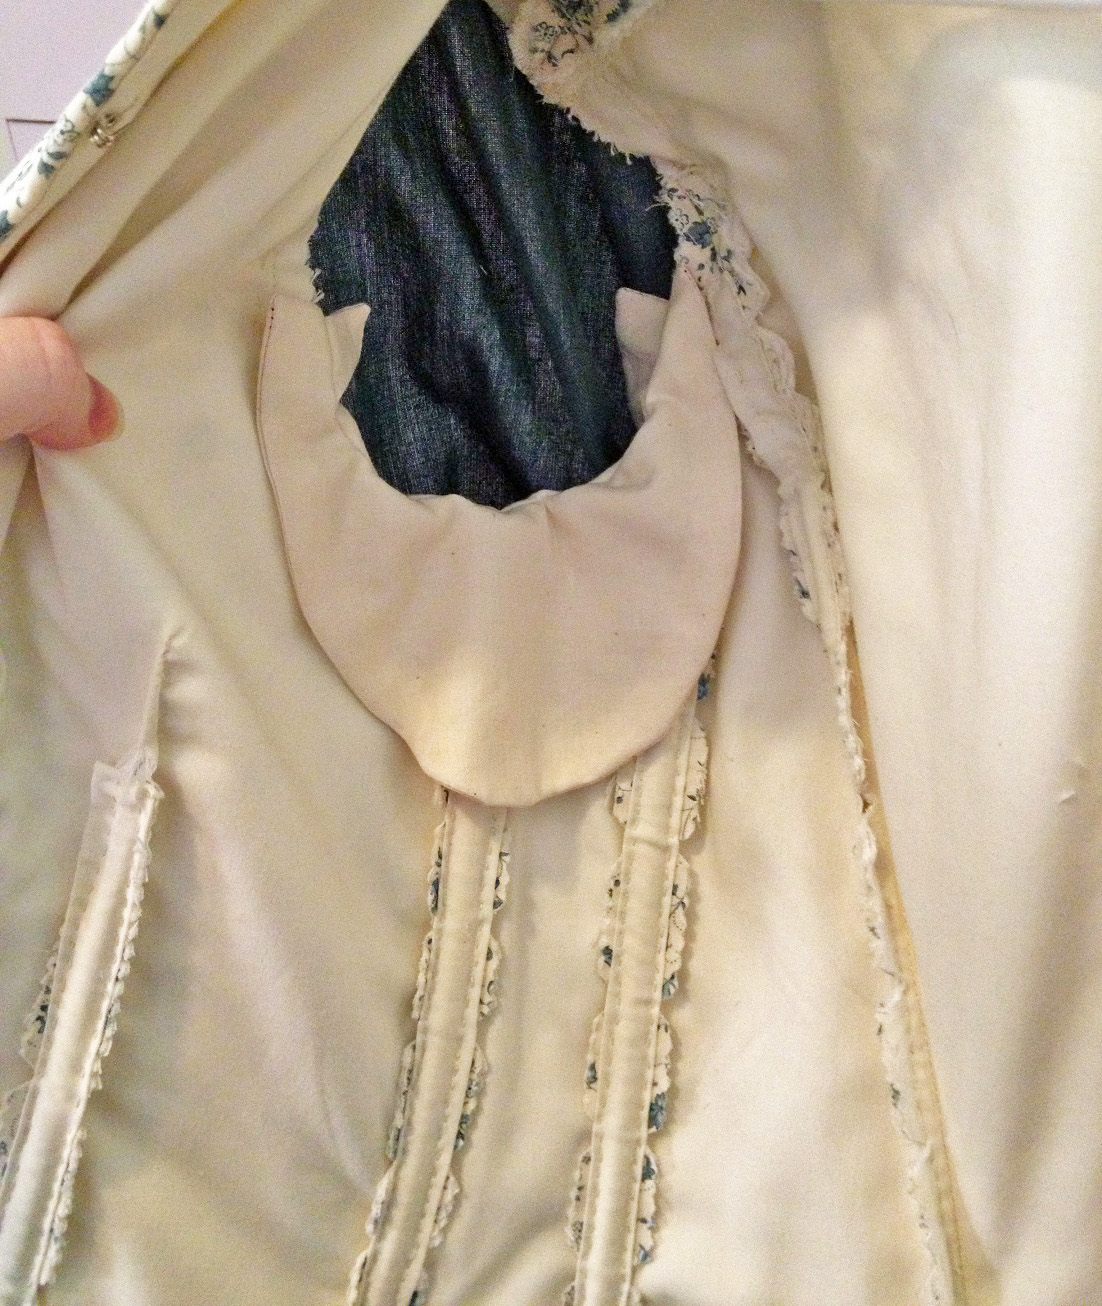
1876 Ballgown (Reproduction), Lined & Interlined
Boning
Boning is another feature that will help a historical bodice look better. Its main job is to keep the fabric smooth and flat, minimizing wrinkling. Without boning, a tight bodice will wrinkle and inch its way up the torso. Boning is also helpful in minimizing the look of a modern bra—but it’s no substitution for a proper corset!
Avoid cheap plastic boning, such as Rigilene, which lacks the necessary strength. If you want a lightweight, historically accurate effect, use synthetic whalebone. Spring steel can be used for straight seams, such as the center back and the front edges of a bodice. Spiral steel is better for curved seams that require flexibility. Both can be purchased online from corset-making shops, or places like eBay and Etsy.
Duct-ties are a budget alternative to steel boning. They’re an industrial version of plastic cable-ties or zip-ties. You can find them in the electrical or air-conditioning aisle of your local hardware store. Just make sure the ones you buy are sturdy enough to do the job!
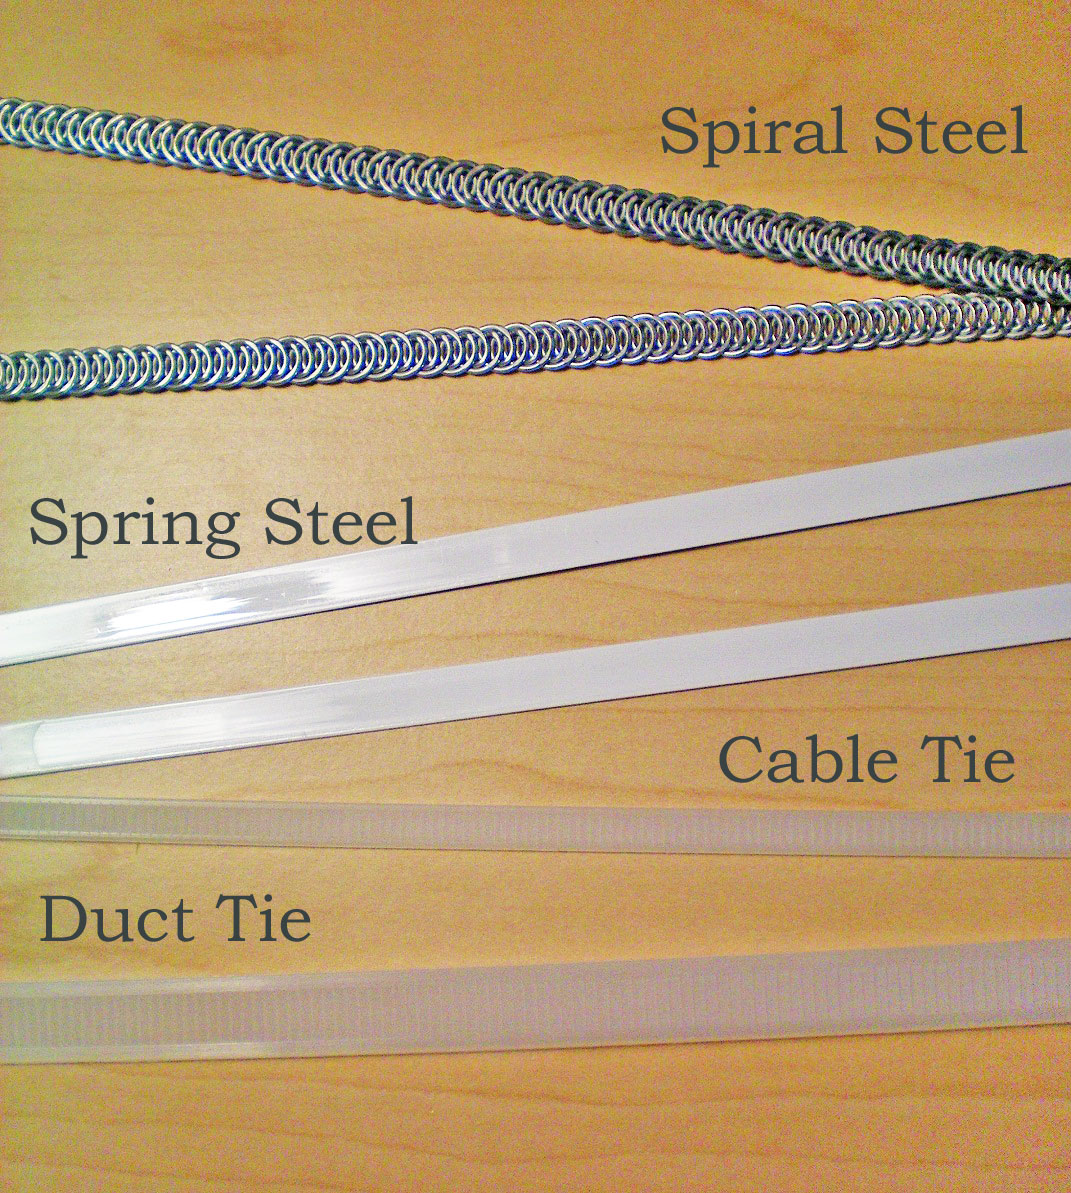
Types of Boning
If you’re going to bone a bodice, be sure to interline and line it first, treating all three layers as one. Anchor the bones to the seam allowances.
If you need a separate lining, interline the bodice and add the boning, then attach the lining, so the bones are hidden between the layers.
In the image below, the bodice was lined and interlined, and then the seam allowances were scalloped and overcast. The bones were encased in strips of muslin, much like you’d do with piping. The seam allowances of the boning casings were sewn directly to the bodice’s seam allowances.
Boned Bodice (Interior View)
Details
As you probably know, it’s the details that can make or break a costume. Pay attention to the small things! It will enrich and authenticate your costumes.
- Collar & Cuffs
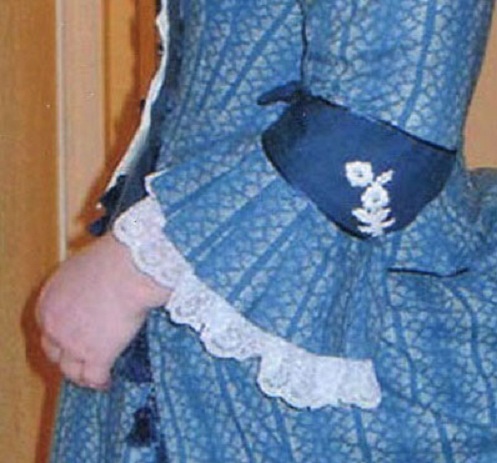
For early Victorian periods (1840s-1860s), day dresses often had white collars and cuffs. Later in the era (1870s-1890s), collars and cuffs might match the dress fabric or be of a contrasting material. Either way, bodices often had a bit of white lace peeking out at the throat and wrists. If you can’t afford real lace, use a frill of voile, batiste, or eyelet (broidere anglaise).
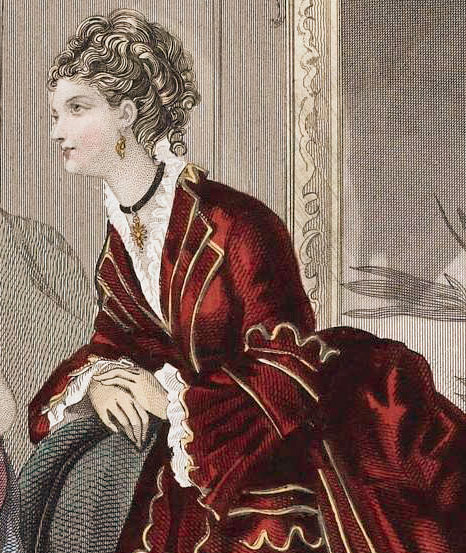
Ruffled Sleeve Cuffs & Collar (1873)
- Lace
So far as possible, avoid cheap lace. It nearly always looks awful, even from a distance. Stay away from large cabbage rose motifs, thick cluny (crocheted) lace, or any lace that’s stiff. Look for finer laces that are soft and delicate, perhaps even embroidered. When searching online, use the terms:
- Embroidered lace
- Net lace
- Tulle lace
- Cotton lace
- Heirloom lace
Note that the finer laces often come from China or South Korea, which means they’ll take several weeks to arrive. Order them early!
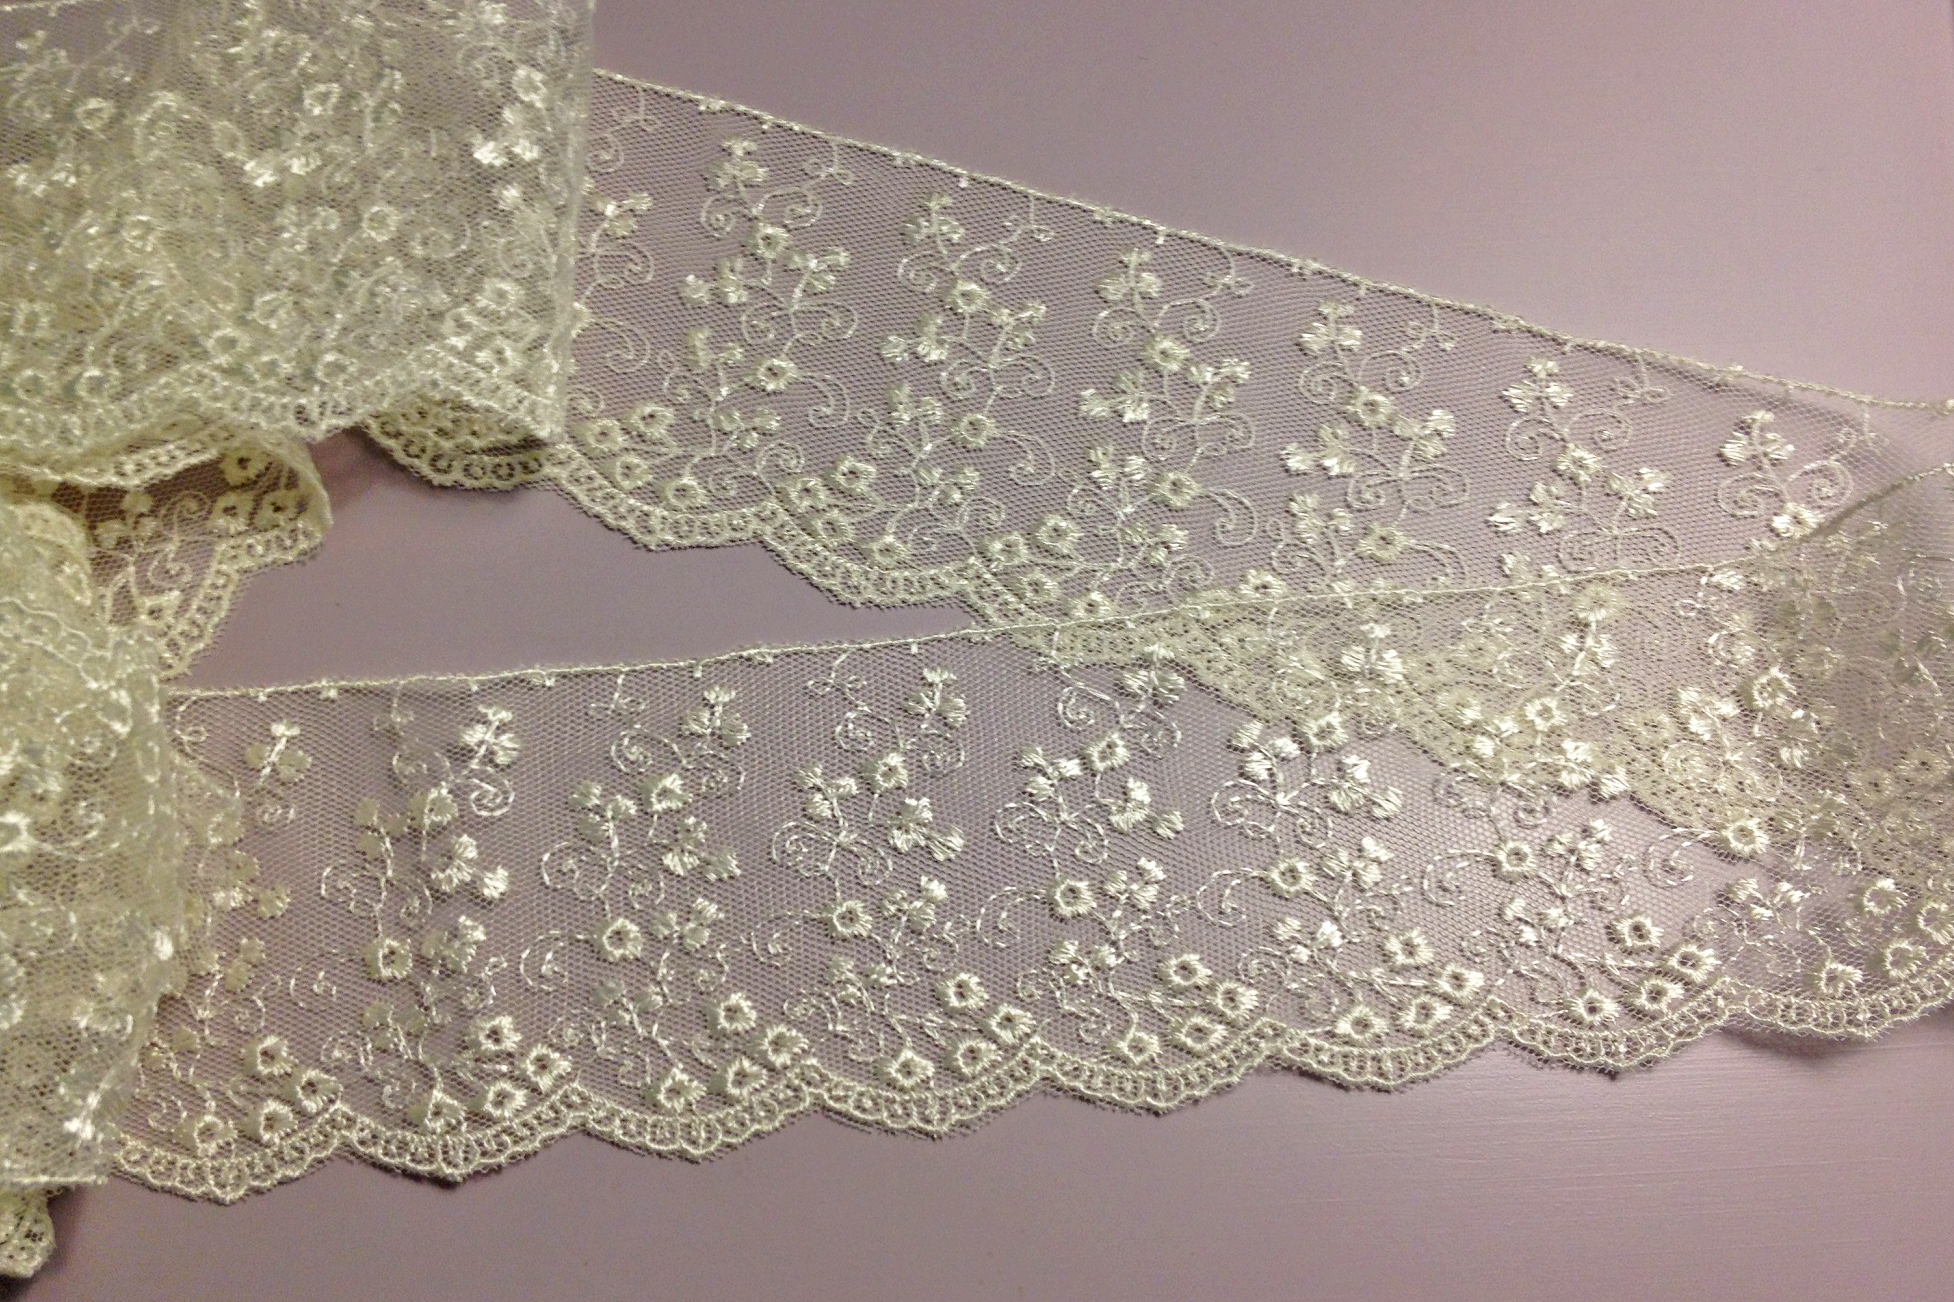
Embroidered Lace
It’s always better to see and touch lace in person before buying it, but sometimes this is impossible. The city where I live, for instance, doesn’t have any good lace shops (or fabric stores, for that matter!). If you’re buying online, ask for a swatch before you order any yardage, or ask the seller to describe the lace’s qualities, so you can determine whether it’s crisp and stiff, or soft and fluid.
When using lace, always be generous. Remember, lace was a sign of wealth or affluence. Those who could afford to embellish with lace would have used a lot of it! For proof, study portraits from the 18th and 19th centuries, looking specifically at lace cuffs and neckline ruffles. There’s usually quite a lot of gathered or pleated lace.

Portrait of Marie Barbara Eleonore of Lippe-Biesterfeld
by Johann Georg Ziesenis (late 1750s)
If it comes down to a choice between using a lot of cheap lace, or very little expensive lace, having a full, gathered ruffle will usually look better than a skimpy ruffle, even if the lace is inexpensive. All the same, try to avoid lace that’s stiff, as it simply won’t drape correctly.
Gathered Lace Engageantes (Cuffs)
Hair
If you’re the wardrobe mistress for a play, you may have very little to do with dressing the actresses’ hair—or you may be in charge of it all! If someone else is in charge of hair, try to coordinate with them, so you’re both on the same page, stylistically speaking. For example, if your Victorian costumes are more traditional, you don’t want the hairdresser coming up with Steampunk hairstyles.
Having the wrong hairstyle for the period will compromise all the hard work you’ve put into your costumes. Hairstyles changed throughout history, so look at fashion plates and portraits to get an idea of popular styles during the period your play is set in. Throughout a good portion of recent history, it’s traditional that only girls and unmarried women wore their hair down loose, and even then, they might use a ribbon as a headband to hold it back from their face, or they might pull the sides back
If going out, either a hat, bonnet, or cap was worn, depending on the era in question.
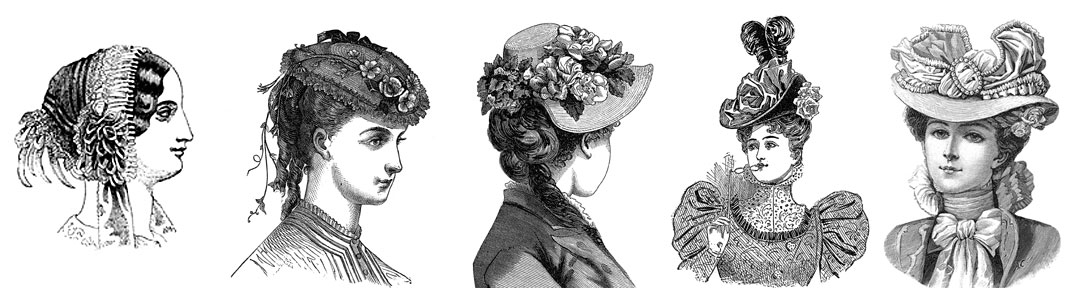
Evolution of Hats, 1850s-1890s (© 1998, Dover Publications)
A side-part was considered masculine, so most of the time, women either parted their hair down the center, or brushed it straight back. During the Rococo period, hair was usually teased and supplemented with false hair for a large, poofy look. During the Victorian period, hair was often parted and pulled into an updo. A simple bun or French twist will work, if anything more elaborate is beyond your means.
There are several articles at Your Wardrobe Unlock’d on historical wig-styling and hairdressing. Victorian Evening Hairstyles by Lynn McMasters is a great example, and it’s free! For most content, you must have a subscription, but if you’ll be doing a lot of historical costuming, it’s well worth it! Their sister-site, Foundations Revealed, is helpful if you’ll be creating corsets or other historical underpinnings.
|
Tip Use real hairpins, not bobby pins. They’ll hold a fancy chignon in place better. |
Try to avoid contemporary hairstyles. Side-parts and long, side-swept bangs are extremely modern. Frizzed or curled bangs were popular in the early 1800s, and again in the 1870s and 1880s, but in many time periods, bangs weren’t stylish.
Add a few ringlets or sausage curls for an evening look. If you can find some Bumpits, they’ll help add volume to your hair. (See: A Rat’s Nest.)
In the examples below, I needed an evening updo to be worn with an 1876 ballgown. I had a modern, shoulder-length haircut, so I wasn’t sure I would be able to come up with anything suitable, but in the end, I found a style that worked quite well—and was extremely simple to do!
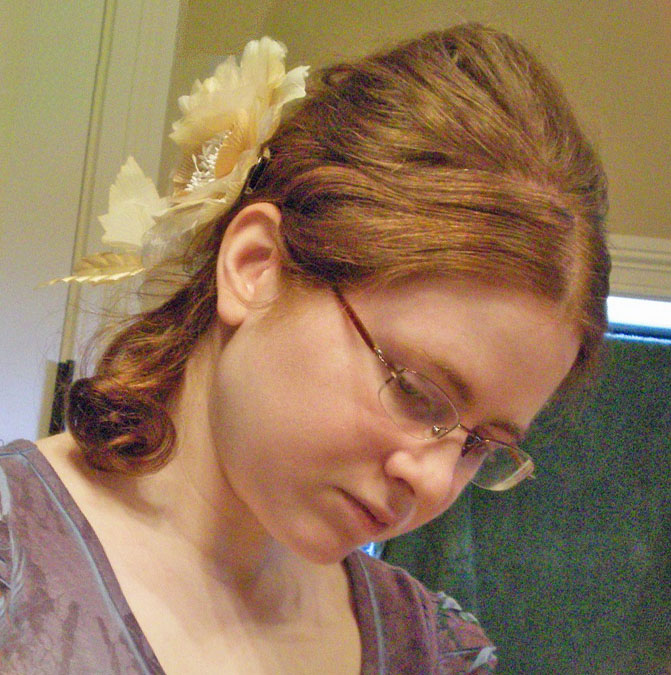
Easy Updo With Ringlets
First, I parted the front of my hair in the center, brushing it flat on each side. Behind the part, I brushed my hair toward the back and placed a Bumpit underneath, at the top of my head, to add height. I gathered my hair near the base of my neck, but before I twisted it into a knot, I pulled a small section free, to be turned into ringlets later. I twisted the bun and used hairpins to secure it. I turned the remaining section of hair into ringlets with a curling iron. Finally, I added a clip-on silk flower for a bit of drama.
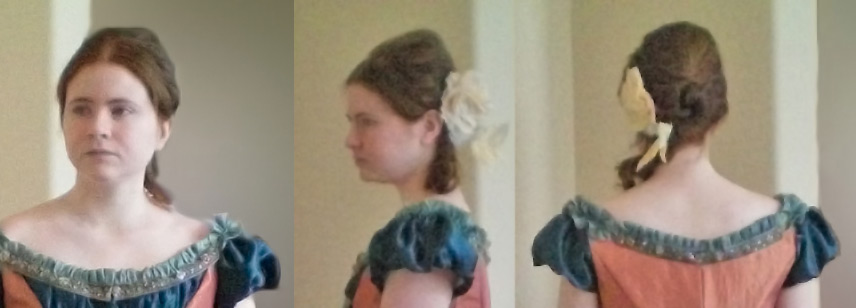
Easy Updo With Ringlets: Front, Side, & Back View
Accessories
Accessories can be just as important as the main costume. Without them, your actress will look as though she’s merely playing dress-up
Women frequently wore gloves in the Victorian era. They needn’t be white—they can coordinate with the costume, or they can be neutral colors, such as pale yellow, buff, or gray. Keep them shorter for daytime—wrist-length or mid-forearm—and stick with cotton or kid leather. Evening gloves can be elbow-length of higher, depending on how formal the occasion is. Satin is appropriate for evening, but very shiny polyester satin looks too synthetic Gloves were worn snugly, so err on the side of them being too small, rather than too loose.
Parasols were a popular item for women to carry during the day, to protect them from the sun. Try to avoid cheap lace parasols, unless you have no alternative. Battenburg lace is better, but if possible, cover your parasols with taffeta or silk habotai. Cotton broadcloth will also work in a pinch. Ruffles and fringe were common, as were decoratively carved handles. If your parasols have cheap plastic handles, try spray painting them to look like wood or ivory.

Victorian Parasol, 1870 (© 1998, Dover Publications)
In most time periods, women covered their hair when going outside during the day. In medieval times, they wore a veil, wimple, or one of many different types of head coverings. These evolved into headpieces (such as the hennin and French hood) during the Renaissance and Tudor periods. In the eighteenth century, women wore small muslin or lace caps. During the Victorian period, women wore hats or bonnets. In the Edwardian period, large hats were all the rage. Since hats grew and shrank in size, look at fashion plates and portraits to get an idea of what’s appropriate for the exact year your play takes place.

Portrait of Lillie Langtry by George Frederic Watts, 1879-1880
When confronted with the word “bonnet,” many think of the stereotypical calico sunbonnet, popularized by The Little House on the Prairie. The truth is, most bonnets were far more elegant! Many Victorian bonnets were indistinguishable from hats, the only difference being that they had decorative ribbons that tied or hung below the chin.
To keep a hat or bonnet in place, Victorian women used hatpins, which speared through the hat and hair. Hatpins are especially useful during a stage performance, so your actress doesn’t need to worry about her hat flying off in the middle of a dance number. If the hat will not be removed, create a topknot of hair that the hairpin can be anchored through.
You can buy vintage hatpins on eBay and Etsy, or you can buy blanks to make your own. Be sure and use appropriately sized hatpins. The larger the hat, the longer the pin should be. For safety, if the sharp end sticks out past the hat’s crown, use an end-cap to cover it.
I hope you’ve learned a few things that will make your venture into amateur theatrical costuming more successful. Remember, it’s all about illusion. You can get away with almost anything—provided it looks great!
~~*~~
Looking for more help with sewing or historical costuming? You can find beginner-friendly sewing advice in our Sewing Basics menu. Also, check out our Articles, Tutorials, and Sewing Diaries.