
 (Custom Photoshop Brushes by deviantART users Lileya and AJ.)
Click any illustration to view the full-sized image.
I generally keep a small back-support pillow on the chair in my sewing room. I made it several years ago, using seersucker. It’s still a nice pillow, if a bit simple for my taste, but I’ve grown tired of it. So, it’s off to Pinterest we go!
Design
I thought about doing a crazy-quilted pillow, but since it’s a back pillow, I didn’t want to make it too fragile. At the same time, I didn’t want anything too plain, either.
While browsing Pinterest, I found several DIY pillows that I liked. After the first few, I noticed a theme was developing—three-dimensional flowers. I also liked the look of pieced multicolored stripes, so I set out to combine the two.
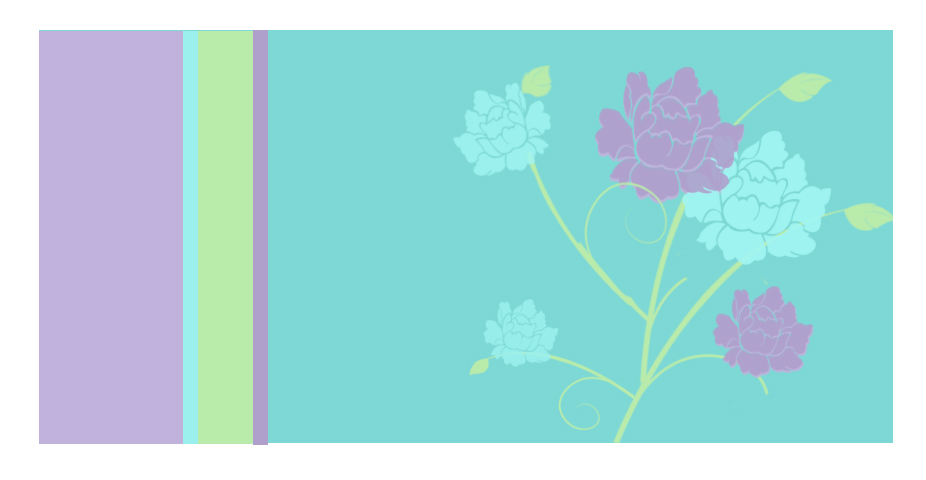
Pillow Design Sketch (© 2017)
Materials
- Twill—Aqua
- Lightweight Twill—Lime Green
- Cotton Voile—Lavender, Light Blue, & Lime Green
- Broadcloth—Aqua
- Velvet Ribbon—Lavender & Aqua
- Silk Ribbon—Lime Green & Sea Green
- Pillow Form
My sewing room’s color scheme is lavender and aqua, with accents of purple, and a muted lime green, so I had several fabrics in those colors to pick from. I’d intended to use several colors of silk ribbon, but changed my mind partway through.
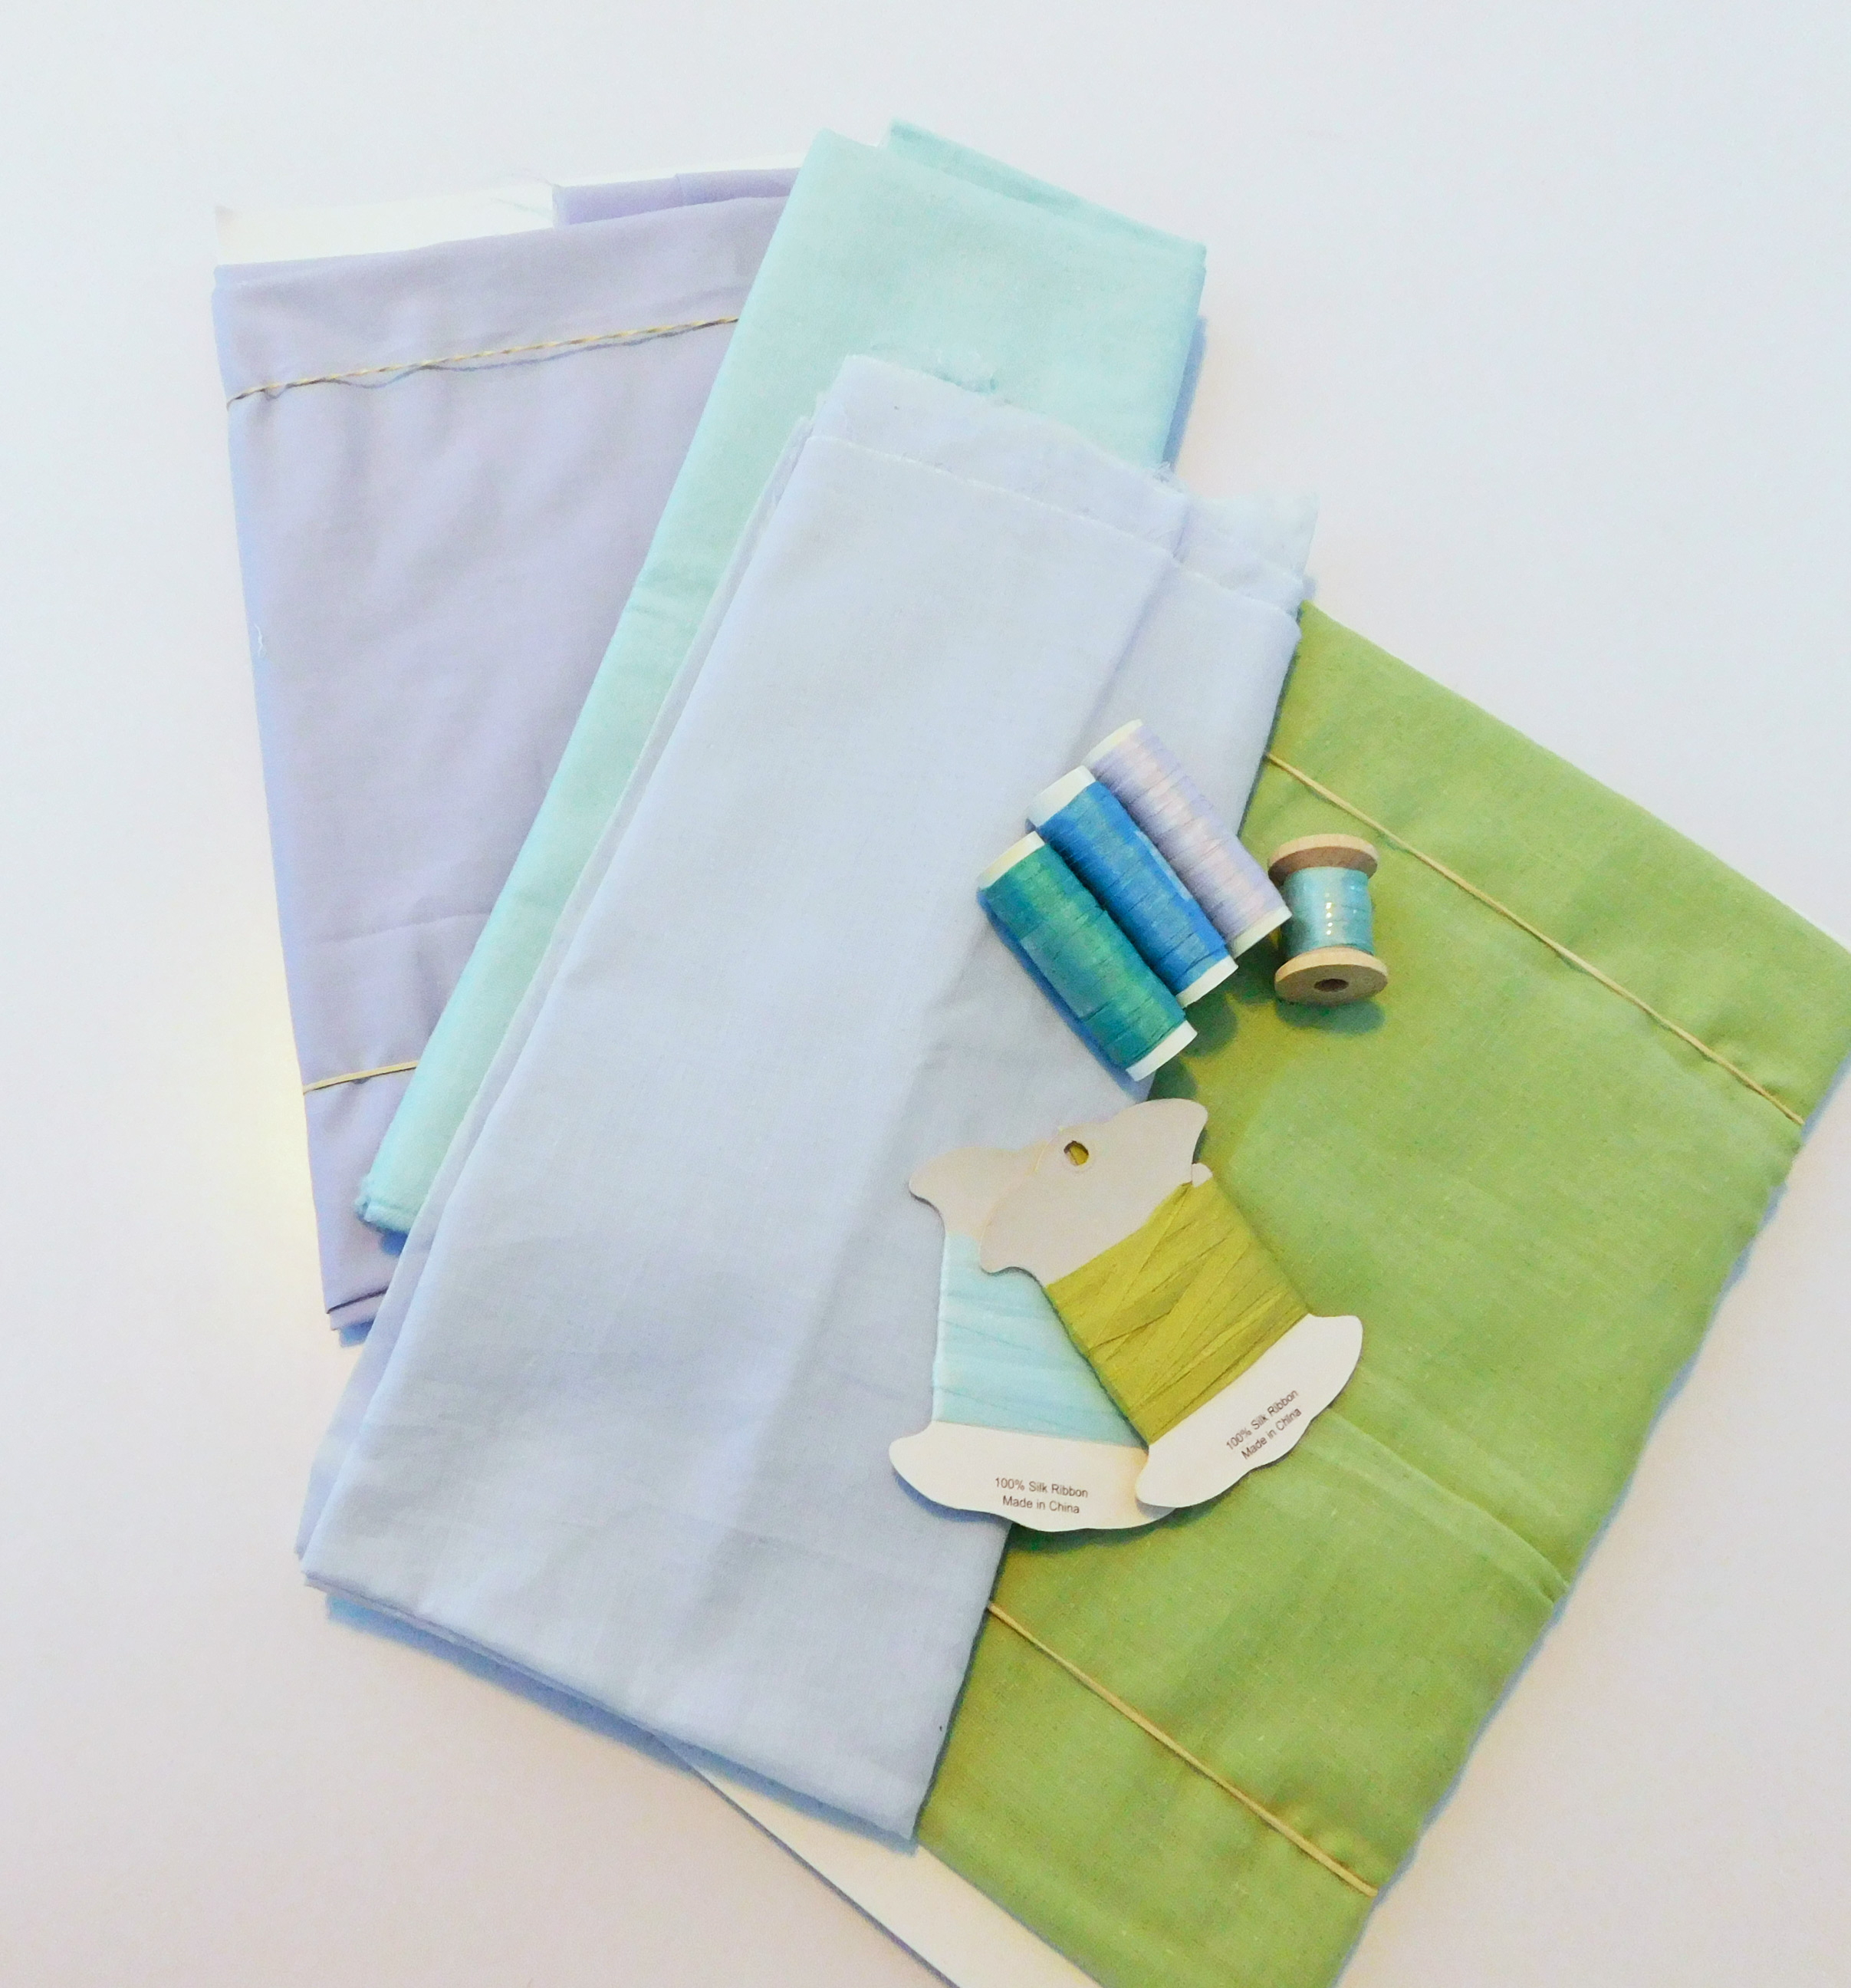
Fabric & Silk Ribbon
Construction, Part I
I measured my existing pillow with the aim of simply re-covering it. Once I knew the size (18″ x 10″) I cut a piece of aqua twill. Instead of cutting two pieces, one each for the front and back, I cut one piece that’s double the length, approximately 37″ x 10 ½”. That way, I only had to sew three sides, instead of four.
Now, I usually fail spectacularly at math and this time proved no exception. Even though I accidentally added too much for the seam allowances, I was just barely able to pin the twill around the pillow. Still, it ended up working out.
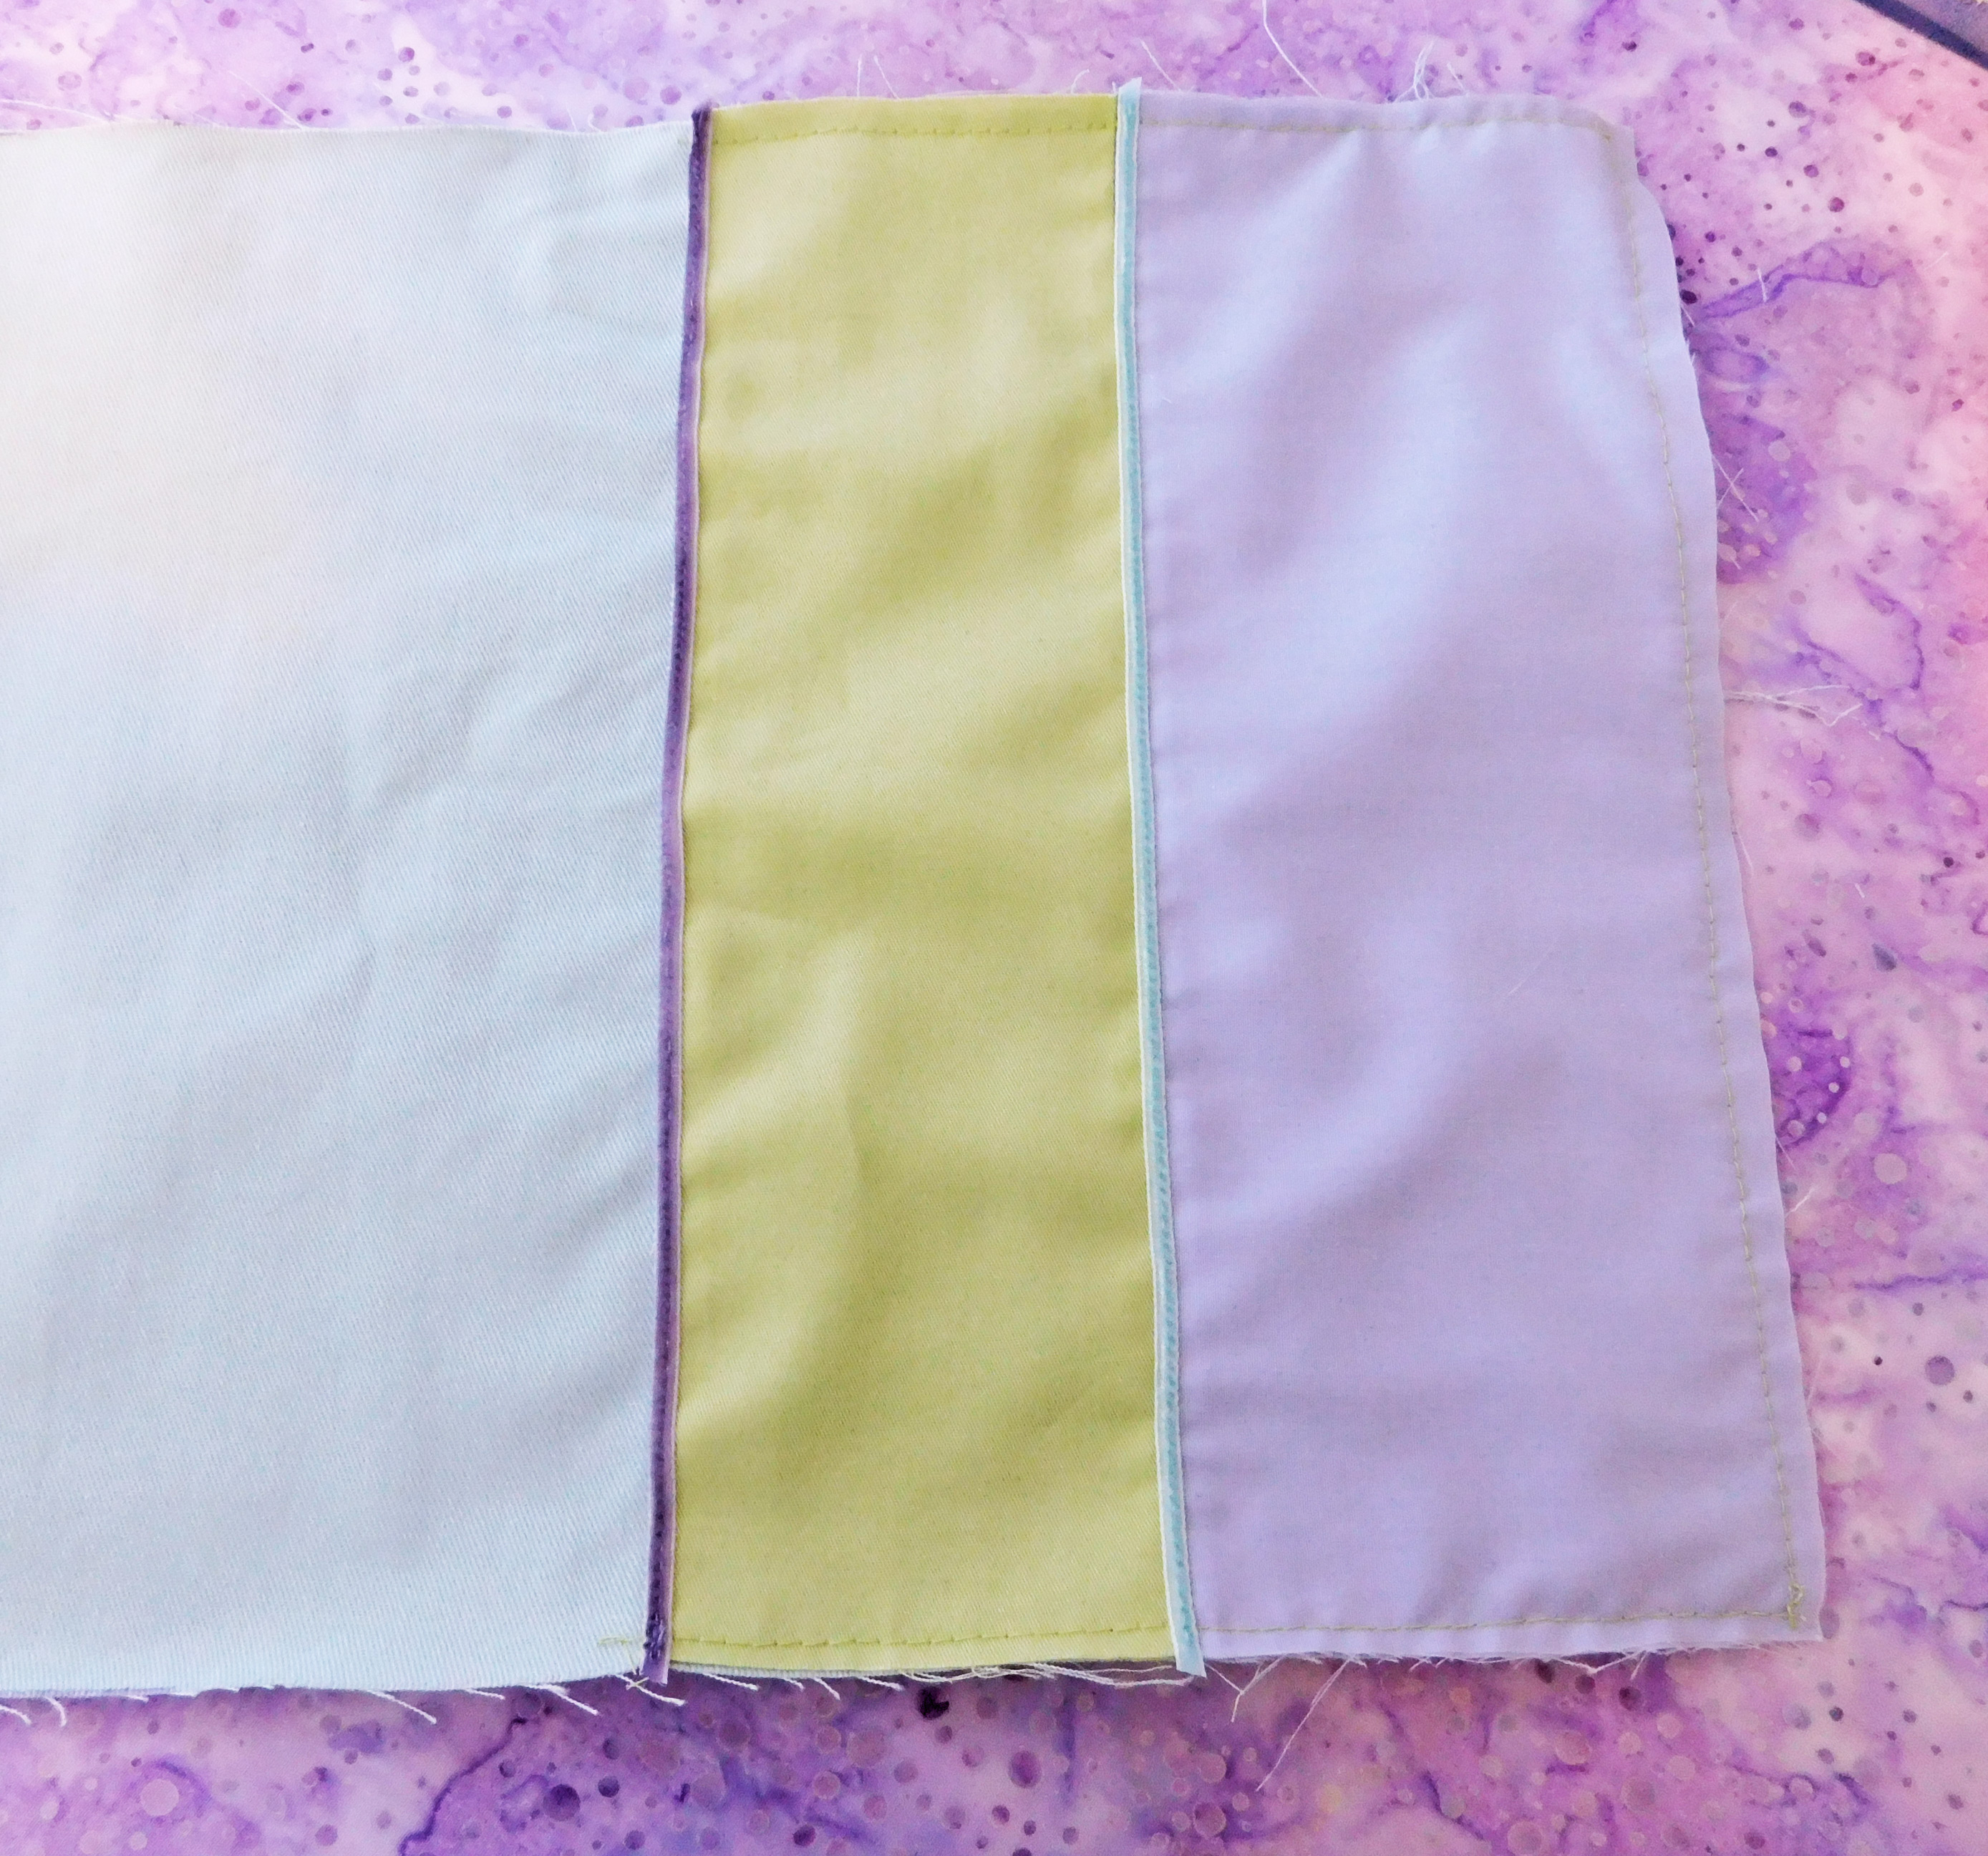
I chose lavender voile and lime green twill for the striped panels. Measuring was once again required, but I did better this time. Because the cotton voile was so sheer, I cut two layers of it, as opposed to one layer of the lightweight twill. I deliberately made the green stripe narrower than the lavender to provide visual interest.
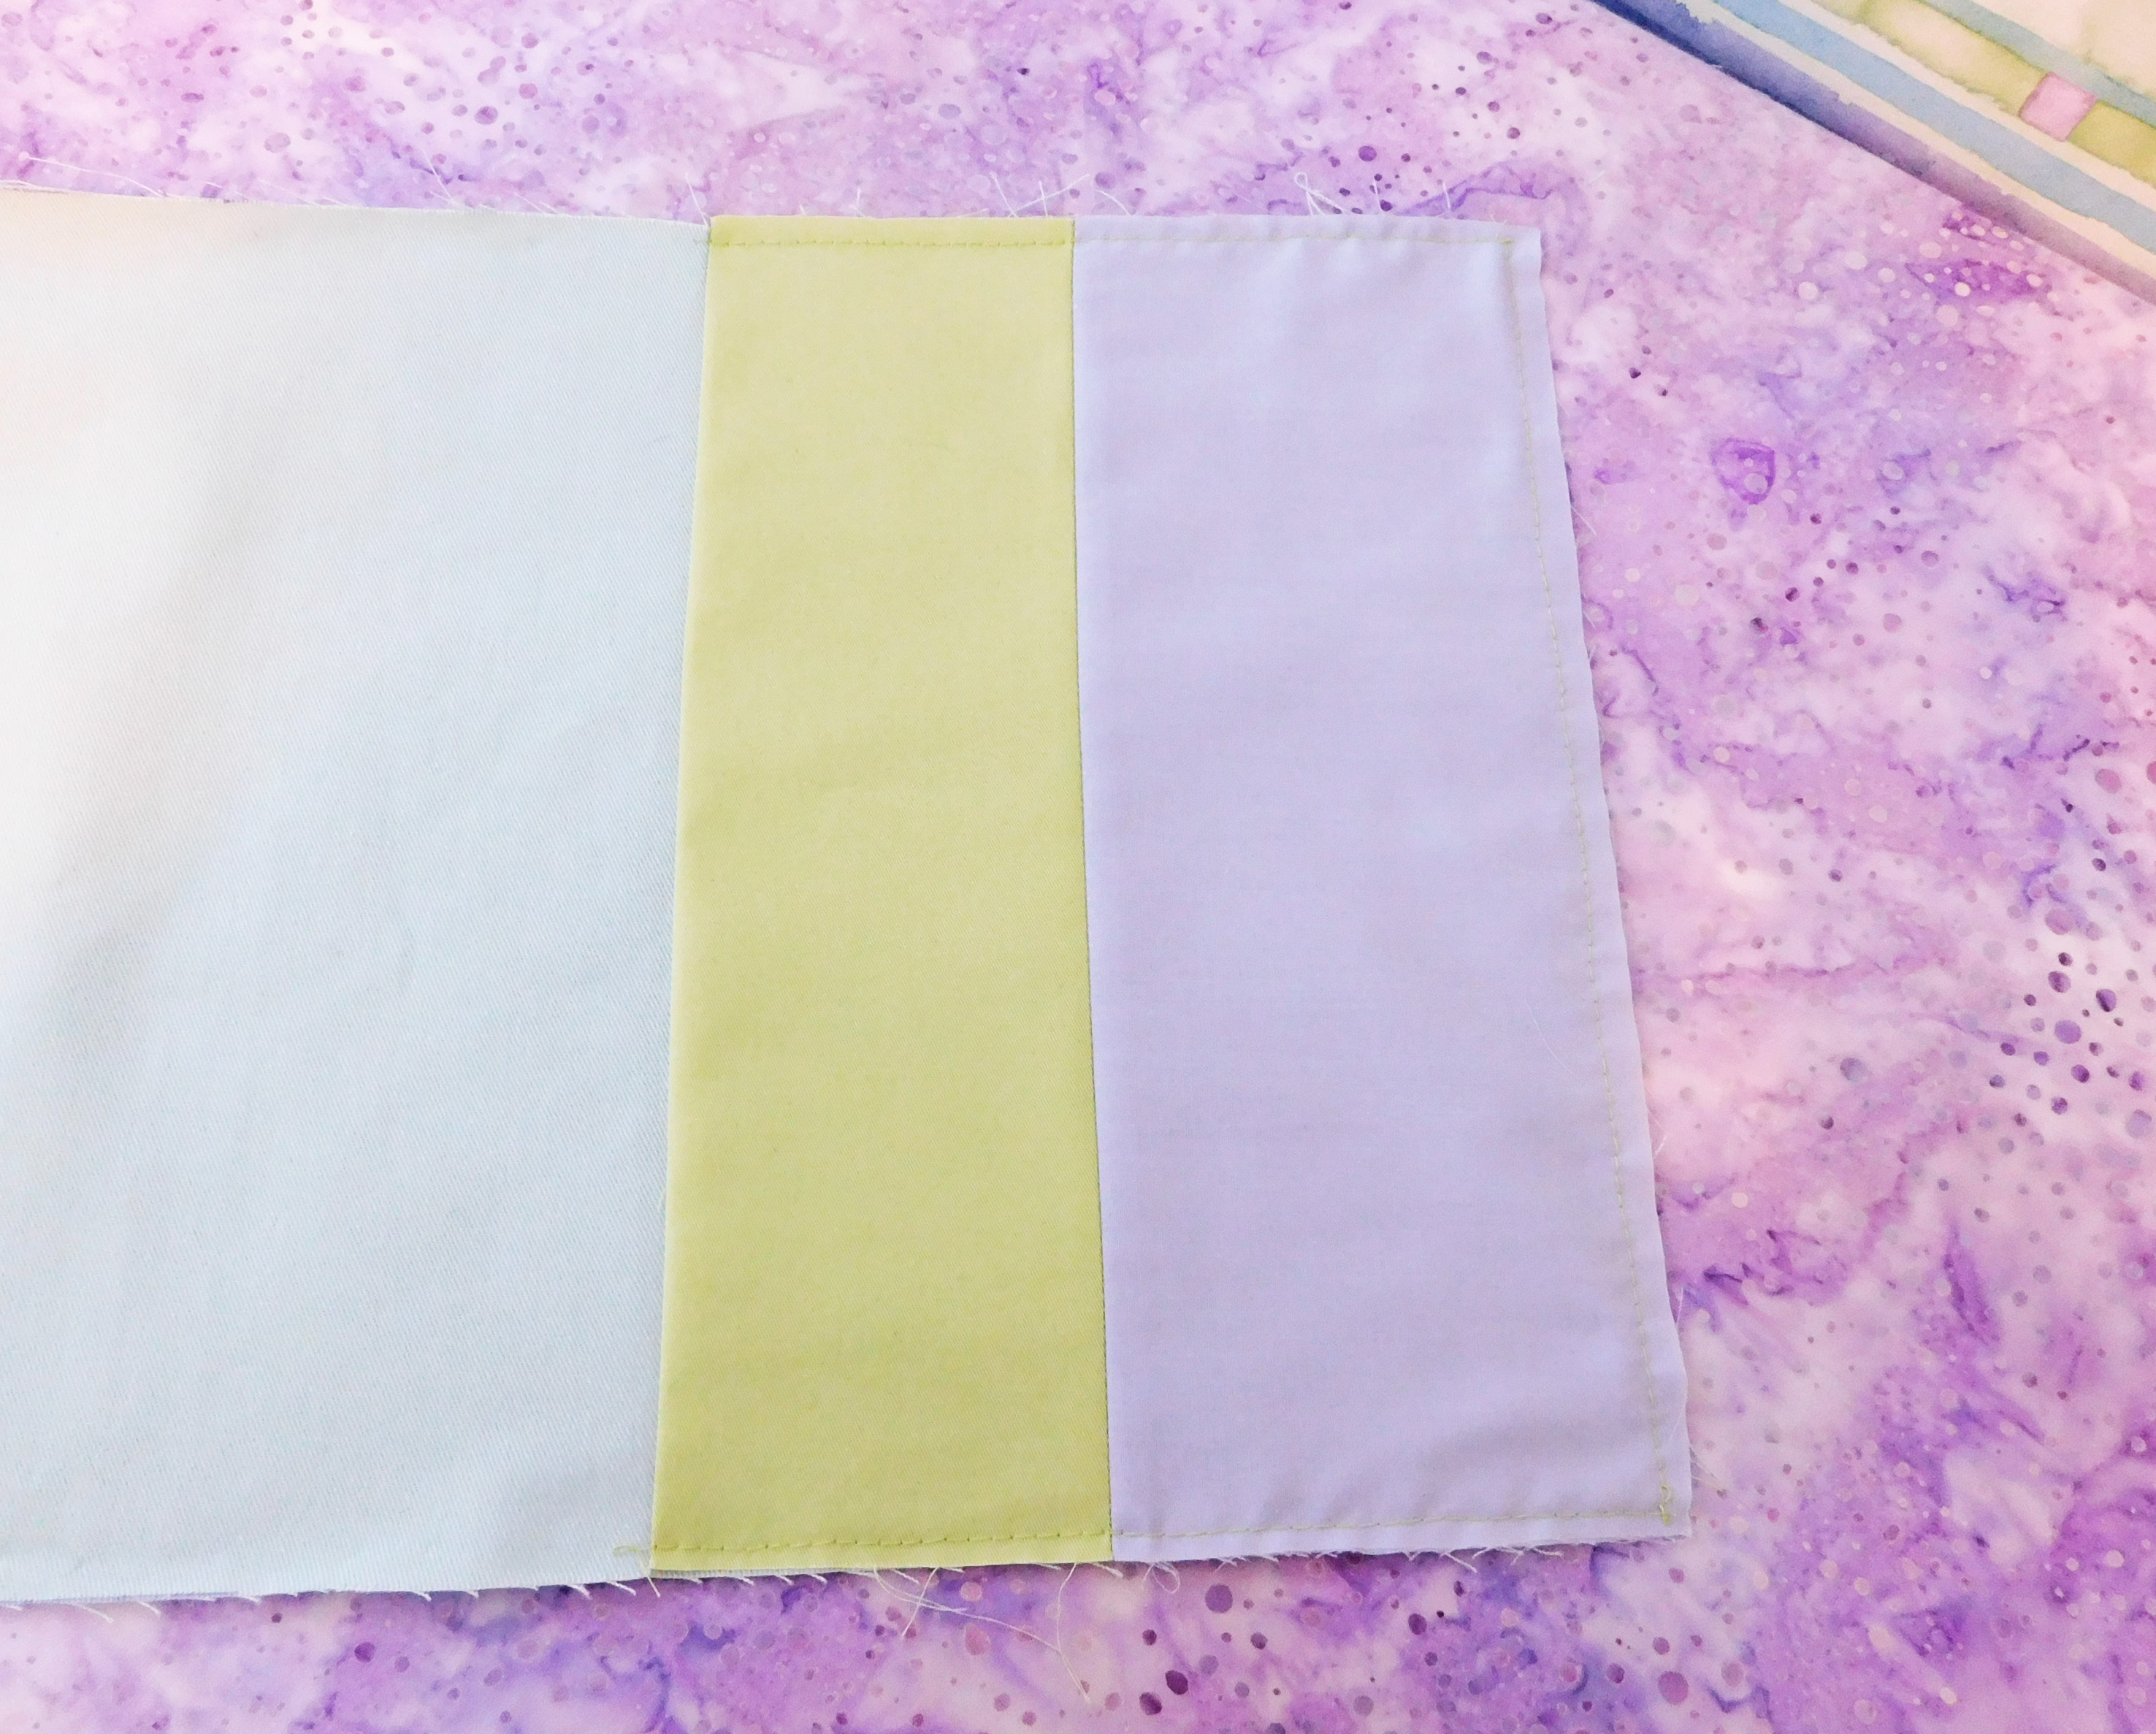
Pieced Stripes
To attach the multicolored panel to the pillow base, I decided it would be best to stitch it to the base with right sides together, then flip it over, right side up. (The somewhat easier alternative would’ve been to press the panel’s seam allowance under, then topstitch it to the base, but I didn’t want to worry about hiding the topstitching.) I machine basted the edges of the striped pieces to the base, so they wouldn’t shift during the decorating phase.
Embellishment
Decorating usually needs to be done flat, before you sew the pillow into a pillow shape. To get things started, I stitched a very narrow velvet ribbon over the seams of the panels. One’s light aqua and the other is dark lavender.
Velvet Ribbon
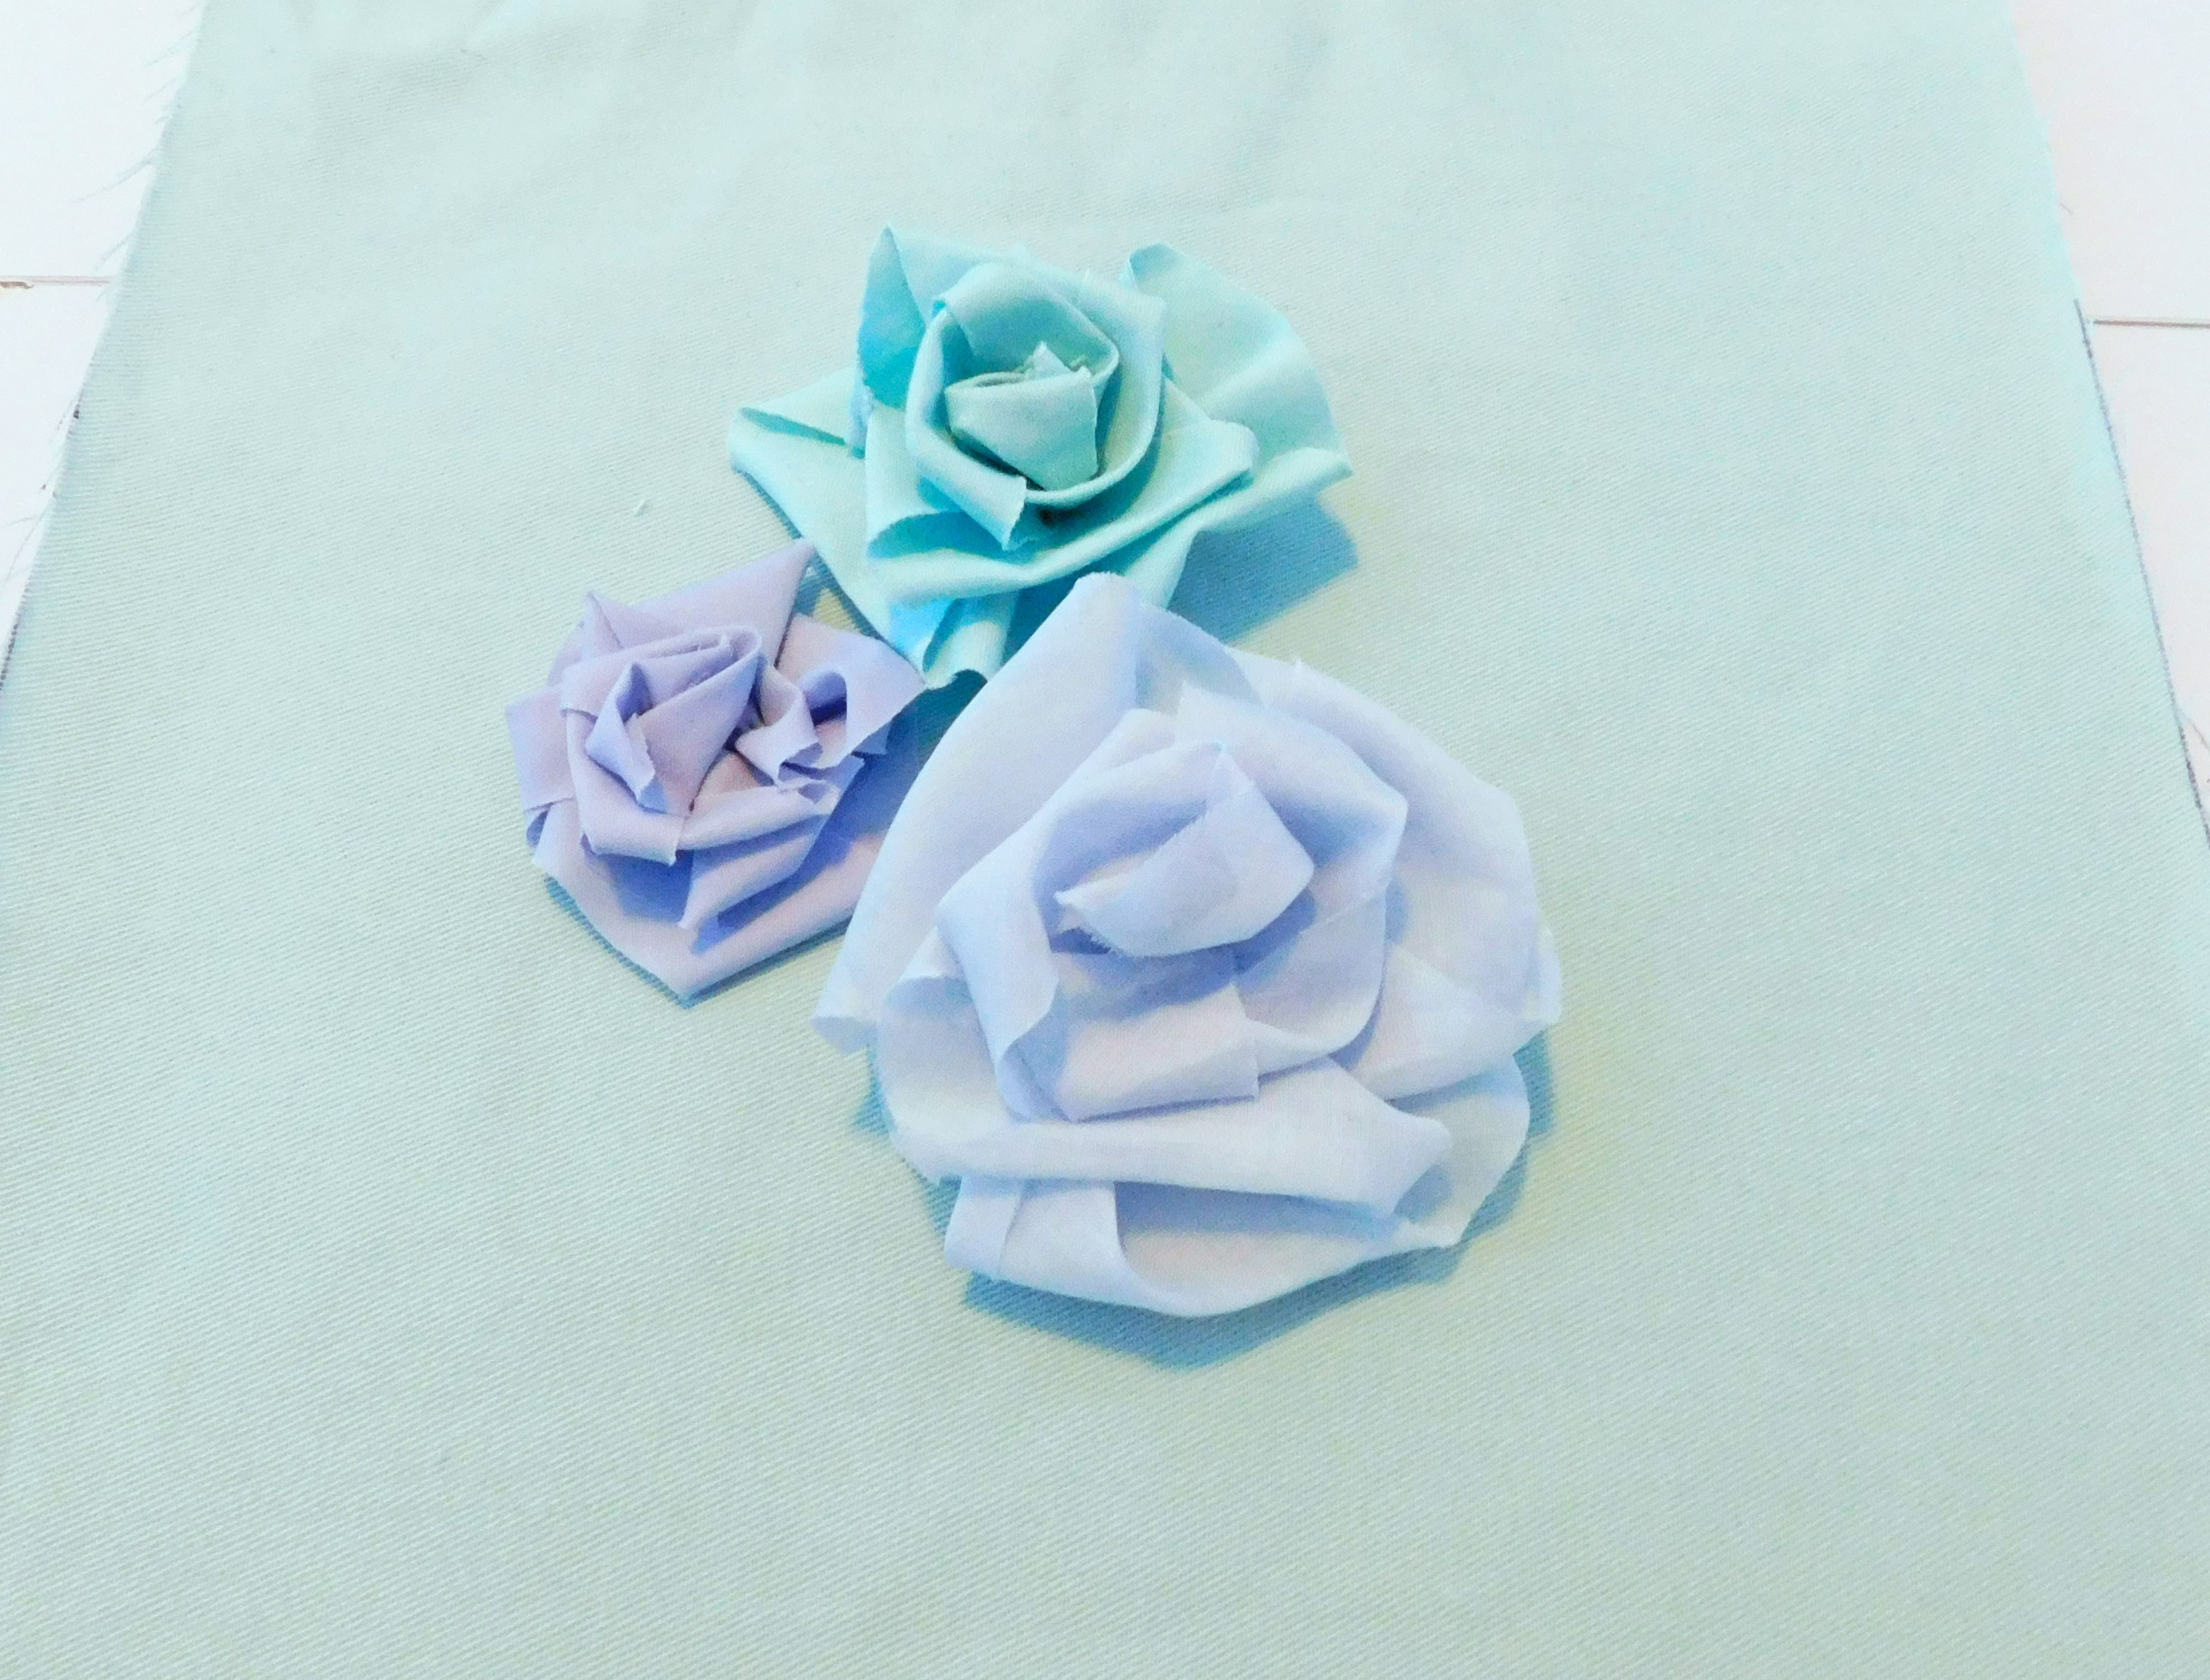
The flowers were an experiment. I watched about 45 seconds of a YouTube video that demonstrated how to make roses using torn strips of fabric and a hot glue gun, but since I had no intention of using a glue gun, I shut it off and did my own thing.
Because I didn’t want to deal with frayed edges, I cut the fabric strips on the bias. Also, I cut the strips of varying widths, so the flowers would be different sizes.
It’s hard to describe how I made these flowers, but basically, I folded one end of the strip diagonally and rolled it a bit to form the center of the rose, then took a couple of hand stitches to secure it. After that, I just twisted the fabric strip and loosely wrapped it around, pinching the bottom and sewing a few stitches to secure it. Twist, wrap, stitch. The technique is vaguely similar to how you construct a spiderweb rose in silk ribbon embroidery, except it’s freehand, without a thread framework.
I ended up making three roses—one of lavender voile, one of pale blue voile, and one of aqua broadcloth. The voile roses turned out better, I think, due to the thinner fabric.
Fabric Roses
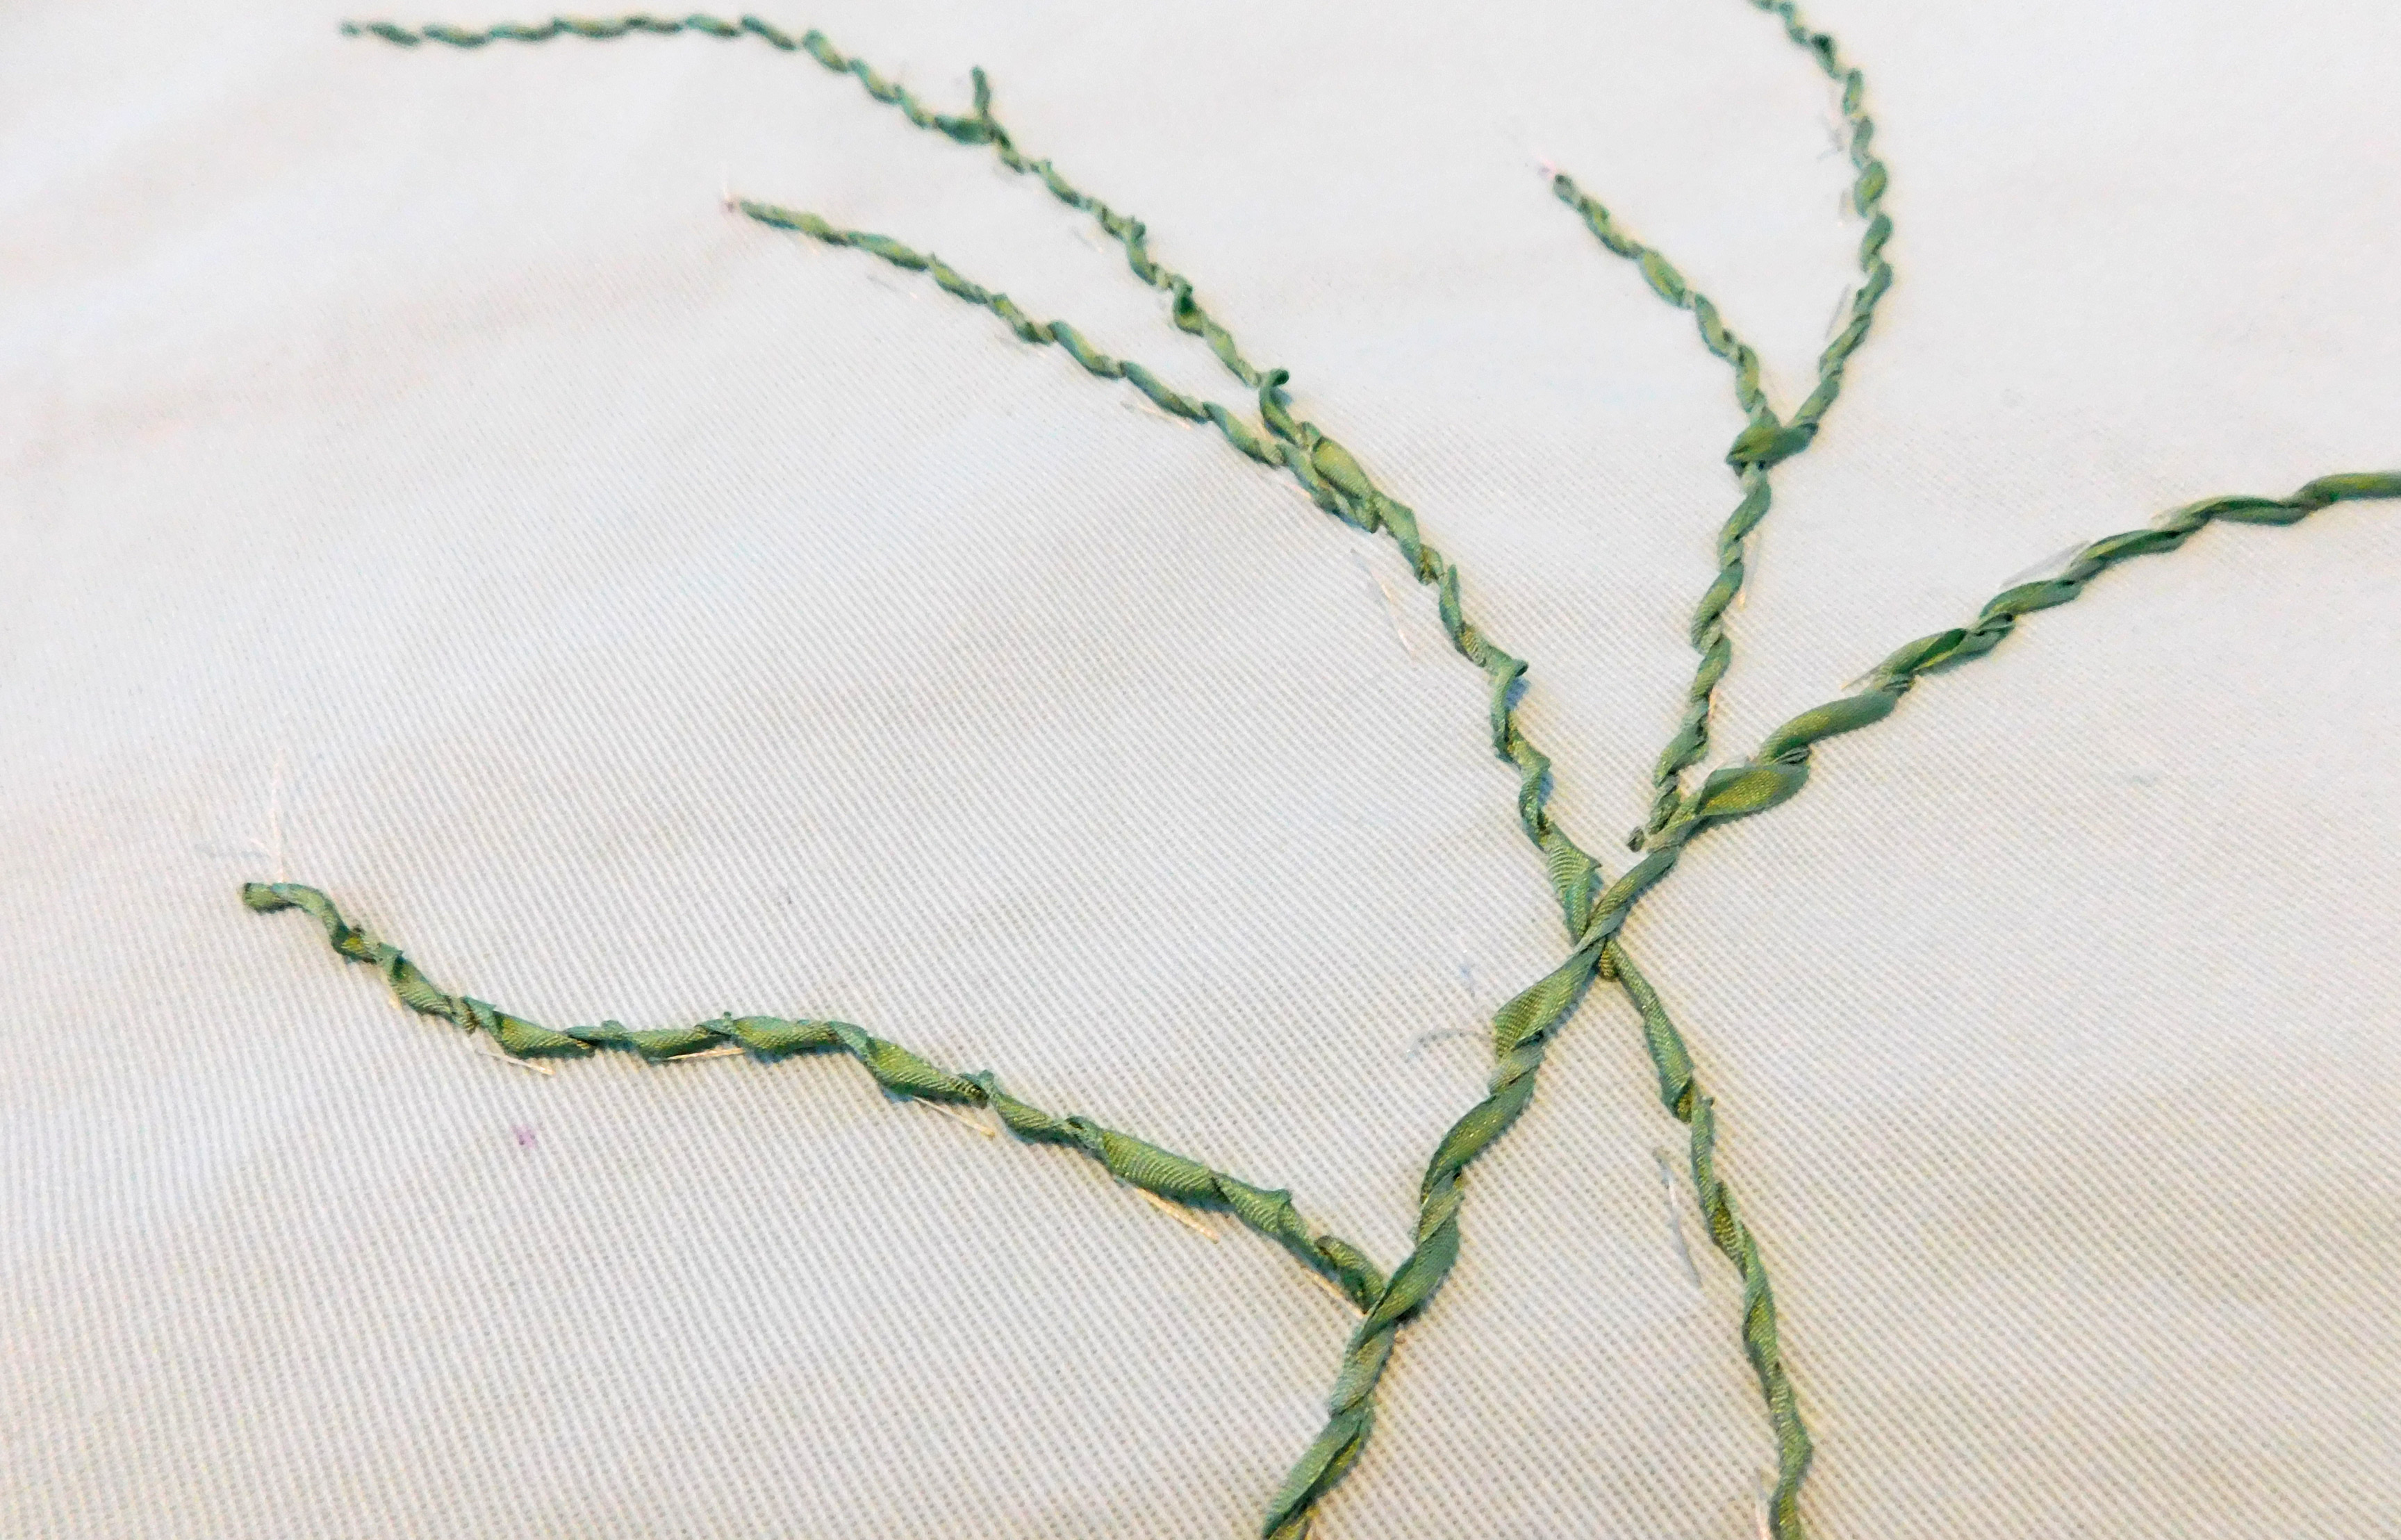
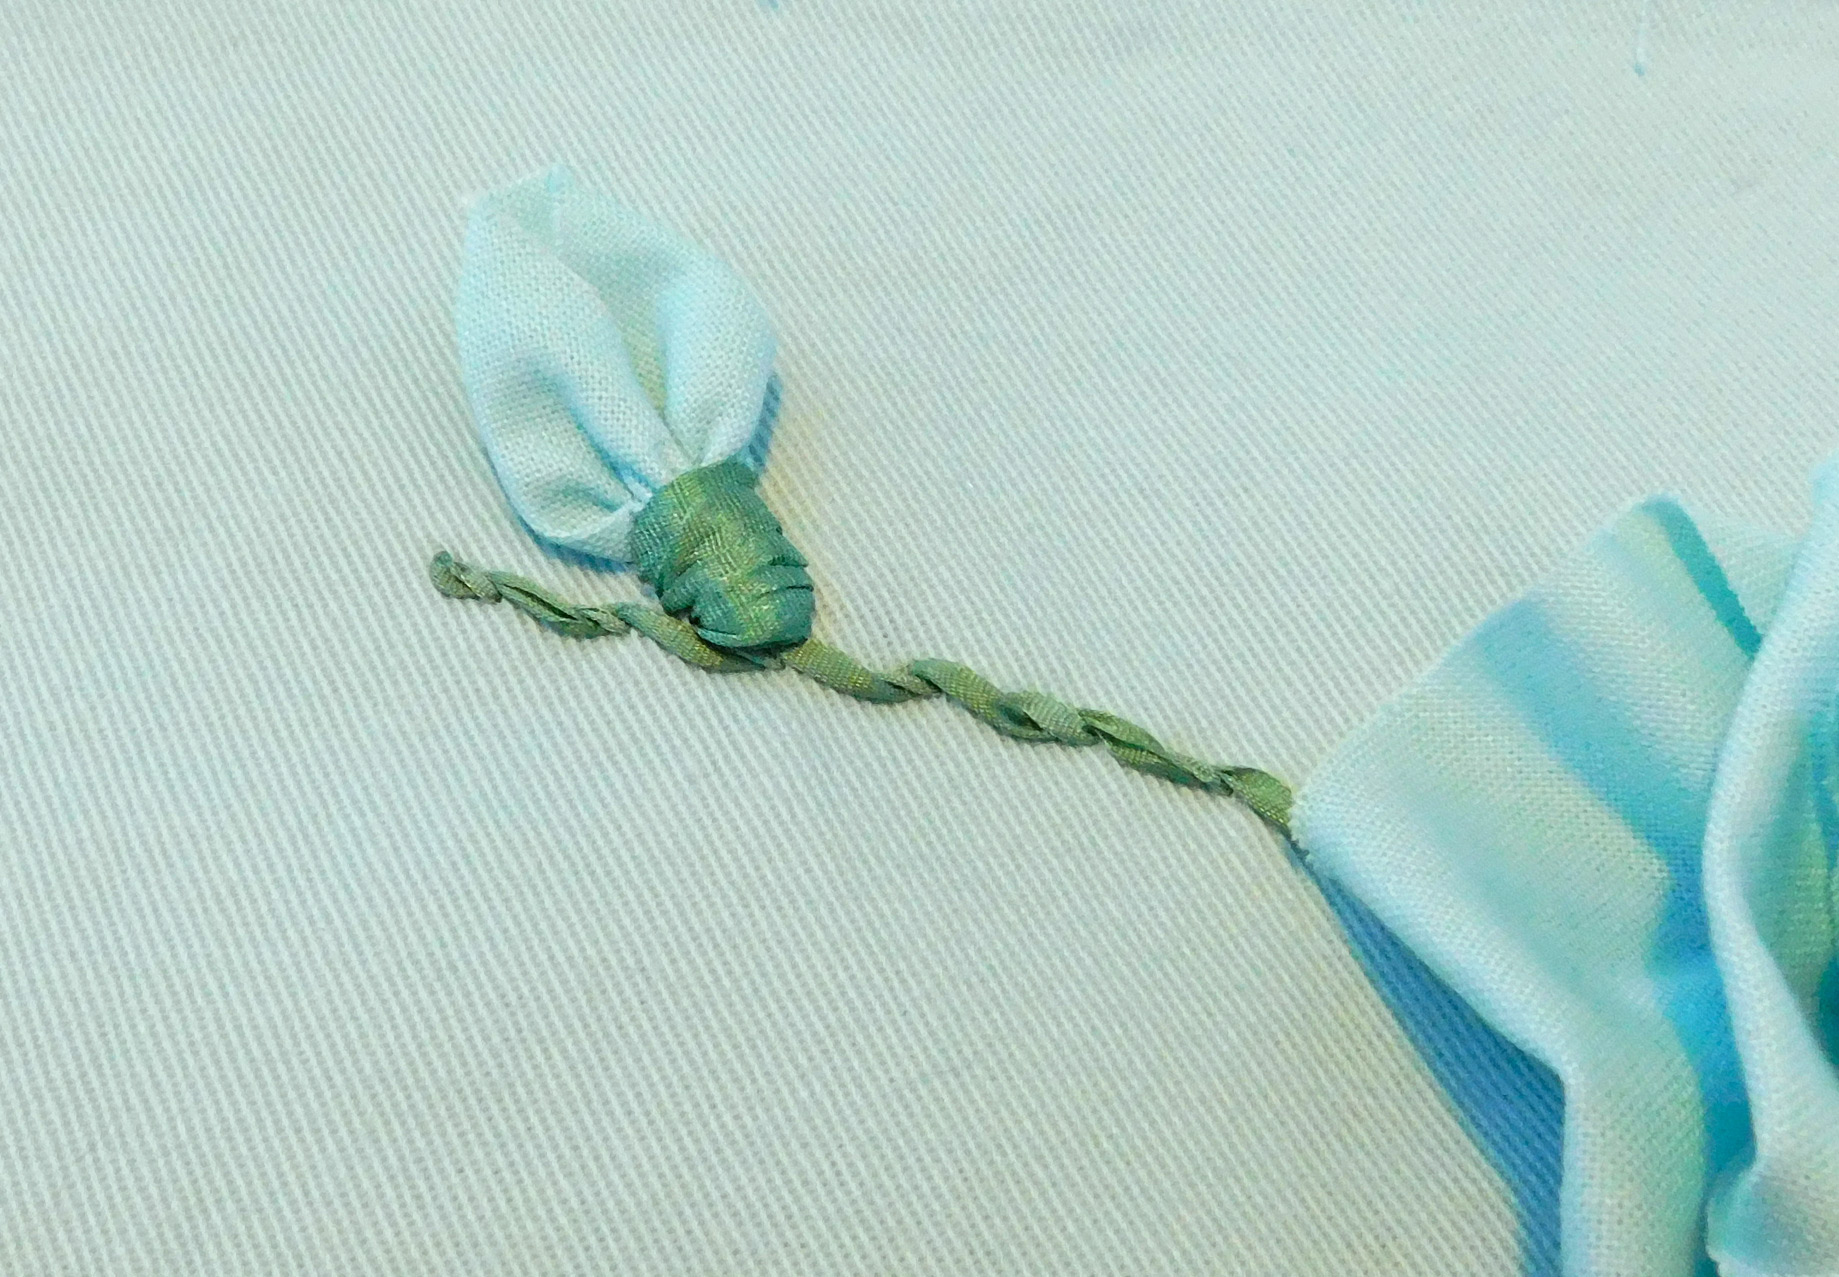
I really didn’t want to use a fabric pen to mark the path of the flower stems, just in case it didn’t disappear properly. But I needed to have an idea of where they would go, so I could embroider them. After giving it some thought, I used silk thread to hand-baste where the stems would go. Then I used a fabric pen to place small X’s where I wanted the roses.
At first, I’d planned on embroidering the stems out of a lime green silk ribbon and making the leaves out of lime green fabric, so they’d be the same color. But my silk ribbon didn’t quite match the lime green fabric. For that reason, I went with a different silk ribbon for the stems—green, but on the bluish side, not quite sea-green. I thought it looked pretty with all the aquas and lavenders.
There were several options for creating the stems, but I decided on a silk ribbon embroidery technique where you make a running stitch, then twist the ribbon, and thread it under and over the running stitches. This creates a three-dimensional effect, perfect for flower stems. (You can see my basting stitches alongside the silk ribbon in the photo below.)
Embroidered Stems
Now, how to make the leaves? Traditional embroidery? Silk ribbon embroidery? I really wanted the leaves to be three-dimensional, like the flowers, so I pulled out my book of crazy quilt embroidery stitches and pondered my options. The technique I settled on isn’t, in fact, embroidery. It’s actually a way of producing prairie-point leaves out of ribbon.
Since I didn’t have a wide enough ribbon in green, I had to get creative. I cut bias strips out of the lime green twill and used that in lieu of ribbon. You’re supposed to fold both ends down, creating a point at the ribbon’s center, then gather across the width. This produces a puffy, pointy leaf-shape.
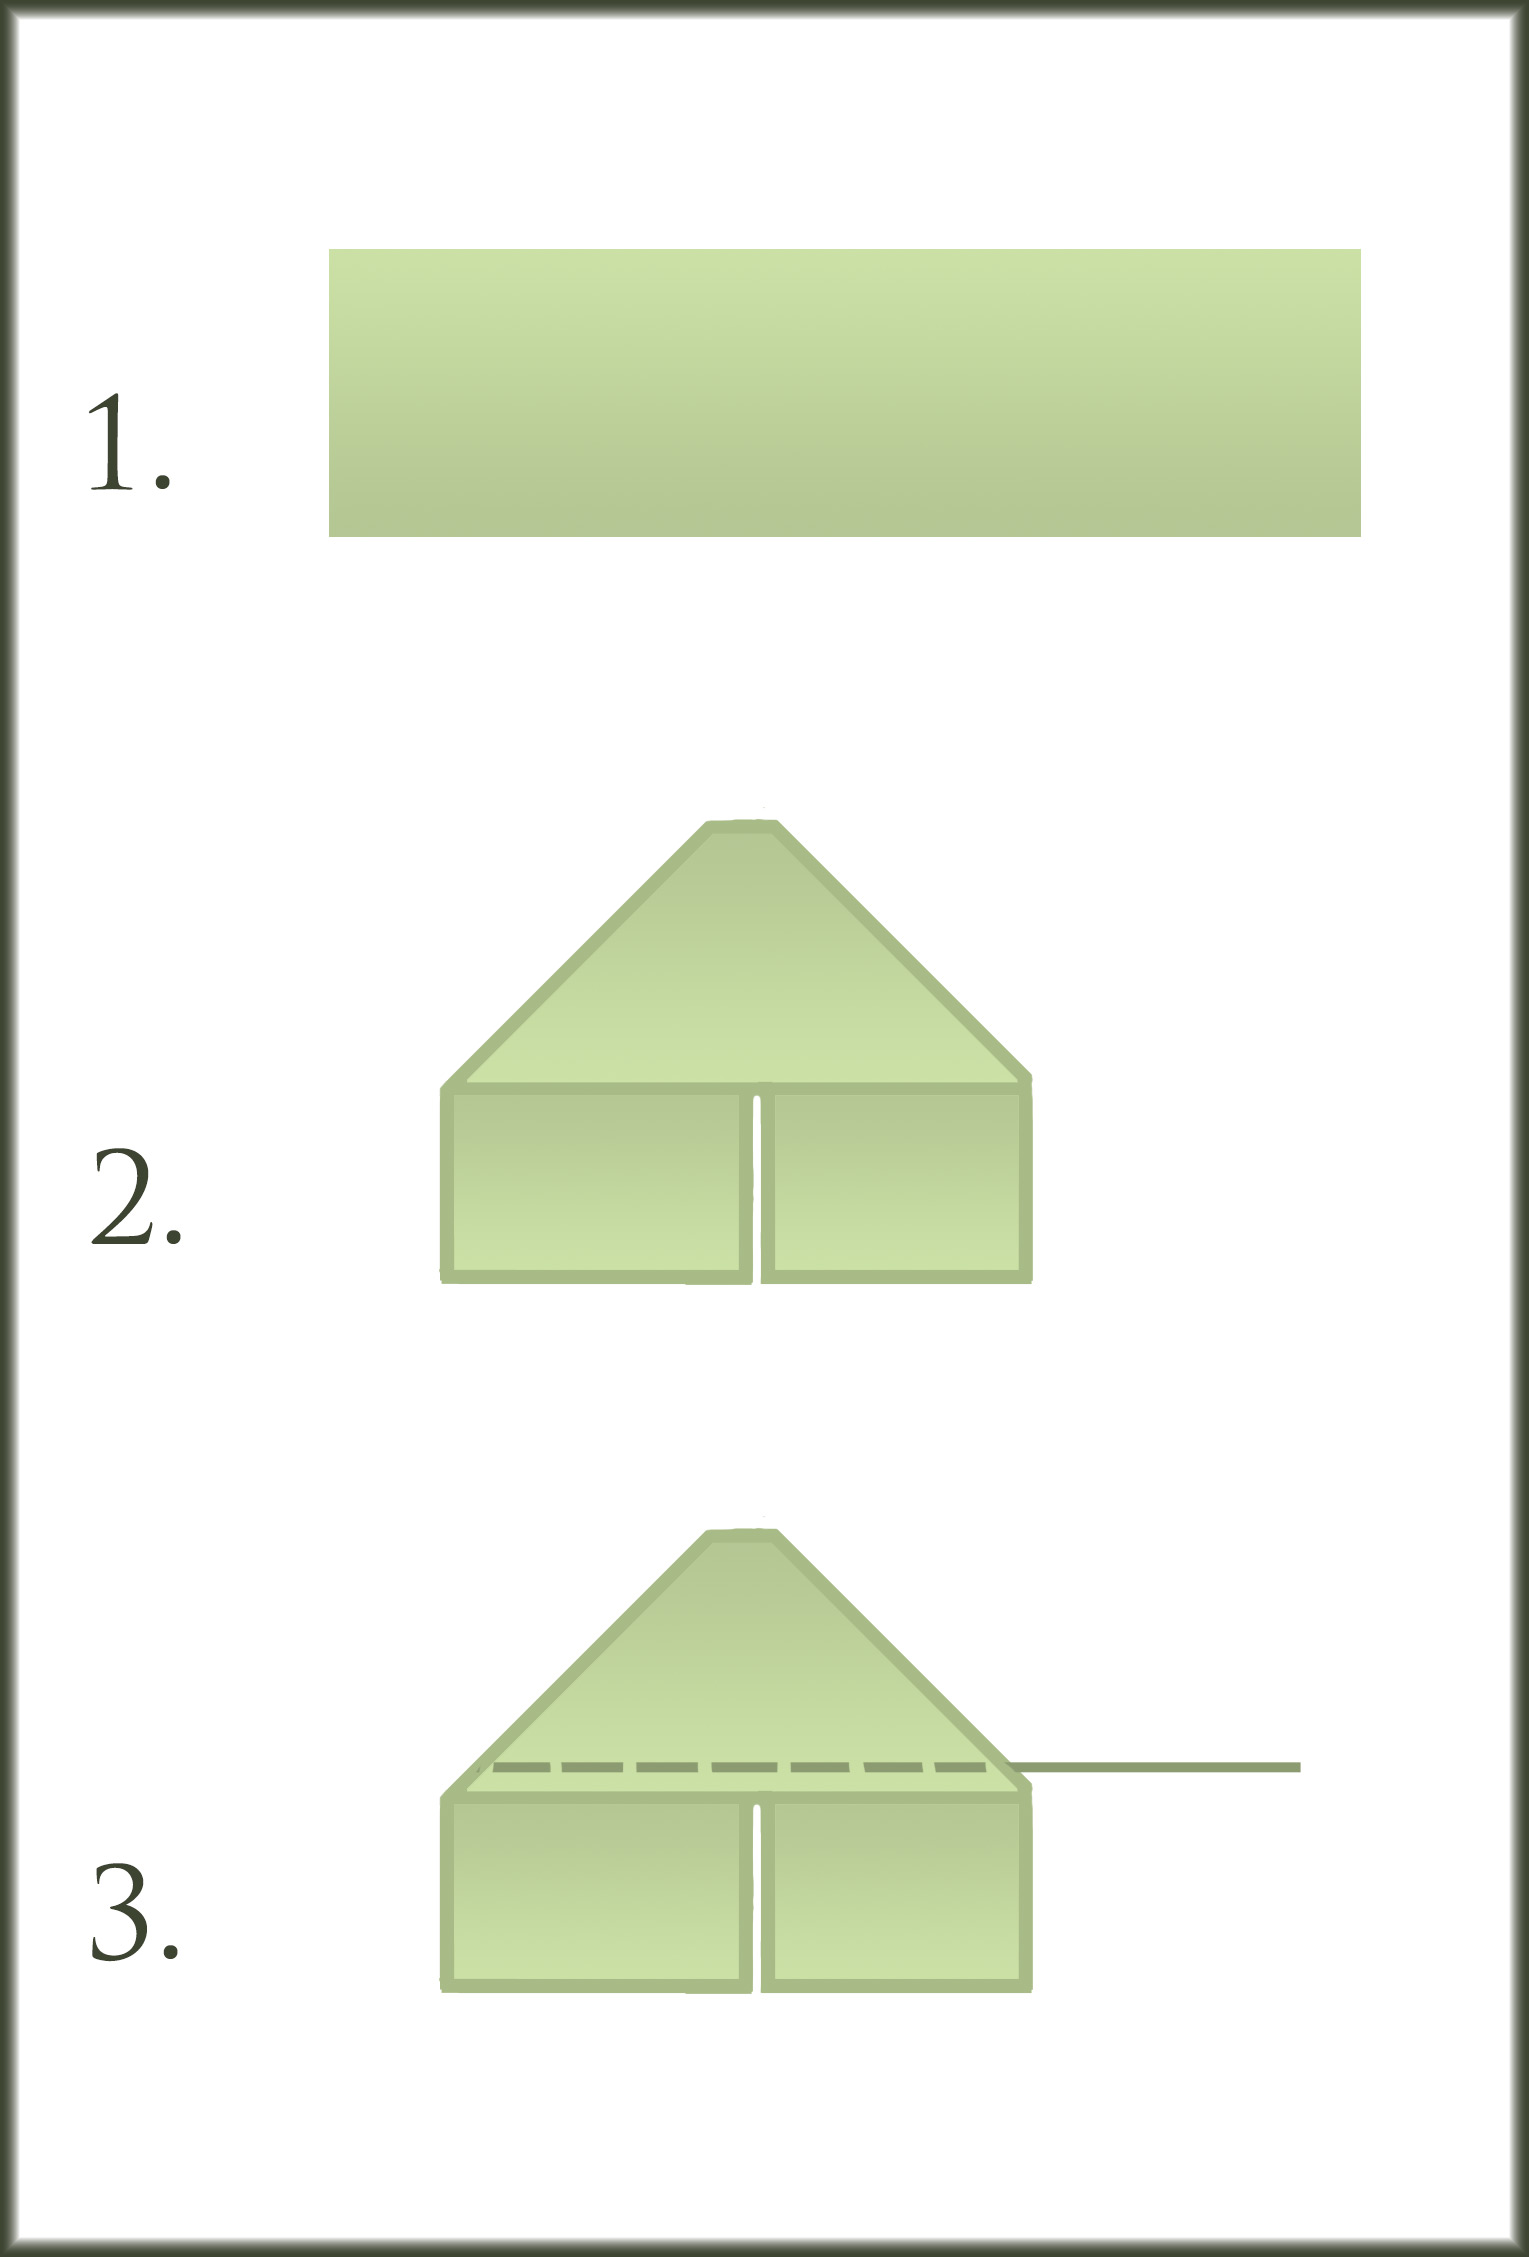
Leaf Demo
I made my leaves in three different sizes, so I’d have a variety.
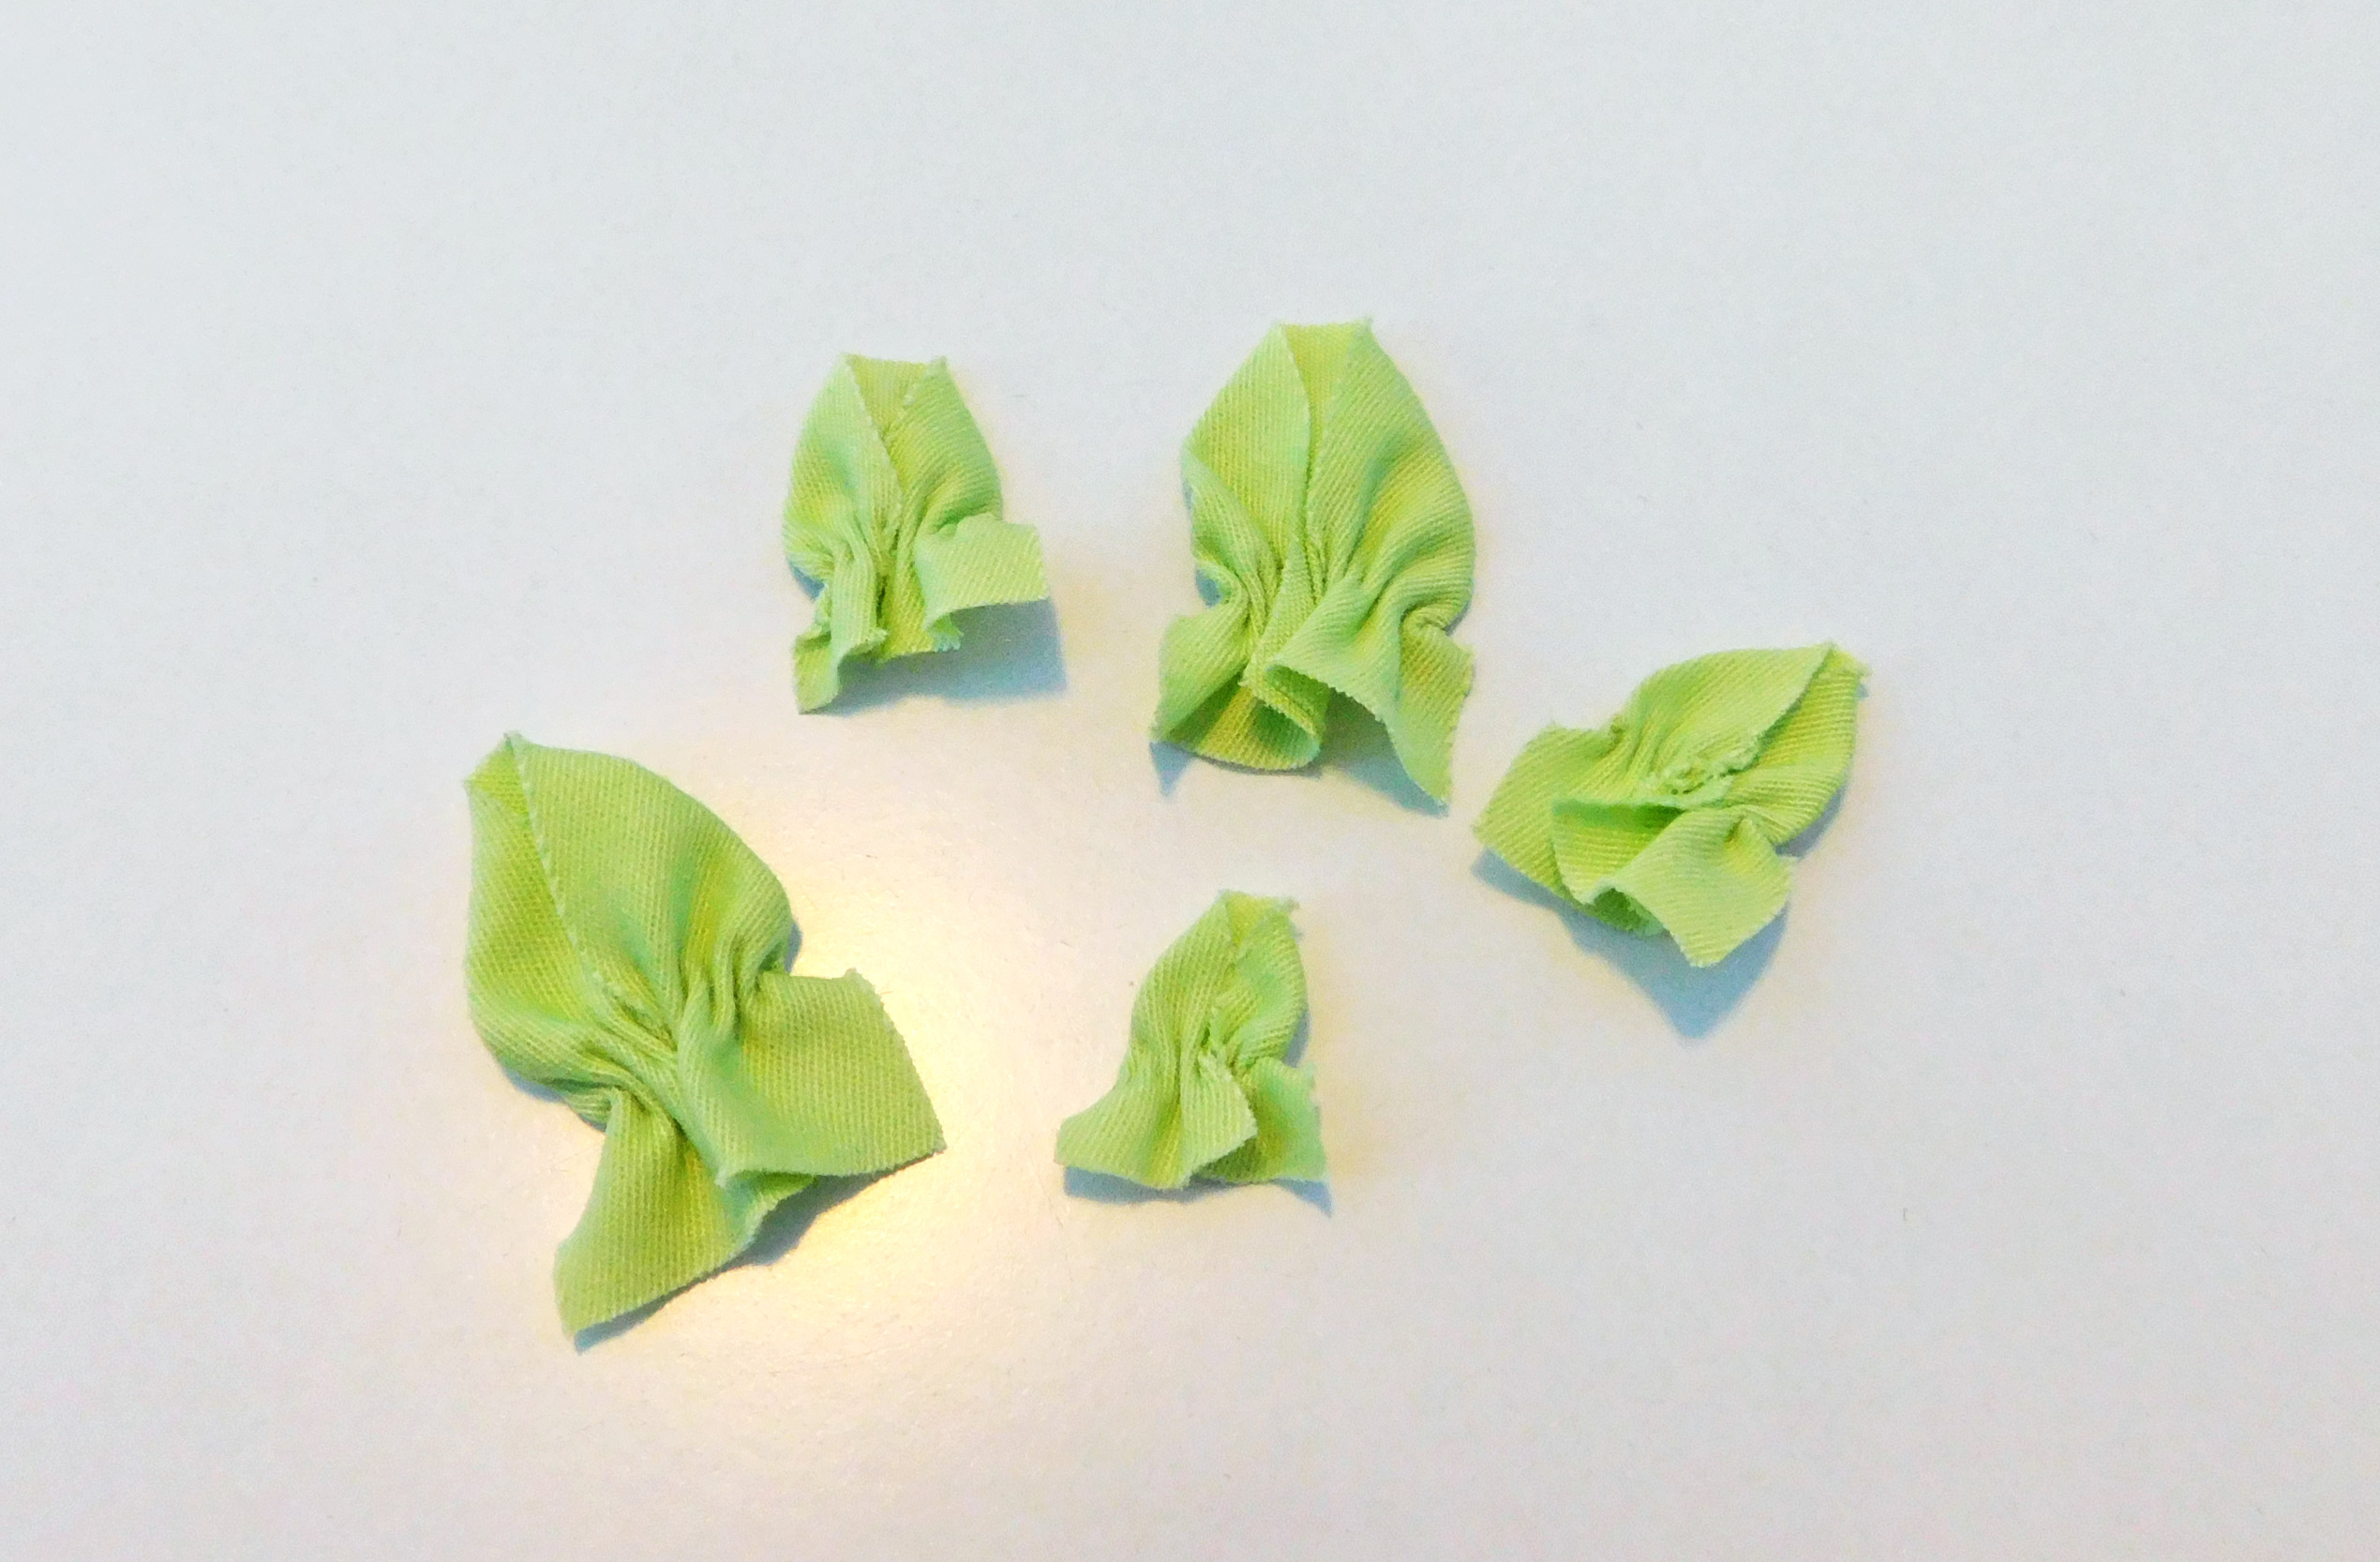
Gathered Leaves
The next challenge I faced was how to attach the leaves. They have little tabs at the base, so I figured I could sew through the tabs, then conceal them by stitching over them with embroidery ribbon. This probably would’ve worked better if I’d used the lime green embroidery ribbon, because now they look like bright green rosebuds, instead of leaves.

Leaves: Before & After Embroidering
I used the same technique for the actual rosebuds—one aqua and one lavender.

Lavender Rosebud
Aqua Rosebud
Here’s the floral panel before I added the leaves.
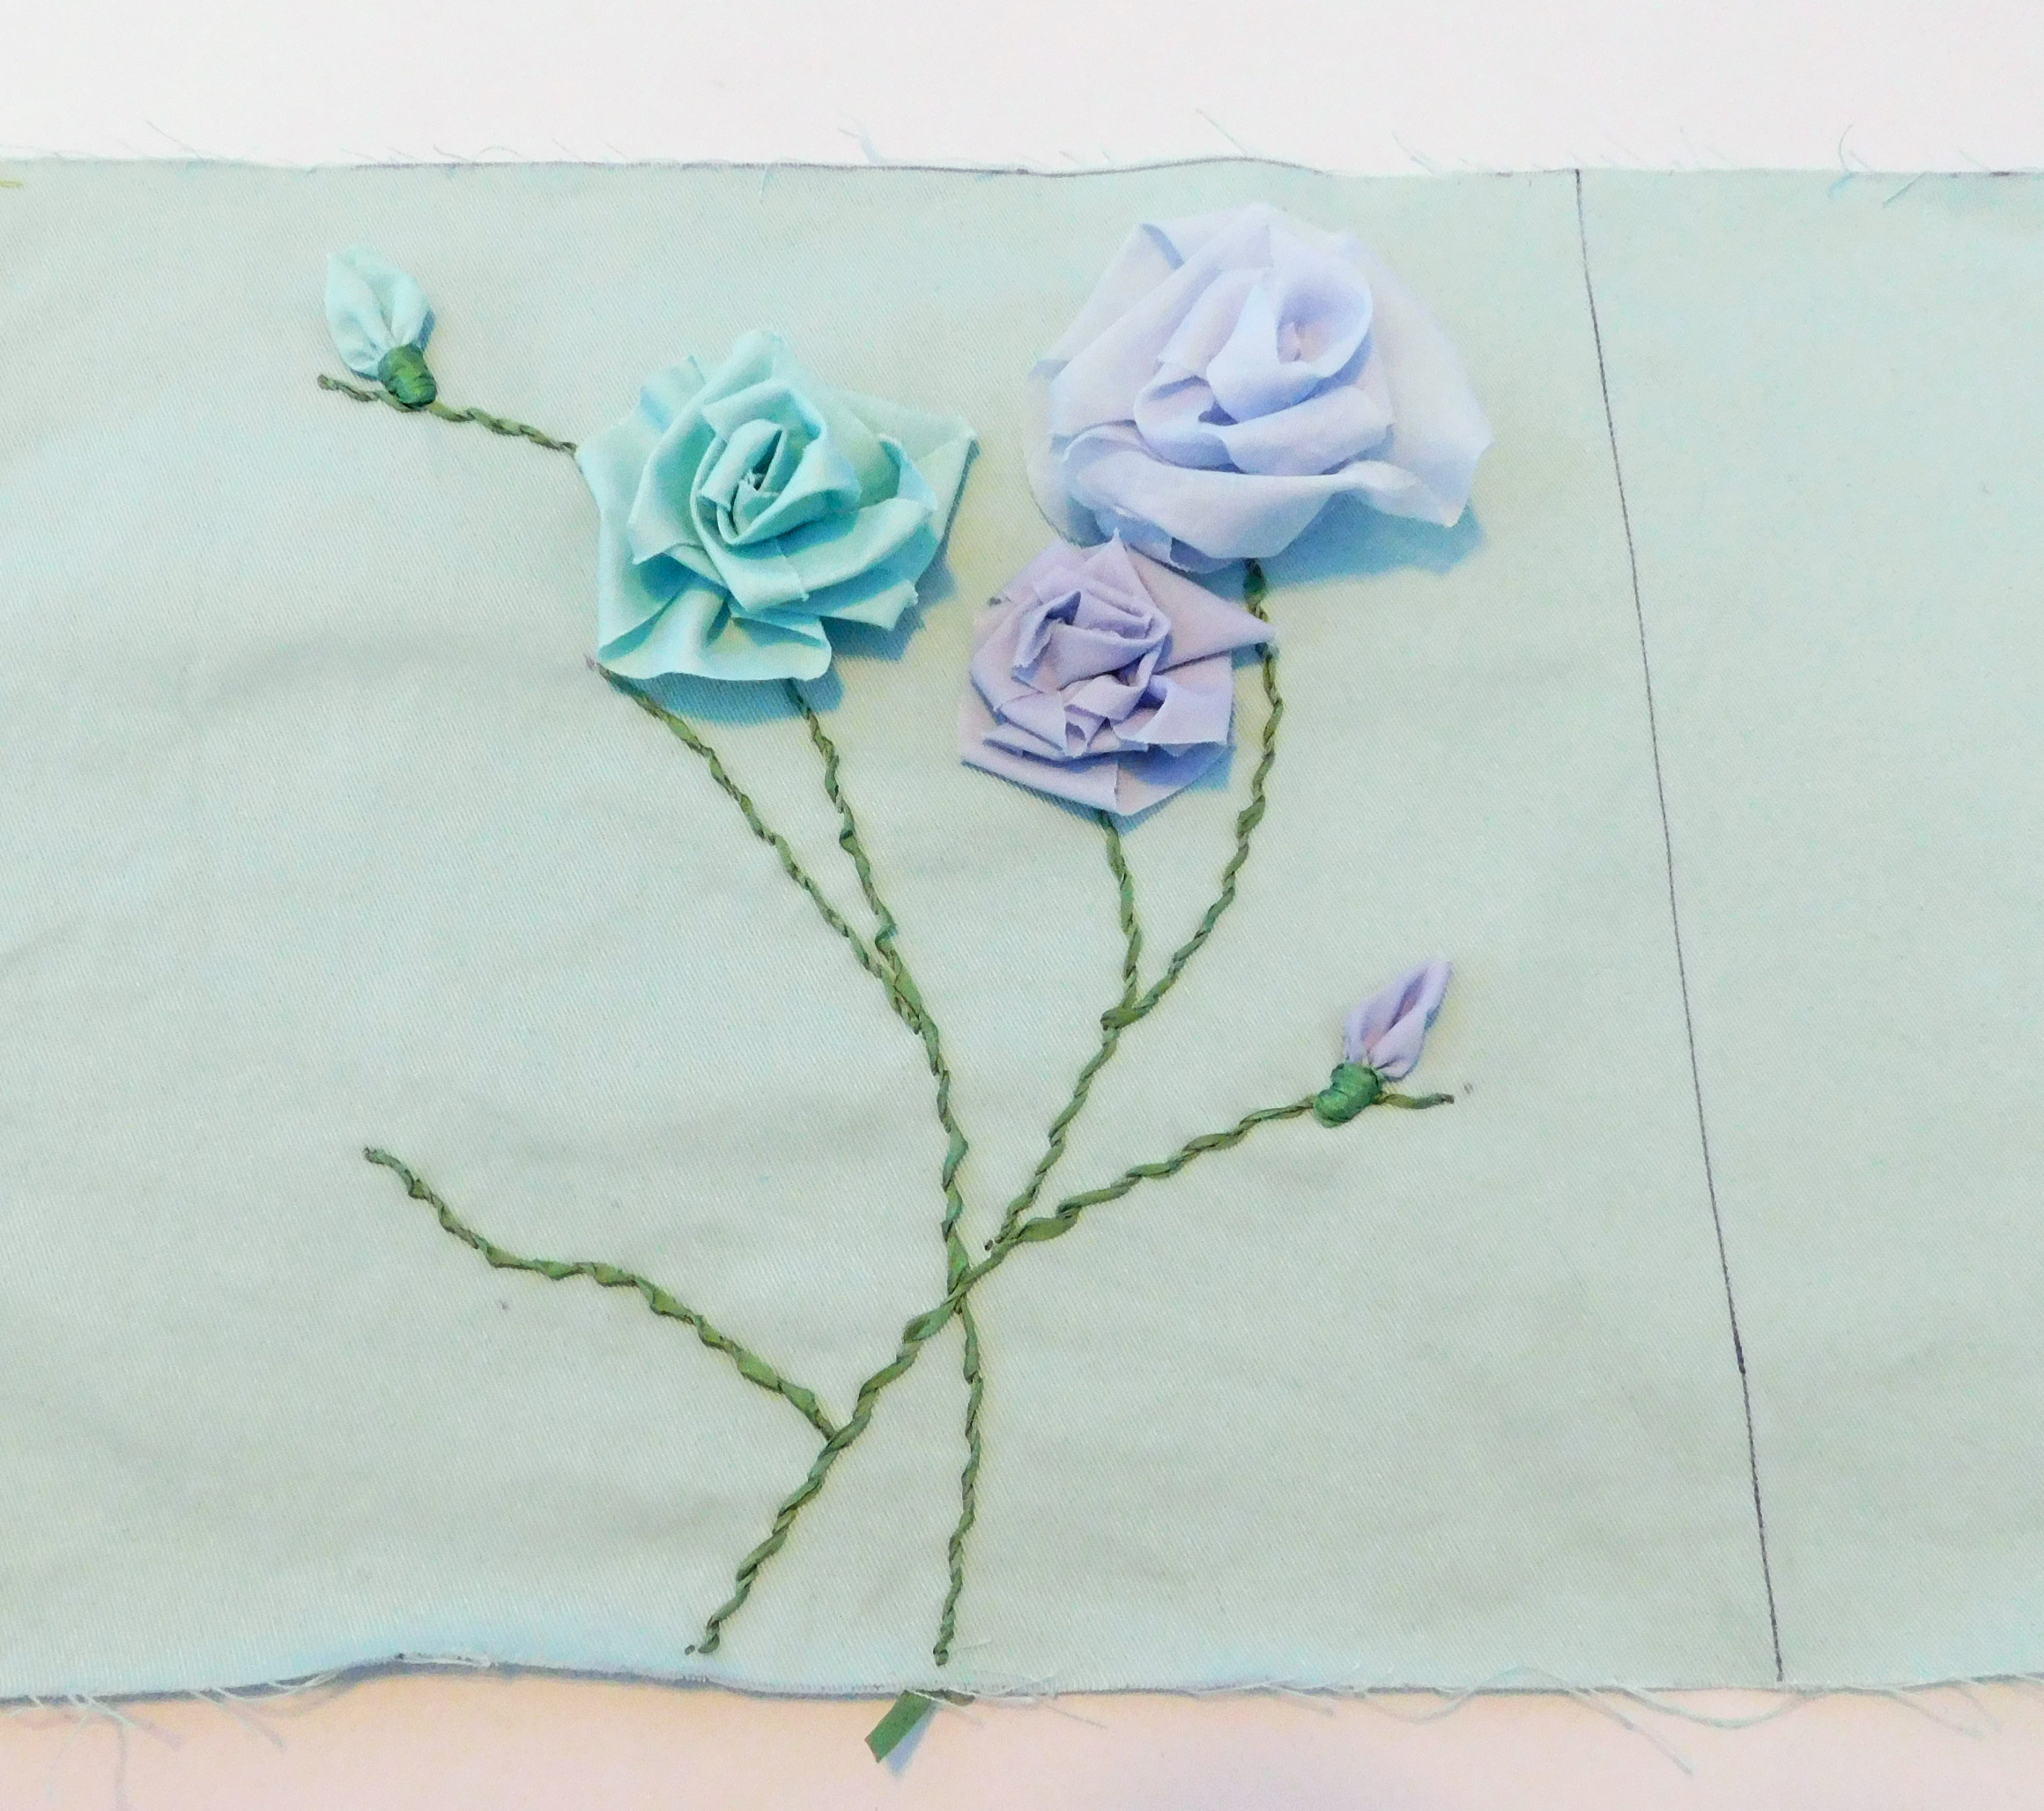
Roses & Rosebuds
And after the leaves.

Roses, Rosebuds, & Leaves
Construction, Part II
Once the embellishment was complete, I was able to finish sewing the pillow. I folded the roses down and pinned them, so they wouldn’t accidentally get caught in the seams, then I pinned the pillow with right sides together, and sewed around the edges with a ¼” seam allowance. I left a gap at the short end, so I’d be able to insert the pillow form.
At this point, I decided the striped panel needed additional embellishment, beyond just the velvet ribbon. I rummaged through my button stash and found several square, lime green, mother-of-pearl buttons I’d been saving them for a special project that never materialized, so I figured, why not? In between each square button, I sewed a cluster of aqua and lavender Swarovski crystals.
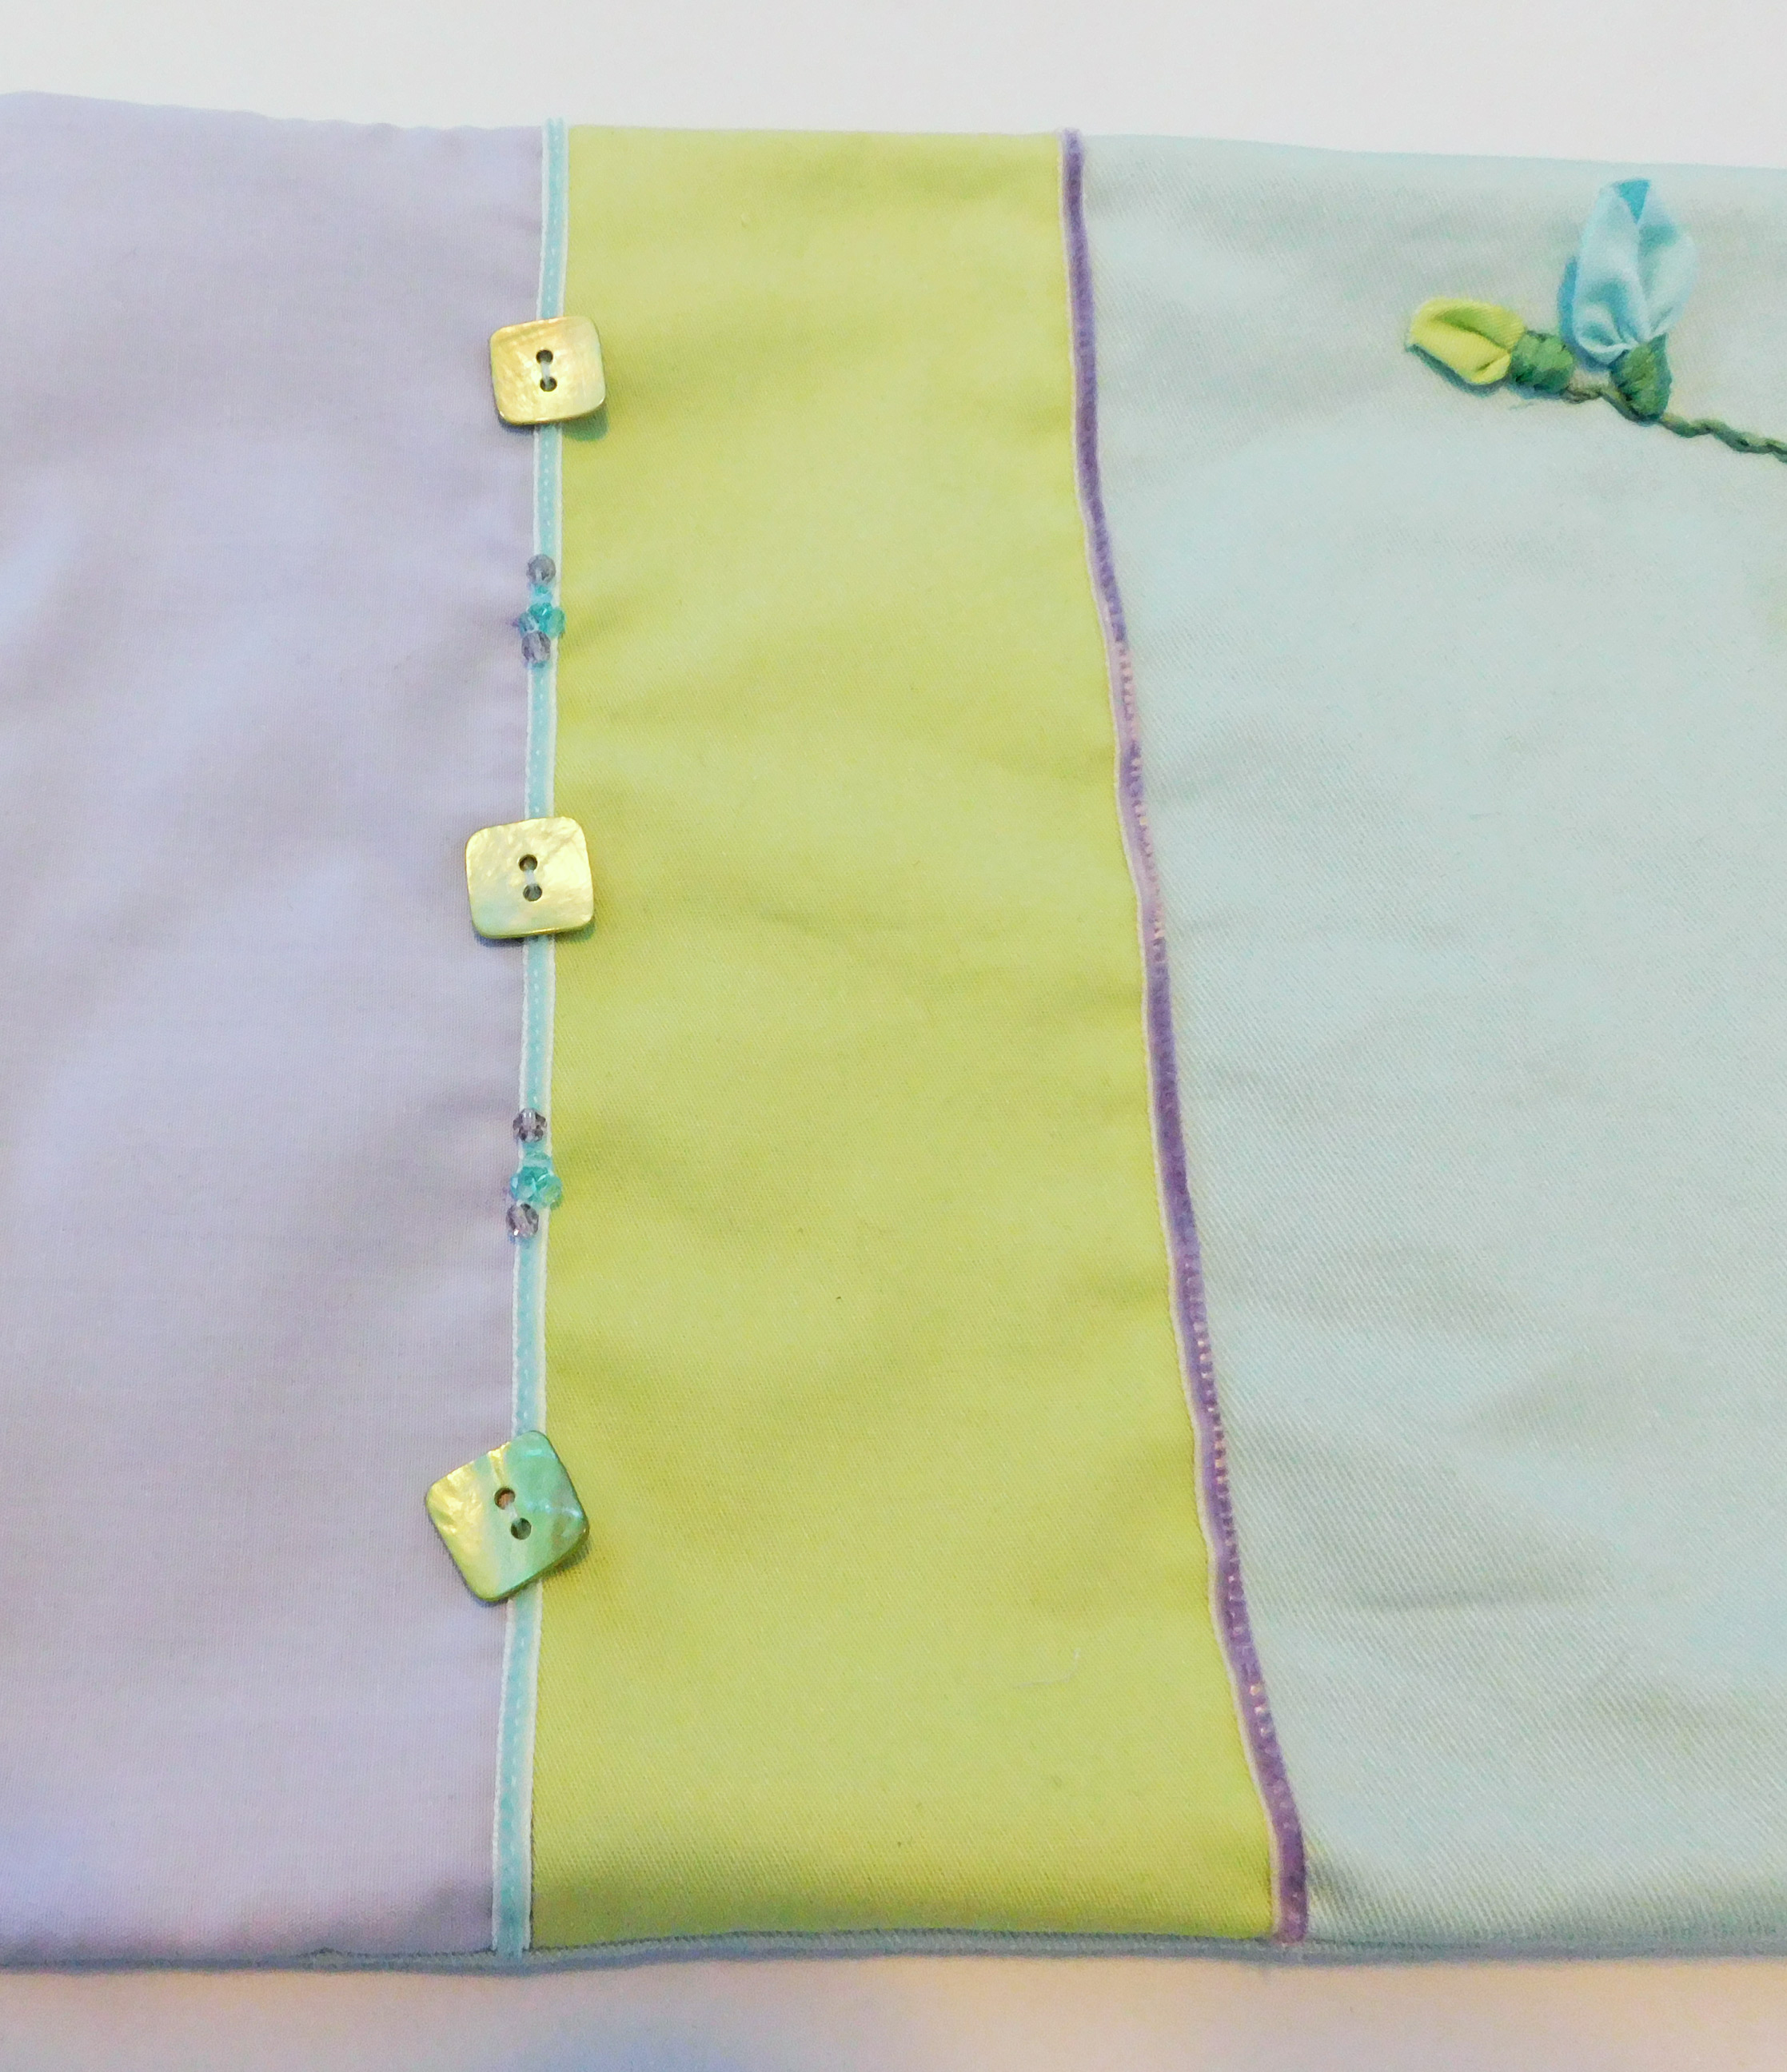
Last Minute Embellishment
After flipping it right-side out, I wrangled the pillow form into it. (It would’ve been a tad easier if I’d left a wide enough gap.) I considered topstitching the gap closed, but decided to go with an invisible slipstitch.
Now, if you recall, my purpose in making this pillow was to replace the small pillow I use to support my back while sewing. That’s why I chose not to make a crazy-quilted pillow, because it would be too fragile for everyday use. After I finished the pillow, however, I realized that the voile flowers probably wouldn’t hold up to being squished and leaned against for hours at a time. All that work to make a new back pillow and I can’t even use it for its intended purpose!
Oh, well. At least I have a pretty new decorative pillow.
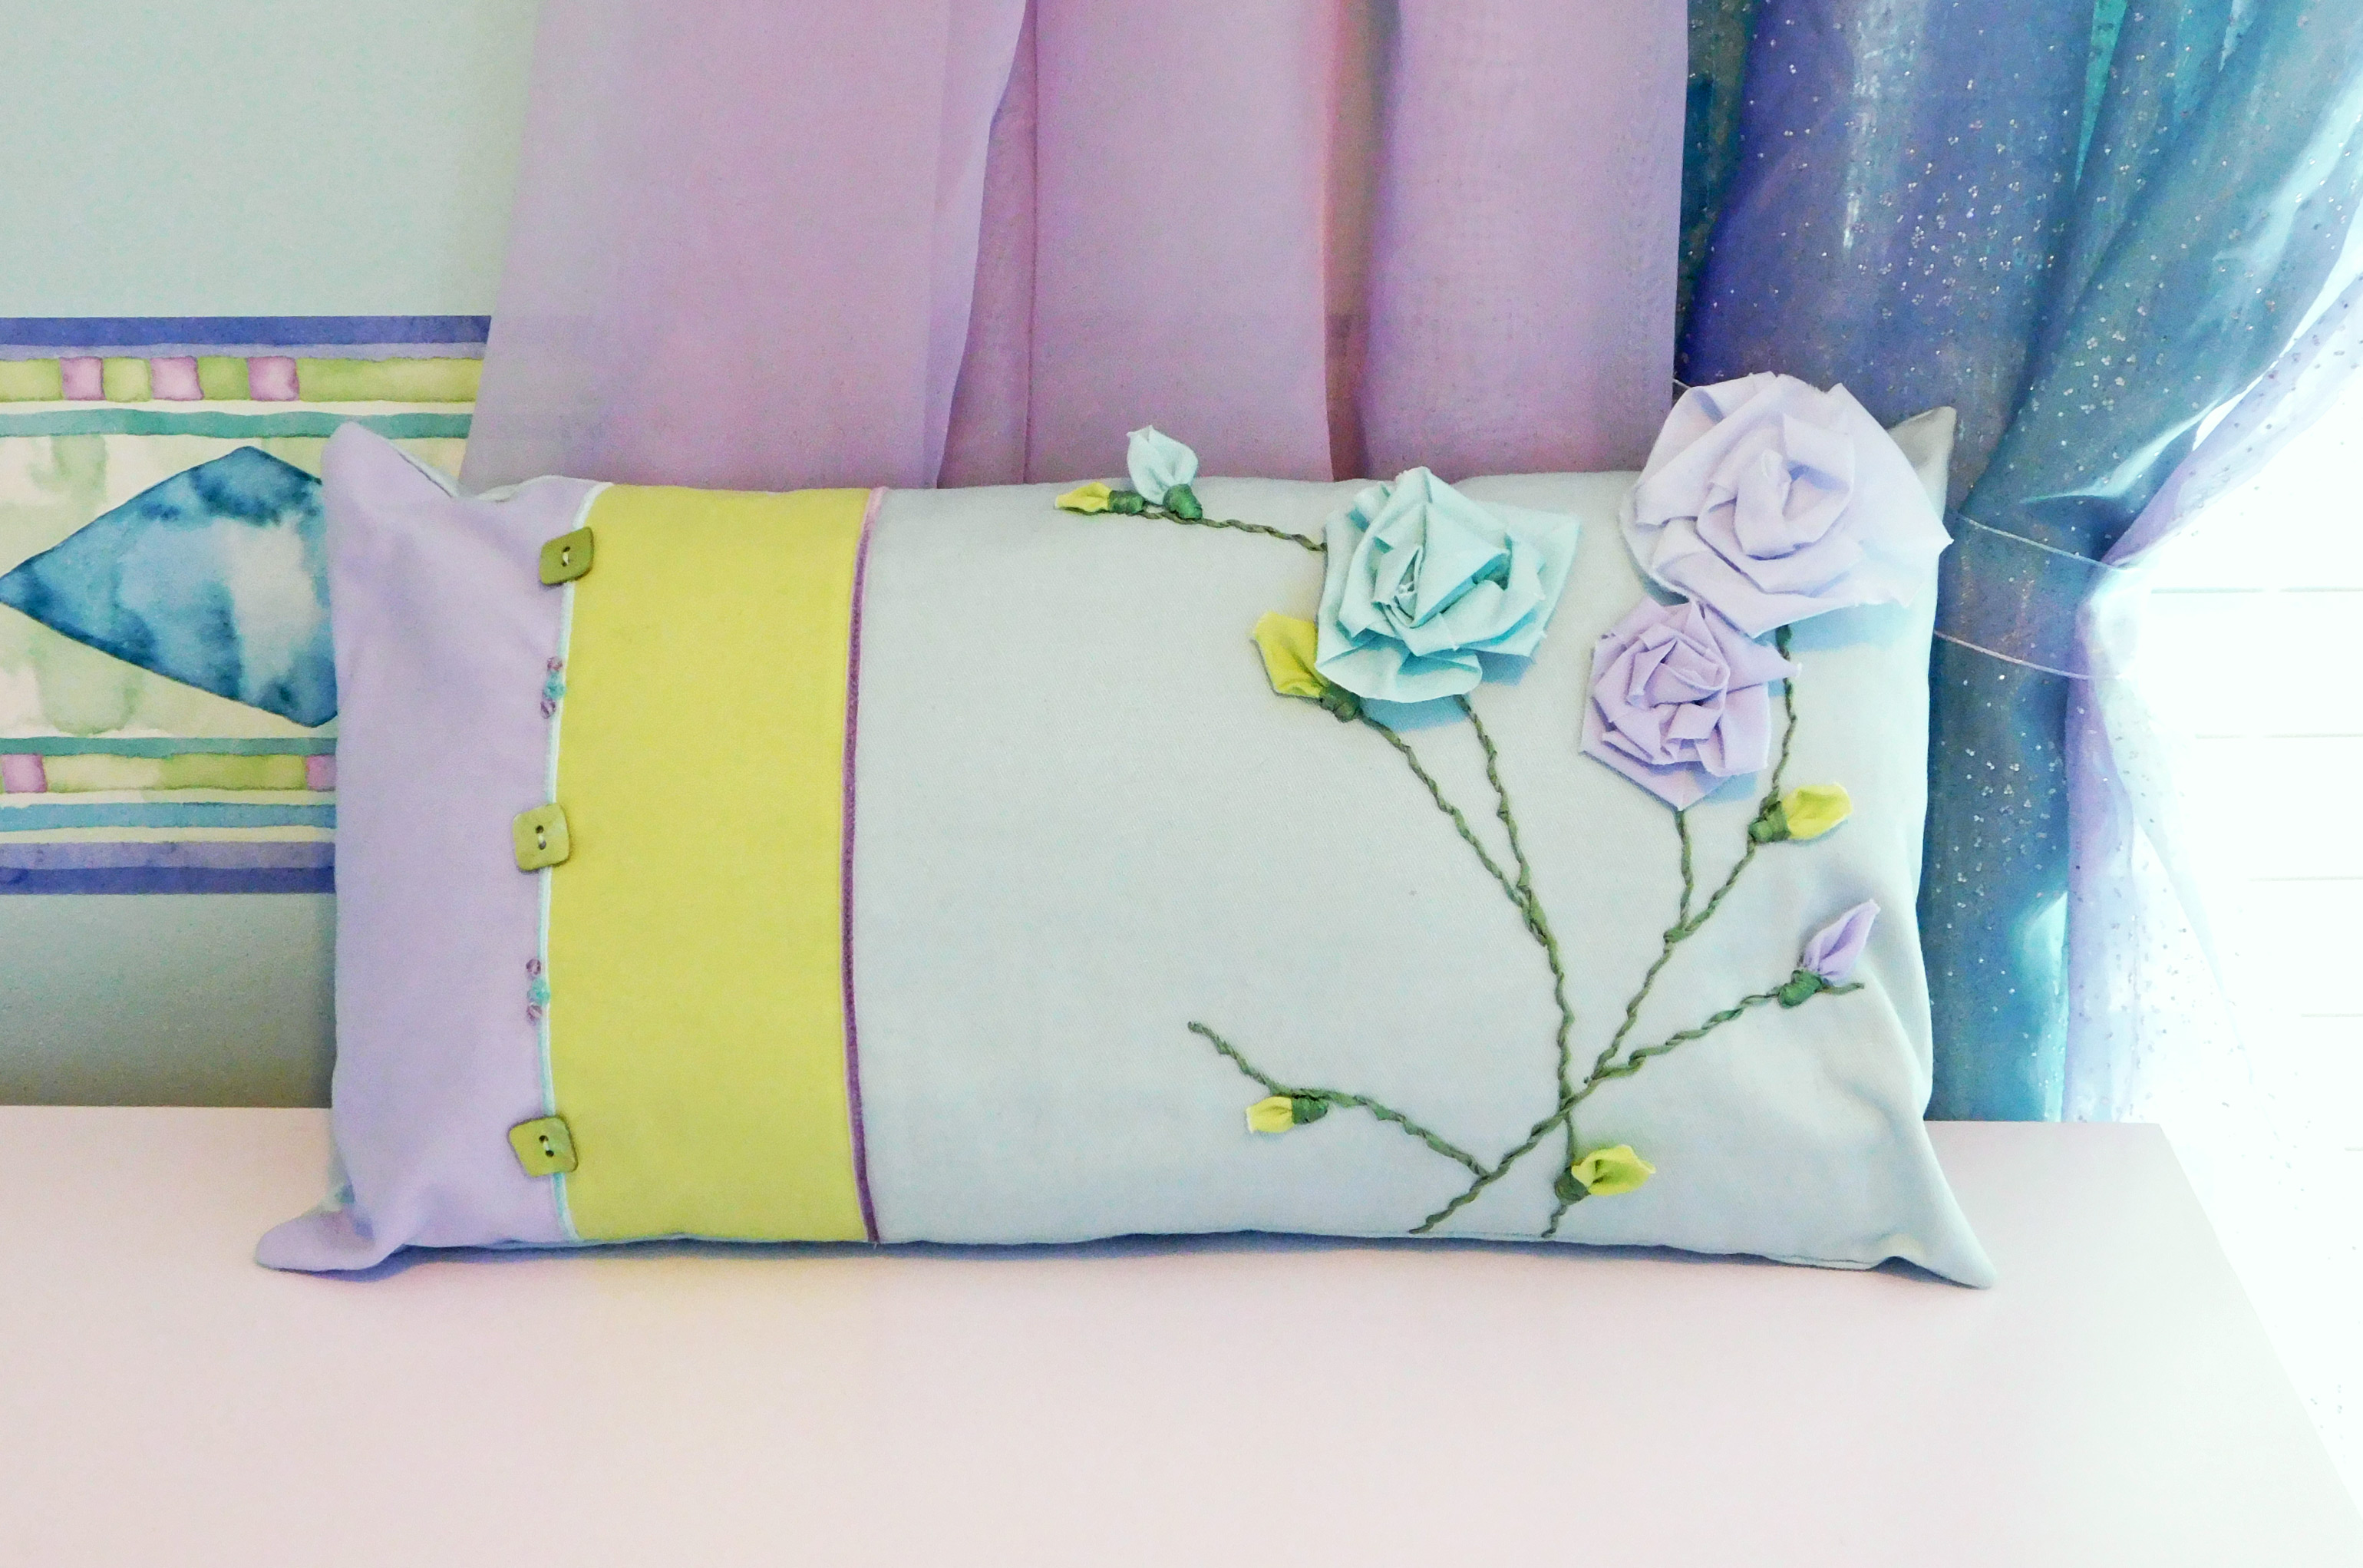
Finished Pillow
~~*~~
Looking for more? Check out our Sewing Diaries! You might also enjoy our Tutorials and Articles.