by Lisha Vidler
This tutorial first appeared at Foundations Revealed. Click on any picture to view a larger image.
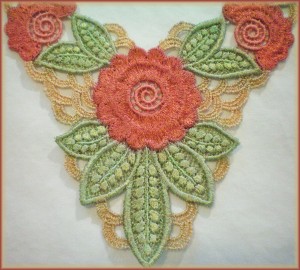
Have you ever wished for lace that matched your fabric exactly? Or for appliques that came in vibrant colors instead of plain white? As an artist, my first instinct is to add color, but you might not realize how simple it is to do this. Hand-dyeing is an easy task that produces breathtaking results. With just a few strokes of a brush, you can produce vividly colored lace and appliques.
Dye Vs. Paint
Lace dyeing might seem like painting, since you use a paintbrush to apply the dye. Note, however, that there is a difference between painting and dyeing. Paint is not absorbed into the lace, but sits upon it, much like paint rests upon the surface of a canvas. Paint stiffens the lace and dulls its luster. Dye, on the other hand, is absorbed into the lace and stains the fibers. The lace will retain its sheen and the result will be something truly beautiful.
You must use dye appropriate to your fiber content. Dye intended for use with natural fibers will not work on synthetic lace. Some dyes are formulated to work best with rayon and these will not work as well if you use them to dye cotton, linen, or silk. Pay attention to the fiber content of your lace and choose a compatible dye.
Different dyes will need to be prepared and worked with differently. This tutorial is for water-based rayon dyes.
-
Dye Suppliers
(The author has not personally used these suppliers and cannot vouch for their service or products.)
Materials
- Venise Lace (aka Venetian or Venice Lace)
- Fabric Dye
- Palette
- Paintbrush
- Water
- Eyedropper
- Toothpicks
- Paper Towels
- Plastic Bags
- Gloves
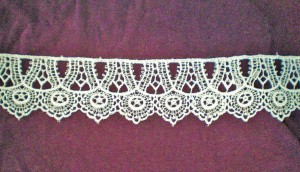
Lace: First, you need something to dye. White or ivory Venetian lace is ideal, particularly if it’s made of rayon. You can also dye lace appliques, collars, and yokes. Before you begin, wash your lace in a bowl of soapy water. Rinse thoroughly, but don’t wring the lace out. Instead, roll it in a towel to dry. Use a warm iron if necessary.
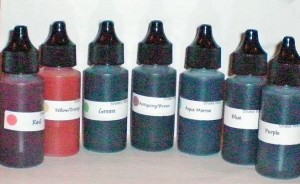
Dye: There are many kinds of fabric dyes available. I purchased a reasonably priced rayon dye kit sold by Alchemy Lace on eBay. It comes with seven colors, plus a sepia dye used for antiquing.
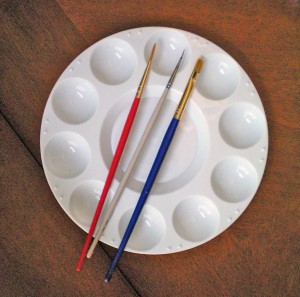
Palette: To hold your dye while you’re painting, you’ll need a watercolor palette—the kind with shallow cups. Mine came with a plastic lid, which is good in theory, but you cannot remove this style of lid without spilling your dye. For short periods away from dyeing, you can set the lid on top of the palette without snapping it in place. This will not prevent evaporation, but it will keep out dust and insects. If you’re away for more than a few hours and evaporation occurs, simply add a drop or two of water to rehydrate your dye and stir well. Some cover their palettes with plastic wrap and place them in the refrigerator if they’re going to be away overnight, but I find it easier to simply dump the dye and start fresh the next day.
Paintbrushes: You don’t need special brushes for dyeing. For detail work, I use a basic liner brush and a small flat brush. Look for brushes that are made for watercolor painting—not oil painting. Watercolor brushes have shorter handles and smaller bristles and are useful for closeup work. A liner brush has a slender tip, which is good for painting small areas. If you’d like to wash on the color, select a flat brush instead.
Water: Dye is concentrated, so you’ll need to dilute it with water. The more water you add, the weaker the color will be. A good ratio is two to three times as much water to dye. Keep track of how much water you’ve added, so you can replicate the colors you mix. Bear in mind that for darker, bolder colors, it’s best not to use a stronger water-to-dye ratio, as this will stiffen your lace. Instead, build the color up gradually, using repeated applications of watered-down dye.
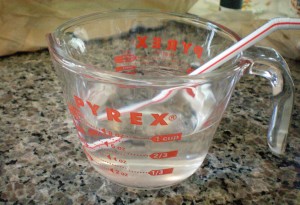
Eyedropper: A small eyedropper comes in handy for adding water to your dye. You can usually find these at the drug store for a dollar or two. If you can’t find one, or if you’re in a hurry, use a drinking straw instead. Simply lower the straw into the water and hold your finger over the top to capture water within the straw. Hold the straw over your palette and lift your finger. This will dump all the water into your palette, so be certain how much water you want to add. If your straw is clear, rather than opaque, it will be easier to see how much water you’re adding. If you know exactly how much water you want to use, you can draw a line across your straw with a marker and fill it to the same level each time.
Toothpicks: These come in handy to mix the different colors of dye with water. You’ll use them like little stir sticks. Alternatively, you can use a coffee stirrer or a plastic knife. Avoid using silverware, as some dyes can cause a chemical reaction when exposed to certain metals.
Plastic Bags: Disposable grocery bags work well as a protective layer between the lace and your work surface. If you’re dyeing a small applique, you might only need to spread one bag on your counter. Overlap several plastic bags to create a larger work area.
Paper Towels: Place a layer of paper towels beneath your lace to absorb excess water and dye. They’re also handy to wipe your paintbrushes on to see the exact color of your dye, and to wipe drips from the lids of your dye bottles. I prefer Viva brand paper towels, because they’re more like fabric than paper, but you can use any paper towels you have on hand.
Gloves: If you’re going to be dipping large amounts of lace into a bowl of dye, you’ll want to wear a pair of disposable gloves. They’ll prevent you from getting colorful stains on your fingers. You can buy these cheaply at any drugstore.
Color Theory
Mixing dye is a little different from mixing paint. With acrylic or oil paints, you blend one color with another and can instantly see what it’s going to look like. Dye is highly concentrated, however. You won’t be able to tell the exact hue until you’ve added water and tested it on a paper towel or scrap of lace. The color will lighten as it dries, too.
Just like paint, dyes come in a wide variety of colors, but it isn’t necessary to buy dozens of colors. You can create every color of the rainbow using just red, yellow, and blue. I like to have a little more control, so I use red, yellow, blue, green, and purple. With those five bottles of dye, I can mix any color I need. How?
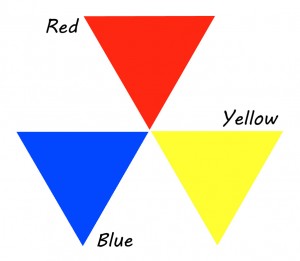
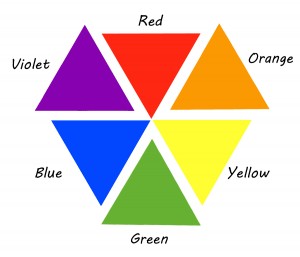
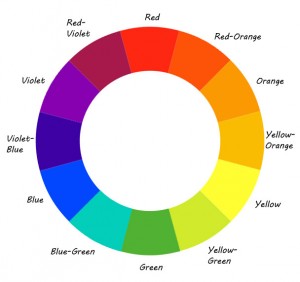
Let’s take a look at the elements of color theory. The basic color wheel starts with red, yellow, and blue. These are primary colors, meaning you can’t mix them using any other color.
Secondary colors are what you get when you blend two primary colors together.
- Red + Yellow = Orange
- Yellow + Blue = Green
- Blue + Red = Violet
Tertiary colors are what you get when you blend a primary color with a secondary color. All together, these colors form the traditional color wheel.
- Red + Orange = Red-Orange
- Orange + Yellow = Yellow-Orange
- Yellow + Green = Yellow-Green
- Green + Blue = Blue-Green
- Blue + Violet = Blue-Violet
- Violet + Red = Red-Violet
Complementary colors are those opposite each other on the color wheel. Green and red, for example, or blue and orange. They will stand out when placed near each other, so if you’re looking for a color combination that will really pop, try using opposite colors. For something a little less common, you can try split complementary colors: pick a color and find its opposite, then look to either side. For example, if purple is your main color, yellow will be its complementary color. Its split complementary colors will be yellow-orange and yellow-green.
Here’s the important part: if you want to tone a particular color down, simply add a little of its complementary. Say your yellow is too bright. Mixing a tiny amount of purple with it will result in a more subdued gold.
Experiment with your colors to get them right, but always keep the color wheel in mind. If your green is too blue, add a little yellow. If your orange is too yellow, add a little red. If your purple is too red, add a little blue, and so forth.
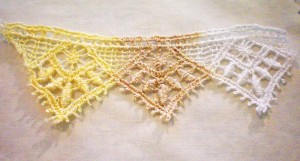
The dye kit I bought contains one bottle labeled “yellow/orange.” The theory is that the orange will turn yellow when highly diluted. You have to use a high ratio of water-to-dye and layer it on to get a yellow tint. I found that it produced a more orangeish-yellow than I was hoping for. Alchemy Lace does produce a true yellow dye, but it must be specially requested.
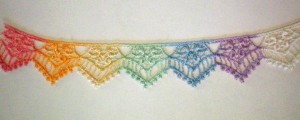
The other colors are pretty straightforward and produce strong, lovely colors. In the photo below, you can see red, orange, “yellow”, green, blue, and purple, with the original, undyed lace at the end for comparison.
When mixing colors, always begin with the lighter dye and add small amounts of the darker dye. It’s impossible to lighten a dye that’s already too dark. If this happens, just start over.
-
A Few Color Recipes
- 3 Green + 2 Yellow + 1 Red = Warm Olive Green
- 3 Green + 2 Yellow + 1 Purple = Cool Olive Green
- 3 Yellow + 1 Purple = Gold
- 2 Orange + 2 Yellow + 2 Purple = Copper
- 4 Red + 1 Yellow = Coral
- 2 Purple + 1 Yellow = Warm Purple
Planning Your Colors
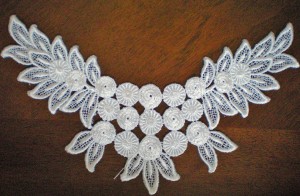
It’s always a good idea to plan ahead and determine what colors to use before you start dyeing. This is especially true with more complex appliques. It’s easy to get an idea of what your lace will look like if you have a painting program on your computer. Photoshop and Photoshop Elements work well, but you can even use Windows’ Paint, if necessary.
First, take a photo of your lace against a dark background. If you’re using an old-fashioned camera, you’ll need to scan the photograph. If it’s a digital camera, just upload the photo to your computer. Alternatively, you could scan the lace itself, but it might not show up well if your scanner’s lid is white.
Open the file in your drawing program. The first thing you should do is click “Save As” and give the file a new name. This way, the original file is safe and you can reuse it as often as necessary.
If you have a basic program, such as Paint, you’ll be painting over the image with the paintbrush tool. Select a “watercolor brush” and make the brush tip large enough that you can cover each section of the lace with just a few strokes. The fewer the strokes you use, the less overlap there will be, and the easier it will be to see the original lace beneath the paint.
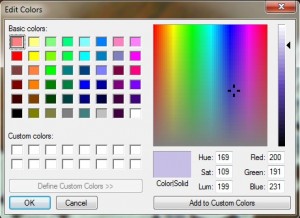
Choose a color that appeals to you. Remember, you aren’t limited to the small number of colors that are displayed at the top of your screen. Click on “Edit Colors” and choose any color you like. The colors toward the top of the rainbow square are the most vibrant, while the ones toward the bottom have more gray in them. To lighten or darken the color, slide the bar on the right.
Now, begin painting over your lace photograph. Keep your strokes loose. If you accidentally paint somewhere you didn’t intend, hit Ctrl + Z to undo the action. Change colors as necessary, until you’ve painted over the entire image of the lace. It won’t look anything like dyed lace, but it will give you a basic idea of how the colors look together.
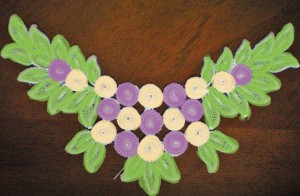
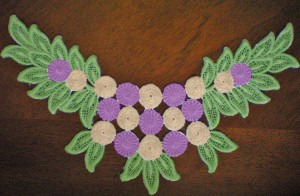
If you have a fancier painting program that supports layers, such as Photoshop or Photoshop Elements, open your photograph and add a new layer. Set the transparency of that layer to 45%. This is the layer you’ll paint on. It will allow your original photo to show through, so that it’s as if you’re tinting the photo with color, instead of painting over it. The transparency effect will cause the colors to lose a great deal of their vibrancy, so be sure and use colors that are darker and brighter to make up for this. Using a basic paintbrush, color over your applique.
If you dislike the colors, open the original file again and start over, using different colors. You can do this as often as necessary, until you get a color combination you love. Print the image and refer to it while dyeing your lace.
Now that you know how to mix your colors and you have an idea of what you want your lace to look like, it’s time to start dyeing. In the second half of this article, we’ll look at how to dye watercolor or ombré-style, how to antique your lace, how to paint detailed appliques, and how to dye lace to match your fabric.


Que coisa mais linda e interessante!…
Eu pinte tela, lona e não é surpresa em ver que arte são todas iguais. Sinto que uma artista da costura, do patchwork talvez seja mais artista do que um pintor de telas.
Abraços
Dalva
Translation into English: That something more beautiful and interesting! …
I paint on canvas, canvas and it is not surprising to see that art are all equal. I feel that an artist of sewing, patchwork is perhaps more artist than a painter of fabrics.
Reply: To me, art comes in many forms and they’re all lovely. Dyed lace is just another form of beautiful art. Thanks for commenting!
Eu acho que as traduções talvez não tao boas, eu digo que eu pinto quatros (óleo e acrílica) e acho também que artistas são todos, realmente as costureiras, os que fazem qualquer trabalhos manuais são todos artistas.
Abraços
Dalva
Eu acho que as traduções talvez não tao boas, eu digo que eu pinto quadros (óleo e acrílica) e acho também que artistas são todos, realmente as costureiras, os que fazem qualquer trabalhos manuais são todos artistas.
Abraços
Dalva
I coloured the lace on my blouse..but unfortunately the colour came out after i wash my blouse…how im gonna make the colour stay?
Love part 1 and part 2. I want to dye lace and have had an issue finding dye kits that are the right dye. 2 of the places you listed are no longer around Sara’s Bloom and Alchemy lace on ebay. When I go to Dharma Trading Company I get confused and do not know what dye to buy. Can you help by recommending a dye for Rayon and a Dye for cotton from Dharma. Thanks