
This article was first published at Your Wardrobe Unlock’d.
Click any illustration to view the full-sized image.
If you’re in charge of the costumes for an amateur theatrical production, you have a monumental task ahead of you! Not only must the costumes accurately portray the time period the show is set in, and reflect the characters’ personalities, but they must also look amazing, even from the back of the audience. This can be quite a challenge. Let’s explore how you can make the most of your costumes, even on a budget.
Three Options
Basically, there are three criteria that all costumers strive for:
- Speed
- Budget
- Quality
The problem is, you can only have two of the three options. If you want something sewn quickly and without spending a lot of money, you’re going to have to sacrifice quality. If you want high-quality costumes, yet must stick to a budget, it’s going to take time. If you want quality and you’re in a hurry, your budget is going to suffer. See how this works?
Knowing this in advance allows you to decide which two options you’re going to aim for. For example, if opening night isn’t far off, you’ll need to focus on speed. That leaves one remaining option—you can either forfeit your budget or the quality of the costumes. Your choice.

Quality, Speed, or Budget
Studying Costume History
Theater is all about illusion—and nothing will spoil the illusion faster than someone dressed inappropriately for the time period. Granted, historical fashion is a complex field that can take years of devoted study to master. But it doesn’t take long to learn the basics.
Forget what you’ve seen in Gone With the Wind, or in musicals like Hello, Dolly! and Seven Brides For Seven Brothers. In the past (and sometimes even today), Hollywood’s idea of historical costuming was often skewed by contemporary fashion, making their costumes less than accurate.
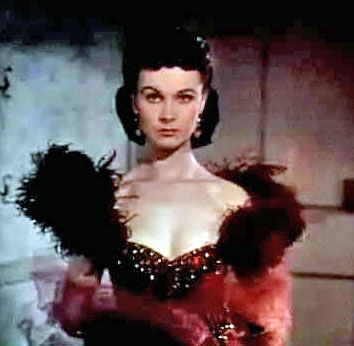
Gone With the Wind, 1939
Do some research and learn the appropriate silhouettes for each major era of history. Wherever possible, go to the source: study antique fashion plates, photographs, and extant garments. How? There are books filled with 18th and 19th century fashion plates, as well as photographs from the 1860s onward. You can find entire collections of fashion plates online to browse. Museum websites often display extant garments, although their dating isn’t always reliable.
If you’re dedicated, you might even purchase a sampling of antique garments for study, whether from estate sales, auctions, or online shops that specialize in extant clothing. Several years ago, I bought two antique petticoats via eBay. They date to the late Victorian period, and from studying them, I’ve learned a great deal about historical construction techniques.
There are plenty of books that detail the history of fashion, but try to stick with those that use extant garments or original fashion plates as their examples. You can also watch costume dramas, but remember that they aren’t always true to history. (Those produced by the BBC in recent years tend to be more accurate than most.)
Once you have an idea of what’s what, you can decide how best to interpret historical styles for your play.
To get you started, here are some great books on historical costuming:
- Period Costume for Stage and Screen: Medieval-1500 (Jean Hunnisett)
- Period Costume for Stage and Screen: 1500-1800 (Jean Hunnisett)
- Period Costume for Stage and Screen: 1800-1909 (Jean Hunnisett)
- Patterns of Fashion (Janet Arnold)
- Patterns of Fashion 2 (Janet Arnold)
- Costume in Detail: 1730-1930 (Nancy Bradfield)
- Fashion in Costume 1200-2000 (Joan Nunn)
- Victorian Fashion and Costumes From Harper’s Bazar: 1867-1898 (Stella Blum)
- Fashion (Kyoto Costume Institute)
- Whatever Shall I Wear? A Guide to Assembling a Woman’s Basic 18th C. Wardrobe (Mara Riley)
- Women’s Hats, Headdresses, and Hairstyles (Georgine de Courtais)
(Note: Yesterday’s Thimble is a participant in the Amazon Services LLC Associates Program. Basically, this means if you click a link to an item that Amazon sells, and then buy that item, I earn a small fee that helps support this website.)
|
A Note on Consistency I once attended a high-school production of a musical set in Paris, 1881. The orchestra was decent and the singing was pretty good. The costumes, however, left much to be desired. None of the female costumes were accurate for the time period! Nor were they consistent. Some actresses wore 1980s prom dresses, while others wore 1970s Gunne Sax prairie gowns. At one point, the lead actress donned a glittery 1920s-style flapper dress. It was gorgeous, but had no business being in a Victorian-era play. Consistency is important, so make sure everyone in your production wears garments from the same time period. If the lead actress wears a bustle dress, the other women should, too—unless the story calls for disparate costuming. |
Pitfalls to Watch Out For
- Wearing Hoops Too Early or Too Late
Many people associate hoop skirts with the Victorian-era, but they were only worn for a short time halfway through the period. Hoops were nothing new—various shapes and styles of hoop skirts had been worn in previous centuries, but the well-known Victorian hoop skirt came into common use around 1856. By the late 1860s, they’d begun transitioning into the bustle.
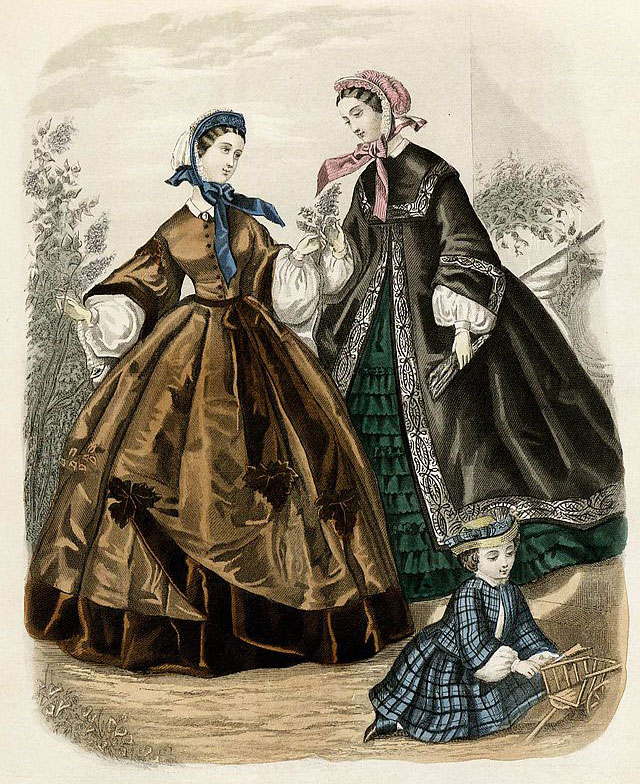
Fashion Plate, 1861
- Hoops of the Wrong Shape
Initially, Victorian hoops were round, giving the skirt a graceful bell shape. In the mid-1860s, hoops became elliptical; that is, flatter in front, with the bulk thrust toward the back.
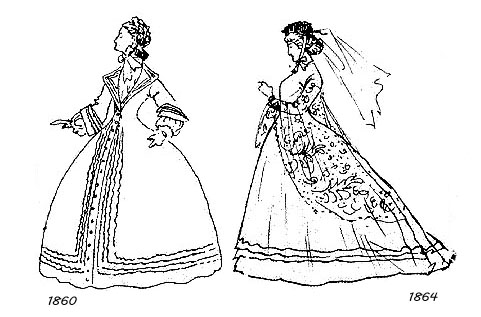
Evolving Silhouettes, 1860s
Be wary of using modern bridal hoops! They may be cheap and easy to find, but they create a more angular shape, not the graceful bell or elliptical shape you need. Avoid the “lampshade” look at all cost! Even professional productions occasionally commit this travesty. Below, you can see a photo from the curtain call of the Warsaw production of Andrew Lloyd Webber’s The Phantom of the Opera. It was a non-replica production, which means they chose to create their own costumes instead of using the iconic costumes designed by Maria Björnson.
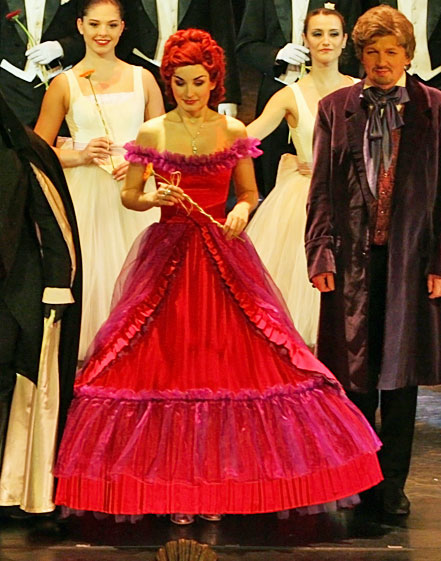
Carlotta, From “The Phantom of the Opera” (Warsaw), 2008 (Photo Credit: Flickr User “Effie”)
One way of avoiding the lampshade look is to increase the size of the upper hoops and reduce the size of the lower two hoops, making these identical in circumference. The goal is more of a rounded look, rather than a diagonal line from waist to hem.
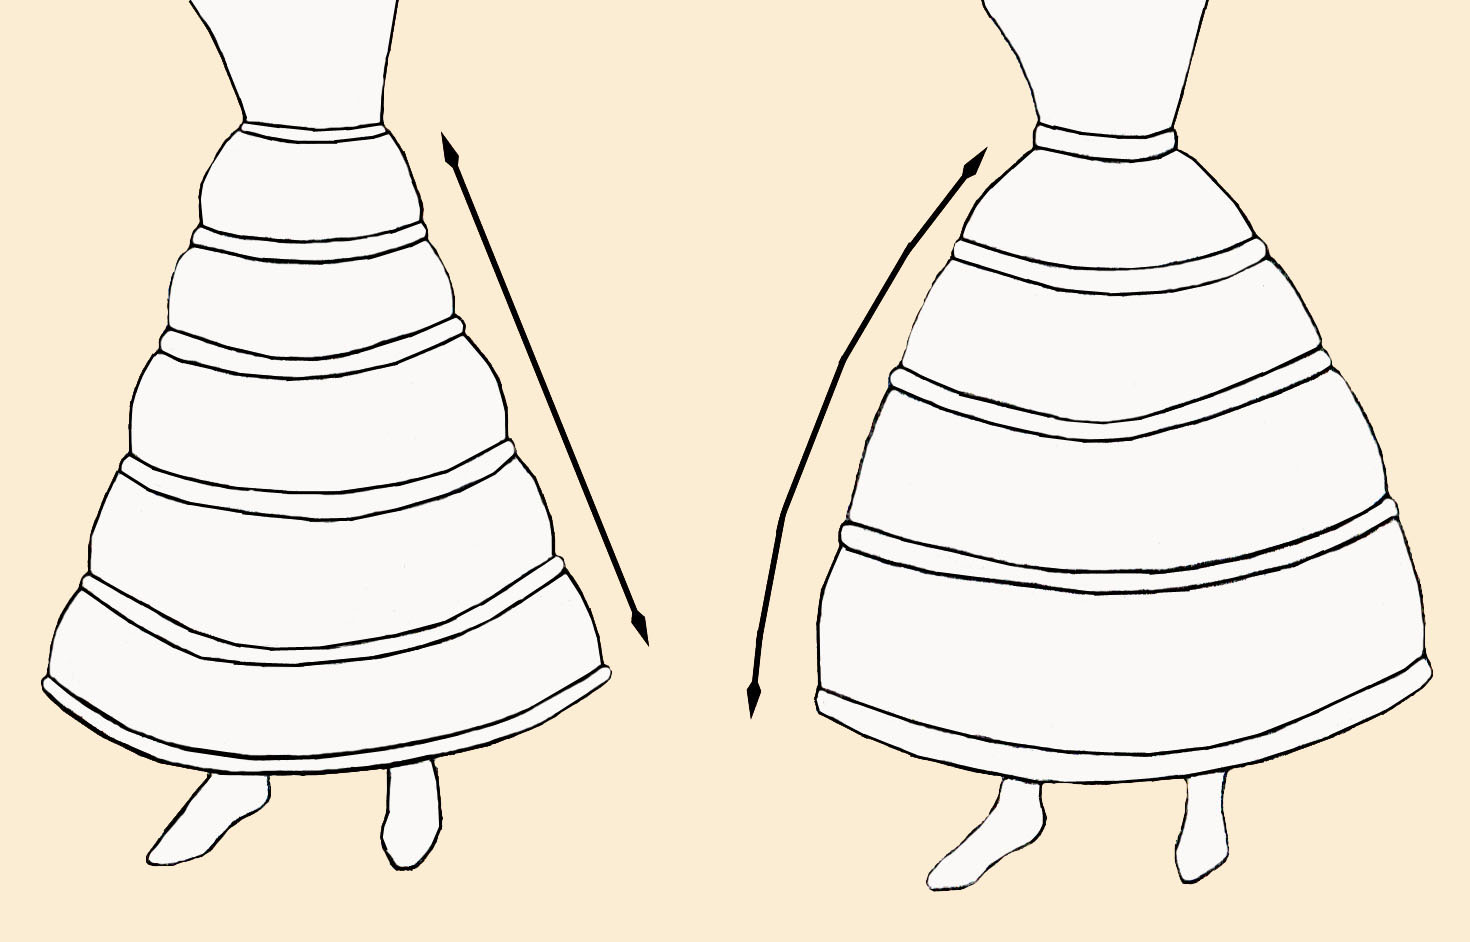
Triangular Hoops (left) vs Rounded Hoops (right)
Choosing Appropriate Fabrics & Trims
One reason amateur theater costumes tend to look, well, amateur, is because of the fabrics used. Broadway and West End productions use rich materials—particularly silk, which shimmers under stage lights. Avoid synthetics, such as polyester, nylon, and acetate, which will look cheap. Such fabrics may cause the actors to overheat, as well, since they don’t breathe.
If you’re under a strict budget, you may be forced into using synthetic fabrics, but try to find ones that don’t look so obvious. Avoid poly satin!
To avoid unpleasant surprises on opening night, take swatches of the fabrics you’re considering and examine them under stage lights to see what they’ll look like. If possible, have someone drape the fabrics on stage, while you walk into the seating area to see how the fabrics look from a distance.
It also helps to consider texture. Smooth fabrics, like satin or broadcloth, may appear flat under stage lights. Look for jacquard, damask, brocade, linen, or anything else that has texture.
To illustrate, take a peek at this Victorian evening suit, designed by the late Maria Björnson for The Phantom of the Opera. She could have used a plain wool suiting, but instead, she chose a silk that’s woven with a diamond checkerboard texture. Notice how even the buttons are three-dimensional! Such details can’t be seen from the audience, except perhaps by those lucky few in the front row, but it adds nuance to the appearance of the costume.
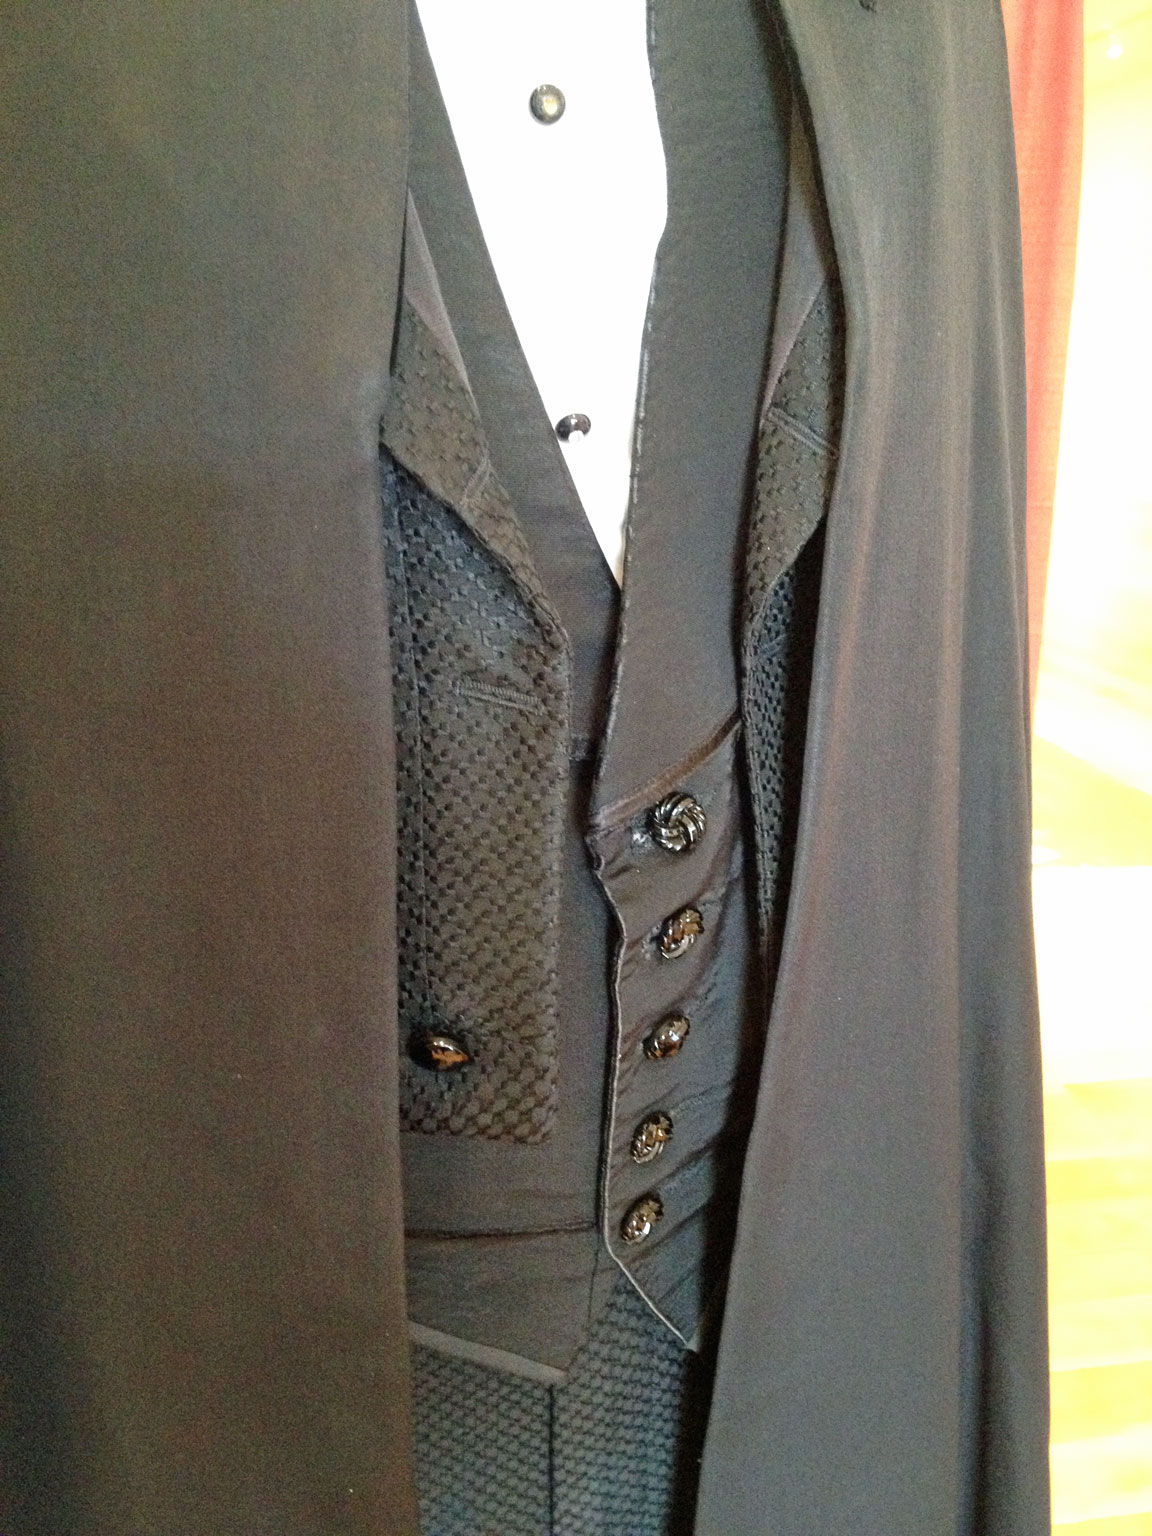
The Phantom’s Suit
Embellishments are a detail that can make or break a costume. Professional theater costumes often have oodles of trims and decorations. Why? Because the costumes must look fabulous, even from the farthest seats in the theater. Up close, they’ll probably appear gaudy and over-the-top, but from far away, they’ll look perfect.
Let’s take another example from The Phantom of the Opera—Christine’s dress from “Point of No Return.” The costume’s skirt has multiple tiers of ruffles, each of which is scalloped and embroidered for definition. The sleeves end in a cascade of embroidered ruffles, but there’s also gathered lace engageantes underneath the outer ruffles. An edging of Venice lace or flat braid covers the seam where the ruffle meets the sleeve, and at the front of the sleeve, there’s a colorful bow of jacquard ribbon. In some versions, the neckline is draped with an embroidered fichu that’s edged with a beaded fringe. Finally, an embroidered stomacher fills in the front gap of the bodice, complete with floral appliques and zigzag lacing.
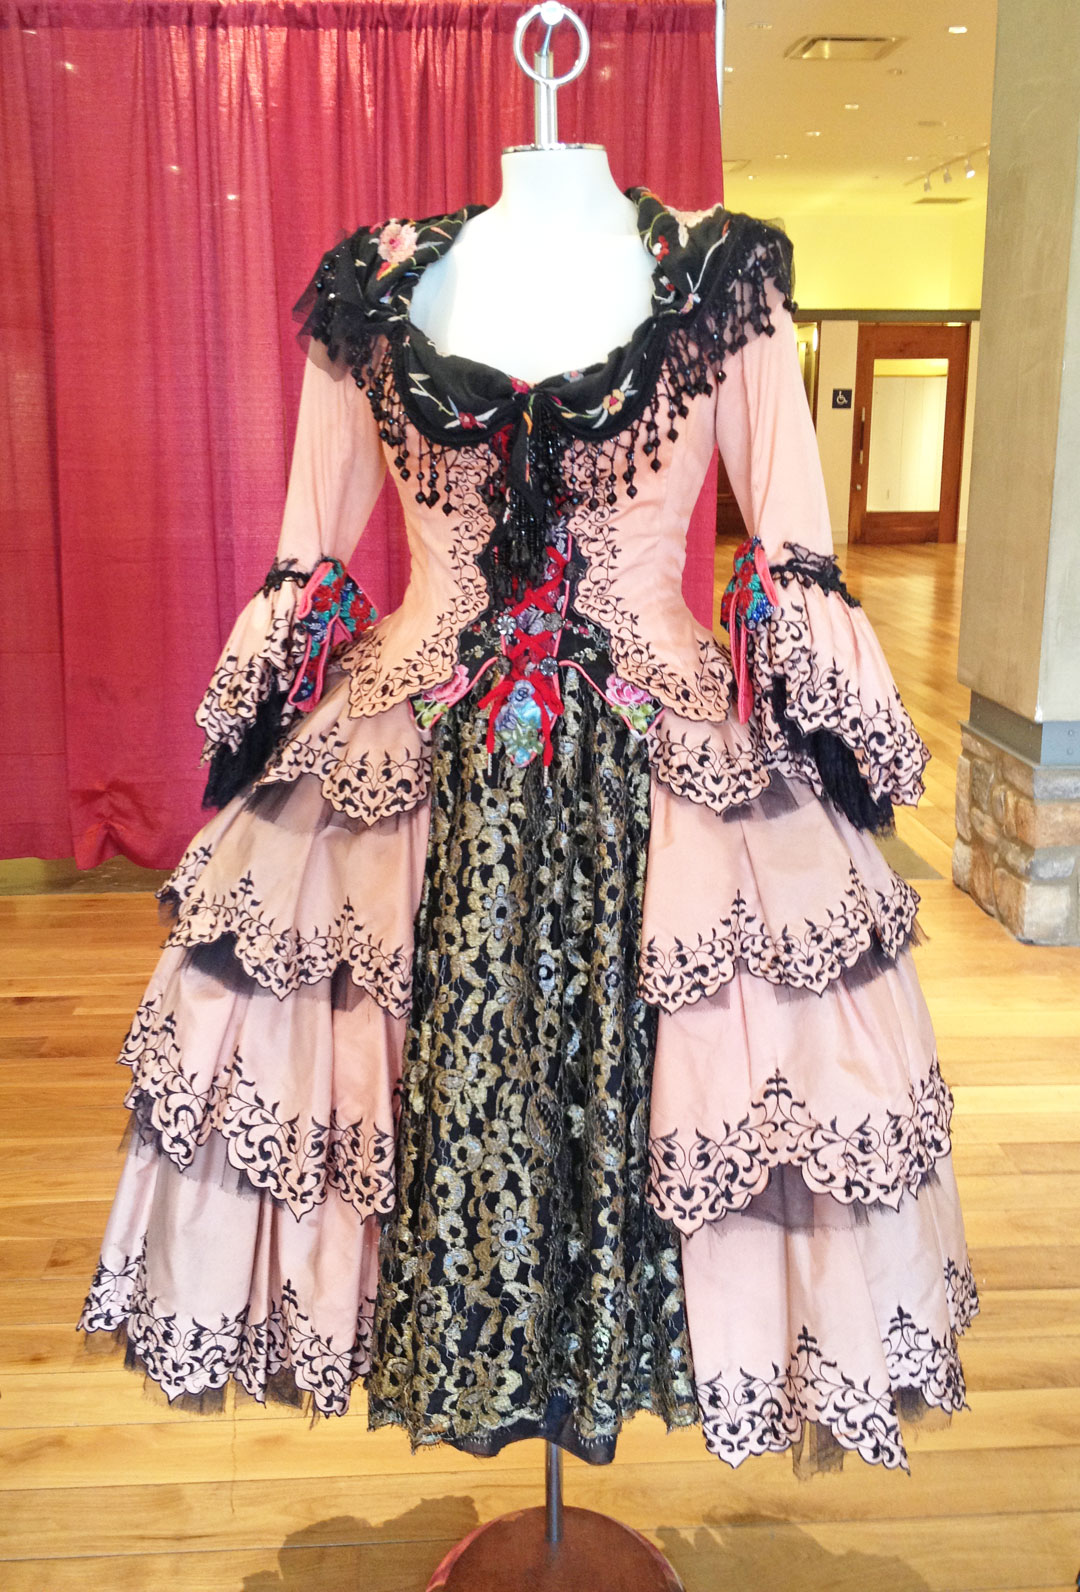
“Point of No Return” Costume
It may seem like overkill, but these details add depth and texture to the costume, which is what those seated at the back of the theater will respond to.
The cost of purchased trims can add up quickly, so try making your own fringe, ruffles, ruching, puffing, shirring, and piping. These embellishments were common in many time periods, so you’ll be saving money and being authentic at the same time.
To save money on embellishments you can’t make yourself, look for wholesale trims, available in bulk from places like eBay and Etsy. Just remember that cheap lace tends to be stiff, which means it will always look cheap, even from a distance.
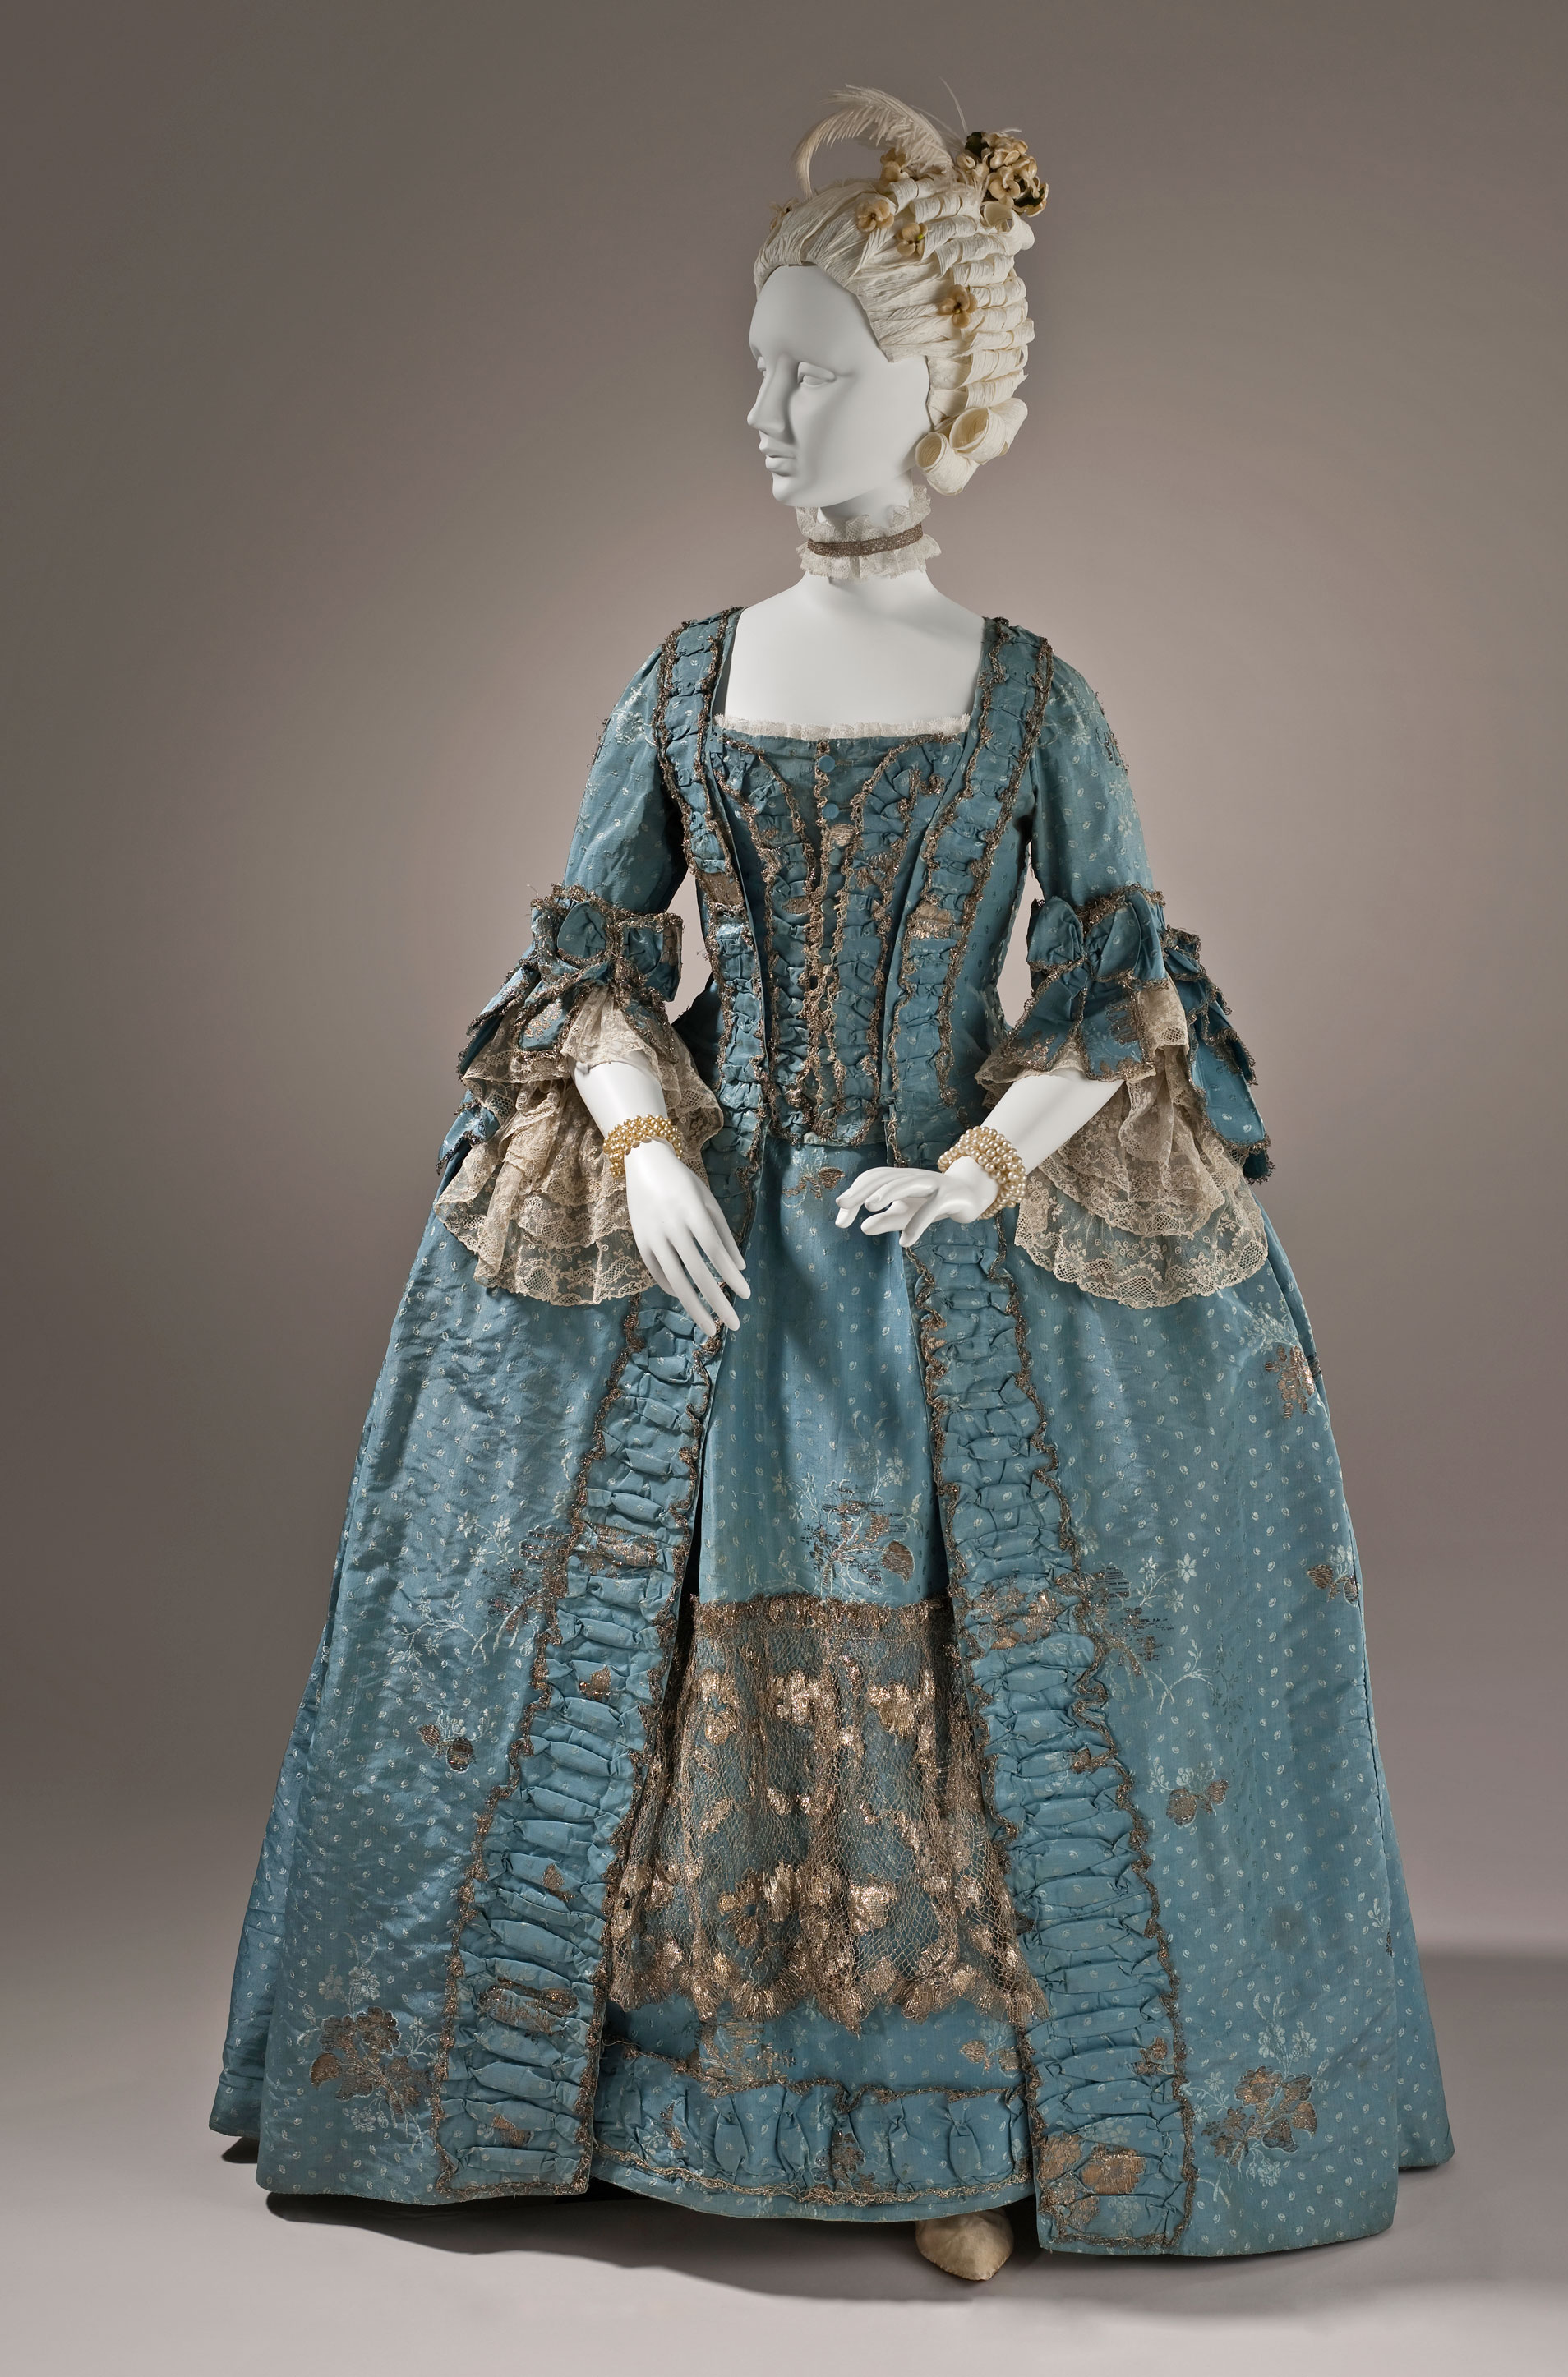
Robe à la Française, 1765 (Courtesy of LACMA)
If you cannot find lace that coordinates with your fabric, consider dyeing lace to match. It isn’t difficult. Pre-mixed dye kits are impossible to find these days, but you can buy ink sticks, such as Derwent’s Inktense Blocks, to make your own dyes.
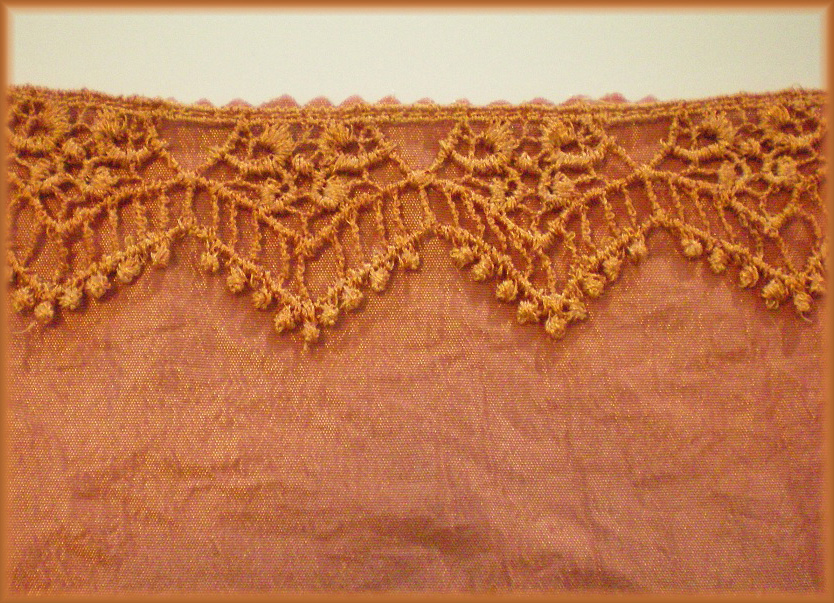
Custom Dyed Lace
Color is another aspect to consider. Stage lights are extremely bright, and they’re often tinted, which affects the way fabrics look. Theatrical costumes often appear garish when you view them backstage, because the colors must be extra bold to compensate for the harsh lighting.
Do some research into textile history, so you know which colors and prints were in use during the era of your play. Modern quilting calico is rarely accurate for historical costuming unless it’s a special reproduction print. Be cautious about which colors you use, as well. Synthetic dyes weren’t invented until 1856, so certain colors were rare, or didn’t exist, prior to that. To get a good idea of which fabrics are appropriate, examine historical portraits and extant costumes from museum sites.
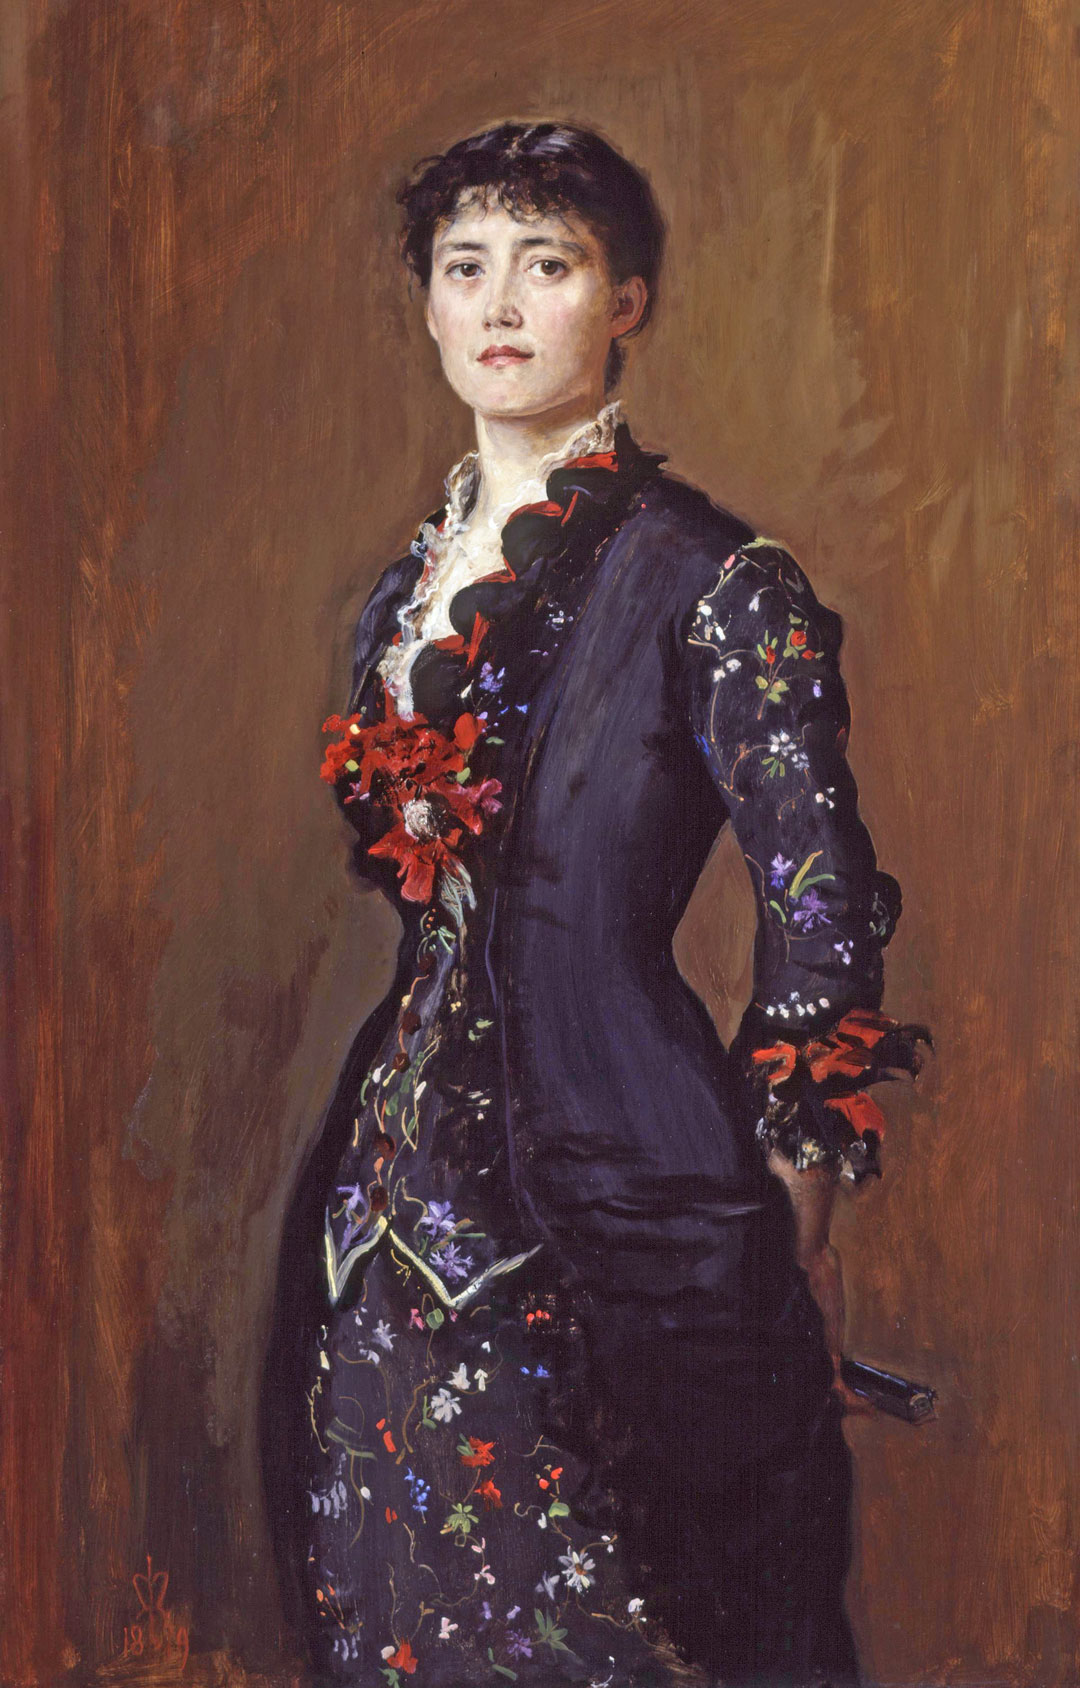
Portrait of Louise Jane Jopling, by Sir John Everett Millais, 1879
Provide Appropriate Undergarments—Petticoats
Women have worn petticoats for centuries, both for modesty and to add volume to their skirts. If the time period of your production calls for full skirts, you’ll need to provide at least one petticoat for each actress. Not only will it make their skirts fuller and more luxurious-looking, but it will appear more authentic. It really is astonishing how much a petticoat or two improves the look of a skirt! You can see the difference in the illustration below.
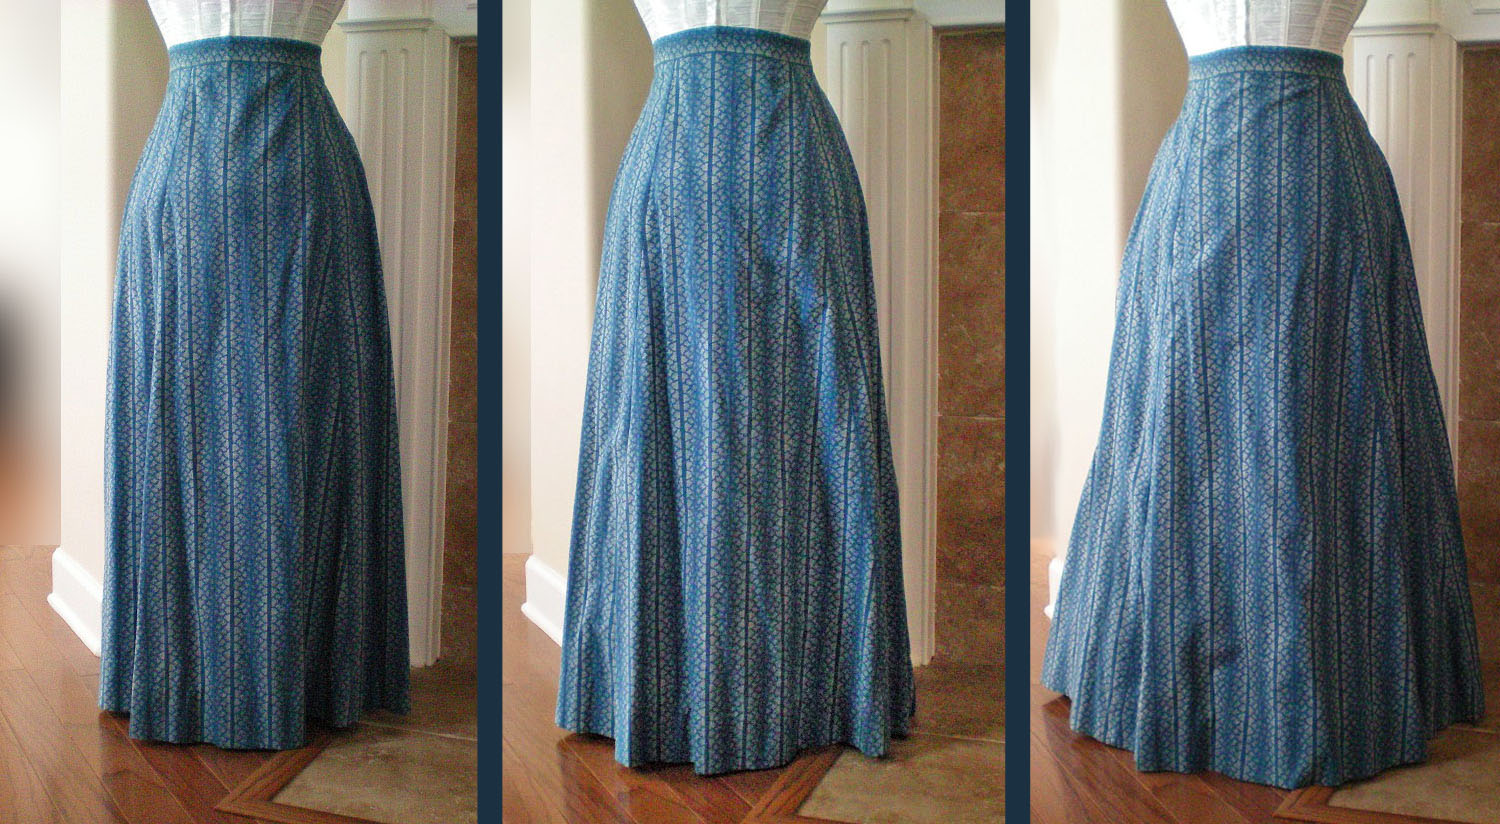
Without Petticoat (left); One Petticoat (center); Two Petticoats (right)
Another benefit is that petticoats help disguise the wires of a hoop skirt, panniers, or bustle. Also, petticoats are especially advantageous if there’s a dance number. Seeing a froth of white ruffles is infinitely better than seeing bare legs when a dancer spins around.
Petticoats are simple to make and very cheap, so there’s no excuse to omit them. For most historical periods, they should be white or off-white. Make them slightly less full than the skirt itself, and about two inches shorter. Add a ruffle along the hem—either gathered fabric, eyelet, or lace, depending on your budget.
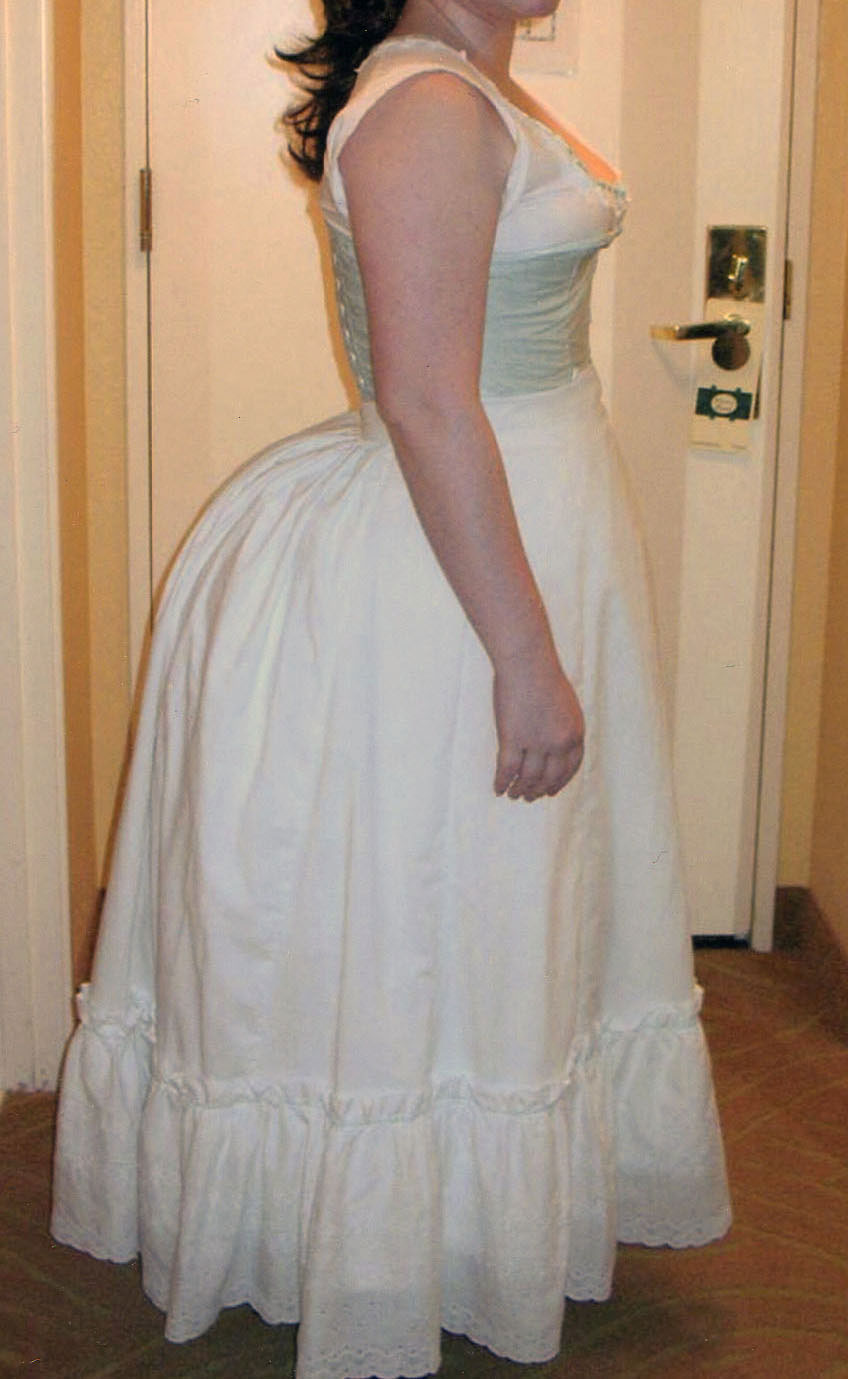
1870s Bustle Petticoat
If you haven’t time enough to make petticoats for everyone, layer two full skirts over each other for a similar effect. This won’t work as well for dance numbers, but it’s better than nothing.
Budget Petticoat
You can sew a quick and easy ruffled petticoat using a king-sized flat sheet. Use a yardstick and chalk pencil to mark the sheet according to the diagram below. (All seam allowances are ½”.)
- Fold the sheet in half and mark the center line (#1).
- Mark 6″ from the edges, all around (#2).
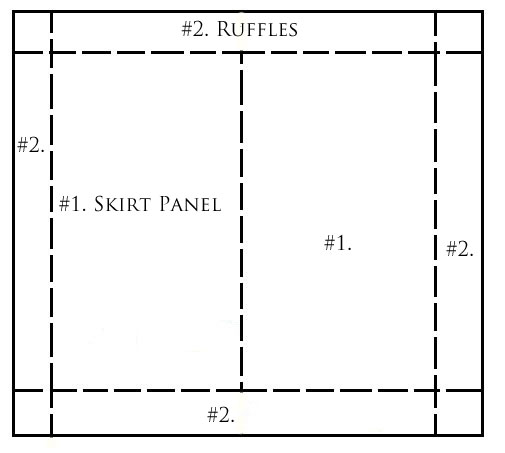
Petticoat Diagram
- Cut the 6″ panels off and stitch them together, forming a long strip. Hem the bottom edge and run a gathering stitch along the top, but don’t gather it just yet. This is your ruffle.
- Cut the remaining square of fabric in half, forming two panels.
- Sew the short ends of the panels together, creating a long rectangle. This is your main skirt. Run a gathering stitch along the top edge, but don’t gather it just yet.
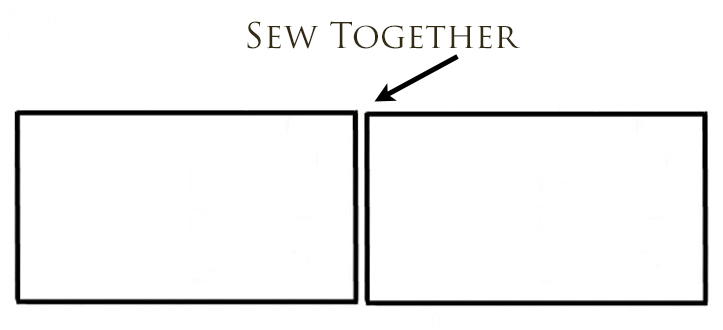
Sew Panels Together For Skirt
- Hem the skirt and add the ruffle in one step: pin the ruffle to the bottom of the skirt panel, right sides together, with the hemmed edge at the top of the ruffle. Pull the gathering thread and distribute the gathers evenly across the length. Sew the ruffle in place, then press it down.
- Measure the skirt panel from the top edge to the bottom of the attached ruffle. If it’s longer than you need, trim the top edge—but don’t discard the fabric. Provided you cut at least 2″ off, it will become your waistband. If your petticoat is the correct length without trimming any fabric off, cut a 2″ strip from the side edge.
- Sew the edges of the skirt panels together, leaving a 9″-12″ gap at the top for the closure. Make sure to backstitch at the ends to secure the stitching.
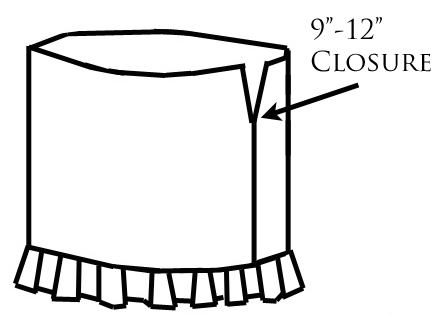
Closure Gap
- Fold the edges of the opening under by ¼” twice and topstitch for a simple placket.
- Cut the waistband to fit the waist circumference of whoever’s going to wear the petticoat, plus 2 ½”.
- Press the short ends of the waistband under by ½”, then fold the waistband in half lengthwise. Topstitch to secure the ends.
- Pin the raw edges of the waistband to the right side of the skirt, lining up one end with the hemmed placket edge. The other end should extend past the placket edge by 1″. This will allow you to overlap the waistband when you fasten it.
- Pull the skirt’s gathering thread and distribute the gathers evenly across the waist. Sew the waistband in place. Press the seam allowance down toward the skirt.
- To fasten the waistband, add a button and buttonhole, or hooks and bars.
Provide Appropriate Undergarments—Corsets
If you’re making costumes from the 16th century or later, keep in mind that ladies always wore corsets. It’s a myth that only the wealthy wore them! Corsets were the historical equivalent of the bra—only young girls went without one.
It’s also a myth that corsets were painful and dangerous. If a corset is well-made and tailored to its owner’s body, it’s no more uncomfortable than a modern underwire bar. It takes getting used to, of course, but a woman can do almost anything in a corset, including dancing and singing. Ill effects, such as fainting or disfigurement, only occurred when a corset was laced too tightly. It should be worn snug, but not so tight that breathing is difficult. (See the article: Exploring the Myths of Corsets, Part I & Part II.)

Victorian-Style Corset
Most period costumes will be improved by the addition of a corset. An actress will stand straighter, move more gracefully, and appear more in-character. Of course, good corsets aren’t cheap. If you’re dressing an entire cast, it may be prohibitively expensive to put all the ladies in high-quality corsets. At the least, the lead actress should wear one. As for the others, if they cannot wear corsets, their bodices should be boned to help minimize the modern silhouette that a bra provides.
Avoid budget lingerie corsets! They usually have cheap plastic boning which doesn’t offer any support. They may also have hook-and-eye tape instead of a proper busk, which means the corset may pop open under the strain of being worn during a performance.
|
The Difference Between a Bodice and a Corset Even though many historical bodices are boned, they aren’t meant to substitute for a corset. Why? They serve completely different purposes. A corset smooths and shapes a woman’s body, molding her into the fashionable silhouette for the period. It also acts as a foundation, preventing heavy skirts and petticoats from digging into the soft tissue of the waist. A bodice, on the other hand, is lightly boned to prevent the fabric from riding up, keeping it smooth and unwrinkled over the torso. |
~~*~~
In the next installment of this article, we’ll look at more ideas that will help you improve your amateur theatrical costumes.