
Here’s a tip for you: I cannot stress enough the importance of staystitching. Patterns aren’t always clear about this crucial step, sometimes skipping it altogether—usually with disastrous results! Whether your fabric is woven or knit, all curved edges must be staystitched as a preliminary step.
What is staystitching? Staystitching is a line of regular straight stitching that stabilizes the fabric’s edge, so it won’t stretch during construction. It’s done within the seam allowance, so it won’t show. I usually use a slightly smaller stitch length than normal.
When should you staystitch? It must be done first thing, before you start pinning and sewing anything together. Handling the fabric, even just to pin the pieces, can result in unintended stretching. Then when you go to assemble your garment, you’ll find that pieces no longer match up. Or your neckline is suddenly a lot deeper than it should be.
Where should you staystitch? To be safe, staystitch any curved or bias edge that might potentially stretch during the sewing process. This includes necklines, contoured waistlines, armscyes, sleeve caps, and even shoulder seams. It’s done within the seam allowance, so it won’t show. If your allowance is a standard ⅝”, staystitch at ½”. If your allowance is ½”, staystitch at ¼”. You get the idea.
How do you staystitch? You’ll need to use a technique known as directional stitching, which is designed to minimize stretching, puckering, and distortion. Here’s a short guide (Directional Stitching), but basically, you sew from the highest point to the lowest point.
With a neckline, you’ll start at the shoulder edge and sew downward, following the curve to the center-front. Do not keep going up the other side! Stop sewing at the center -front. Flip the piece over and repeat what you just did, sewing from the shoulder down to the center-front.
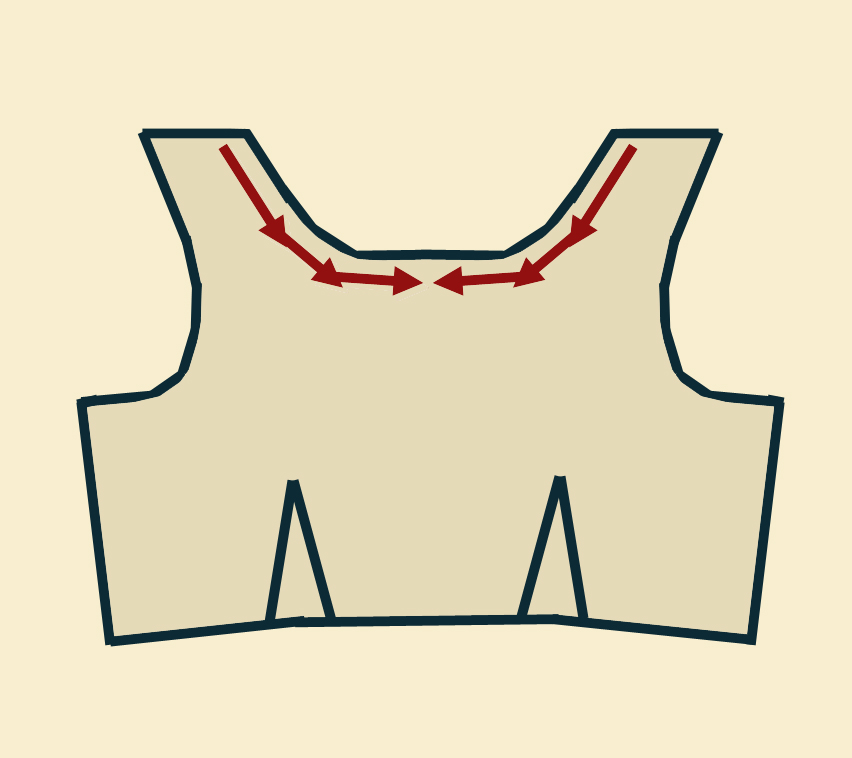
Directional Staystitching
Hopefully, you’ll find a lot less distortion and stretching once you incorporate staystitching into your sewing repertoire.
3 Responses to Basics: Staystitching