
Pins secure your pattern pieces, so you can cut them accurately. They’re also useful for holding the layers of fabric together while you sew. Some experienced dressmakers don’t use pins at all, preferring pattern weights for cutting, and simply holding the layers of fabric together themselves while they sew. But not everyone is comfortable abandoning pins.
Using pins can be hard when you’re first starting out. Practice will certainly help—the more you do something, the easier it gets. Meanwhile, here’s ten tips to nudge you in the right direction.
Tip #1: Use the Proper Pins
When I first started sewing, I had no idea there were different pins for different fabrics—I simply bought whichever pins looked the prettiest. No wonder I had so much trouble!
- Ballpoint pins are for knit fabrics. They’re small and thick, with rounded points that are designed to slip between the knitted fibers. Never use regular pins on knit fabrics, as they may cause snags.
- Pearl-head pins are meant for regular woven fabrics. They’re long and thick, with large plastic heads. They don’t bend as easily, so they’re good for thick fabrics, like denim and twill.
- Extra-fine glass-head pins are made for delicate fabrics, like fine silks. They are long and very slender, with small glass heads. They’re ideal for when you need to press a pinned garment—the glass heads won’t melt!
- Silk dressmaker’s pins are also meant for delicate fabrics, but they don’t have ball-heads. They are just as heat-proof as glass-head pins, but their lack of a head makes them hard to use.
- Flower-head pins tend to be extra long, with a flat head that’s shaped like a flower (or sometimes butterflies or even buttons). They’re often used by quilters, since they’re easier to use with thick layers.
- Quilter’s pins are likewise very long, with large heads, which makes them useful for pinning through multiple layers.
- Applique pins are extremely small. They’re great for pinning on appliques, sewing doll clothes, attaching trims, or any other purpose where having half-size pins would be useful.
- Sequin pins are even smaller than applique pins, but like dressmaker’s pins, they don’t have ball-heads to grip, so they’re very hard to use.
- T-head pins have flat, extended heads (so the pin is shaped like a T). This makes them ideal for pinning fur, and for craft-making.
- Fork-pins are U-shaped, which makes them useful for matching seams. They work great for plaids and striped fabrics, as well as for quilting.
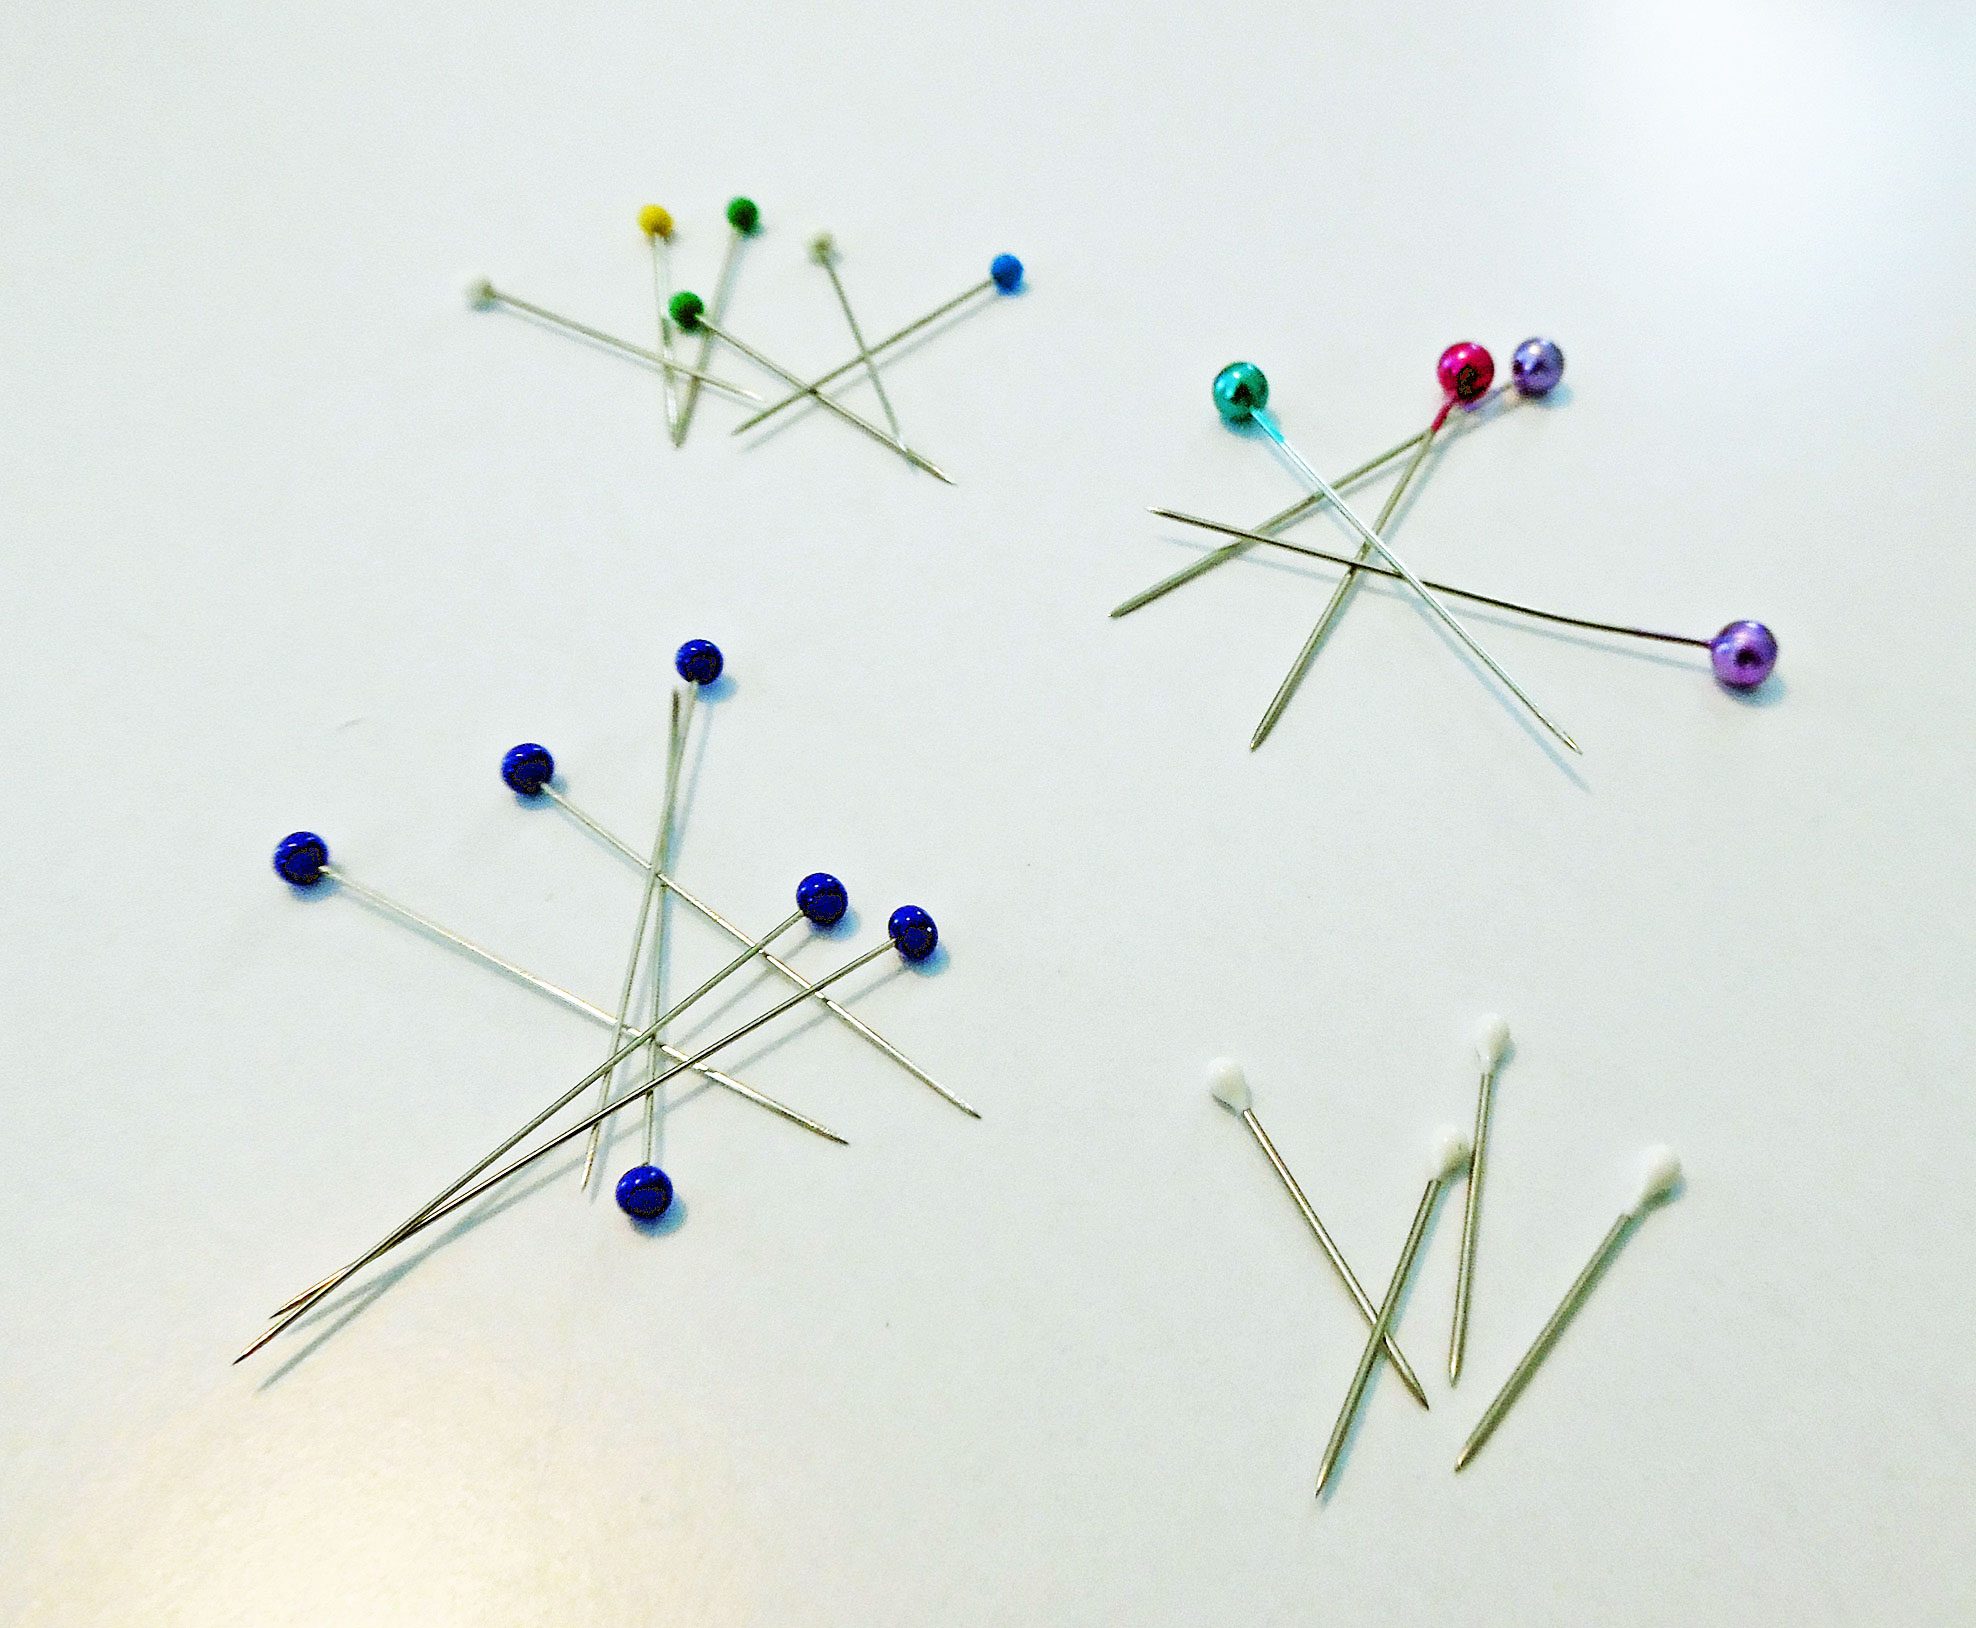
A Variety of Pins
Tip #2: Using the Right Size Pins
Just as you need to use the right type of pins, you also need to use the right size. Using pins that are too large can result in permanent holes in your fabric. If you’re working with delicate fabrics, minimize the damage by using silk pins or extra-fine glass-head pins. Pinning within the seam allowances will ensure that any damage will be hidden.
Tip #3: Pin Parallel, Not Perpendicular
When pinning pattern pieces to fabric, it’s important to orient the pins so they’re parallel to the edge of the pattern. Place them about a quarter-inch from the edge, and when you reach a corner, make sure the pin doesn’t extend past the pattern. If it does, you might cut through it, which will damage your scissors.
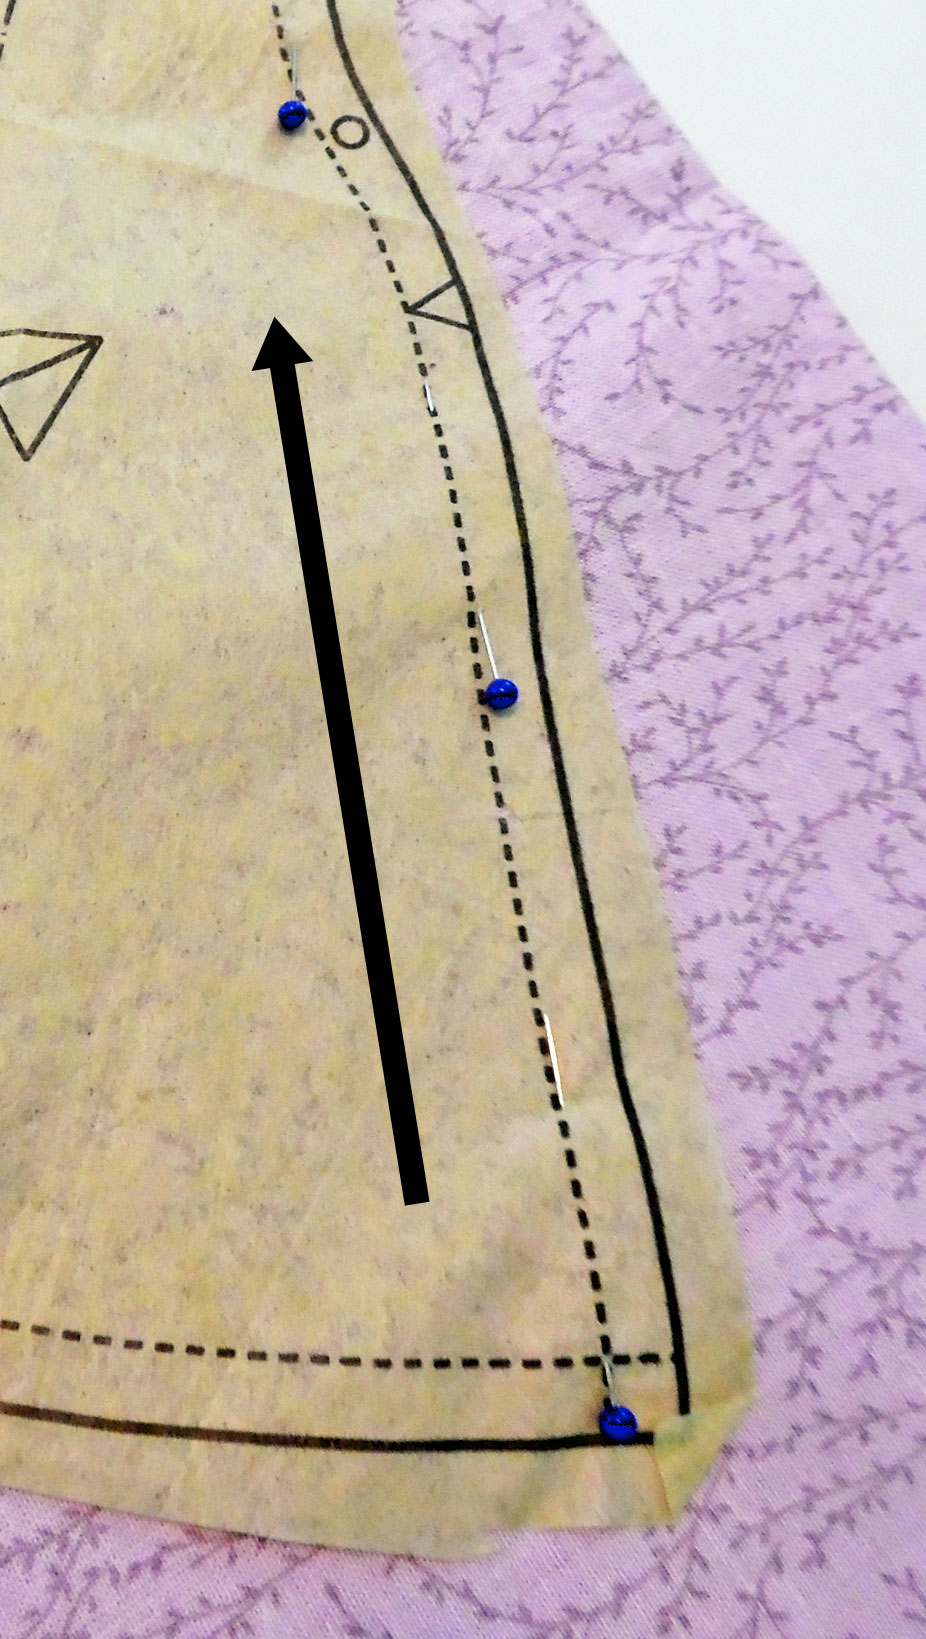
Parallel Pins
Tip #4: Pin Close Together
For long, straight edges, you can place your pins one to two inches apart. For curved edges, however, you need more pins. If the curve is shallow, place them about half an inch apart. If the curve is tight, the pins should be very close together—so close, they overlap. Alternatively, you can use smaller pins for sharp curves, so you can place more, without overlapping them.
Tip #5: Divide & Conquer
It saves time if you place your pins in a certain order. After you’ve straightened your pattern, insert a pin at one corner. Smooth the pattern out and place a pin at the opposite corner, diagonally across the pattern. Then move on to another corner.
Once all your corners are pinned, use the technique known as “divide and conquer.” Find the halfway point between the corner pins and put a new pin there. Then, find the halfway point between that pin and the next one, and pin there. Keep dividing the space between pins, until you’ve pinned the entire pattern.
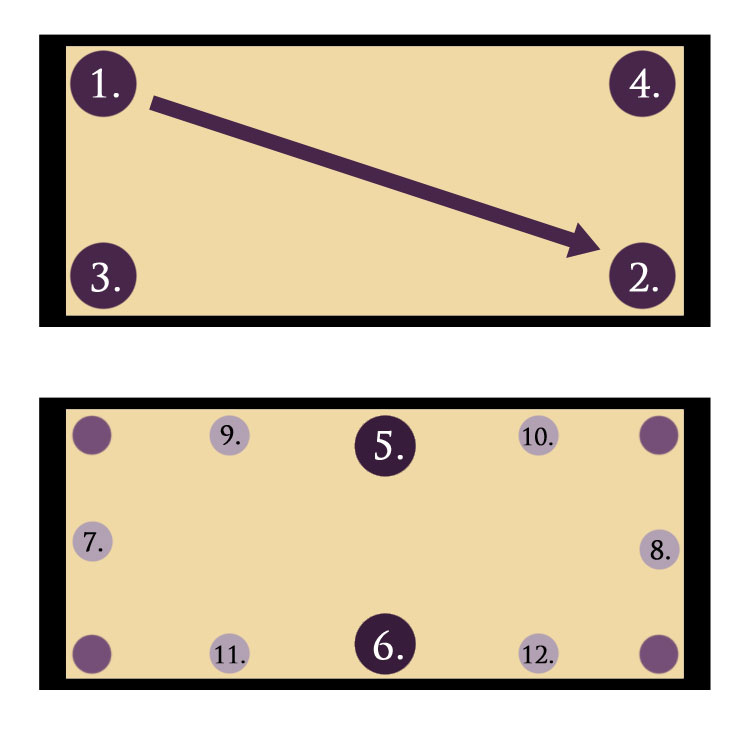
Divide & Conquer
Tip #6: Scooping
If you’re having trouble getting the pins into the fabric, you might need to revise your technique. First, don’t be afraid to scratch your cutting table. (If you’re cutting on a good surface, like your dining table, put down a cutting mat, so you don’t have to worry about scratching the table’s finish.) Push the pin all the way through the fabric, until it hits the table. Then use a scooping motion, angling the pin down and sideways, then back up. If necessary, press against the fabric with your fingers to help push the pin back out.
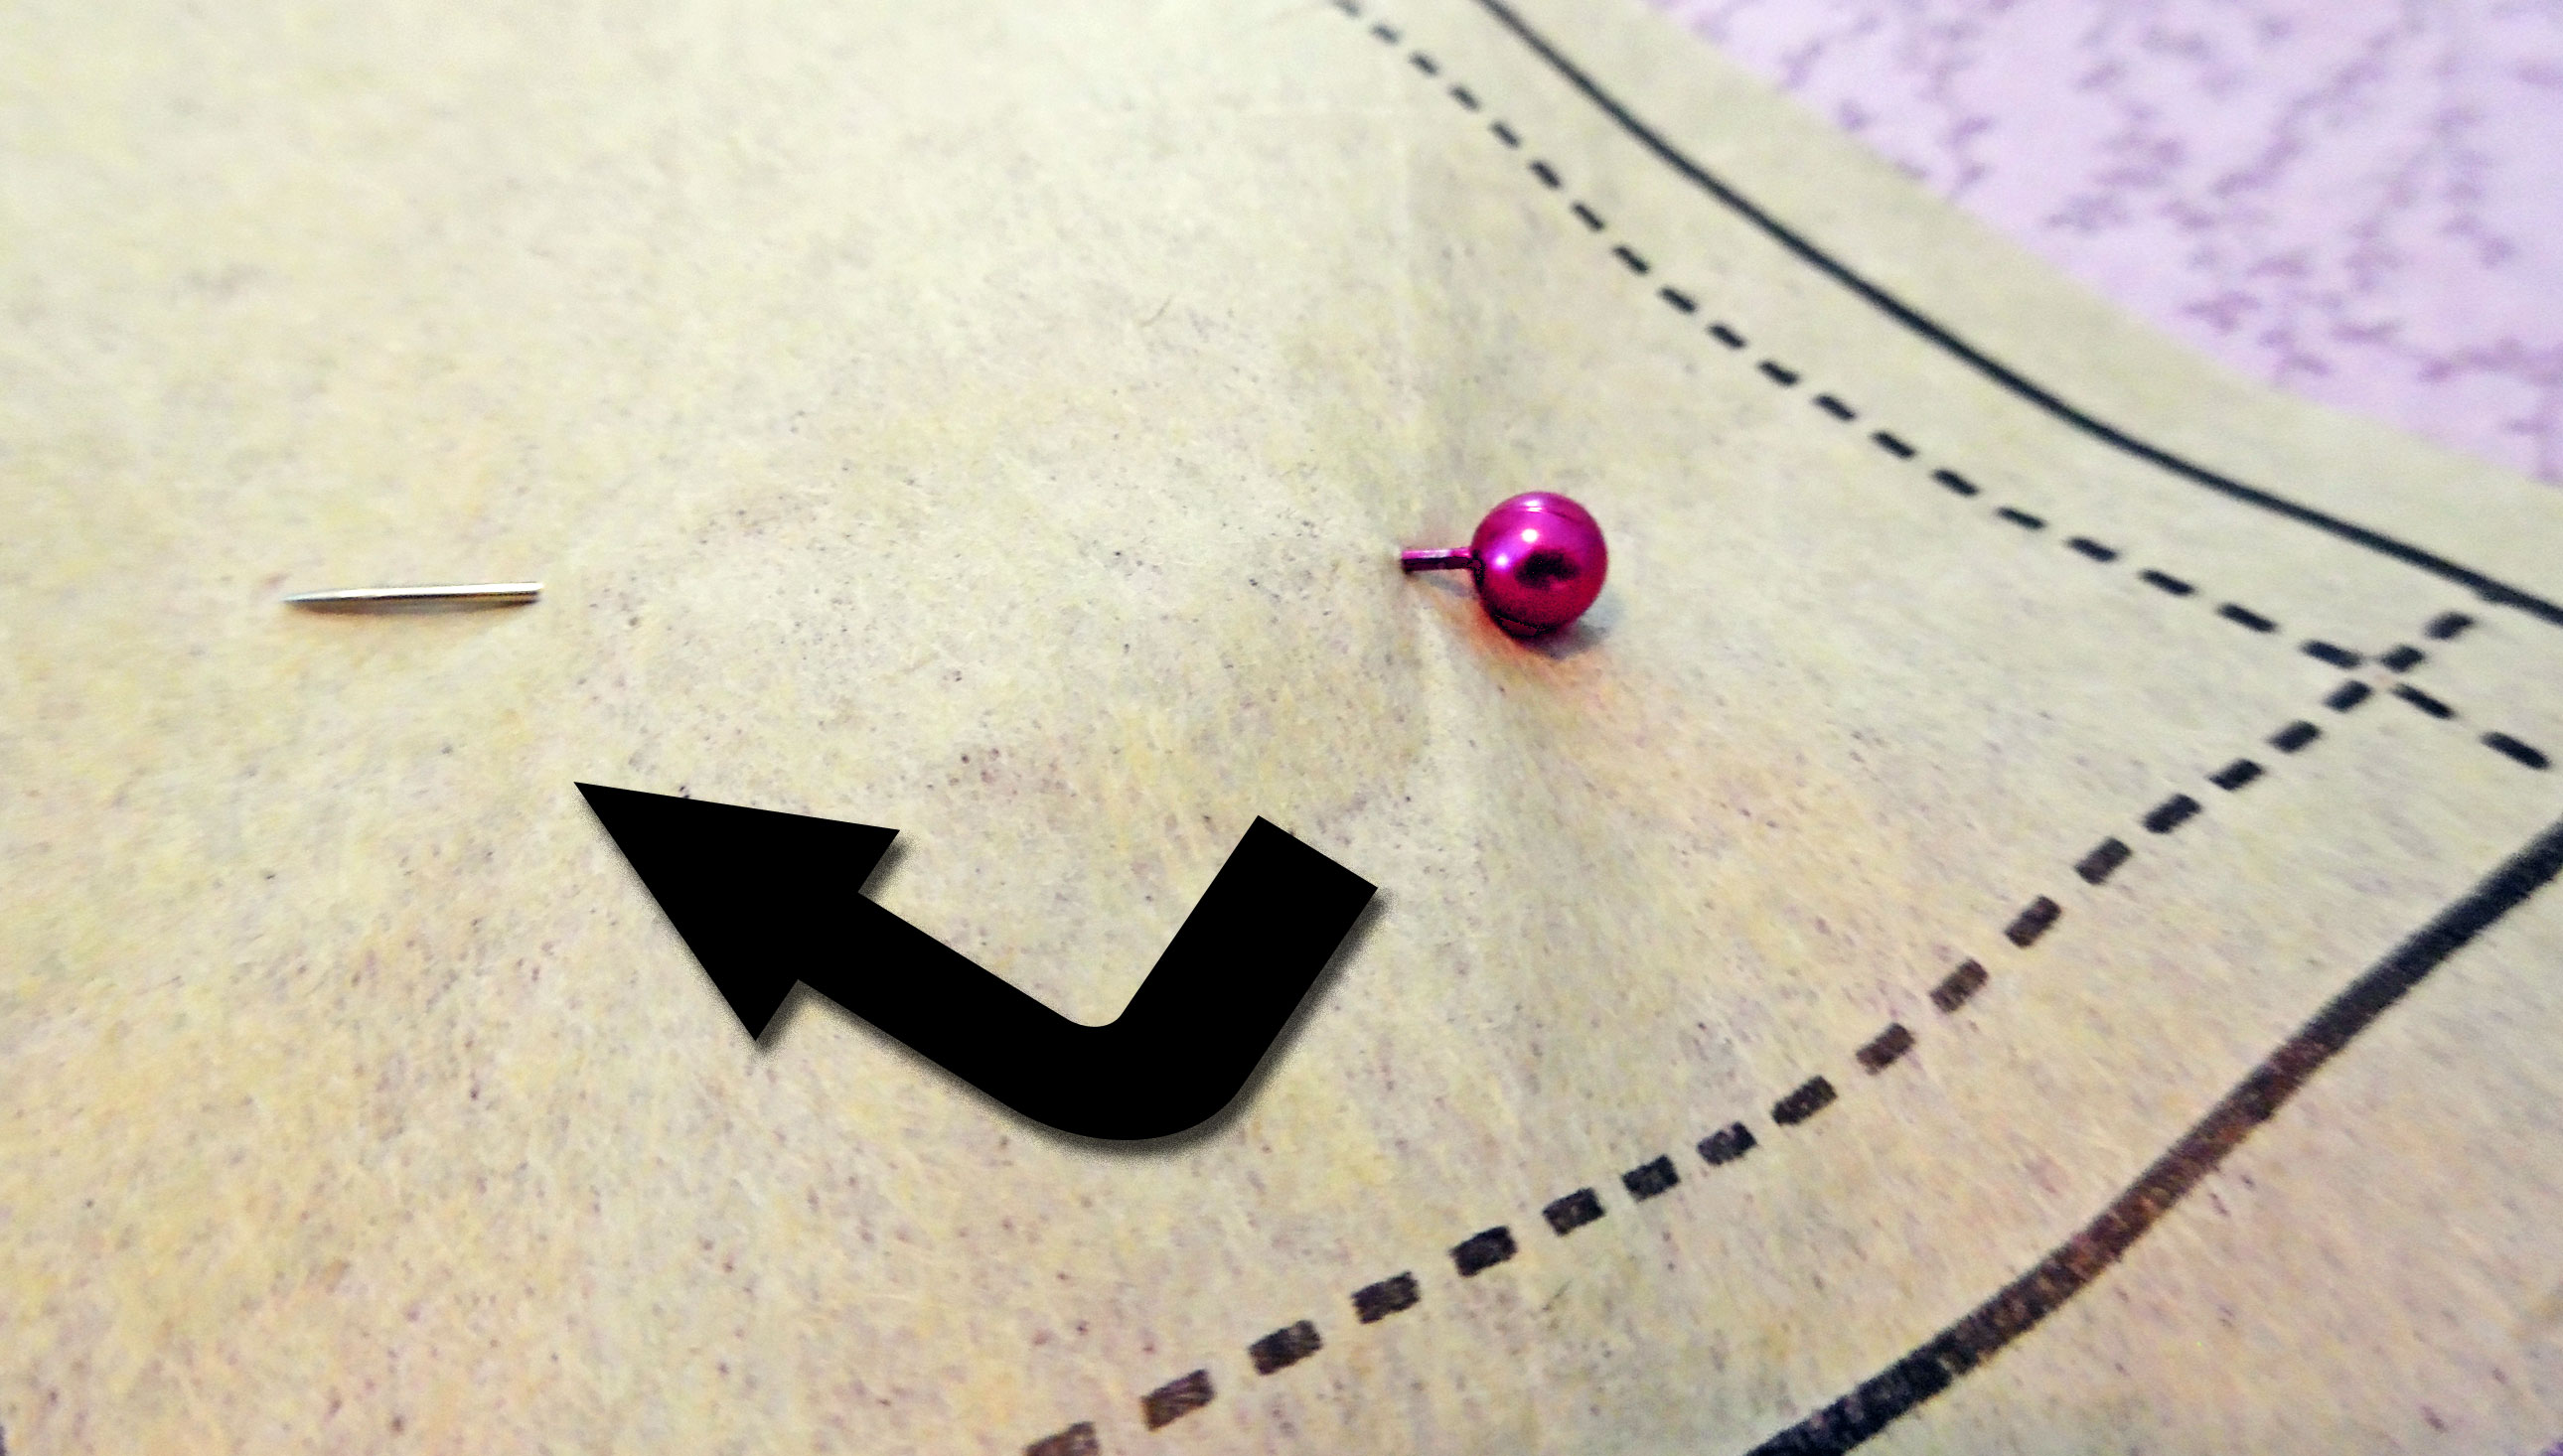
Use a Scooping Motion
Tip #7: Distance & Spacing
Since you’re sewing, not cutting, you can place your pins a little farther from the edge than you did when pinning your pattern to the fabric. Still, try to keep them within the seam allowance, between a quarter-inch and a half-inch from the edge.
Space the pins as close together as you feel is necessary. Your goal is to keep the fabric from shifting as you sew. If you’re working with something like quilting cotton, you won’t need very many pins. (In fact, I rarely use pins when working with muslin or calico.) On the other hand, if your fabric is slippery, such as silk charmeuse, you’ll need to place your pins closer together. Just as with pinning your pattern pieces, you need fewer pins on straight seams, and more on curved seams.
Tip #8: Directional Pinning
When you’re sewing with pins, you need to be able to remove them swiftly, so you don’t sew over them. For this reason, it’s important for all your pins to face the same direction. It’s up to you whether to place them perpendicular to the edge of the fabric, or parallel to the edge. Personally, I pin parallel. It holds the fabric more securely, so fewer pins are needed. It also minimizes pinholes outside the seam allowance.
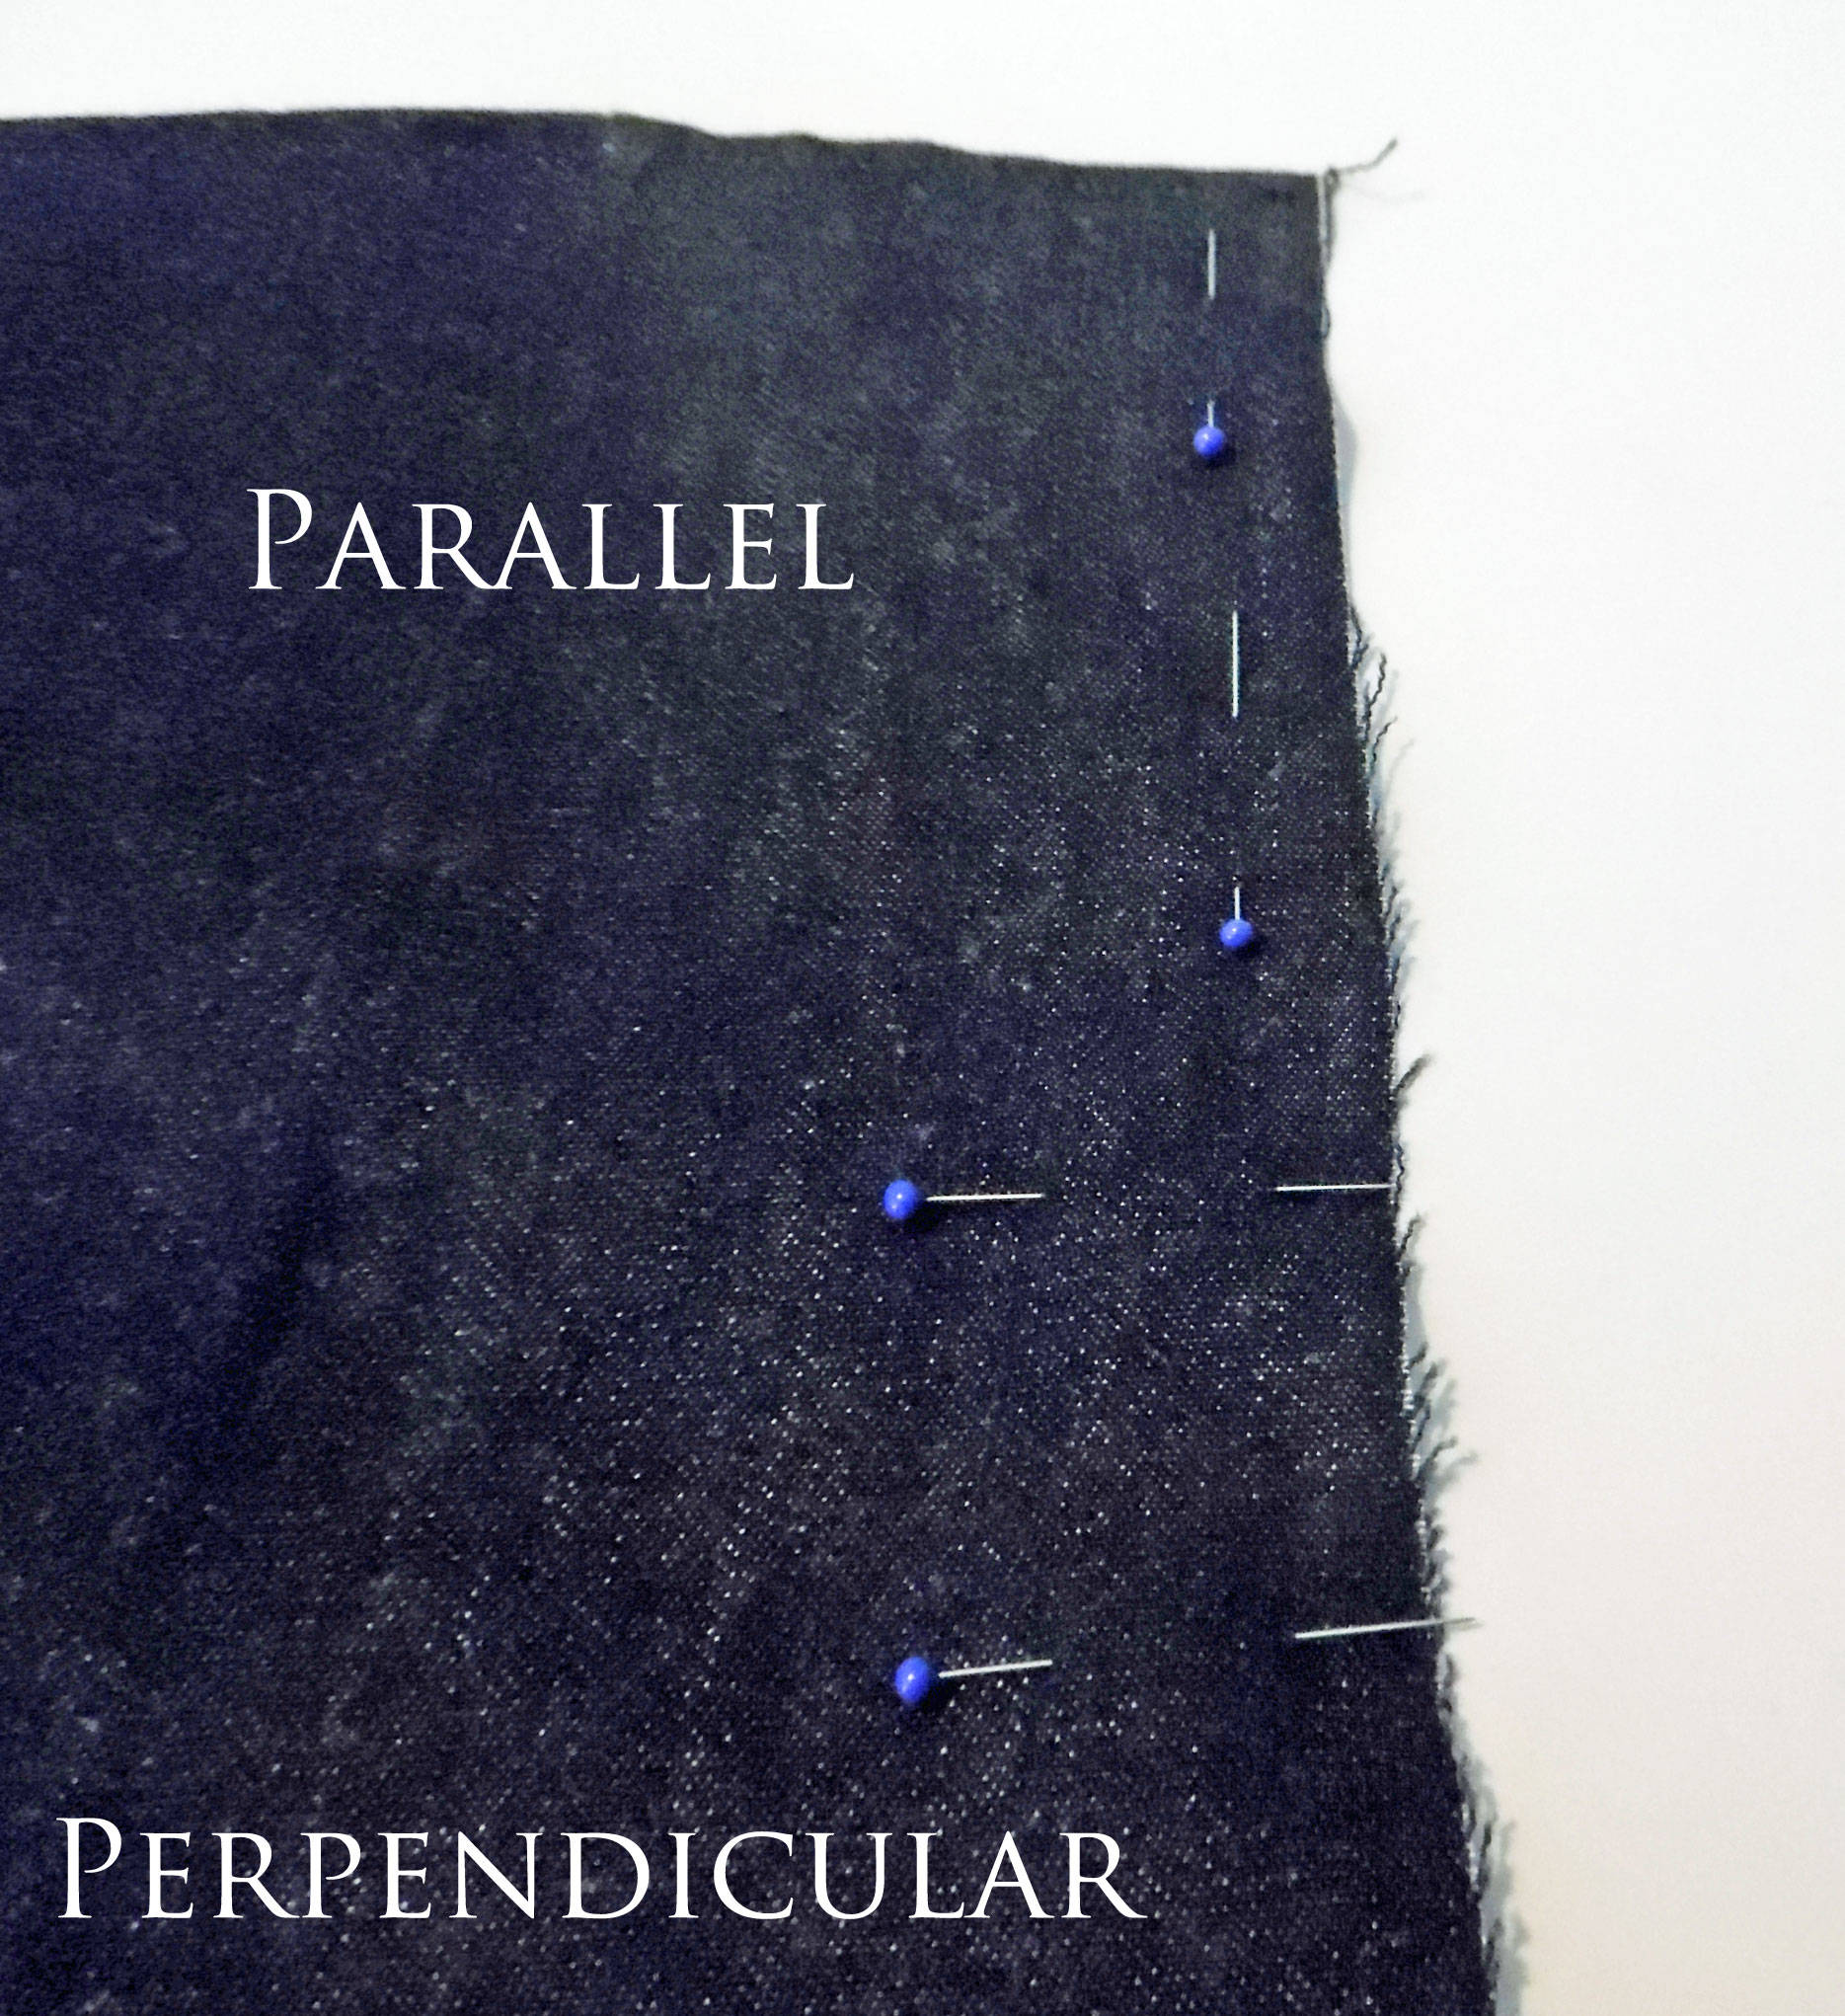
Parallel vs Perpendicular Pinning
If you place your pins parallel to the edge, make sure the pinheads face you while you’re sewing, so you can remove them easily. If you’re struggling to figure out which direction to place them, remember that the bulk of the fabric always goes to the left of the needle. Orient your fabric this way, and then insert the pins so the pinheads face you.
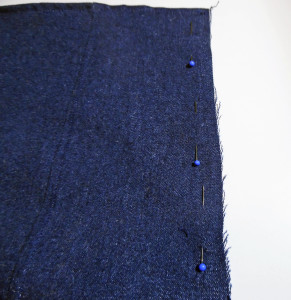
Pin Placement (Parallel)
Tip #9: Safety
Never sew over your pins! Many a dressmaker has tried to justify doing this, but it’s extremely dangerous. If the needle hits the pin, it may break, sending tiny shards of metal flying at your face. The needle might not always break, but it could bend, which will cause major problems when you resume sewing. Hitting a pin can also damage your sewing machine, throwing off the timing, which is expensive to fix.
Another safety issue is putting pins in your mouth. Never do this! I know of more than one dressmaker who accidentally swallowed pins, which led to surgery. (My cat did this, too. . . .) If you need your pins close at hand while you’re working, make yourself a wrist pincushion, instead.
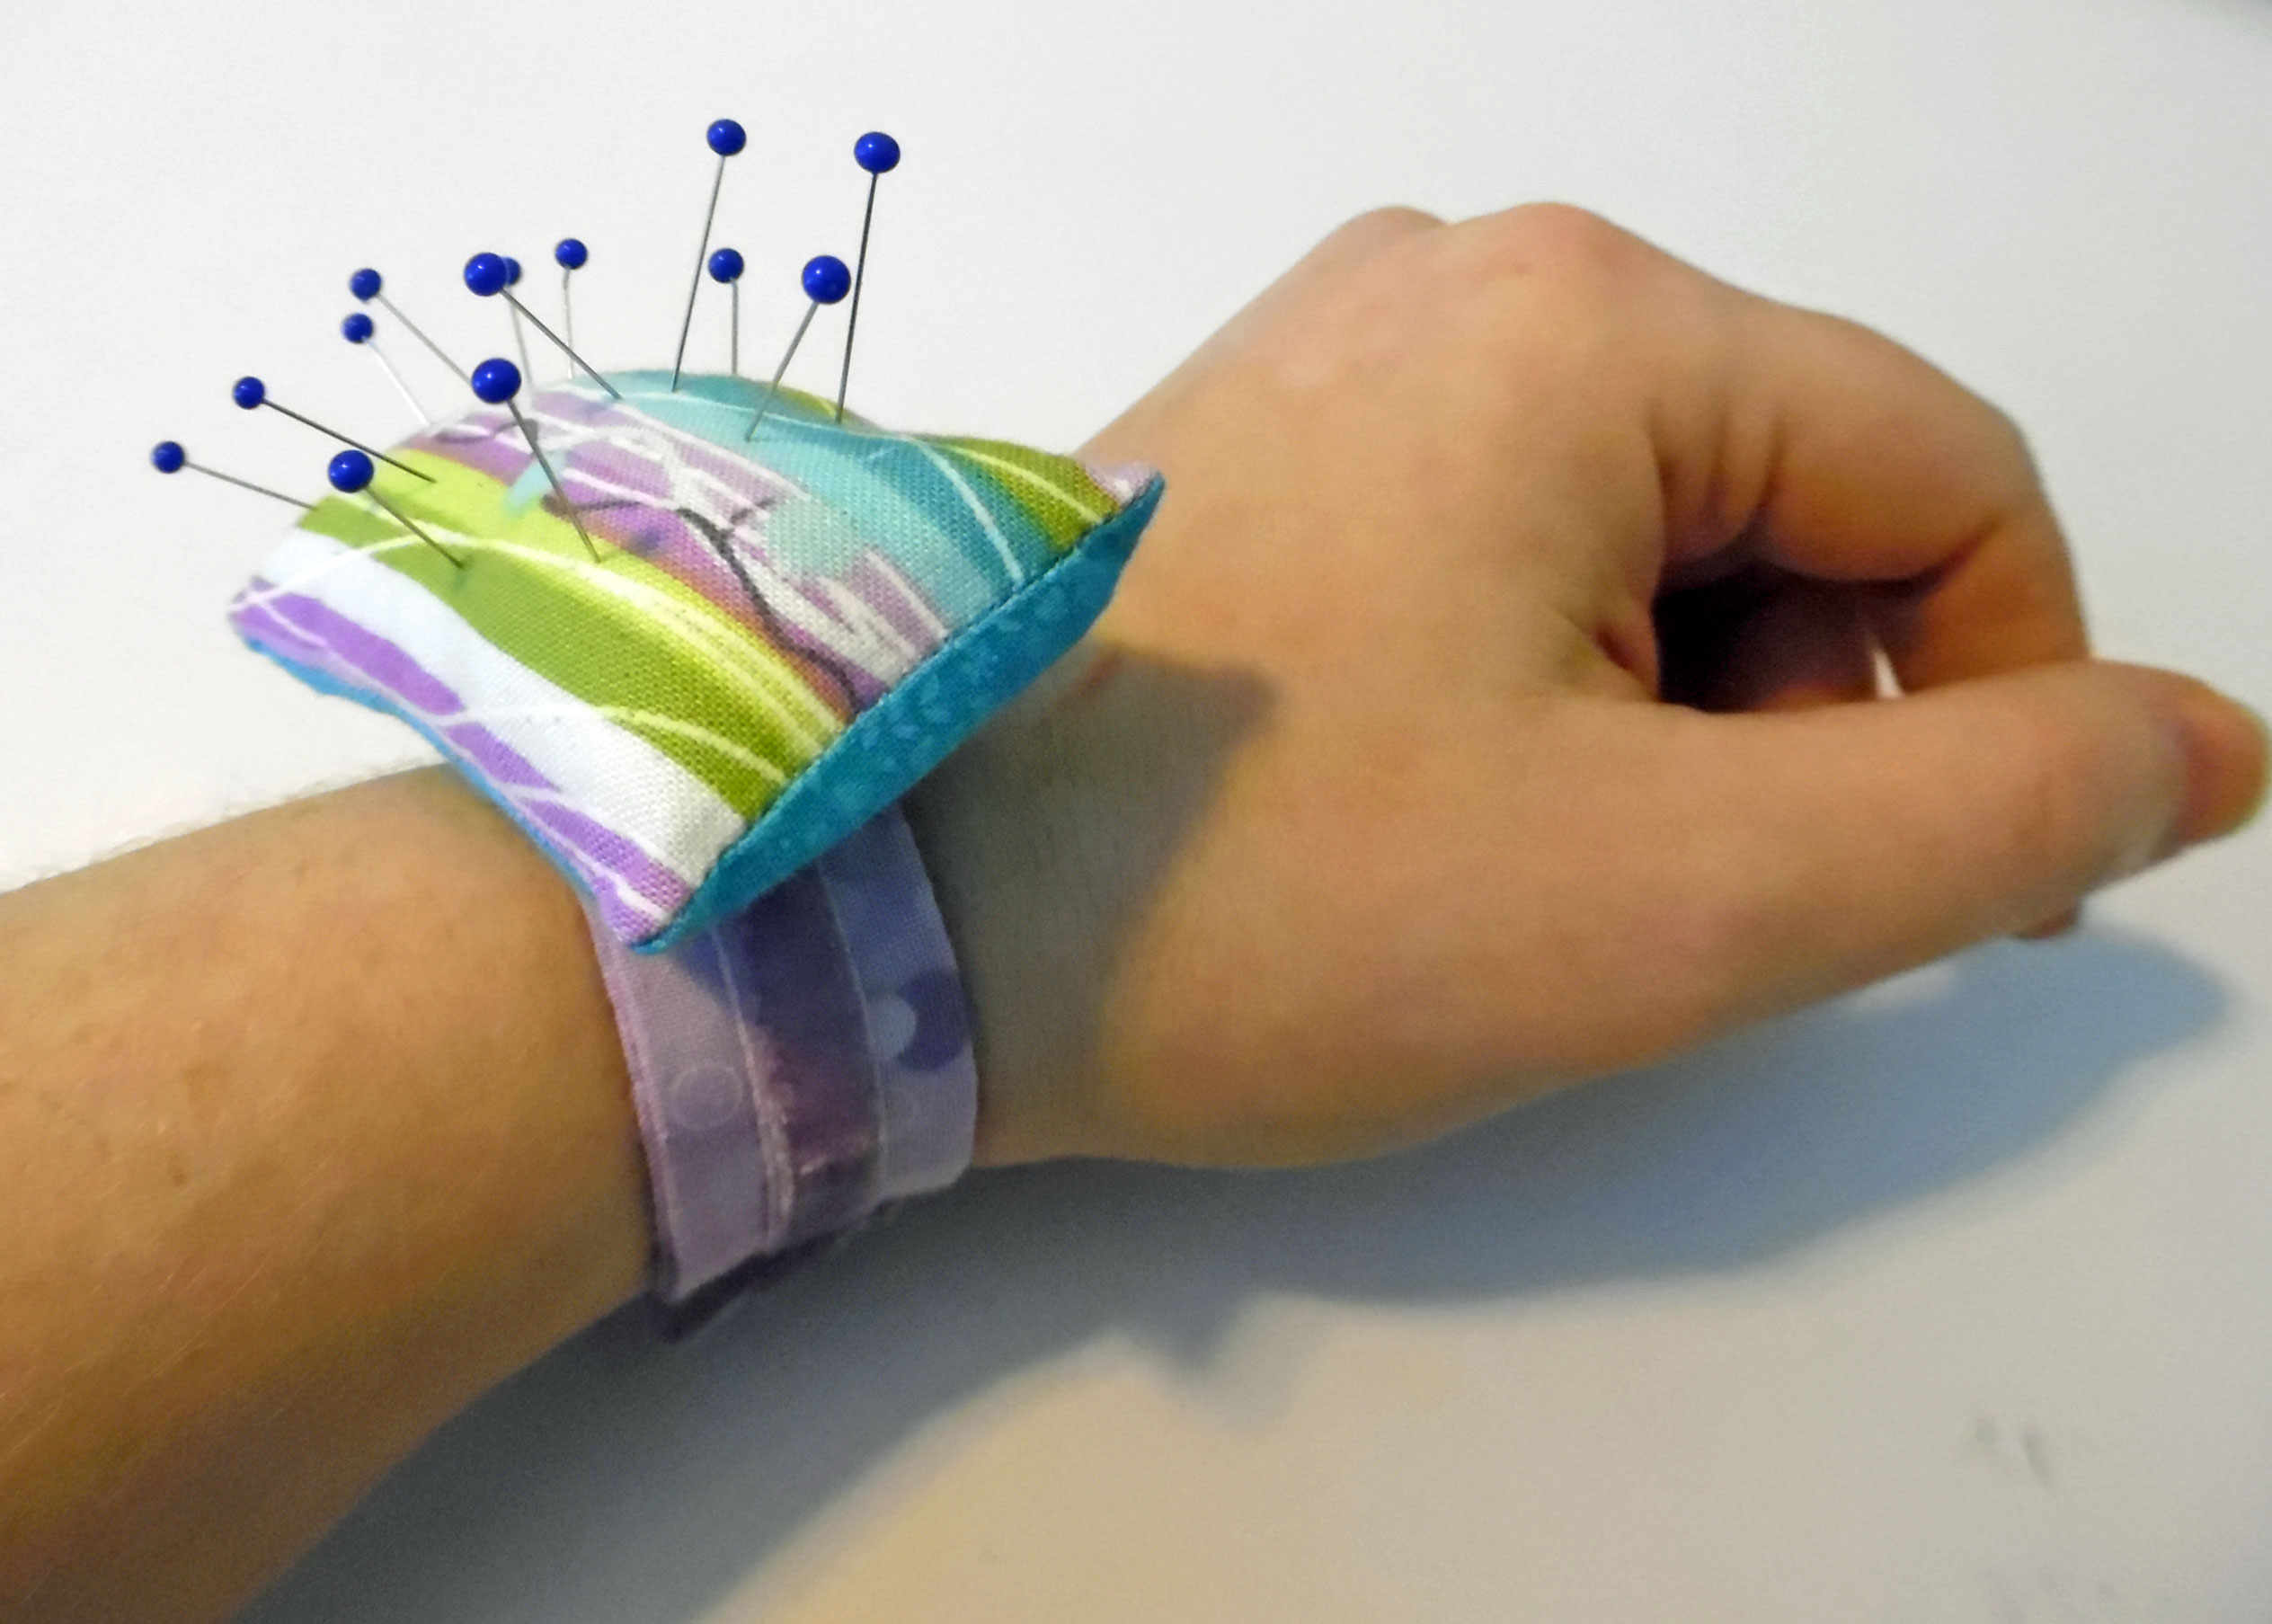
Use a Wrist Pincushion
Tip #10: Pin Disposal
When you remove the pins as you sew, what do you do with them? Many simply drop them on their sewing table, and then round them up once they’re done sewing. This isn’t the best idea, however, because it’s all too easy for pins to fall on the floor, where they’ll lie in wait for the next bare foot to come along.
Instead, keep a pincushion or pin box next to the sewing machine, so you can keep your pins corralled while you sew. Another option is to attach a pincushion to your sewing machine. Fasten it around the main body with an elastic or Velcro band, and it will always be close at hand when you need it.

Use a Pincushion
~~*~~
Looking for more sewing tips? Check the Sewing Basics menu for a list of beginner-friendly articles.
Pingback: How Do You Prepare The Sewing Machine For Sewing? – Erickkasysavane
Pingback: How Do You Slip Stitch Facing? – Fallsgardencafe