

Most patterns come in an envelope that has all the information you need to get started. But sometimes, the charts and diagrams can be hard to decipher! Let’s see what’s what.
Front
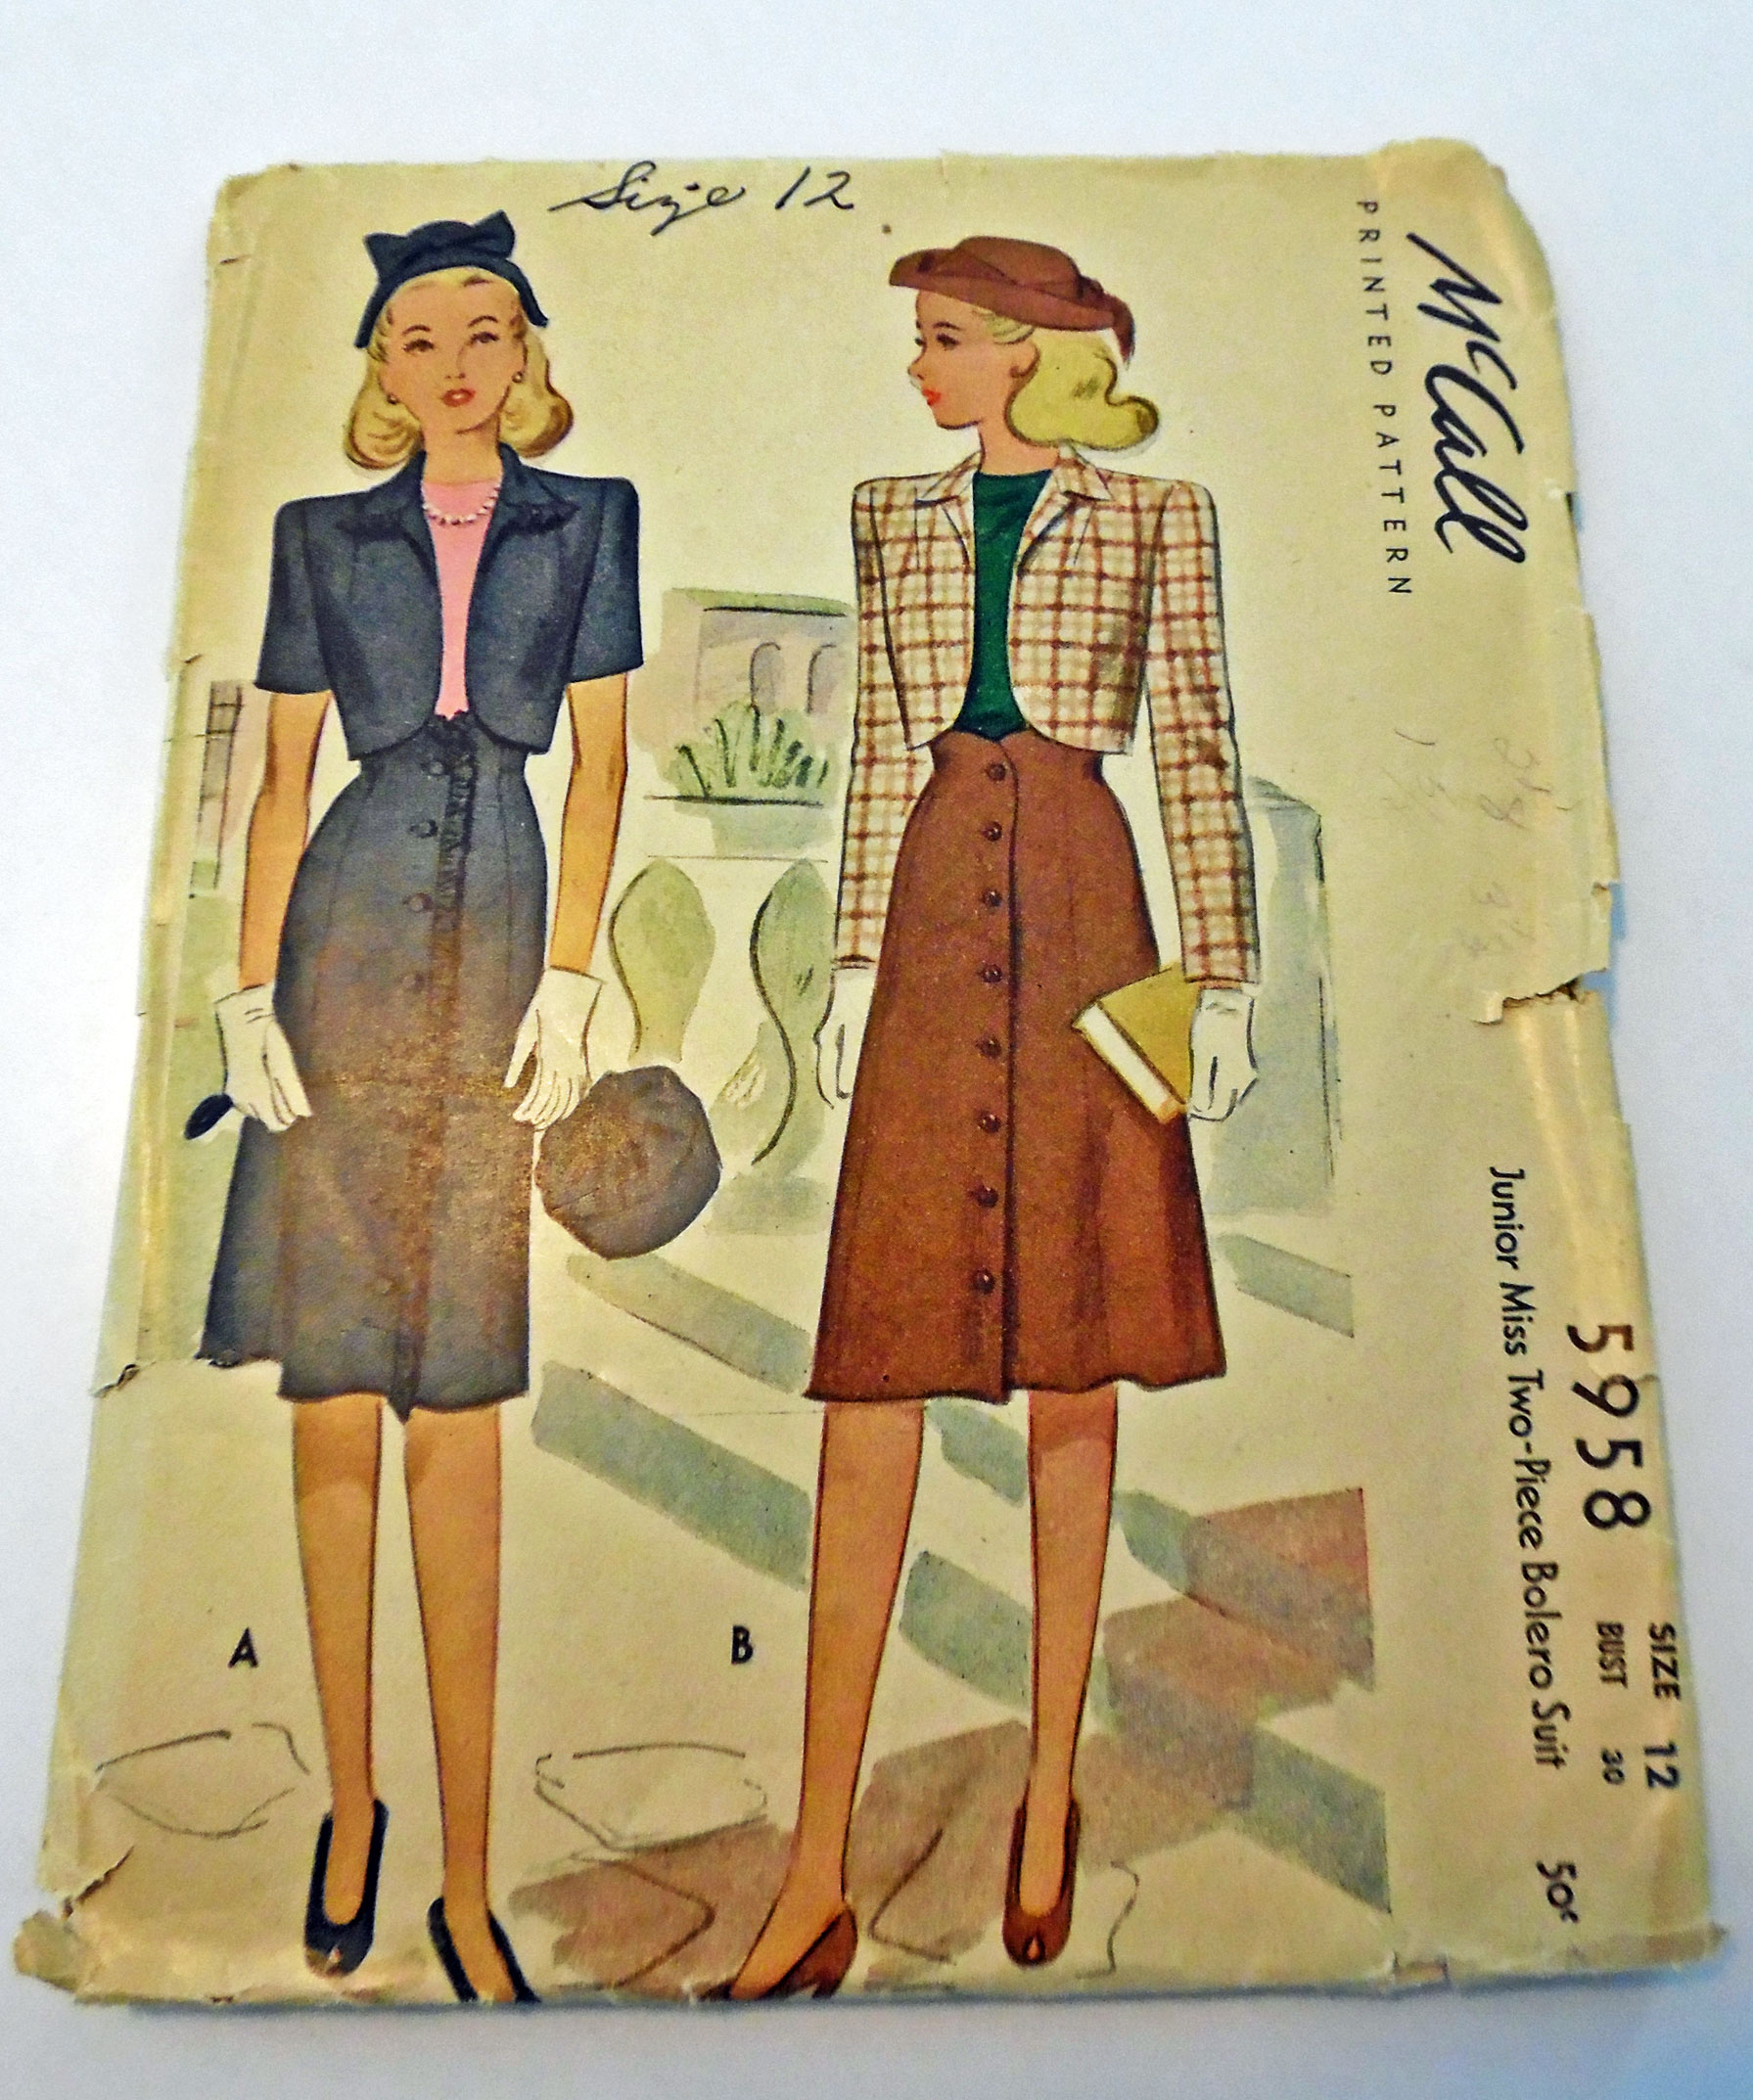
The front of the pattern is the attention-grabbing side. It’s designed to convince you to pick up the pattern.
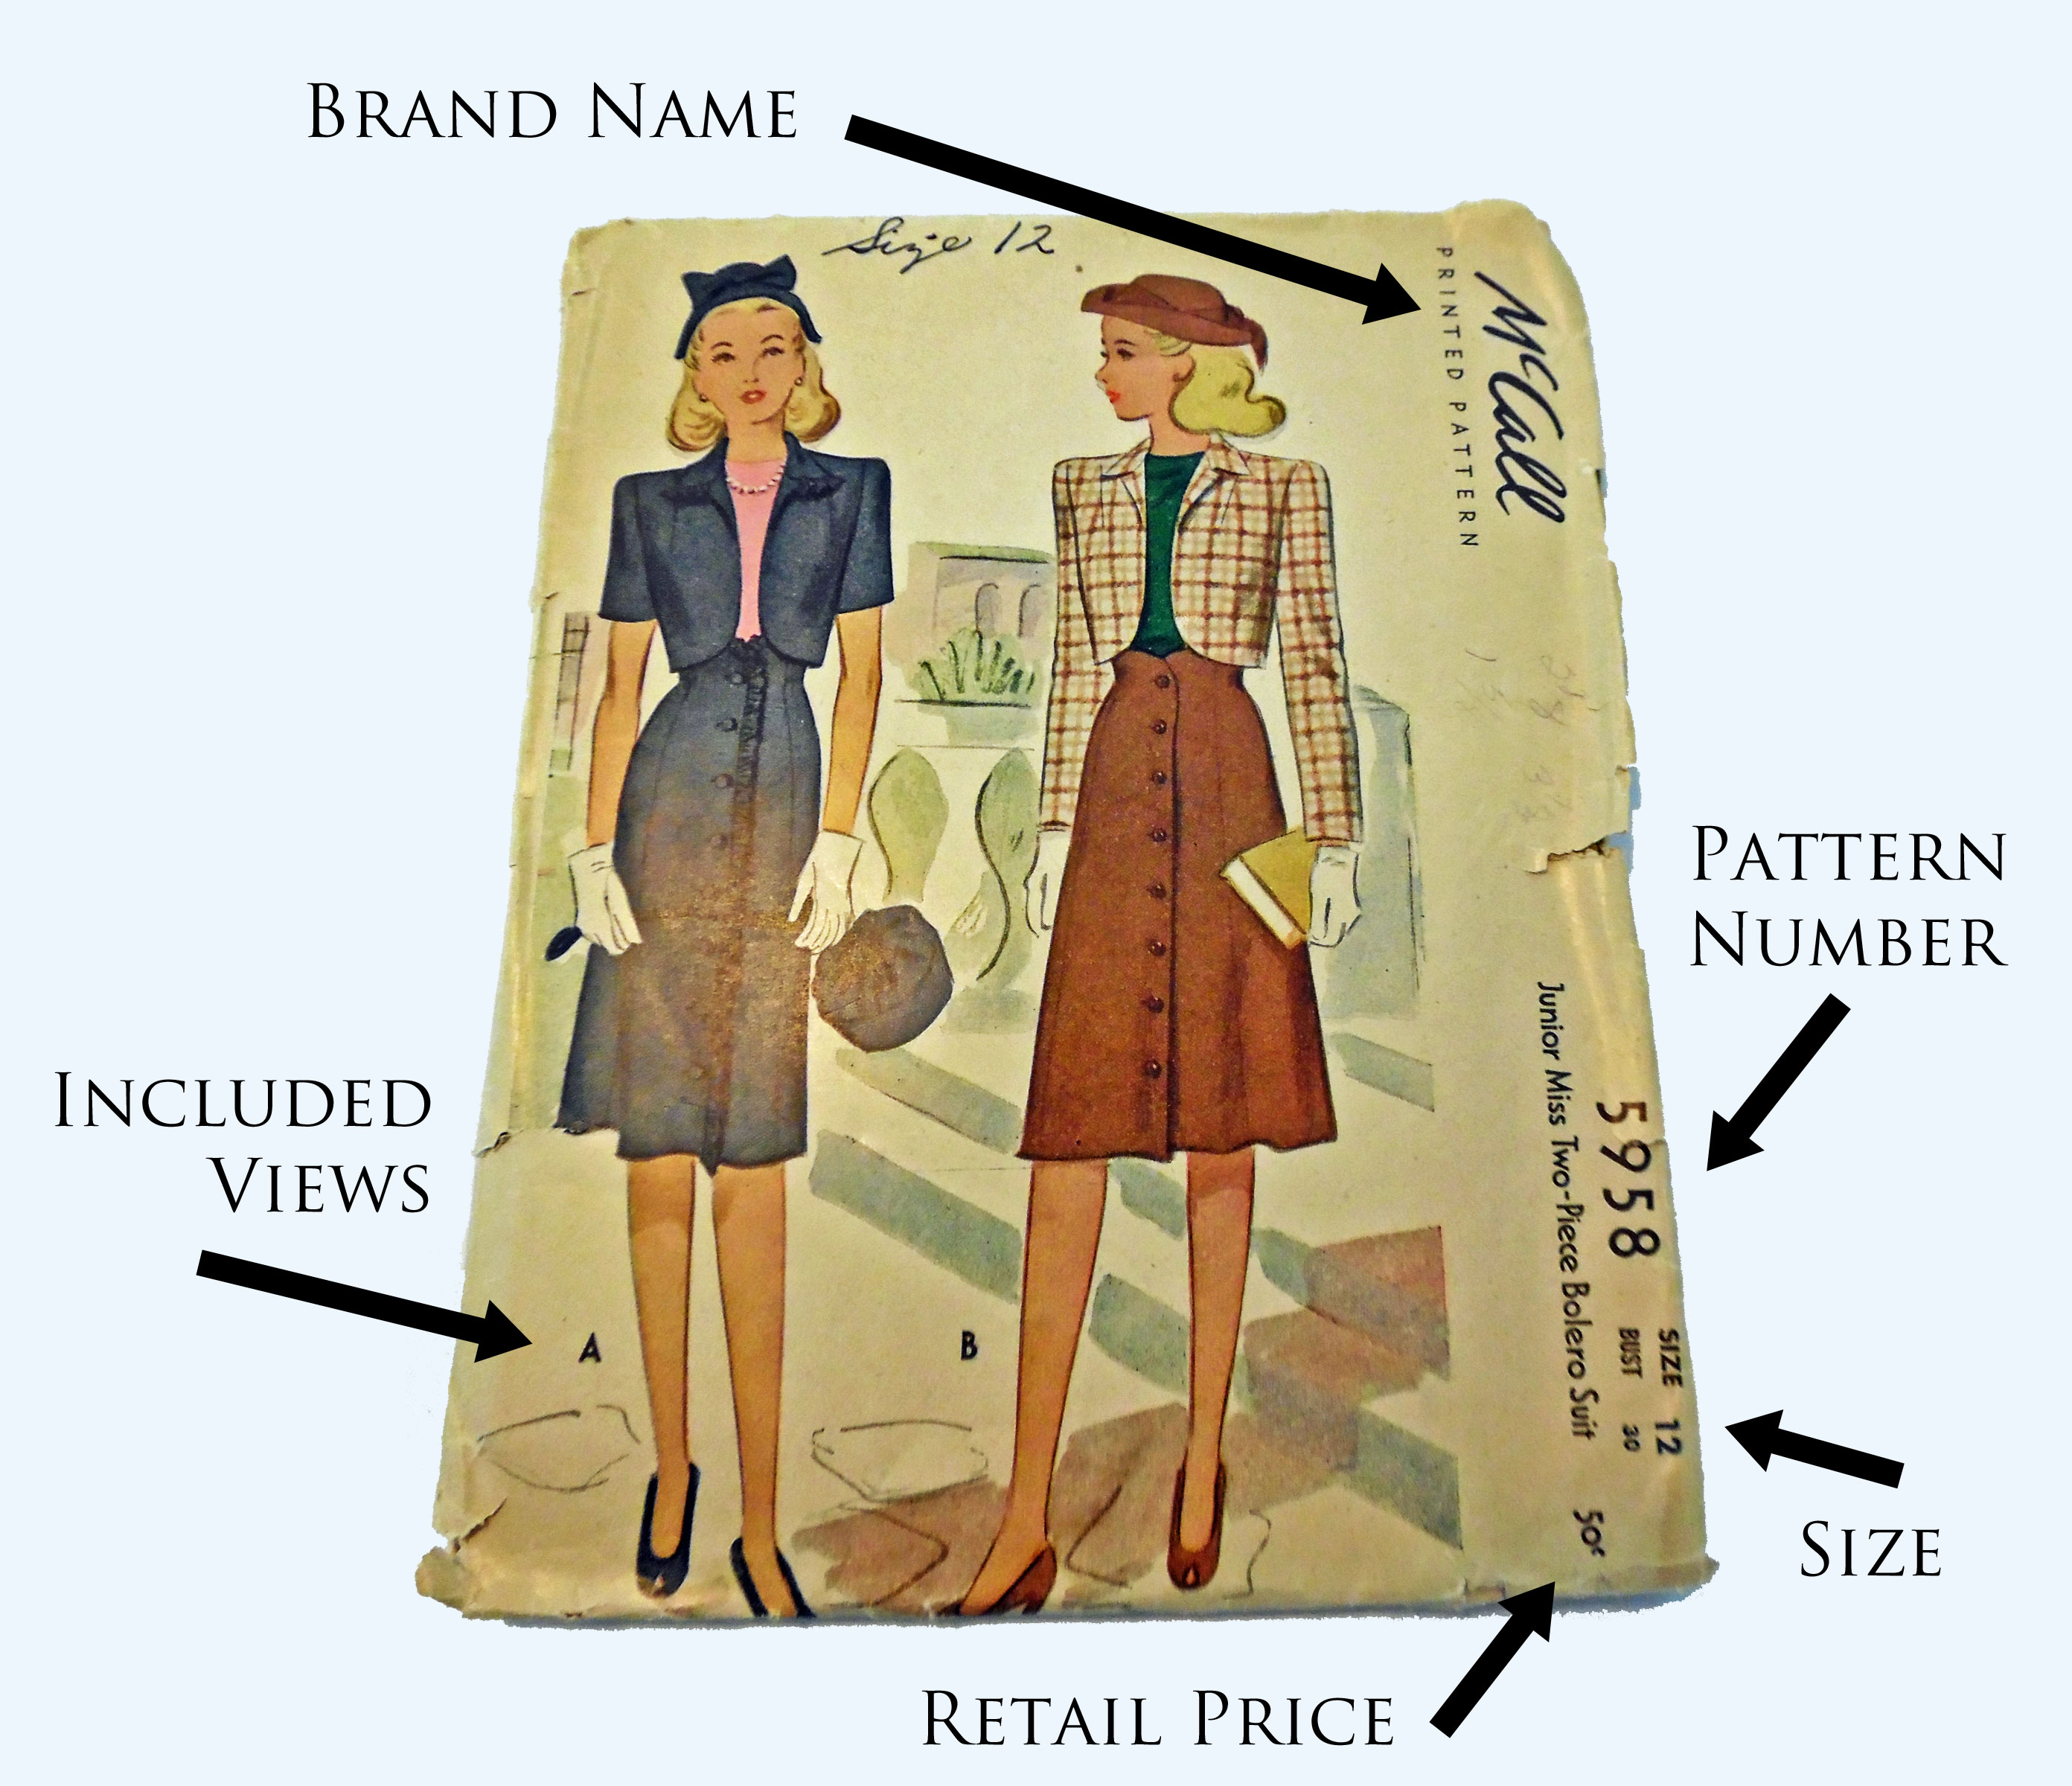
Pattern Envelope Front (McCall, 1945)
Here’s what you’ll find on the front of the pattern:
- Brand Name
This is the company that makes the pattern. There are six well-known commercial pattern brands, plus dozens of independent companies.
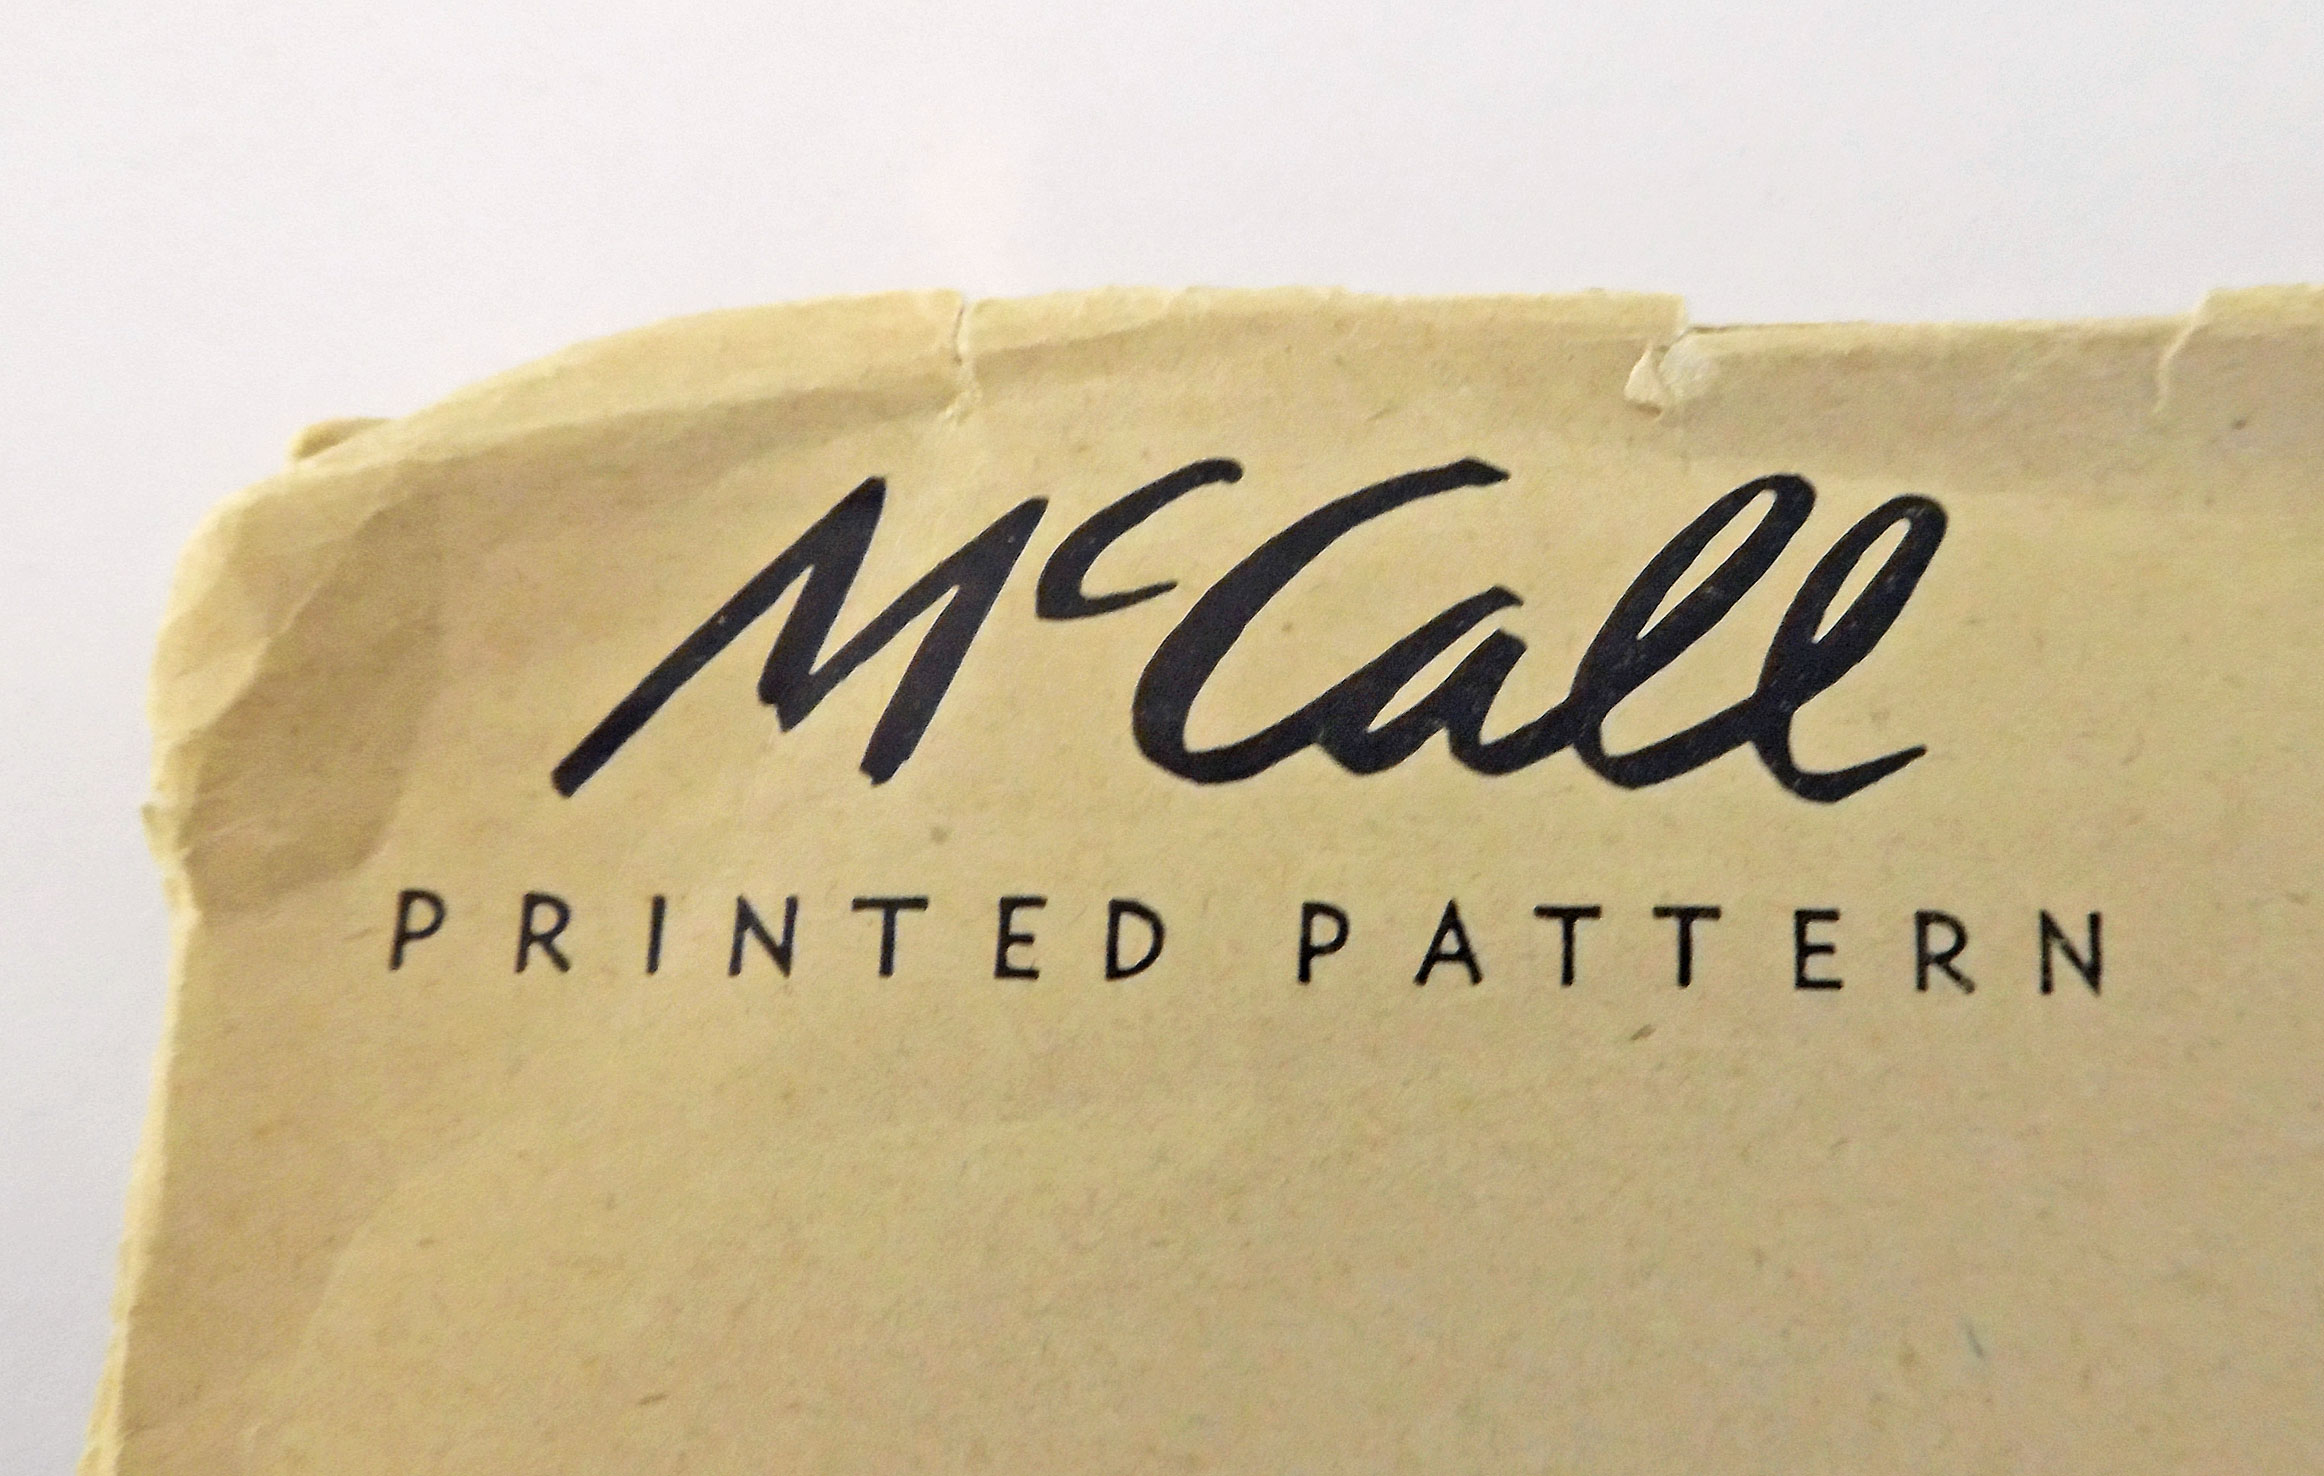
Brand Name: McCall (later changed to McCall’s)
- Pattern Number
This is a unique identifying number that’s printed not only on the envelope, but also on each pattern piece. That way, if your pieces get scattered, you won’t be completely lost.
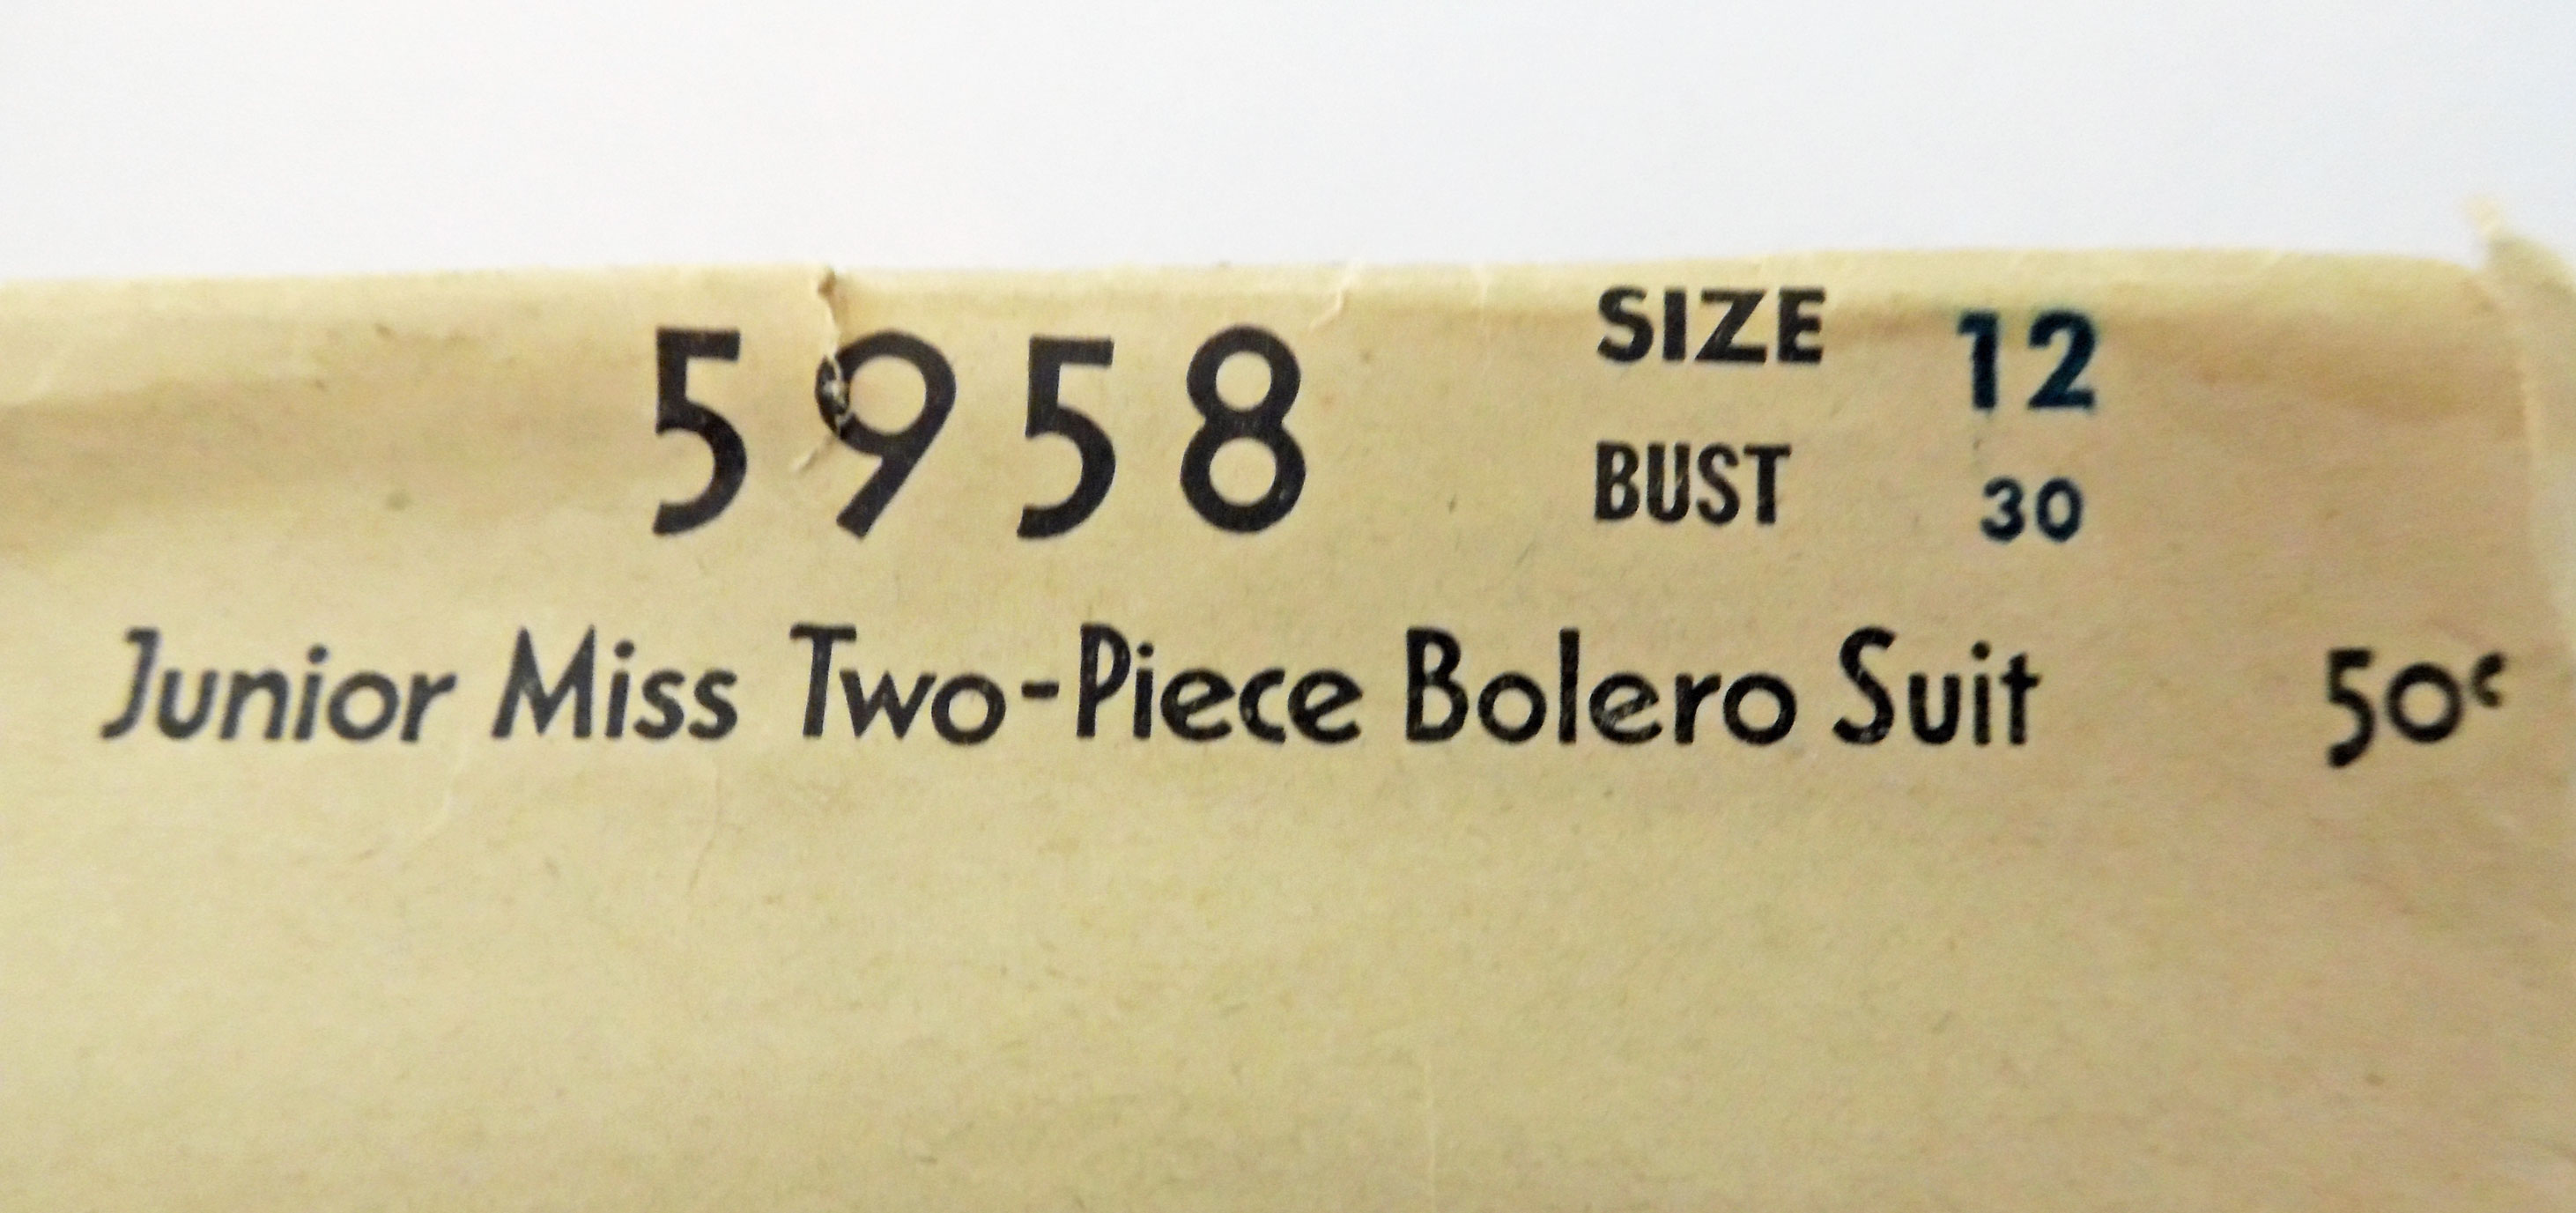
Pattern Number (McCall, 1945)
-
Note
Companies recycle their old pattern numbers. So, if you search for, say, McCall’s 2201, you’ll find a vintage rocket costume from the 1980s, but you’ll also find a slip dress from 1999. If you’re buying sight-unseen, it’s a good idea to verify that the pattern is the one you want, and not a different pattern with the same number.
- Size
Most modern patterns come in a range of sizes, all in the same envelope. Some are divided into different size groups. For example: Sizes 6-14 and Sizes 16-22. This means you have to pay attention and pick the right size option. And yes, it can get frustrating if your size is right on the edge! If you need a size 14 bust, but your hips are size 16, you’ll want to blend the two sizes, which means buying both size options.
Independent and vintage patterns often only include one or two sizes per pattern, rather than a wide range. This means you’ll have to check your measurements carefully, in order to buy the right size.
To make things more confusing, vintage patterns have more categories, such as Ladies, Misses, Petites, and Juniors. This can get confusing, because they aren’t always based on traditional sizing. Some are based on age. For example, a size 12 Junior Miss pattern might be meant for a twelve-year-old girl, not a modern size 12. Fortunately, they often print the bust measurement near the size, so you can tell at a glance what you’re dealing with.
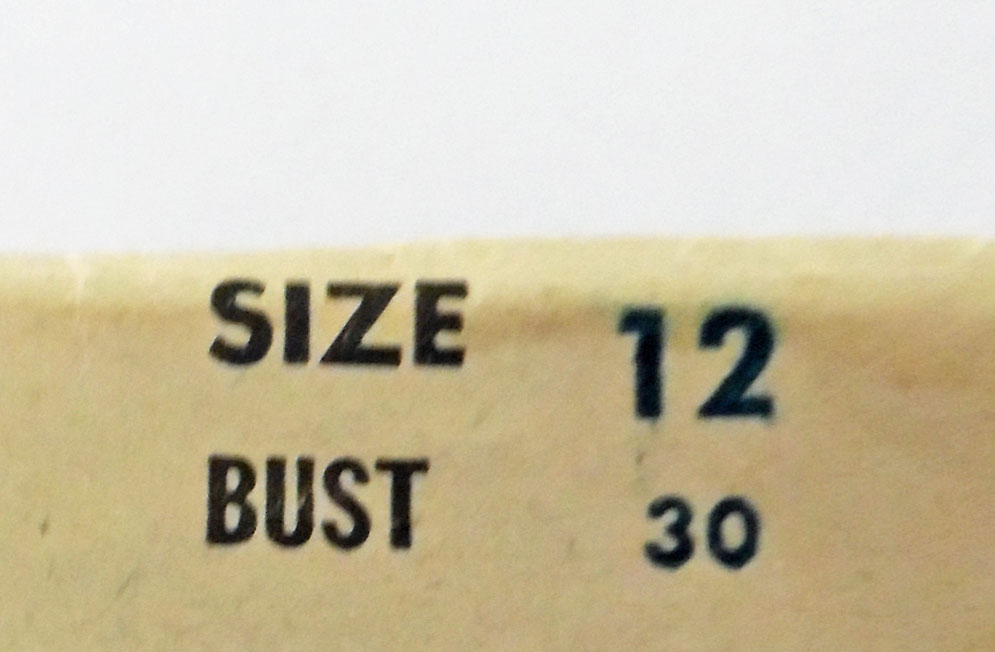
Pattern Sizing (McCall, 1945)
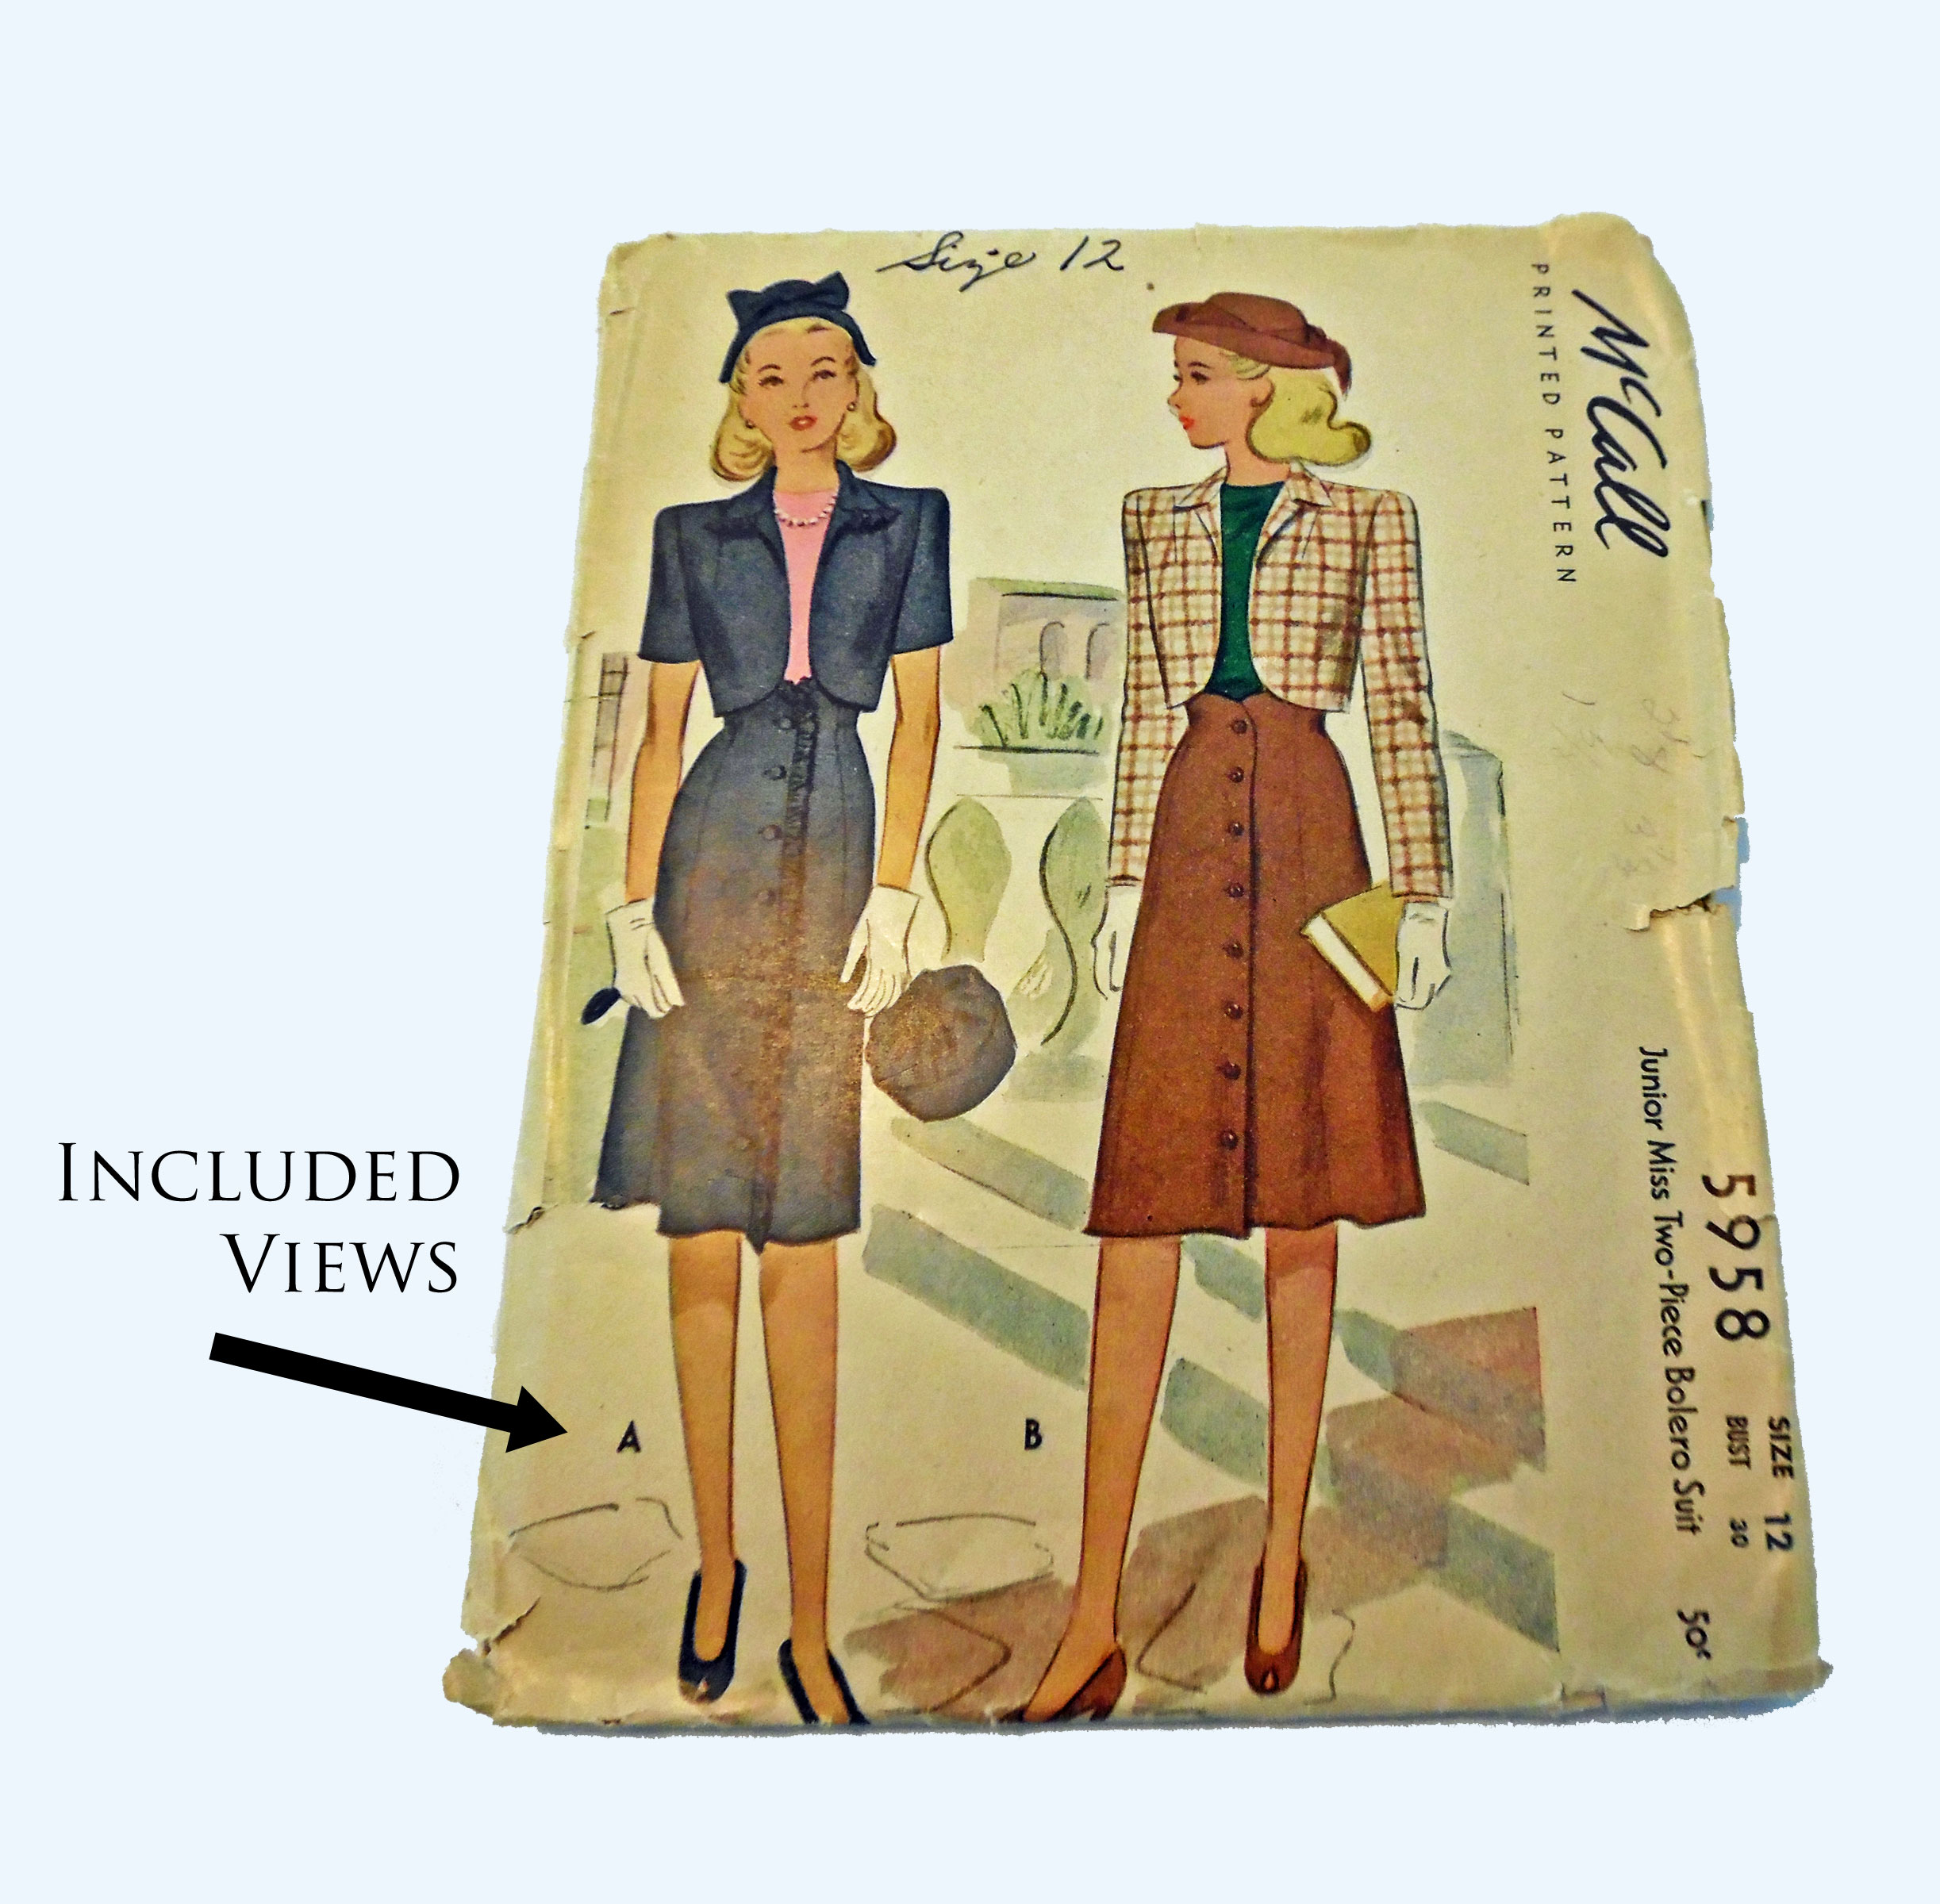
- Views
If the pattern comes with more than one garment, they’ll be individually labeled. For example, a pattern that offers a variety of skirts might dub the pencil skirt View A, the circle skirt View B, and the pleated skirt View C.
Often, patterns are designed so you can mix-and-match features from different views. If View A is a dress with long sleeves, while View B has short sleeves, you can probably take the short sleeves and pair them with the other dress, or vice versa.
In the pattern shown below, there are three different views of a WWII-era suit. The skirts are identical, but the bolero jackets come with three different sleeve lengths: short, elbow-length, and long. The sketch on the front cover only illustrates two of these options, but the third can be seen in the flat sketch, on the back.
Pattern Views (McCall, 1945)
Back
The back of the pattern is where they put all the technical details, such as what you need to make this particular pattern.
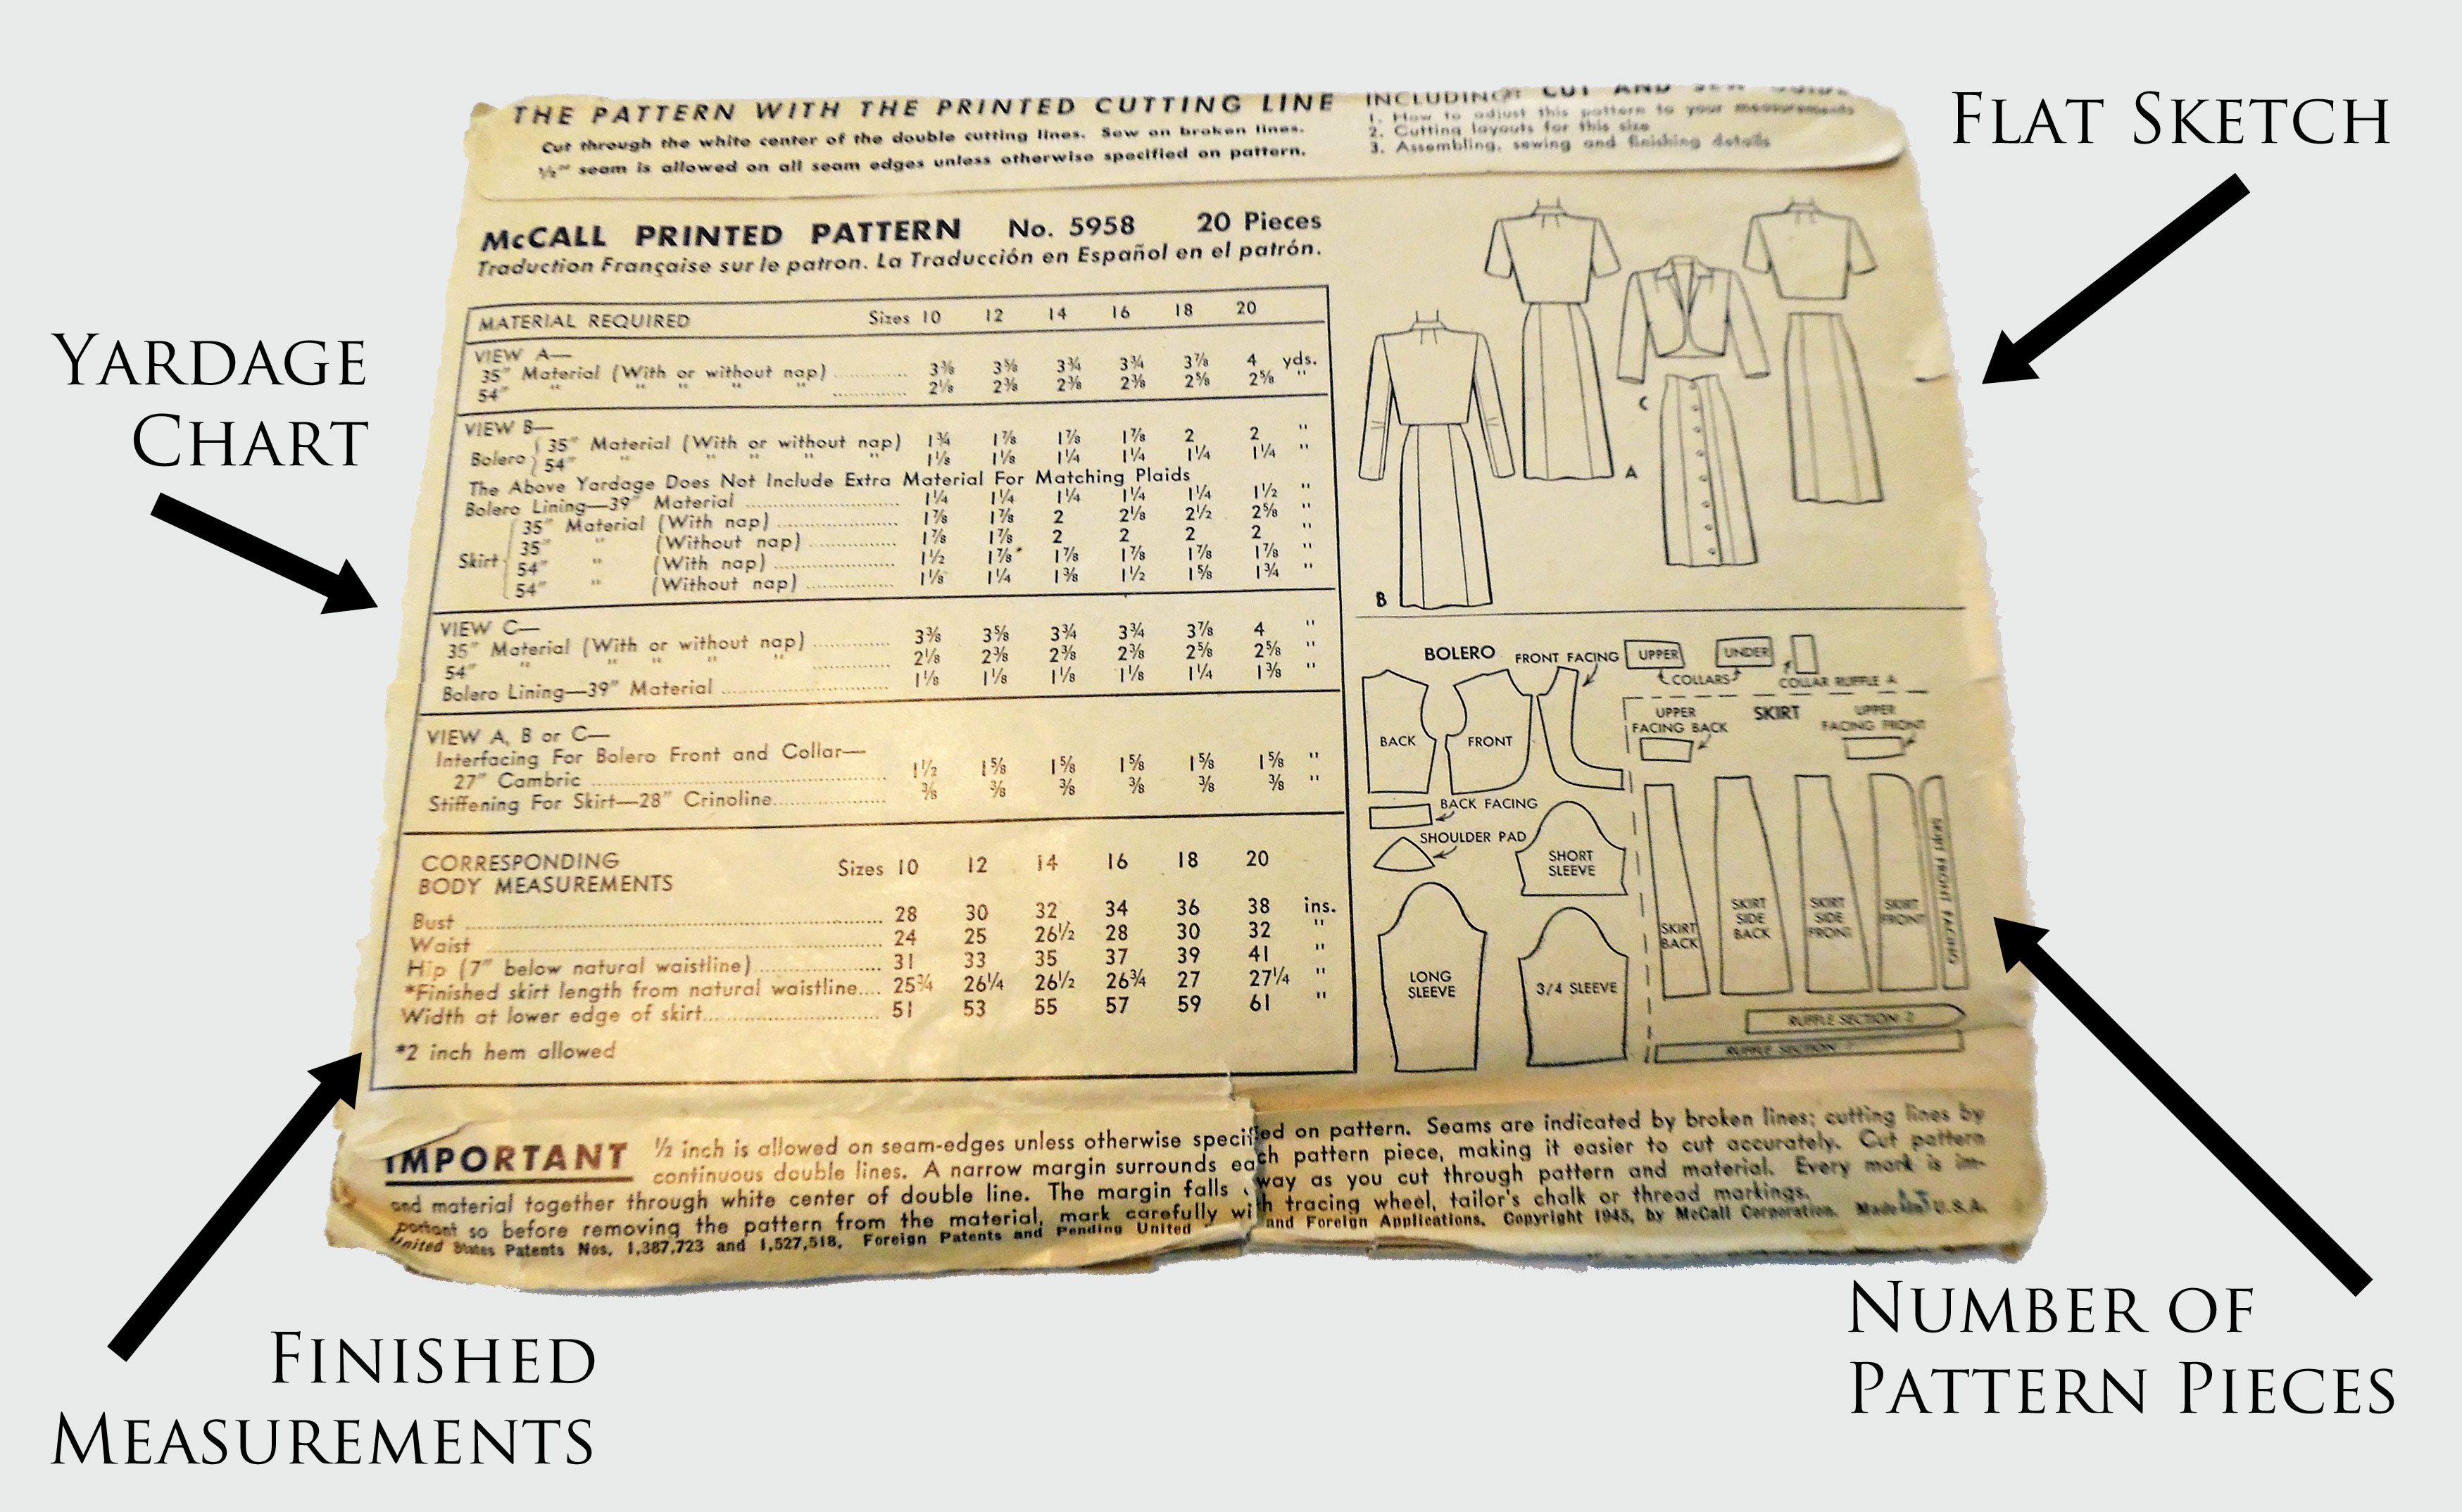
Pattern Back (McCall, 1945)
The exact layout varies between pattern lines. Older patterns can be quite different, too. The vintage pattern I used as an example doesn’t have all the same features that a modern pattern has.
Here’s what you’ll usually find:
- Flat Illustration
A fashion sketch (or photograph) is designed to be appealing. It sells the pattern and therefore goes on the front of the envelope, where it can catch your eye. If it’s an artistic rendering, it may not be entirely accurate. The flat, on the other hand, is a precise technical illustration that shows exactly what the pattern will look like. It includes specific details that might be obscured in the fashion sketch, such as seam lines and silhouette. It’s usually found on the back.
In this vintage pattern from 1945, the fashion sketch shows a suit with an A-line skirt and a broad-shouldered cropped jacket. Judging by the flat, however, the skirt is narrower than it appears in the sketch. Also, there are details you can’t see in the sketch, such as shoulder and neck darts on the jacket, as well as the skirt’s shaped seaming and slanted waistline.
Fashion Sketch (McCall, 1945)
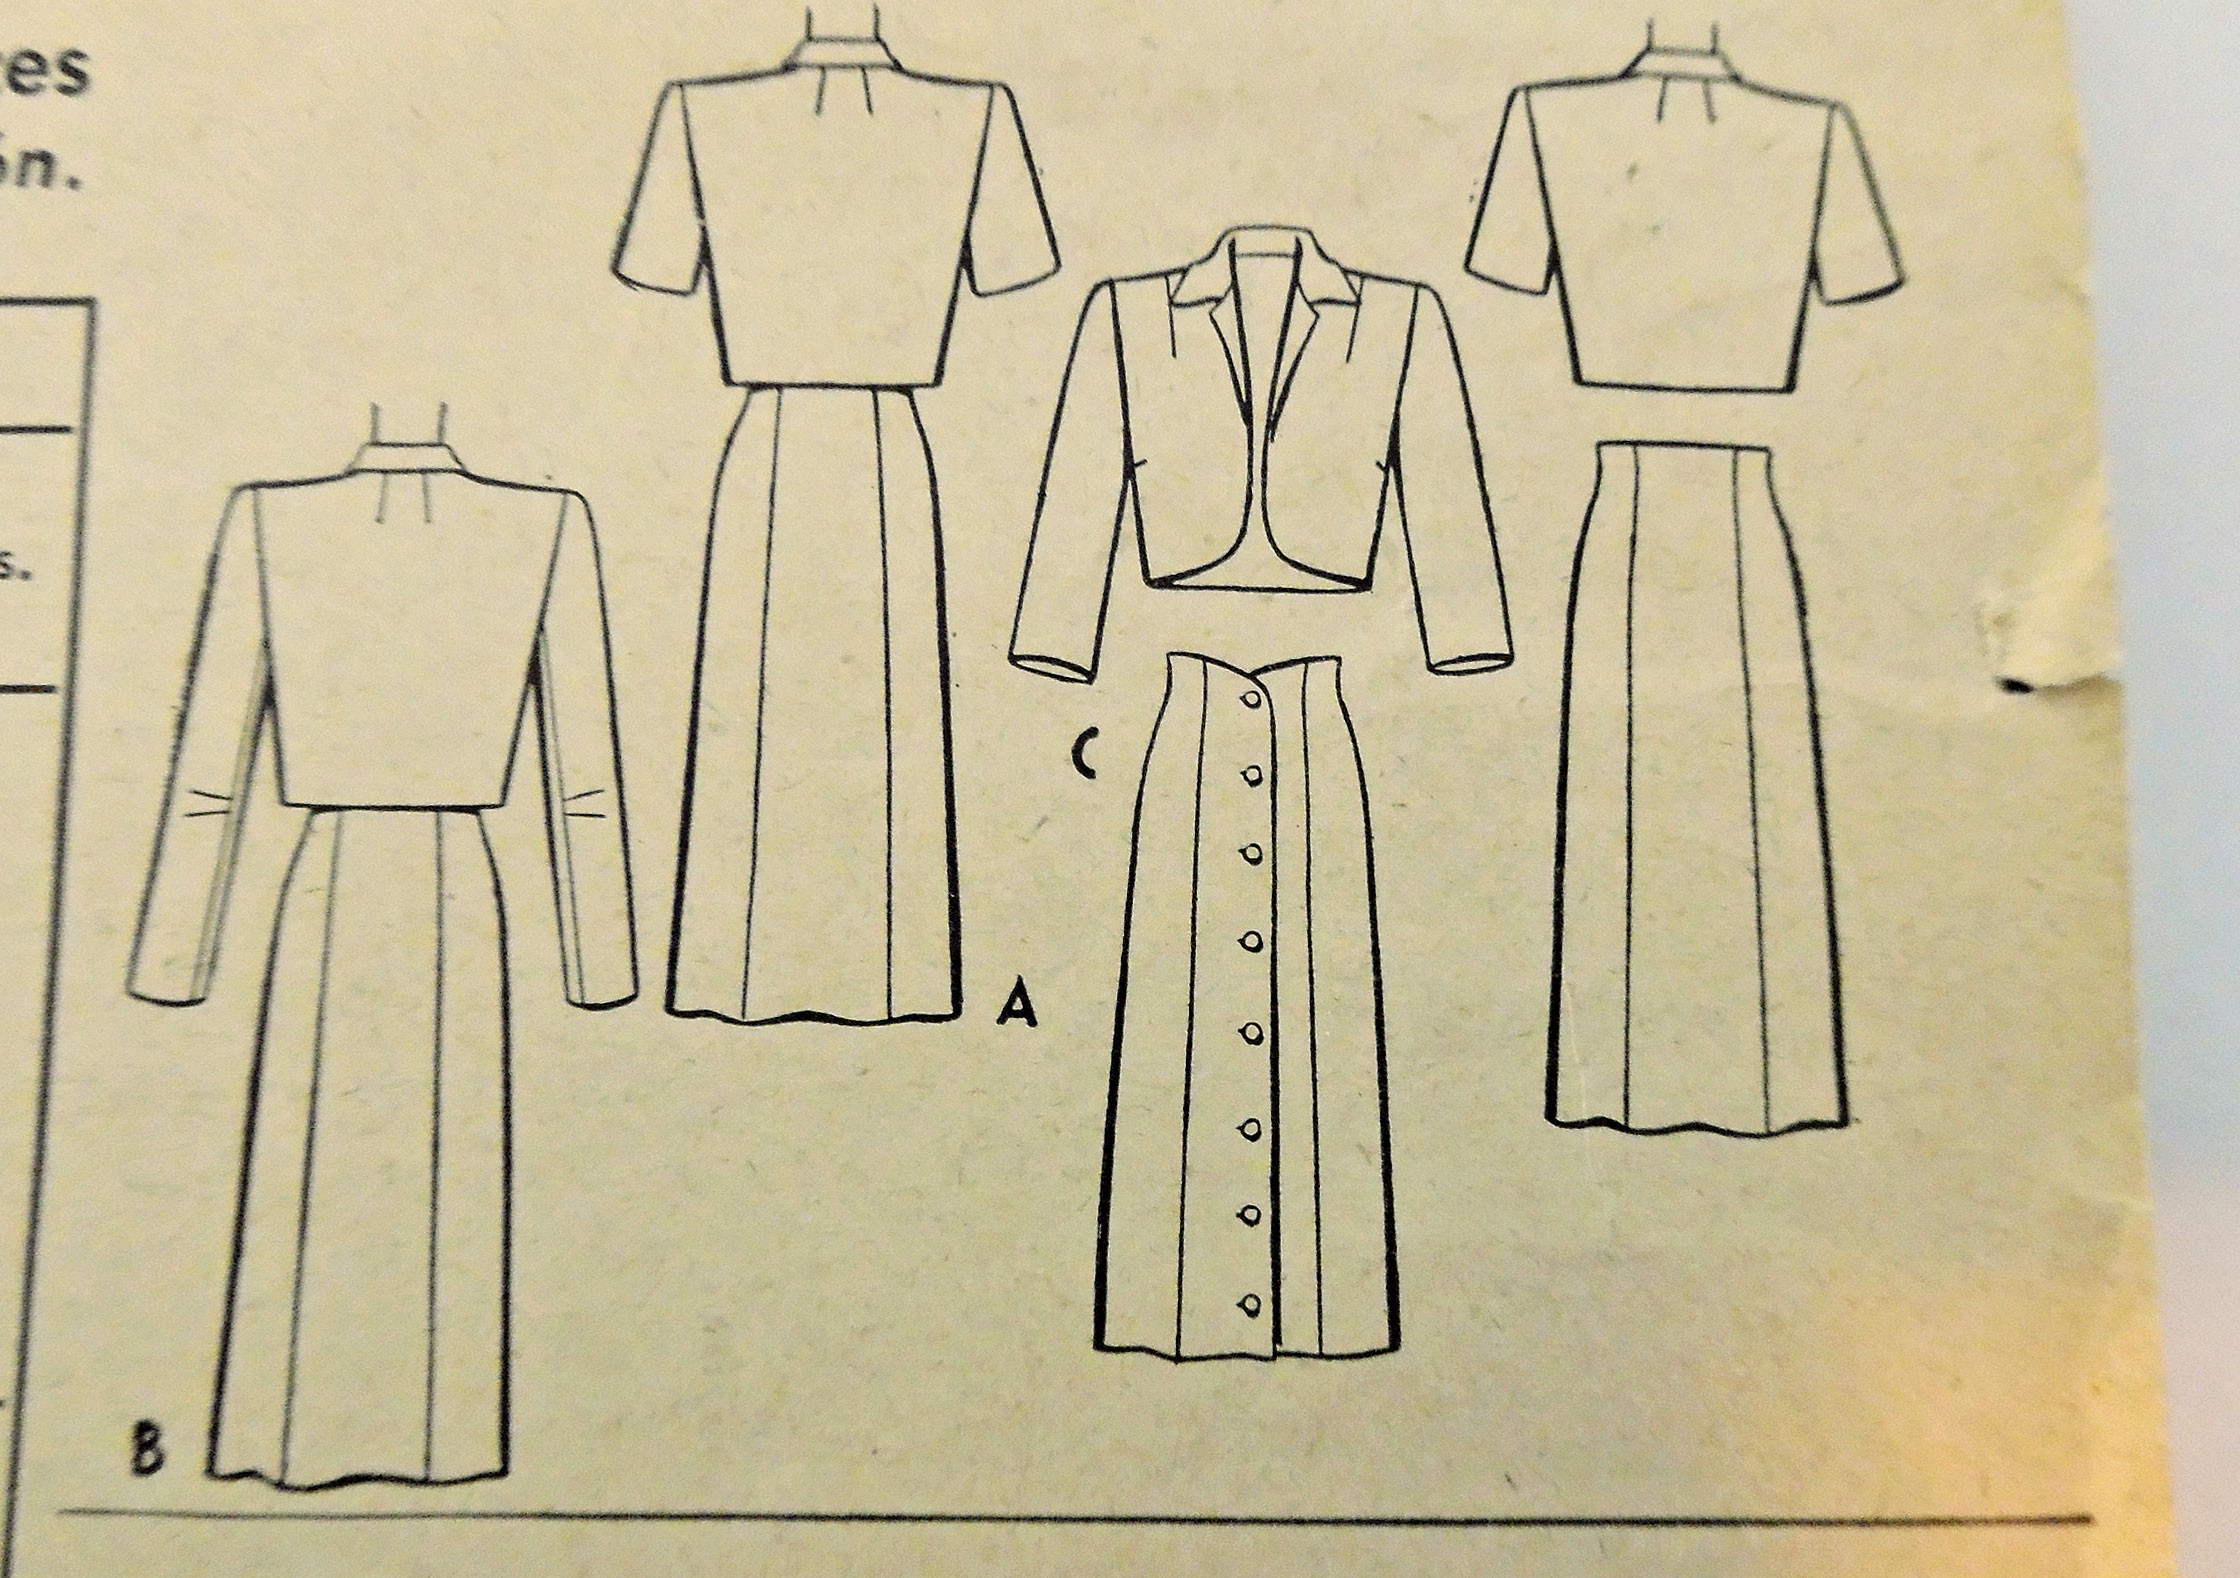
Flat (McCall, 1945)
- Number of Pattern Pieces
Often, a pattern will tell you how many pieces there are. This gives you an idea of how easy or complex the pattern will be to sew. Also, you can double-check the number of pattern pieces in the envelope against the number given, just to make sure everything is there.
Some vintage patterns display a diagram of the pattern pieces, so you can see at a glance what you’re in for. Modern patterns tend to place the diagram inside, with the pattern directions.
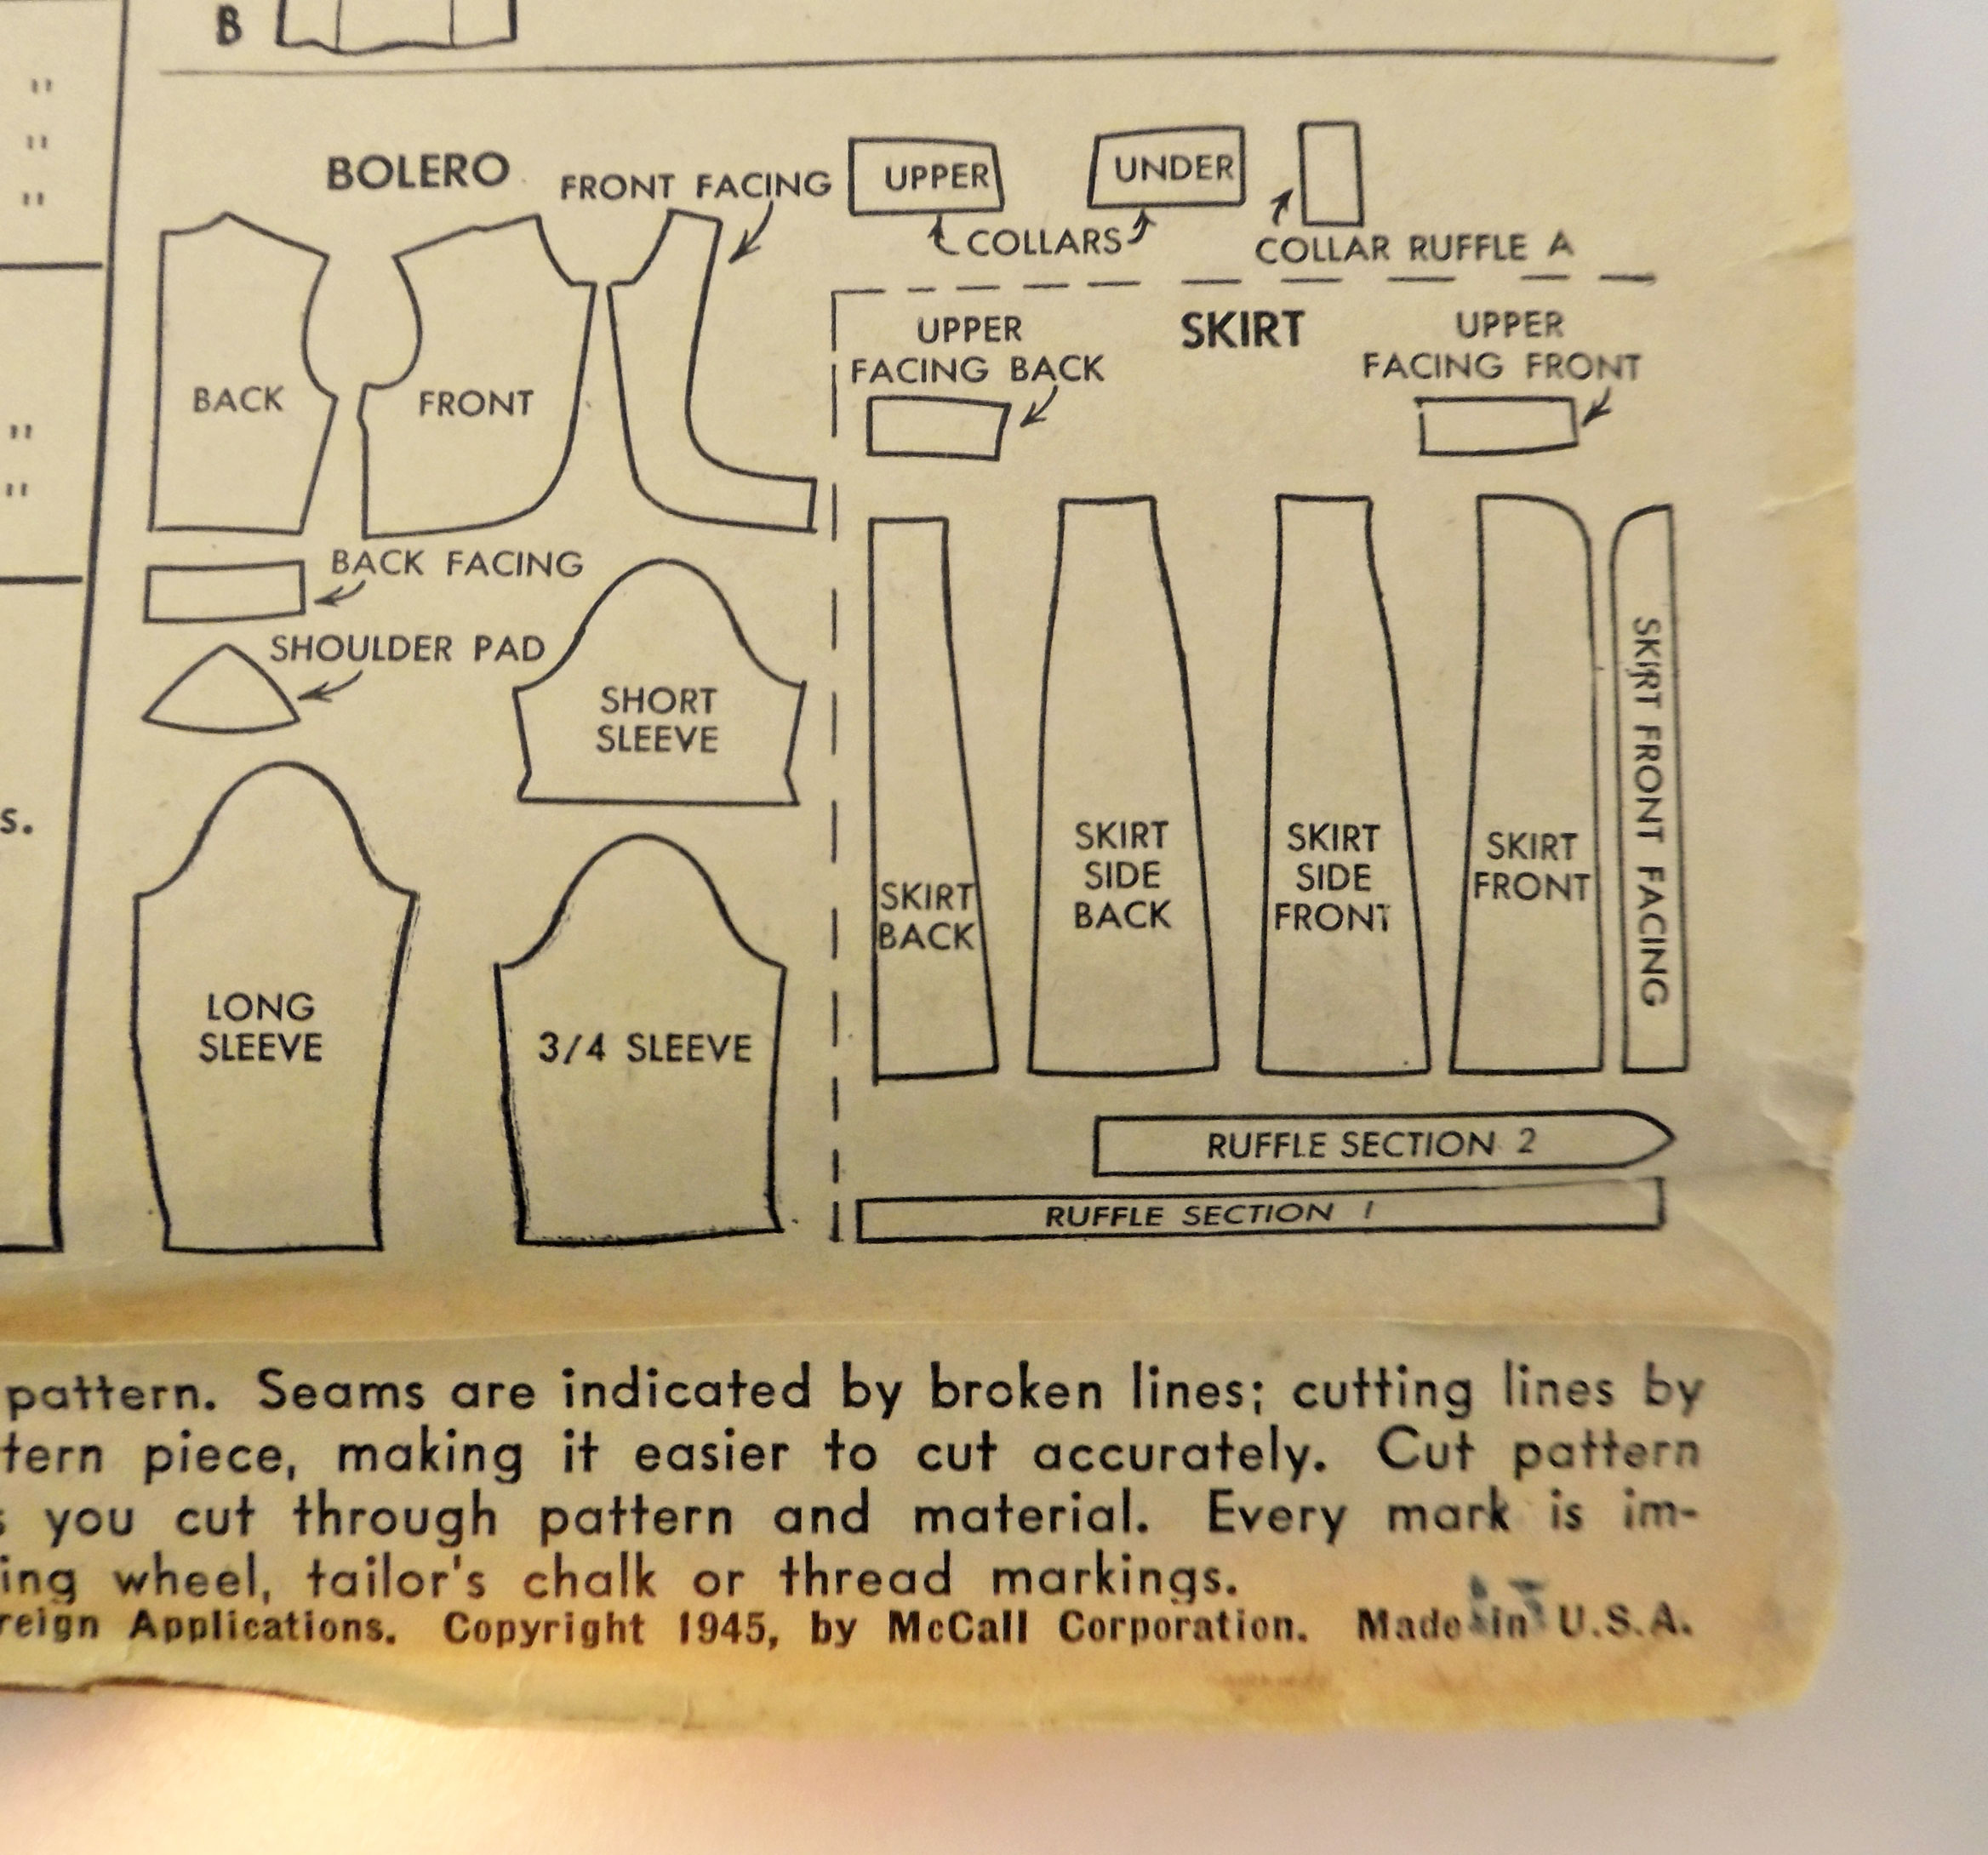
Pattern Pieces (McCall, 1945)
- Size Chart
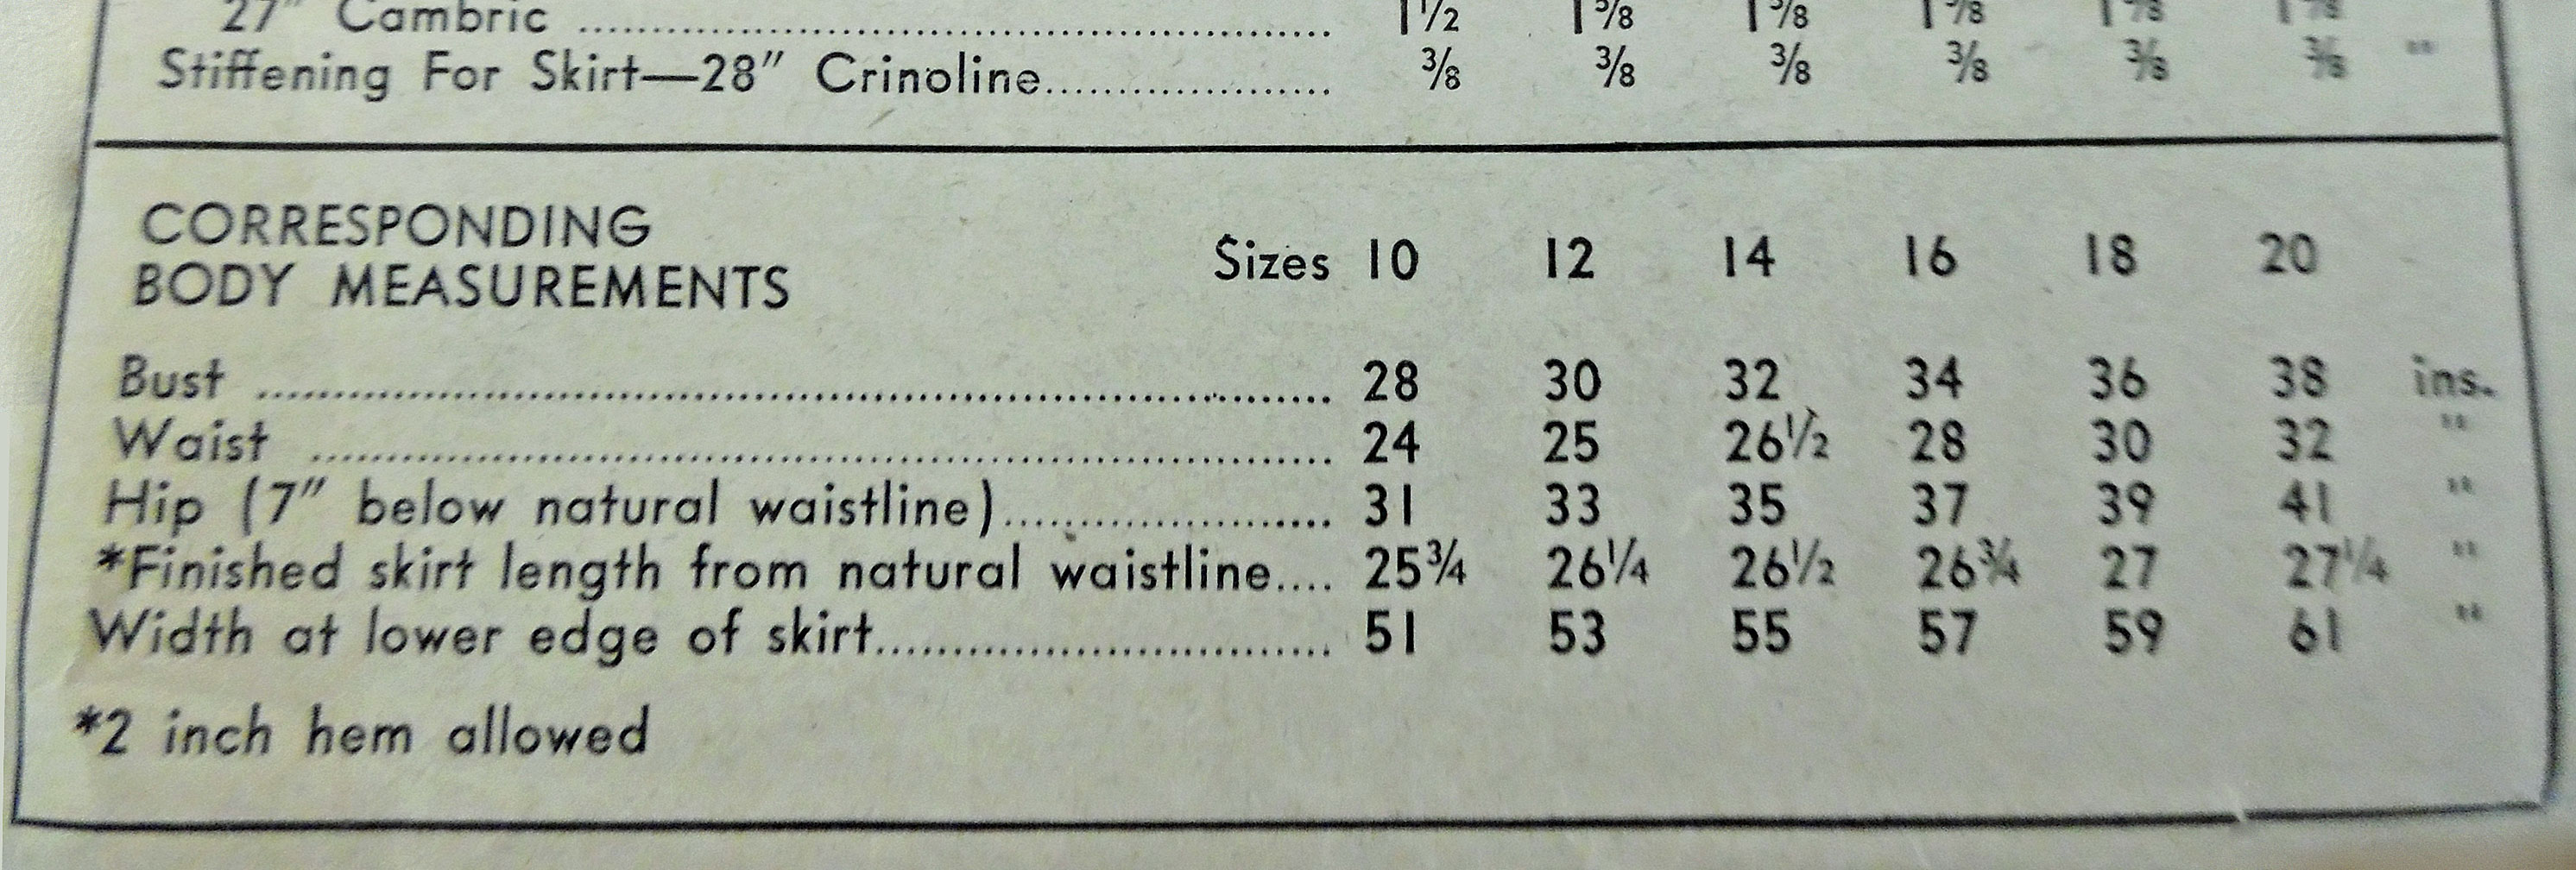
The size chart helps you decide which size to cut out. It may be on the envelope’s flap, or somewhere on the back. Typically, it has a row of measurements (bust, waist, hip, length, etc.) along with a row of the corresponding pattern sizes.
Pattern sizing is not the same as off-the-rack clothing sizing. This is important to understand! Normally, I wear a size 6 in ready-to-wear garments, but in patterns, I need a size 14. Quite a difference! Pay close attention to the measurements, not the sizes, and you’ll be okay.
Size Chart (McCall, 1945)
For blouses and jackets, use your bust measurement to choose the pattern size. For pants and skirts, use your hip measurement.
Find the right measurement on the chart and follow it down to see which size you should use. It’s common for different parts of your body to be different sizes. Simply cut the largest size and alter the rest of the garment to fit. Use caution, though! If your sizes are radically different, altering the pattern can change the proportions and lines, throwing the professionally designed garment out of whack.
-
Tip
If a pattern calls for your bust measurement, it’s better to use your above-the-bust measurement, especially if you are larger than a B-cup. If you measure at the widest part of your bust and cut that pattern size, the pattern will fit across your bust, but will probably end up being too large in the upper chest and shoulders. These areas are difficult to alter. Instead, use your above-the-bust measurement and cut the pattern in a smaller size. If necessary, you can do a full bust adjustment (FBA) to enlarge the bust to fit.
- Finished Measurements
This is a chart listing the exact size of the finished garment. It allows you to compare the measurements with a garment you already own, so you can tell whether the pattern has enough ease (or “wiggle room”) for your comfort. It’s also useful for determining whether you need to lengthen or shorten the pattern.
- Yardage Chart
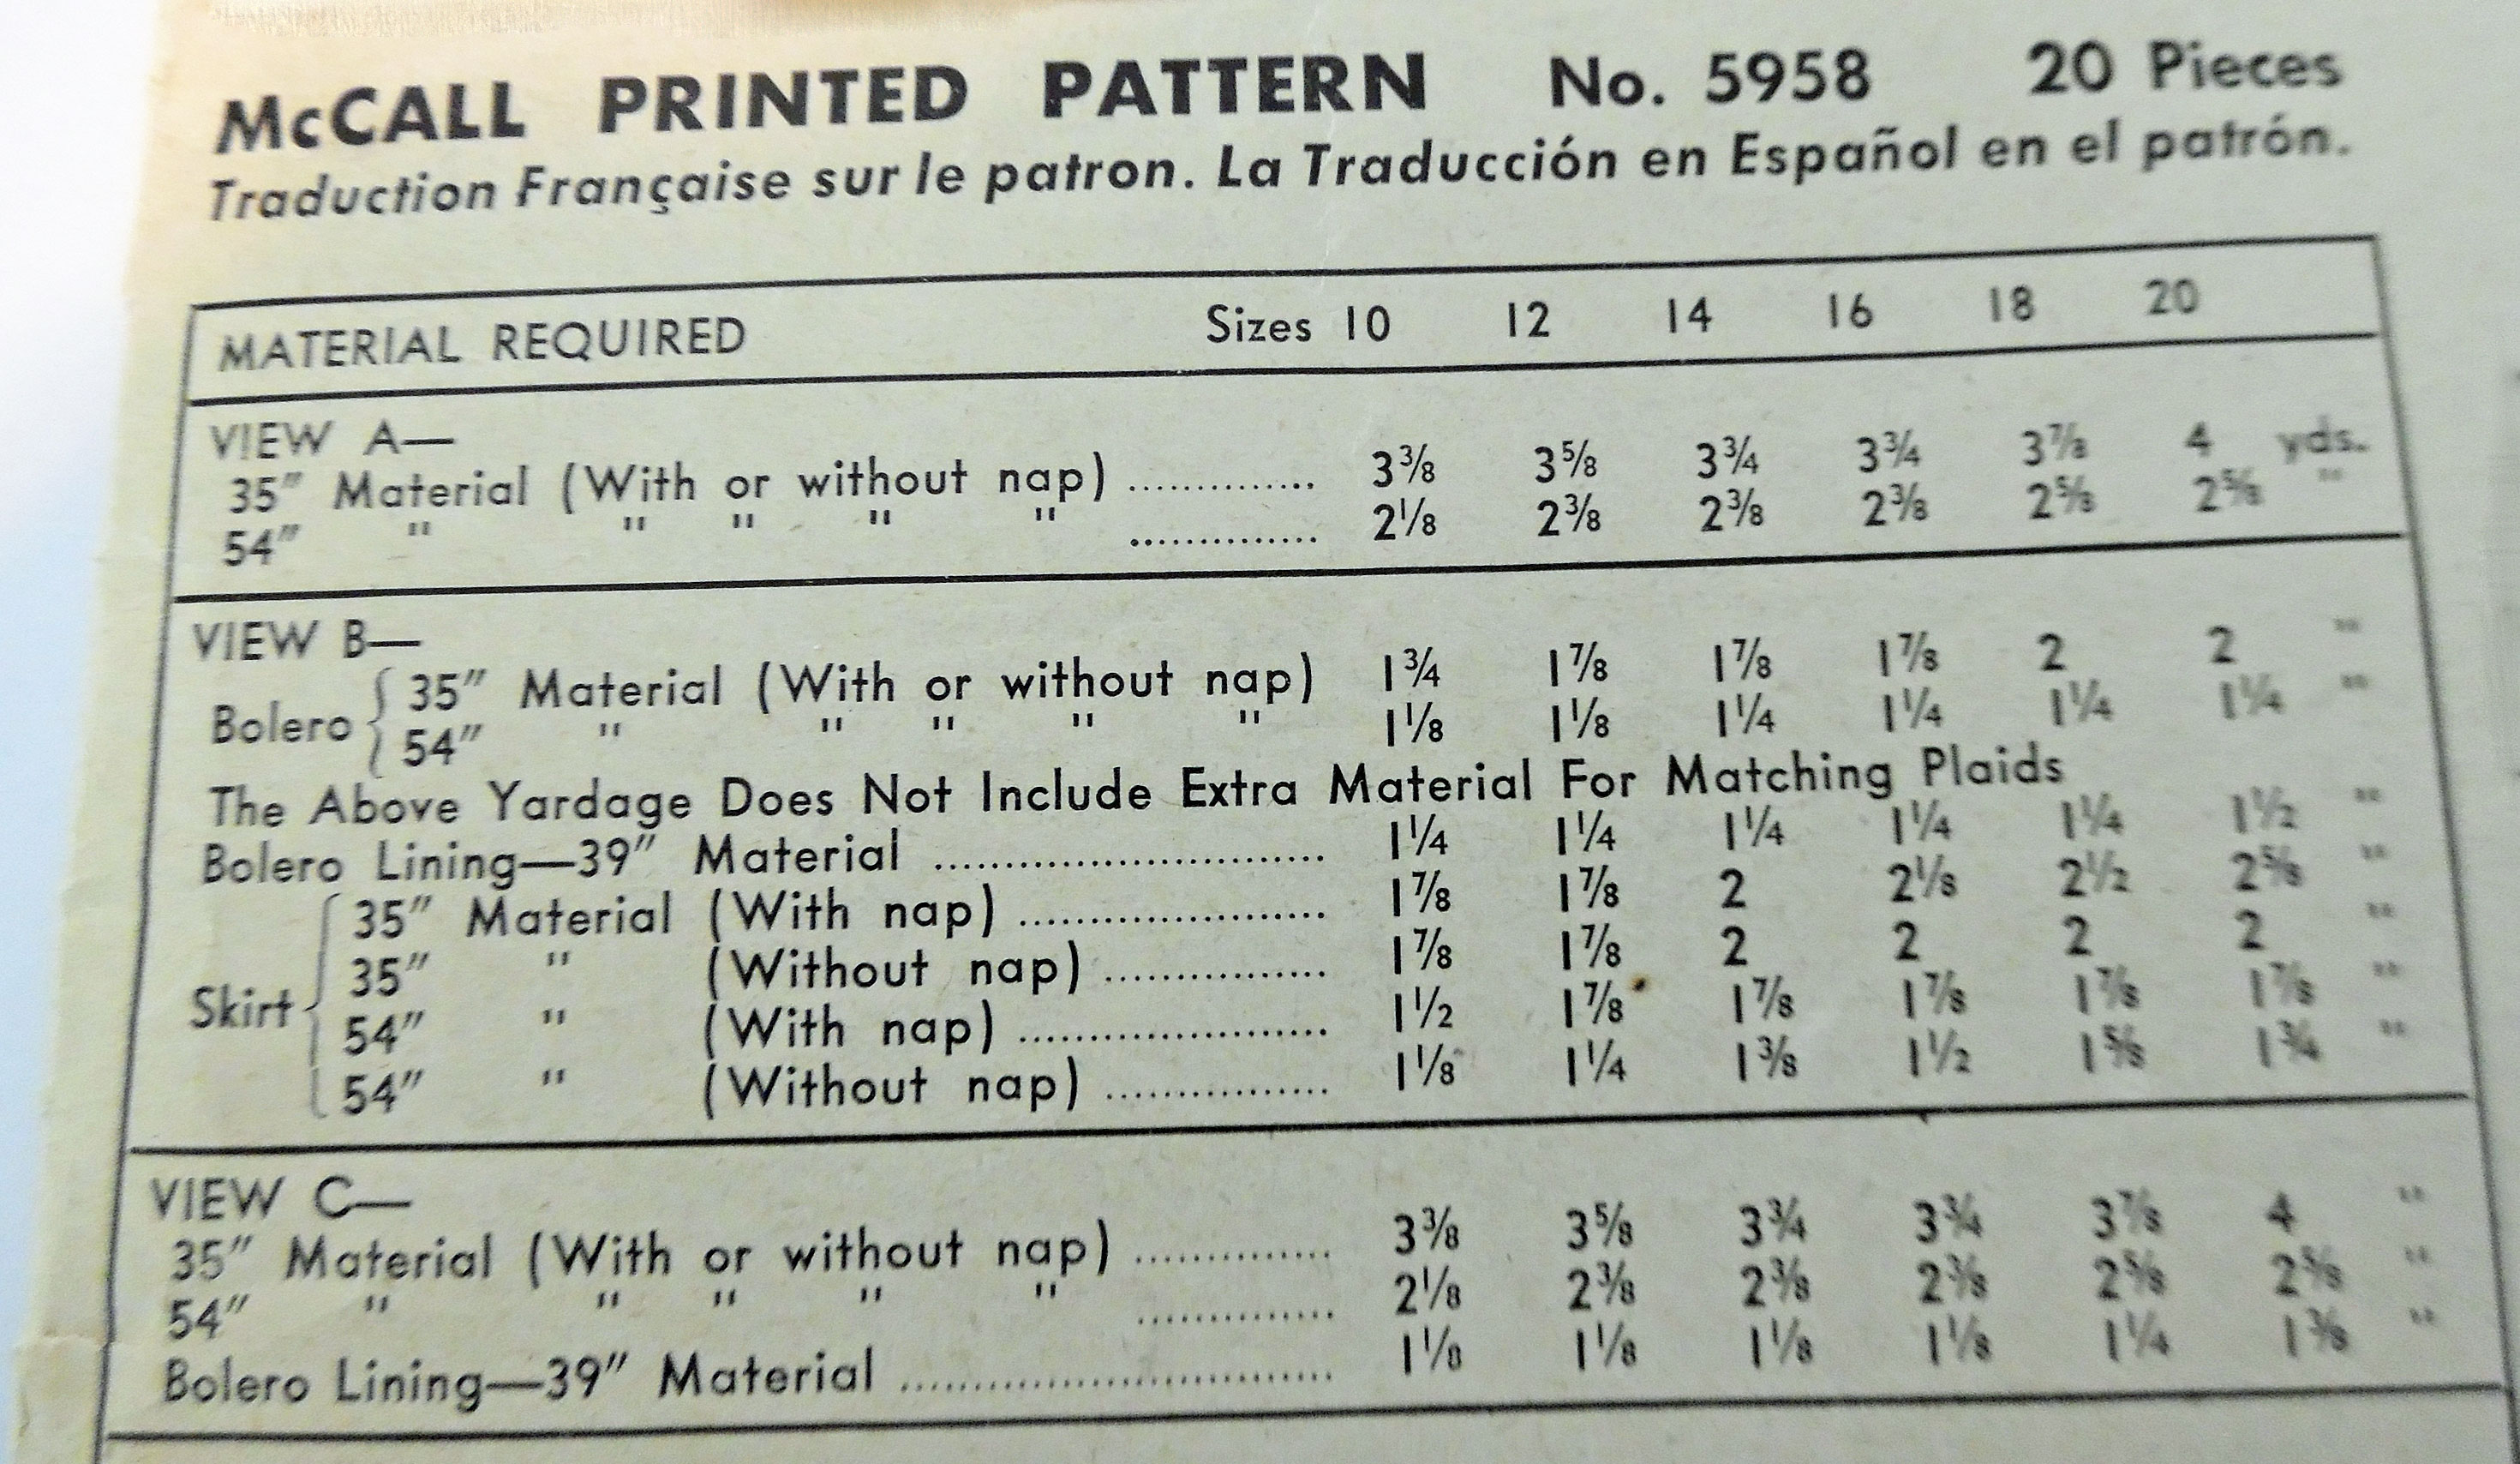
The yardage chart tells you how much fabric you need for each size. The exact layout can vary, especially in vintage patterns. Generally, though, you’ll have a column with the individual views on the left (View A, View B, and so forth); across the top, you’ll find a row of the different sizes. Locate your size and the view you want to make. The intersection where the column and row meet lists the yardage amount you need.
Yardage Chart (McCall, 1945)
Note that there’s usually two different fabric widths given. (In modern patterns, it’s 45″ and 60″. In older patterns, the widths may be smaller.) If you use a wider fabric, you’ll need less yardage, and if you use a narrower fabric, you’ll need more yardage. The chart allows you to see the difference.
Check your fabric to see how wide it is, then look at the chart to find the corresponding yardage amount. (For more information on this topic, see my blog post: Fabric Widths.)
The yardage chart should also tell you how much lining and interfacing you’ll need.
- Recommended Fabrics
Every pattern is designed with a specific kind of fabric in mind. For example, jeans are usually made with heavy fabric, like denim or twill, while a summer dress might be made from a lightweight fabric, like voile, batiste, or lawn. Most patterns provide you with a list of recommended fabrics, so you don’t have to guess.
You don’t need to stick specifically to what’s listed, but use it as a guide. In other words, if the pattern recommends heavy fabrics, like twill and corduroy, you won’t have good results if you try to sew the pattern out of silk organza or charmeuse!
- Notions
The final item is a list of what notions you need to make the pattern. These are things like thread, elastic, zippers, snaps, bias binding, and so forth.
Now that we’ve taken the mystery out of deciphering a pattern envelope, you can go forth confidently and sew!
~~*~~
Looking for more sewing tips? Find beginner’s tutorials under the Sewing Basics menu, and more advanced help under Tutorials and Articles. There’s also plenty of advice to be found in Tuesday’s Tips & Tricks.
Pingback: Reading a Pattern Envelope | Yesterday's Thimble