
(Custom Photoshop brushes by deviantART user: Lileya)
(Click any illustration to view the full-sized image.)
Like many projects, this one began with the fabric: a gorgeous olive green faux-suede with copper foil accents. It was rather expensive, so I only bought one yard—and I had no clue what I would make from it.
Eventually, I settled on the idea of making a handbag. Since I’d never made a purse before, I wanted something relatively simple, without a lot of bells and whistles, but I still wanted it to be stylish. After months of searching for a suitable pattern, I attended a local sewing guild meeting, where one of the ladies displayed a purse she’d made. I thought the pattern would work for my project, so I looked up the company’s website. While browsing the site, I discovered another purse pattern that I liked even better.
With that, this project officially got underway!
Pattern & Design
I wanted a purse I could use for special occasions. Something I could sling over my shoulder. Not too big, but large enough to hold my wallet, keys, iPhone, and perhaps my Kindle Fire. I’ve always been partial to hobo bags, so I was pleased when I found a pattern for one that was a good size and not too casual-looking. Since it didn’t have internal pockets or dividers, the pattern was easy enough for a beginner—which, when it comes to purses, I am!
It’s Swoop’s free hobo bag pattern: Laney Reversible Hobo. They actually had several patterns I was tempted by, but free always wins!
Materials
- ½ yard Foil-Printed Faux-Suede—Olive Green/Copper
- ½ yard Sateen—Olive Green
- ¼ yard Taffeta—Copper-Brown
- 2 yards Woven Fusible Interfacing
- Magnetic Snap—Antique Bronze
I’d been collecting materials for this project for awhile, so I had everything I needed, except for the interfacing, which I ordered. The fabrics coordinated with each other nicely. I just had to choose which ones to use for which parts of the bag.
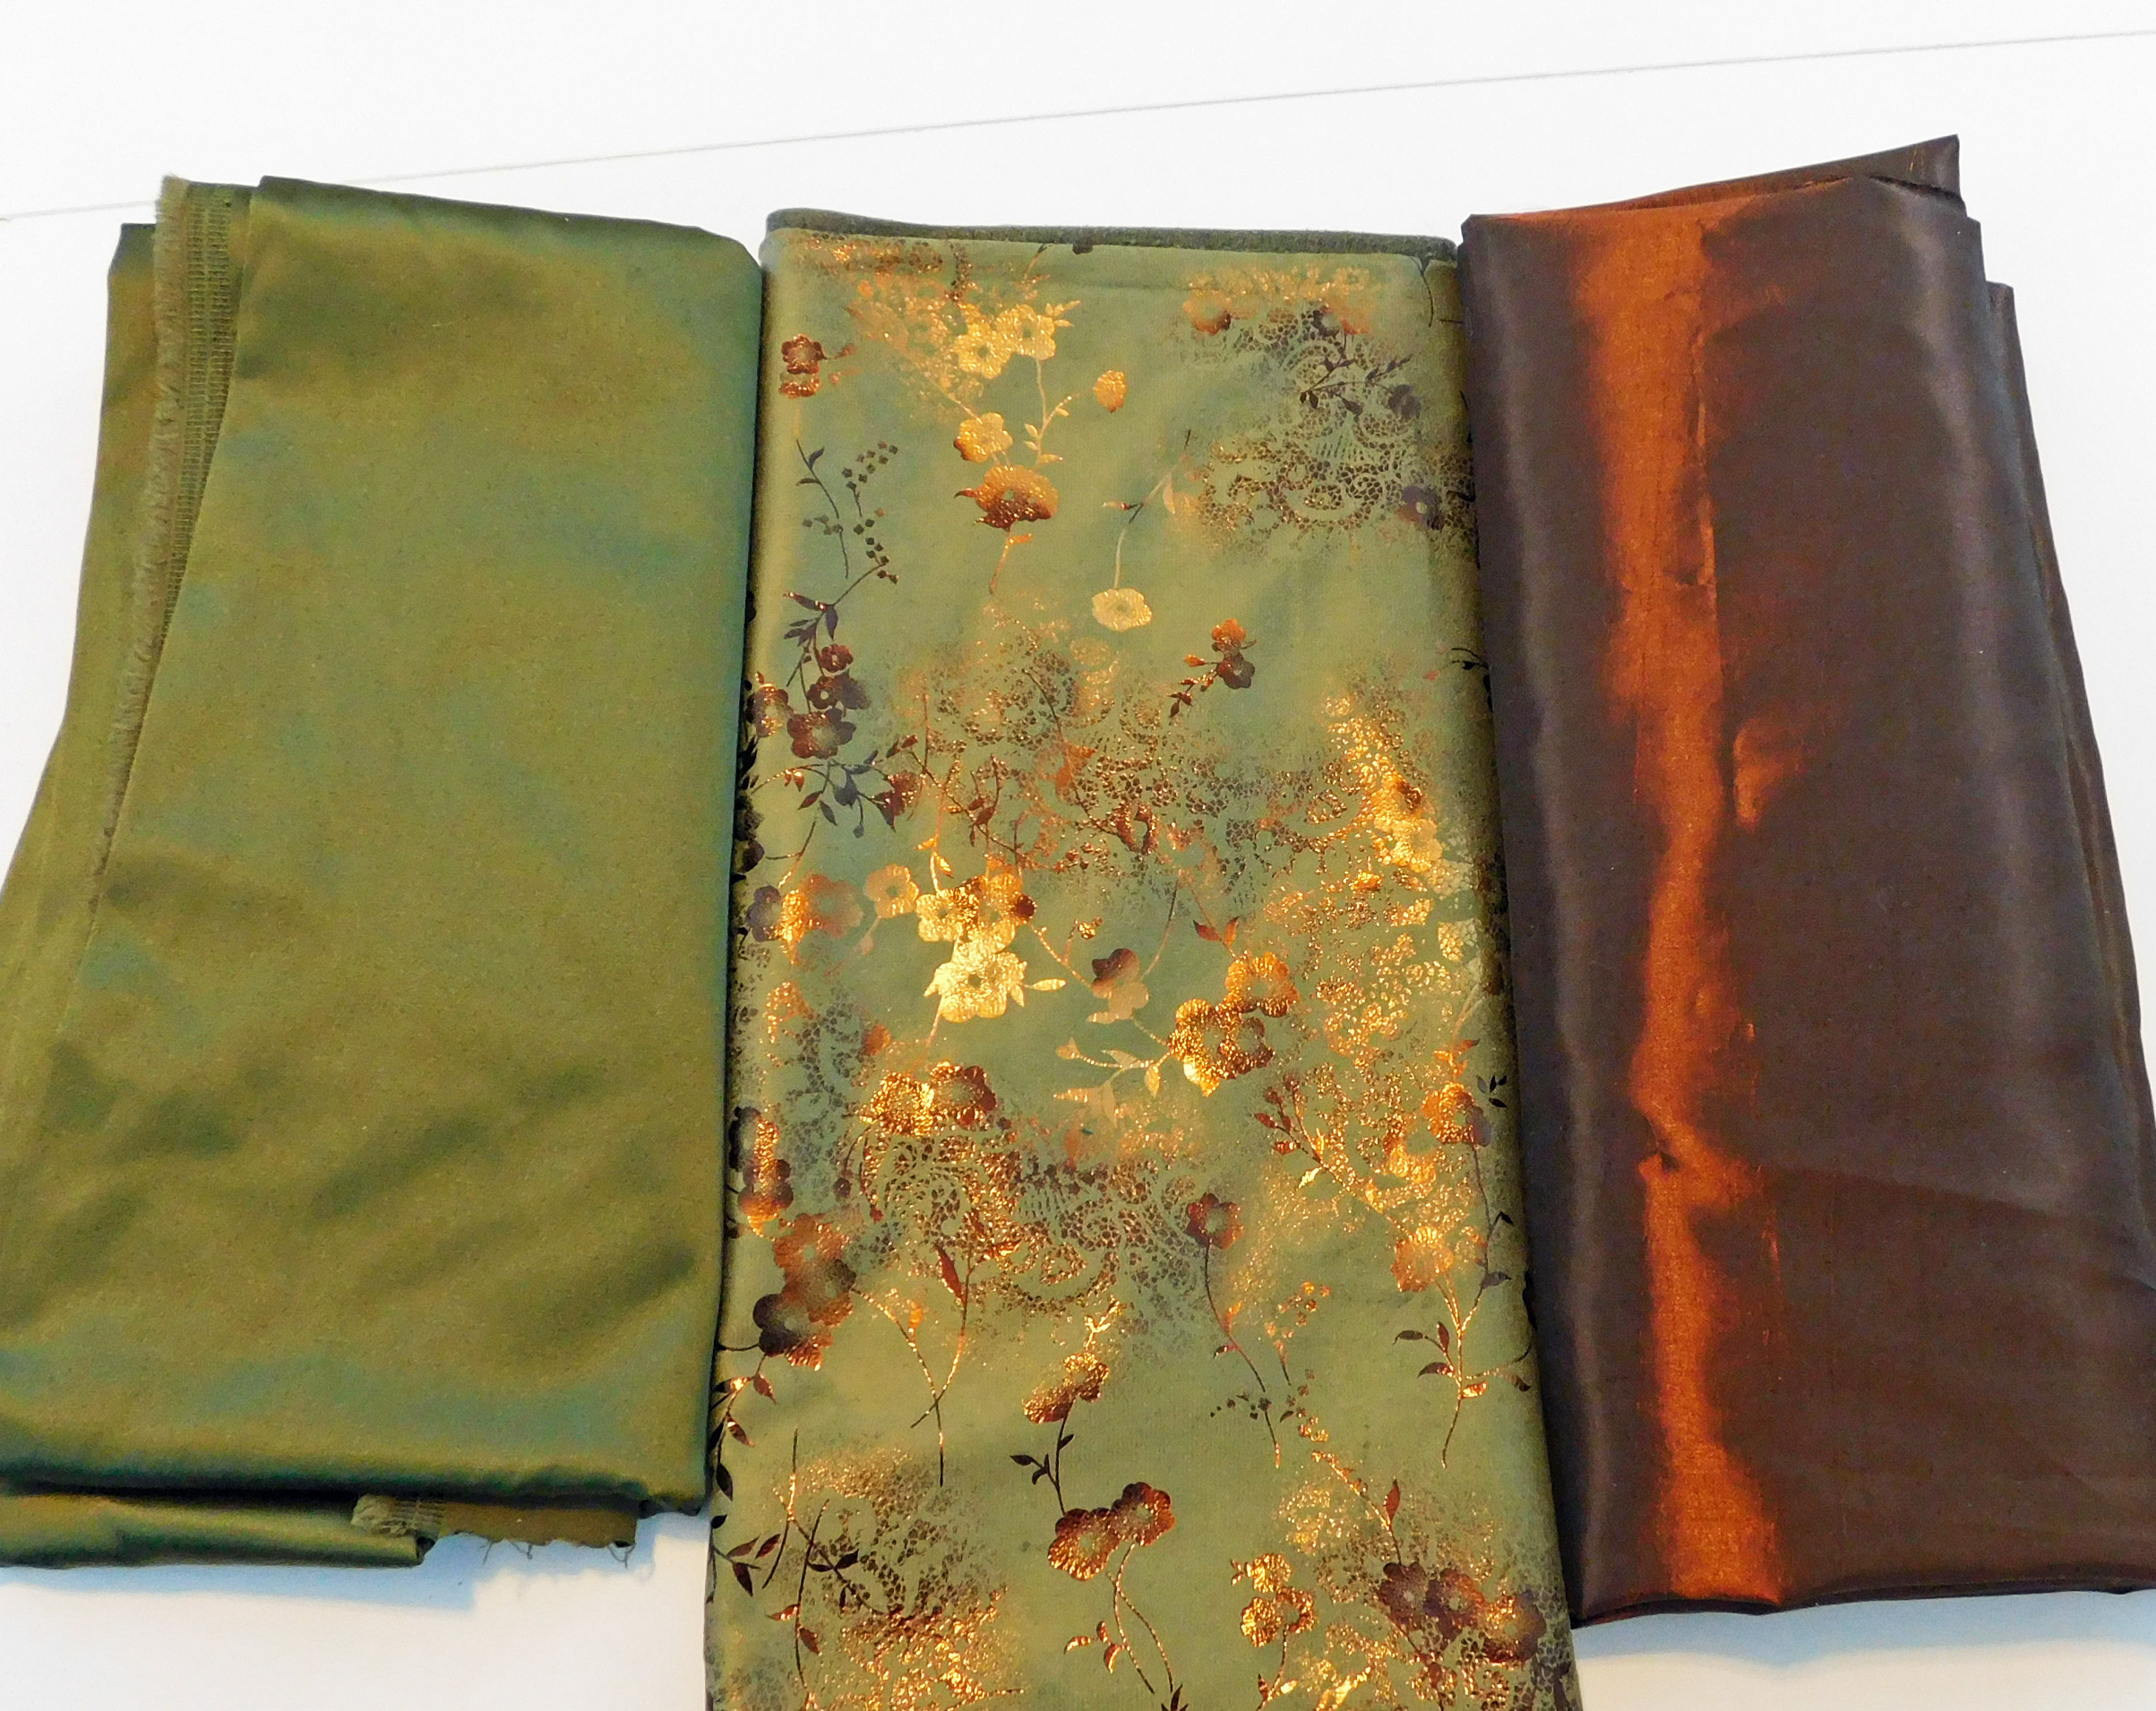
Fabrics
Mockup
To start things off, I did a quick mockup, using an old flat sheet instead of muslin, because lately I’ve been having difficulty with unbleached muslin stretching. I didn’t bother to line the mockup—I just assembled the outer pieces to get an idea of how the bag is constructed and what size it would be.
Since I didn’t care for the tie closure, I omitted it. For the real purse, I planned on using a magnetic snap closure. The snap I ordered was the type with prongs, which must be hammered in place, rather than the kind that’s sewn on—which unfortunately meant I couldn’t test it.
The pattern was decent, although there were no notches or markings to help you line the pieces up with each other. No matter what I did, I couldn’t quite get the ends of the side panels to match up with the center panel. But since it would be hidden inside the lining on the real purse, I supposed it wasn’t much of an issue.
I was quite pleased with the finished mockup. I wouldn’t mind if it was a bit wider across, but overall, it’s the size and shape I was expecting.
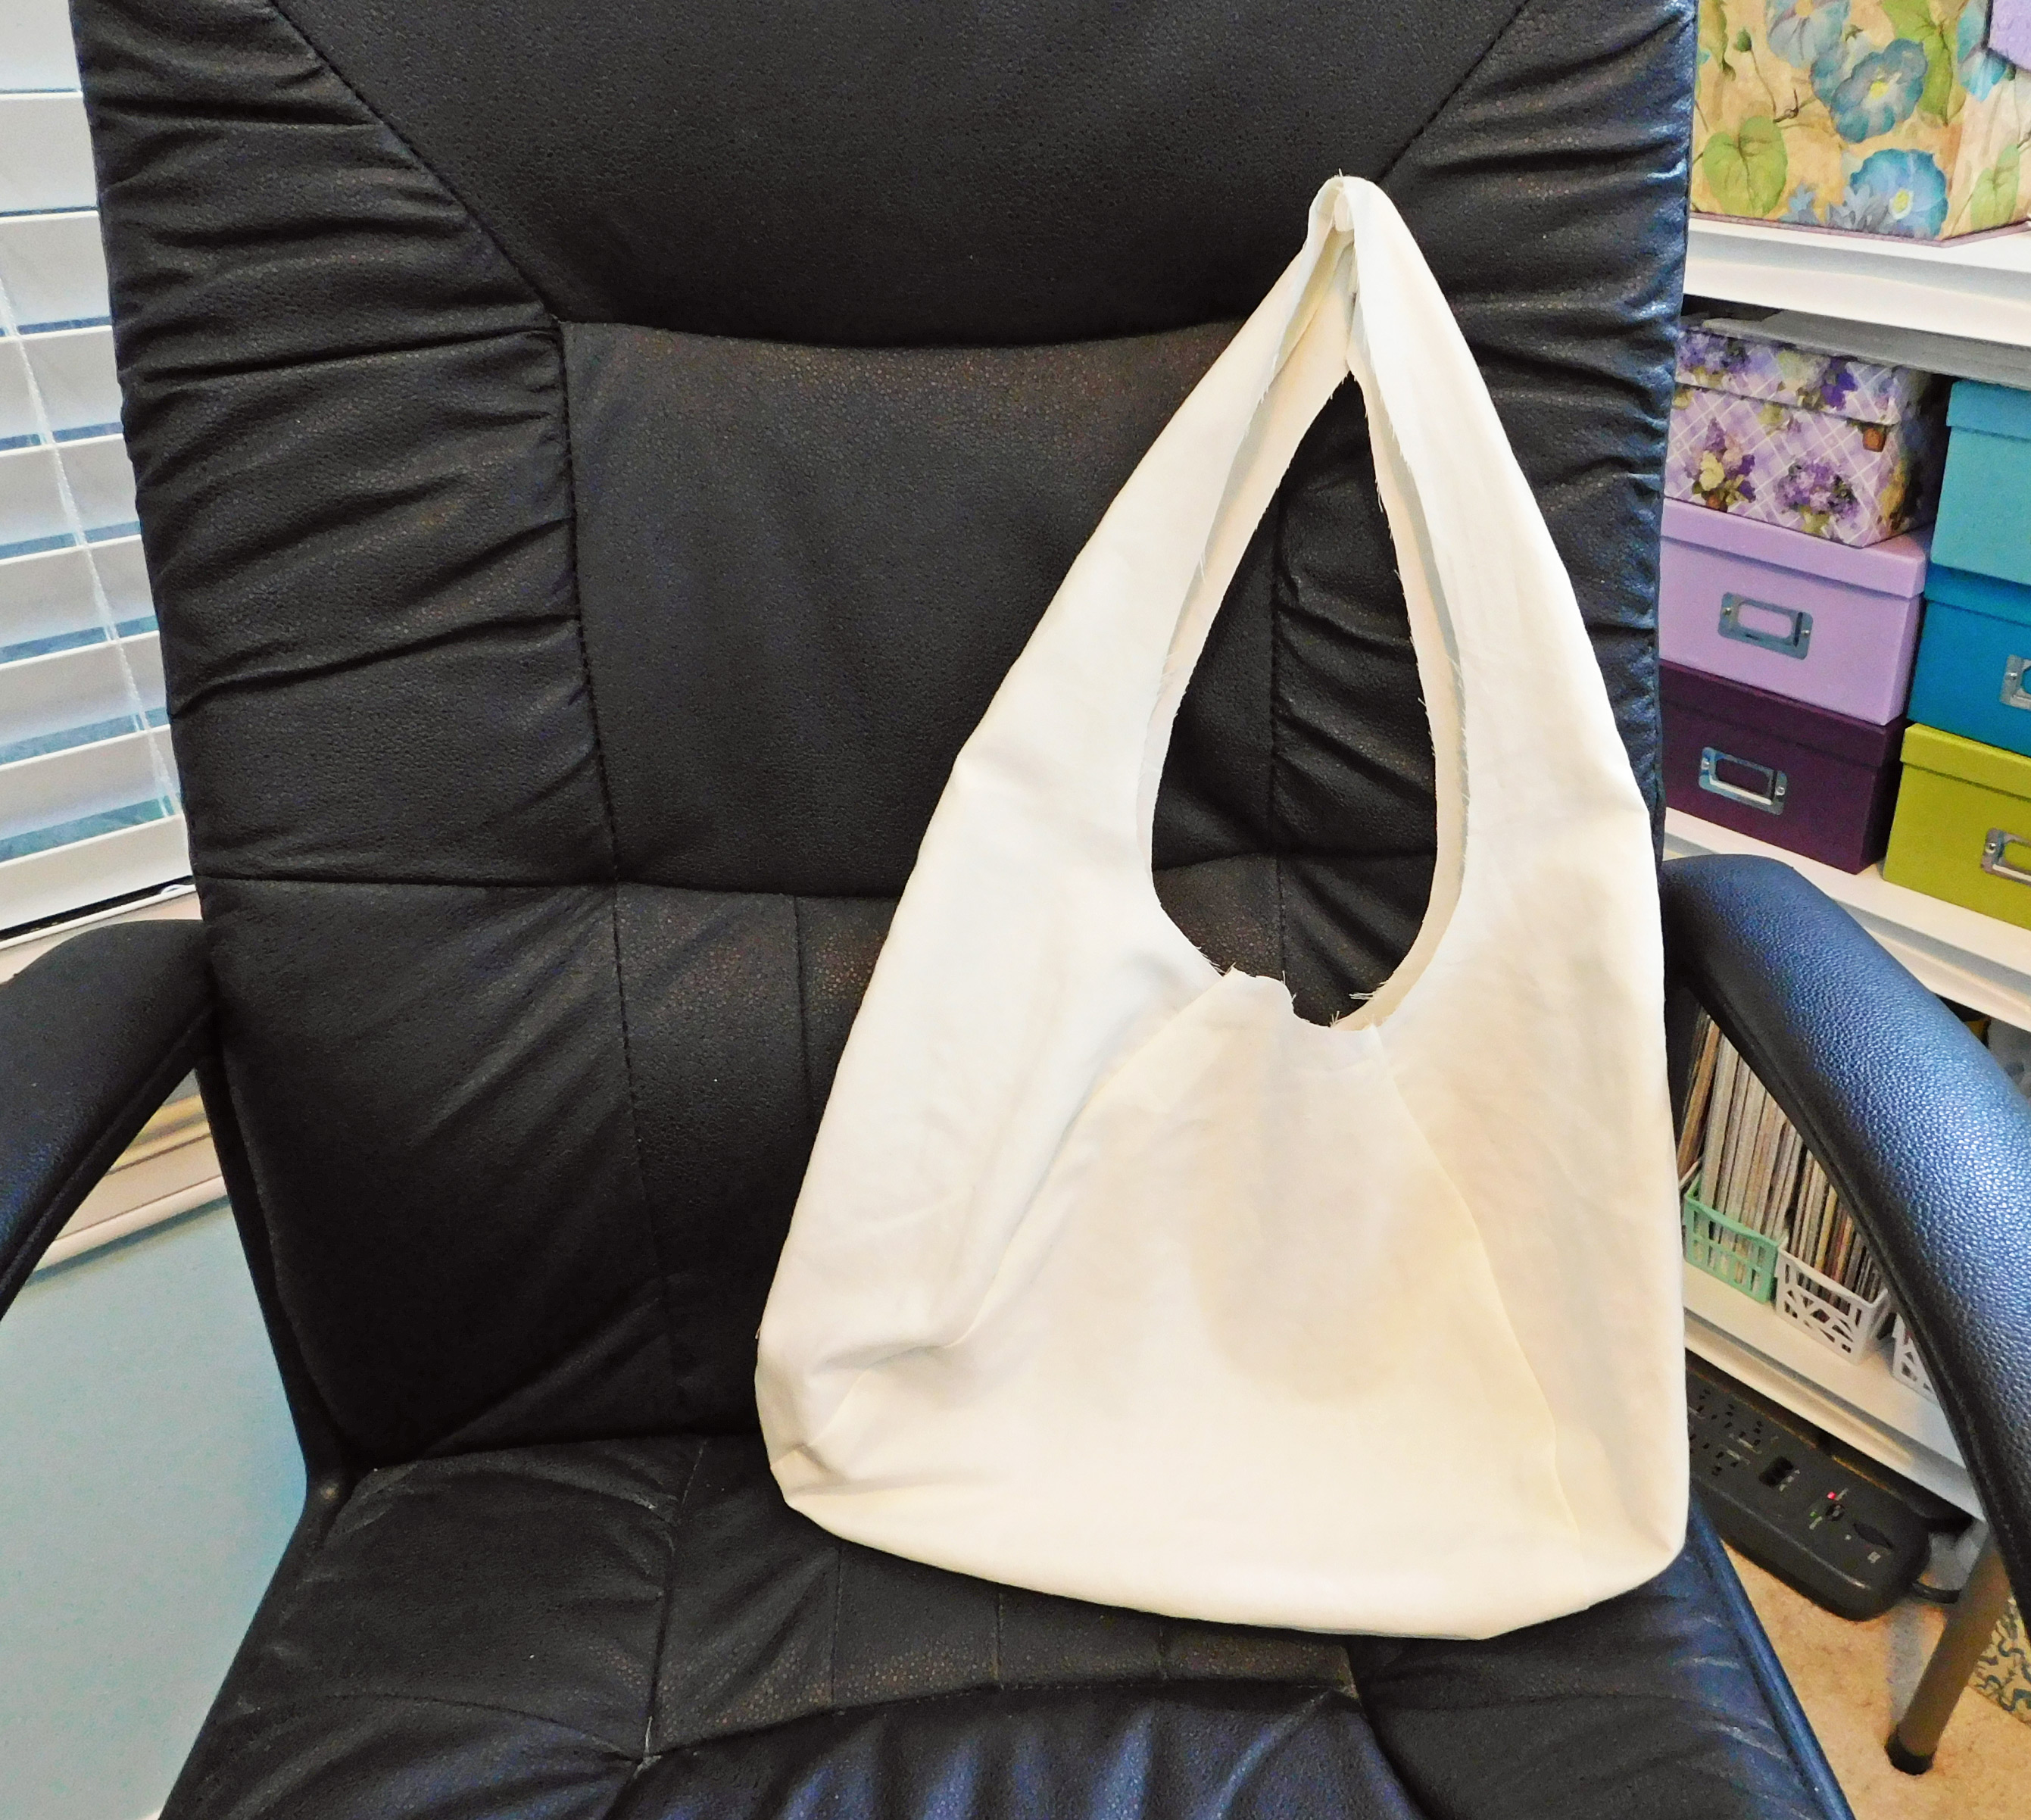
Purse Mockup
Construction
My first decision was to make the “reversible bag” non-reversible. Next, I had to decide which fabrics to use for the outer bag and the lining. I had several options. And what about contrasting panels? Hmm. . . .
After some contemplation, I decided to make the outer bag entirely out of the foiled suede, rather than having contrasting panels. The lining would be of the olive sateen. Since I really wanted to incorporate the copper-brown taffeta, I decided to get creative and add piping along the seams.
You’re supposed to fuse interfacing to every piece, but I wasn’t sure if the foil-print suede would tolerate the high heat necessary for fusing. Therefore, I only fused the lining panels. Since my fabrics were heavier than the quilting cotton that’s recommended for this pattern, I was sure it would turn out fine. (And it did!)
The interfacing called for by the pattern is woven, which I’d never worked with before. I was a bit nervous about it fraying when I cut each piece out, but it didn’t, perhaps because of the glue on the reverse side. Before fusing, I trimmed the edges with pinking shears. This wasn’t strictly necessary, but having zigzag edges helps prevent a ridge from showing where the interfacing stops. Then, I went ahead and fused all the lining panels.

Pinked Interfacing
Next, I worked on the piping. Piping must be sewn three times—first, you enclose the cord within the bias strip; then, you baste it to the fabric; then, you sew the seams together, sandwiching the piping between the layers. According to an article I read recently, it’s a good idea to stagger these seams, so you don’t end up with three rows of stitching right on top of each other. So that’s what I did.
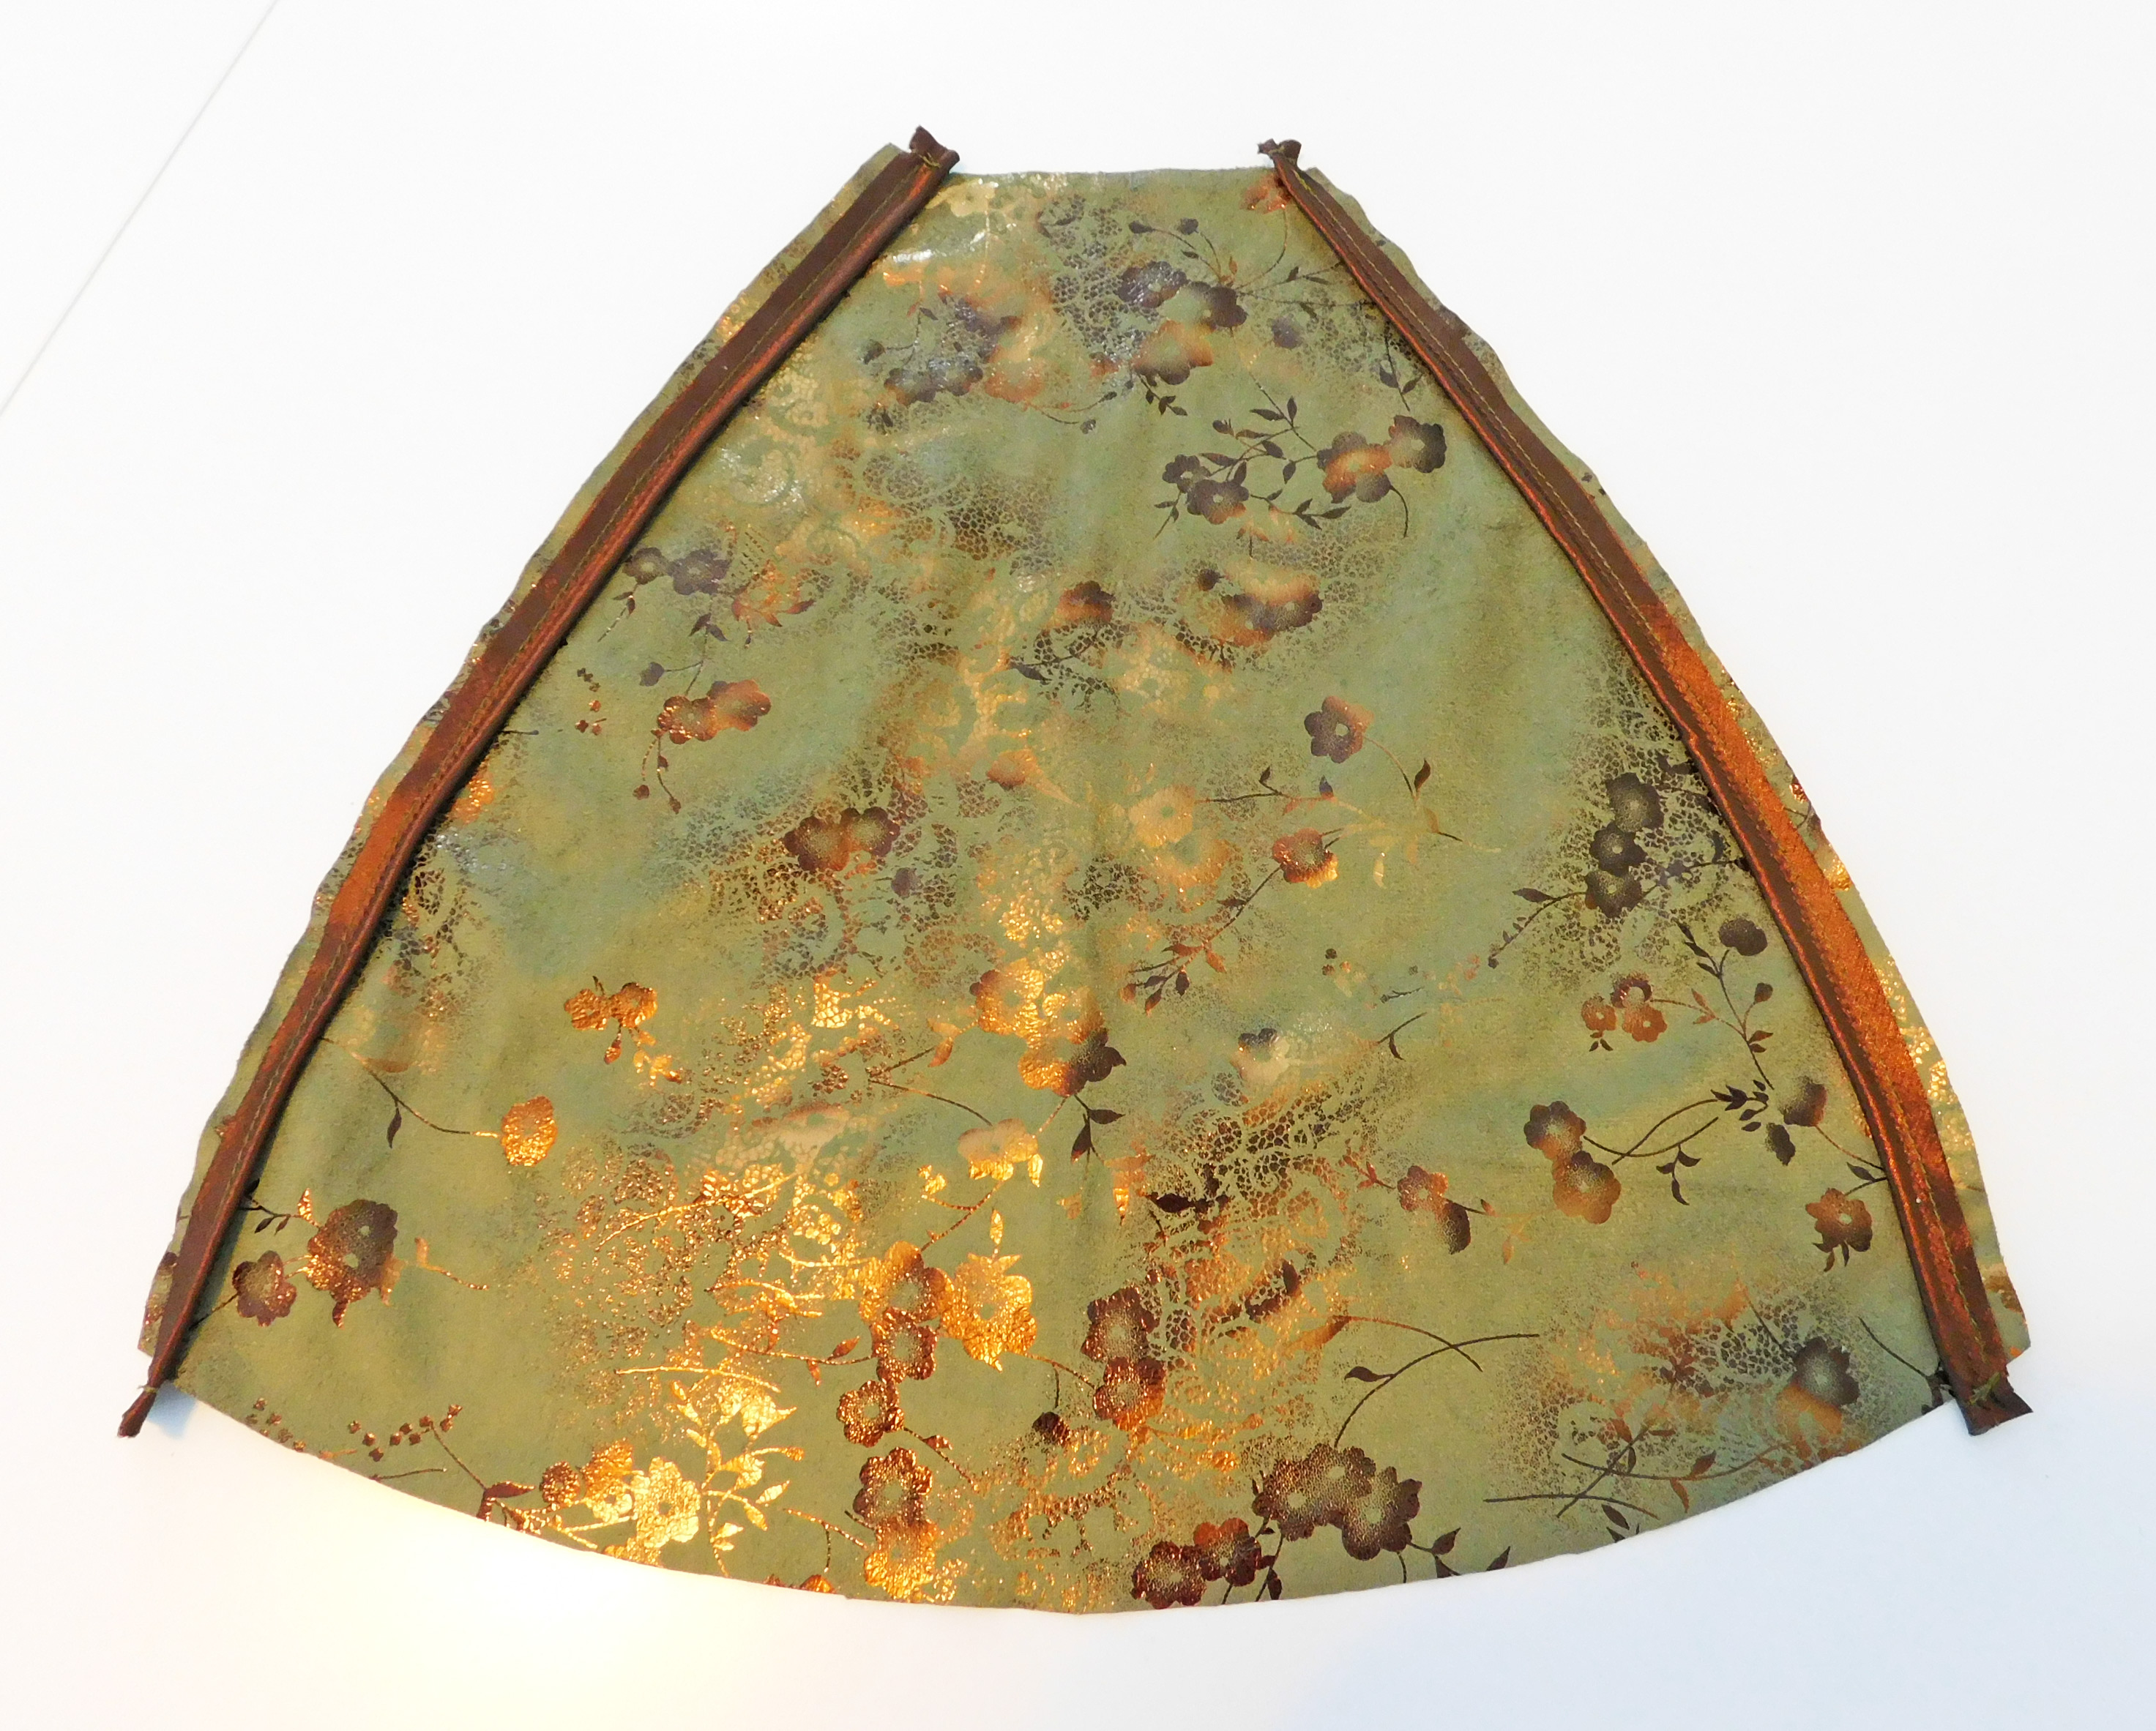
Piping In-Progress
The basic assembly went smoothly. I skipped the topstitching called for in the directions, mainly because I was worried about being able to sew parallel to the piping. Also, I suspected that any stitching in the faux suede would be permanent—unpicking would likely leave holes—so I decided not to risk it.
I was quite nervous about installing the magnetic snap, since I’d never used one before, and it didn’t come with instructions. Fortunately, there’s plenty of directions to be found via Google! I learned that it’s important to reinforce the area around the snap by fusing an extra square of interfacing there. The most nerve-wracking part was cutting the slits for the snap’s prongs. I bolstered my nerves by telling myself that any mistakes would only be on the purse’s lining, so I could conceal them, if necessary.
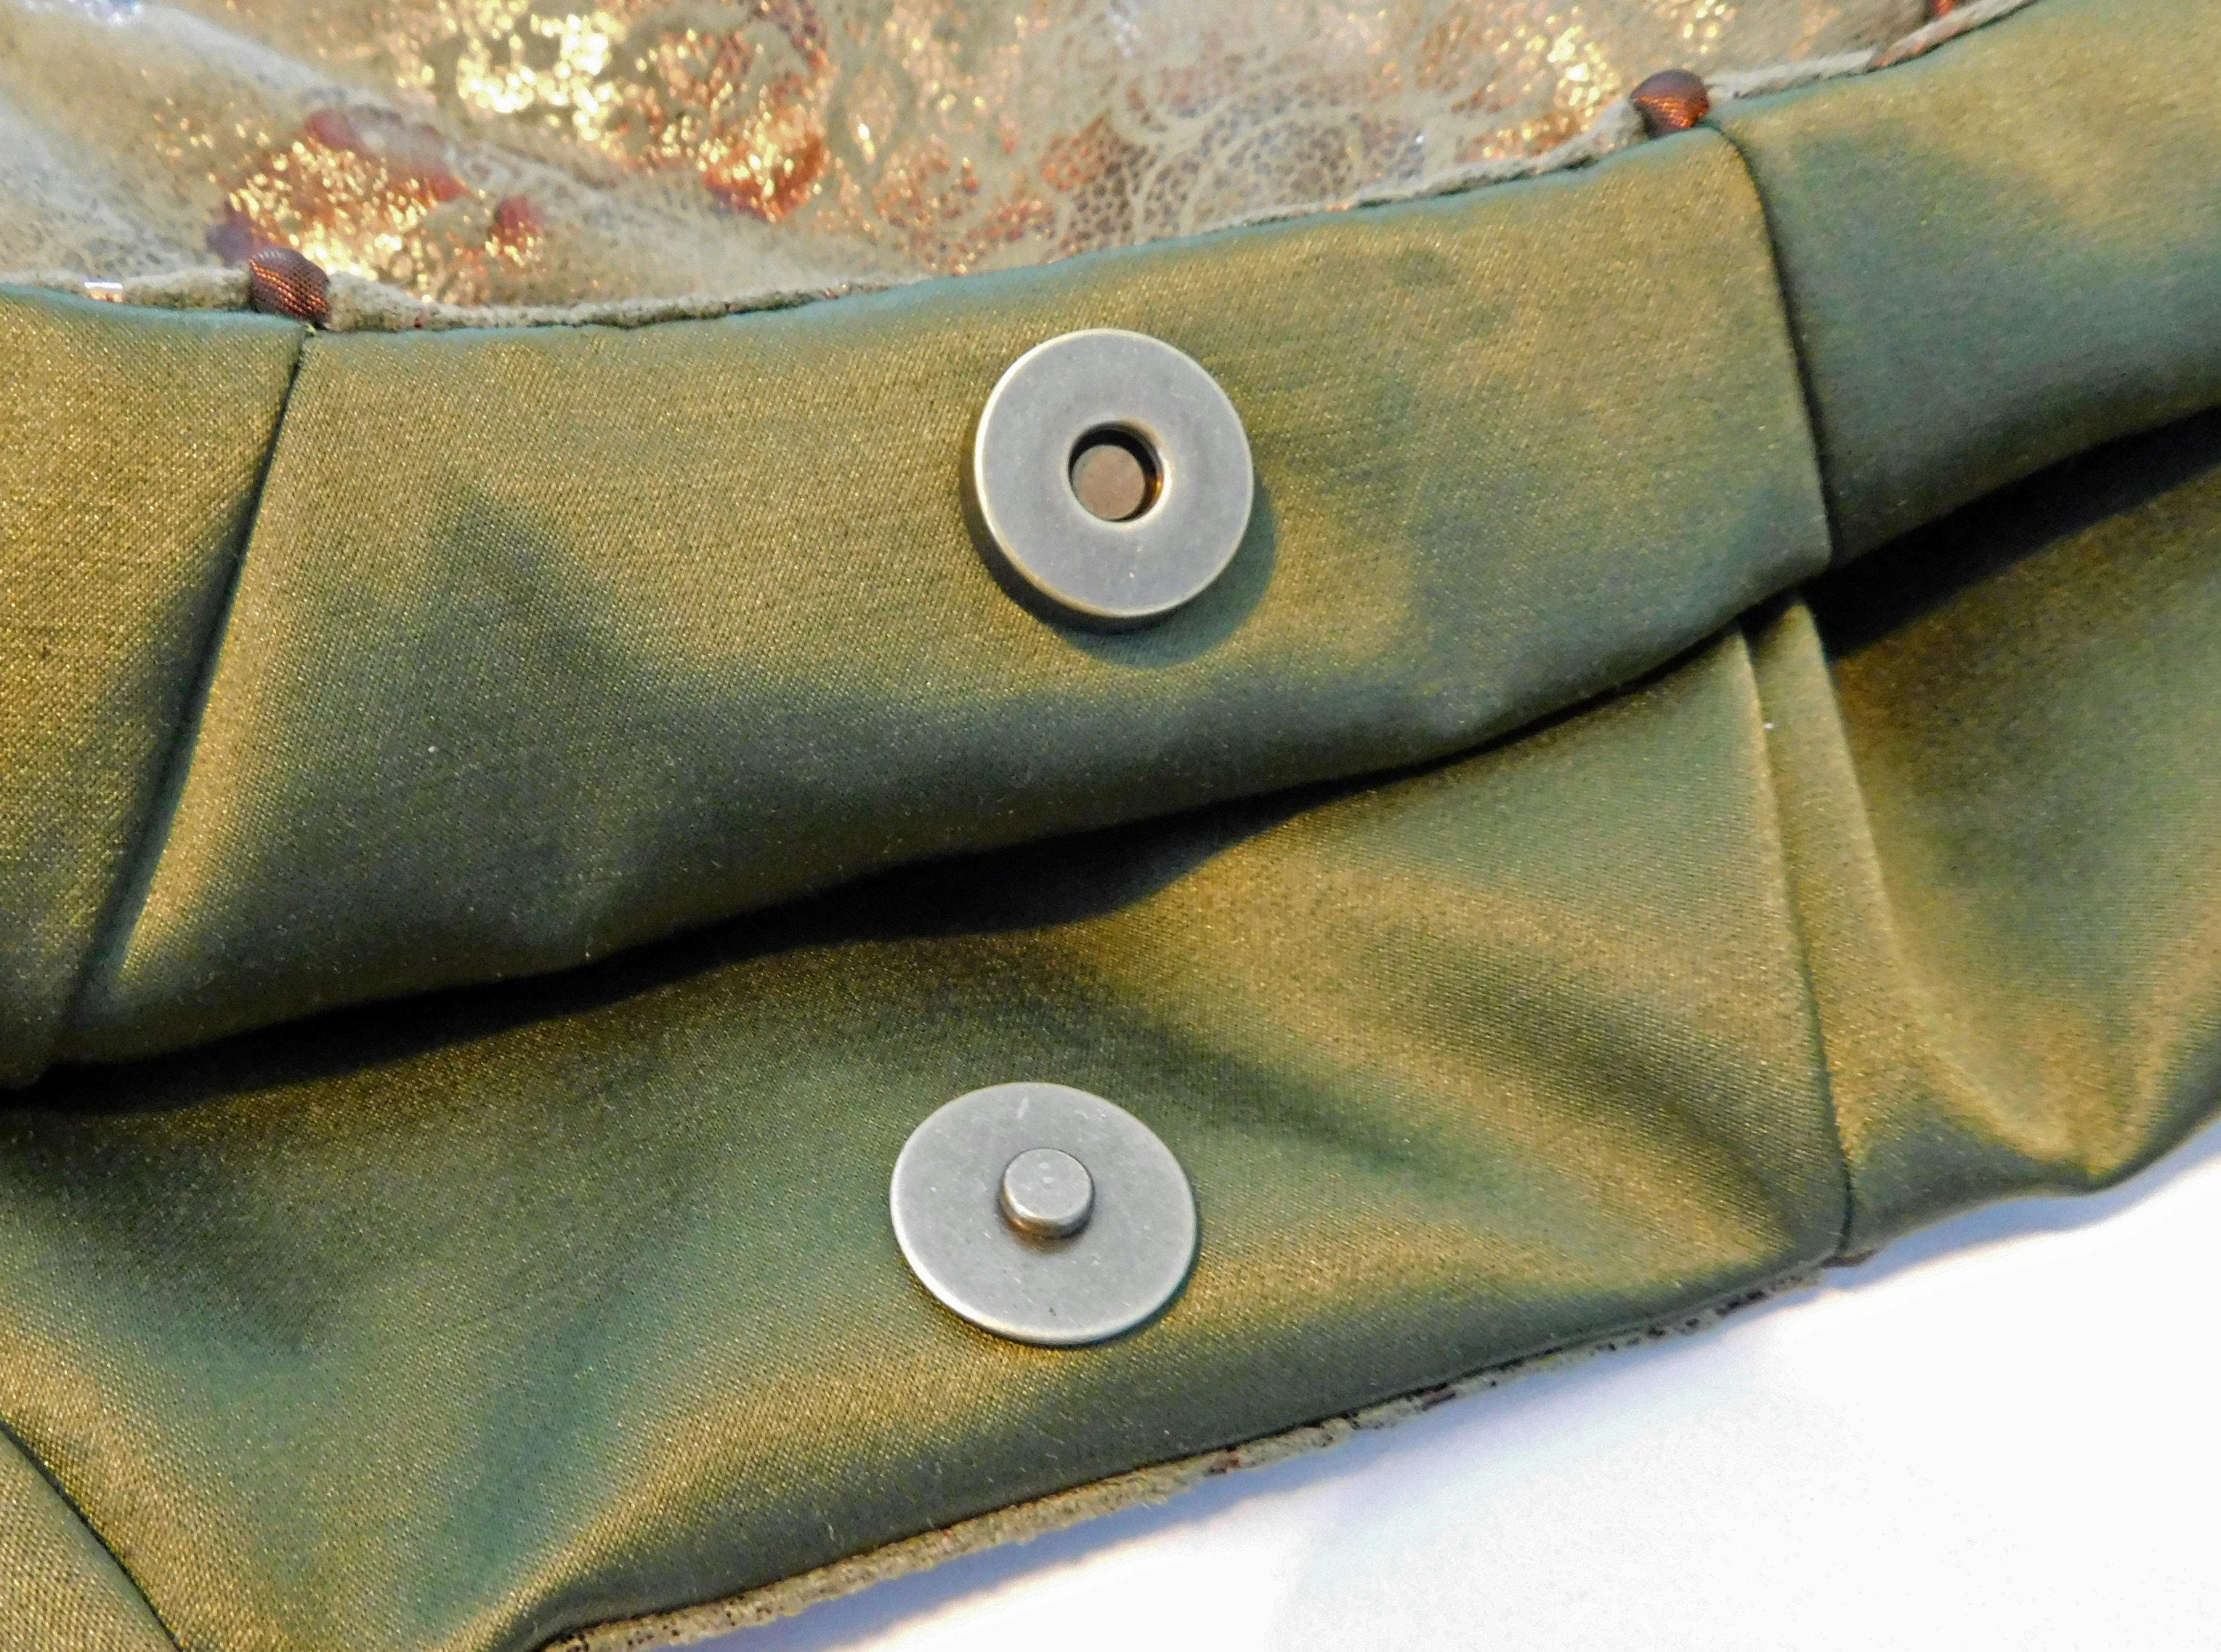
Magnetic Snaps
After installing the snaps, I sewed the lining to the outer layer, leaving a gap through which to flip it right-side out. The directions said to trim the seam allowances, but made no mention of clipping the curves. After flipping the bag right-side out, I noticed significant strain at the curved sections, so I pulled those sections back through the gap and carefully clipped the seam allowances.
The next problem I encountered was the gap itself. You’re supposed to tuck the seam allowances inside and topstitch along the edge to close the gap. That’s fine, except, somehow, the outer fabric was about half an inch longer than the lining! I tried stretching the lining to compensate, but because of the interfacing, it wouldn’t stretch enough. I thought about easing the excess in while hand-sewing the gap closed, but I didn’t want the rippling that often accompanies that sort of fix. I ended up taking a tiny box pleat in the outer fabric to make it the same length as the lining. Neat and tidy!
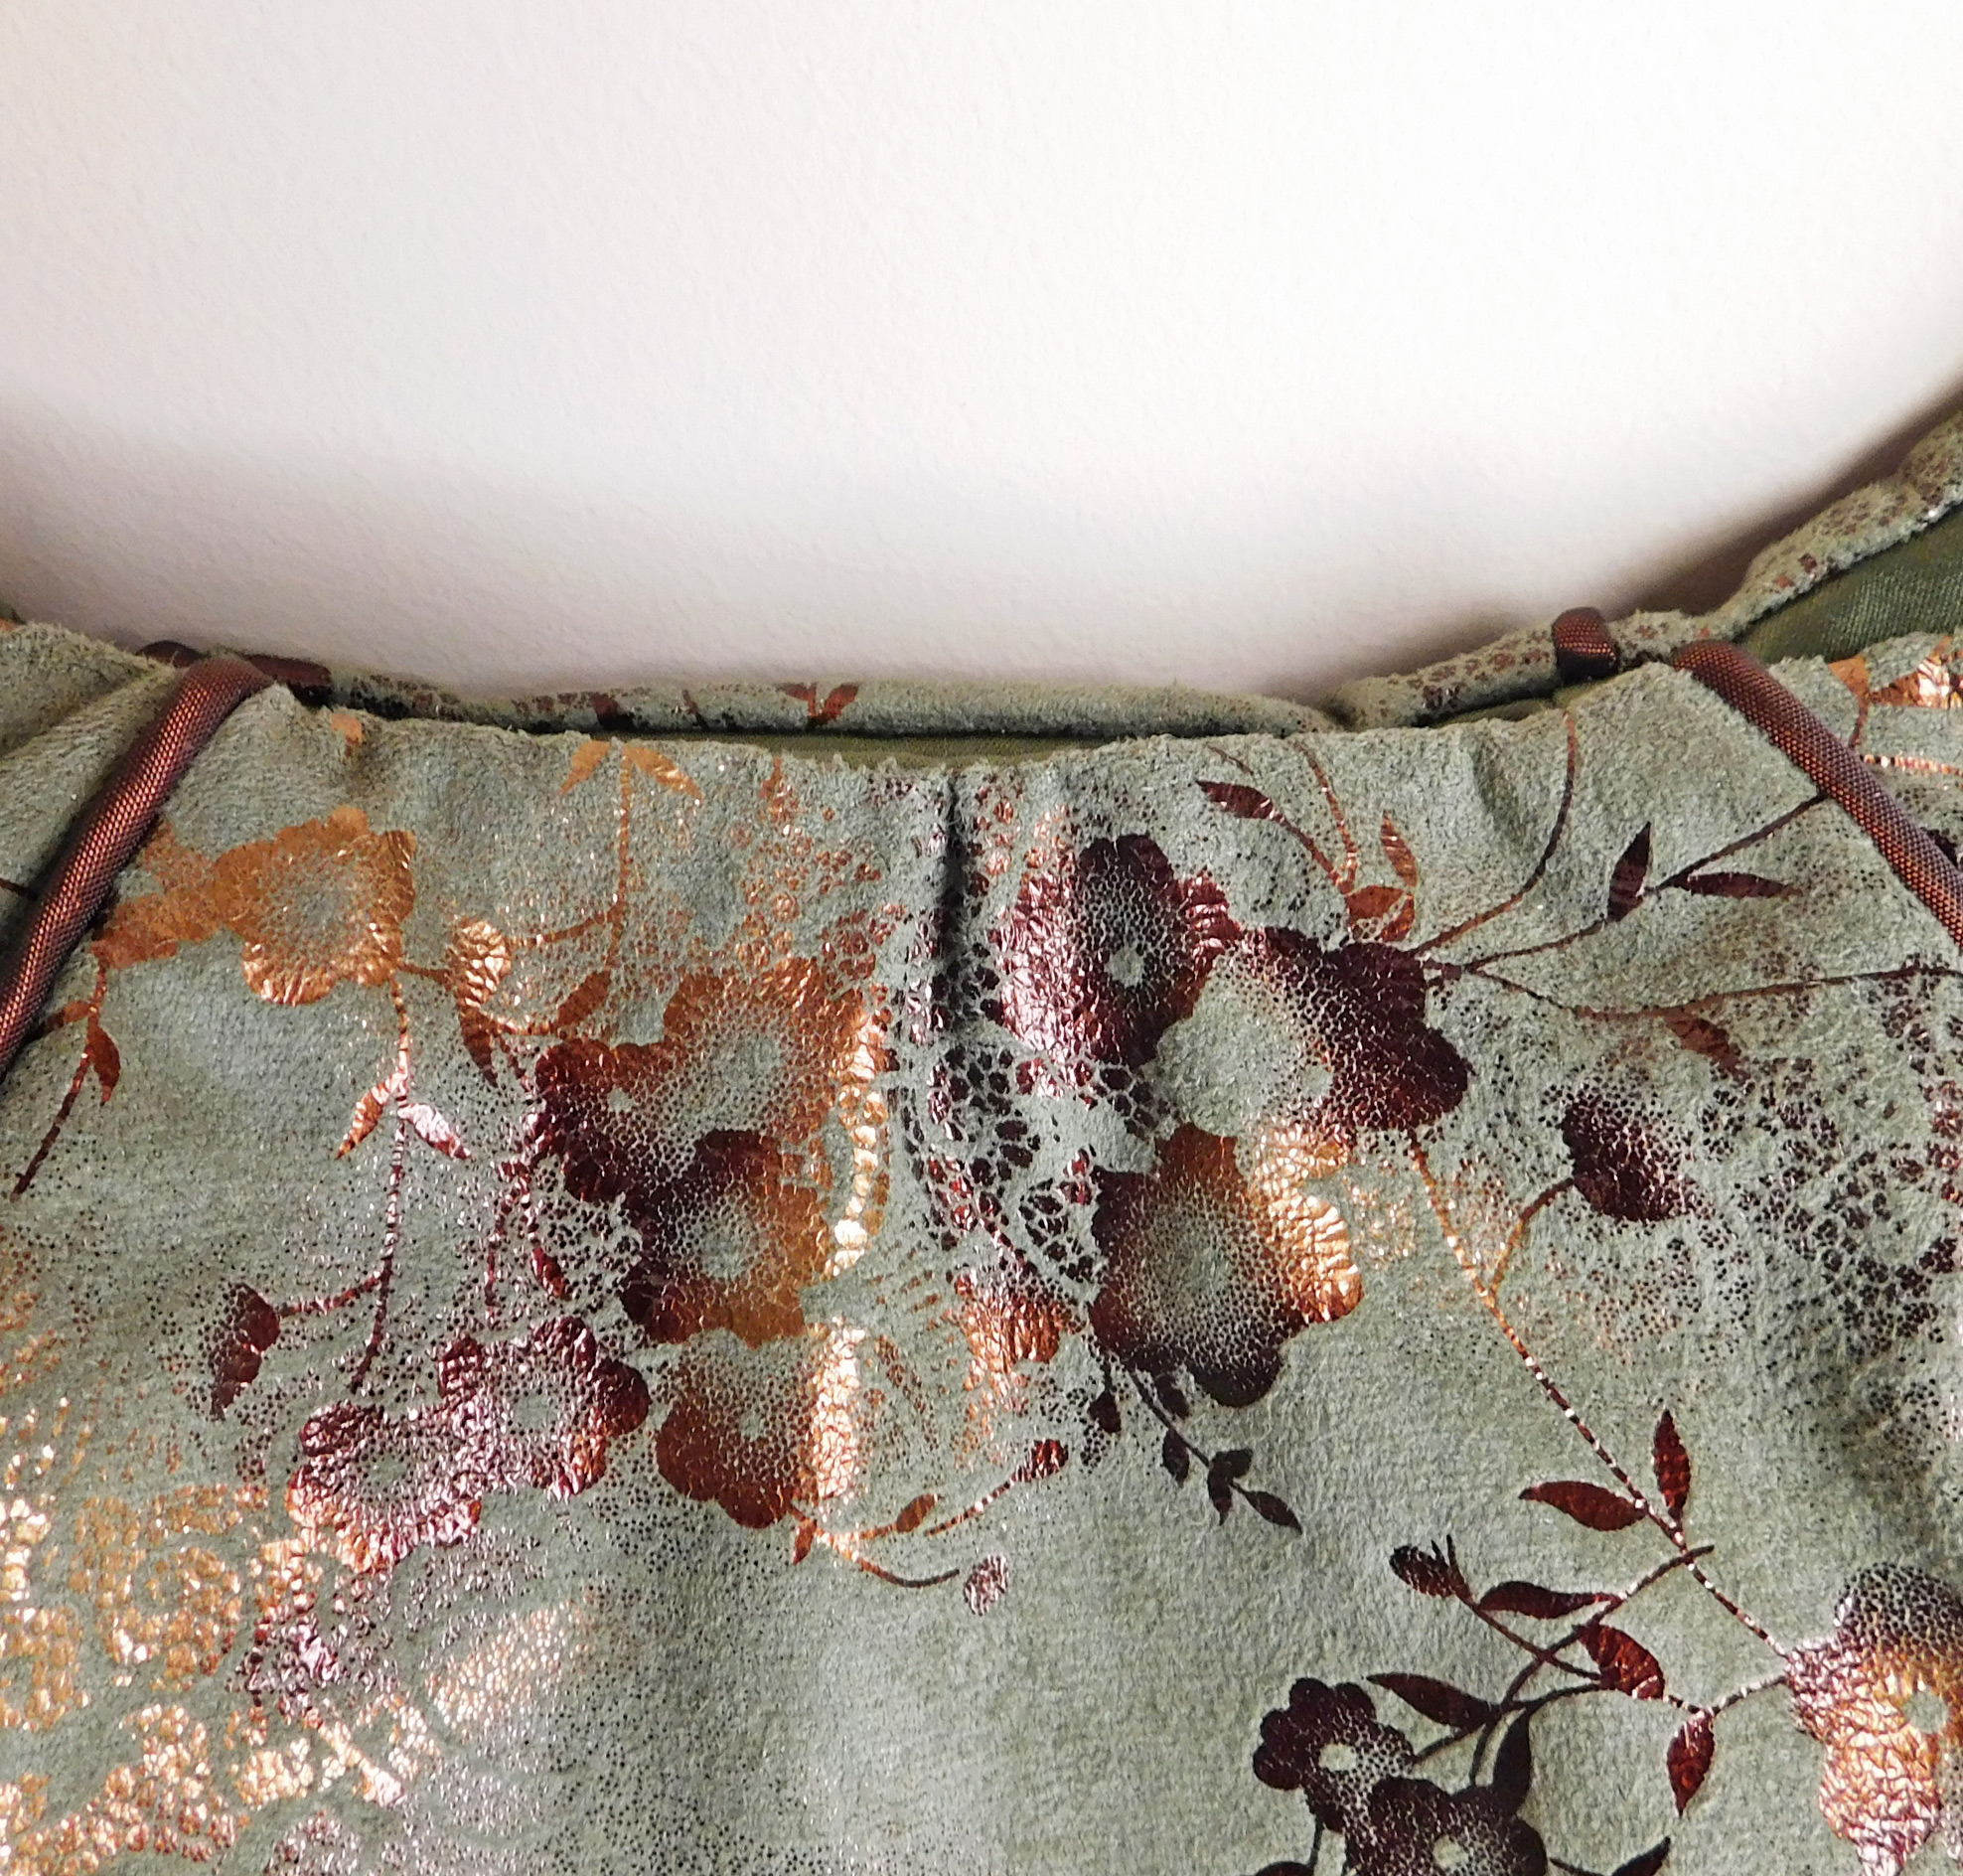
Tiny Box Pleat
Conclusion
Overall, this was an easy project—and one I’m exceedingly proud of! Everything fell into place: the fabric choice, the embellishment, the pattern, etc. I adore the finished purse and can’t wait to make another one. Next time, I’d love to add internal pockets, making the purse more functional.
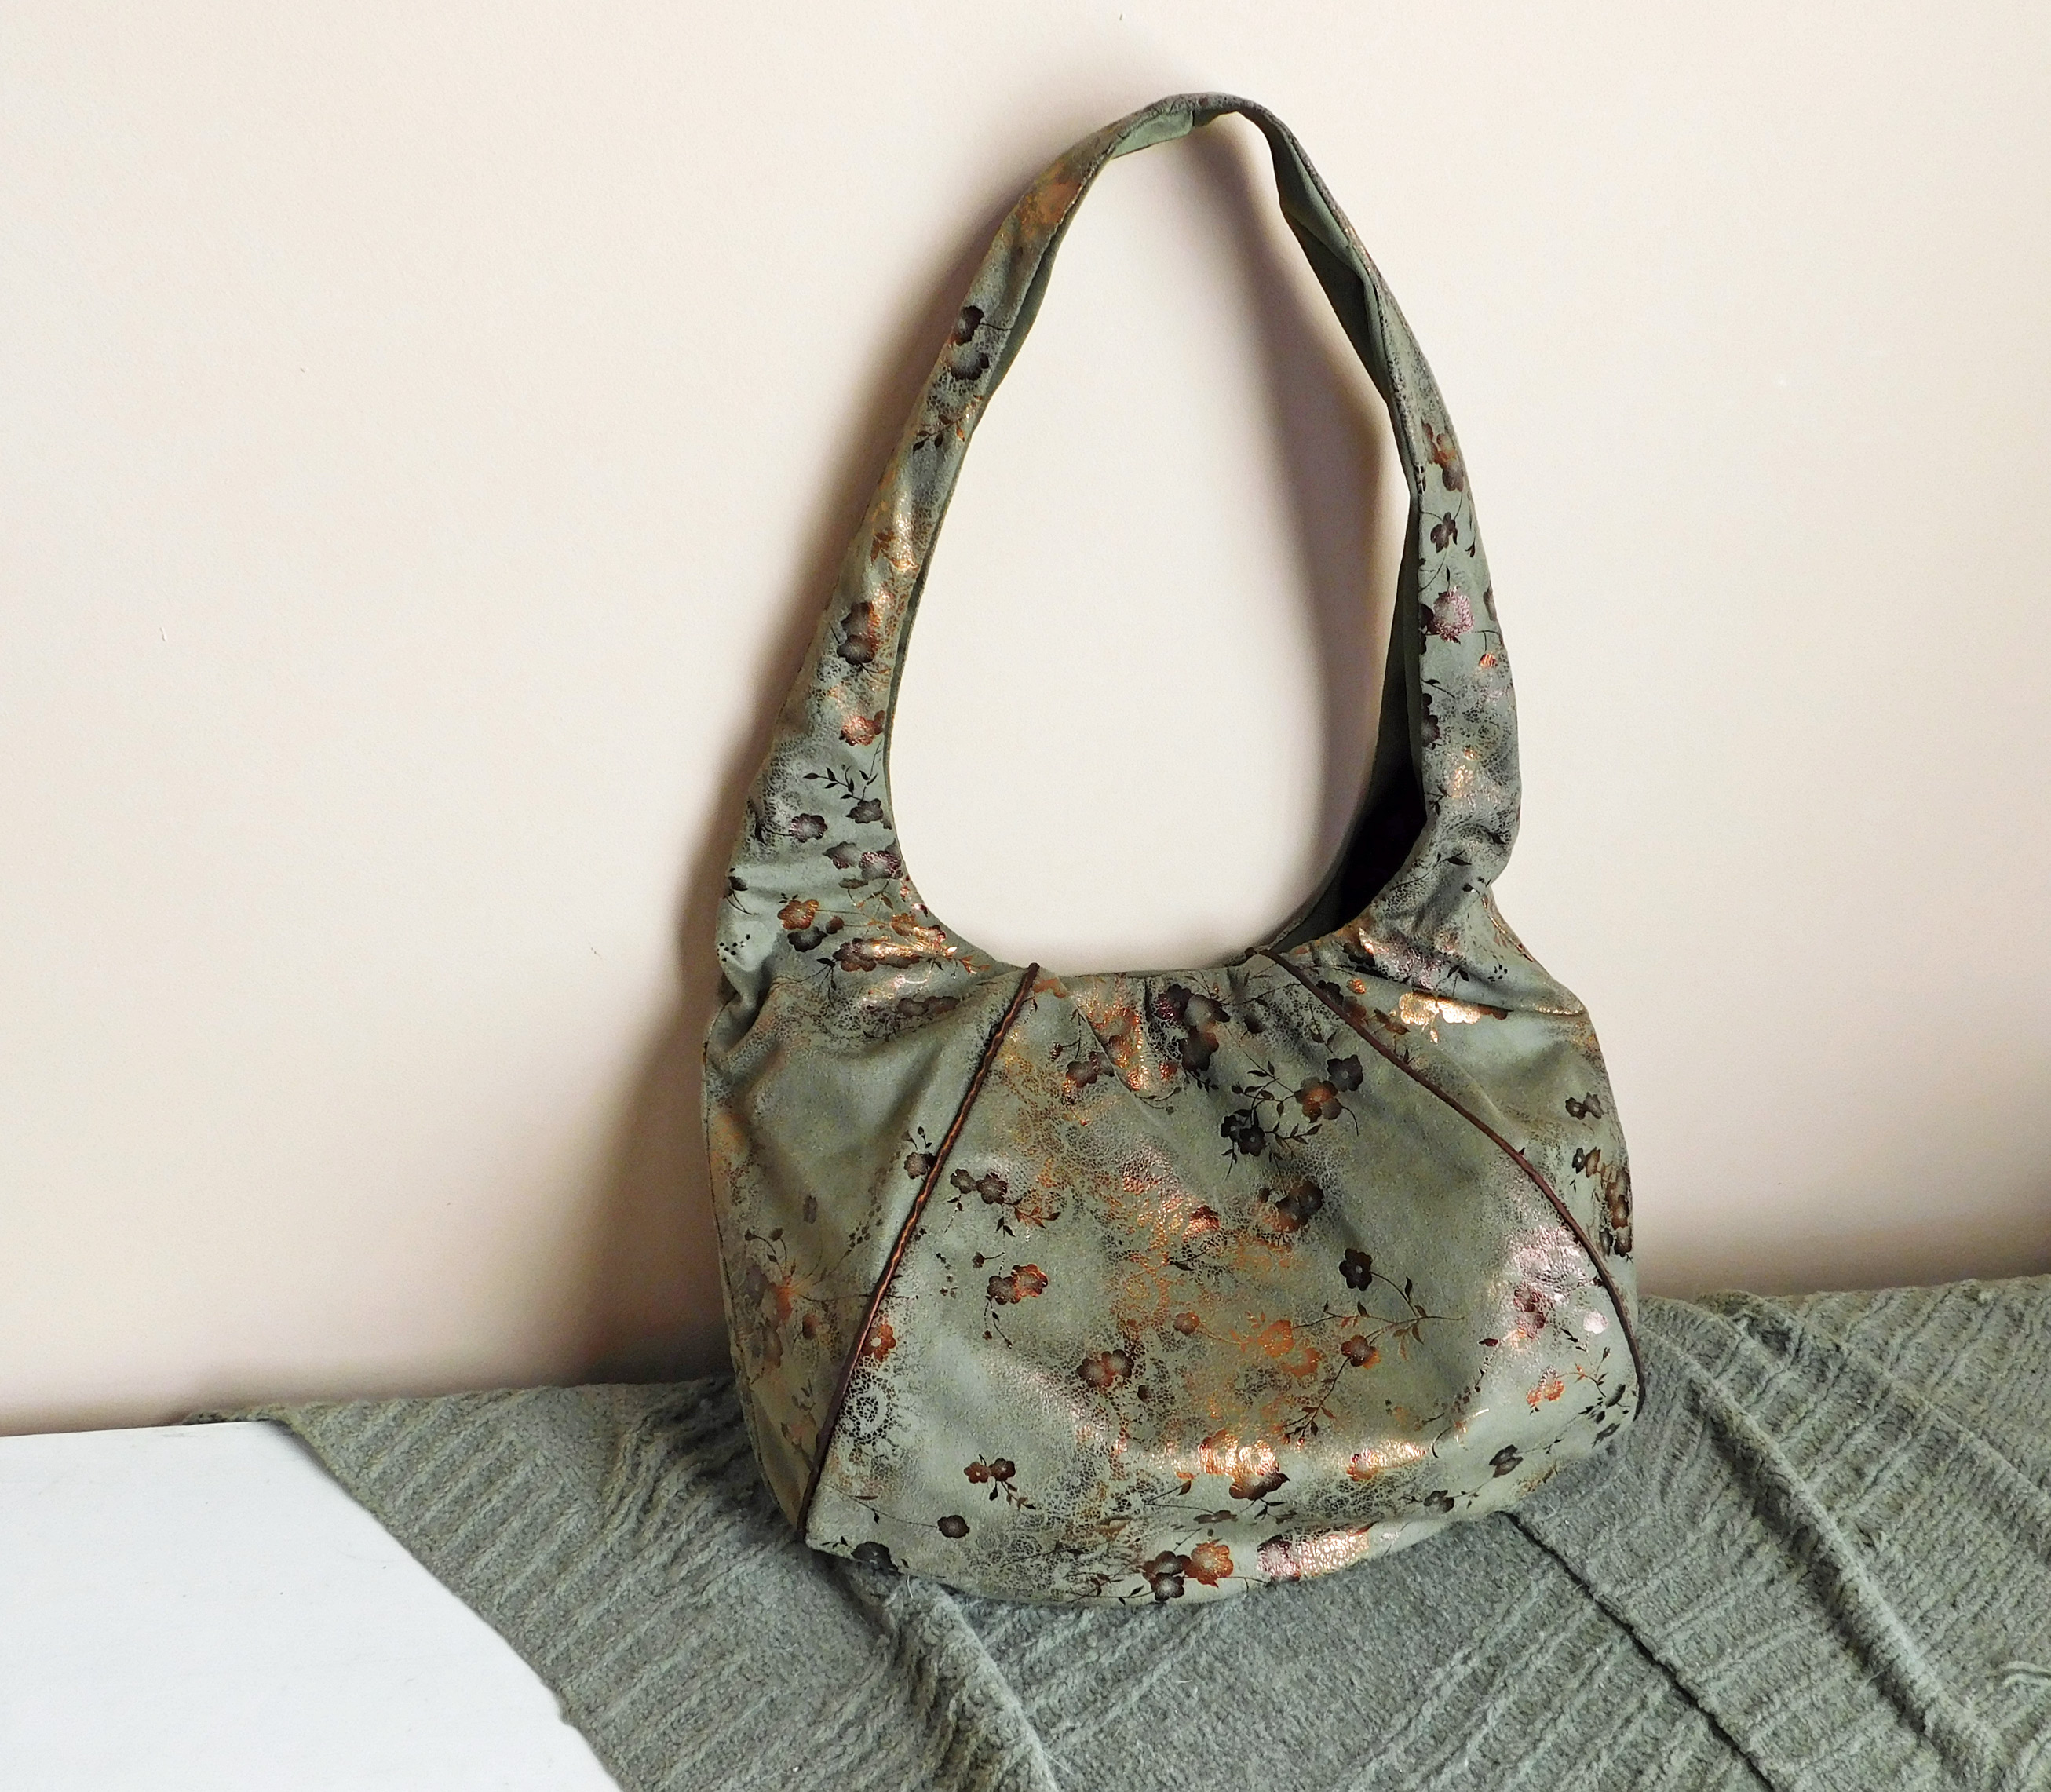
Finished Hobo Purse
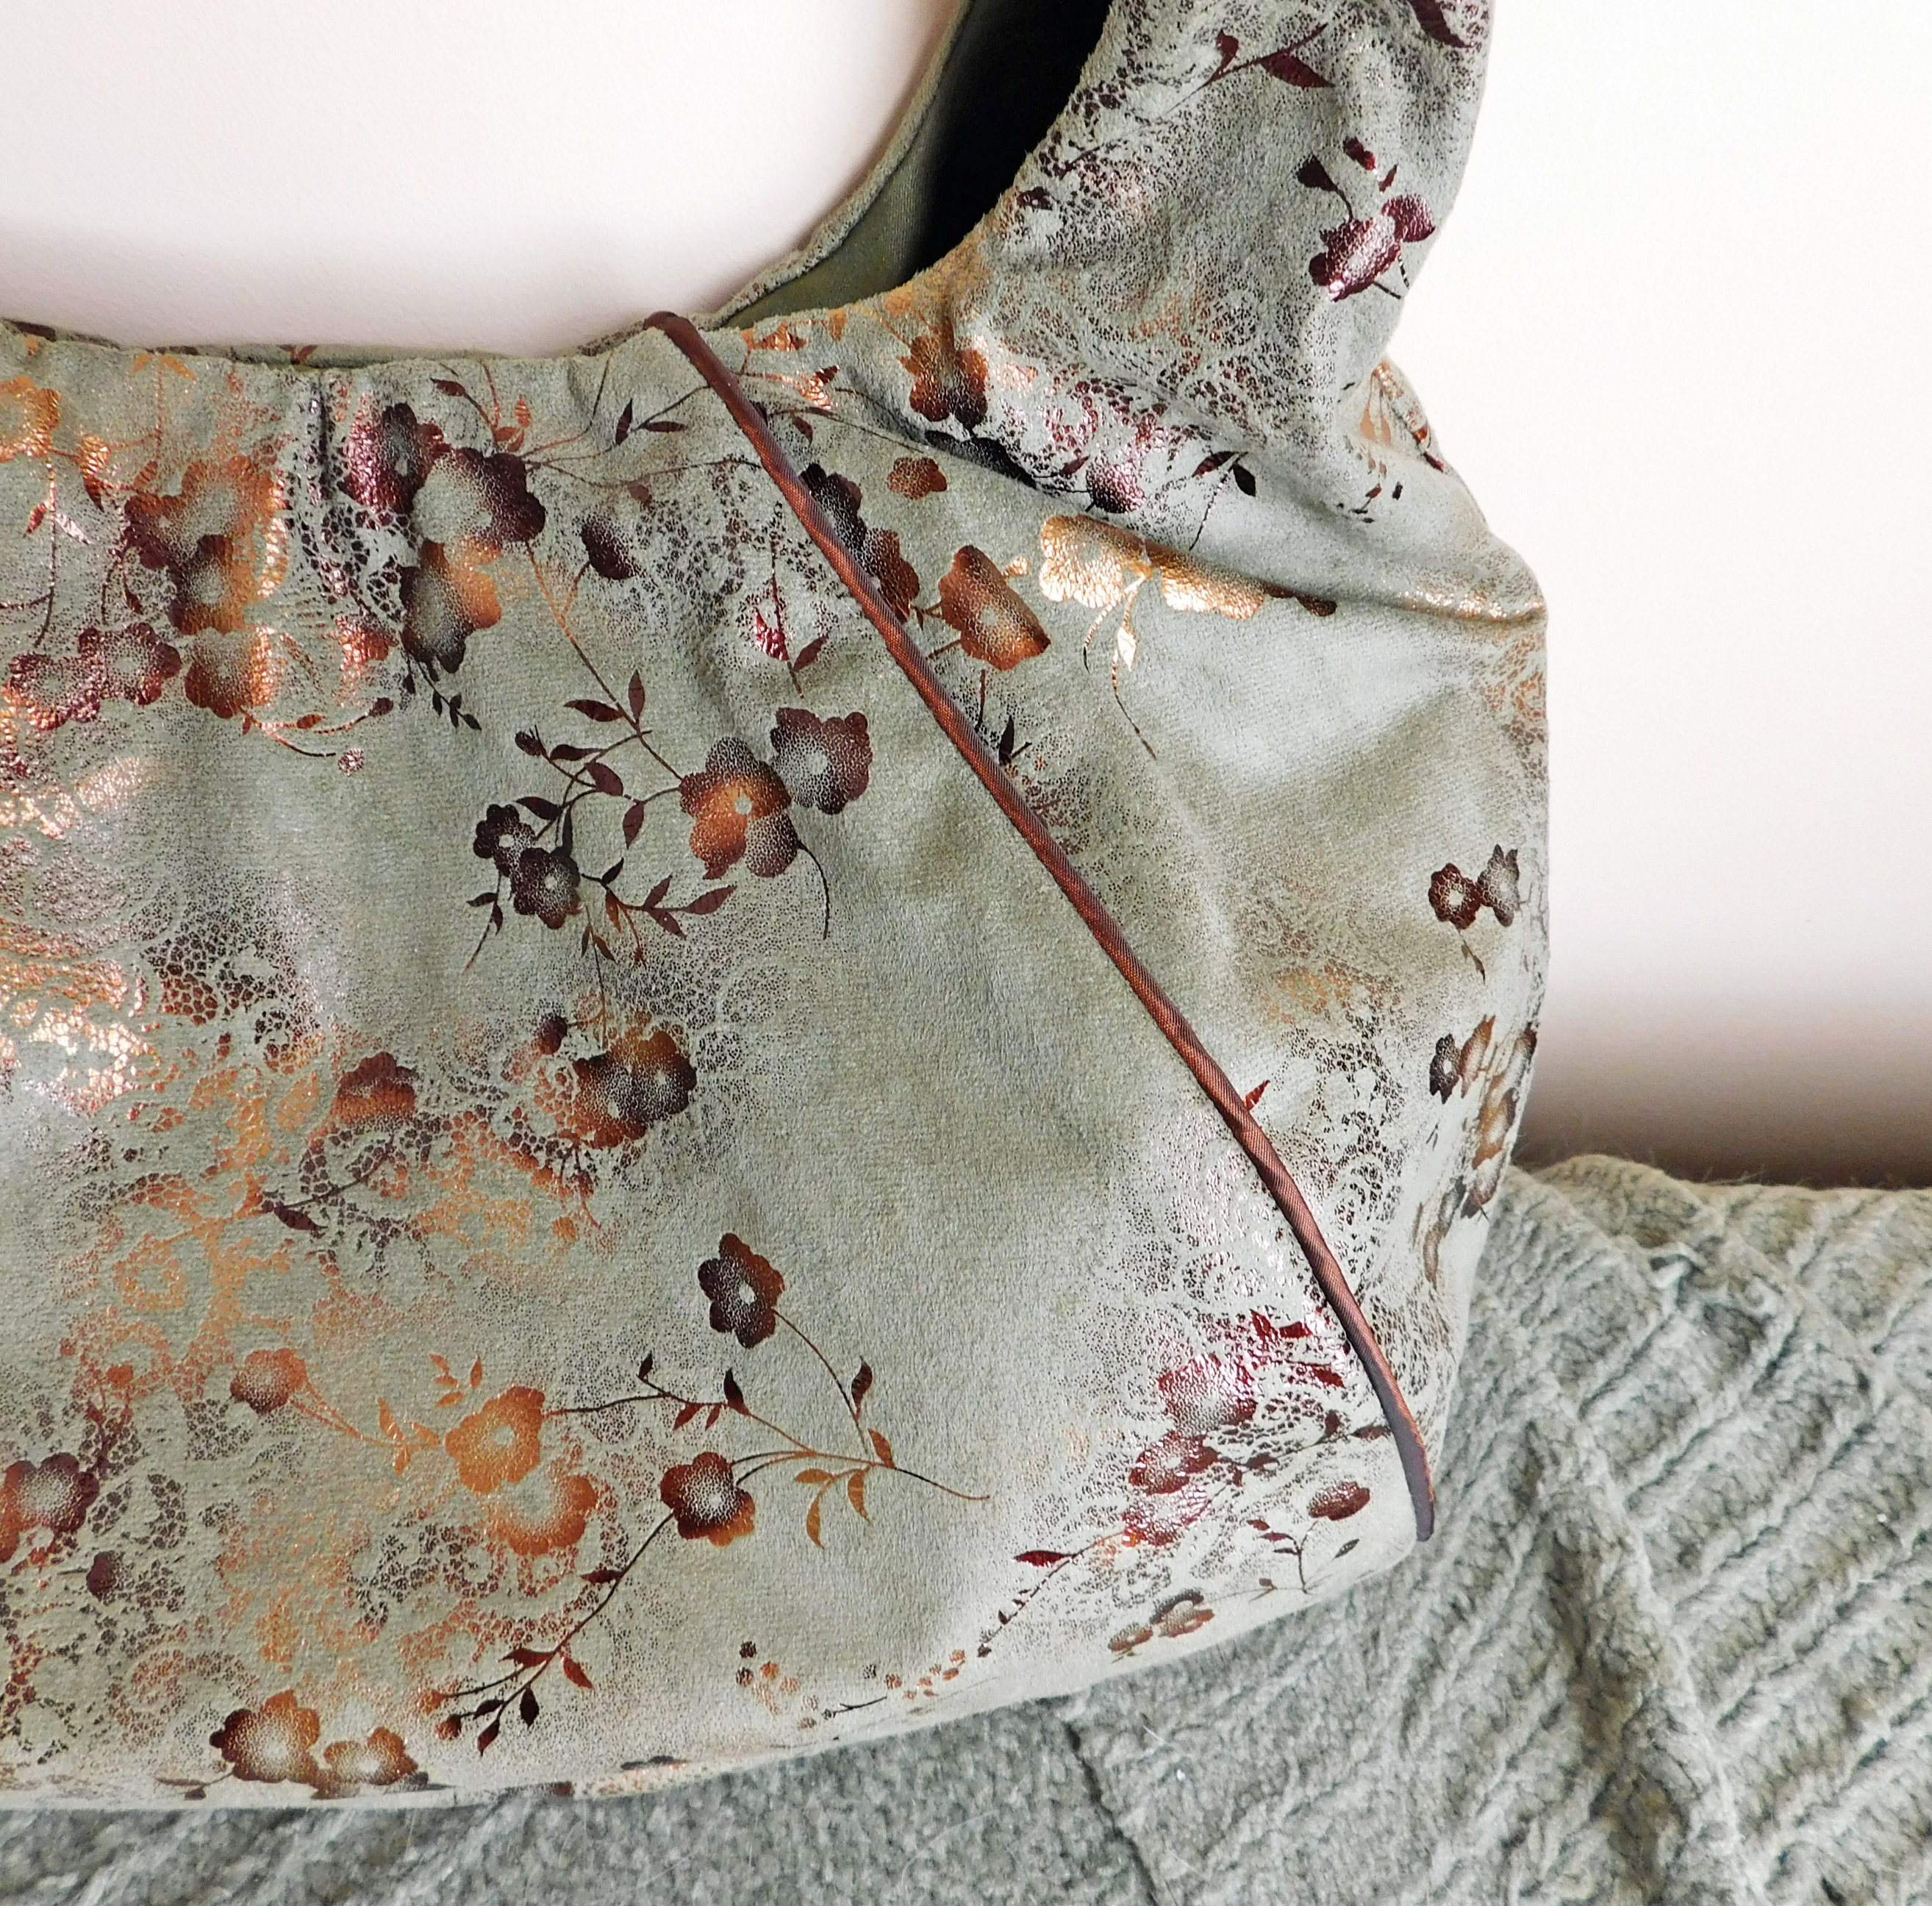
Closeup of Piping
~~*~~
Looking for more? Check out our Sewing Diaries. You might also enjoy our sewing Tutorials and Articles.