A Tutorial
by Lisha Vidler
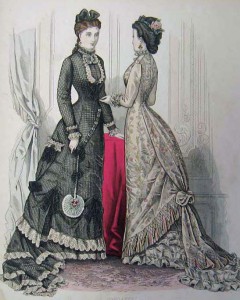
As the Early Bustle style began to evolve into the Natural Form, large bustles were abandoned in favor of a more streamlined look. Skirts became narrow in front, and the rear fullness dropped to below the knees. Skirts no longer needed the protruding bulk of a wire bustle, but they did need some support underneath the heavy drapery of the overskirts.
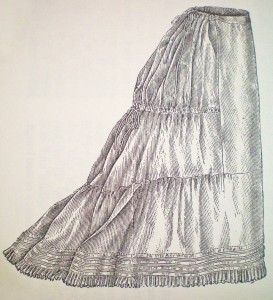
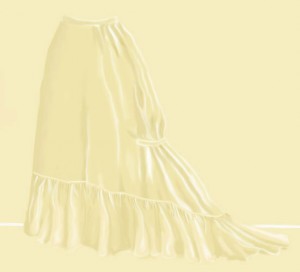
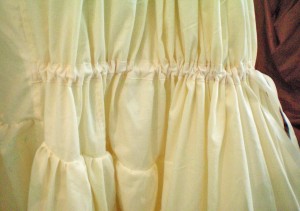
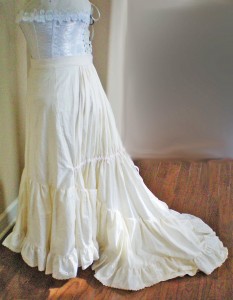
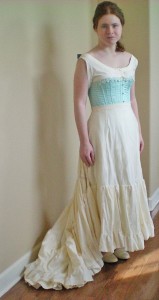
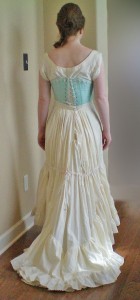
To help achieve this look, petticoats became shaped like the dresses they supported. A woman could easily modify an existing petticoat to suit the new fashion with the simple addition of a drawstring partway down the back. This would draw the bulk of the fullness together, narrowing the width of the petticoat and creating a stiff support for the skirts.
Design & Materials
If you would like to make your own Natural Form petticoat, choose a skirt pattern that represents the shape you desire. It should be gored, with narrower pieces in front and plenty of fullness in the rear. It can be trained, or not, as you desire. For this demonstration, I modified Truly Victorian’s TV208—Trained Skirt Ensemble.
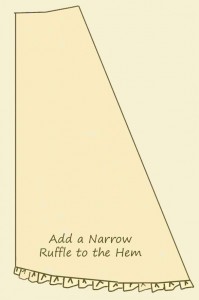
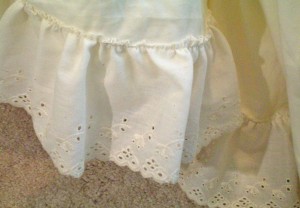
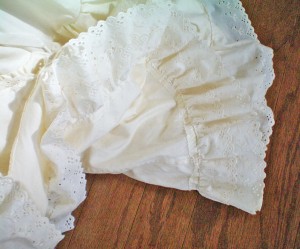
I will show you how to alter the original pattern so that the petticoat will have a double-layered hem, like that of extant Victorian petticoats. The under-layer of the petticoat is gored, with a narrow ruffle at the hem. Its sole purpose is to support the outer ruffle. The outer layer is long and gathered, and mine has an eyelet ruffle along the bottom. I will also show you how to add the rear drawstring. An added benefit of the drawstring is that you can let it out for a fuller petticoat, in case you wish to wear it with an earlier style dress, then cinch it back up again for later styles.
It’s important that you choose a lightweight fabric because the final petticoat will be heavy. At the same time, you don’t want it to be so flimsy that it won’t adequately support your skirt. A broadcloth or lightweight muslin will work well. For mine, I used a lightweight ivory cotton sateen. I picked an embroidered eyelet for the decorative ruffle and for the balayeuse.
Your basic trained skirt pattern is probably between five and seven yards, depending on how full the skirt is and how long you need it to be. You’ll want to add an extra three or four yards of fabric to accommodate the ruffle, depending on how deep you want it to be. You’ll also need enough fabric to make at least a yard of bias tape for the drawstring casing. You may choose to cover your ruffle’s seam with bias tape, as well, in which case you’ll need an additional four yards. It looks prettier to use self-bias tape, but you could buy pre-packaged, if necessary. You will also need two yards of half-inch wide cotton twill tape for the drawstring. Finally, you’ll want hooks and eyes, a button, or an additional two yards of twill tape to make ties for your waistband closure.
Supply List:
- Trained Skirt Pattern
- Fabric, 8-12 yds
- Wide Bias Tape, 1-5 yds
- ½” Cotton Twill Tape, 2 yds (or 4 yds if making a drawstring waist)
- Thread
- Hooks and Eyes, or a Button
Construction
Cut and assemble your skirt pattern per the directions, making it one to two inches shorter than your skirt will be. However, don’t hem it or add a waistband yet. Stitch all of the main seams together. You can use French seams or flat-felled seams for a nice, finished look.
If you’re using TV208, the circumference of your hem should be about four yards, give or take. Measure it to be sure, then cut the ruffle for the under-layer. This will be a strip of fabric anywhere from one to three inches wide, depending on your preference, and twice the length of your hem circumference. Finish one edge with a narrow hem, and then gather the top edge using your preferred method of gathering. Attach this narrow ruffle to the bottom edge of the petticoat.
For a period effect, fell the joining seam. To do this, stitch the ruffle to the hem with right sides together. Press the seam flat, and then press the raw edge of the seam allowance under. Stitch along the folded edge of the seam allowance, creating a flat-felled seam.
Ruffle
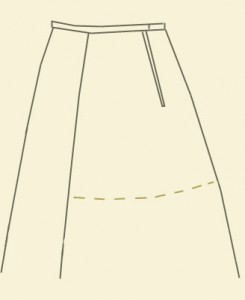
Next, you’ll want to add your large ruffle. Try on the petticoat and have someone help you measure up from the hem to just below your knees. Mark it, then remove the petticoat, measure this distance, and make a note of it. Mark the same amount all the way around the skirt, measuring up from the hem. This is where you will attach the large ruffle, to ensure an even length all around the hem.
Cut your ruffle the width of what you just measured, plus one inch to turn under for a hem. Make it twice the length of your hem circumference to ensure a nice, full ruffle. Hem the ruffle by turning under the raw edge half an inch twice and stitching it flat.
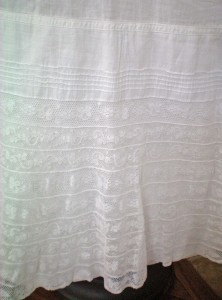
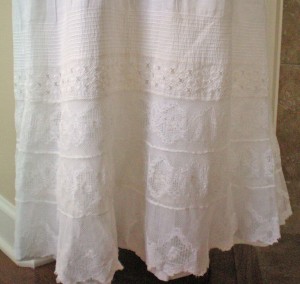
Decorate your ruffle, if you’re going to. Many antique petticoats have multiple rows of tiny pintucks, followed by rows of lace insertion, or a lace ruffle. Historically speaking, eyelet or broiderie anglaise is always acceptable, as is cotton net lace, bobbin lace, or tatted lace. You can also go a plainer route, if you prefer.
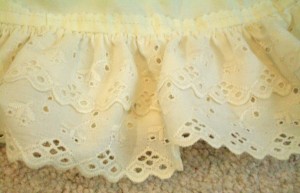
Because my petticoat has such a full skirt, I decided to add a simple eyelet ruffle for decoration.
Once your ruffle is decorated, go ahead and gather its top edge using your preferred method. (I use either a ruffler attachment foot, or zig-zag stitching over a length of pearl cotton crochet thread.)
As soon as your ruffle is gathered, you can attach it to your petticoat. You can do this a number of ways.
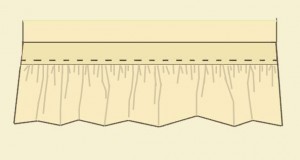
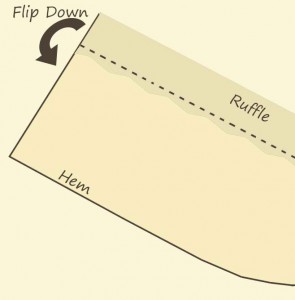
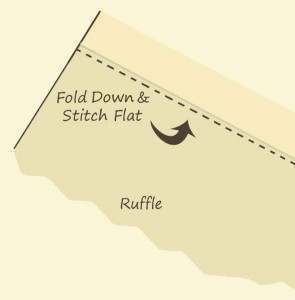
- Place the ruffle upside down, so that the top edge runs along your marking line, right sides together. Stitch, then flip the ruffle down so the raw edge is hidden. Press the seam. For a flatter top edge, you can then stitch again a quarter of an inch down from the seam.
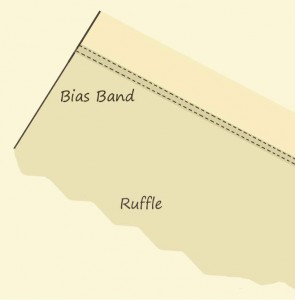
- Attach the seam by the above method, then create a band of bias tape and use this to cover the join, stitching along both edges. This is an historic method that creates a very neat seam.
- Or, before gathering, fold the top edge of your ruffle down by one inch. Gather, then line up the top edge with the markings on your petticoat. Stitch down half an inch from the top of the ruffle. This will give you a ruffled top edge. Leave plain, or cover the stitching with a ribbon or bias band.
Balayeuse
If you’d like to add a balayeuse, or dust ruffle, now would be the easiest time to do so. Historically speaking, a balayeuse is a ruffle that buttons, ties, or is basted to the underside of a skirt or petticoat. Its job is to drag on the ground, protecting the hem and keeping it clean. A balayeuse can be removed and washed as necessary, so it should be made of a sturdy fabric or lace, such as eyelet or muslin. (For more information, please see my tutorial Making a Balayeuse.)
My balayeuse is a double-layered ruffle. I happened to find a narrower version of the same eyelet that decorates the outer ruffle of the petticoat, and so I layered the eyelet on top of itself to make a wider ruffle, then gathered it. Then I basted it to the underside of the petticoat’s hem, where it can easily be removed if necessary.
Drawstring
First, go ahead and gather or pleat your waist and attach your waistband. Your drawstring will go about eighteen inches below your waistband, between the side back seams. Measure down and mark the entire length, to be sure your drawstring is level all the way across.
If you’re going to make your own bias tape, cut bias strips one inch wide. (For more information on making your own bias tape, please see the free article, Don’t Let the Binding Get You Down by Cathy Hay at Your Wardrobe Unlock’d.)
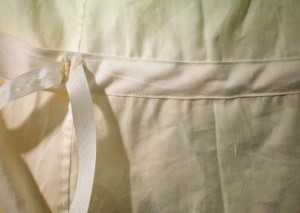
Sew two vertical buttonholes at the center of the bias tape, side by side, about a quarter inch apart.
Next, stitch the bias tape to the back of the petticoat, eighteen inches down from the waist. Sew close to the edges, all the way from end to end, creating a channel for the drawstring. Be sure to leave the ends open for now!
Cut two pieces of cotton twill tape, making each one as long as the entire bias channel. Attach a safety pin to the end and thread it through the buttonhole, pulling it through the channel. Once it’s reached the open end, remove the safety pin. Fold the raw edge under, then hand stitch the twill tape within the channel, through all layers of bias tape and petticoat, firmly anchoring it. Slip stitch the channel edges, as well, to finish it. Repeat on the other side.
Now that your drawstrings are anchored, you can tug on them to draw the back of the petticoat up. Tie the drawstring into a bow to secure it. When you wish to wear your petticoat for an Early Bustle style, simply untie the bow, releasing the drawstring, and then retie it when you’re ready for a Natural Form style again.
You now have a petticoat capable of supporting any style of trained gown from the mid to late 1870s, whether worn with a bustle or not.
~~*~~
Have you ever made a trained Bustle or Natural Form petticoat? What techniques did you use? What features did you include?



Pingback: A Plethora of Petticoats | Yesterday's Thimble