
Everything you sew has seam allowances. But what is a seam allowance?
Definition
The seam allowance is the strip of fabric that lies between the seam you’ve sewn and the raw edge of the fabric. It may be narrow or wide, depending on what size seam allowance your pattern calls for.
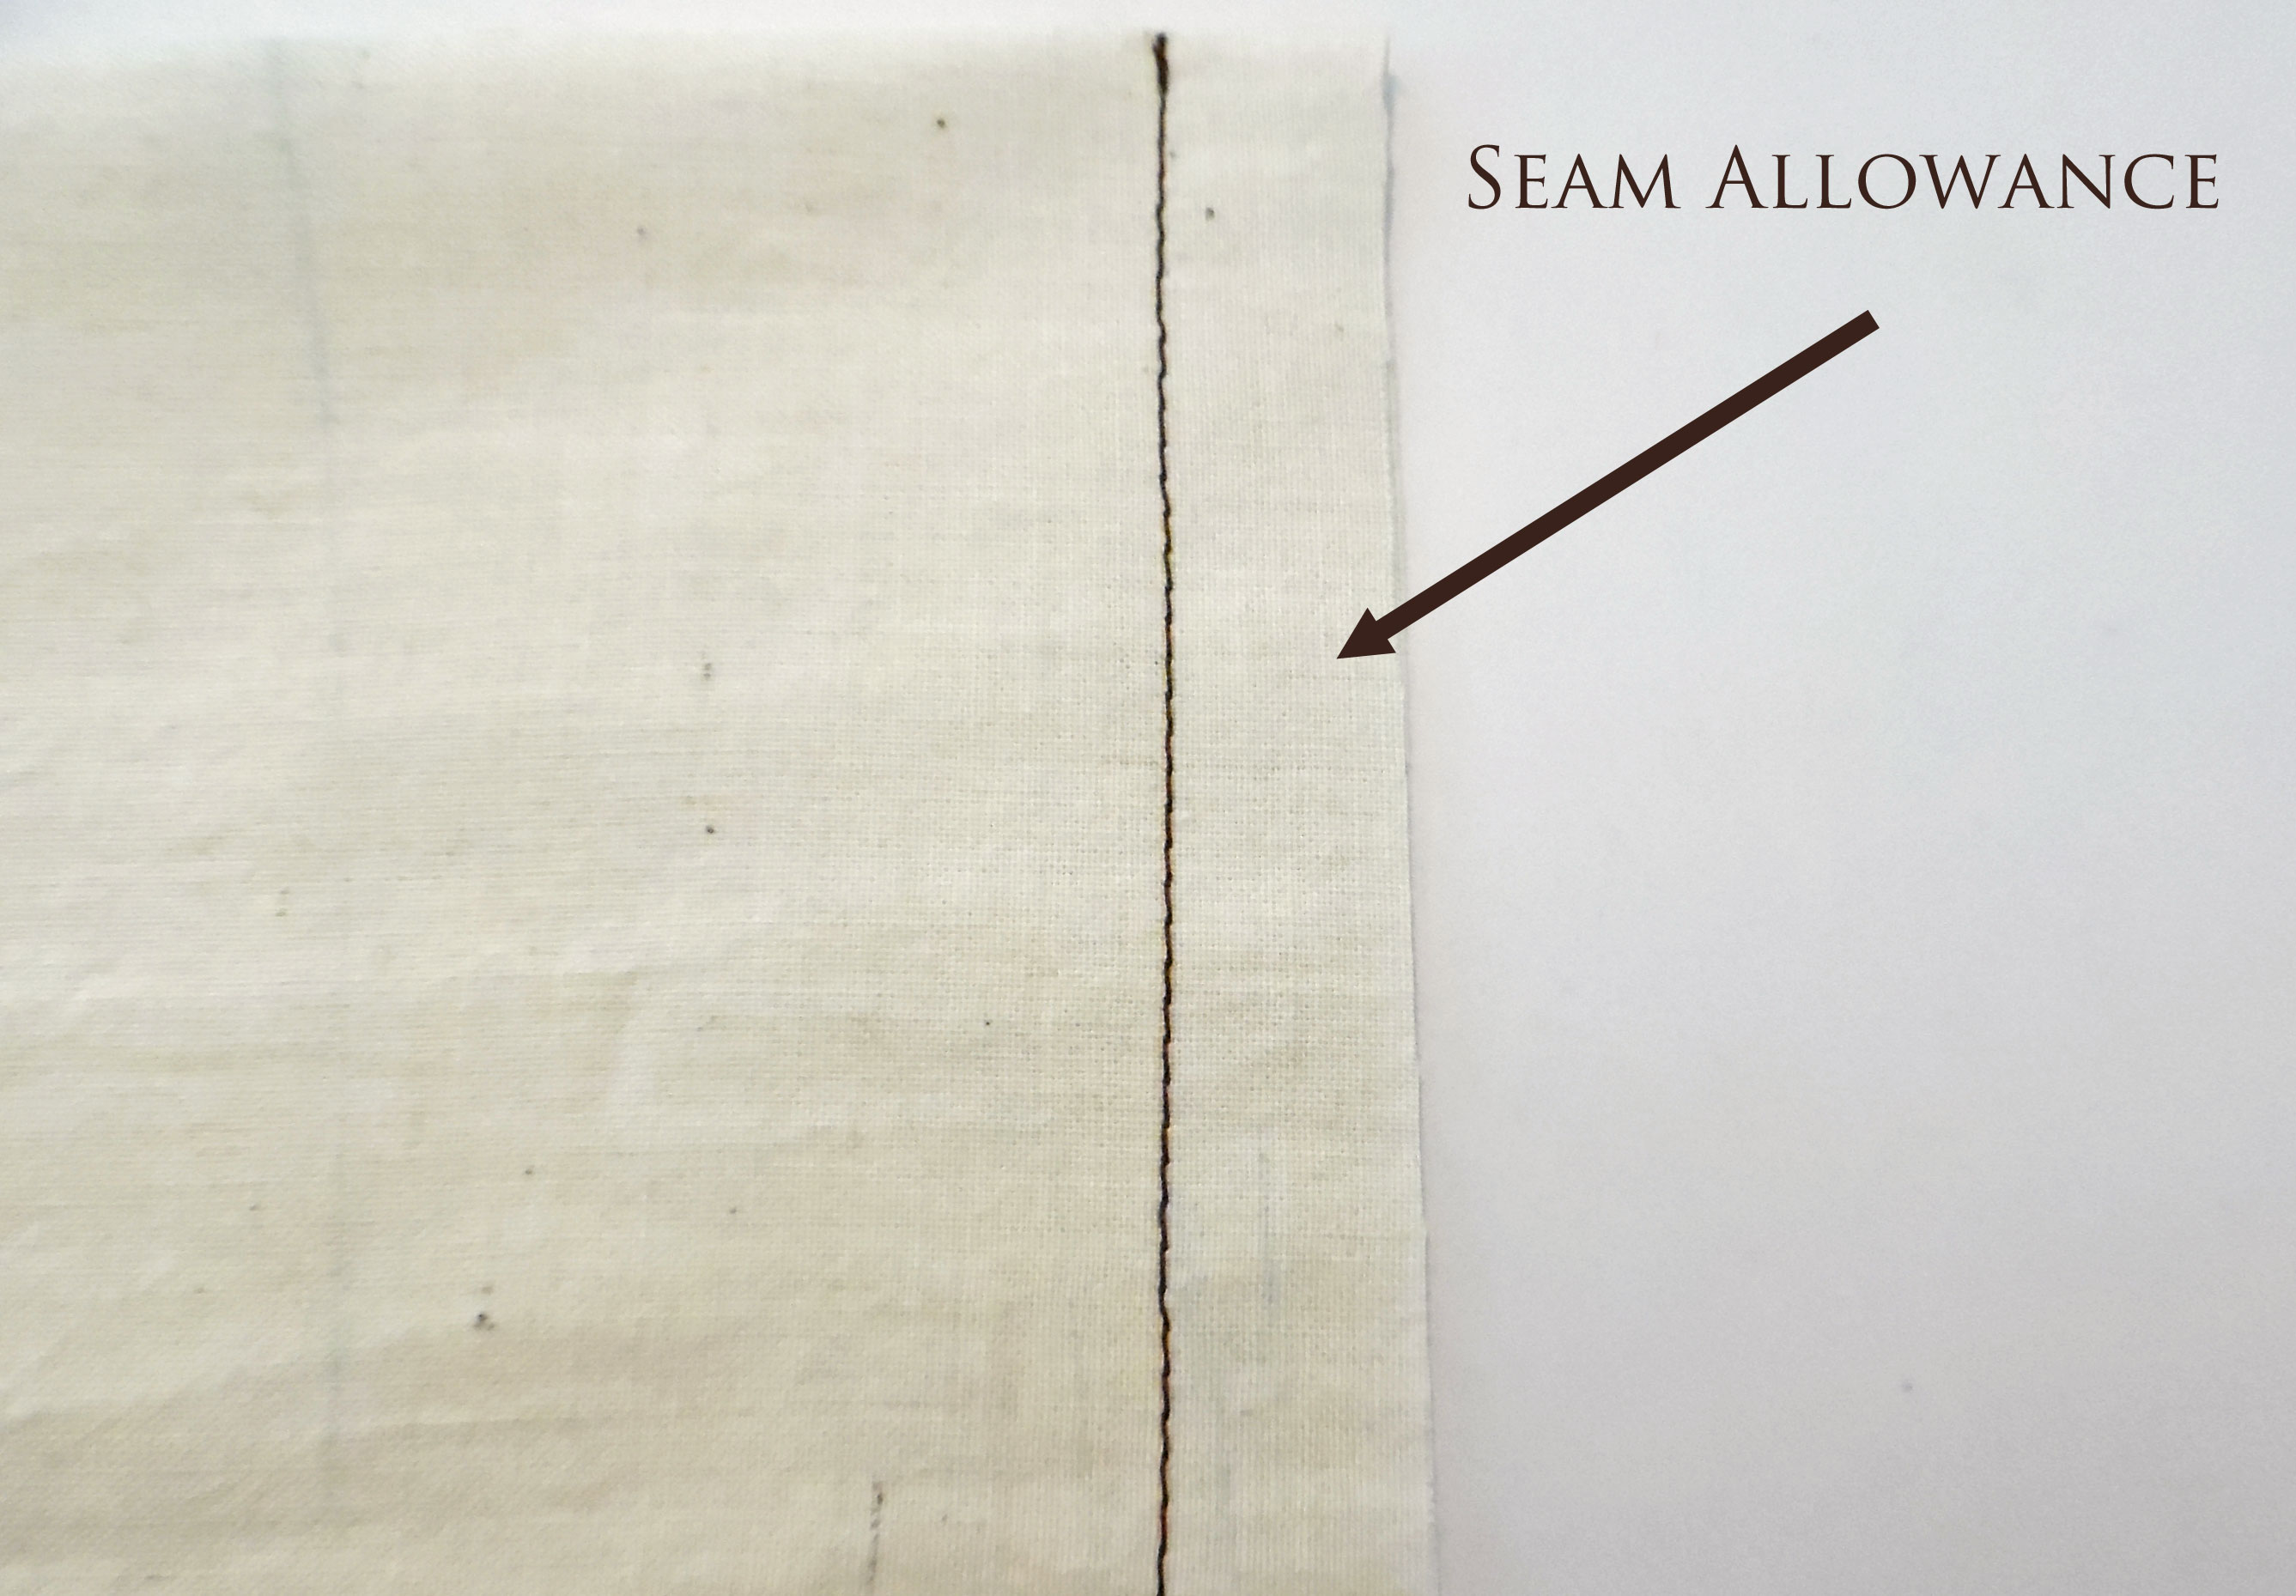
Seam Allowance
Most commercial garment patterns have a 5/8-inch seam allowance. This is rather wide, because the pattern company wants you to have room for alterations if the pattern doesn’t fit as planned. (Which, unfortunately, is most of the time!)
Many historical costume patterns have a ½-inch seam allowance, which is a bit narrower than the standard. This is probably because you’ll usually make a mockup of your garment out of cheap muslin, in order to perfect the fit. By the time you cut out your good fabric, you should already know it fits well, so you don’t need as much “safety room” in the seam allowances.
Baby clothes and doll clothes often have ¼-inch seam allowances. This is because they’re much smaller garments, which don’t work with wide or bulky seams.
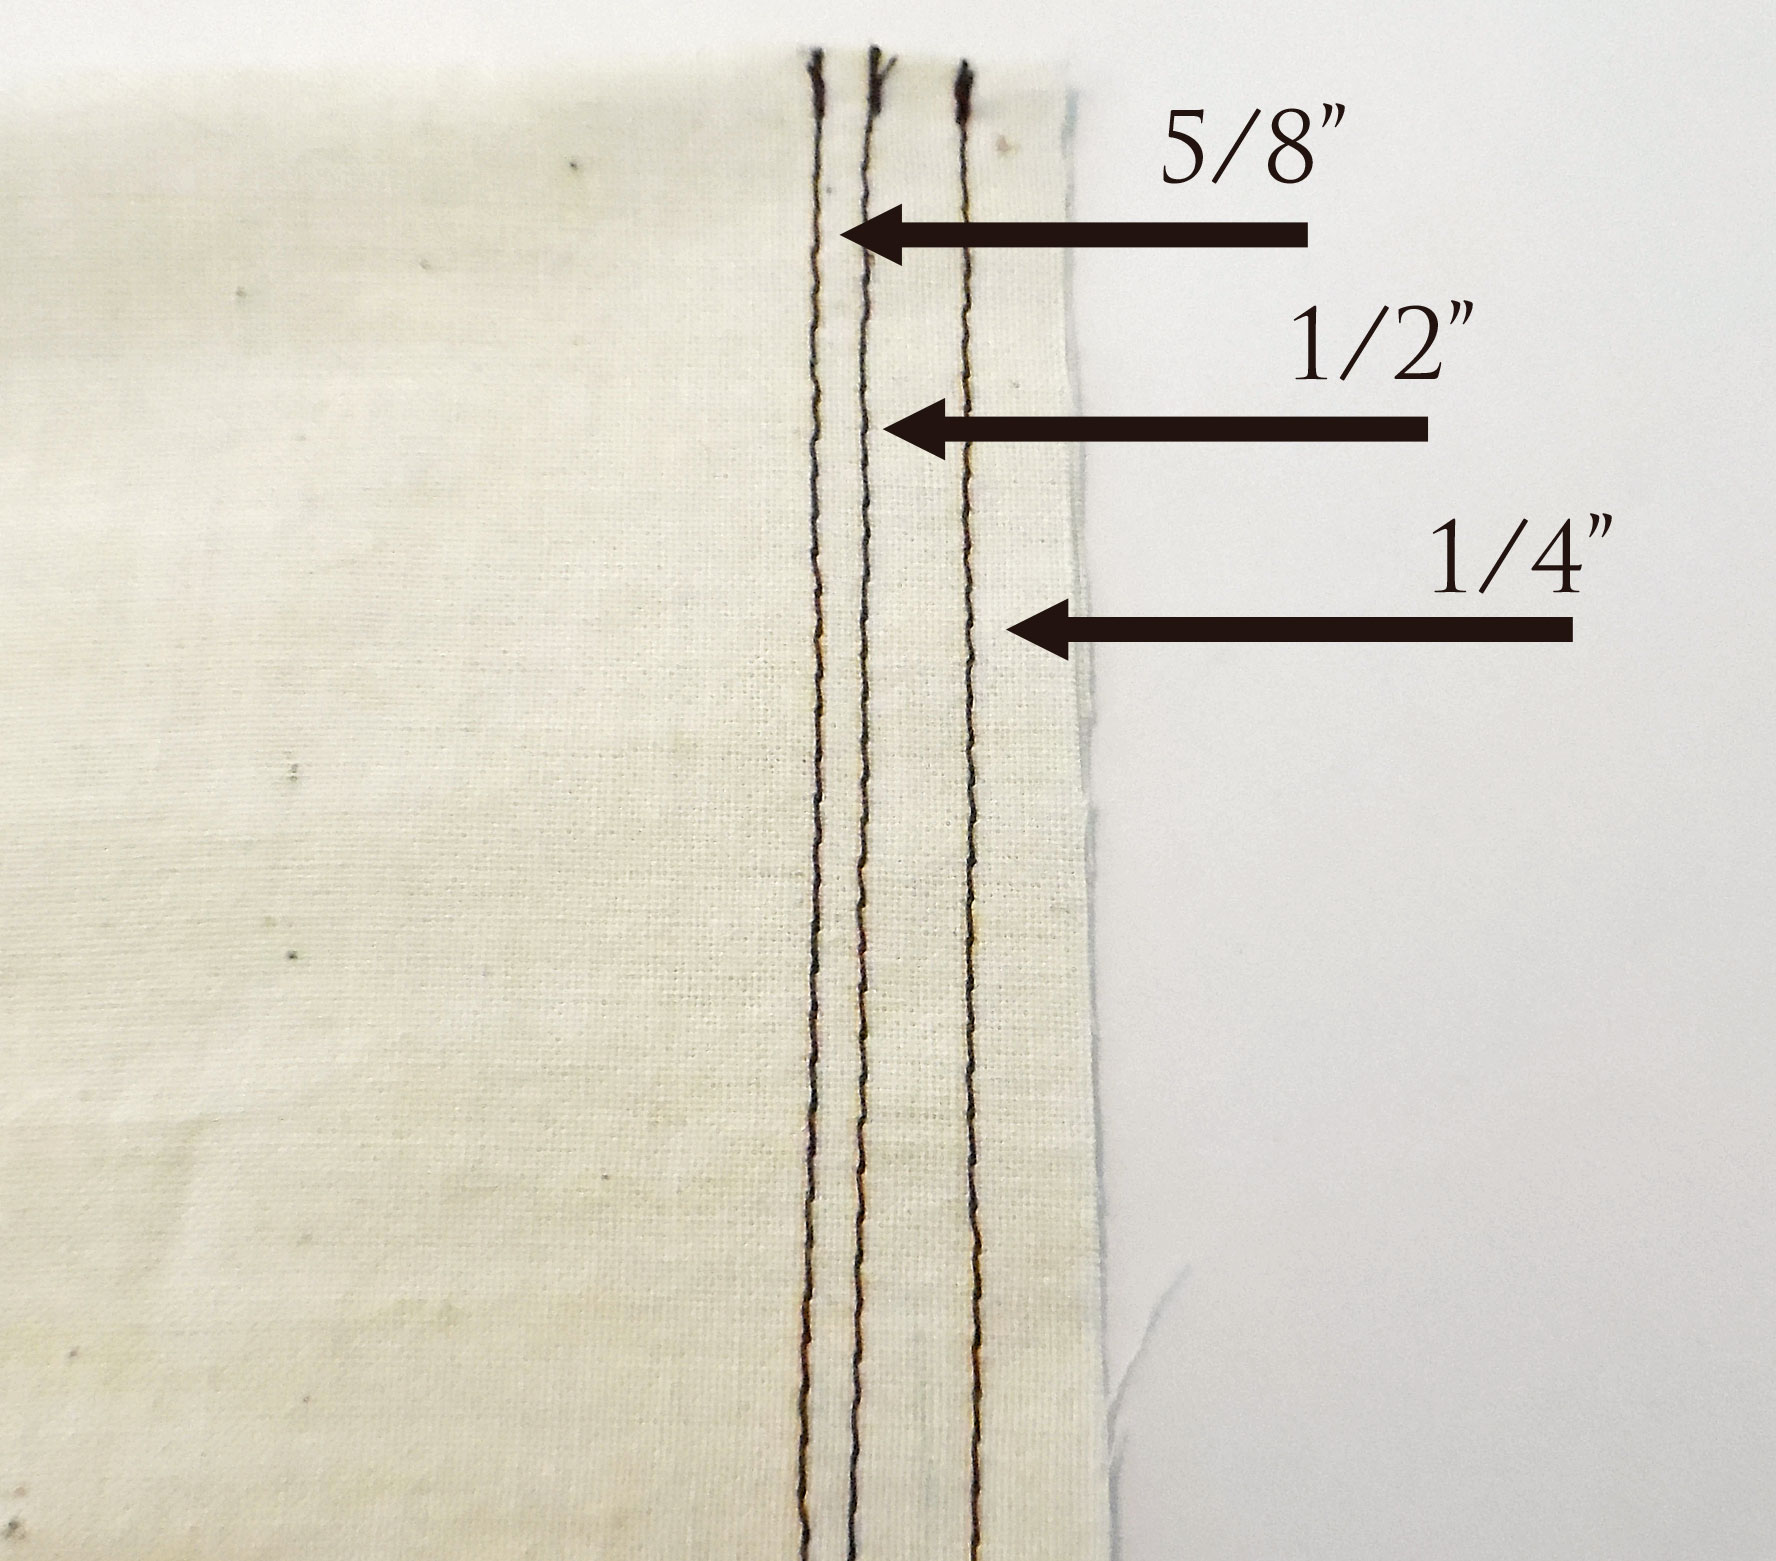
Comparison: 5/8″ vs 1/2″ vs 1/4″
Tips
- If your pattern calls for a narrow seam allowance, such as ¼-inch, don’t sew a wider seam allowance, with the intention of trimming it afterwards. Some people do this because they’re intimidated by the idea of sewing a narrow seam allowance—but it doesn’t have to be scary! There are special presser feet that will help you sew a perfect ¼-inch seam, every time. Some ¼-inch presser feet have a guide-bar to help keep the fabric aligned, but these only work well on straight seams. If your seam is curved, you’re better off using the kind without a guide-bar.
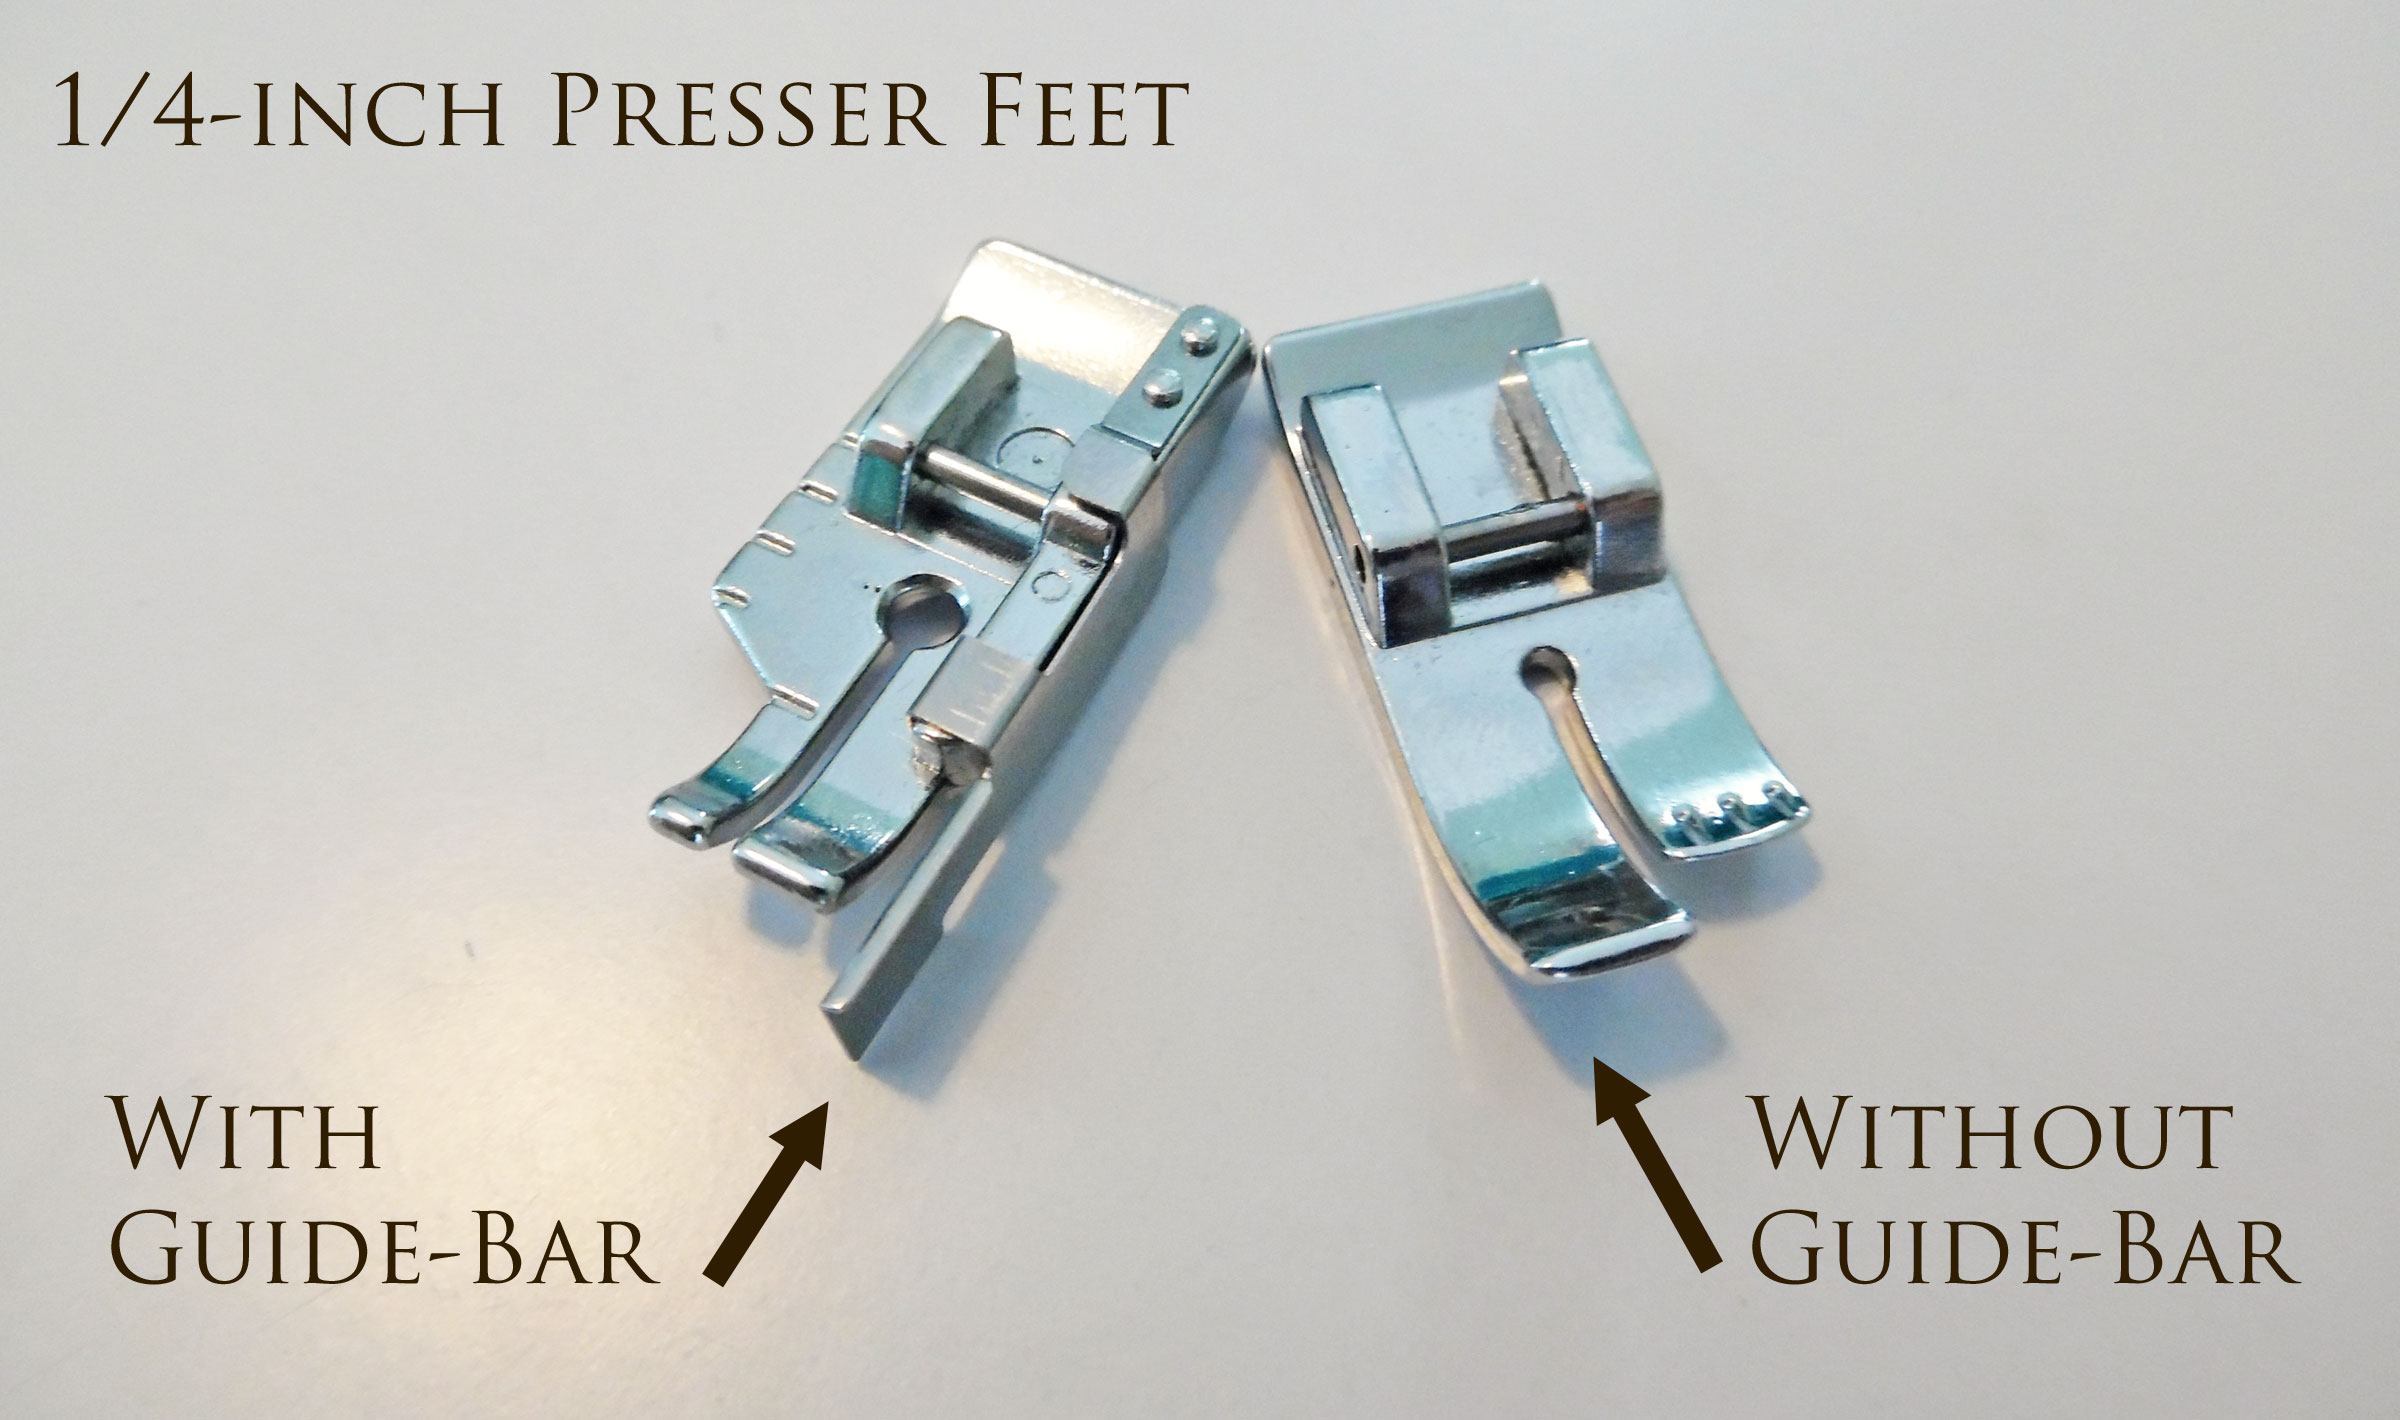
1/4-Inch Presser Feet: With & Without Guide Bar
- Most sewing machines have grooves incised into the area next to the feed dogs. These grooves mark the various seam allowances: quarter-inch, three-eighths, half-inch, five-eighths, and so on.
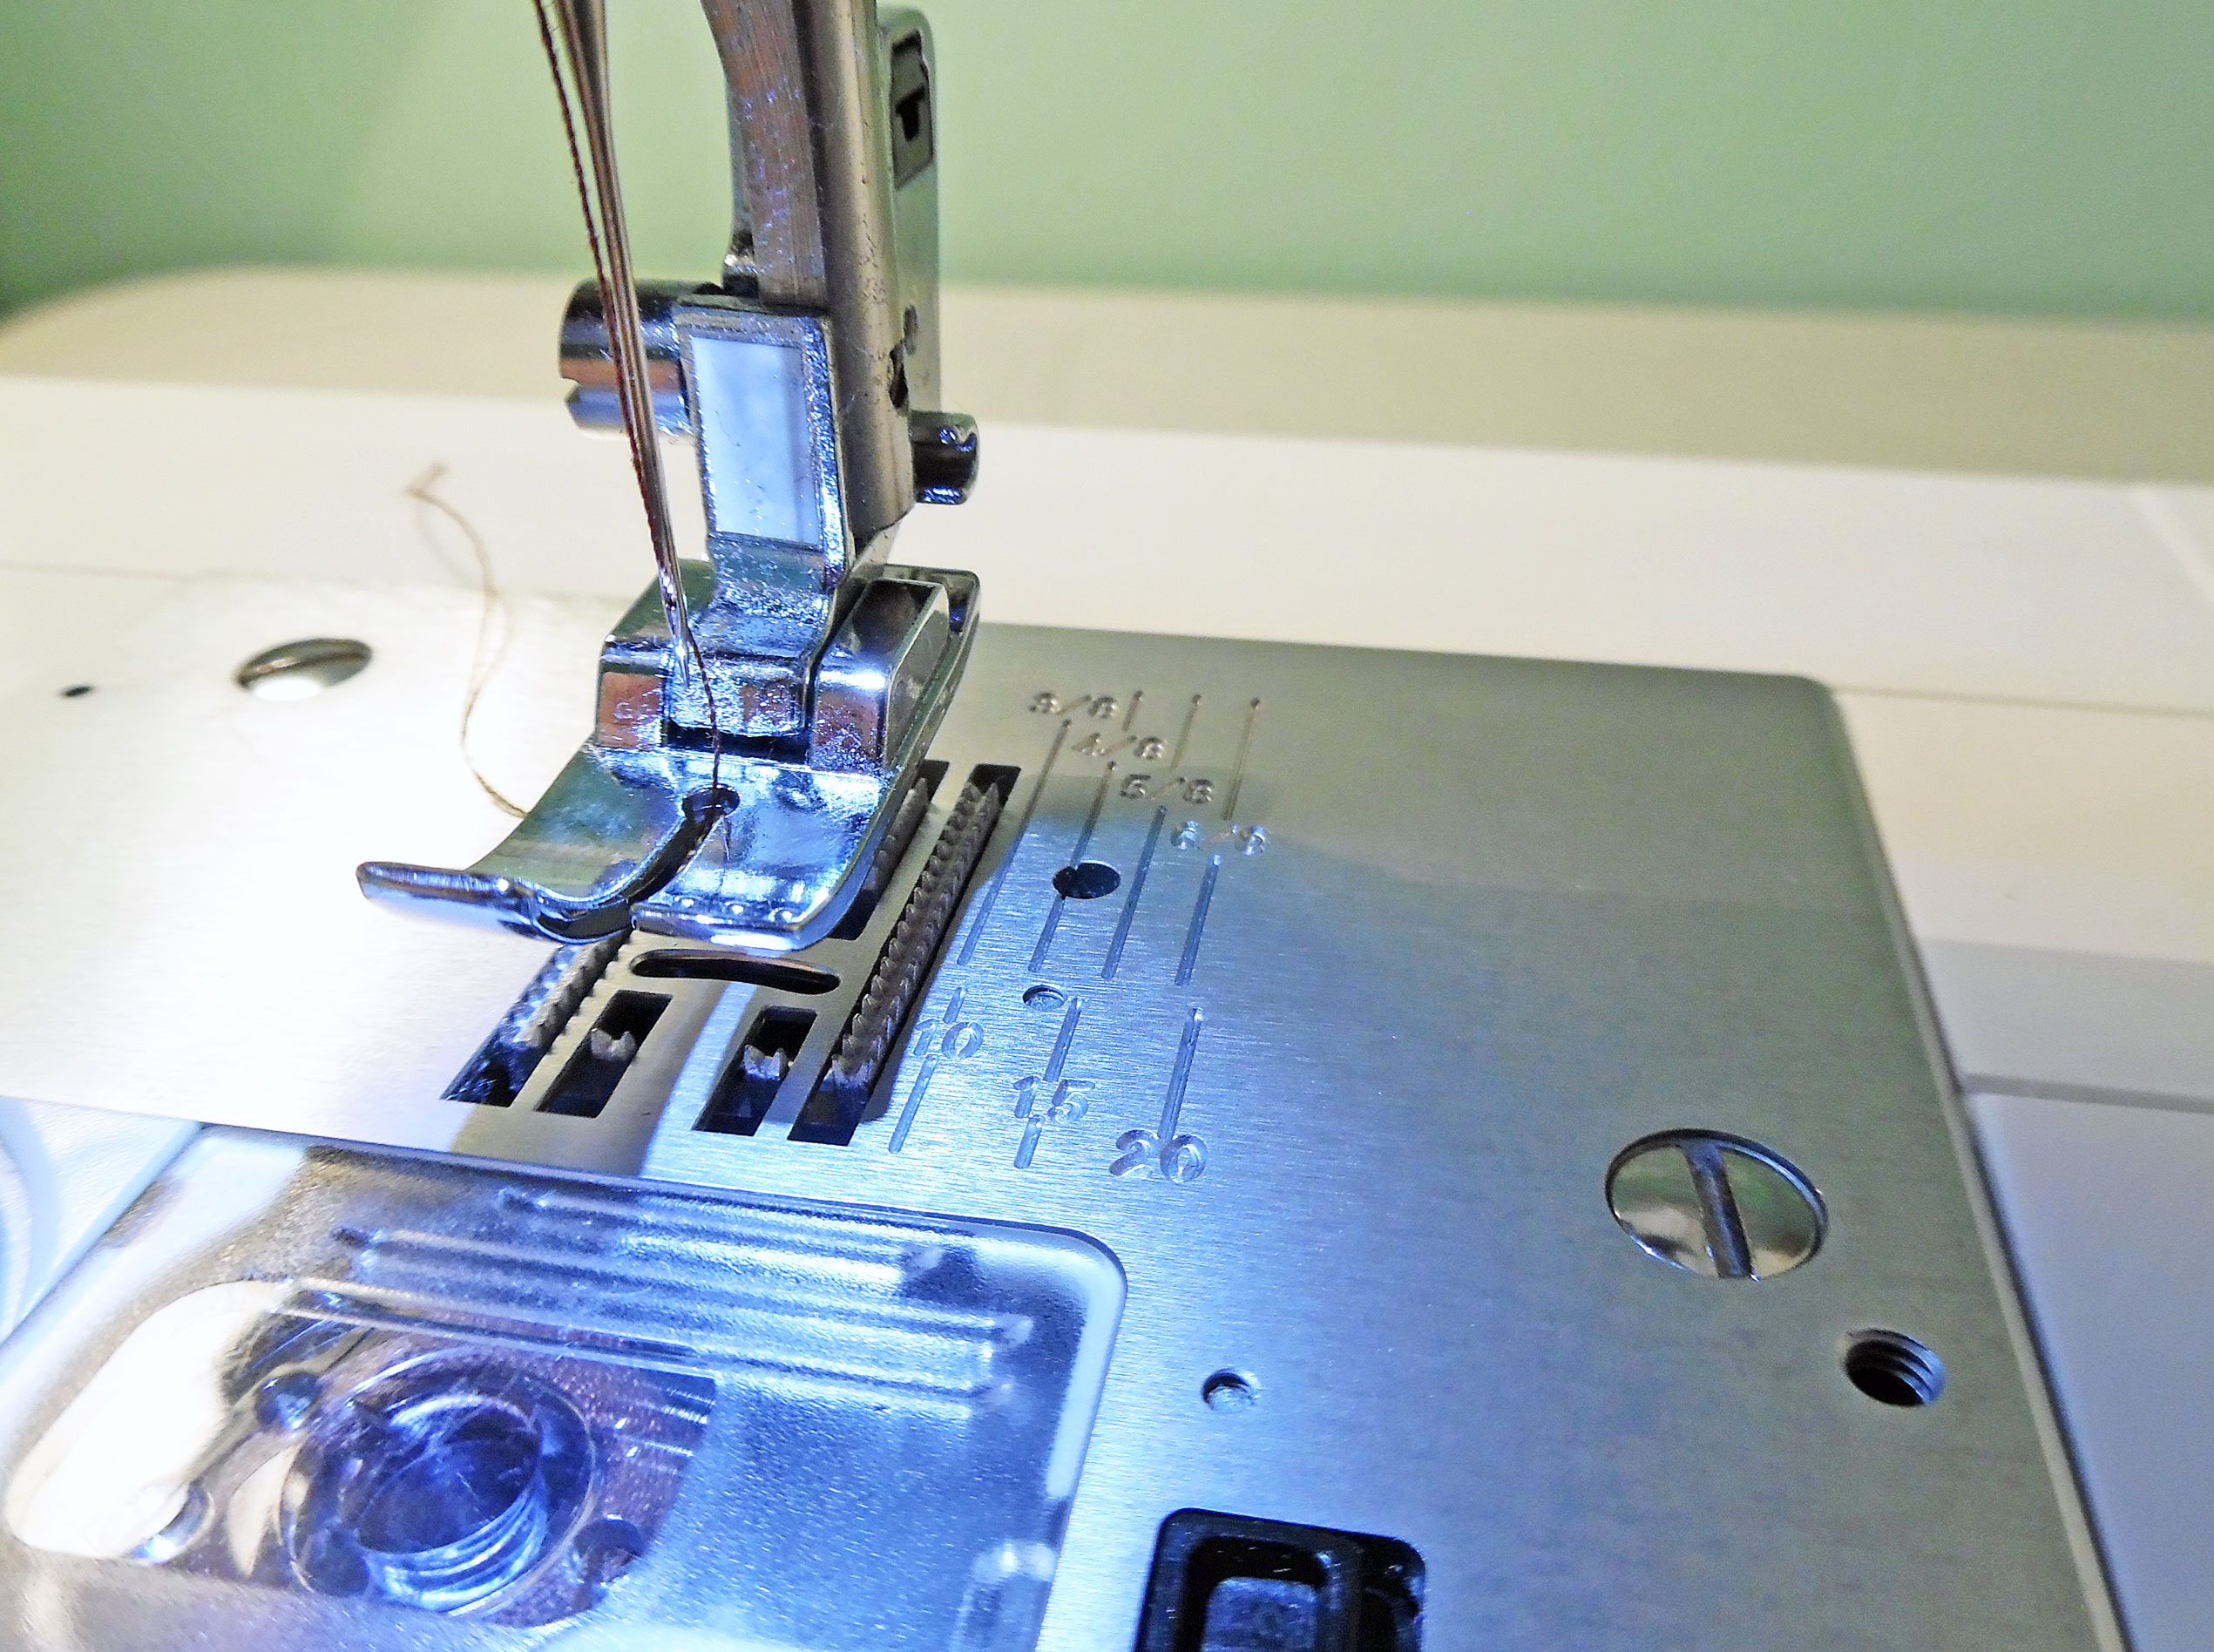
Seam Allowance Grooves
- Usually, the grooves are marked, so you know which is which, but sometimes they’re not. Occasionally, the grooves are labeled oddly. (For example, it might say 4/8-inch instead of ½-inch.) Sometimes, they’re even mislabeled! To check, make sure your needle is in the center position, then lower it all the way, leaving the presser foot up. Slide a ruler under the presser foot until it bumps against the needle. Measure outwards from the needle to check each groove. If they aren’t labeled, or if they’re labeled incorrectly, place a piece of blue painter’s tape above the grooves, and write the measurements on it with a pen or fine-tipped Sharpie.
- To ensure a straight seam, use a seam guide. There are lots of different kinds available, so pick one that works for you. The easiest (and cheapest!) is a piece of blue painter’s tape. If your machine has grooves to mark the seam allowances, you can place a piece of tape along the groove that represents the seam allowance you need. Make sure the tape extends all the way to the front edge of your sewing machine. If you don’t want to have to move the tape every time you change the width of your seam allowances, simply measure outward from the needle and use a ruler to draw seam allowances on the tape.
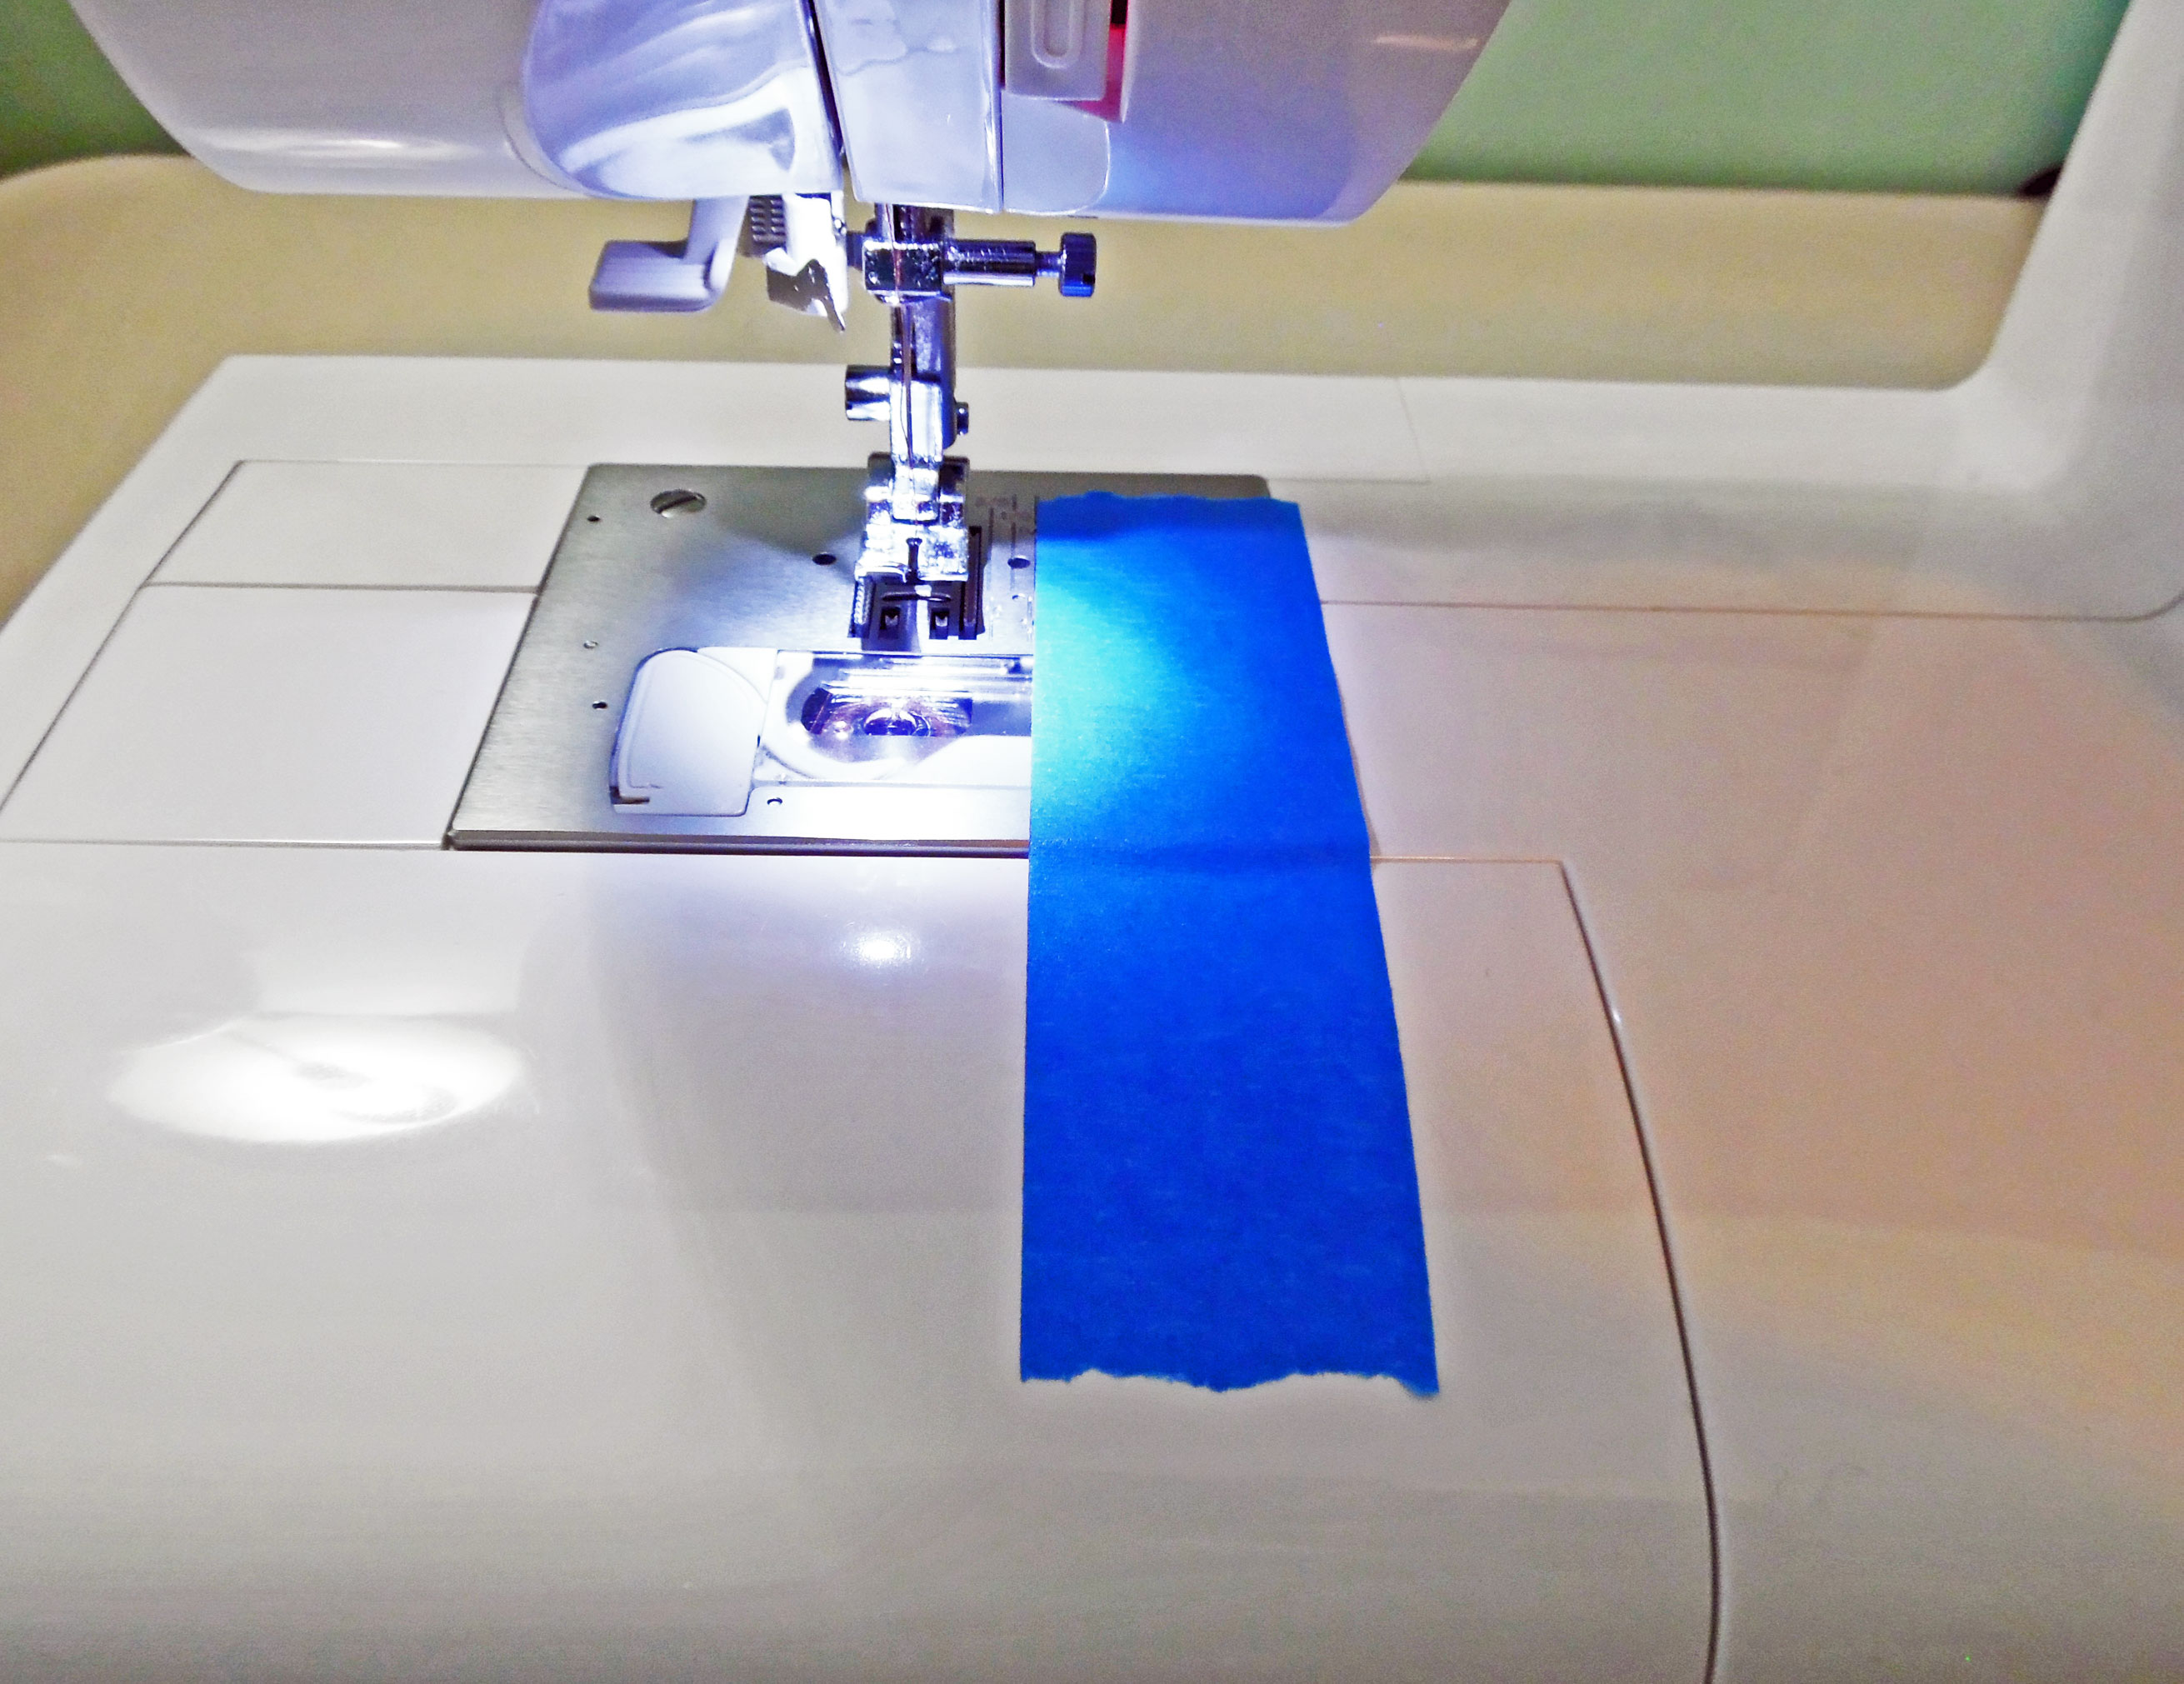
Seam Guide: Blue Painter’s Tape
- Don’t use ordinary masking tape as a seam guide! It’ll leave an awful sticky residue when you pull it off.
- There’s also a thick seam guide that sticks onto your sewing machine. It’s three-dimensional instead of flat, which makes it easier to line your fabric up with it. Even though it’s sticky, it doesn’t leave a residue. And it can be pulled off and moved many times before the adhesive wears off.
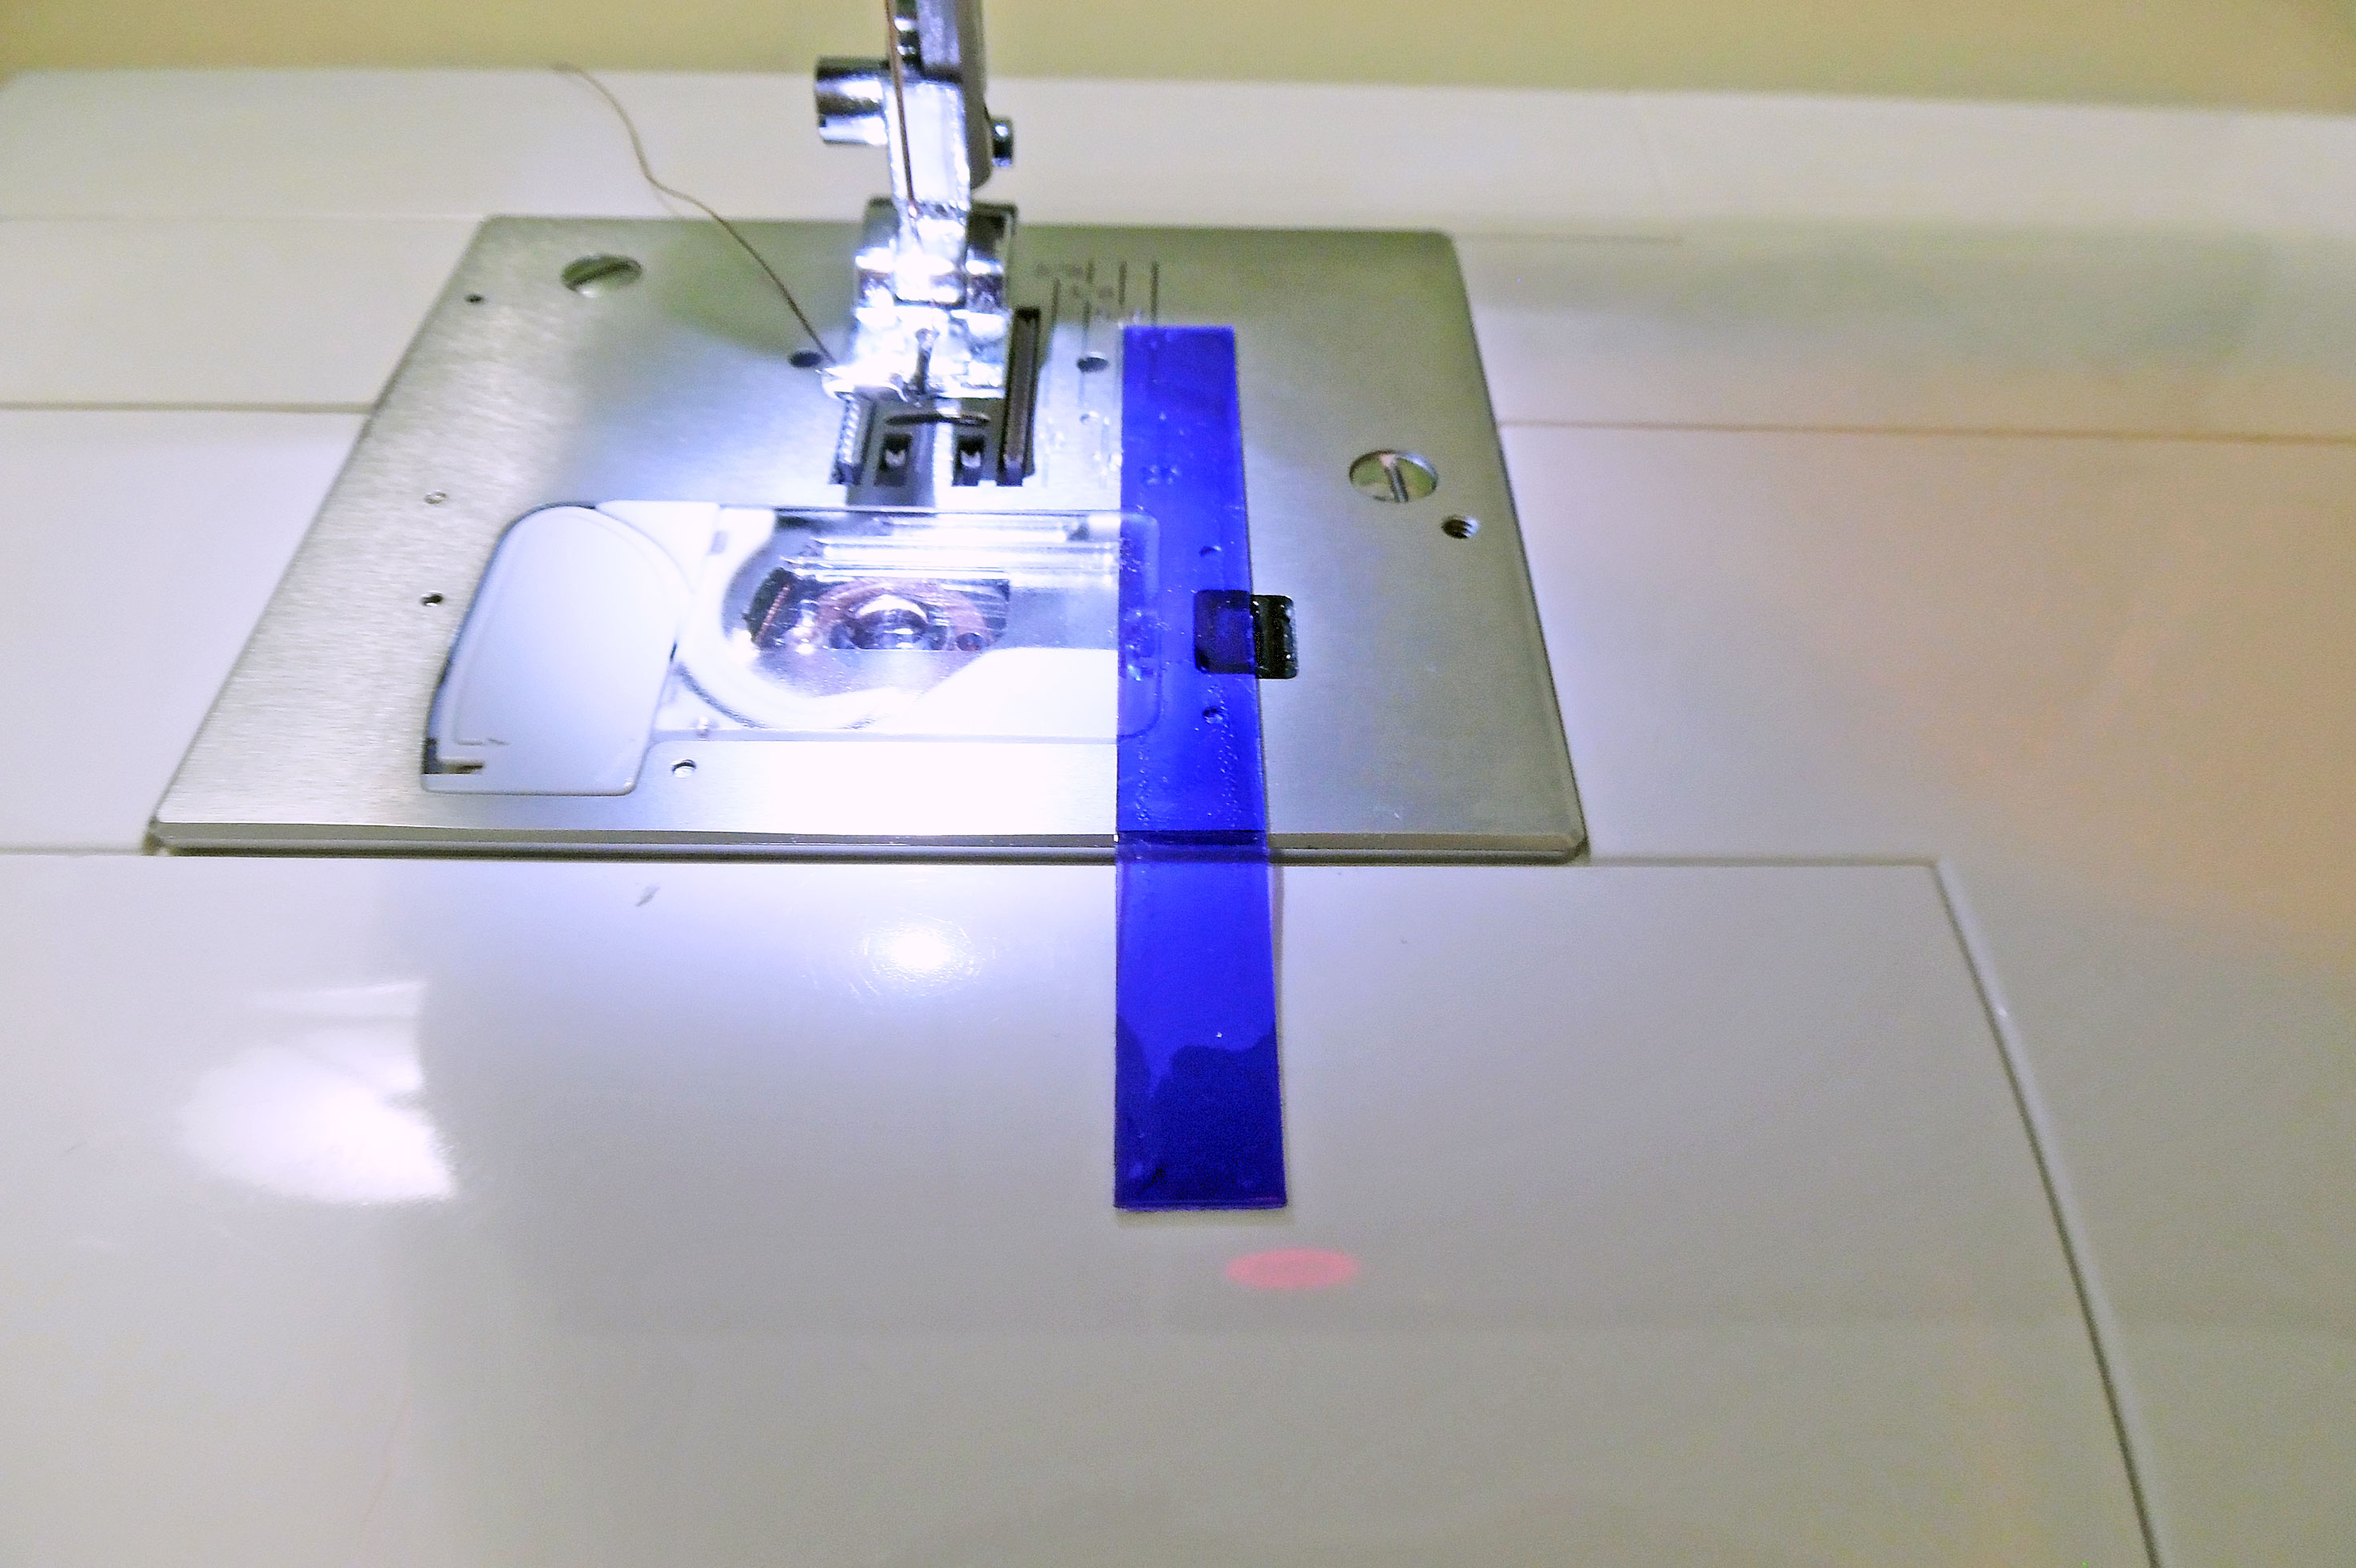
Seam Guide: Stick-On
- Another kind of seam guide is a heavy, L-shaped wire that attaches behind your presser foot and extends outward. You can adjust it to whichever seam allowance width you need.
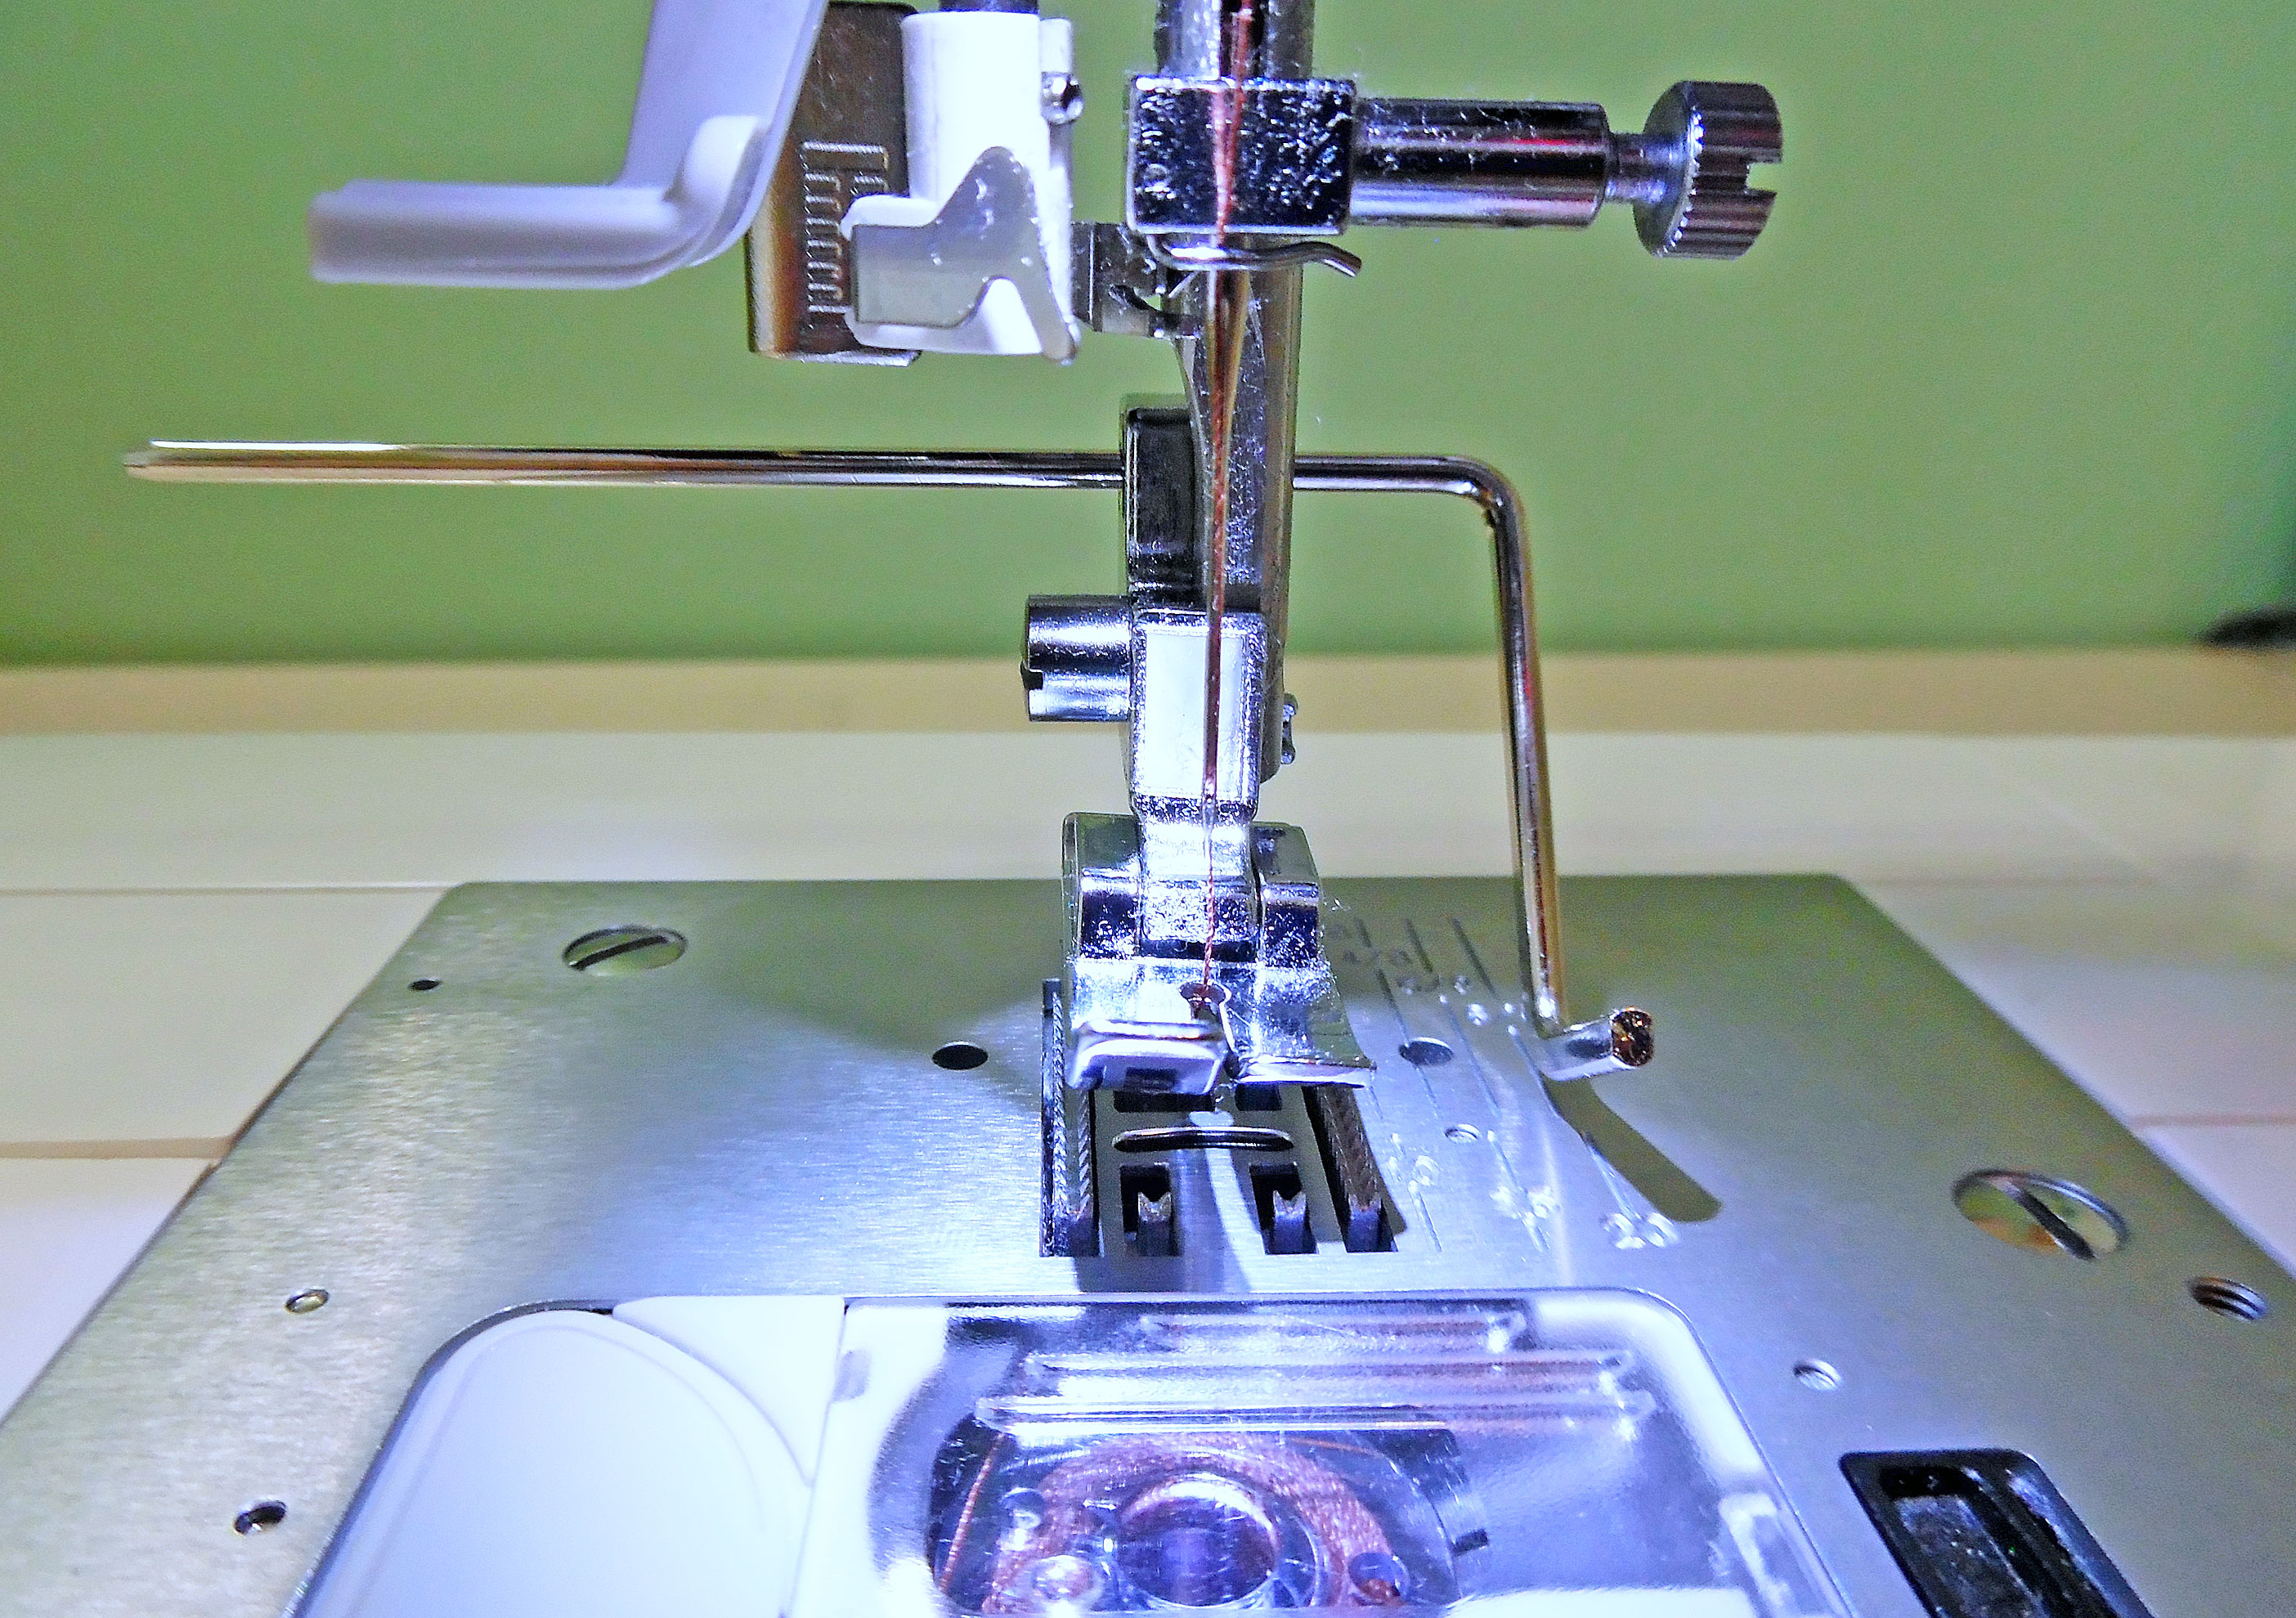
Seam Guide: Wire
- If your sewing machine is computerized, never use a magnetic seam guide! Magnets can fry computer circuits, so if your sewing machine is digital or computerized, don’t let a magnet anywhere near it.
- If you want your garment to look professionally sewn, you’ll need to finish your seam allowances. There are many different types of seam finishes, including French seams, mock-French seams, flat felling, and overlocking. Unfortunately, seam finishing is a step that’s often left out of pattern directions. A general guideline is to finish the seam before you cross it with another seam. (For example, finish the side seams before you sew the hem.) For help with seam finishing, see the article: “Basics: Seven Seam Finishes.”
~~*~~
Looking for more sewing tips? You can find plenty of beginner-friendly articles in Sewing Basics. More advanced help can be found in Tutorials and Articles.