by Lisha Vidler
(Click any image to view it full-size.)
Inspiration and Design
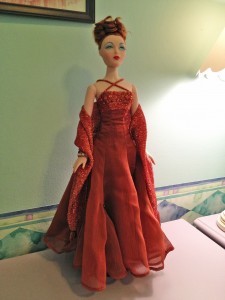
I recently purchased an evening gown off eBay for the 15.5″ Gene Marshall doll. It’s a textured copper chiffon with an empire-waist bodice and a princess-seamed skirt with inserted godets. It includes a matching A-line petticoat, a metallic knit shawl, shoes, and jewelry. The ensemble is extremely elegant and looks fantastic on my red-headed Gene doll.
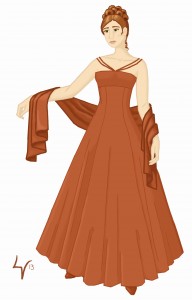
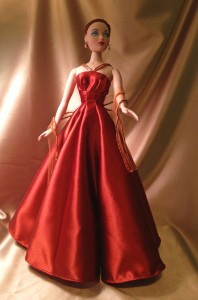
I liked this ballgown so much that I decided to make something similar. I wanted to simplify the design, so my gown has an empire-waist bodice and a princess-seamed skirt, but no godets. The beaded shoulder straps are arranged differently, but it does include a petticoat and shawl.
Pattern
- Gown: Self-Drafted
- Petticoat: Self-Drafted
- Shawl: Self-Drafted
None of the few doll patterns that exist were suitable, so I drafted my own patterns.
Materials
- 1 yard Lightweight Satin, Rust
- 1 yard Tulle, Copper
- 1/2 yard Poly Lining, Tan
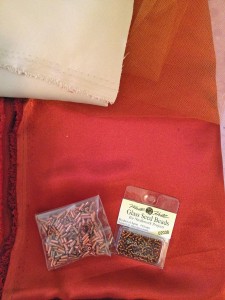
- Seed Beads, Copper
- Bugle Beads, Copper
- Ribbon, Dark Orange
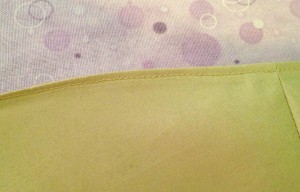
I found a stretch satin at Fabric.com that, in reality, is an extremely lightweight satin with virtually no stretch. It’s perfect for doll garments, so I purchased yardage in several different colors. This one appears tomato red in the photo below, but in person, it’s a dark rust-red, almost copper. I paired it with a copper-colored tulle and a lightweight tan lining fabric, which I chose to use for the petticoat as well as the lining. To embellish the gown, I purchased matching seed beads and small bugle beads.
Mockup
I knew I wanted the gown to have an empire-waist bodice and a princess-seamed skirt, so I began with a basic strapless bodice, adding darts for shape. The skirt was simple, a panel that’s narrow at the top and wide at the bottom, angling in at the waist. Somehow, I managed to get the darts and side seams of the bodice to line up precisely with the seams on the skirt. Unfortunately, the first bodice didn’t fit well. It didn’t look bad when pinned to the doll, but it was too low-cut. Plus, it angled downward toward the back, which meant the waistline wouldn’t hang straight.
I cut a new bodice, designed to fit better—but it didn’t. Somehow, my measurements were off, because the upper edge flared out, meaning the bodice wouldn’t stay up.
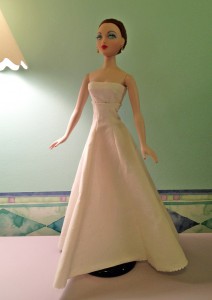
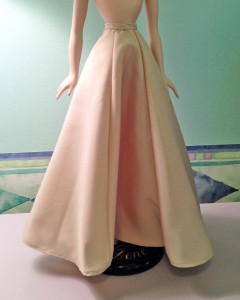
Instead of altering the same bodice yet again, I went back to the drawing board and cut an entirely new bodice. The pattern fit quite well, so I went ahead and cut it out of muslin. While I was at it, I removed two of the skirt panels to make it smaller, and re-cut the center back panels so there would be fewer seams. I also needed to make the skirt slightly longer, so it would cover the doll’s stand.
It didn’t turn out as well as I’d hoped. The bodice fit nicely and I finally got the skirt the right size, but the gown didn’t look elegant. The problem, I think, was that the empire bodice was too long-waisted, and the skirt wasn’t fitted enough through the curves of the waist and hips. I also didn’t care for the hem, which rippled and puckered.
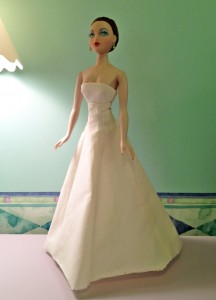
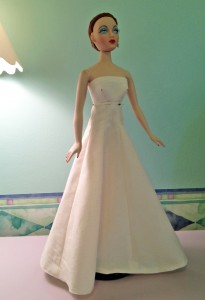
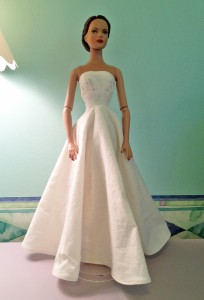
For the fourth mockup, I shortened the bodice and re-drafted the skirt pieces to be narrower through the waist and wider at the hem. This resulted in a much fuller skirt with a more fitted waist. Because the new hem had a shallower curve, the baby hem I used worked much better. When I first tried the mockup on the doll, I feared it wouldn’t close at the waist, but it did. Even better, it fit my Tyler doll, as well as the Gene doll, without modification.
Construction—Petticoat
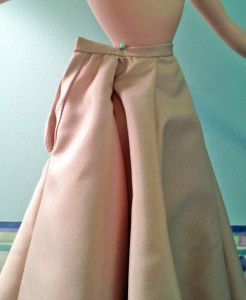
I decided not to make a mockup of the petticoat. This nearly proved disastrous, but I was able to salvage it. Basically, I cut a shorter version of the skirt pattern, then added a waistband and tulle ruffle. It got frustrating because the fabric kept sliding around beneath the needle as I stitched the hem.
I added a placket facing to the back opening and a hand-stitched bias-cut waistband. Unfortunately, when I tried it on the doll, it was much too large. The waist overlapped by about an inch and a half! I’m not sure how that happened, unless the fabric stretched.
To fix it, I removed the waistband, along with two of the skirt side panels. This made it the right size, so I sewed it back together, re-stitched the hem, and reattached the waistband. I decided the petticoat was too long, as well, but I didn’t feel like redoing the hem.
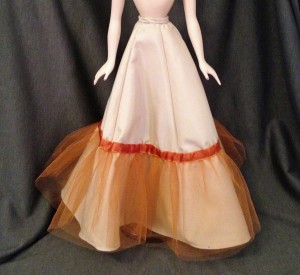
For the ruffle, I cut a length of tulle twice as long as the skirt’s width and eight inches wide. I folded it in half lengthwise and gathered the folded edge by hand, then basted it onto the petticoat, following the curve of the skirt. Once I was sure it was positioned right, I stitched it by machine. It turned out less full than I would have liked, so next time, I’ll use a length of tulle that’s three times as long, rather than double.
Once the ruffle was in place, I covered the raw edge of the tulle with a dark orange ribbon from my stash. It was an impulsive decision, but I don’t regret it. The ribbon harmonizes with the rust-colored satin of the ballgown, tying the two pieces together for a coordinating look.
Construction—Shawl
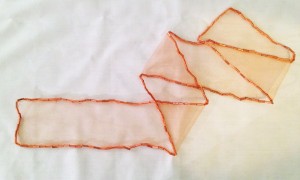
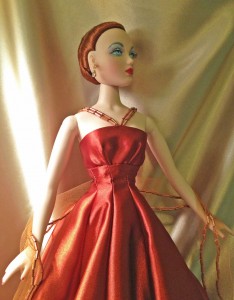
I had some spare time while waiting for the ballgown’s lining fabric to arrive, so I decided to start the shawl. I figured out an easy way to give it mitered corners, if I wanted to sew it using regular fabric. But I decided to use tulle, which doesn’t need to be hemmed. I wanted to jazz it up a little, and I had a whole bag of copper bugle beads, so I pulled out my beading needle and got to work. The beads weighed down the shawl more than I expected, but it drapes nicely on the doll. I considered adding beaded tassels to each corner, but decided against it, as it would have weighed the shawl down even further.
Construction—Ballgown
My plan was to fully line the ballgown with a high-quality polyester lining fabric. I cut the ballgown out of both the satin and the lining fabric, and assembled it fairly quickly. I attached the lining, notched all the curves, and pressed all the seams. The problem came when I basted the bodice to the skirt and found that the top edge of the skirt was about 1/2” smaller than the bodice. This didn’t bode well, but I thought perhaps the bodice had stretched during construction. I basted the bodice to the skirt and put the gown on the doll, only to discover that it was, indeed, too small. The edges wouldn’t meet at the back. The mockup fit perfectly, so it’s a mystery. Perhaps the muslin stretched slightly across the torso, allowing for a better fit.
I wondered if the lining was part of the problem, so I went ahead and removed it—which meant a great deal of seam-ripping. I also removed the center back panels of the gown itself. I cut a wider pattern for the back and attached it to the dress. Since I’d already notched the curves, I had to be careful not to stretch the gown’s edges as I sewed the new panels on.
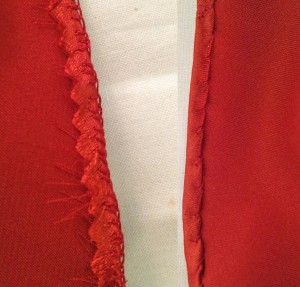
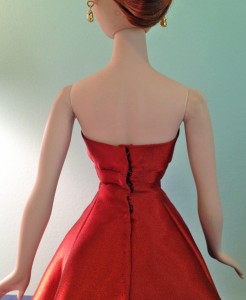
The wider back panel still wasn’t quite wide enough. It fit better, but there wasn’t enough seam allowance to turn the center back edges under twice for a clean finish. I improvised, turning the overlapping side under by 1/8” twice and finishing it with a blind-hem stitch. For the underlapping side, there just wasn’t enough fabric, so I only turned it under once and finished the edge with a buttonhole stitch. It looks fairly tidy, though the raw edge is beginning to fray. I should have applied Fray Check beforehand, but if I try to do so now, it will seep through the fabric.
There was barely enough overlap to attach the snaps. It doesn’t appear strained, but the edges of the snaps show, which annoys me greatly. Also, I didn’t have enough snaps to fasten the entire length of the back closure. I added five snaps, fairly close together, from the top edge to just below the waist. Fortunately, the gap below that stays closed on its own.
The final step was to add the beaded shoulder straps. I used a beading needle and waxed thread. For the beads, I alternated copper seed beads with copper bugle beads. My original plan was to add a scattering of beads across the bodice, but I decided I liked the finished gown without additional beading.
Conclusion
Despite all the problems I encountered, the finished dress turned out rather well. It fits beautifully and the fabric’s drape is exquisite. I really need to buy more of this satin before it sells out!

