
A Sewing Diary
by Lisha Vidler
Every year, Your Wardrobe Unlock’d holds a costume competition. For 2015, one of the themes was early World War I, 1914-1915. I adore the styles of this era, so I decided to make a set of 1915 undergarments—in miniature, for a 16″ fashion doll. The set includes drawers, a petticoat, and a corset cover.
(Click any picture to view the full-sized image.)
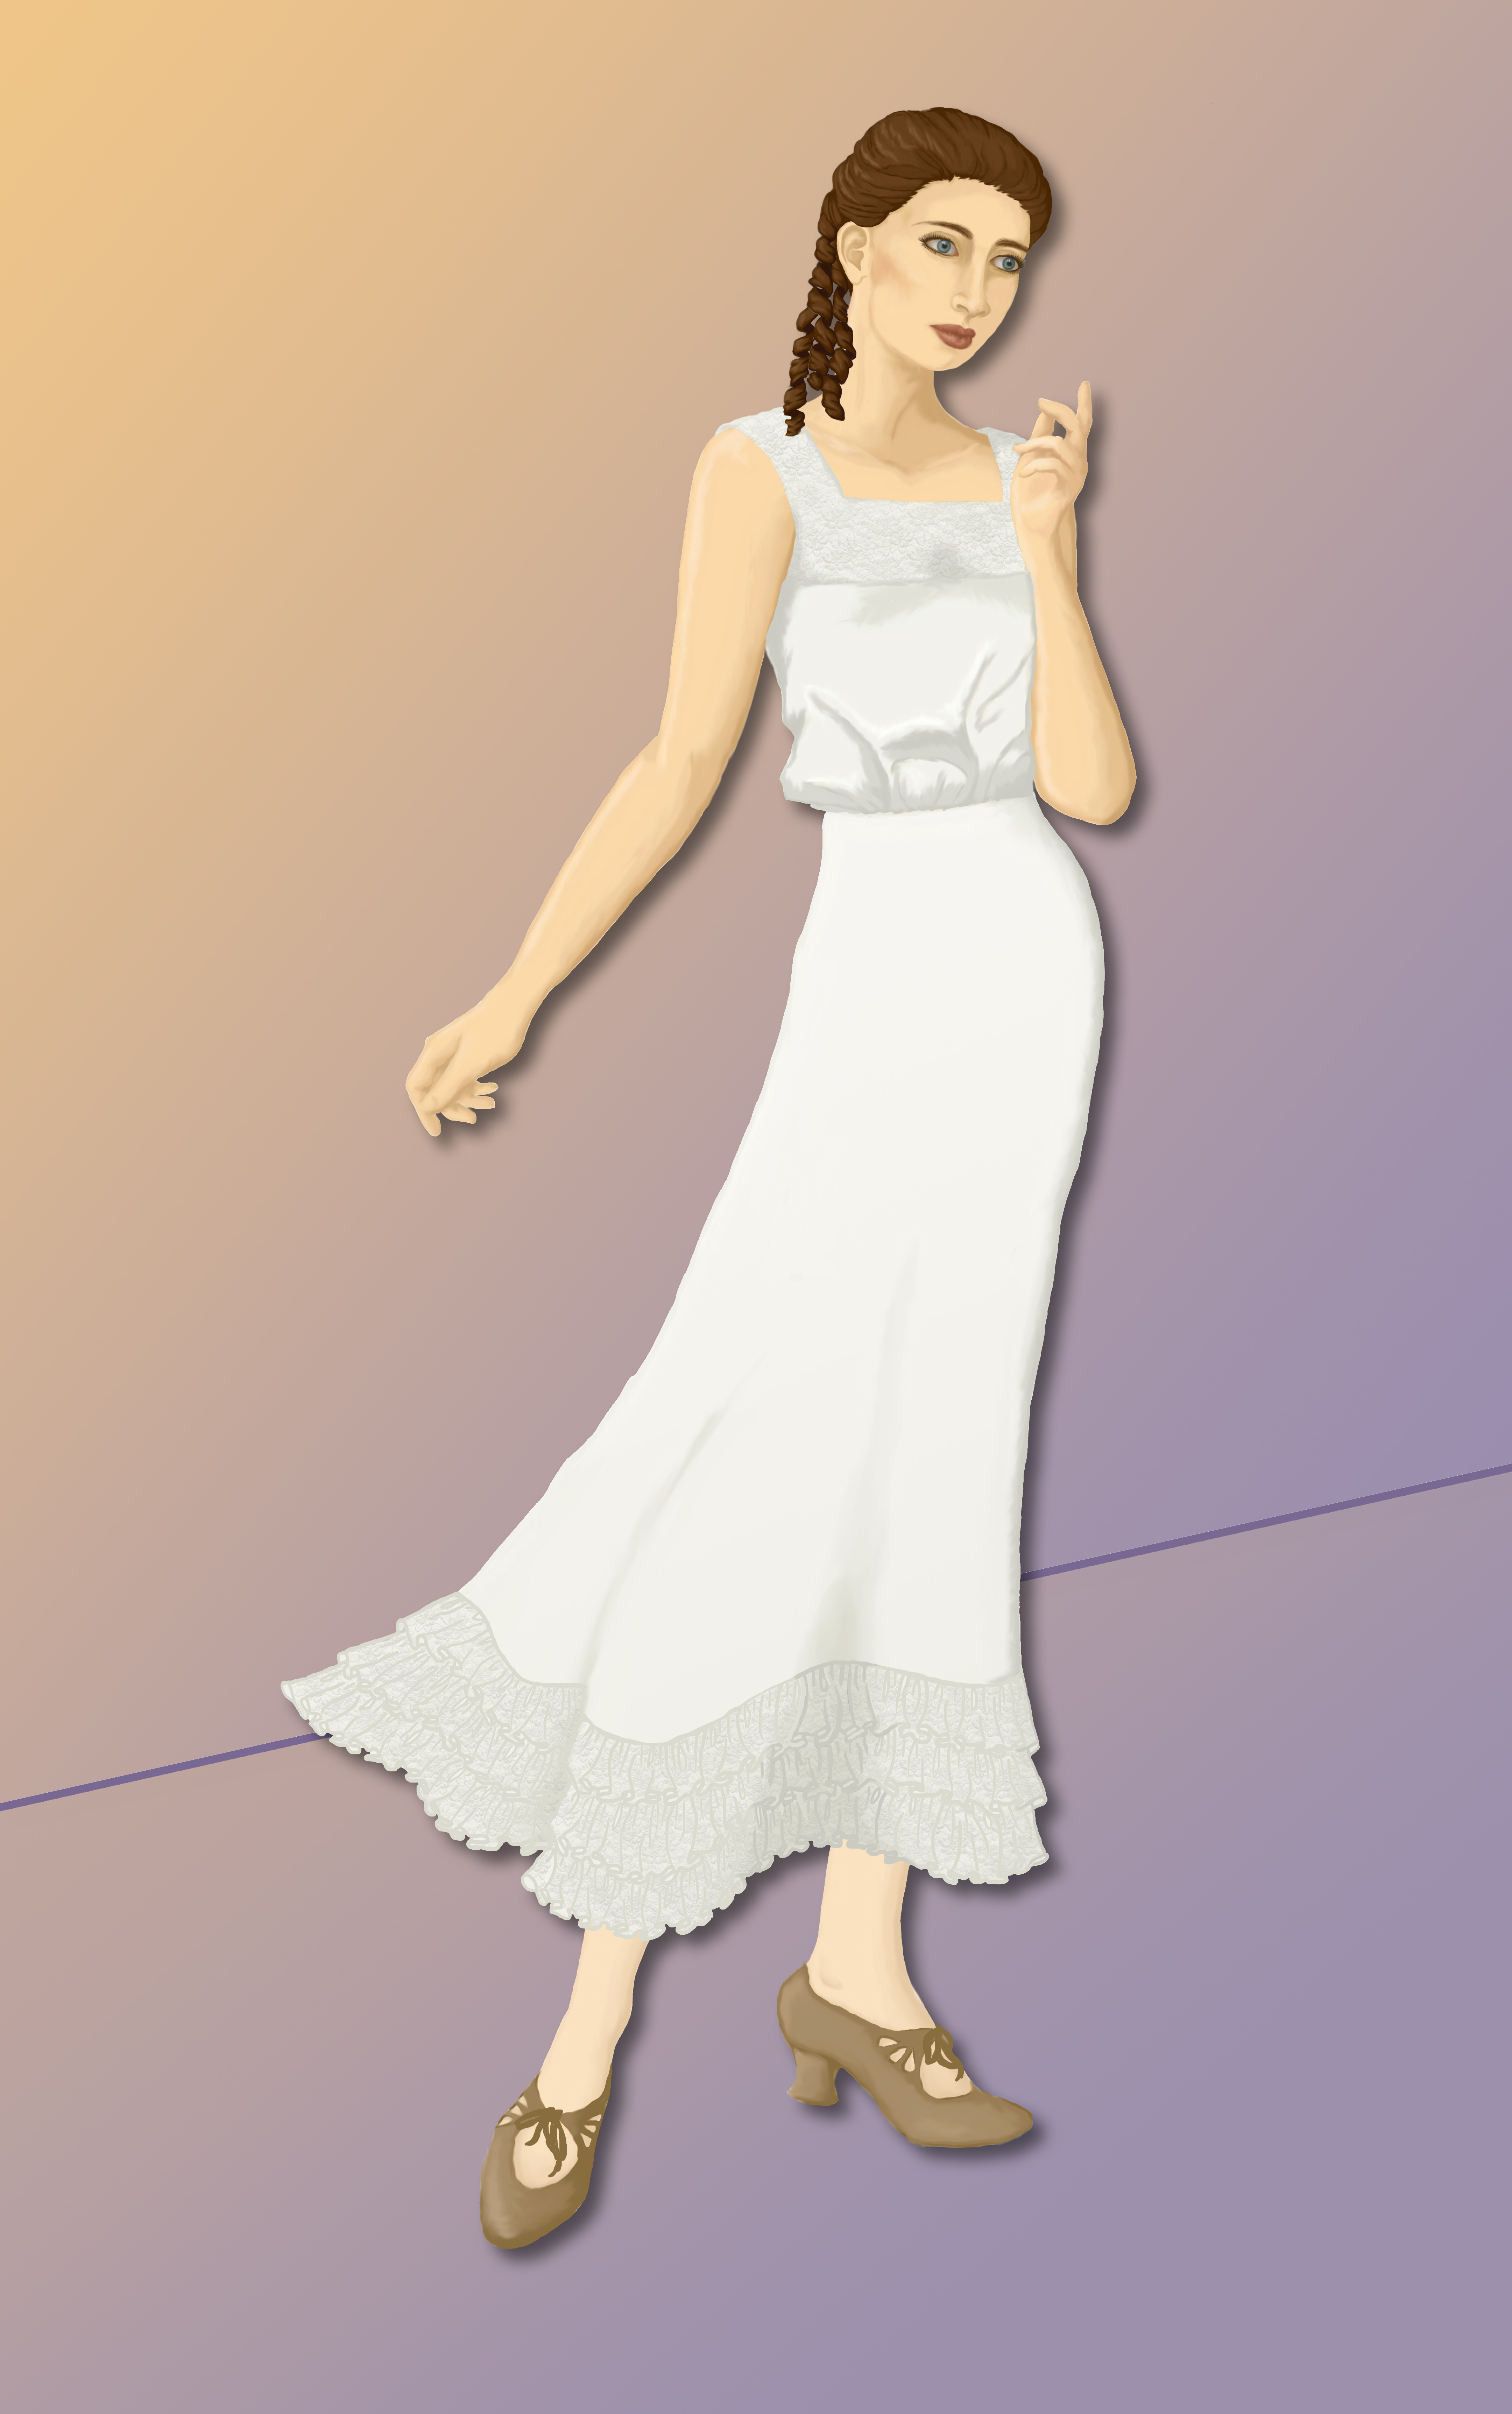
Fashion Sketch
Inspiration
I drew inspiration from multiple fashion plates and antique pattern catalogs. Thanks to World War I, corsets were waning, hemlines were rising, and the silhouette was becoming more practical than the hobble skirts of the previous year. This is reflected in the popular A-line petticoat, which often had rows of ruffles at the hem to support a fuller skirt.
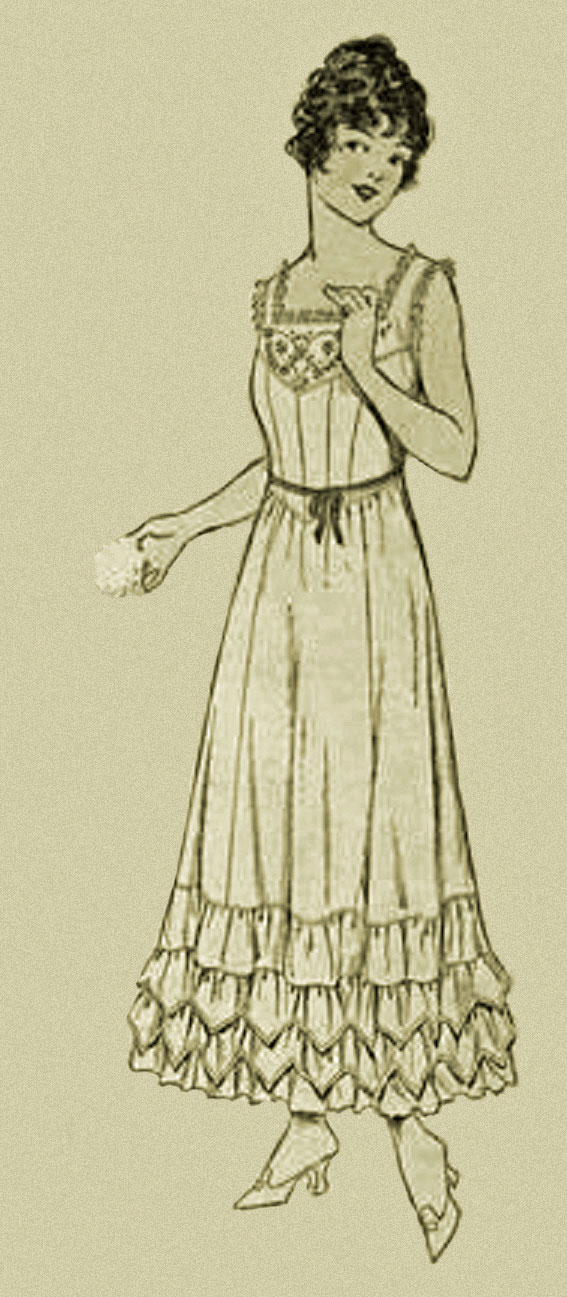
Petticoat Inspiration, 1915
Edwardian drawers were cut fuller and shorter than Victorian drawers, a design that lasted through the early war years. As the war progressed, women needed to preserve fabric, so drawers became less full. They weren’t usually gathered onto a waistband or yoke, as earlier styles were, but were fitted at the waist, with flared legs. This permitted plenty of modesty, while keeping the silhouette slender.
Corset covers could be snug-fitting or loose. Surplice and square necklines were both popular. The pigeon-breasted look was briefly resurrected around this time, as well, leading to bloused styles, with ruffles to enhance the bosom.
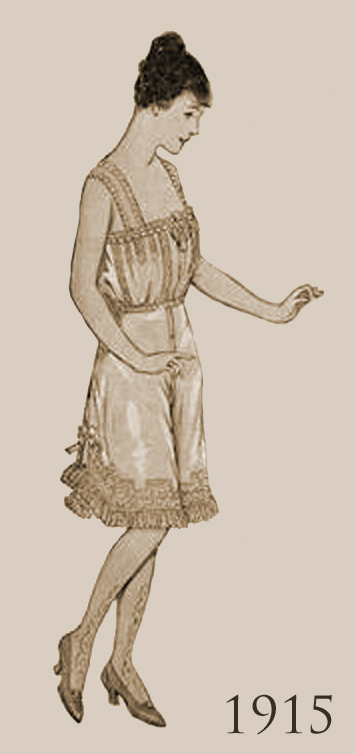
Drawers & Corset Cover Inspiration, 1915
Doll
I wanted to use a 16″ fashion doll, so I chose Tonner’s Nu Mood “Jess.” She came with a short auburn wig, which was very modern, so I went to Facets by Marcia and purchased the “Contessa” wig in honey blonde.
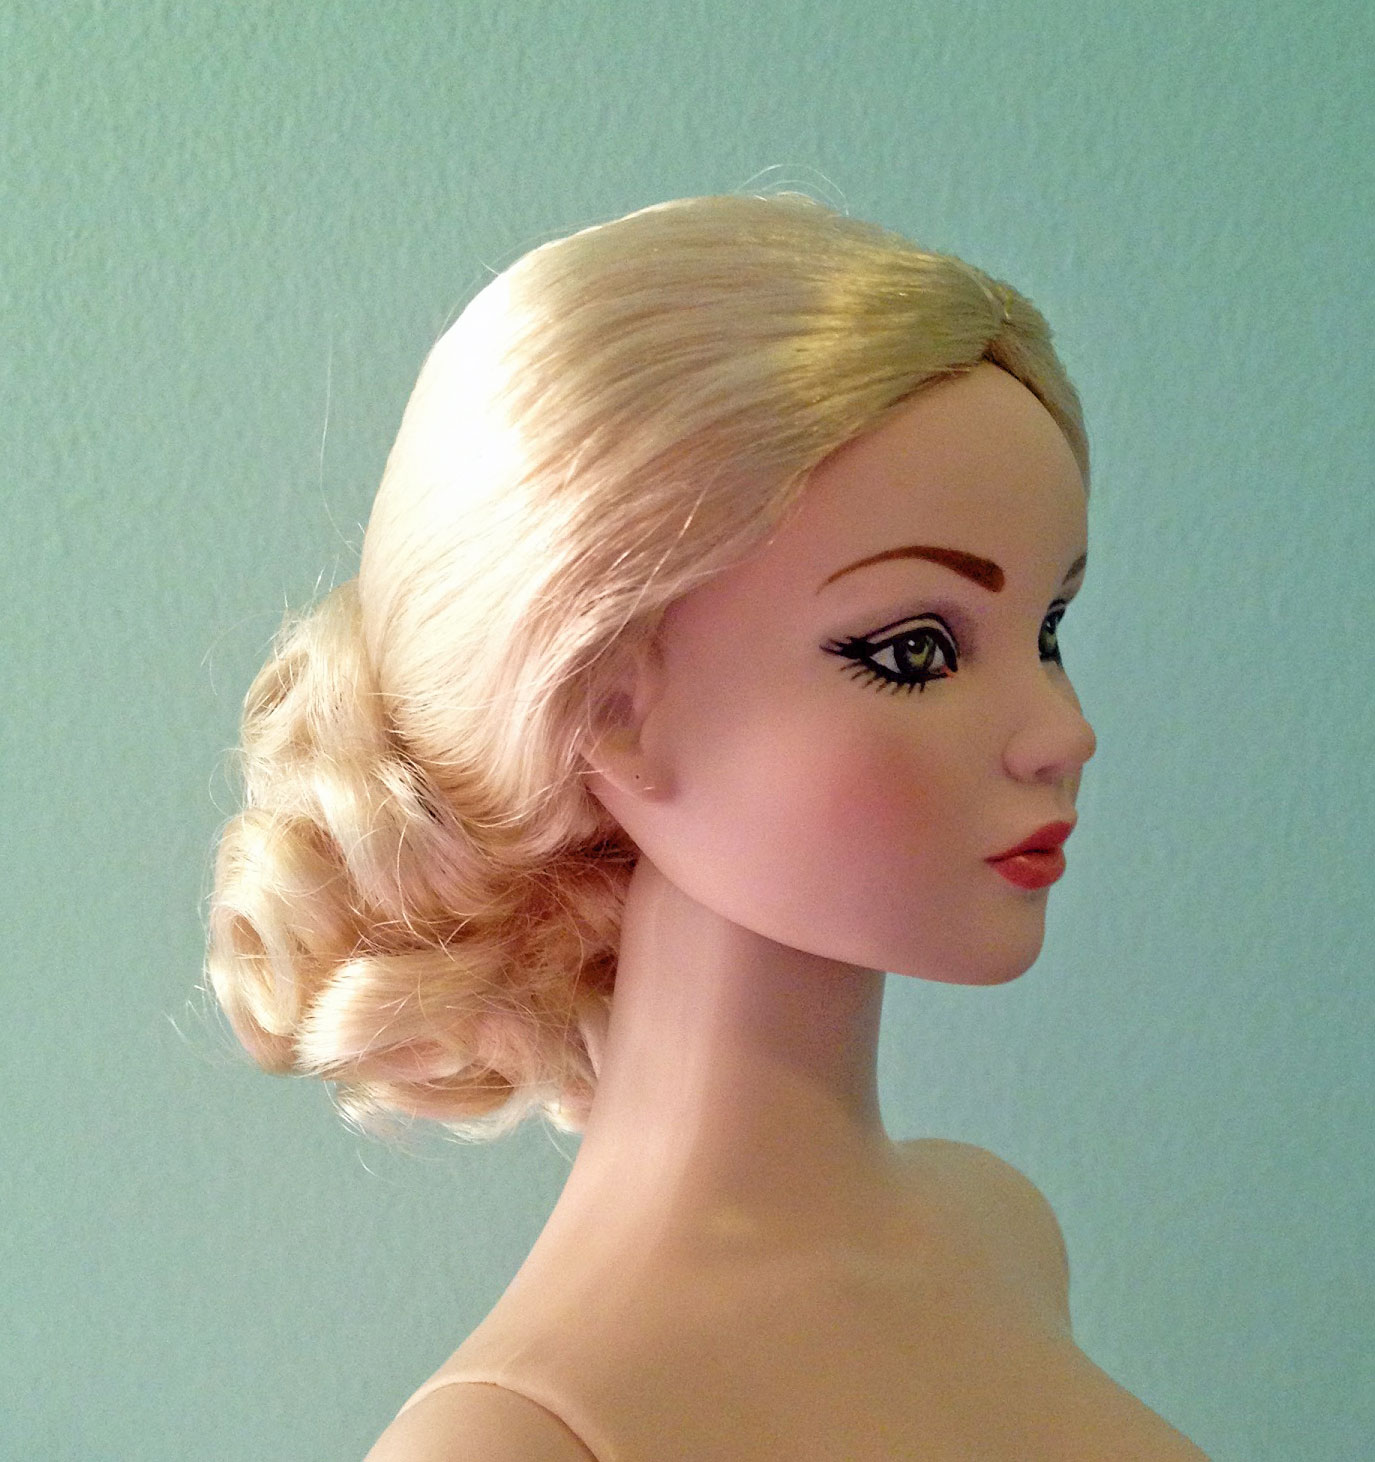
Nu Mood Jess in “Contessa” Wig
I would have bought some period doll shoes, too, but I already had a pair of black oxfords that were perfect for this time period.

Miniature Edwardian Oxfords
Patterns
- Petticoat—Self-Drafted
- Drawers—Self-Drafted
- Corset-Cover—Self-Drafted
Period undergarments are hard to find patterns for, at least in doll-size, so I drafted my own.
Materials
- Voile, White
- Antique Cotton Edging Lace, White
The biggest challenge one faces when sewing period doll clothes is finding appropriate fabrics and trims. Fabrics must be extremely lightweight, and any lace must be fine and delicate. (In other words, expensive!) If the materials aren’t thin enough, they will add bulk, which is a doll costumer’s greatest enemy.
Cotton voile is the perfect fabric for historical undergarments, since it’s so lightweight and soft. For the lace trim, I used an antique cotton heirloom lace that I inherited from my grandmother.
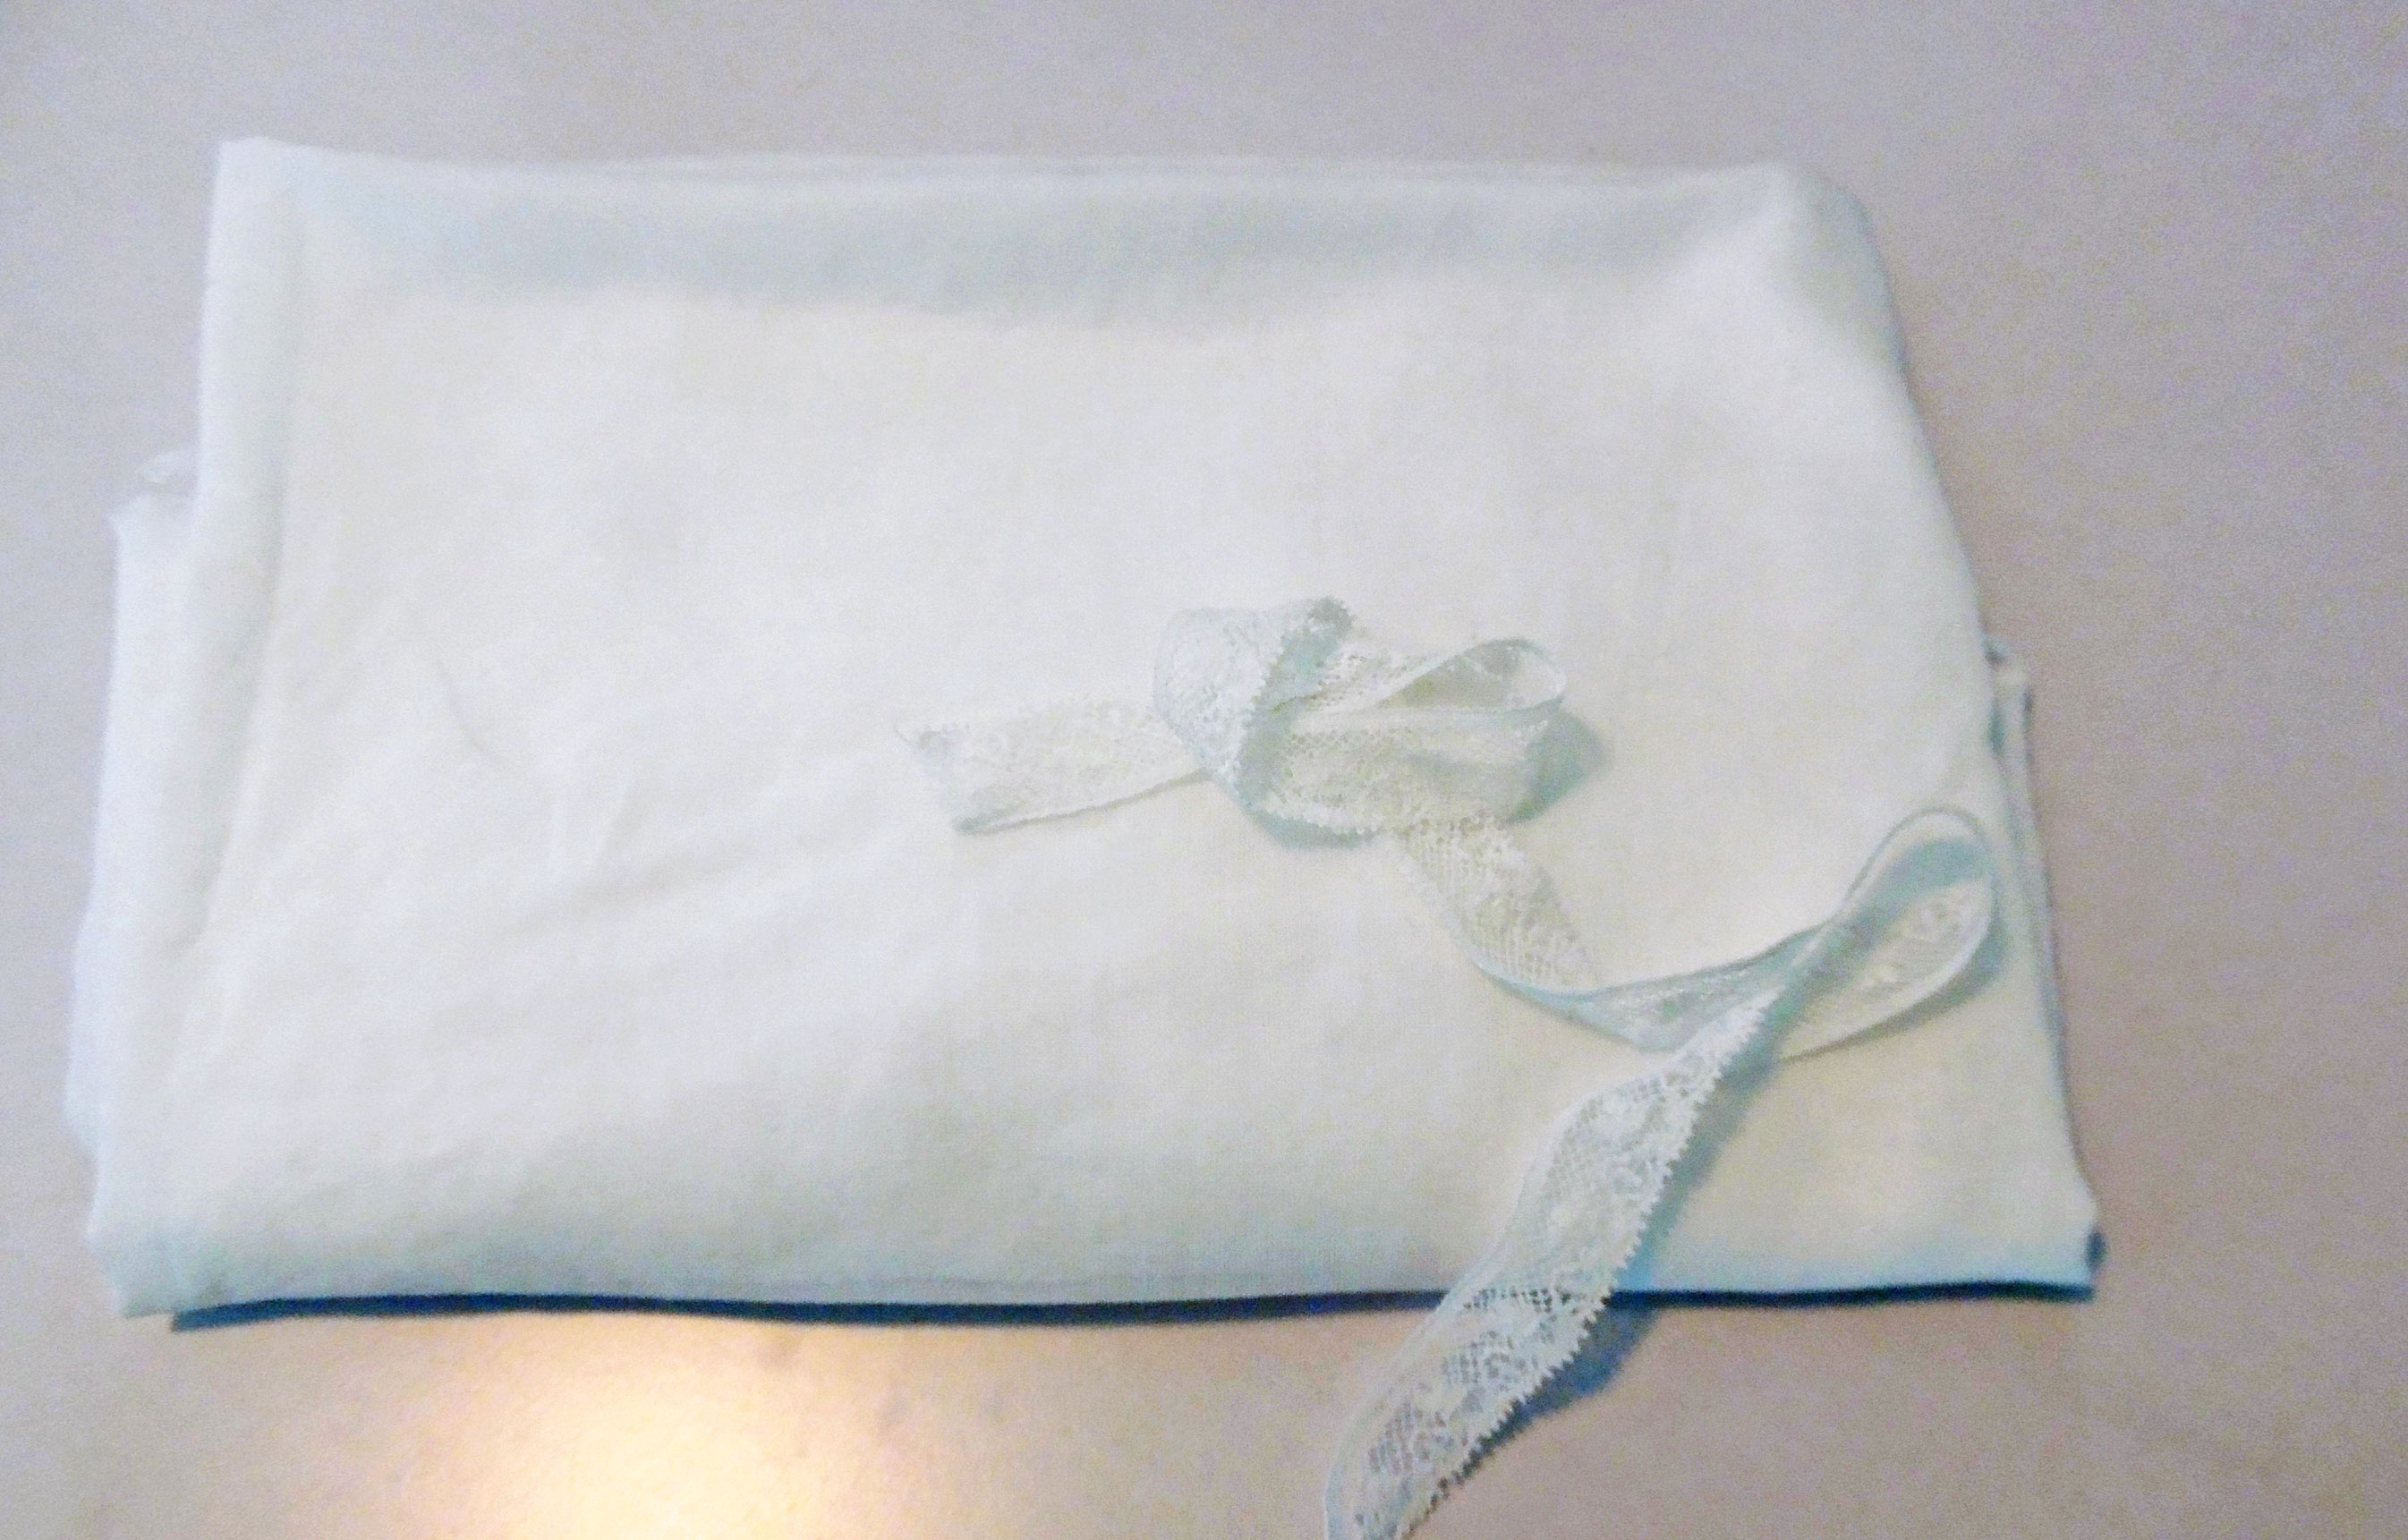
White Voile & Heirloom Lace
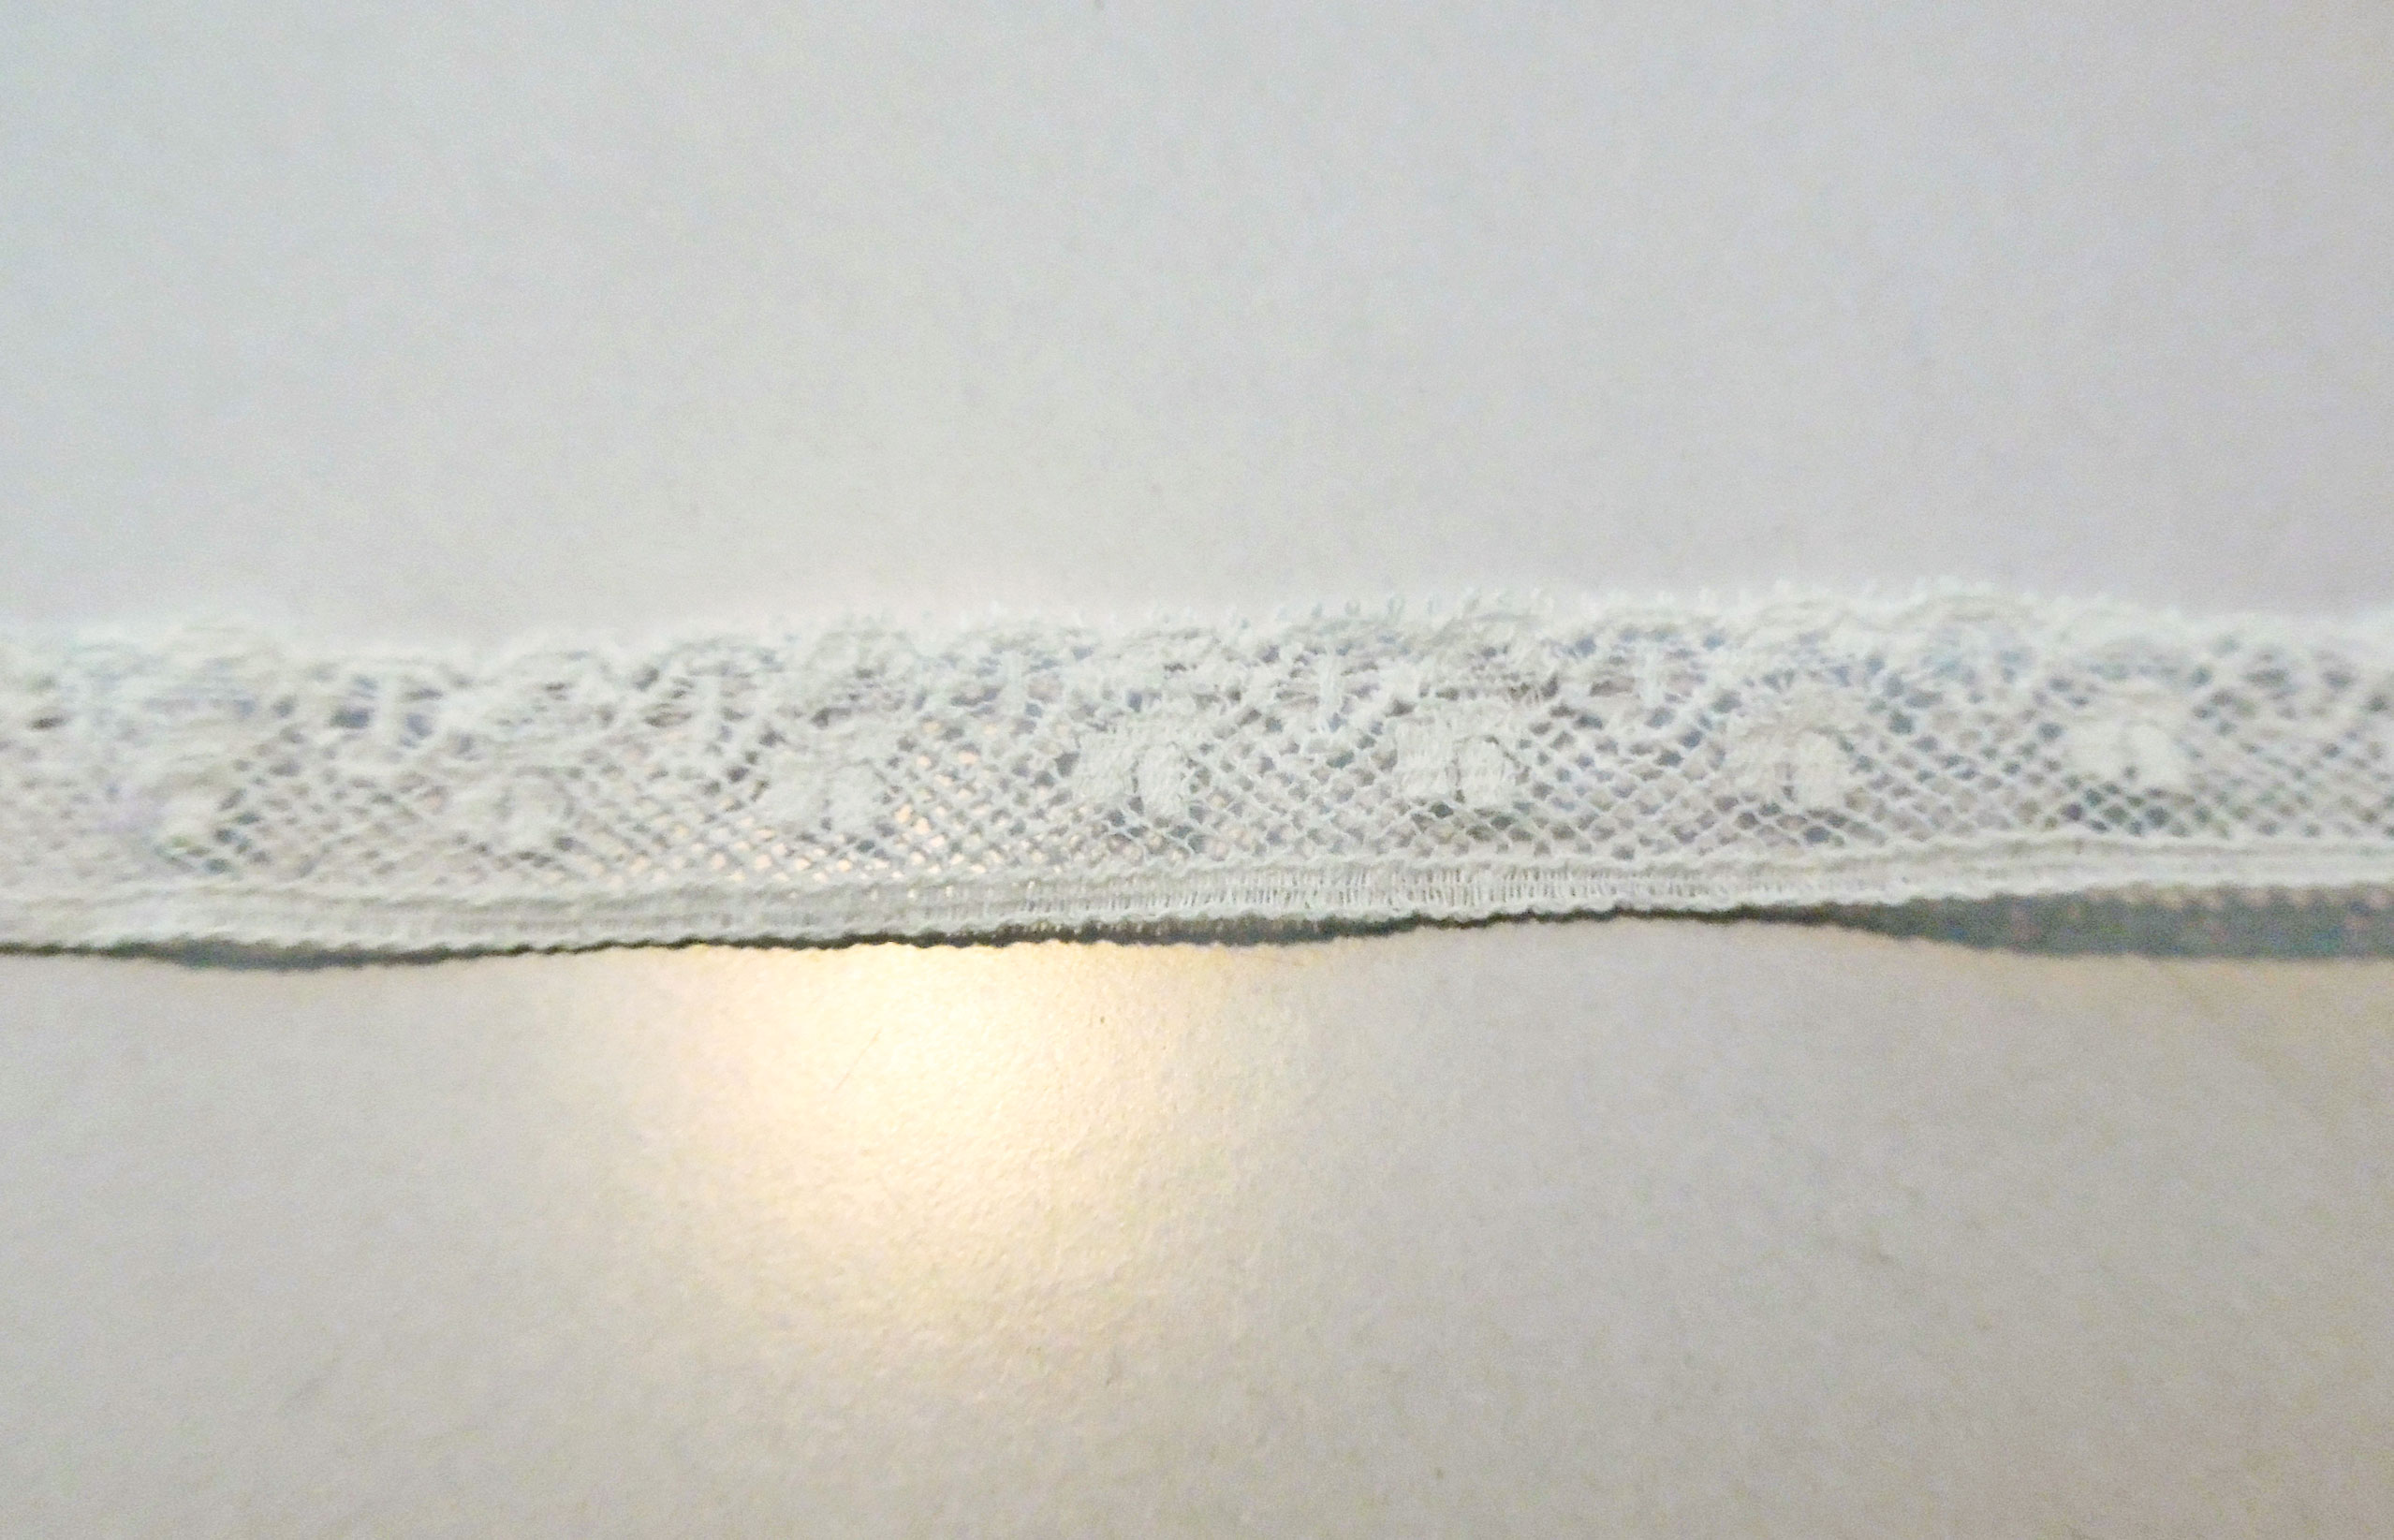
Heirloom Lace
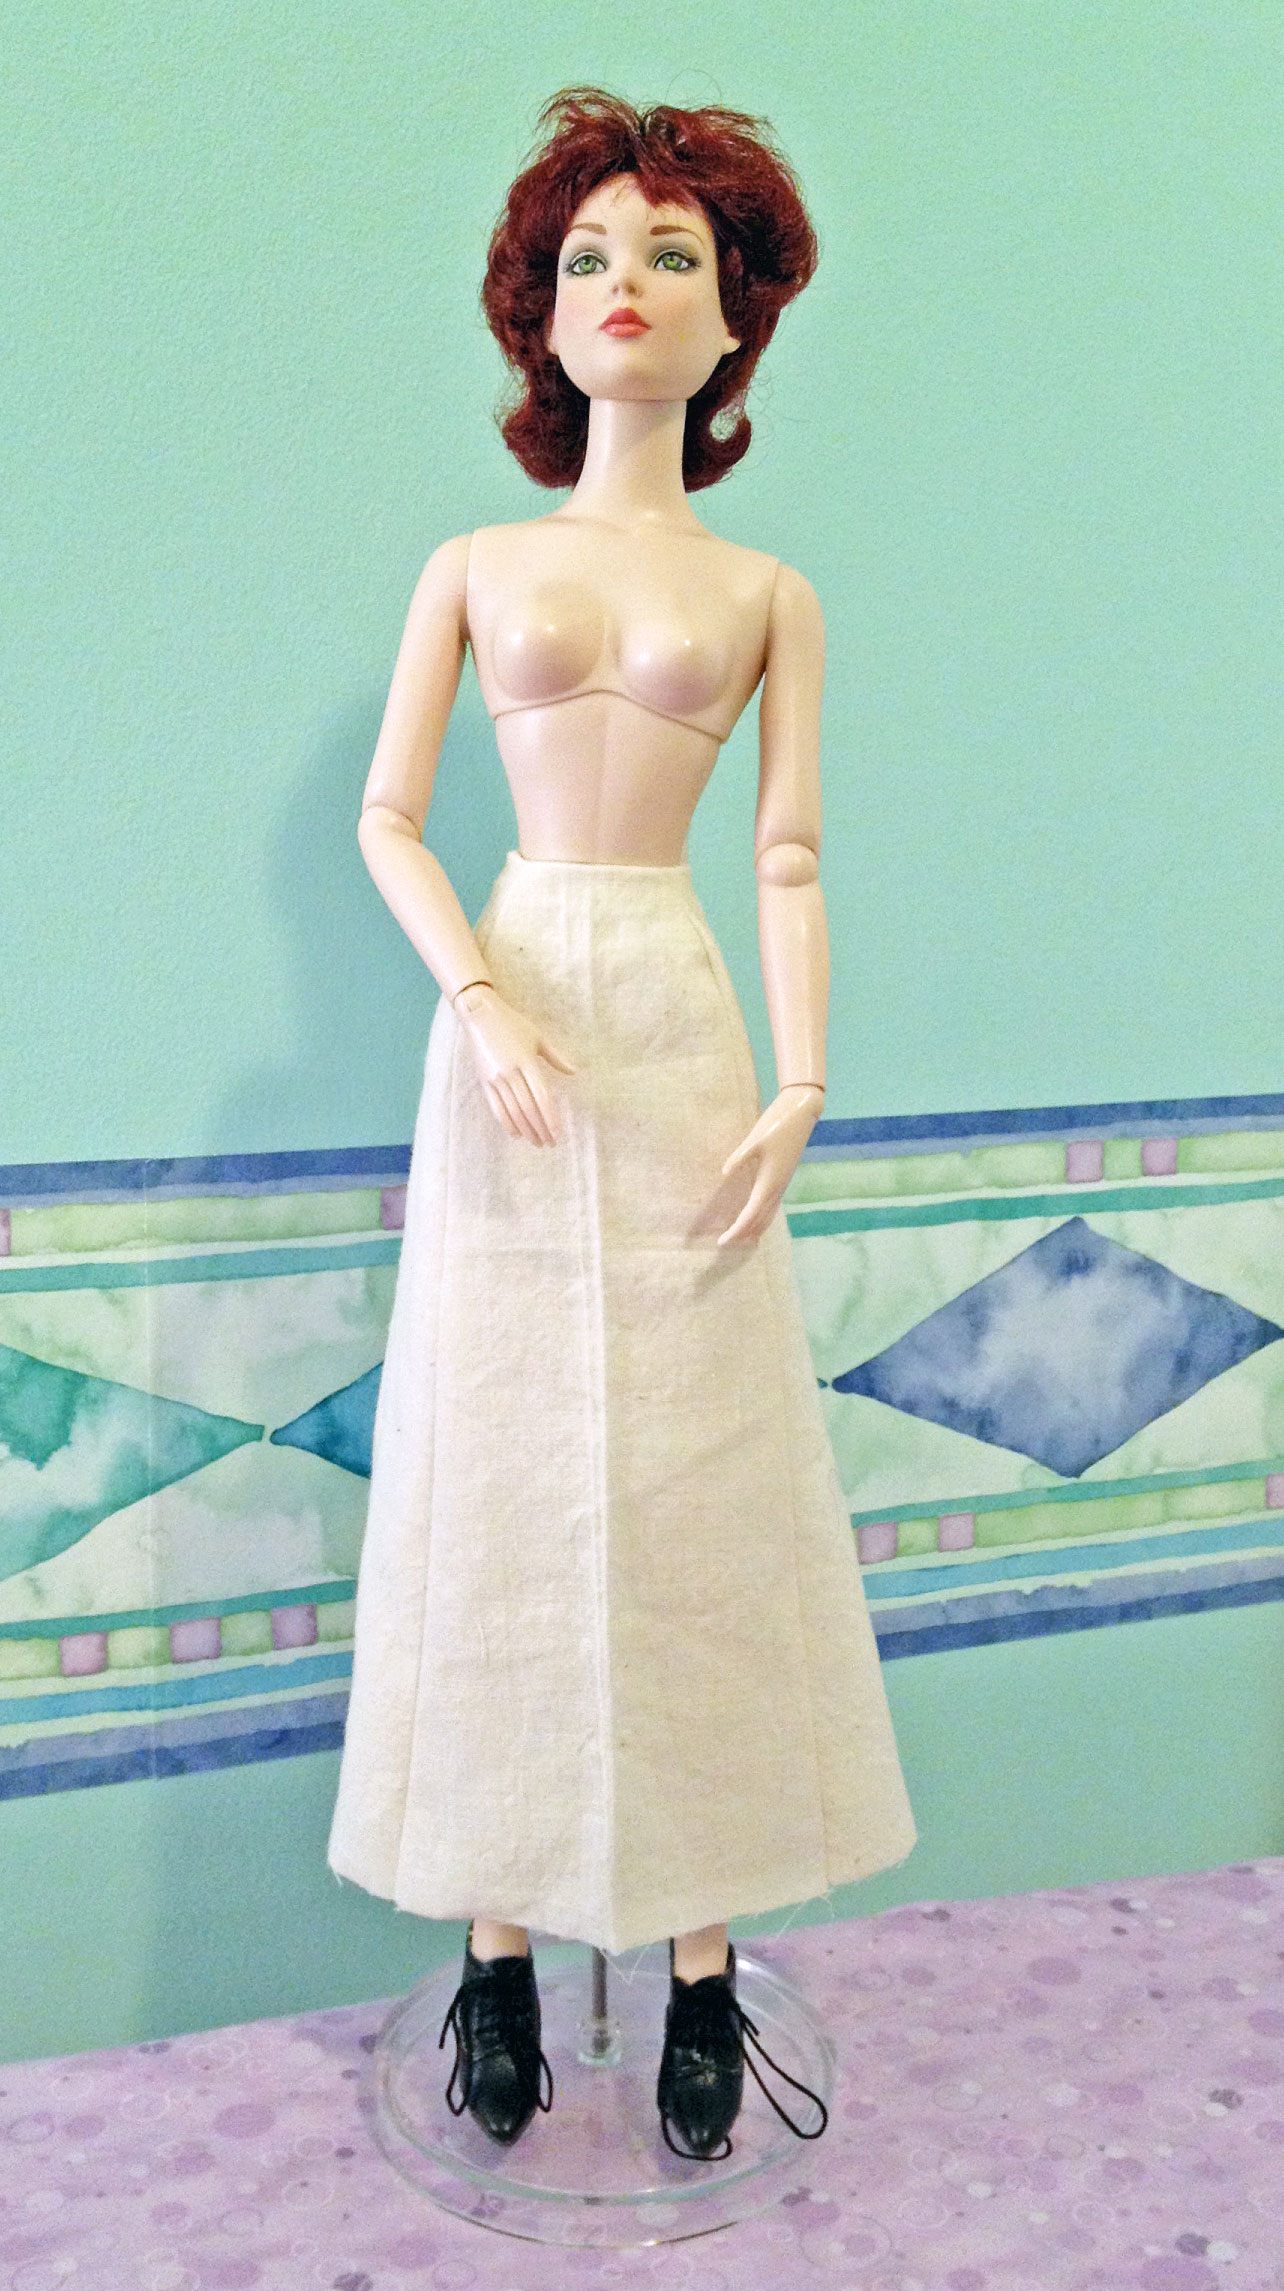
Mockup, Petticoat
The petticoat needed to be A-line—not too full and not too straight—and trimmed with lace ruffles. My initial design had a waist facing and was fitted through the waist and hips. I wasn’t happy with this, however, as it was too similar to the design of the drawers. I didn’t want them being identical. Plus, while the mockup fit nicely in the front, it was much too large in the back.
Petticoat, First Mockup (Front View)
Petticoat, First Mockup (Back View)
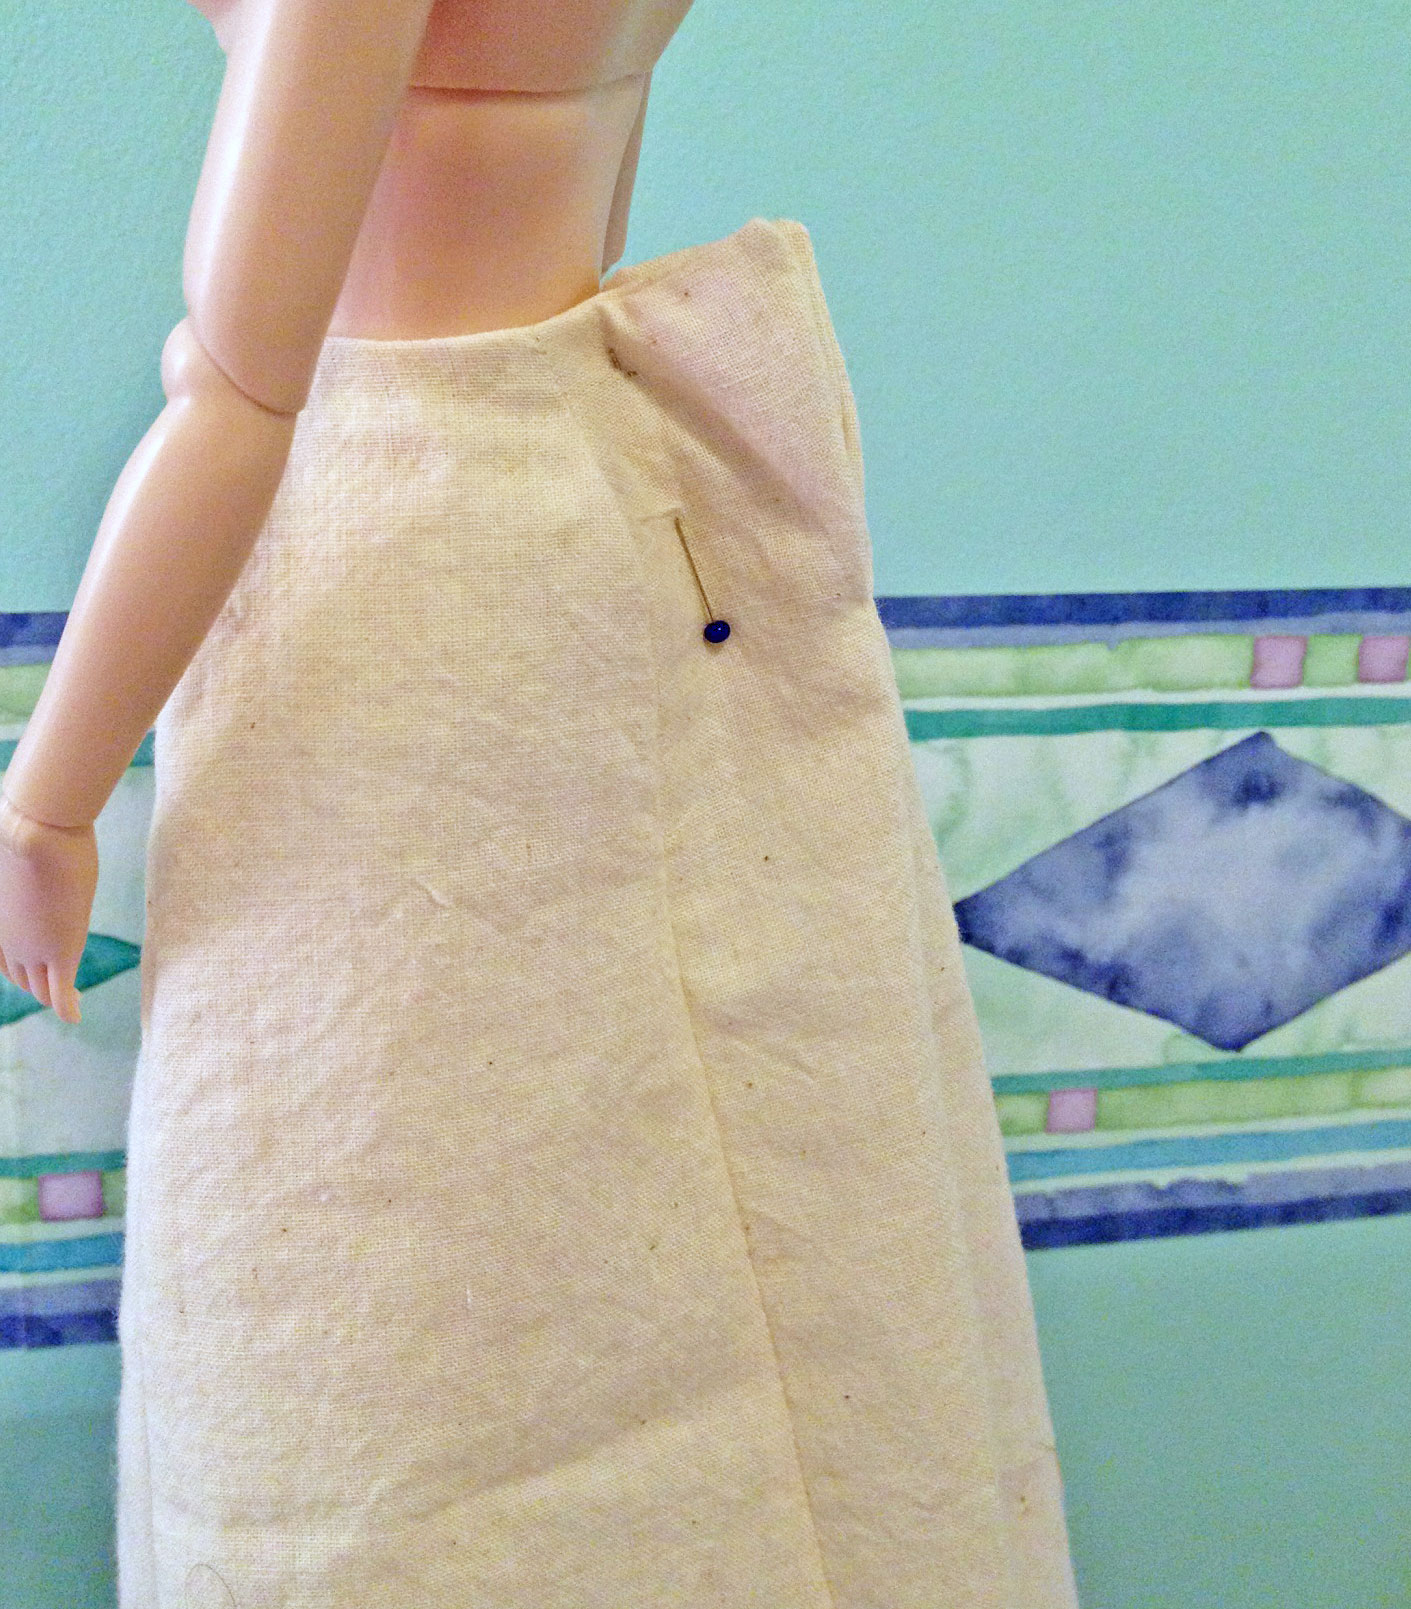
I made a few clumsy mistakes in constructing the second mockup, but was able to make it work. To start, I removed the back panels and extended the side panels, so they wrapped all the way around to the back. This eliminated the side-back seams, removing some bulk from the petticoat.
Instead of replacing the facing with a more traditional waistband, I decided to try an out-of-the-box approach—fully lining the petticoat. Since it was to be sewn from voile, a self-lining wouldn’t add much weight, and if I added a narrow ruffle to the lining’s hem, it would lend support to the skirt, much like the designs I’ve seen in extent petticoats.
I knew it would be tricky to add all the ruffles once the petticoat was assembled, so I sewed them beforehand. For the lining, I created a narrow ruffle out of the same fabric as the petticoat. The final version of the outer layer would have lace ruffles, but for the mockup, I omitted them altogether.
It took some experimentation to figure out the best way of sewing the petticoat so the raw edges would be hidden and the placket would be clean. I wanted the closure to overlap, but because of the lining, I couldn’t figure out an easy way of doing it. I settled for having the edges meet at the center back.
As you can see, the lining ended up too long—the under-ruffle peeked out at the hem, so I shortened the pattern to ensure that the final version would fit.

Petticoat, Second Mockup (Front View)
Since everything seemed okay, I went ahead and started the final construction.
Construction, Petticoat
There ended up being two problems with the final petticoat. First, when I realized the lining was too long, I shortened it at the waist, instead of the hem. As a result, the waistline ended up too big. I had to overlap the back closure to make it fit, which wasn’t much of a problem, since I’d originally wanted to do just that. Although, I would have preferred if it had been deliberate and not an accident!
The other issue was more serious. Somehow, I sewed the ruffle to the wrong side of the lining, which threw off the entire construction process. I was using the ruffle to judge which way to sew the lining, so when I attached the outer layer to the lining, it ended up backwards, with the lining facing the wrong way. Unfortunately, I didn’t discover the mistake until I was 90% done. Voile doesn’t take kindly to seam-ripping, so rather than risk the work I’d already done, I opted to leave it be. After all, the lining doesn’t show when the petticoat is being worn.

Finished Petticoat (Front View)

Finished Petticoat (Closeup of Ruffle)
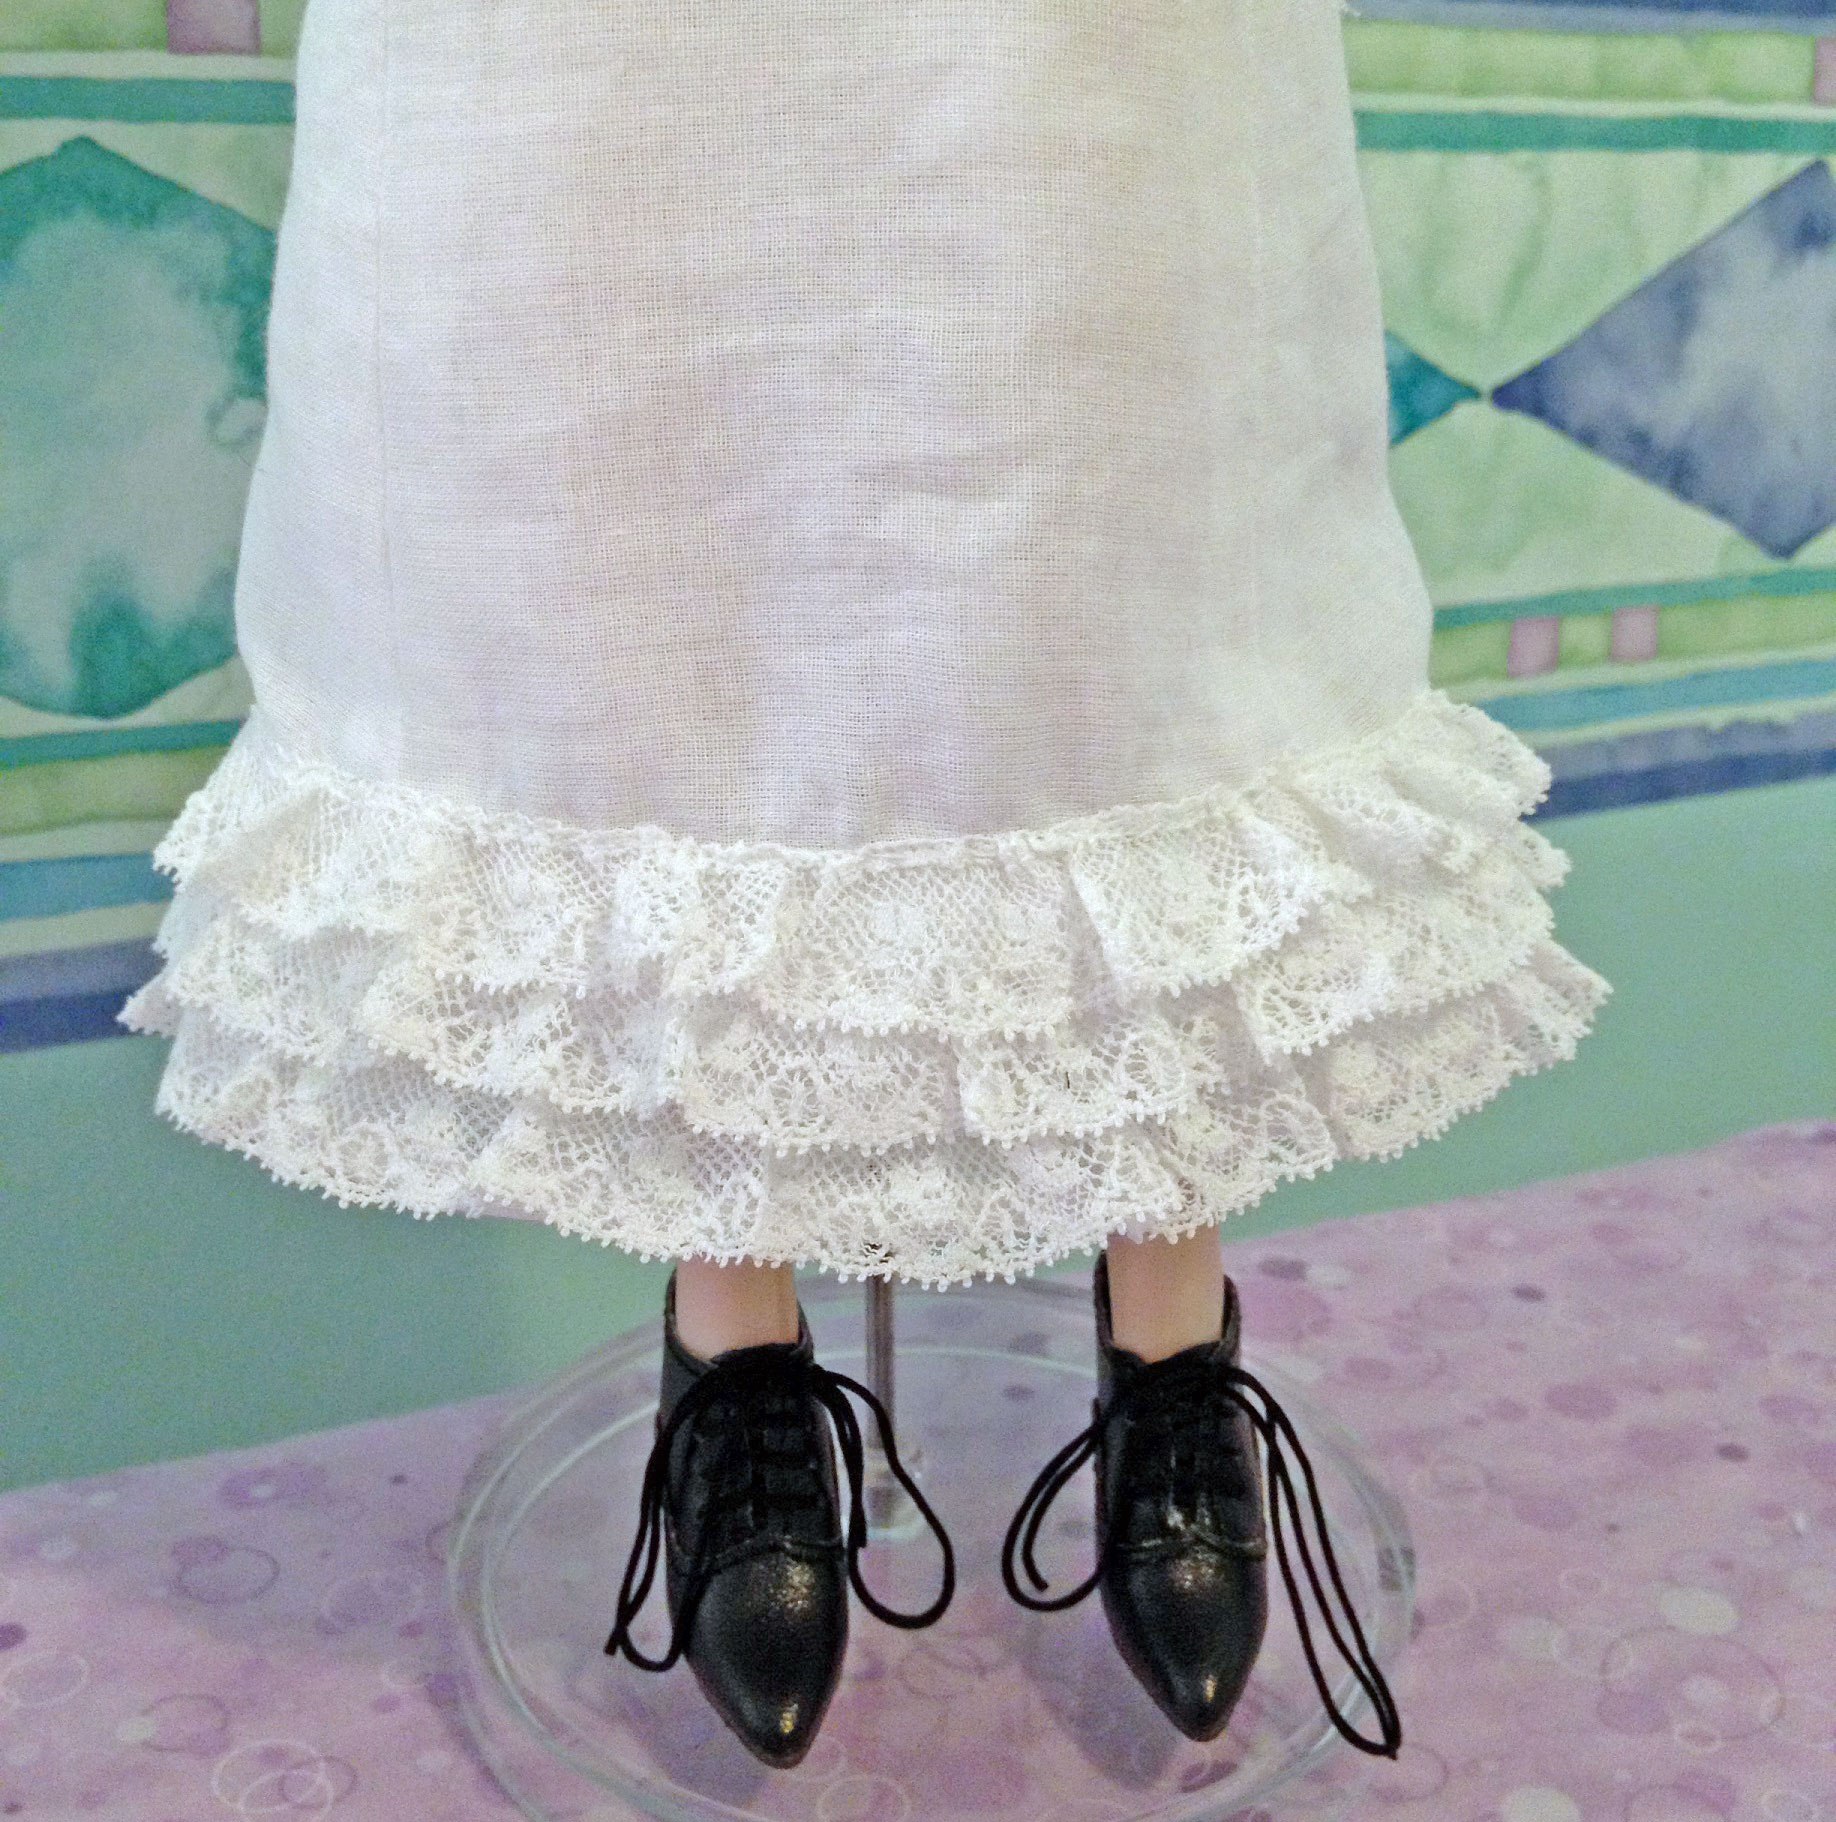
Finished Petticoat (Closeup of Lace)
It turned out pretty well, I think, in spite of the mistake I made with the lining.
Mockup, Drawers
As I mentioned earlier, bulk is the doll costumer’s enemy. Gathered waistbands are among the worst offenders, so I designed the drawers to sit on the hips, with a waist facing instead of a waistband. I thought about using a yoke, but I didn’t want an extra seam around the doll’s hips. Besides, in most of the examples I’ve seen of drawers from 1915, yokes were no longer fashionable.
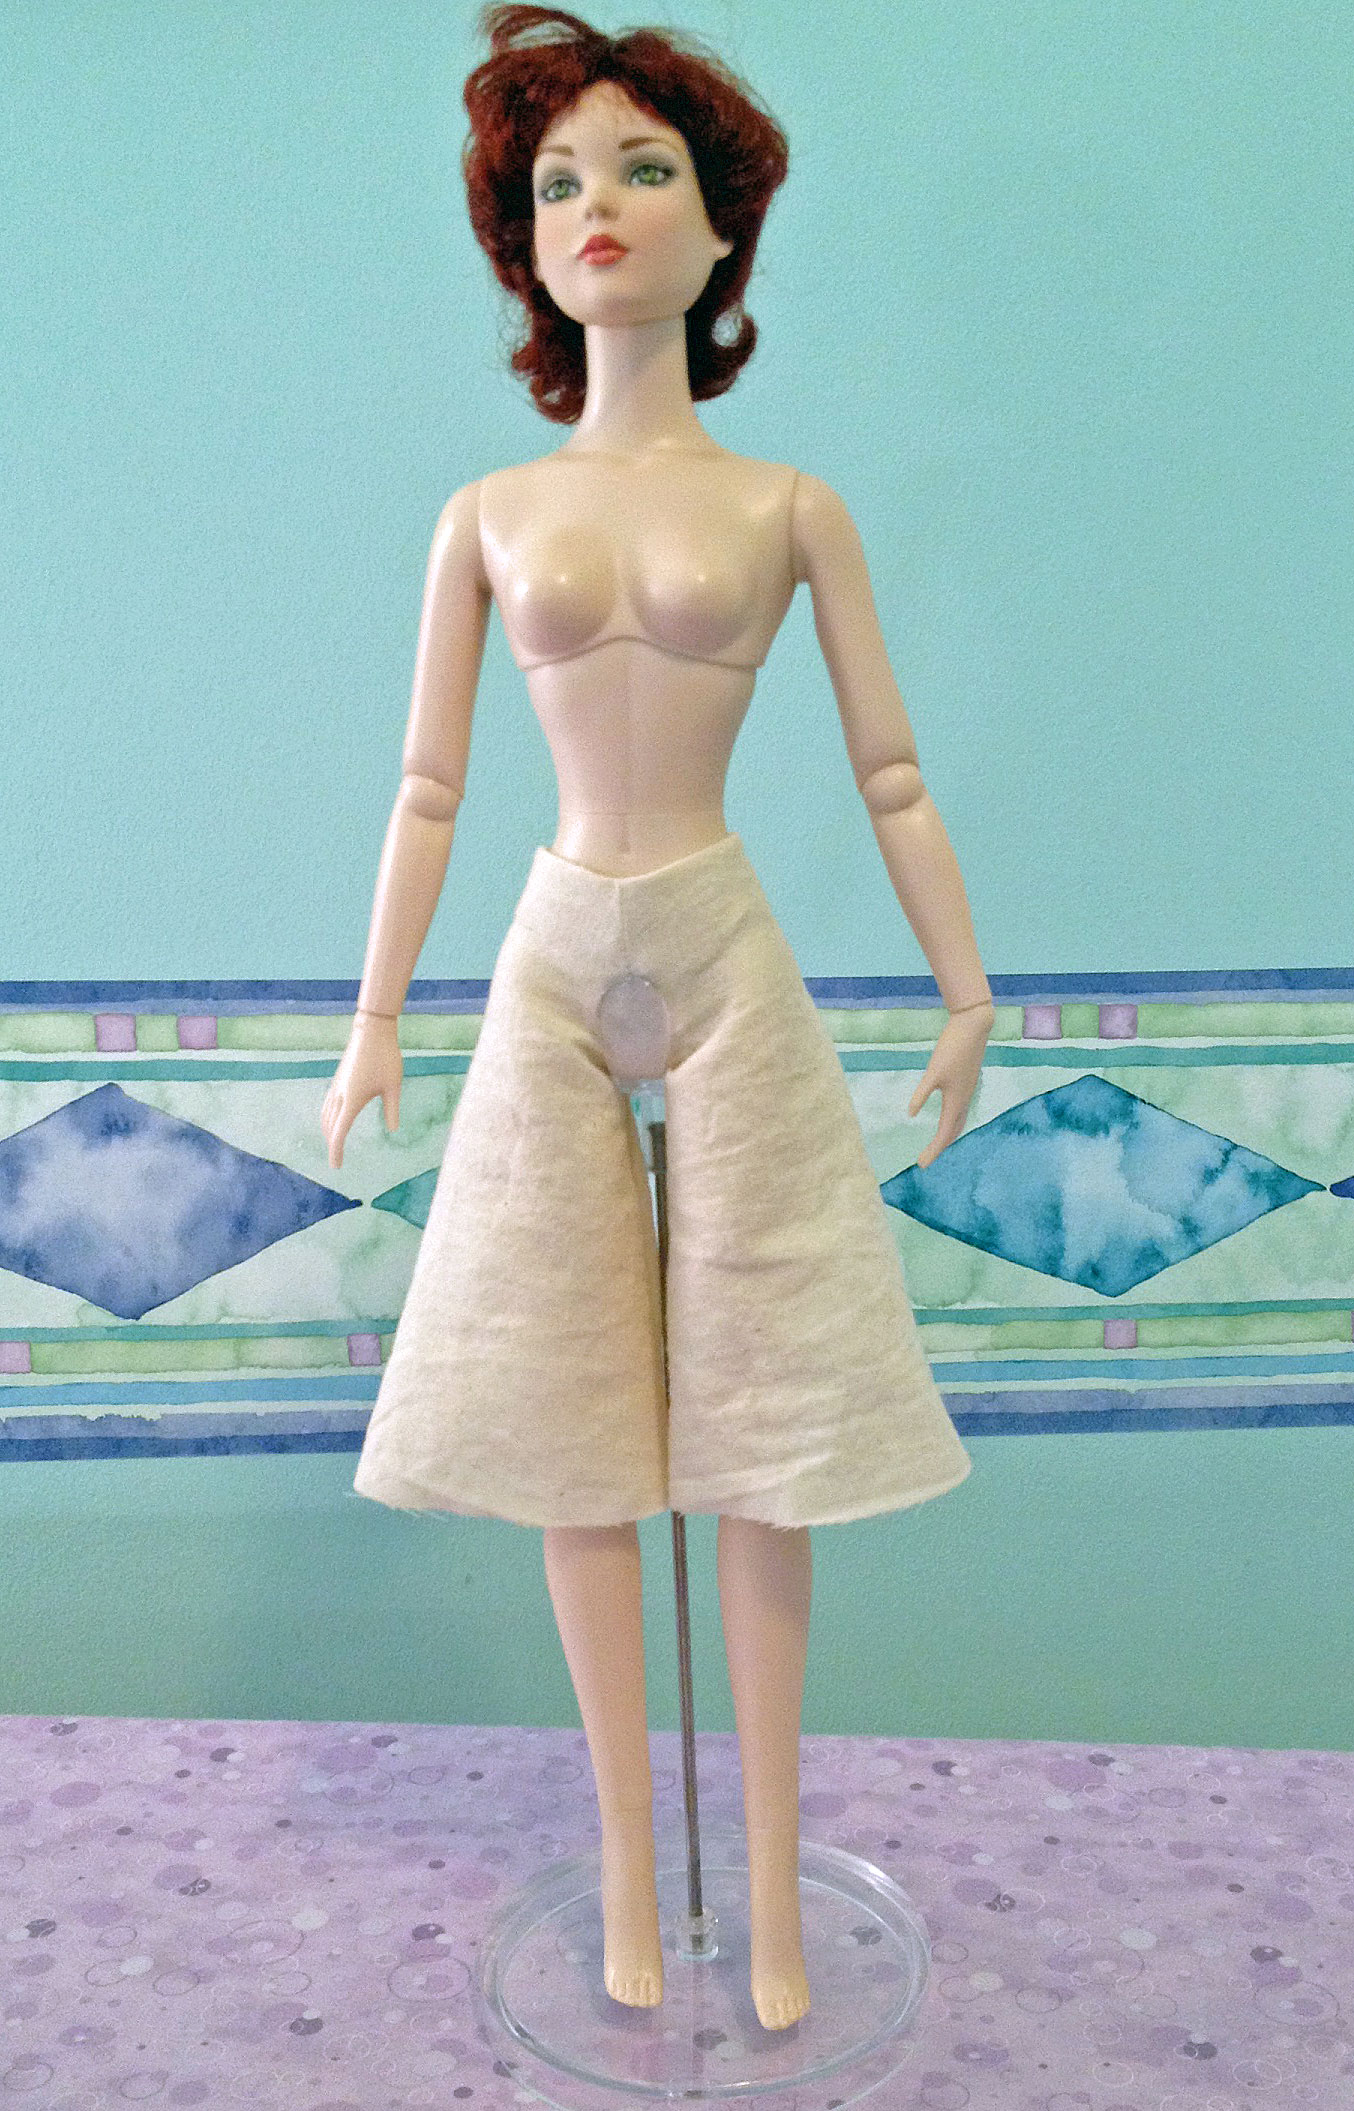
Drawers, Mockup
My first attempt fit perfectly, but since voile is so fragile, I decided to add a touch more ease, so as not to strain the seams. The legs weren’t full enough, so I widened them. And because the drawers were looking a little too much like 1970s culottes, I shortened the legs by an inch.
I felt sure of my alterations, so instead of making a second mockup, I dove right in.
Construction, Drawers
I quickly realized that any embellishing needed to be done first, prior to assembling the drawers. I wanted pintucks and lace, but from previous experience, I knew that pintucks could be somewhat bulky. To keep things light and airy, I chose to simulate pintucks with parallel rows of stitching.
This is where I committed my first big mistake—I forgot to stabilize the voile before sewing. As a result, the fabric got sucked into the feed dogs and ran afoul of the bobbin thread. I actually had to unscrew the throat plate in order to cut the tangled threads and pull the fabric free!
Since the first pair of drawers was ruined, I cut a second pair. This time, I used a spray starch alternative to stiffen the fabric. It worked beautifully and I was able to sew three rows of stitching along the bottom of each leg to give the illusion of tiny pintucks.
Once the “pintucks” were done, I used a narrow zigzag to attach edging lace to the bottom of the legs.

Drawers (Closeup of Lace & Faux Pintucks)
After embellishing the drawers, I assembled them.
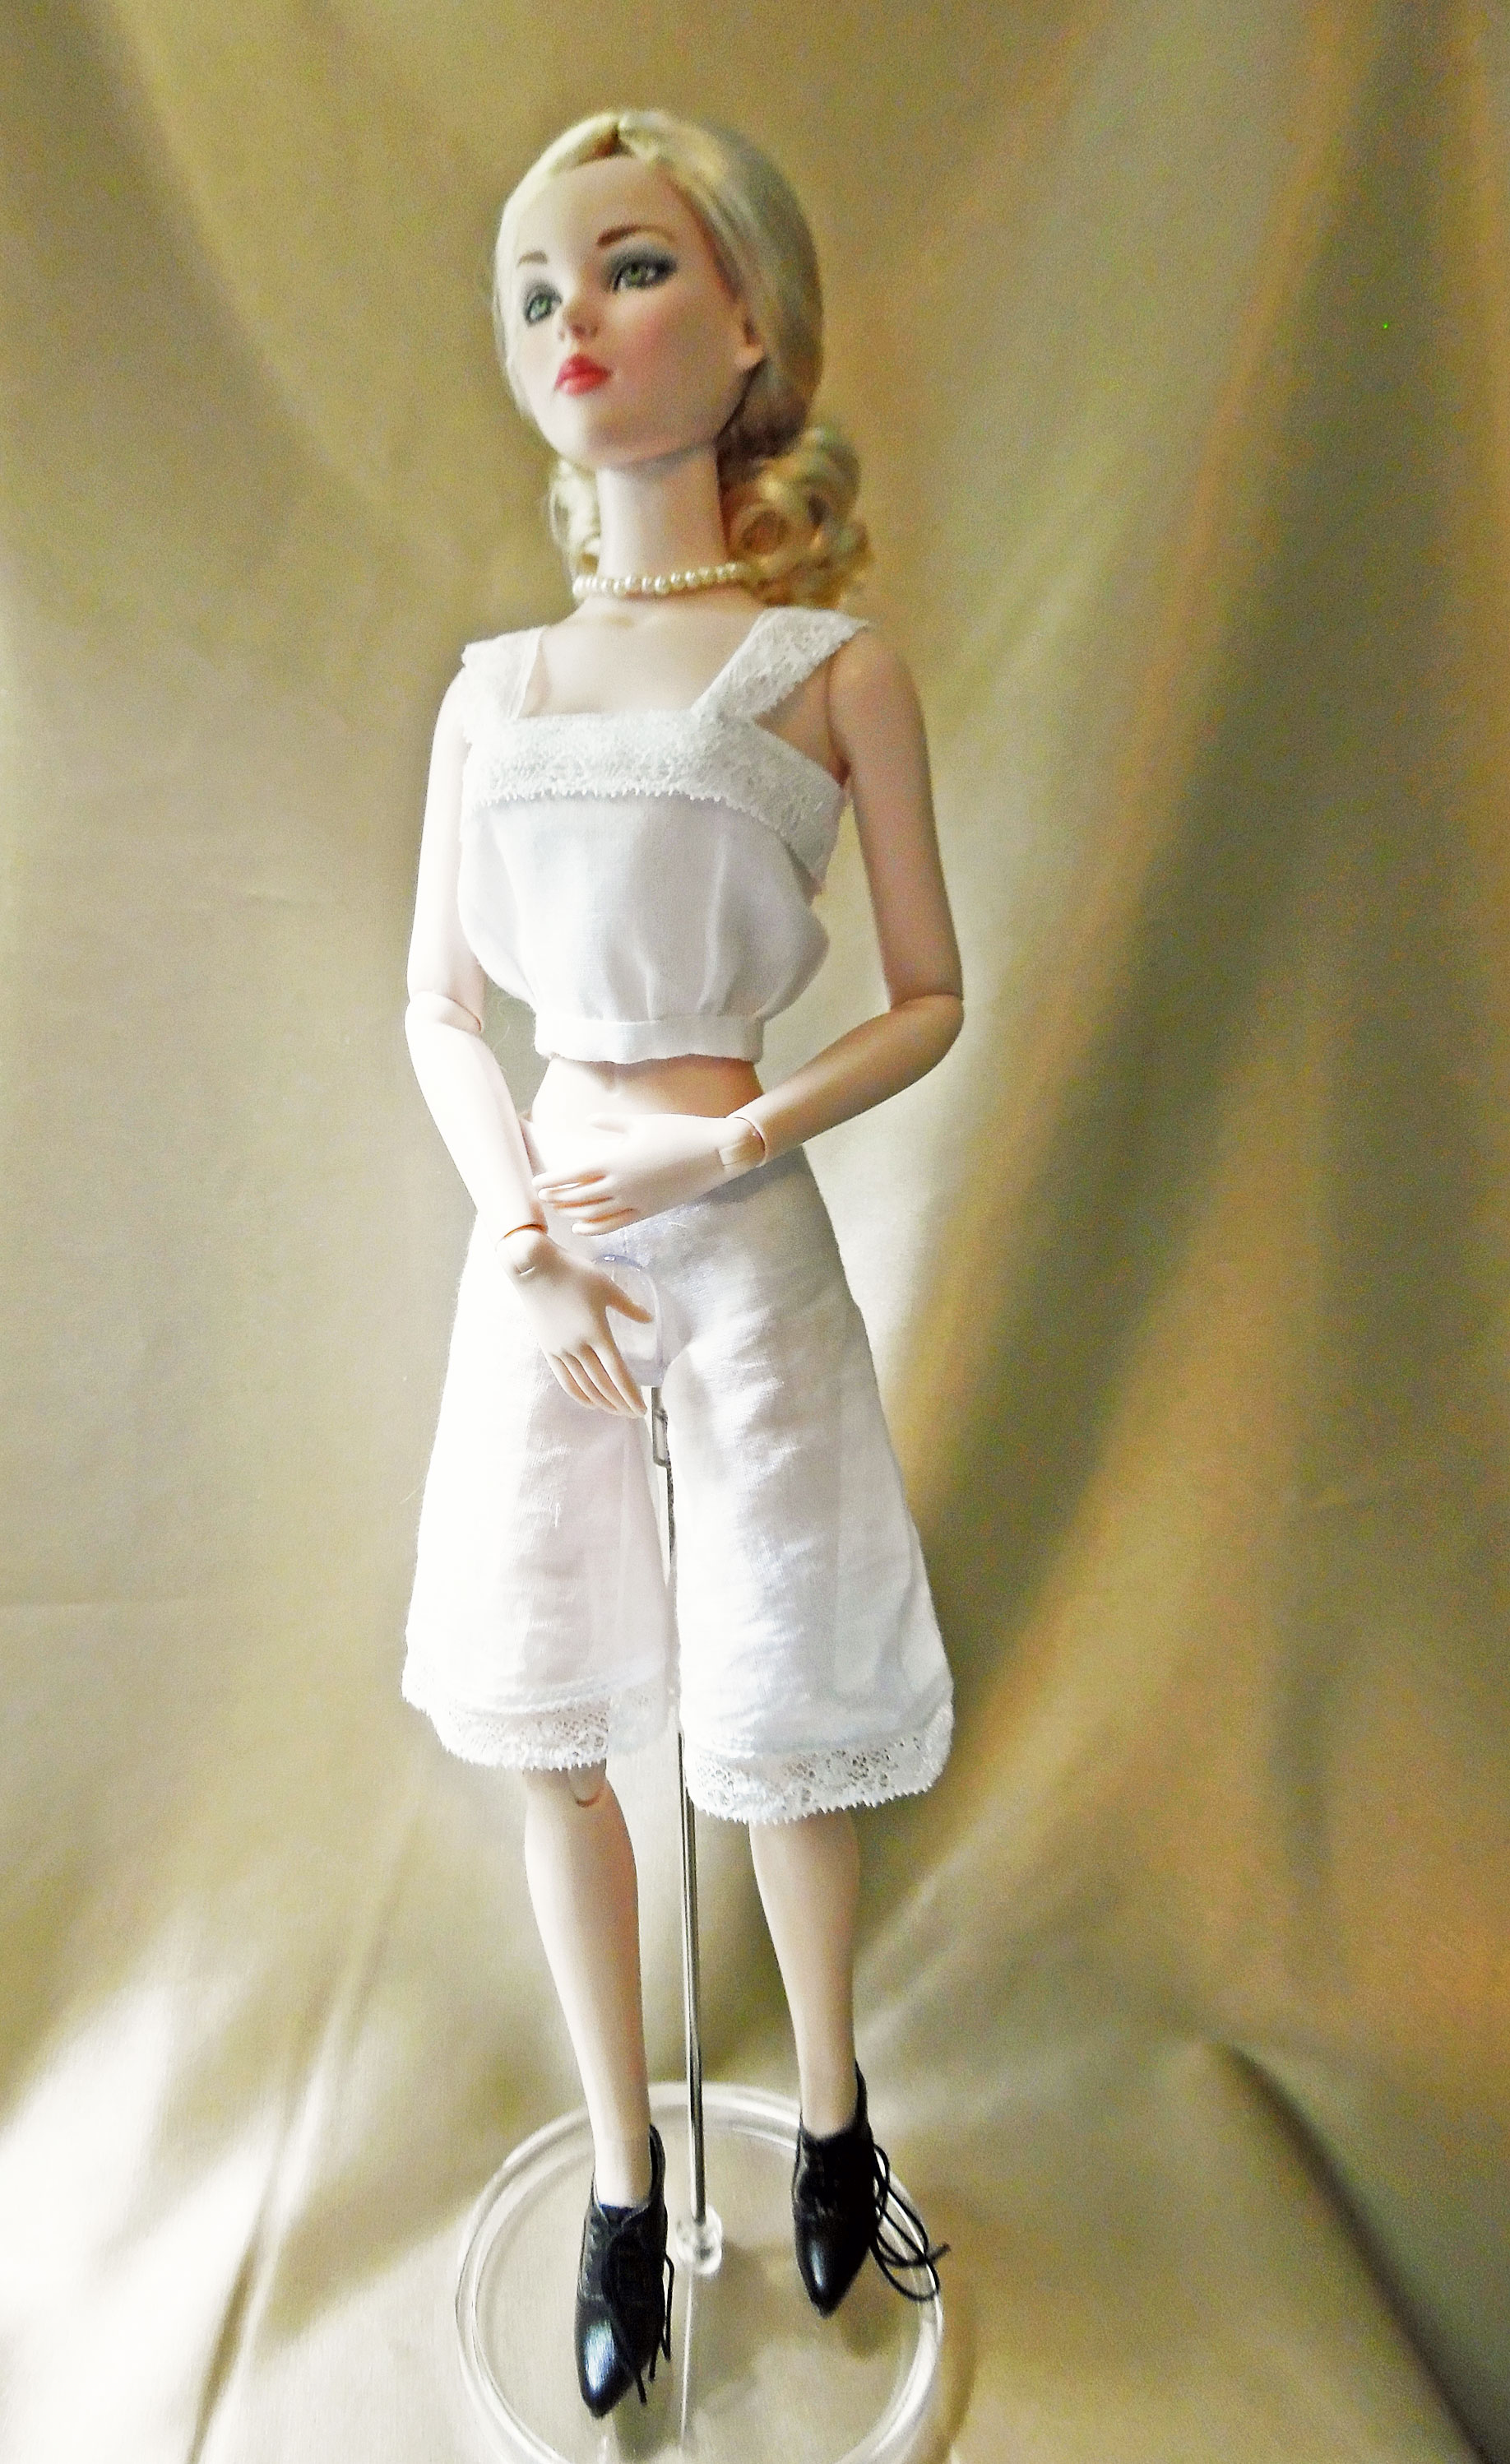
The waist facing serves to finish the top edge, but I sewed it in such a way that it also finishes the center back edges, forming a ready-made placket. The final step was to sew a tiny hook and thread bar to the top of the back opening.
Once the drawers were done, I gently hand-washed them, to rinse the spray starch out. It was a pain and a half to press them once they’d dried, but the final result was worth it.
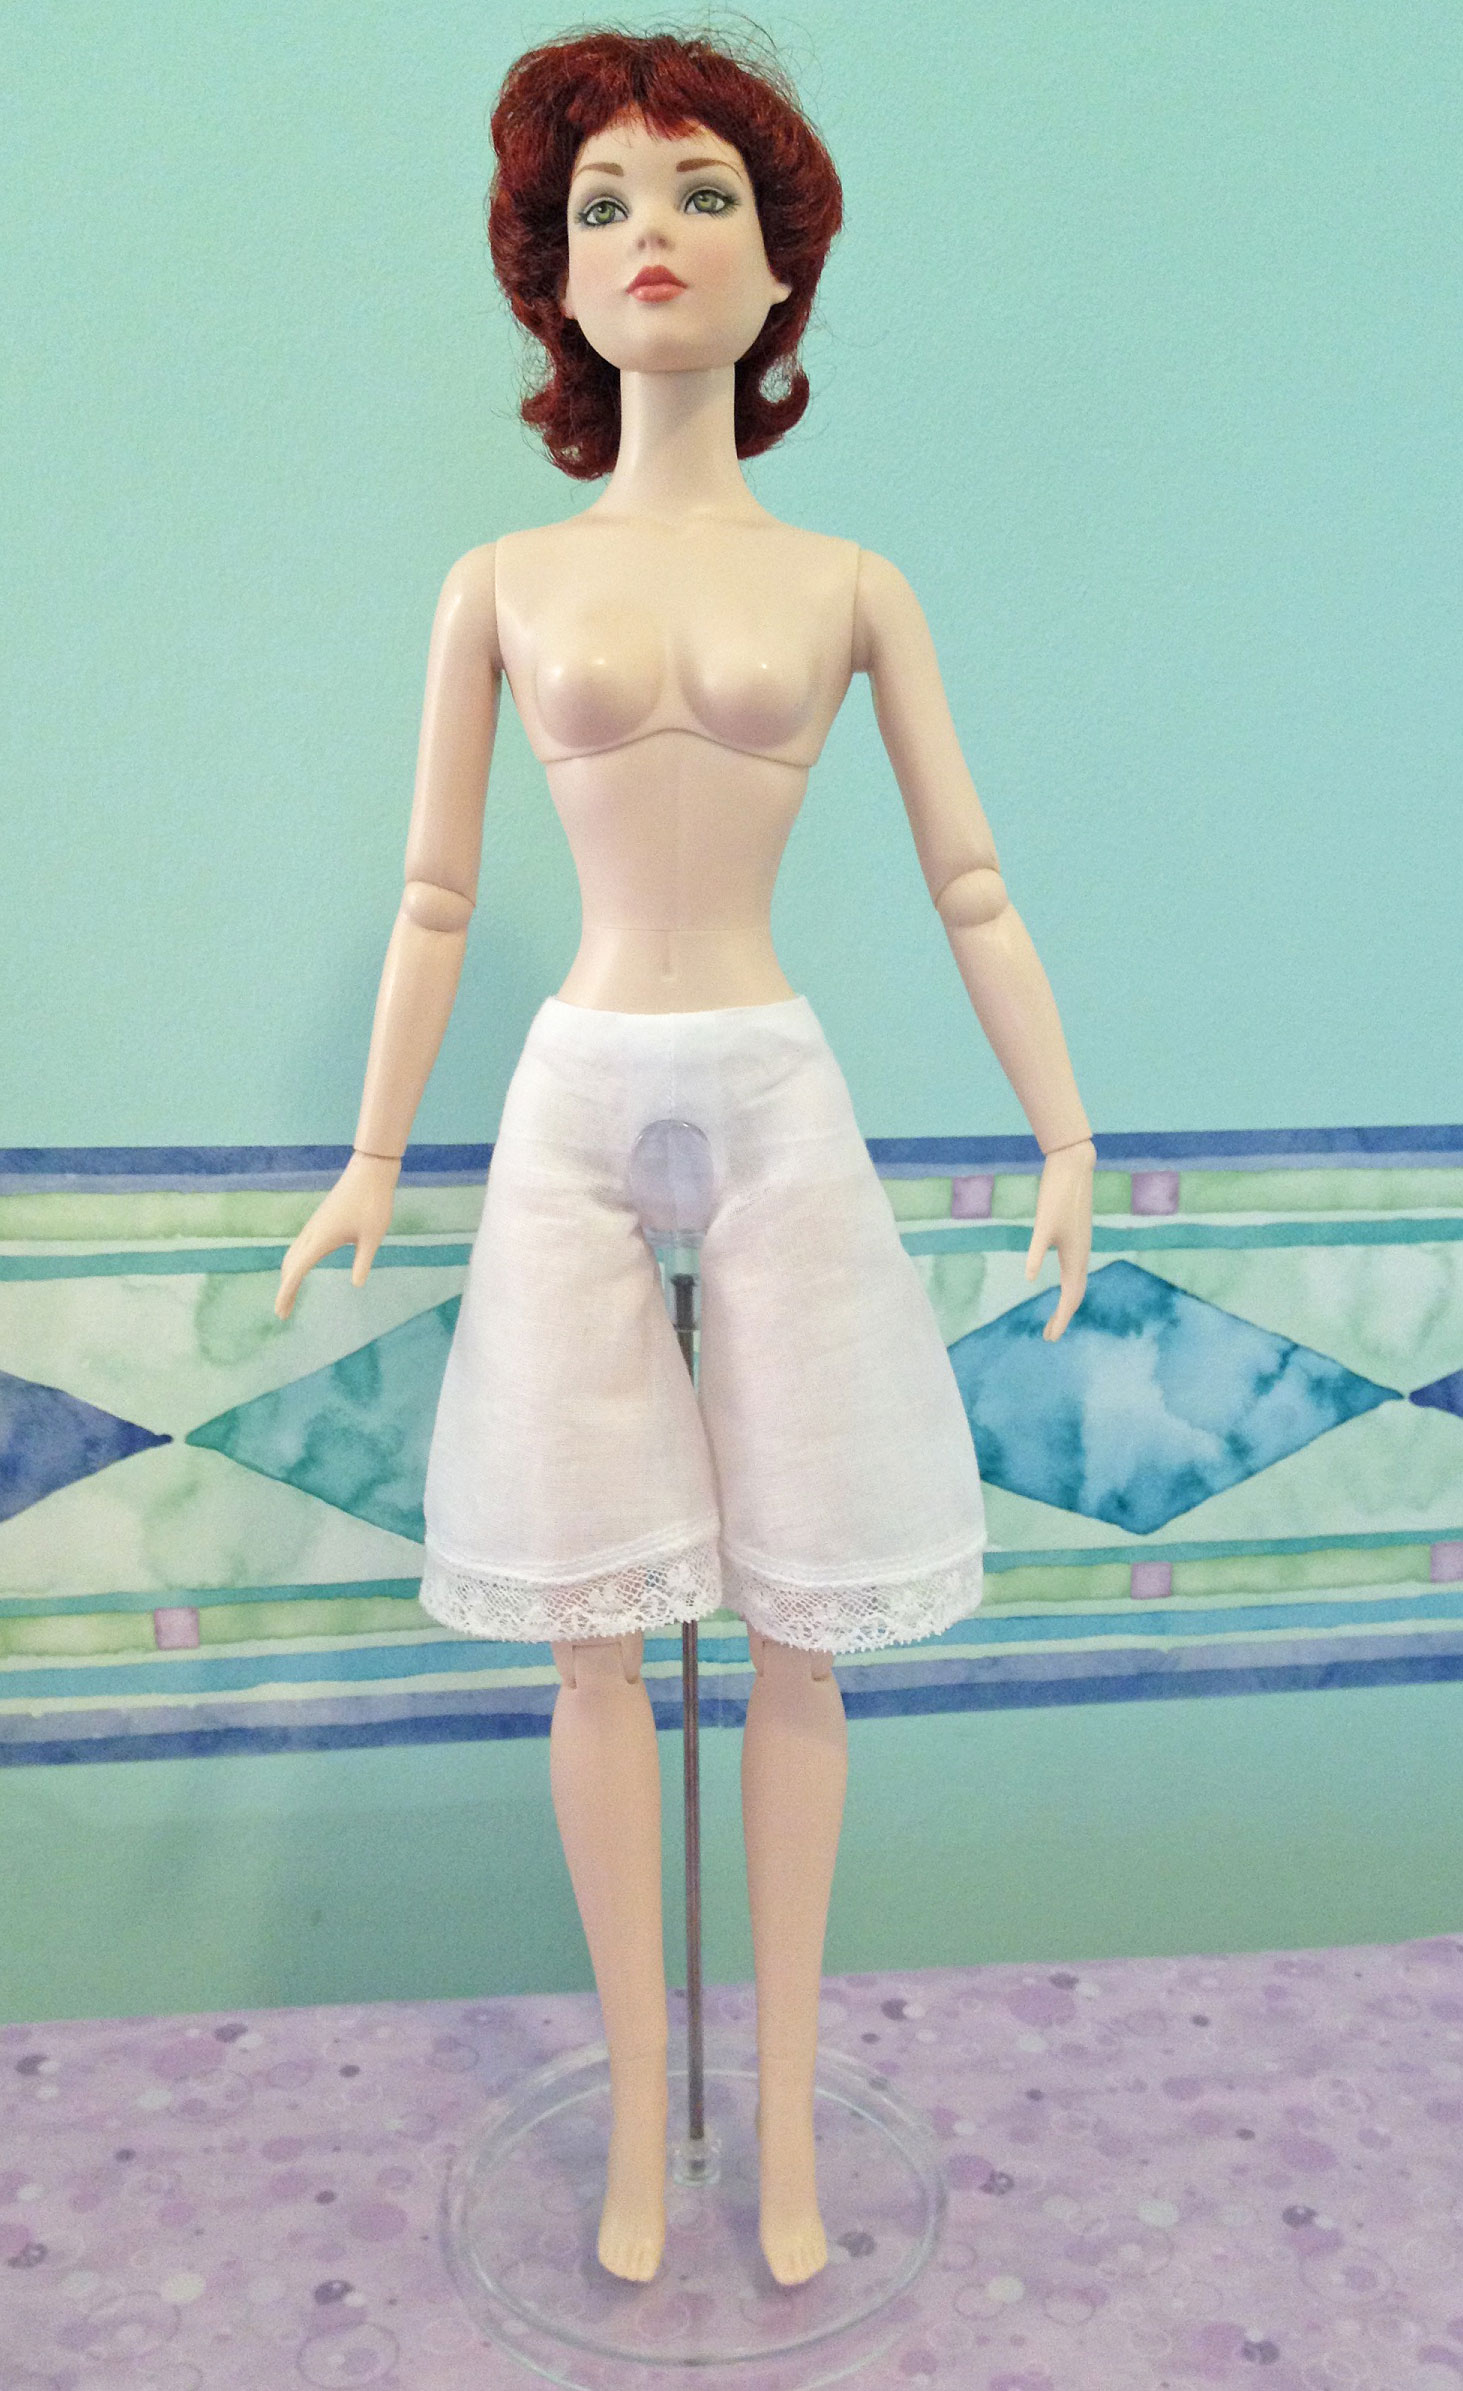
Finished Drawers
Mockup, Corset Cover
After browsing through three different books containing fashions from 1915, I decided to edge the top of the corset cover with lace, using separate pieces of lace to form the shoulder straps. This gives it a square neckline, which was extremely popular during this period. The corset cover fits snugly around the bust and falls straight down, with the excess gathered at the waist, producing the fashionable blouson effect.
A real corset cover would likely be pulled on over the head, with drawstrings to adjust the fit. However, it would have been quite difficult to reproduce such a style in miniature scale, so I decided to use snaps to close the center back.
Normally, I omit any lace or trims from my mockups, but since it was integral to the design, I used some inexpensive Cluny lace. Doing so helped me figure out how, exactly, to embellish the corset cover. I ended up lining it, so it has a finished top edge beneath the lace.
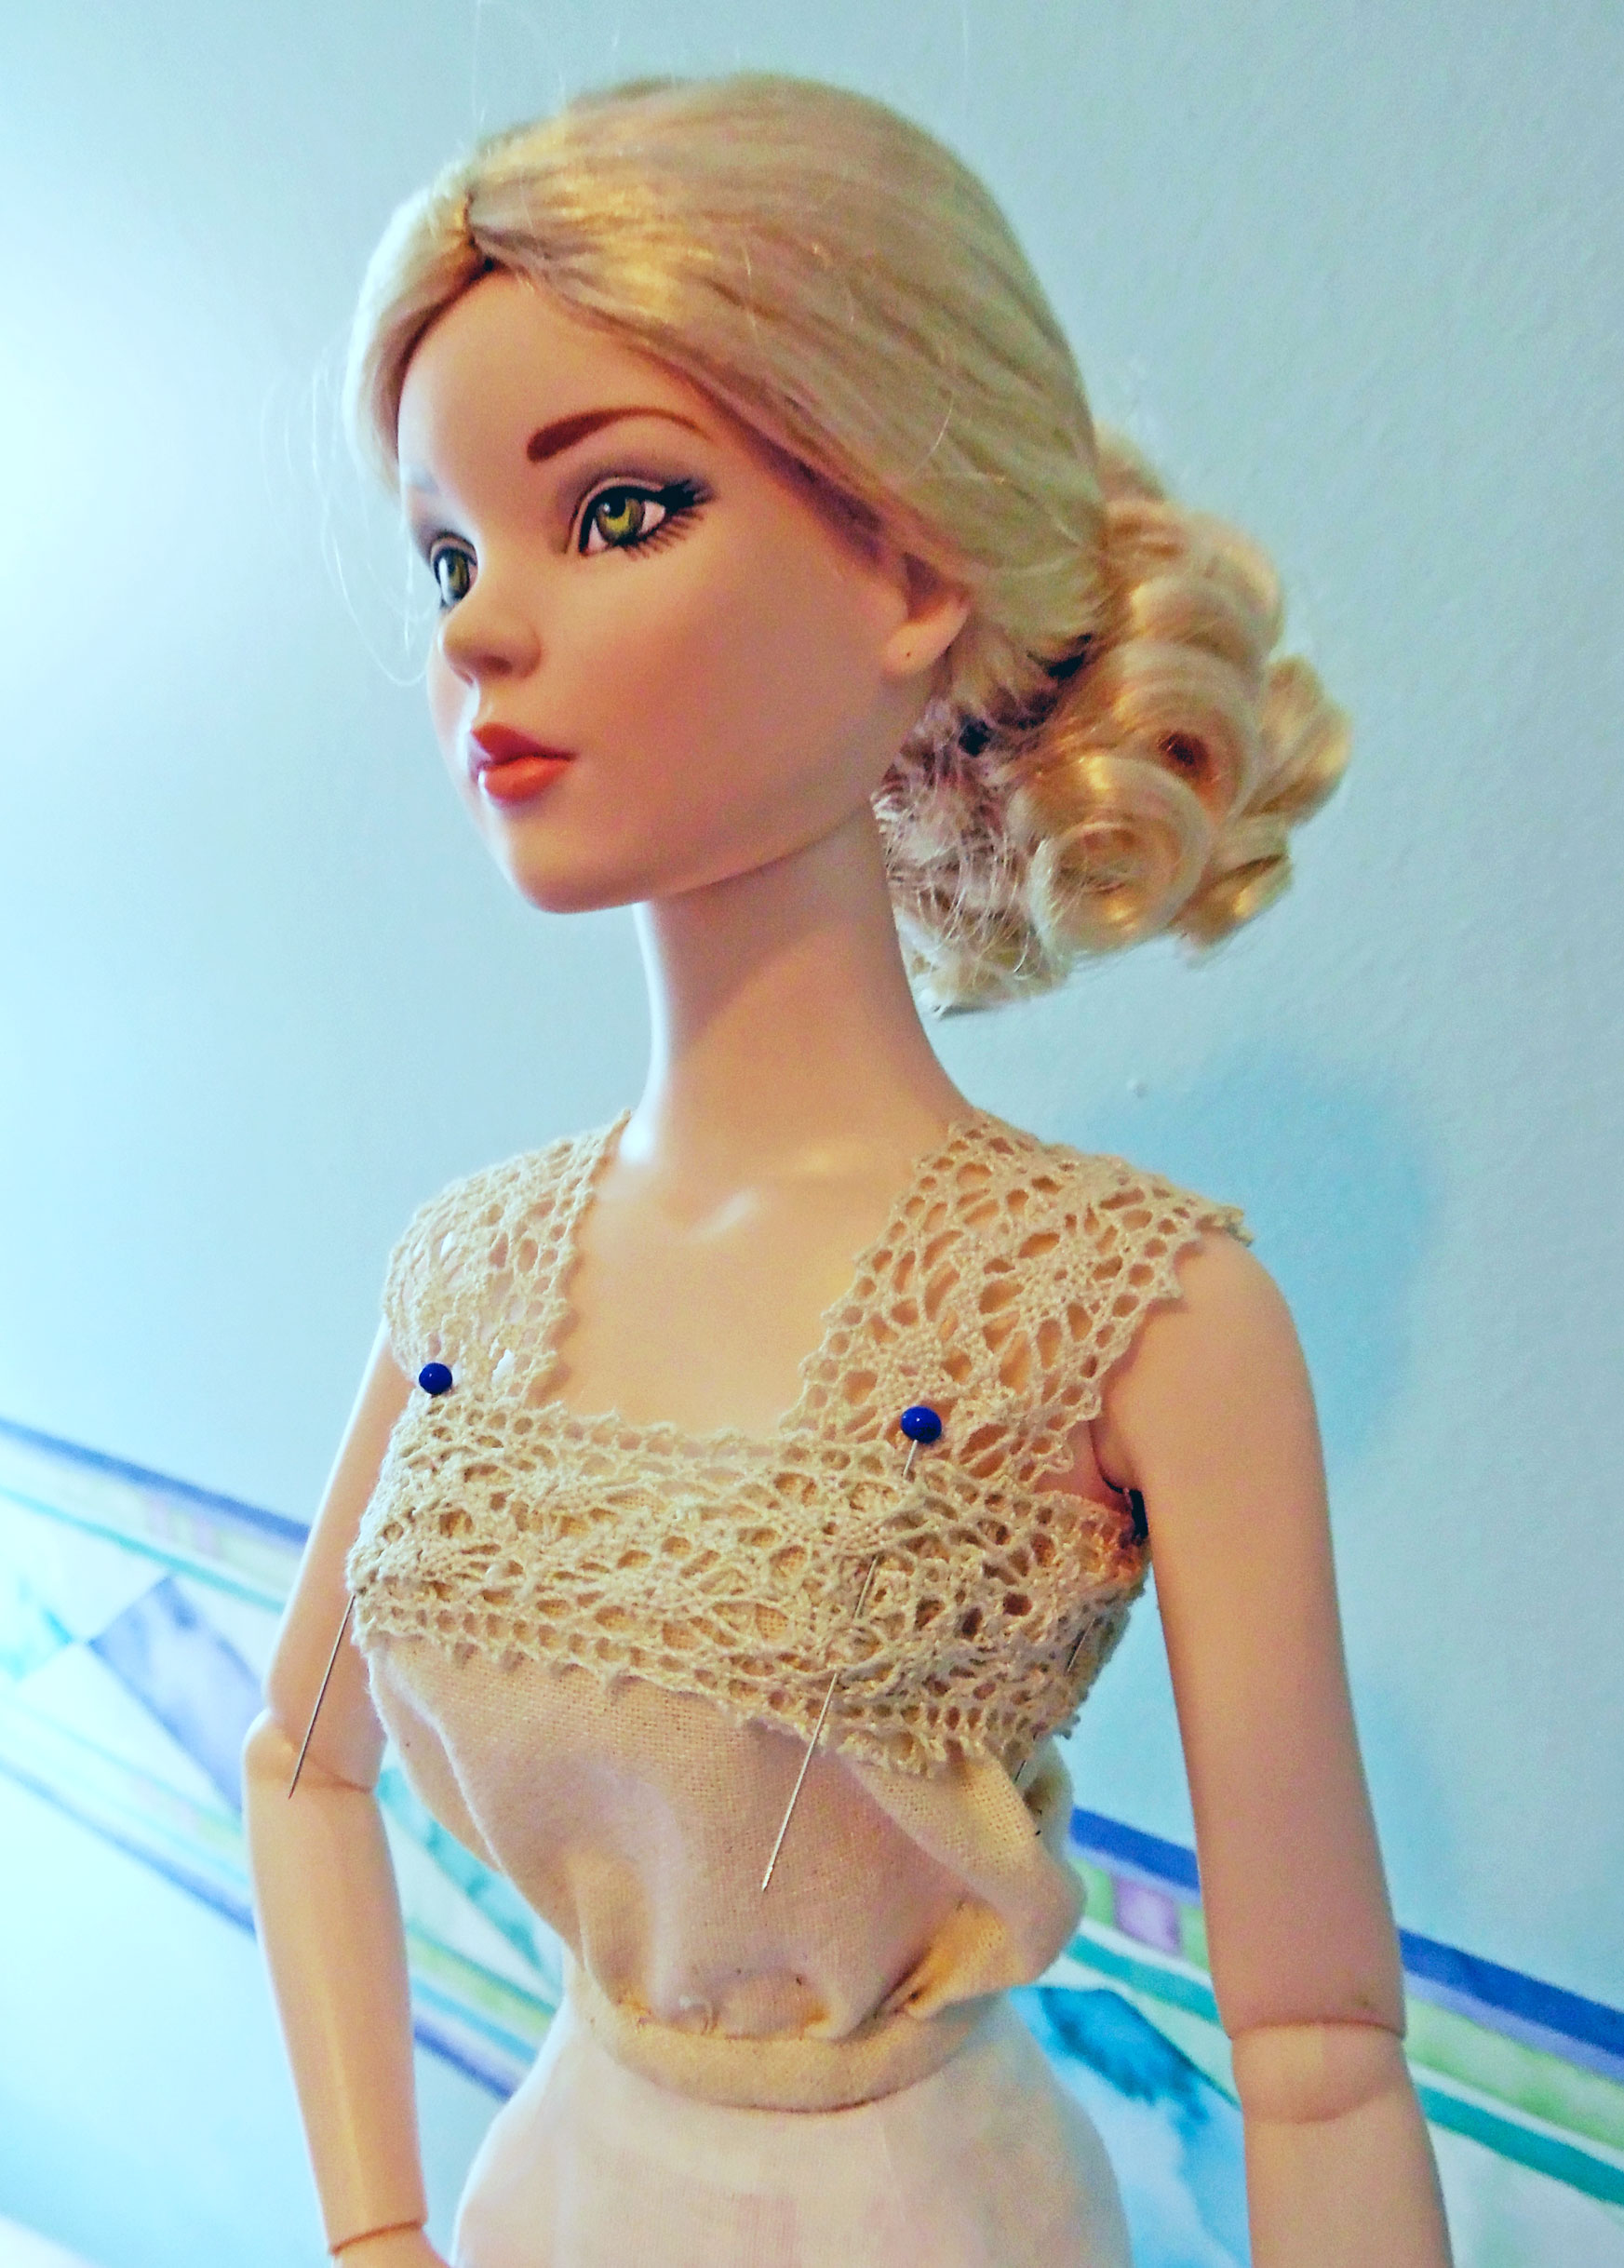
Corset Cover, Mockup
It’s hard to see in the photo, but I had an issue with the top edge. I’d designed it so it wrapped straight around the doll’s torso, from front to back. However, this caused it to pass over the doll’s underarm ball-joints, which created bunching on the sides and in the back. To correct this, I tapered the top edge, so it slopes downward as it passes under the arms and around to the back.
The upper portion of the mockup was a little too snug, but that was easily solved by letting out the seam allowance. Everything else looked good, so I proceeded to the real thing.
Construction, Corset Cover
I used the same white voile and antique heirloom lace for the corset cover, so it would match the other undergarments. It went together quickly and easily. This time, I remembered to starch the voile! That made a huge difference.
Once the corset cover was assembled, I discovered a flaw in my plan. Voile is so thin and sheer that you can see right through it. This wouldn’t be a problem, except for the fact that the seam allowances were clearly visible from the outside—especially around the top edge. Fortunately, the lace I added around the neckline concealed the visible seam allowances, thereby solving the problem.
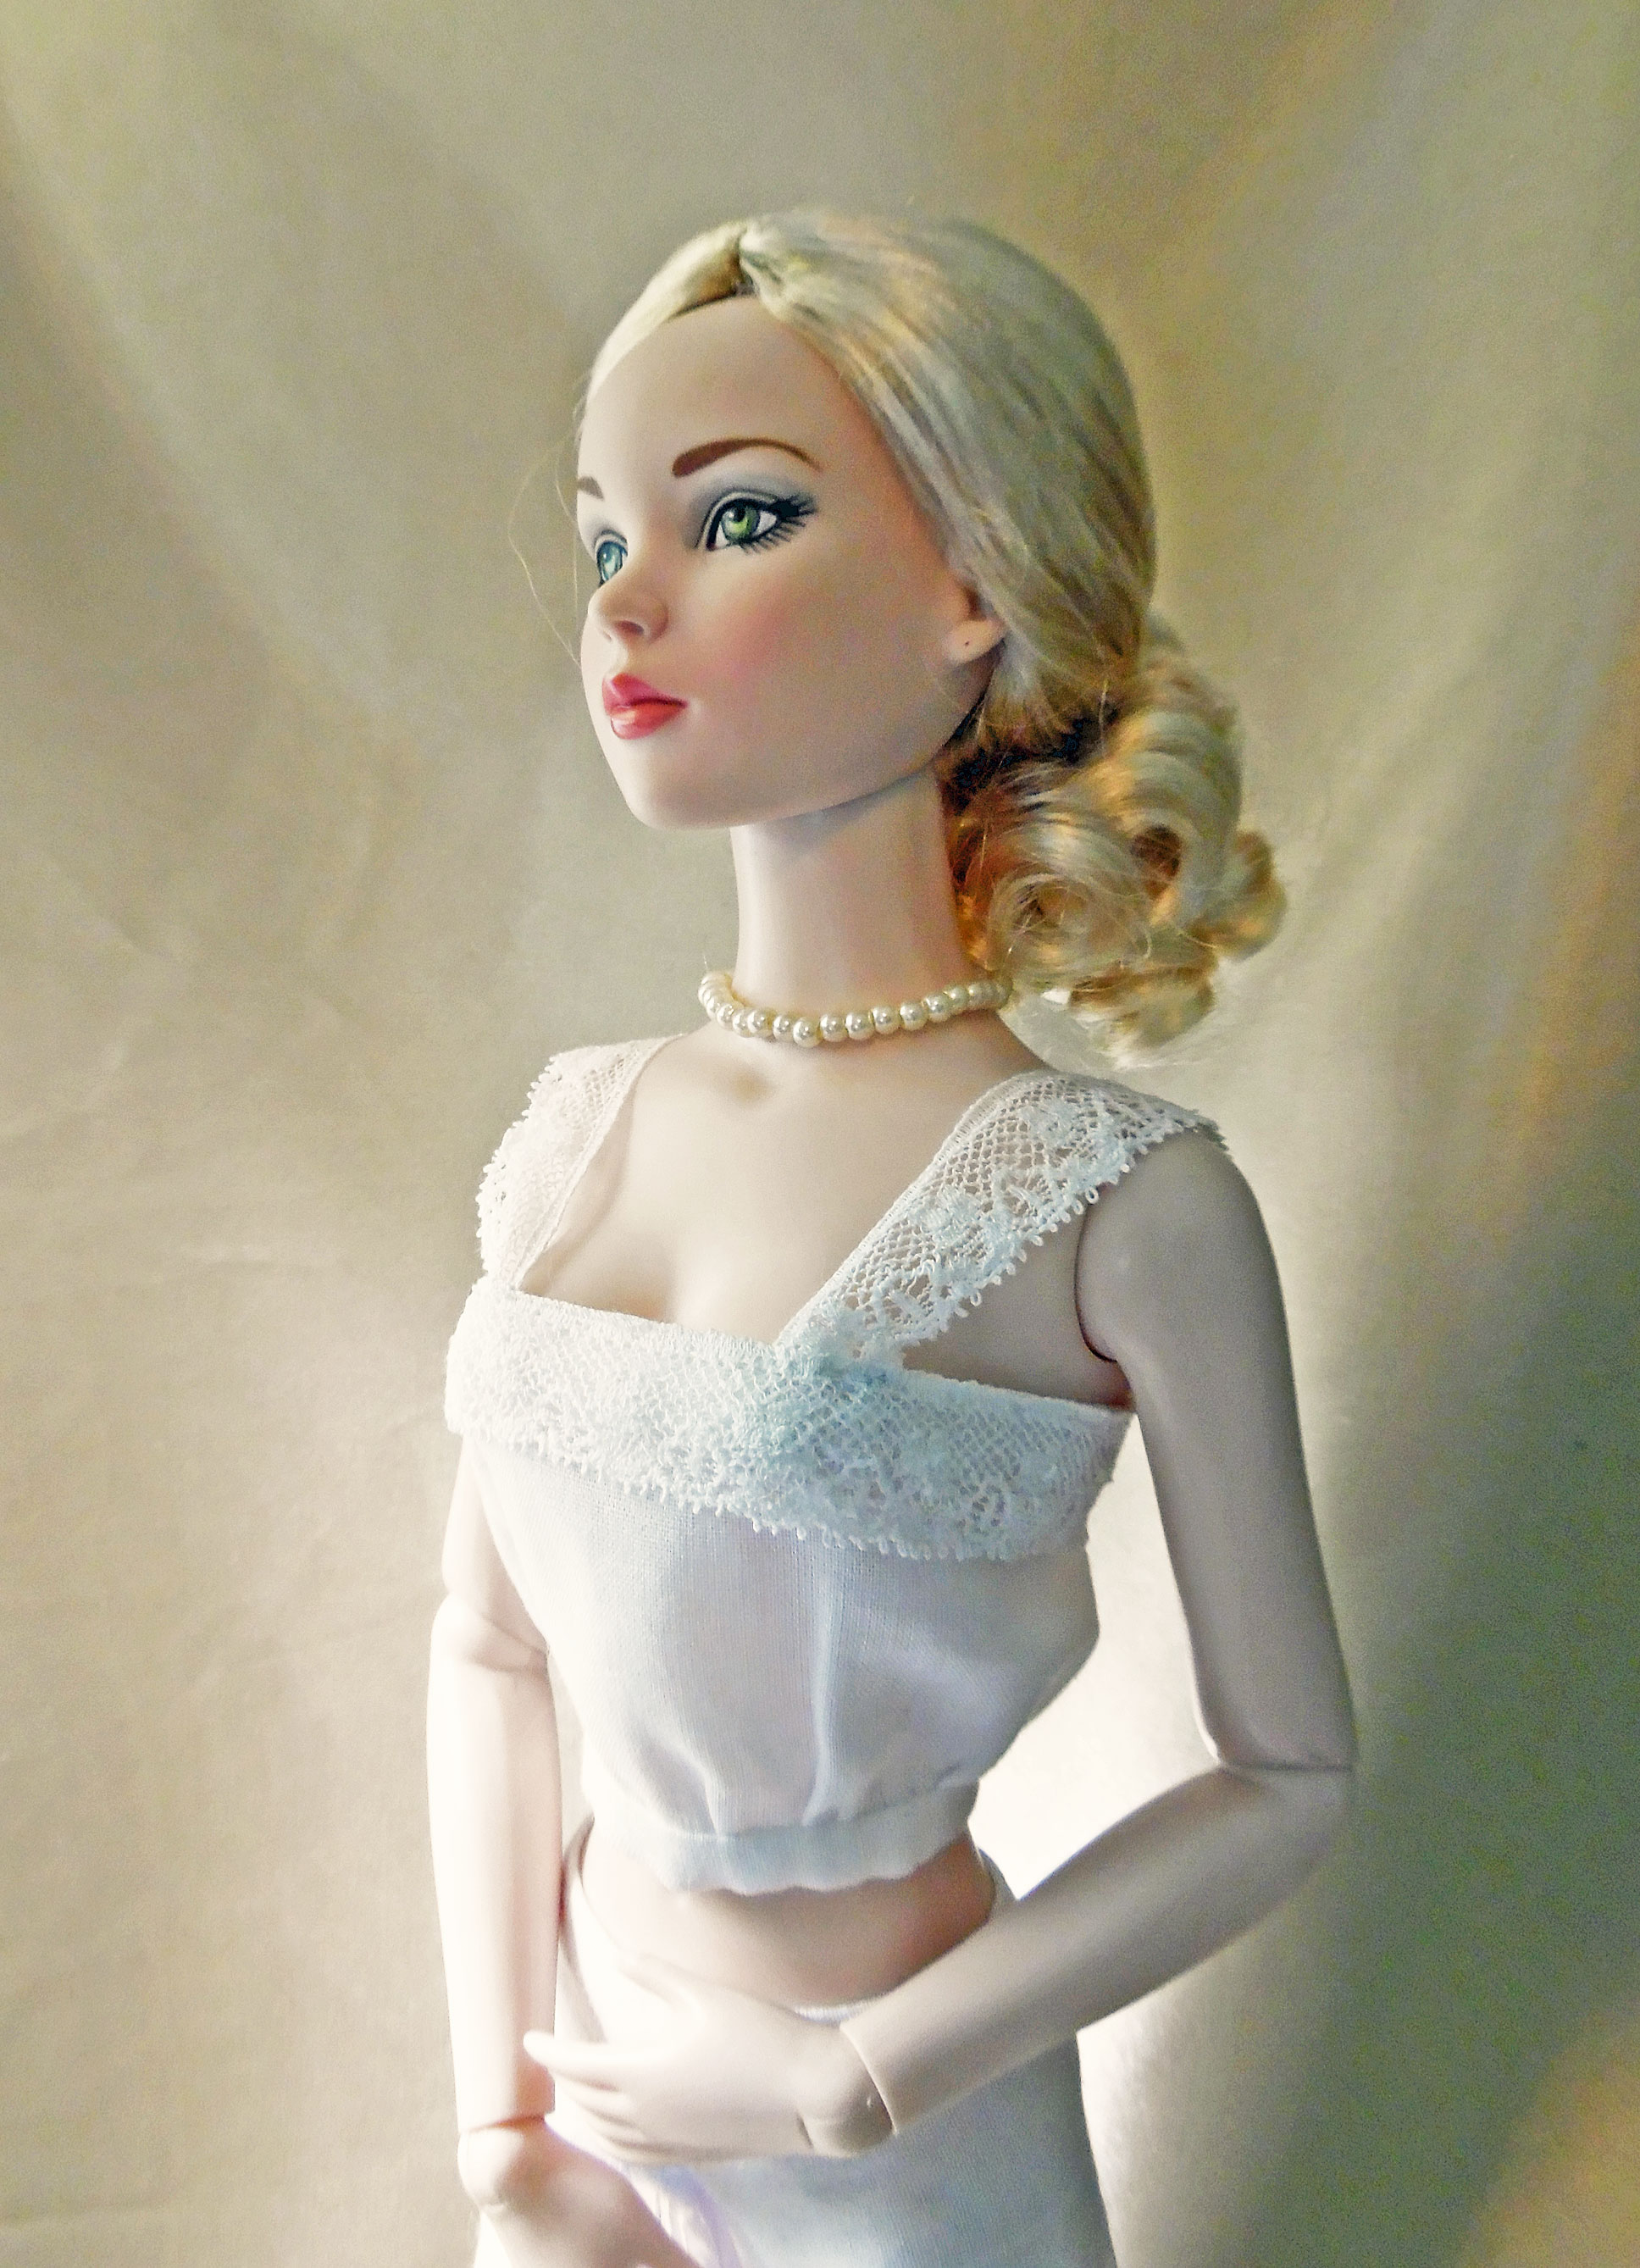
Finished Corset Cover
Conclusion
This was a fun project! I’m pleased with these pieces. They’re delicate, light, and airy—just what every WWI-era doll needs!
1915 Drawers & Corset Cover
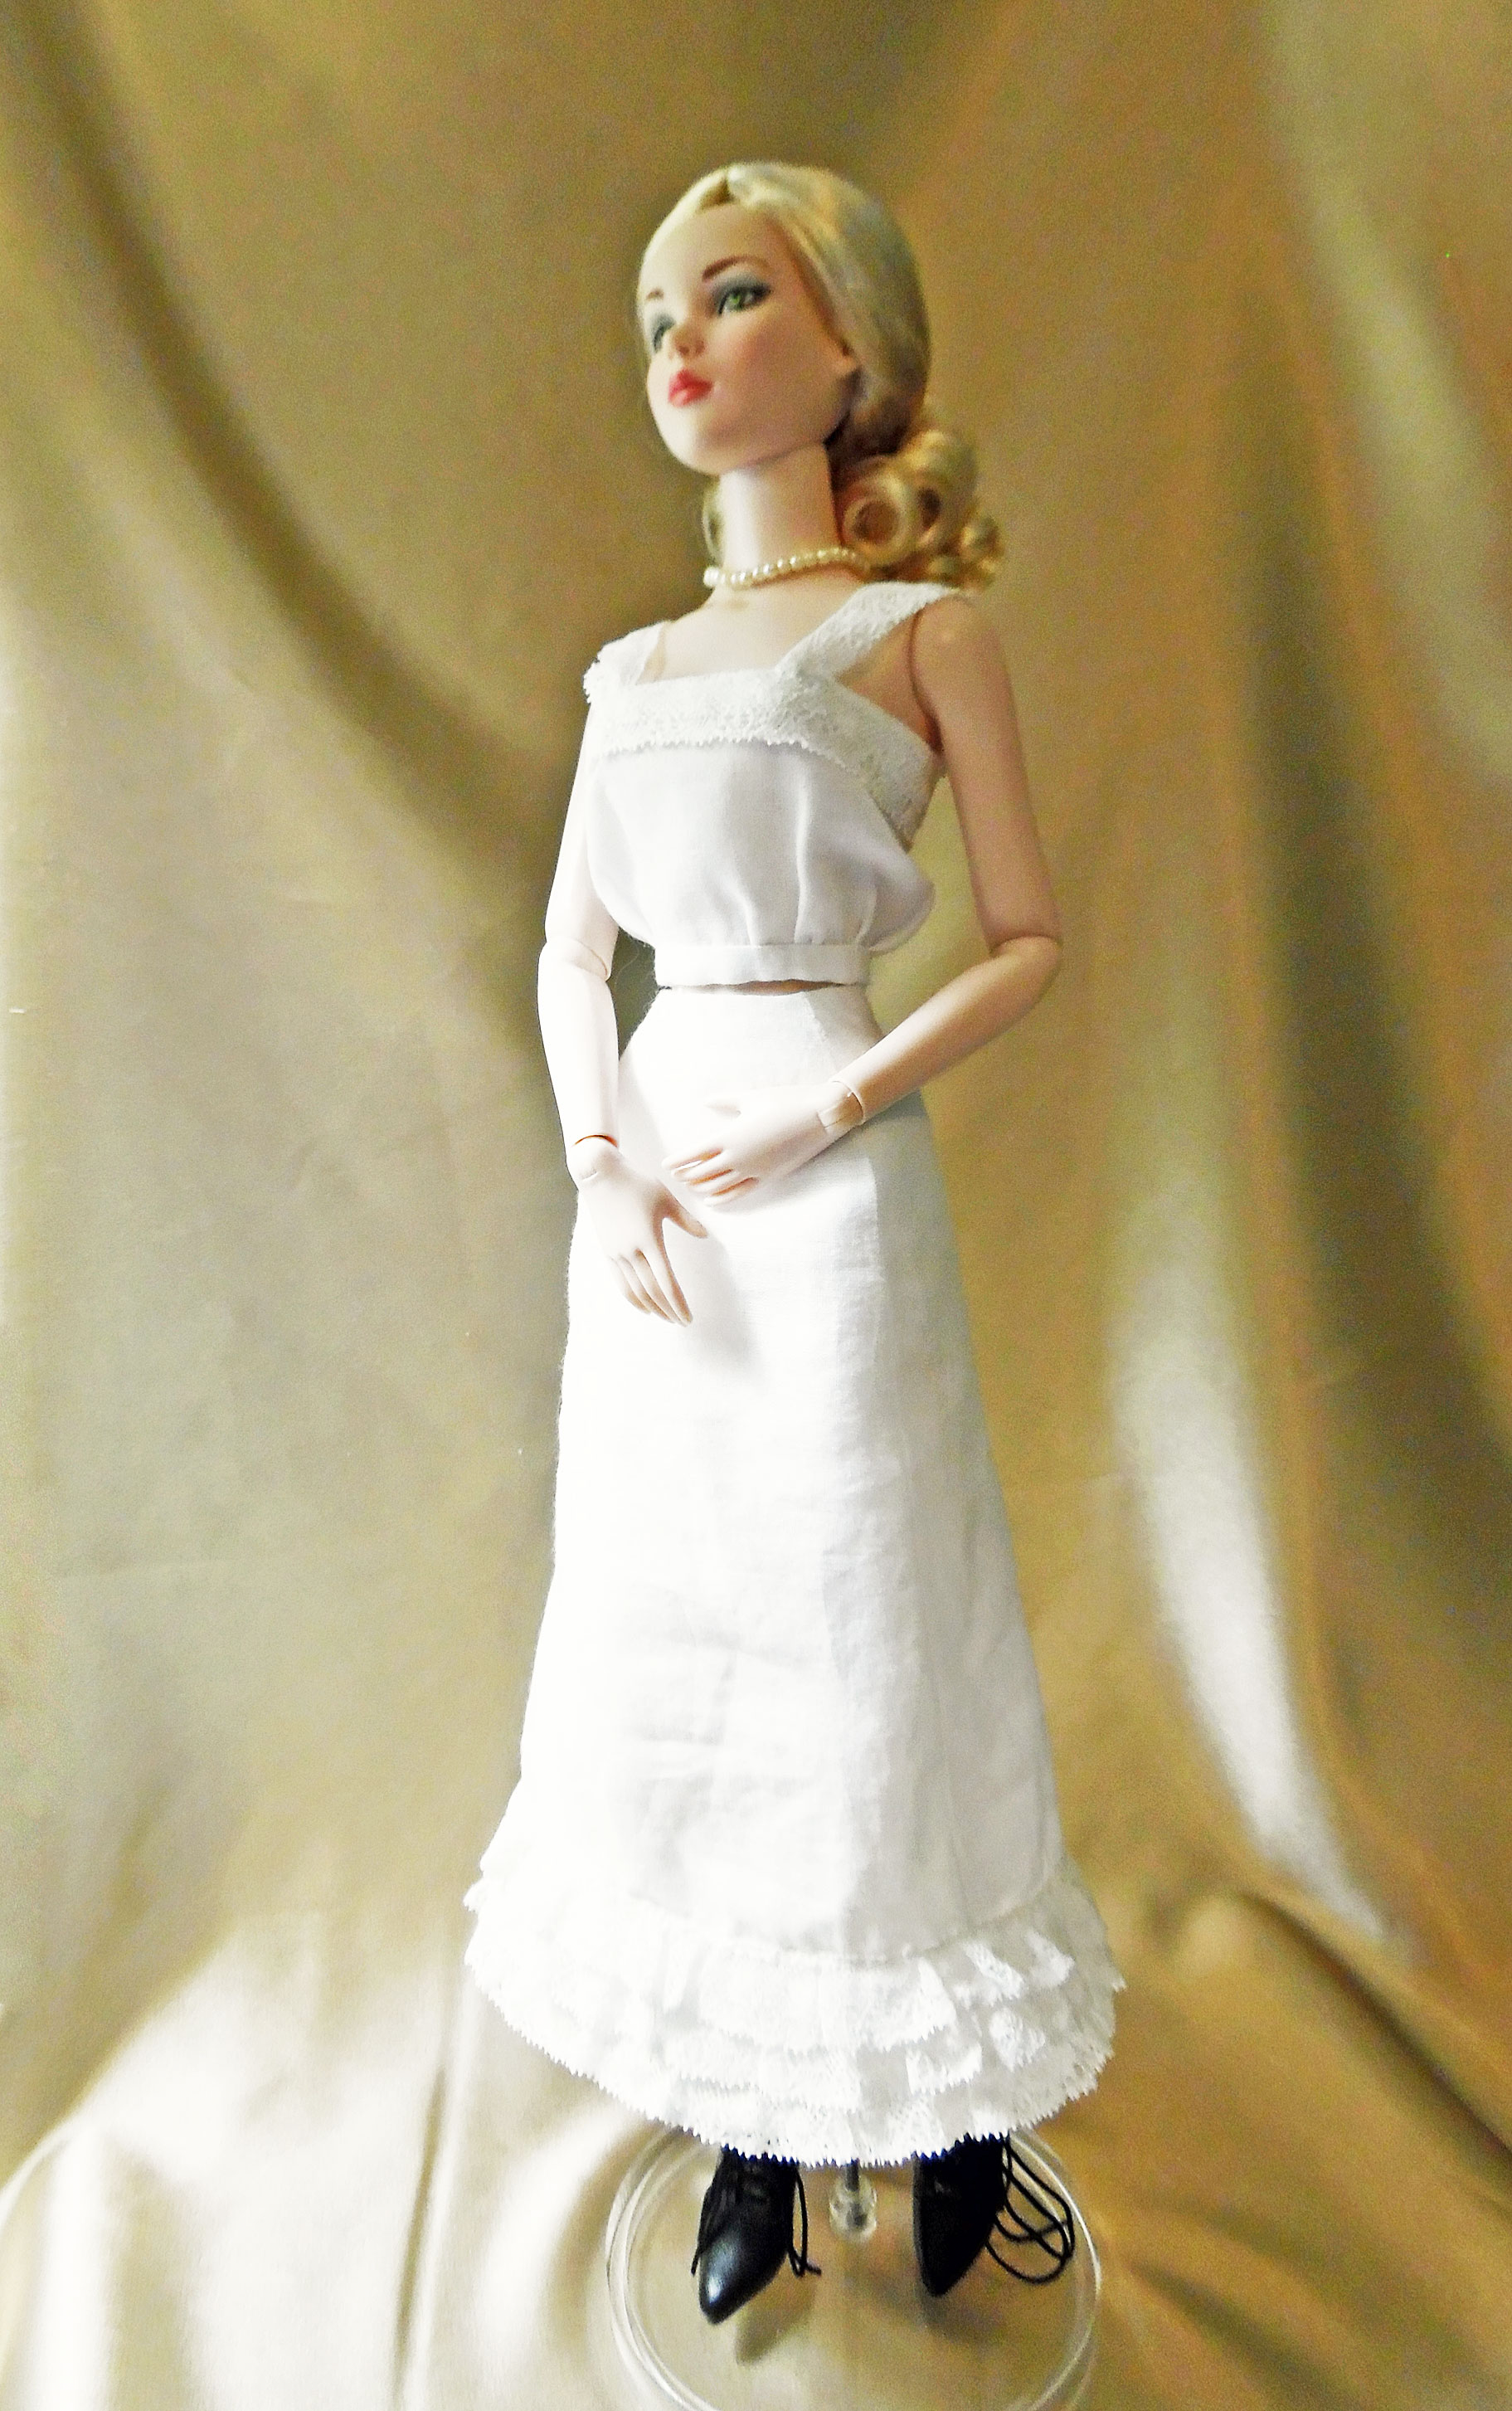
1915 Petticoat & Corset Cover
Pingback: 1915 Undergarments (In Miniature) | Yesterday's Thimble
Pingback: Miniature 1915 Undergarments – Your Ward
Pingback: Miniature 1915 Undergarments | Foundations Revealed