
Recently, I came across a guide for storing and organizing your fabric at So Sew Easy. It looked simple enough, so I gave it a try—and the results were spectacular! What’s so special about this particular way of storing fabric?
- It’s super easy.
- It doesn’t require a huge investment.
- It can be adapted for your personal space.
- It reduces the amount of space your fabric takes up.
To illustrate that last point, I took an entire drawer stuffed with fabric and reorganized it. When I put the fabric back, it only filled half the drawer! Just think of what you could do with all that extra space. . . . Hmm. More fabric?
So how does it work? You’re going to fold your fabric in a certain way, wrapping it around a piece of cardboard—essentially creating a miniature bolt of fabric. You can keep your mini bolts in a dresser drawer, plastic bin, banker’s box, or on a closet shelf. You can organize your fabrics according to color, print, fiber content, or whatever system works for you.
Supplies
To get started, there’s only two absolutely necessary items:
Comic boards are a thin, but stiff and sturdy archival (acid-free) cardboard used for storing collectible comics. Mine came in a pack of one-hundred for $10. Depending on the size of your stash, you may need a couple packs. They come in different sizes, so measure the space where you plan on storing your fabric and pick a board that’s close in size. I chose magazine-size boards, which are 8-½” x 11″. However, my dresser drawers are less than 8-½” tall, which means I had to trim them down.
To trim your boards, you’ll want the following:
- Pen or Pencil
- Transparent Ruler
- Paper Trimmer
Trimming
Measure the width you need the board to be and draw a line across the length of the board where you need to cut. Make sure it’s at least ½” shorter than the actual depth of your drawer or bin, otherwise it won’t fit once it’s wrapped in fabric.

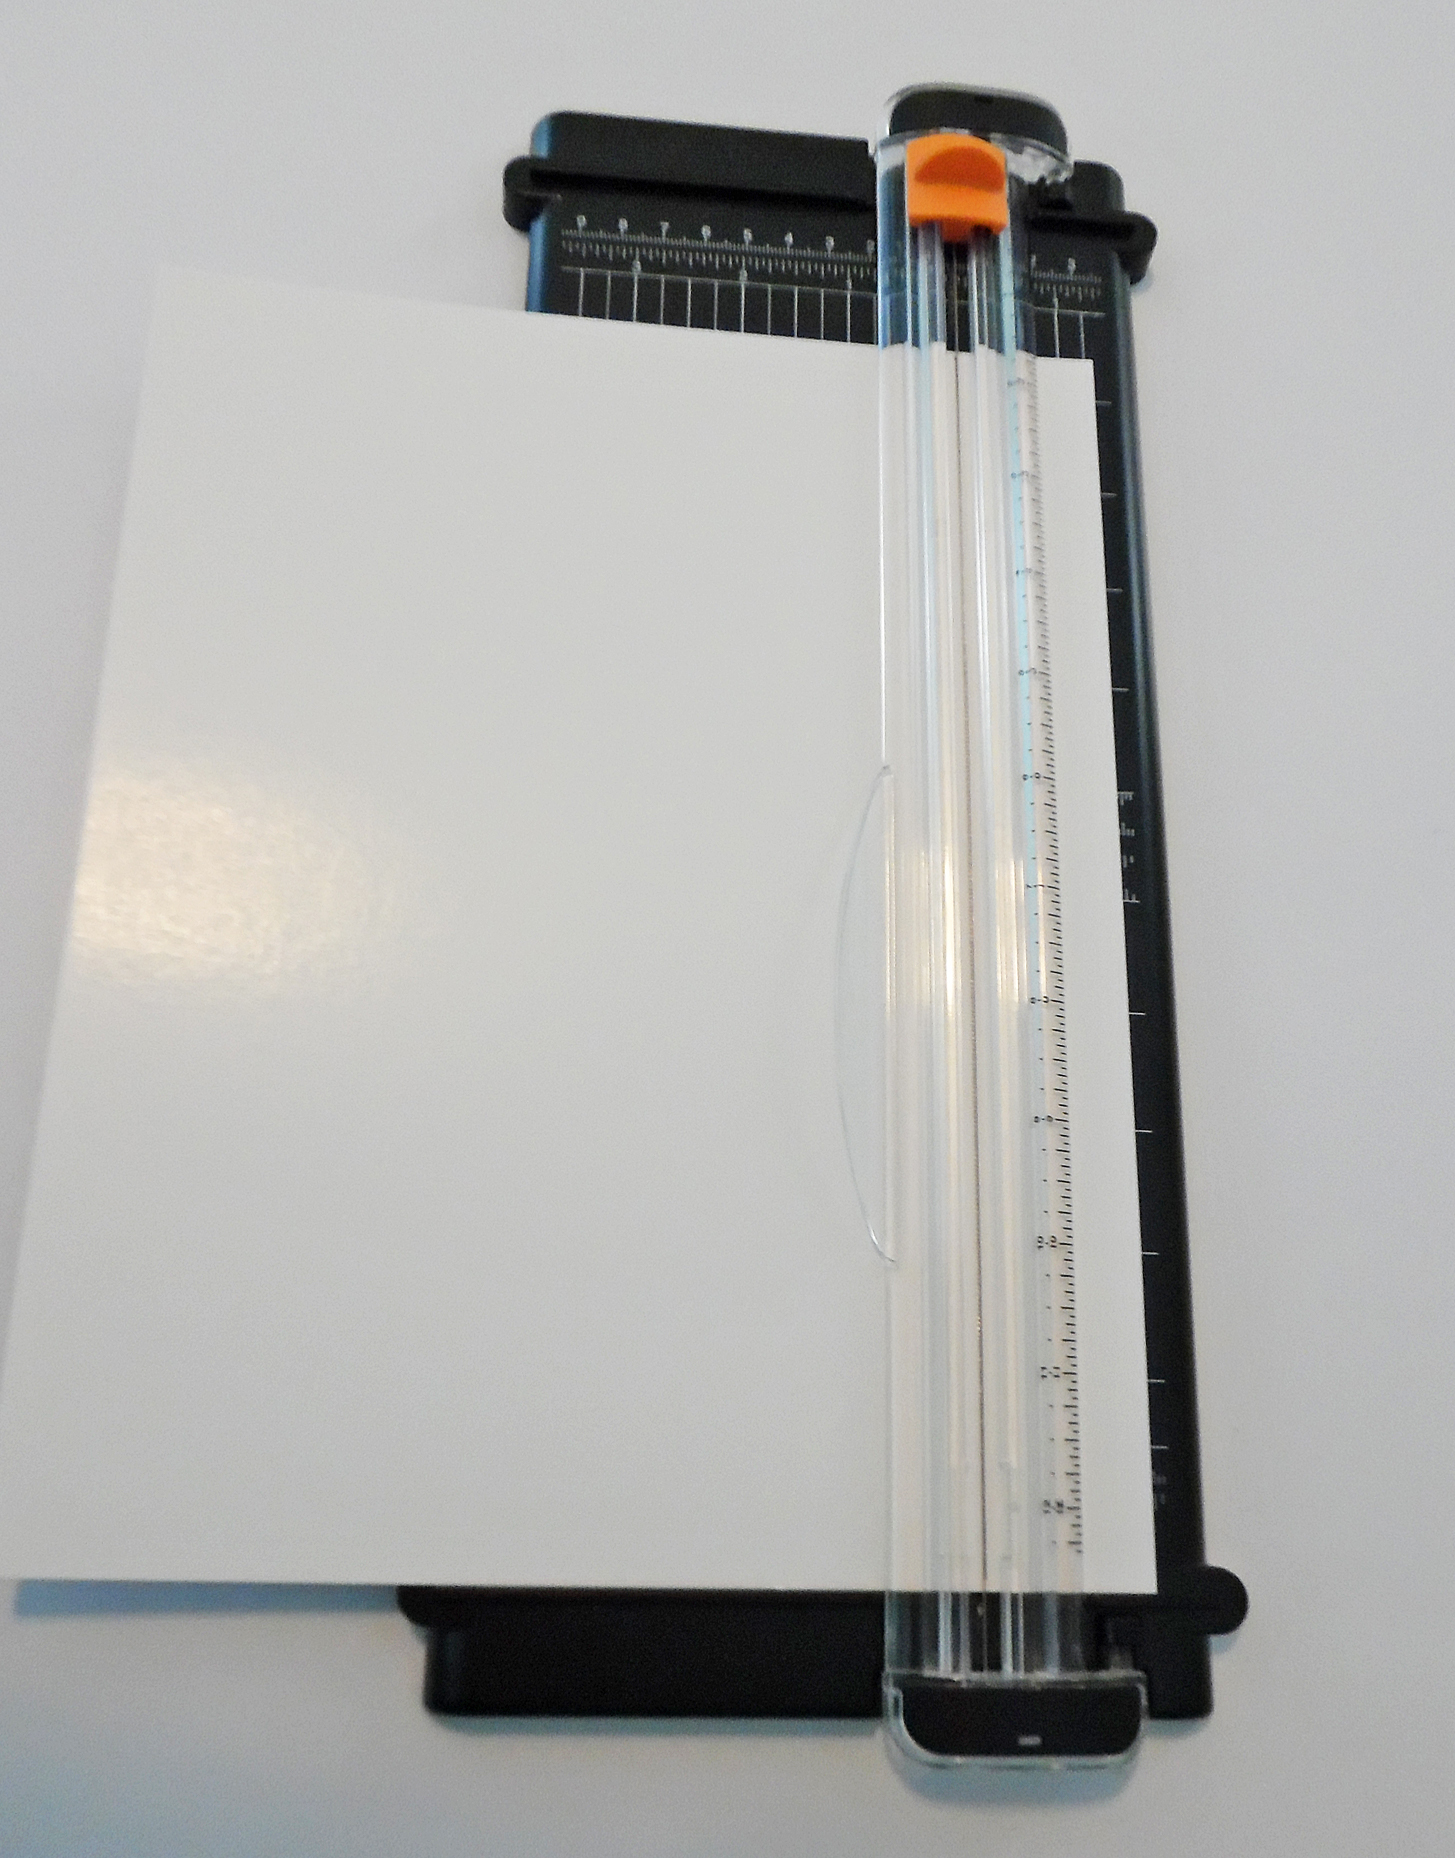
Measuring Comic Board
While you could just use scissors to trim your boards, I found it much easier to use a paper trimmer. With scissors, your cuts may be imprecise or crooked, and your hand will probably grow tired. There’s an entire pack of 100 boards to be trimmed, after all. So, I used a 12″ paper trimmer by Fiskars, which I already owned.
Trimming Comic Board
I found it more efficient to mark the whole stack of boards, and then trim them afterwards, rather than switching back and forth between marking and cutting. Go ahead and do as many as you think you’ll need, plus a few extras. That way, once you start wrapping fabric, you won’t have to interrupt yourself to cut more boards.
Fabric Wrapping
This whole method of storing fabric works great with quilting cotton, since its folded size matches the comic board. That said, even if your fabric is wider than standard calico, you can make it work, simply by folding it differently.
Also, it’s best for lengths of fabric between half a yard and two yards. Fat quarters and quarter-yard cuts aren’t long enough to wrap all the way around the board. Cuts that are longer than two yards tend to be too heavy—the board buckles under the fabric’s weight.
Here’s how to wrap your boards:
- Unfold a piece of fabric and shake out the wrinkles. If you really want to be proper about this, go ahead and iron the creases out, so it’s nice and smooth.
- Fold the fabric in half lengthwise, matching selvage-to-selvage.
- Fold the fabric in half again lengthwise, matching the folded edge to the selvage. It should now be about the same width as your comic board, give or take a half-inch.
- Lay the fabric on your cutting table, smooth it flat, make sure the edges are still aligned, and place a comic board on top of it. The board should be 4-6″ from the cut end of the fabric.
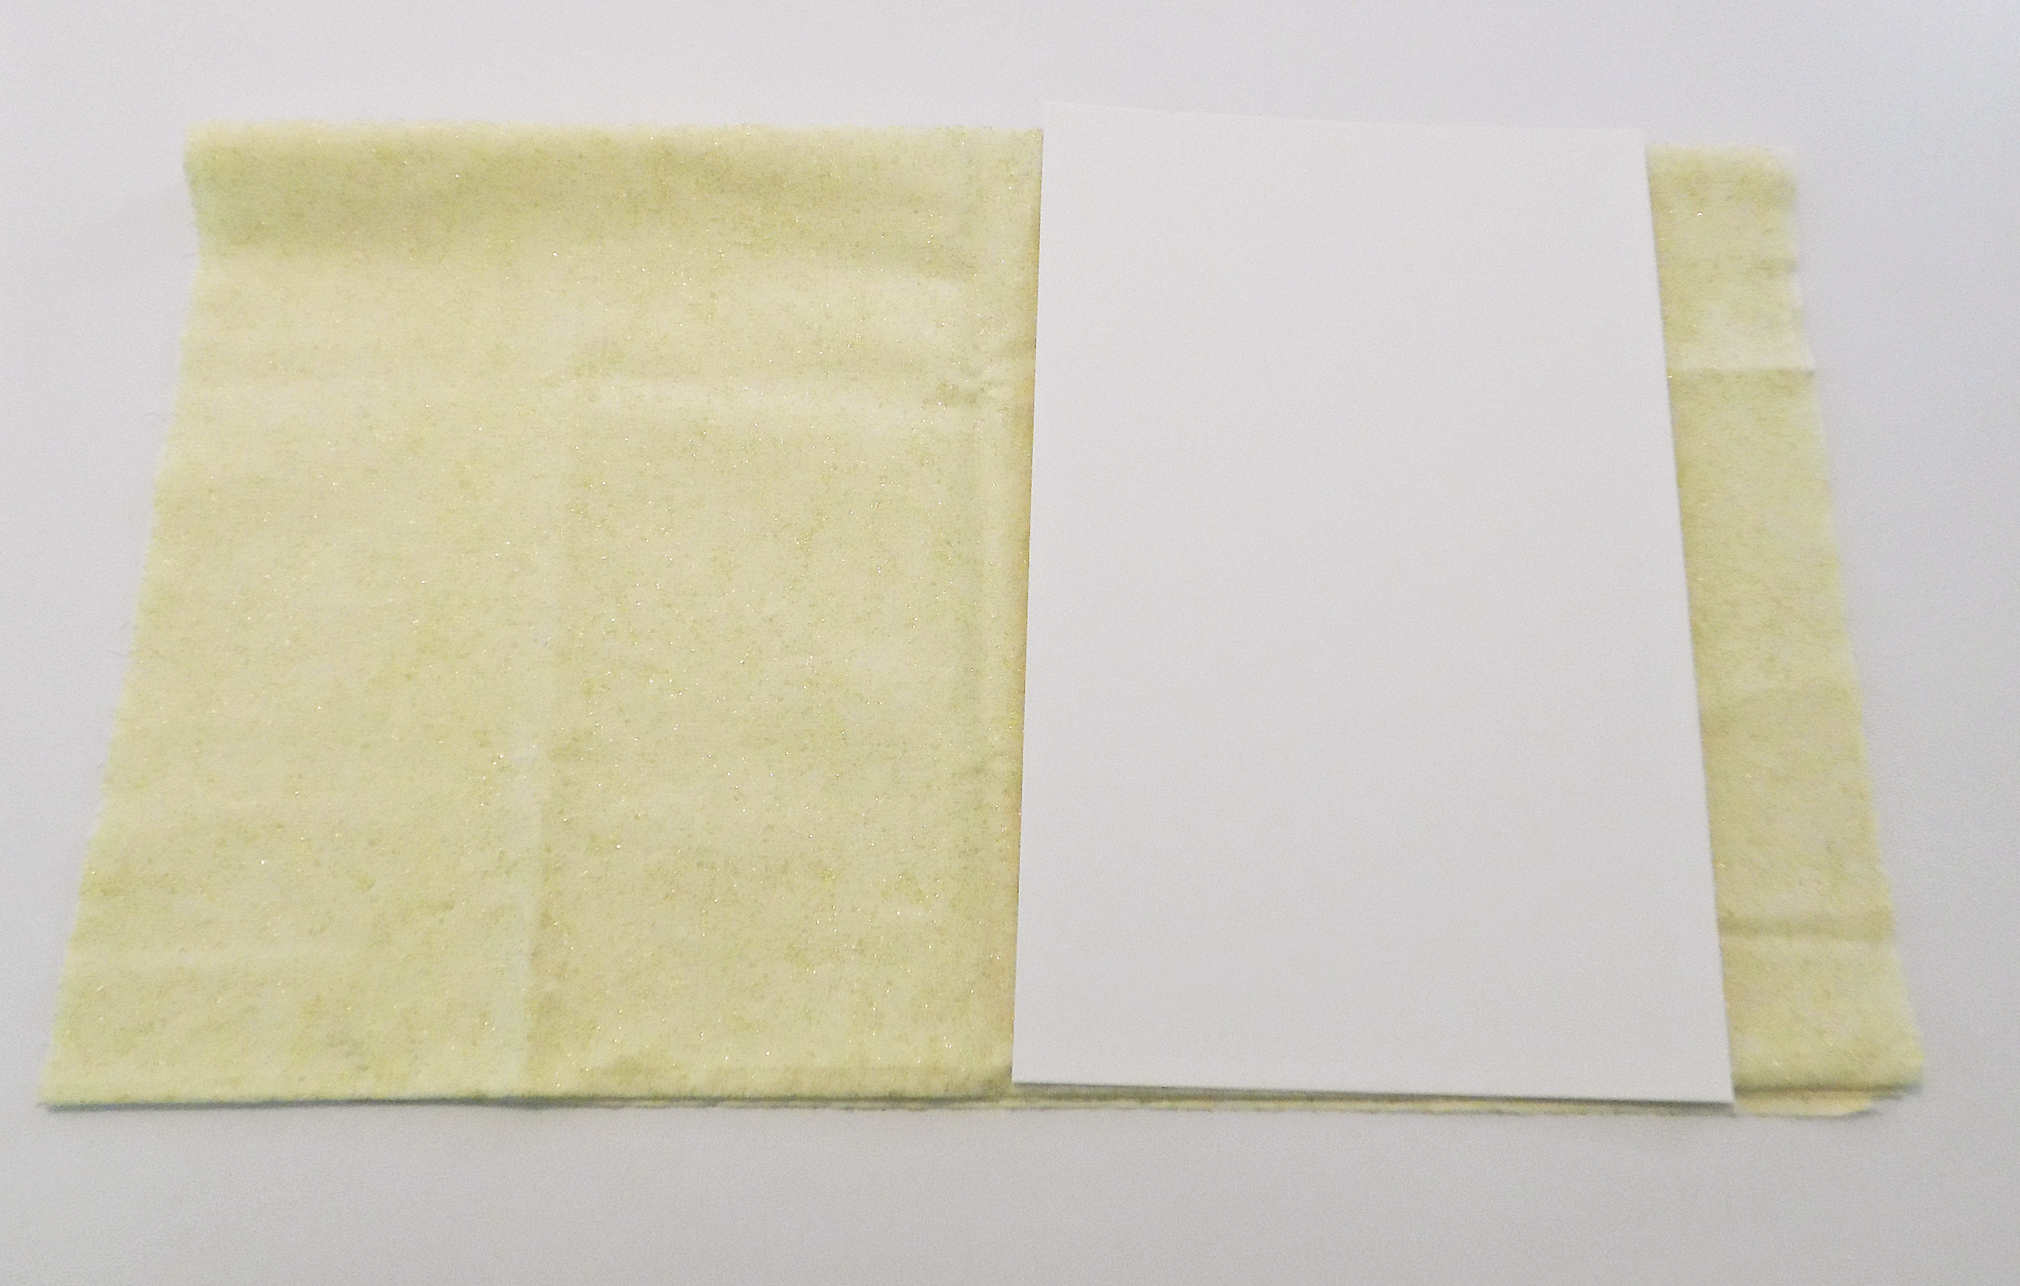
Placing Comic Board
- Fold the cut edge of fabric over the board.

Folding Fabric
- Flip the board to the side, wrapping the fabric around it. Smooth out any wrinkles as you go, and with each flip, pull the fabric taut, so it’s snugly wrapped. (But don’t pull so tight that the board buckles!)
- When you reach the end, fold the raw edge of fabric under by about 2″, so you have a clean, tidy edge.
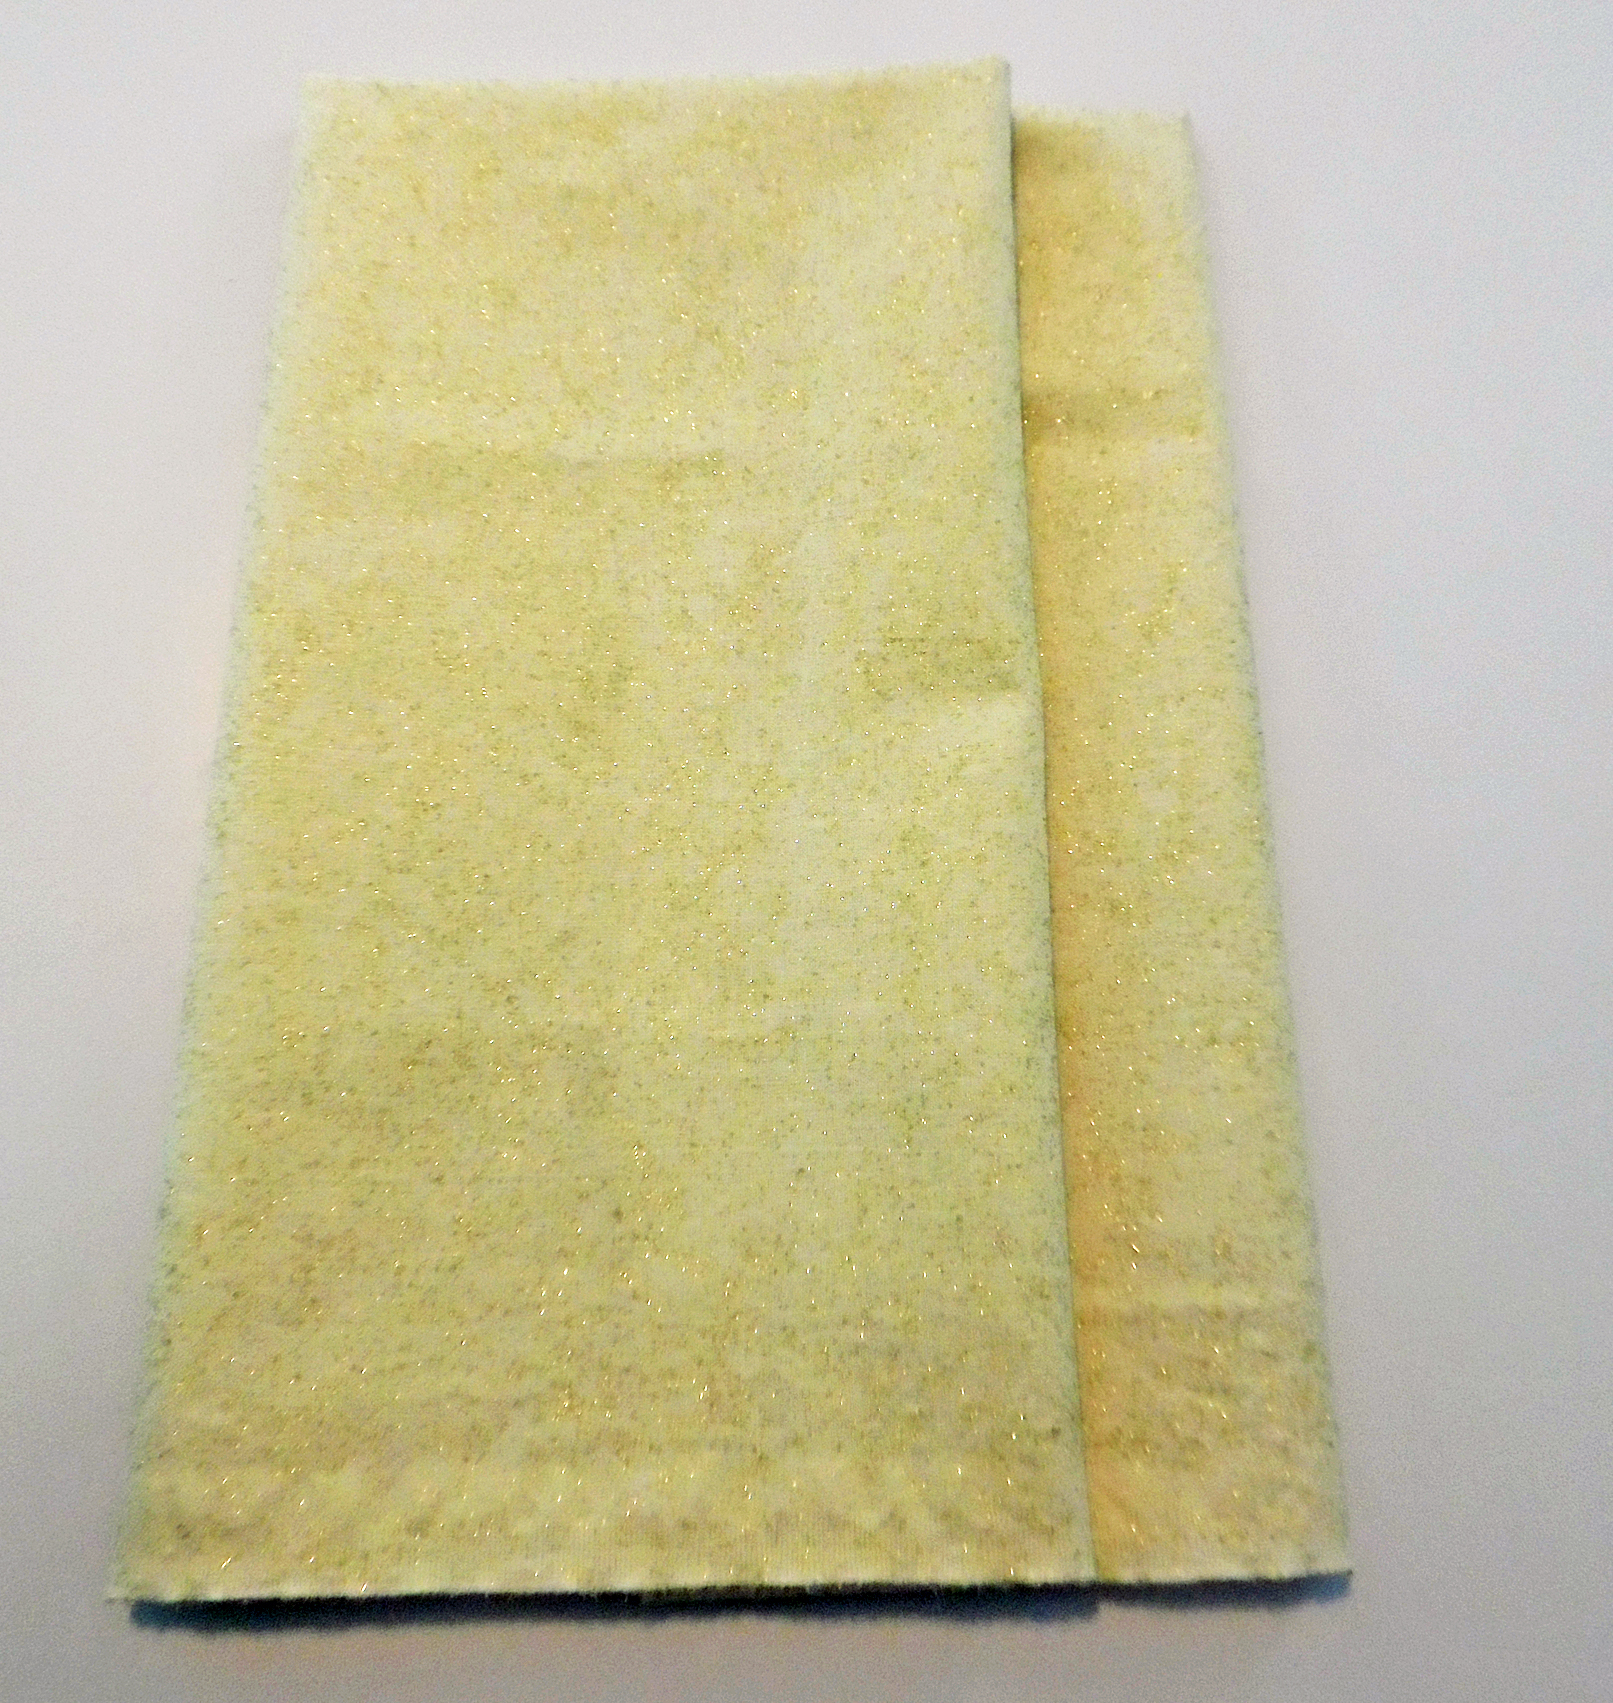
Folded Fabric
Securing the Fabric
To keep the fabric from unwrapping, you need to secure it. The owner of So Sew Easy used pins, but rusting was a concern. She also mentioned elastic, but I didn’t have a large amount of elastic on hand, and it seemed like it would be rather bulky. In a subsequent blog post, she figured out a way of folding the fabric over itself, so it would stay put, but that seemed rather complicated to me. So, what to do?
The first solution I came up with was paperclips. I placed one at each end of the mini bolt, and they did a fair job of keeping the fabric in place. However, the fabric tended to sag across the middle, since there was nothing to hold it. Also, because the layers of fabric are so thick, the paperclips bent out of shape, rendering them useless for future tasks.
Eventually, I came up with the idea of using thin rubber bands, instead. I ordered a bag of size #18 rubber bands, which are 1/8″ thick and about 3″ long. They stretch enough to fit around the mini bolt of fabric. A bag of several hundred was less than $5 and it contains more than I’ll need for my entire stash.
Place one rubber band at each end of the bolt to keep the fabric secure. If your comic board is extra long, you could place a third rubber band in the middle, just to keep the fabric from sagging.
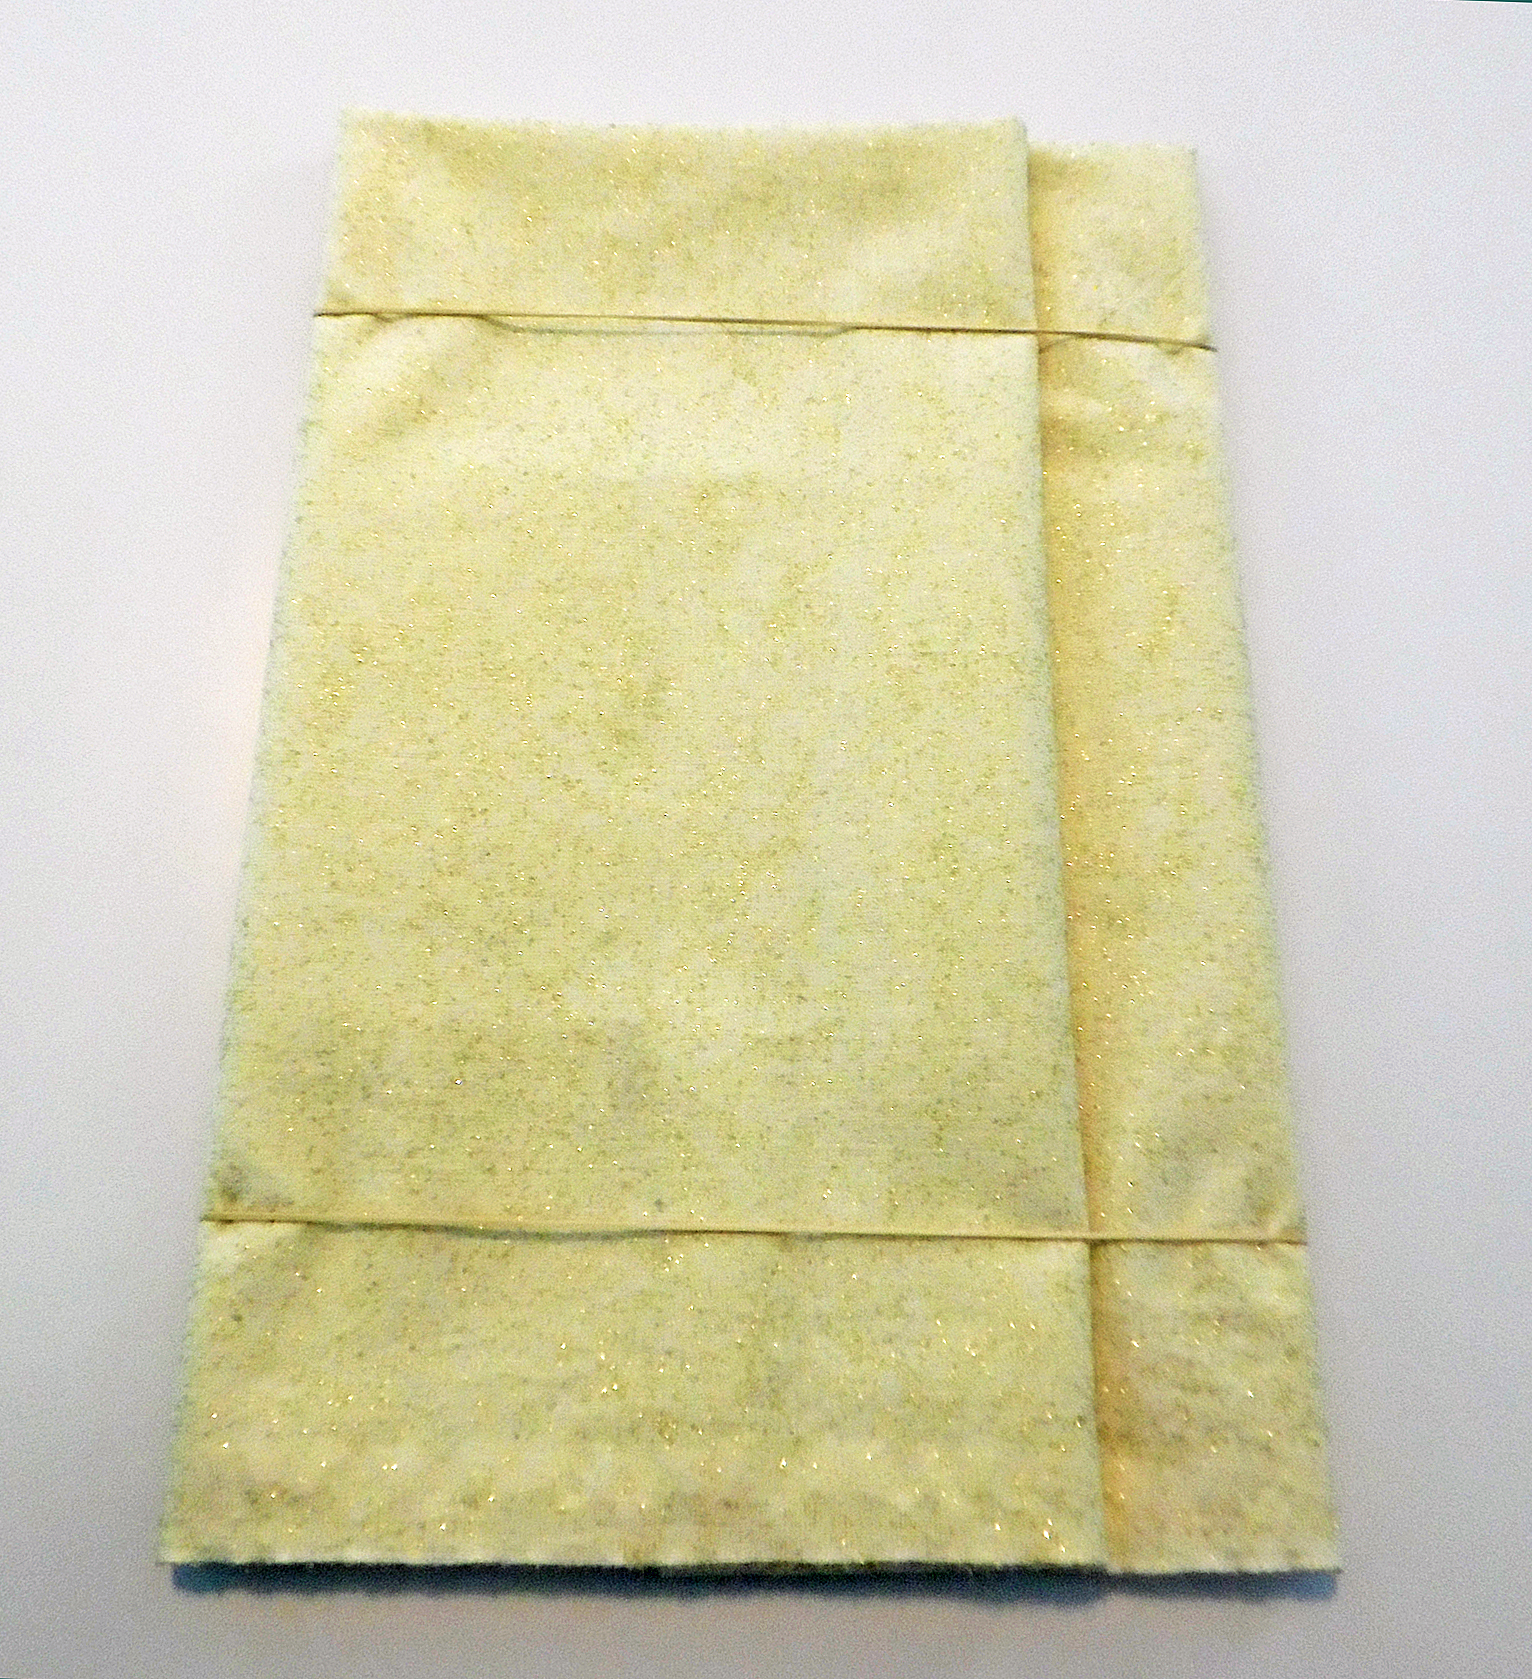
Secured Mini-Bolt
Organizing Your Stash
Once you’ve wrapped every length of fabric, you need to think about how you want to organize your stash. I’m an artist, so I’m a very visual person. I love color, and anything in my house that can be sorted chromatically, is. That includes clothing, books, and spools of thread, among other things. For me, there was no question of how to arrange my fabric—it had to be done by color! I also separated my fabrics according to type: quilting calico in one drawer, solid cotton in another, satin and taffeta in another, knit jersey in another, and so forth. That way, if I know I need a certain type of fabric, I don’t have to hunt through all my drawers trying to find it.
Once my fabrics were separated by type, I categorized them according to the dominant color on each fabric. Then, I arranged them in order, so that each color group blends into the next. Reds next to oranges, greens next to blues, and so forth. It isn’t perfect, but it’s organized well enough that I know where to look when I want something purple, or turquoise, or whatever.
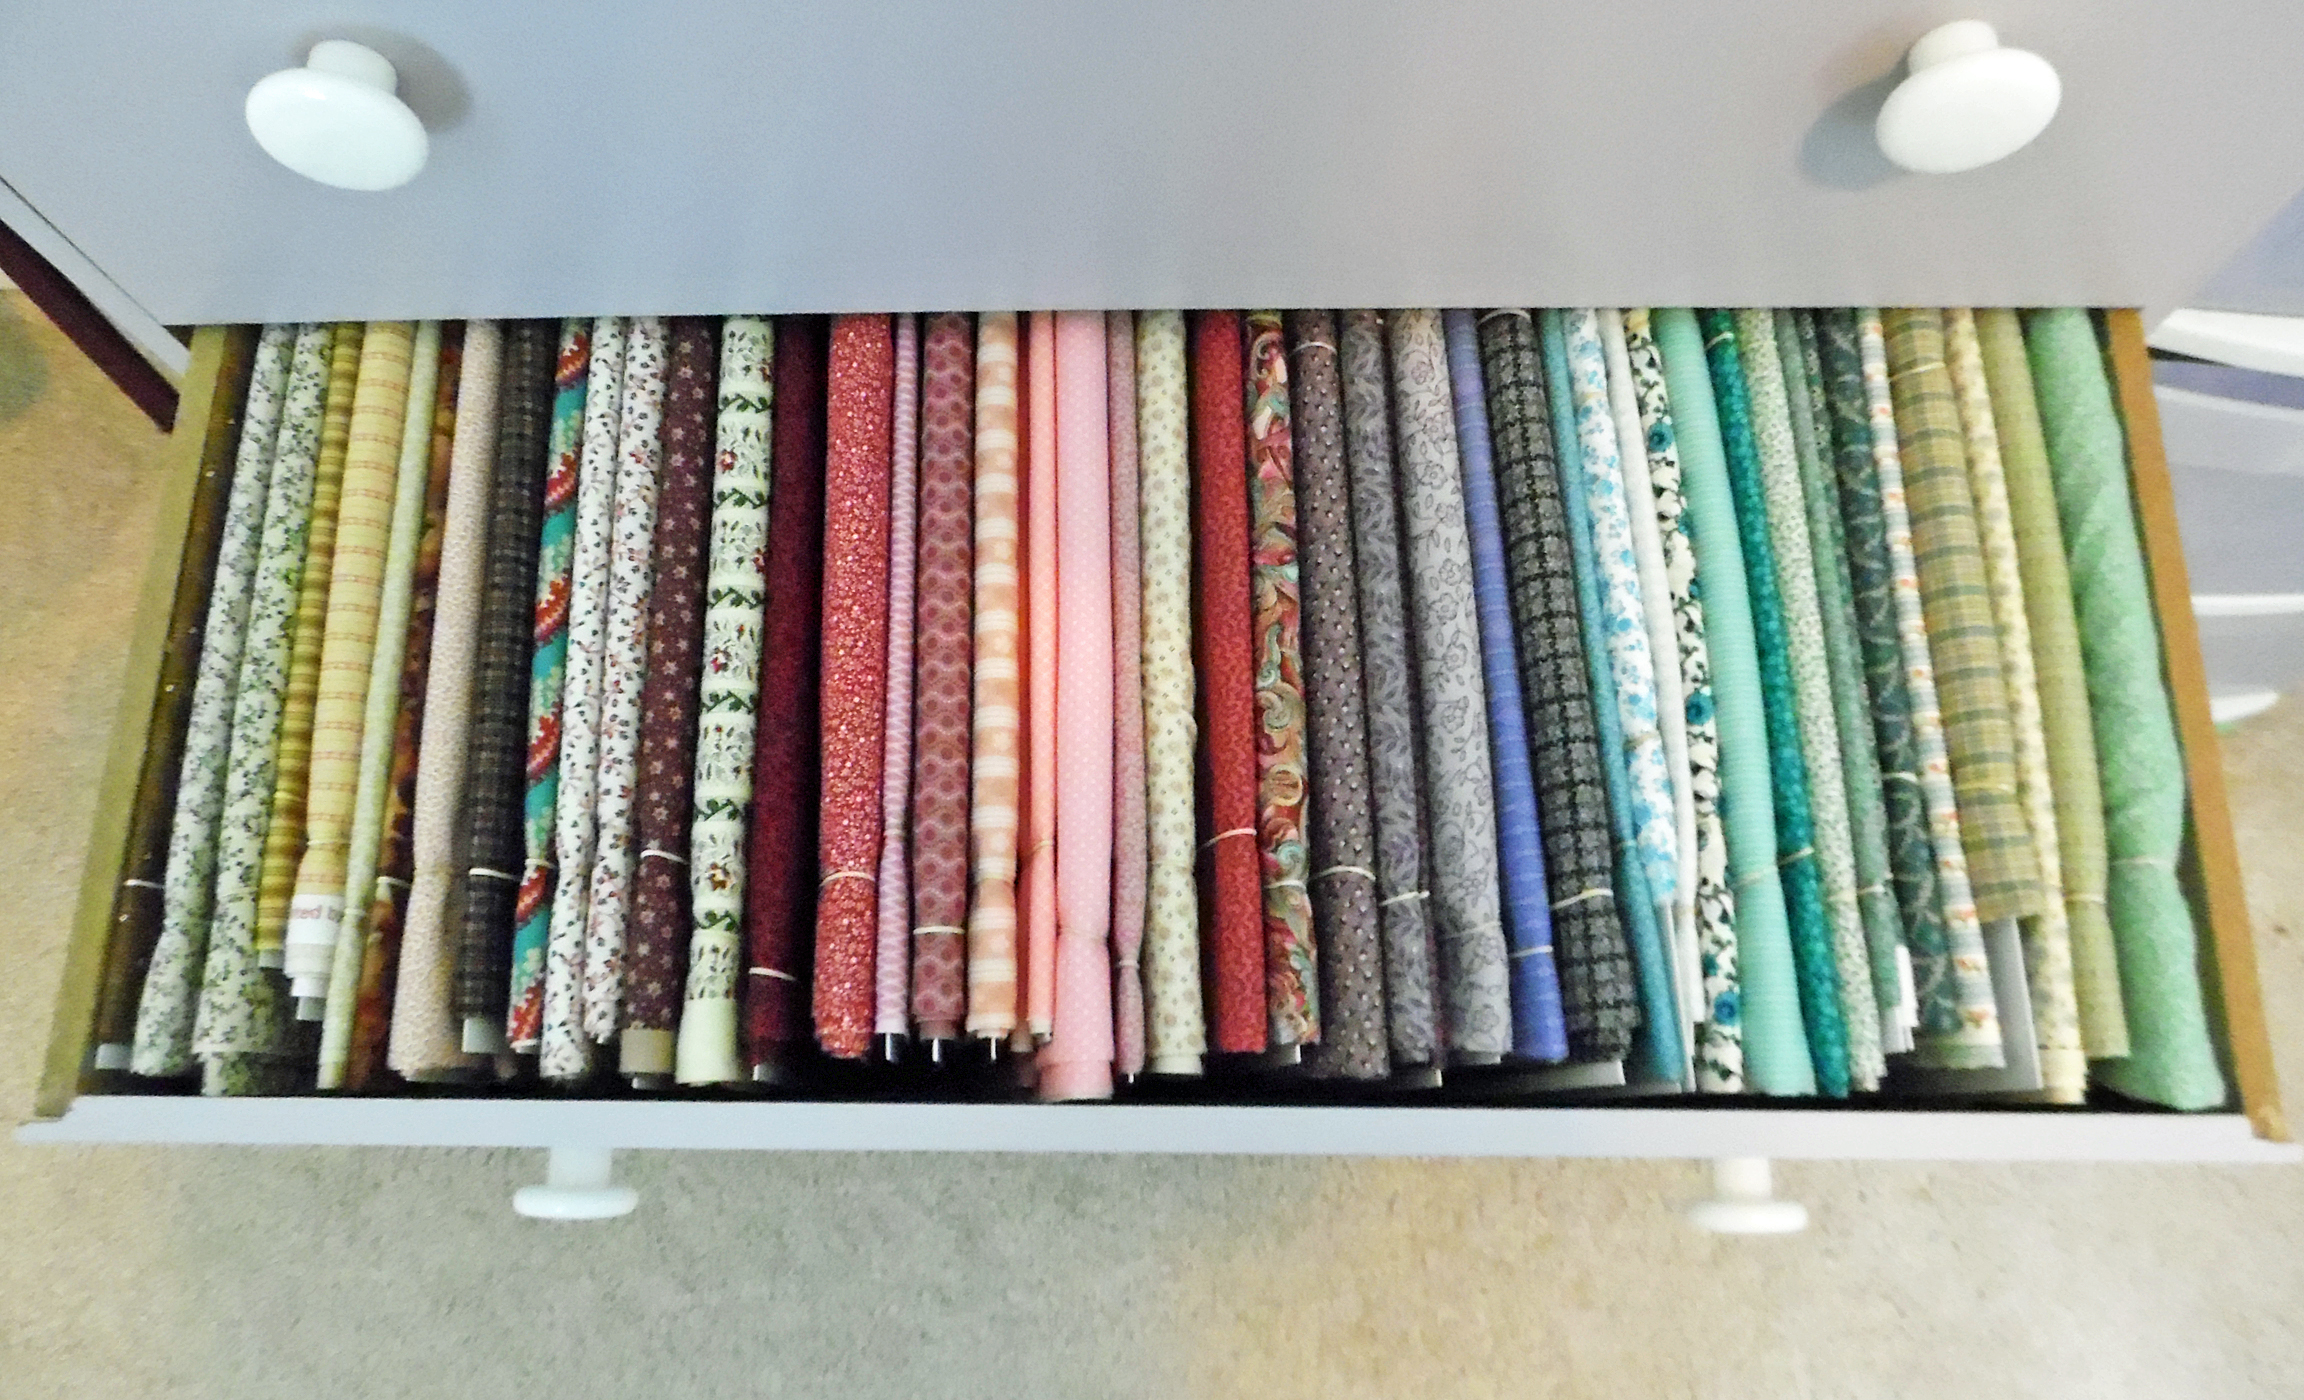
Organizing By Color
If you want, you can group different types of prints together—stripes, plaids, geometrics, florals, polka dots, and so forth.
Alternatively, you could sort your fabrics according to fiber content. Whatever system works for you—use it! Even if no one else in the world will be able to make sense of how you’re organized, so long as you understand your system, there’s no reason to do it differently. It’s your fabric, after all!
Don’t be surprised if your new method of organizing starts receiving compliments!
~~*~~
Looking for more sewing advice? Check our Basics for beginner-friendly tutorials, and for more advanced help, try our Articles and Tutorials.
-
Yesterday’s Thimble is a participant in the Amazon Services LLC Associates Program. This means, if you follow a link to Amazon and purchase something, I earn a small fee to help support this website.