Wednesday’s Project: A Zippered Clutch
I’ve been wanting a basic zippered pouch, like a flat clutch or wallet. Since I couldn’t find anything that suited my purpose, I decided to make one. This type of pattern was surprisingly hard to find. Most had extra pockets or details I didn’t want to bother with.
Eventually, I discovered Noodlehead’s Gathered Clutch Tutorial. It’s a simple, flat pouch with a zippered top. The front is gathered—a pretty detail that I liked, so I decided to give it a try. Best of all, it’s free!
Materials
- 1/4 yd Quilting Cotton, Lavender Swirl
- 1/4 yd Quilting Cotton, Lavender Bubbles
- 1/4 yd Lining Fabric, Lavender
- 9” Zipper, Lavender
I chose two lavender quilting cottons, one with silver stippling and the other with lavender bubbles. I also bought a high-quality polyester lining fabric to use, as well as a lavender zipper.
Construction
It looked simple enough, and didn’t use much fabric, so I decided against making a mockup. I cut the pieces according to the given measurements and started sewing.
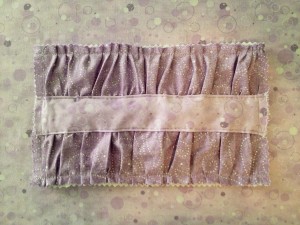
First, I made a long, narrow band, which covers the gathering stitches on the front panel. It’s a contrasting fabric—in my case, lavender bubbles. Next, I gathered the front panel. I chose to run the gathering stitches by hand, since I’ve had bad experiences with trying to machine gather.
After gathering the panel to the right size, I topstitched the band over the gathered rows. The directions tell you to press a piece of fusible interfacing to the back side of the gathered panel, but I prefer to work with sew-in interfacing, so that’s what I used. It might not secure the gathers as well, but I think it did a good enough job.
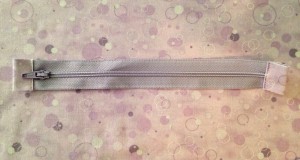
Since I didn’t need them, I skipped the divider pocket and credit card holders. I cut the zipper to size, then sewed on the tabs that cover the top and bottom ends of the zipper. These gave it a surprisingly finished look.
The next step was to sandwich the zipper between the front and the front lining and stitch alongside the zipper’s teeth on one side. I repeated this step for the back, then opened it flat and stitched all the way around the edges, leaving a small gap in the lining with which to flip it right-side out.
I did encounter some problems with the edges of my fabric not lining up. One side was considerably shorter than the other. I trimmed it to size, but I’m left wondering whether I did something wrong or if the pattern was flawed.
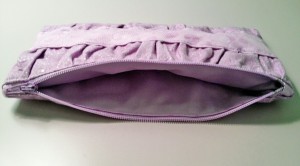
After flipping the clutch right-side out and poking out the corners, I slipstitched the gap in the lining closed. And that was it! The zipper tilts a little toward the front, but I’m not sure if it’s intentional or something I did wrong.
Conclusion
It took me perhaps two hours from start to finish, and if I made it again, it would probably only take an hour, since I know what I’m doing now. In any case, it’s the perfect size and exactly what I needed. I could also see making one in satin or taffeta, for an evening look. It would be quite elegant.


