A Tutorial
by Lisha Vidler
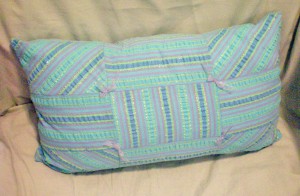
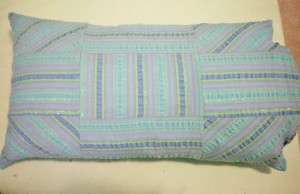
This quick and easy project looks a lot more complex than it really is. It takes very little fabric, a touch of creativity, and in an hour or two, you’ll have a fancy pillow!
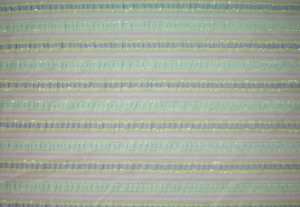
I started with ½ yard of striped seersucker in colors that match my sewing room (aqua, lavender, green, & blue). I use a little back pillow when I sew, and it happened to need a cover, so this worked out perfectly. I varied the direction of the stripes for interest, but you could also use different fabrics for a patchwork look.
Supply List
- ½ yard Fabric
- Matching Thread
- Pillow or Stuffing
- Tissue Paper or Paper Towels
- 2” Transparent Ruler
- Coordinating Ribbon (optional)
- Corner Turner (optional)
Let’s Begin
First, pre-wash your fabric. You do this to remove any sizing chemicals or excess dye, and to shrink it. Most fabrics shrink up when they’re first washed; you don’t want that to happen the first time you wash your new pillow, so wash and dry the fabric ahead of time, following the directions on the end of the bolt.
If you didn’t save the directions and you’re not sure how to wash it, consider what kind of fabric it is. Cottons and polyesters can usually be thrown in the washer on gentle, and tumbled dry on low. Rayons must be treated with special care, for they can shrink considerably: wash on delicate and hang to dry. Silk can sometimes be washed, and sometimes not. If it’s a “fancy” fabric, like taffeta or velvet, you’re better off dry-cleaning the fabric (unless the label specifically says it can be washed). But if it’s a hardy fabric, like quilting cotton or seersucker, then go ahead and wash it.
Cutting the Back of Your Pillow
Decide whether you’re going to cover an existing pillow or stuff a new one. If you’re going to stuff a new one, you’ll need to choose the size and shape you want the pillow to be. You can choose a square, rectangle, circle, or something exotic like a heart, triangle, or star shape. For this demonstration, however, we’ll be making a rectangle that’s about 18 x 11 inches.
First you’ll cut out the back of the pillow. This is usually plain and not quilted. Mark the outline of your pillow and add 1/2” around the edges for a seam allowance, then cut it out.
If you’re going to cover an existing pillow, wrap the fabric around it snugly and mark the edges with pins. Measure from one edge to the other, and add ½” to each side for a seam allowance.
Cut out one layer. You’ll use this as the back of the pillow, and as a guide for your quilting. If your fabric is loosely woven, use pinking shears for a zig-zagged edge that’s less likely to fray.
Creating Your Quilting Pattern
Now you must choose your quilting pattern. You can use the one I’ve provided, or you can make up your own. If you design your own, be sure and add a seam allowance to each pattern piece, otherwise your finished pillow top will be too small.
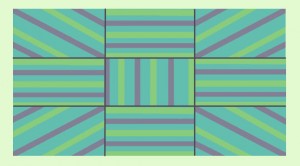
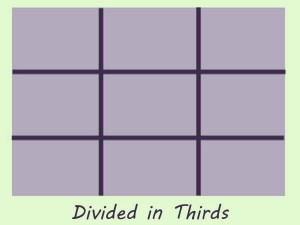
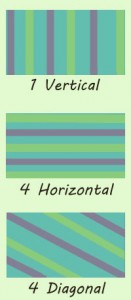
The quilting pattern I’ve designed is very simple. It’s divided into nine segments, and it makes excellent use of the striped fabric. Some of the pieces are oriented horizontally, some vertically, and some diagonally. You can achieve a similar effect with florals or other fabrics, simply by alternating colors or prints.
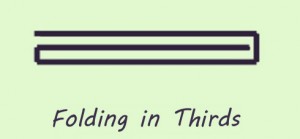
Take the back piece of fabric and fold it into thirds. You can do this by overlapping the edges and aligning the cut edges with the folded edges.
Mark the fabric with pins to show the thirds. Now, fold it again in thirds, but the opposite direction (across the width instead of lengthwise). Mark the folded edges again. You should now have a piece of fabric marked with rectangles that are exactly one third in length and one third in height. They should all be identical in size.
Take a piece of tissue paper, or a paper towel, and cover one of the rectangles. With a pen, draw a dotted line around the edges. Add ½” to each edge for a seam allowance, and cut out the rectangle. This is your pattern for the quilt blocks.
Cutting Your Quilt Pieces
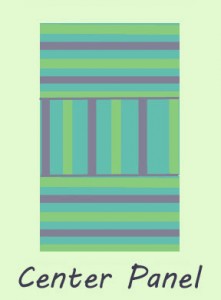
For this quilting pattern, you need one piece where the stripes go vertically, four pieces where the stripes go horizontally, and four pieces where the stripes go diagonally.
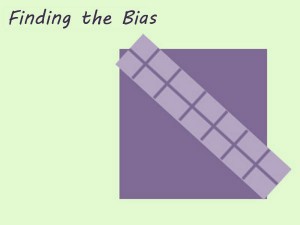
To get your stripes perfectly diagonal, you’ll want to cut the fabric on the bias. This is where a 2” transparent quilting ruler comes in handy. You’ll notice there are lines running down the length of the ruler, as well as across it, marking the inches. Line the ruler up along the corner of the fabric, then pivot it until it’s at a diagonal. You can determine the true bias (a 90 degree angle) when the edge of the fabric lines up perfectly between the center line and the first inch line.
Cut all of your pieces out now and separate them into piles depending on orientation, so you can keep track.
Sewing Your Quilt
Begin with the vertically striped piece, which goes in the center. Take one horizontally striped piece and stitch it to the top of the vertical piece, right sides together. Then stitch another horizontal piece to the bottom of the vertical piece.
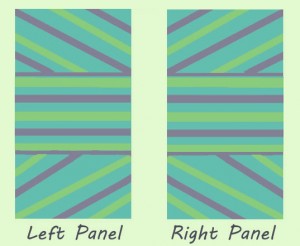
Now take two diagonally striped pieces and sew them above and below a horizontal piece. Take care that you get the stripes going the right direction. Repeat this, mirror imaging the diagonal stripes.
You should now have three separate panels comprised of three blocks each.
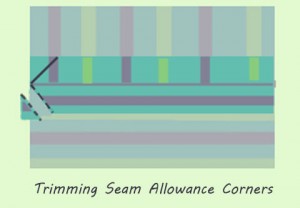
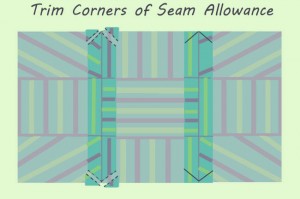
Press the seams that you’ve just sewn, first pressing them flat, and then pressing the seams open. Once you’ve done that, you should reduce bulk by trimming the corners of the seams.
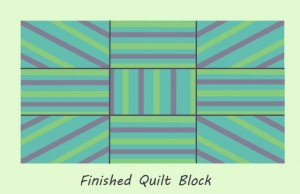
Now it’s time to sew the panels together. Make sure you have the piece with the vertical stripes in the middle, and check that the other pieces are turned the right way, so all the stripes are going the right direction. The diagonal stripes should point toward the center of the pillow.
Once you’ve stitched the pieces together, press the seams flat, then press them open. Trim the seam ends to reduce bulk, and you’re ready to assemble your pillow! (Please note, the stripes are going the wrong way in the following illustration. It’s so easy to get them wrong, even just in a drawing! Double check your stripes—again—before you begin sewing!)
Assembling the Pillow
Now you’re going to stitch your quilted front to the solid back piece. If your front and back pieces are not the same size, don’t panic! This happens sometimes. Just smooth the back piece over the front piece so it’s centered. After you’ve stitched it, you can trim the excess fabric.
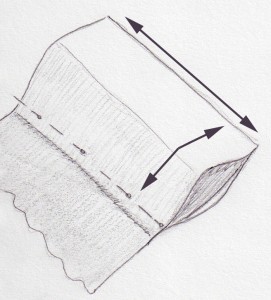
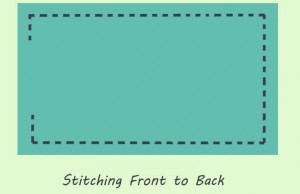
Begin stitching about two inches from the end of the short side of the pillow. (See Illustration) Back-stitch to secure the stitching, then keep going. Turn the corner, taking the time to back-stitch two or three stitches at the corners. Keep stitching all the way around, until you reach the short side where you began. Stitch about two inches on that seam, and back-stitch to secure the stitching.
This should leave a gap of at least four inches, through which you’re going to stuff your pillow.
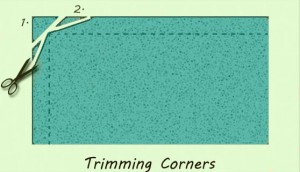
Press the stitching, then trim the corners, and if your fabric is thick, trim your seam allowance with pinking shears. This will blunt the edges and help prevent them from showing through on the right side of the pillow.
Turn the pillowcase right side out. If necessary, finger press the edges, using your fingernails to smooth the seam flat. Use a corner turner to get crisp corners, but be careful not to poke through the seam.
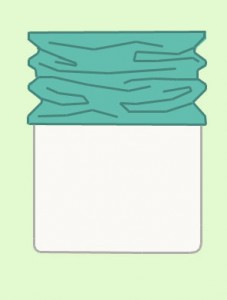
Now you must insert your pillow or stuffing. If using a pillow form, scrunch the pillowcase up , insert the pillow, and unfold the fabric down over the pillow. It might help to squeeze the pillow with your knees while you’re doing this.
If you’re adding stuffing, make sure you add plenty. Add more than you think you need! Otherwise your pillow will be limp and weak, instead of firm and squishy.
Hand Stitching
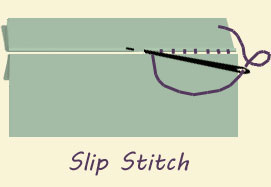
Once your pillow is stuffed, you’ll need to hand stitch the opening closed. Use a slip stitch, or ladder stitch, to make an invisible seam. First, run your thread through some beeswax to strengthen it. If you have time, you should wrap the thread in a clean, white cloth and press it with a warm iron. This melts the wax into the thread, strengthening it further. If you’re in a hurry, make do by pulling the waxed thread between your fingertips, allowing the friction to rub off any excess wax.
“Pop” your knot, pulling it through to the inside of the pillow where it won’t show. Then take a small stitch on one side of the seam. Directly across from this stitch, on the opposite side of the fabric, take another stitch. Continue back and forth, from one side to the other, like creating the rungs of a ladder. Every so often, pull the thread taut, so that it vanishes. When you’re finished, the seam should be invisible, just like a standard machine seam.
Knot the thread by taking a tiny stitch, but instead of pulling the thread all the way through, leave a loop. Pass the needle through the loop twice, then pull it tight. This should create a knot at the surface of the fabric. Stick your needle into the fabric and pull it out an inch or two away, then clip the thread. This hides the excess thread inside the pillow.
Decorating Your Pillow
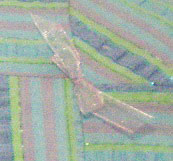
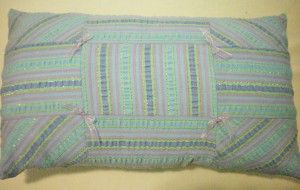
For the final touch, take a ribbon and tie four small bows. Hand stitch them to the four inner corners of the quilt top, keeping your stitches small and hidden. Use thread that matches the ribbon, so it will be as subtle as possible.
Alternatively, you could sew ribbon along the seams of your quilt, creating a three-dimensional effect. Or, you could add a ruffle to the edges, before you sew the front piece to the back. The options are endless! Play around with it and have fun. In no time at all, you’ll have a lovely quilted pillow.
~~*~~
Have you ever incorporated quilting into clothing or decorative sewing? Do you have any quilting tips to share?

Pingback: Patchwork Pillow | Yesterday's Thimble
Pingback: 116 Homemade Pillows DIY | Rilane - We Aspire to Inspire
Where did you find this Aqua & Lavender Striped Seersucker fabric? I have been looking all over trying to find this fabric and haven’t had any luck.
I found it a few years ago at Hancock Fabrics. It was with their seersuckers, near the front of the store. But I haven’t seen any, so it may have been a one-time seasonal fabric.