
(Custom Photoshop Brushes by deviantART users: Redhead Stock & Pelleron)
(Click any illustration to view the full-sized image.)
My goal is to create a doll-sized replica of every major costume from Andrew Lloyd Webber’s The Phantom of the Opera. This diary is for the fourth costume on my list, the “Il Muto” ballet costume—a frothy confection of mint green and pink, done in the Romantic style.
In the first half of this diary, I sewed a mockup of the skirt, sash, and bodice. Now, I’m starting on the actual costume.
Skirt Construction & Embellishment, Part I
When I went to cut the main skirt, I realized I had a problem. The sage green satin I’d chosen for the skirt and bodice was an older piece I’d inherited from my grandmother’s stash. Unfortunately, it had been folded so long in her sewing cupboard, the creases became permanent. I tried ironing it, I tried washing it and pulling it fresh from the dryer, but these creases were stubborn. I searched online for something similar, but apparently sage green is no longer en vogue. I thought about simply omitting the longer skirt layer, but since the color repeats in the bodice, I couldn’t do that.
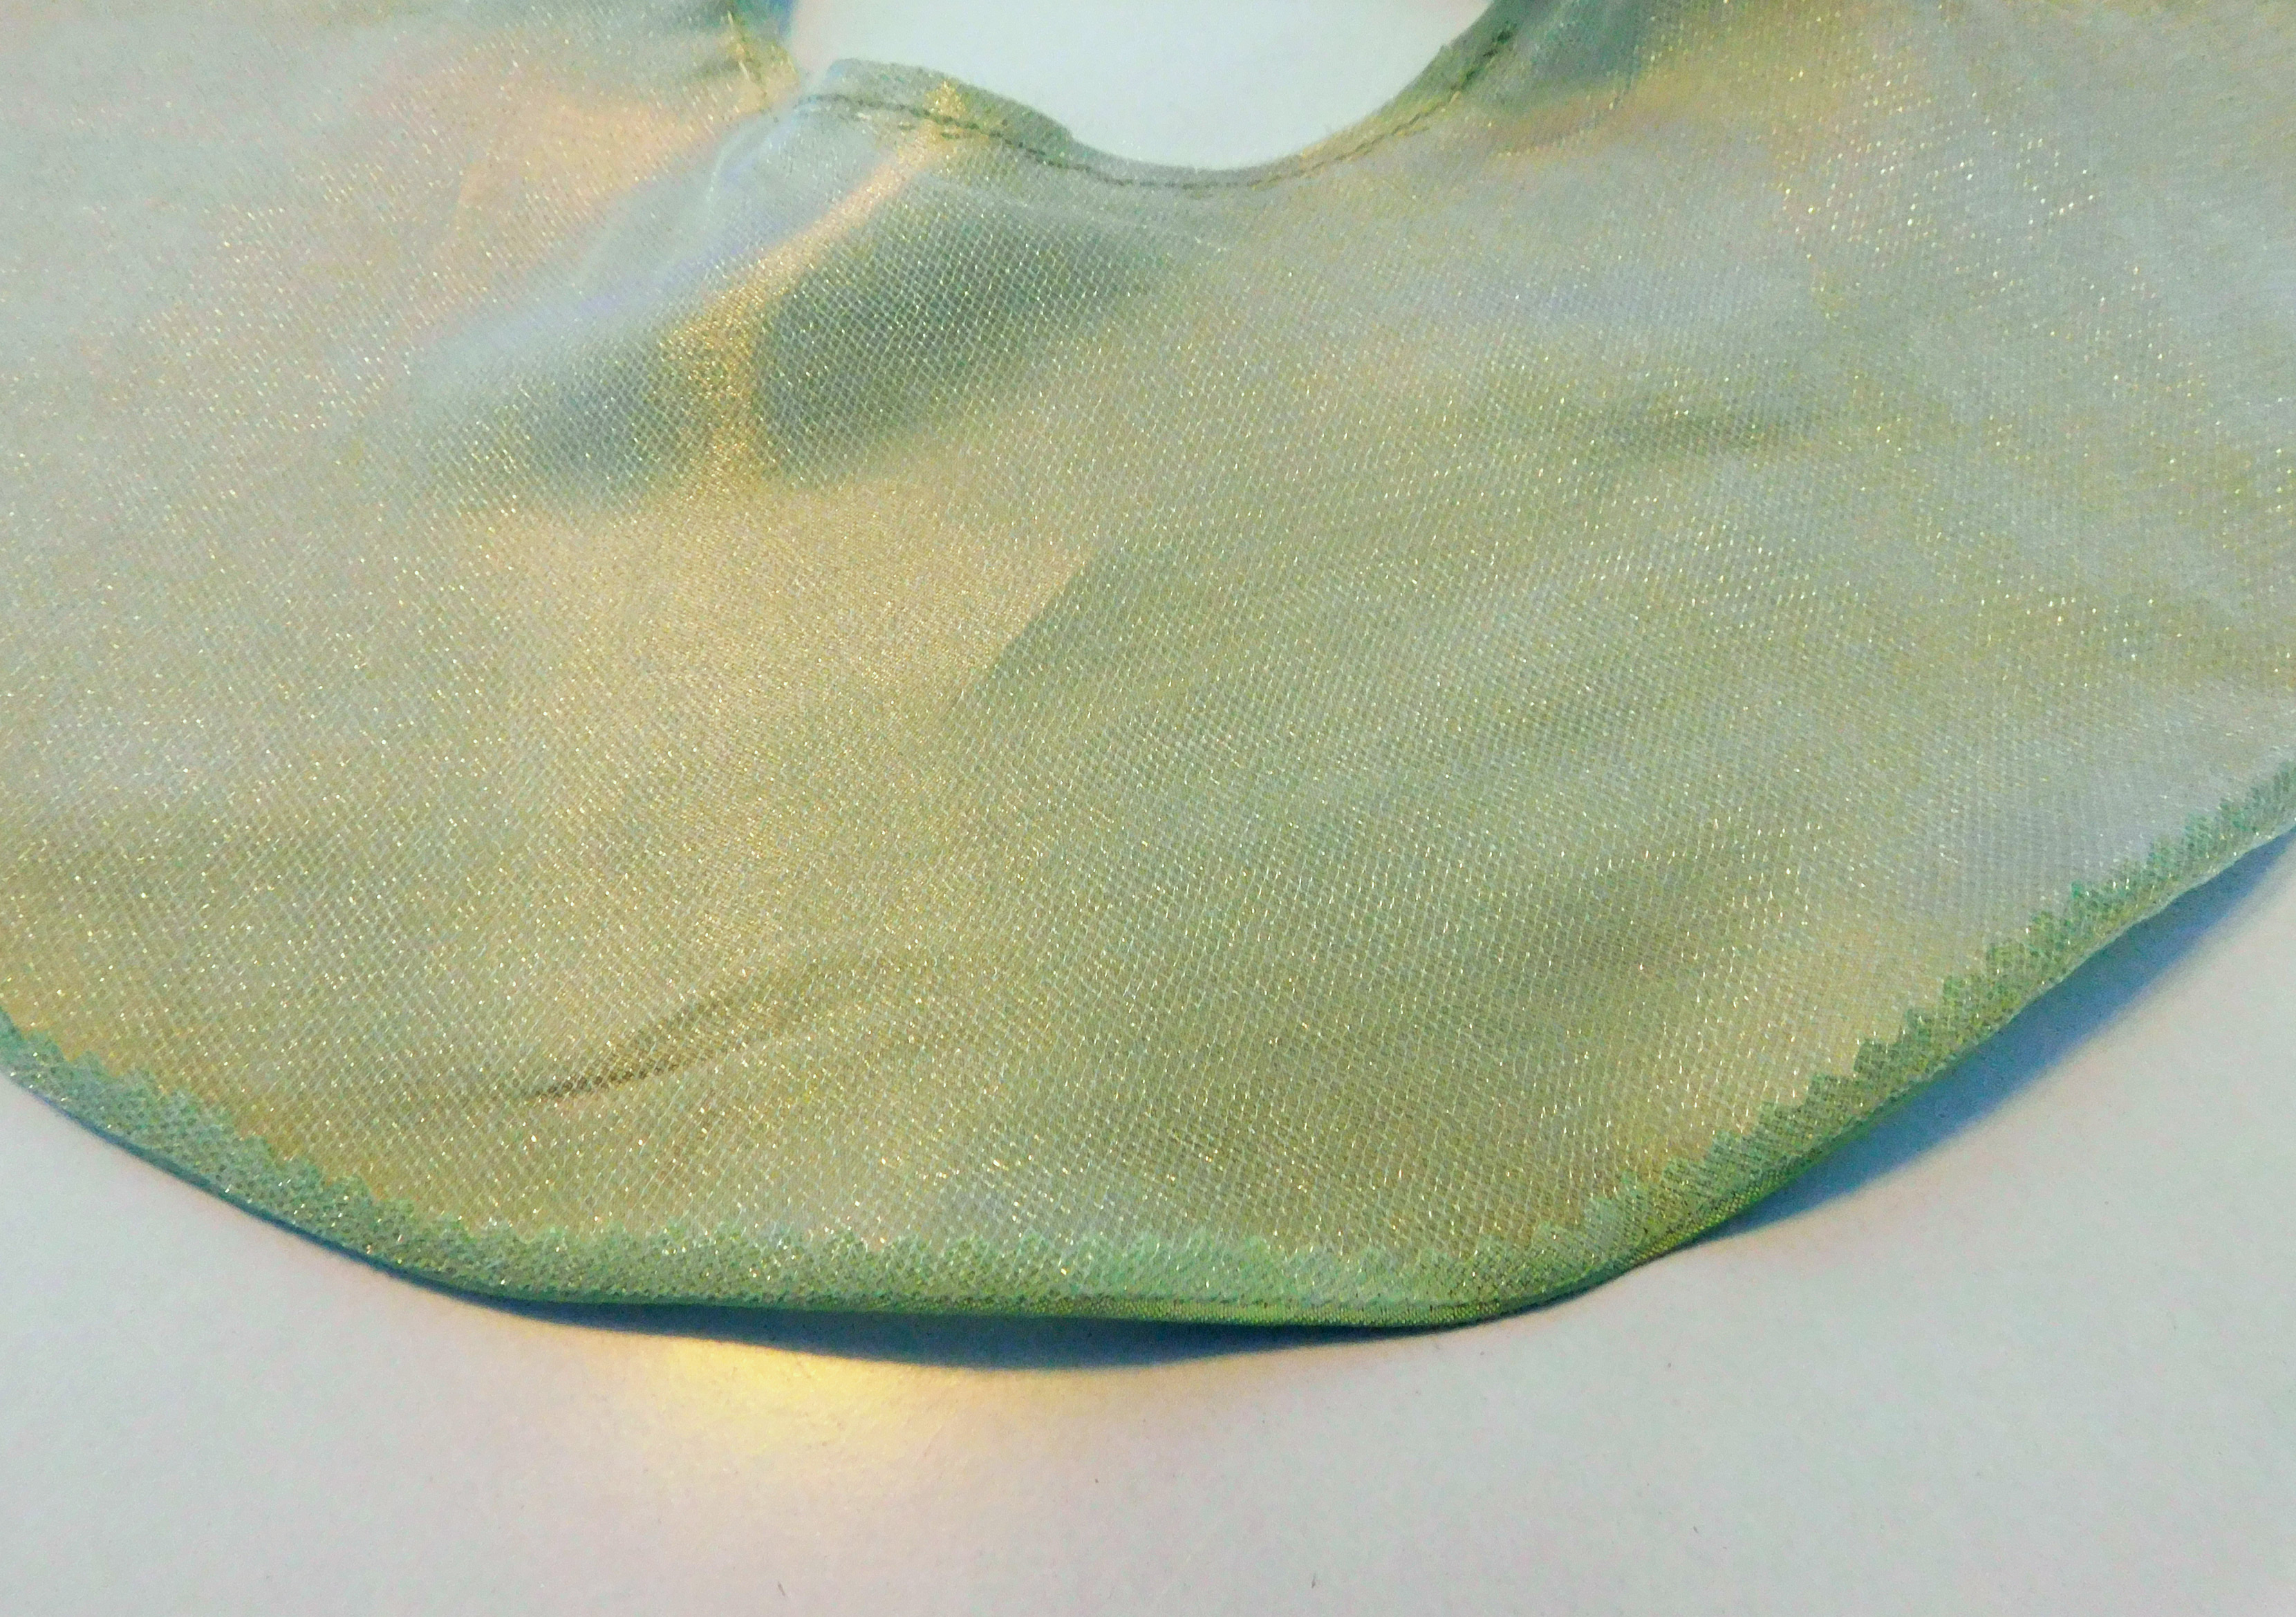
One day, while staring at the pink and green shot satin, I idly flipped part of the fabric over . . . and realized I could use the wrong side! The color isn’t perfect—it’s more of a bright spring green with hints of pink—but it definitely coordinates.

Satin, Wrong Side & Right Side
Once I had the skirt pieces cut out, I stumbled upon another dilemma. How to hem the skirts? They’re quite rounded, which means you can’t simply fold the edge under twice and stitch it. Using bias binding or a bias facing would’ve added too much bulk, weighing the skirts down. Even a baby hem would’ve been difficult. I thought about simply using Fray Check on the edges and leaving them raw, but Fray Check leaves a visible trace, even after it dries.
After much consideration, I decided that Hug Snug (rayon seam binding) would be my best bet. It’s extremely thin, so it doesn’t add a lot of bulk, and it can be applied around curves. I went to Etsy and ordered several yards in light pink.
Naturally, right after ordering the Hug Snug, I came up with an alternate technique for hemming the skirts! Because I was worried about finishing this project before the competition deadline, I went ahead with my new plan.
My idea was to line both skirts with illusion, a very fine tulle. If I treated it like a lining, it would finish the raw edges, without adding stiffness. Rather than manually notching the curved seam allowances, I trimmed them with pinking shears—instant notches!
Skirt Lined with Illusion
Next, I needed to embellish the overskirt. I found an iridescent pink ribbon in my stash, which I started hand-sewing onto the hem of the skirt. When I was barely a quarter of the way done, I realized it looked terrible! The ribbon rippled between every stitch. It would have to be machine sewed, which I usually avoid doing for embellishments, since it stiffens them.
Before heading to the sewing machine, I tried scrunching the top edge of the skirt up, as if it was gathered, just to see how well the skirt draped with the iridescent ribbon on it. Unfortunately, it stood out like a poodle skirt!
I needed a much thinner ribbon. I found a spool of olive green organza ribbon, which seemed to work better, but I didn’t have any matching thread, so I had to wait until a visit to the fabric store could be arranged.
Bodice Construction & Embellishment
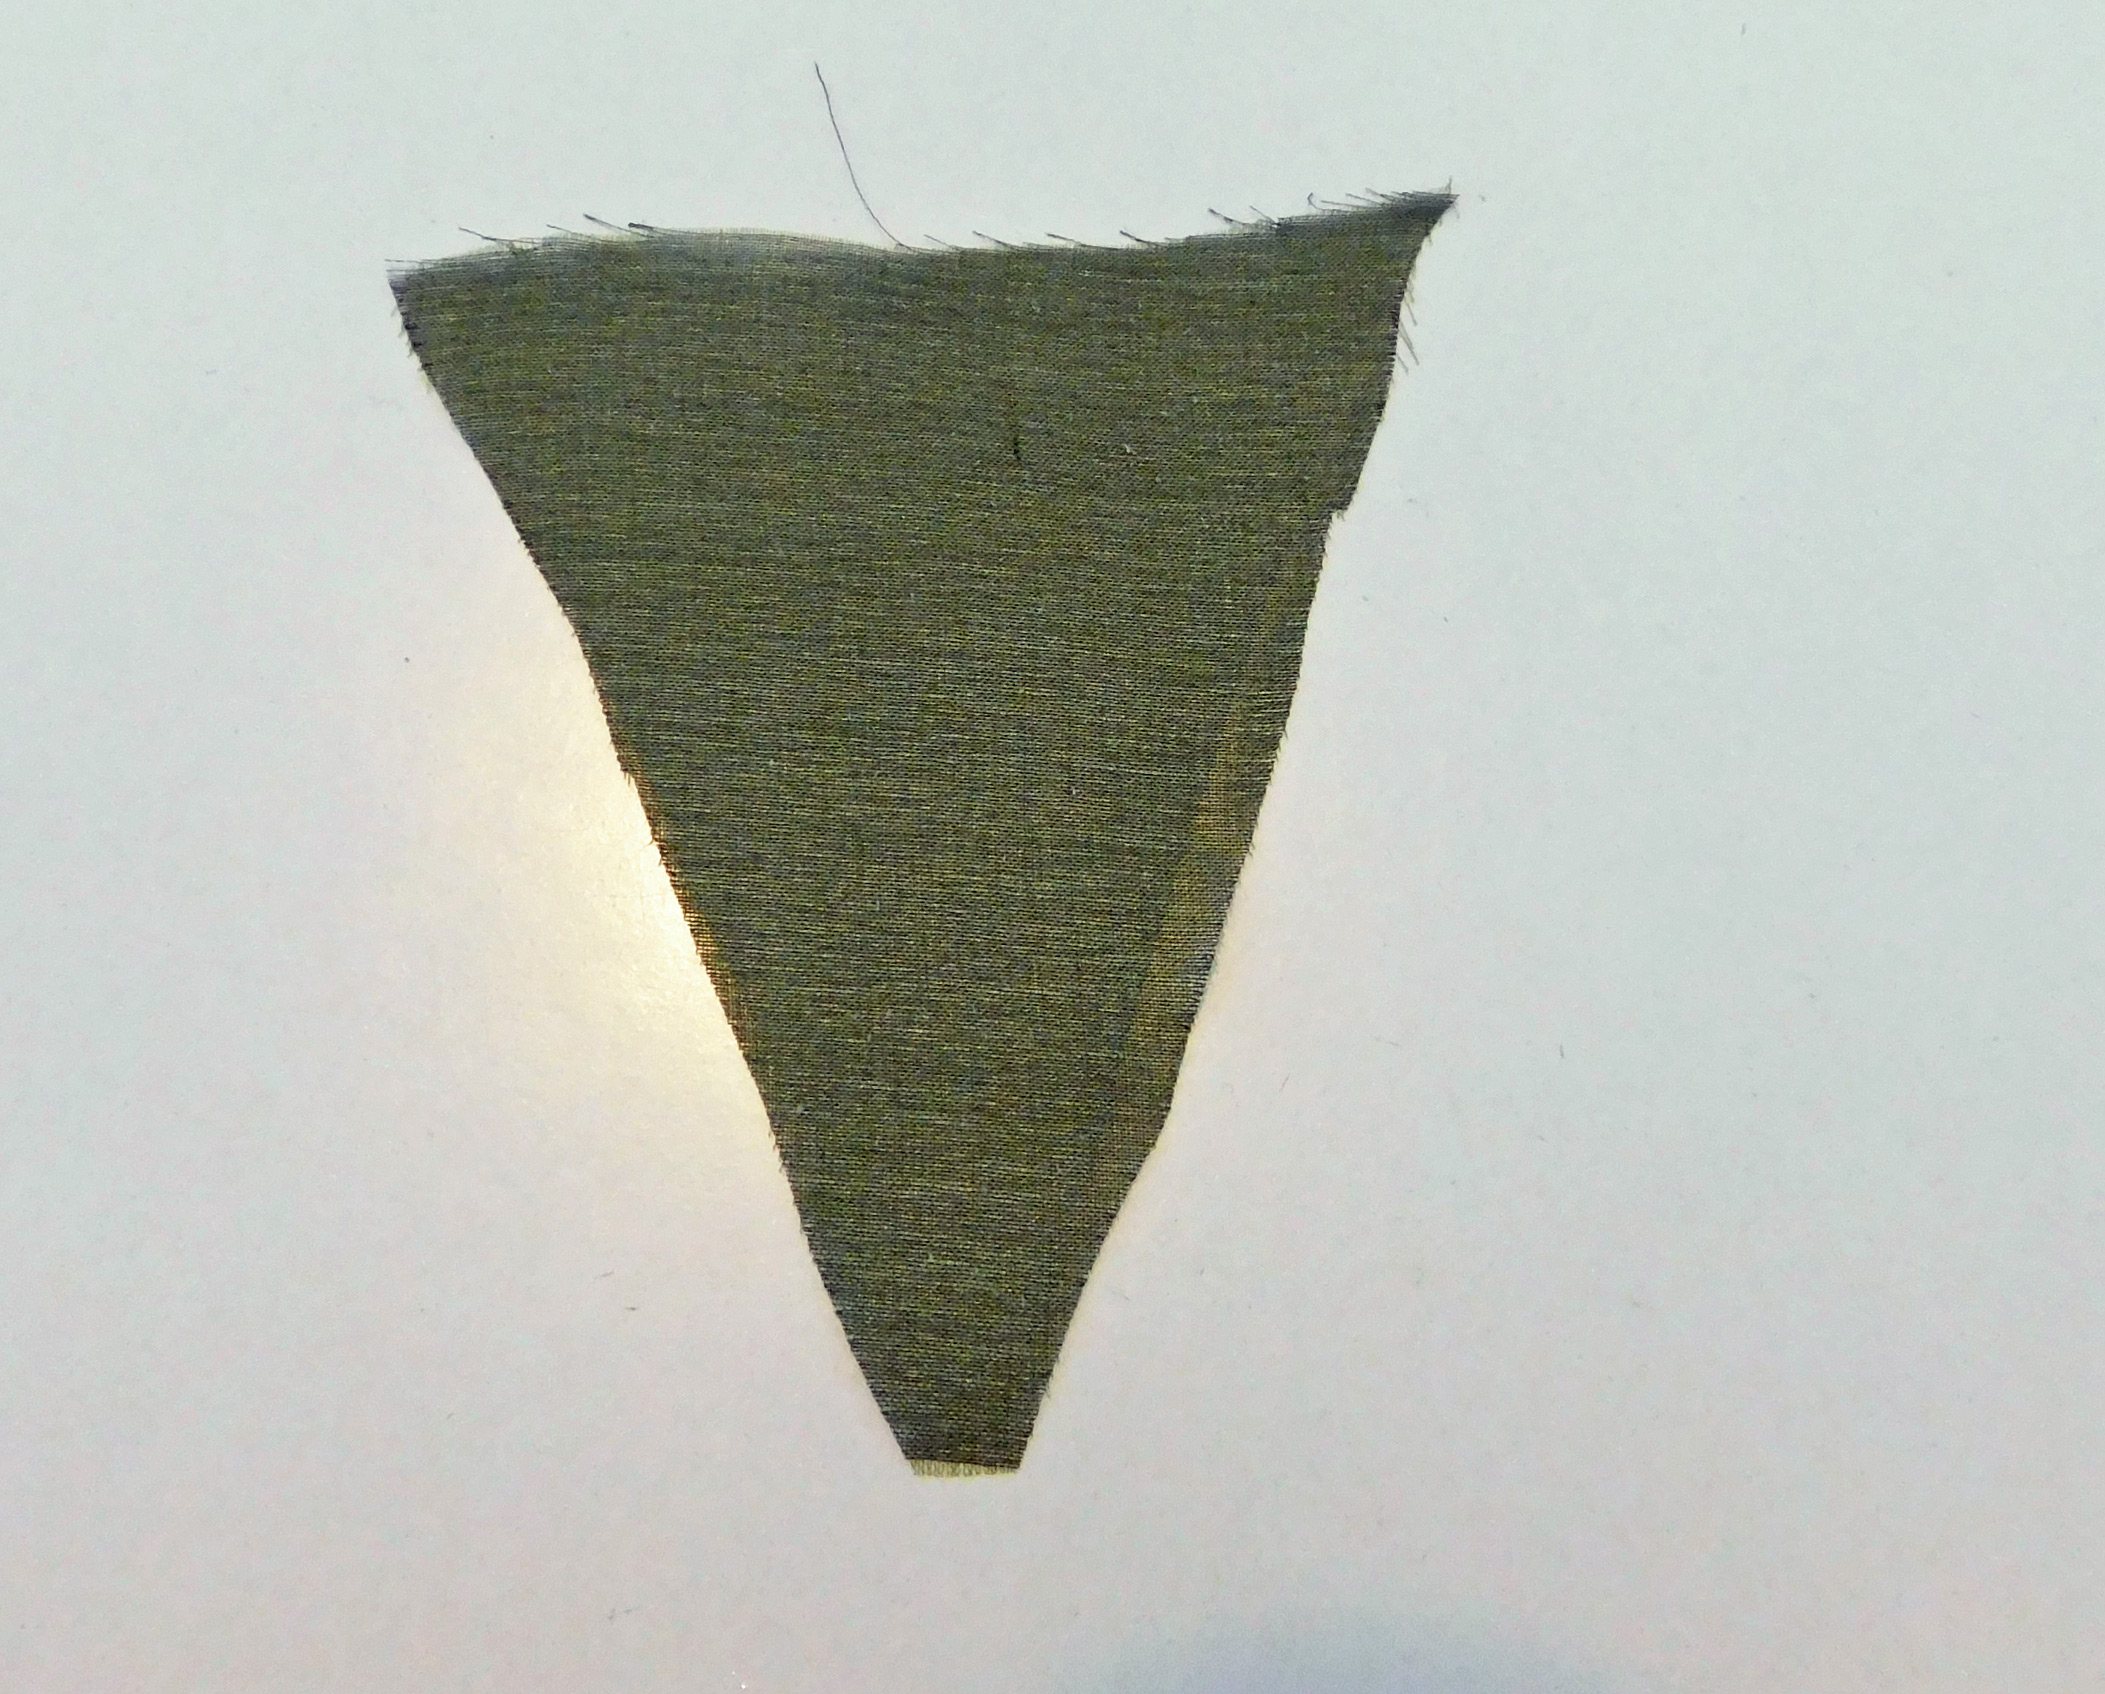
In the meantime, I started on the bodice. Most of the bodice uses the reverse side of the iridescent satin, but the front panel uses the right side, so it would stand out. Unfortunately, I made a mistake when I drafted the pattern. The center-front panel is supposed to get narrower toward the waist, forming an inverted triangle, like a Rococo stomacher. But I didn’t draft the pattern that way. I’d used regular princess seams, which go straight down from the bust.
Time to get creative!
Since most versions of this costume have a darker green front panel, I wanted to use an overlay of the olive silk chiffon to create a stomacher that I could sew onto the front panel. Silk chiffon is extremely thin, so I fused it to a lightweight interfacing. If I’d thought it through, I would’ve realized that you can’t fuse interfacing to chiffon. The melted glue seeped right through the sheer fabric, creating a rough texture on the front of the chiffon. You can’t tell in the photo below, but the chiffon had teeny-tiny white glue spikes sticking out of it!
Rejected Stomacher
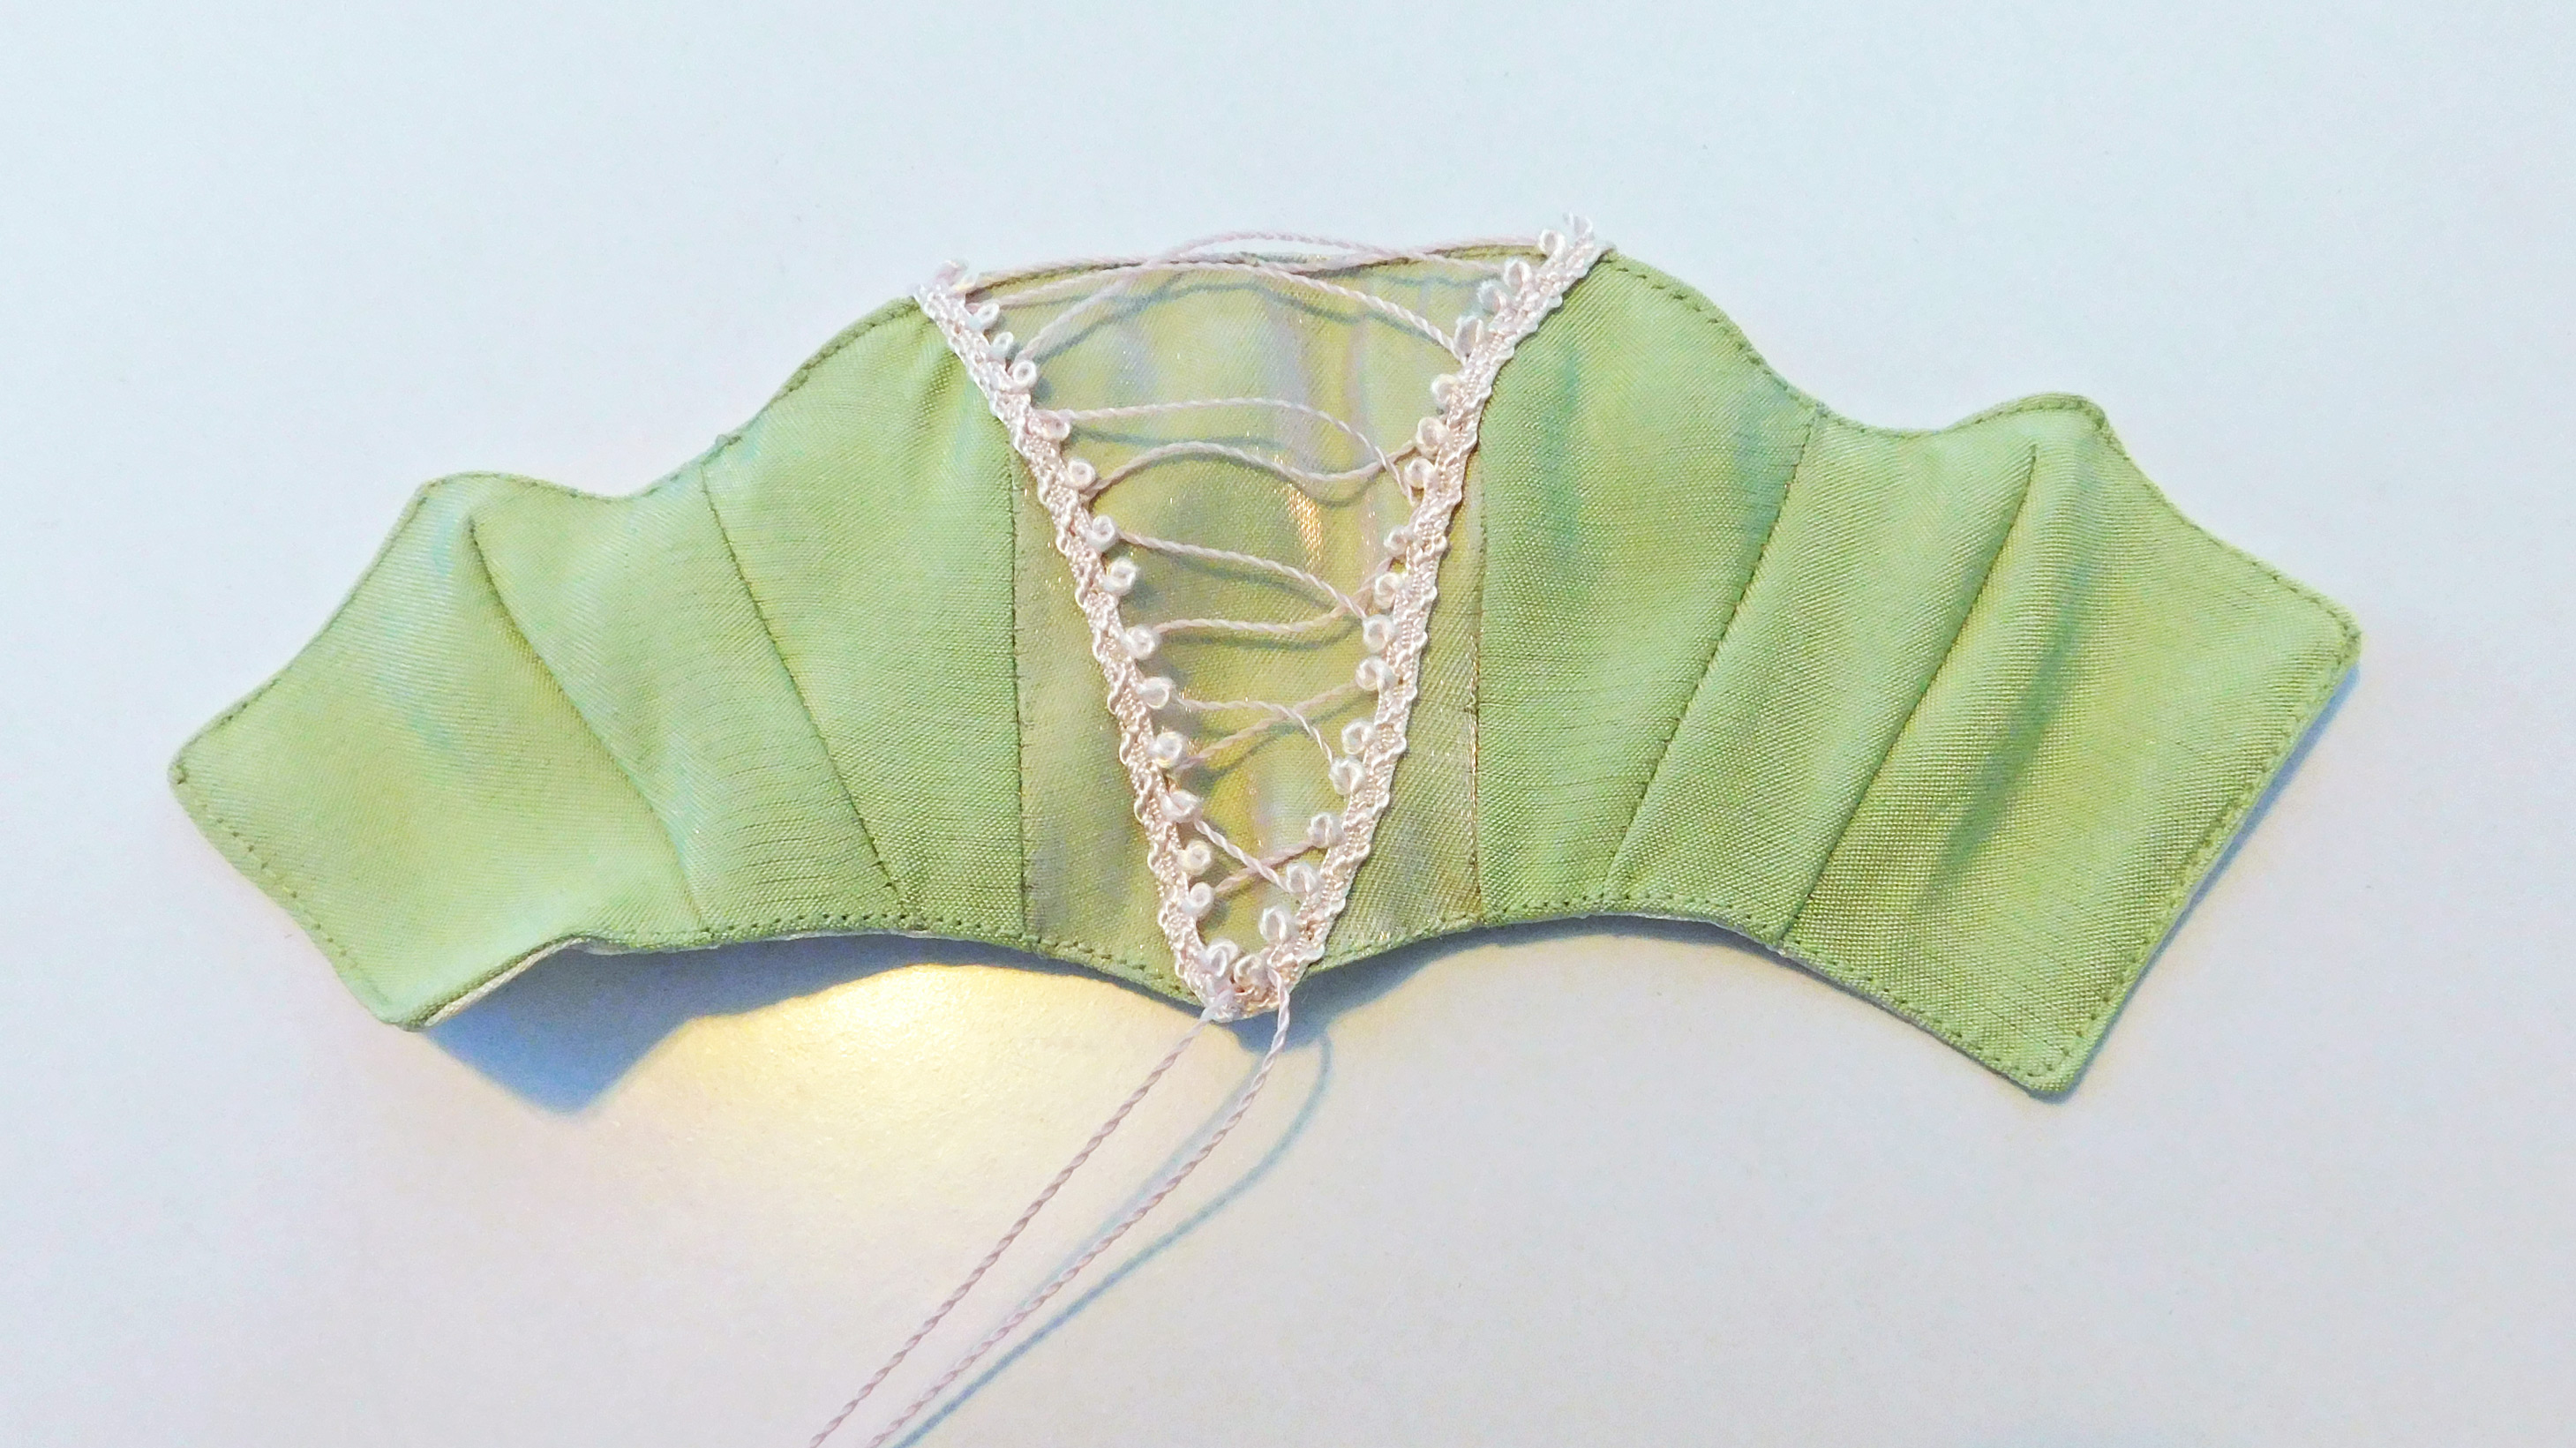
My backup plan was to use trim to create the illusion of a stomacher on the bodice. I spent quite some time hand-sewing the lacing cord onto the bodice front. When I finished, I noticed that I’d forgotten the lacing was supposed to taper to the hem. Instead, I’d followed the princess seams, which meant the lacing was much too wide. Much aggrieved, I unpicked my stitches and sewed it again.
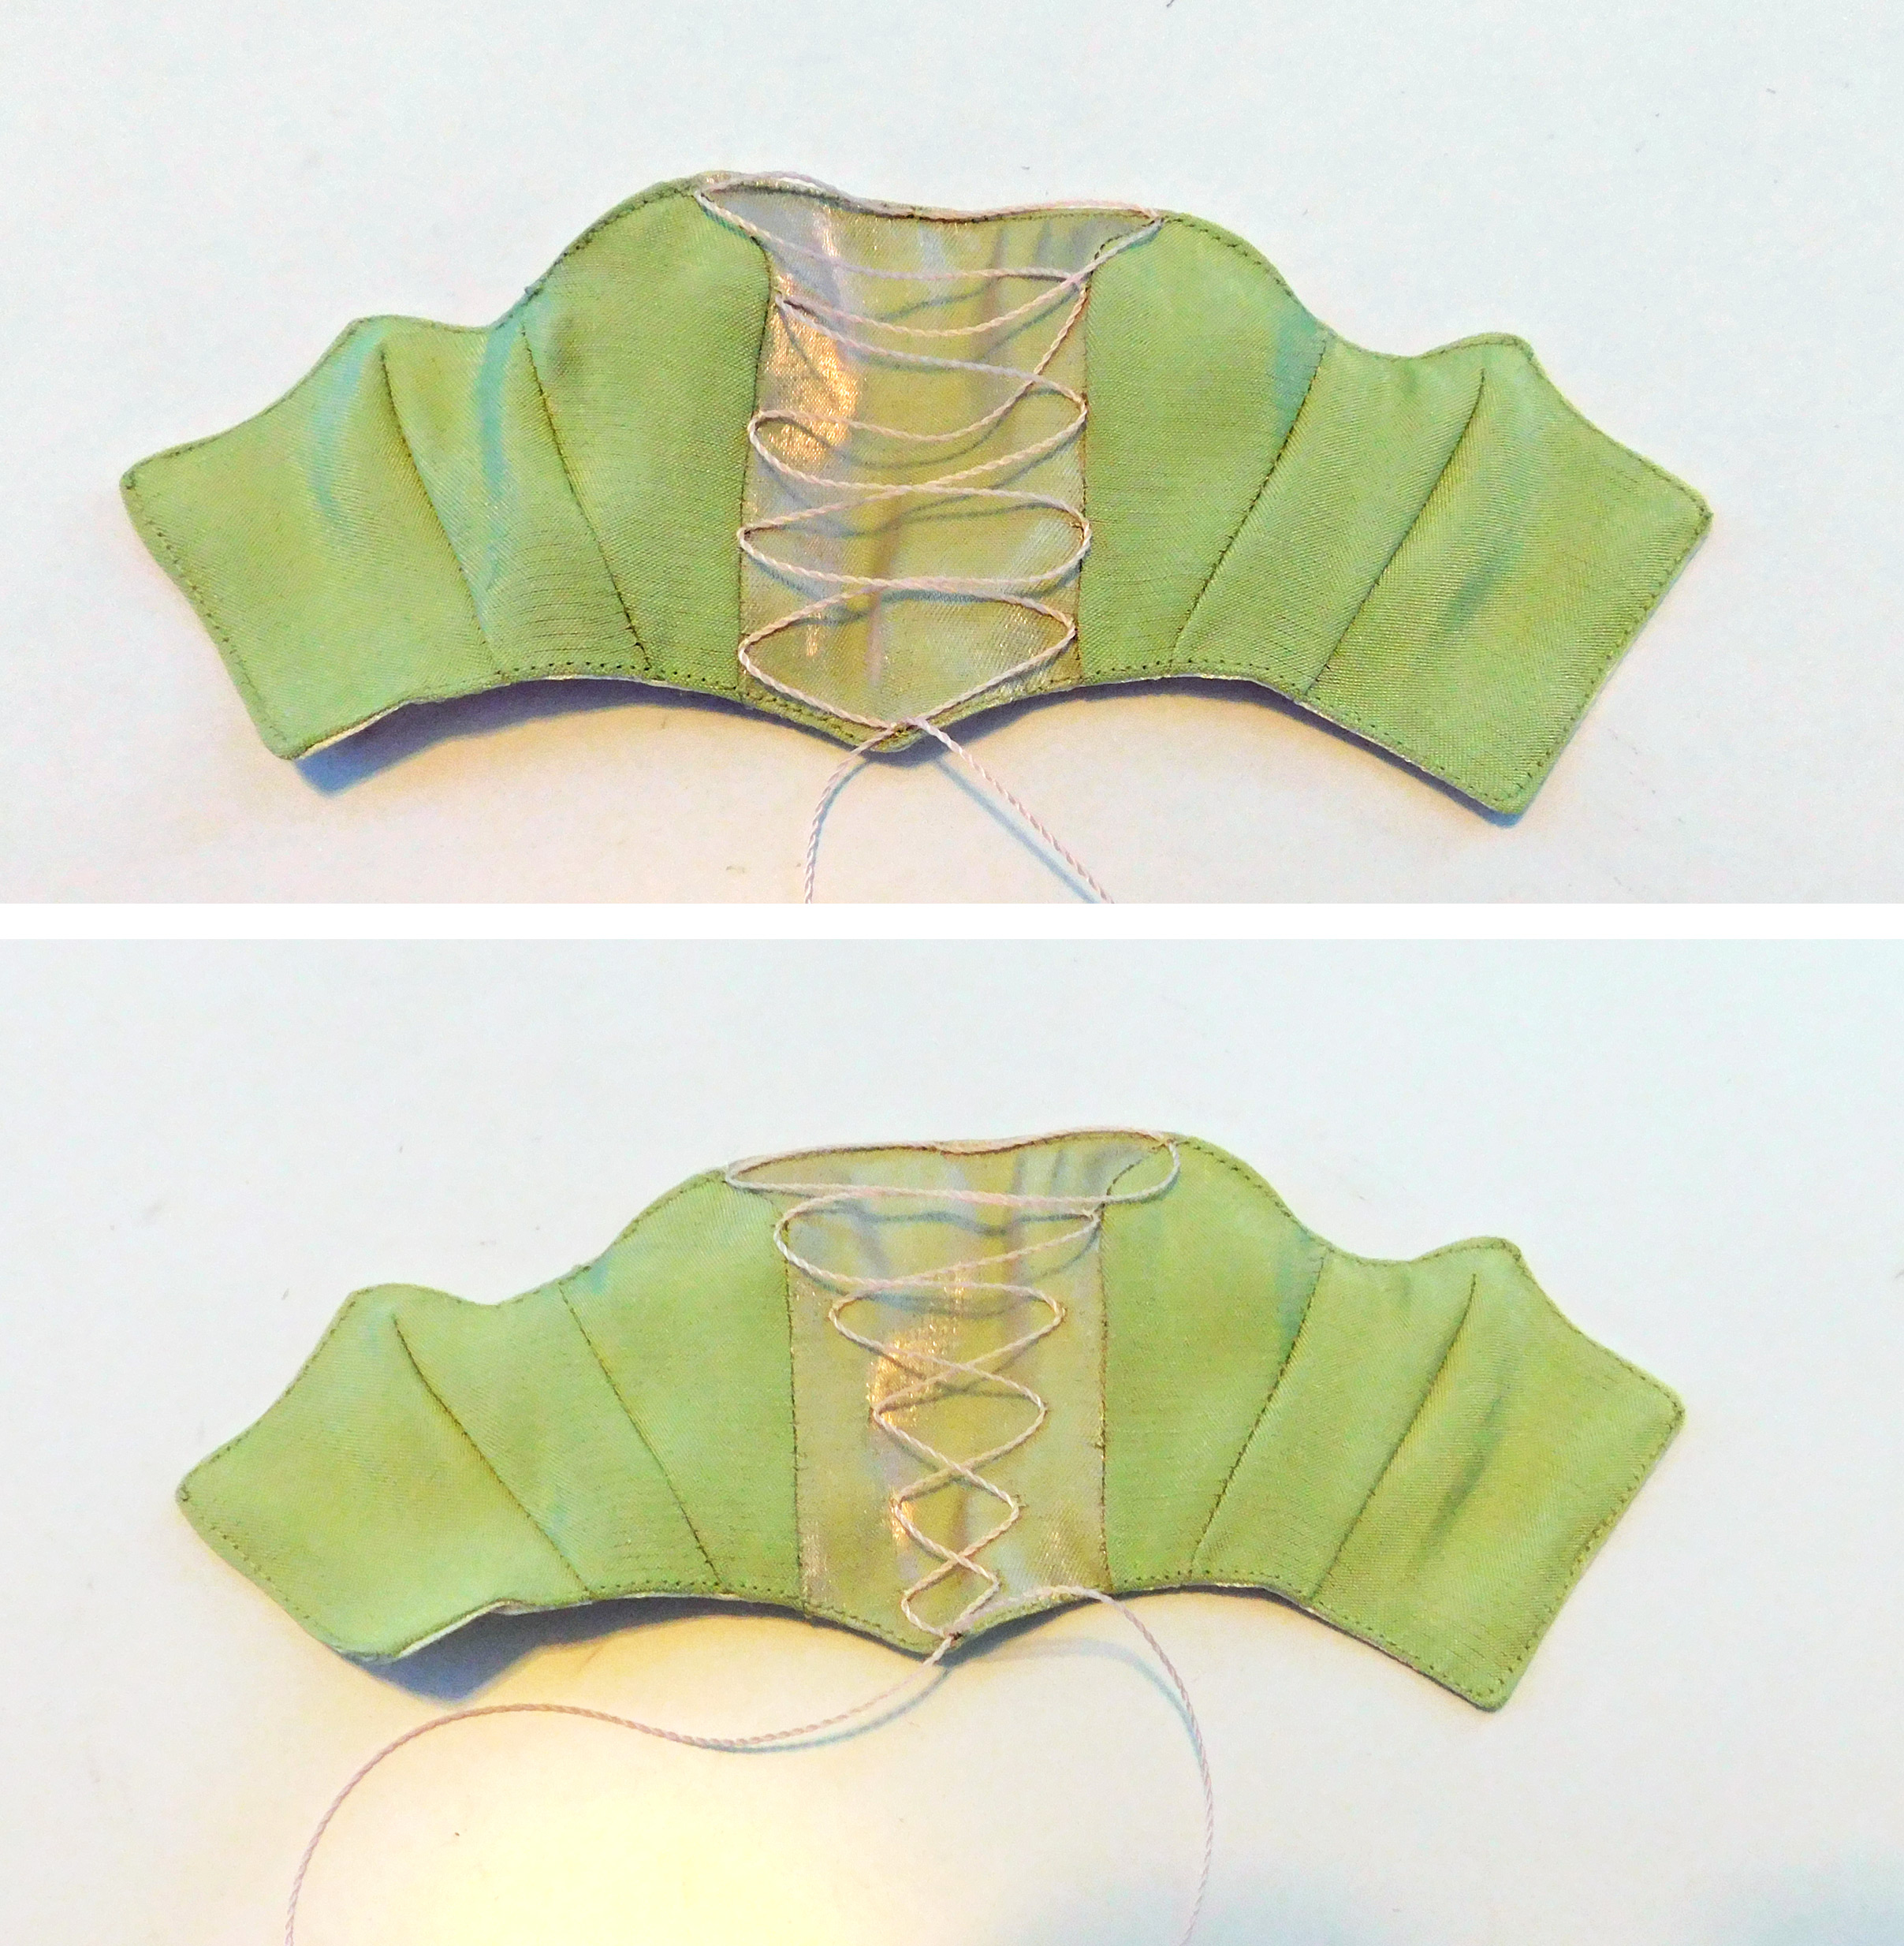
Stomacher Lacing (Wrong & Right)
Next, I needed to outline the edges of the lacing with trim, so it would look like a stomacher. I rummaged through my stash of ribbon and braid, searching for the right trim. I had both olive green and pink velvet ribbon, but even though they were only ⅛” wide, they were too thick and wouldn’t work for the scale of the doll. I had narrow ribbon, but when I hand-stitched it onto the bodice, it looked sloppy. I tried couching the ribbon instead, but my thread didn’t match closely enough, so again, it looked messy.
Eventually, I found a light pink picot braid that was narrow enough. In fact, it worked quite well, because the picot loops almost look as if they’re there to hold the lacing.
Bodice with Finished Stomacher
The costume is supposed to have silk flowers attached to the bodice. I’d ordered a variety of miniature roses, but wasn’t sure which colors to use. I eliminated the ivory and yellow flowers, but that still left several choices. All pink? All white? Or perhaps a combination? Any of these would be accurate, since each production of The Phantom of the Opera uses a different variation. To help me decide, I took pictures of three different versions.
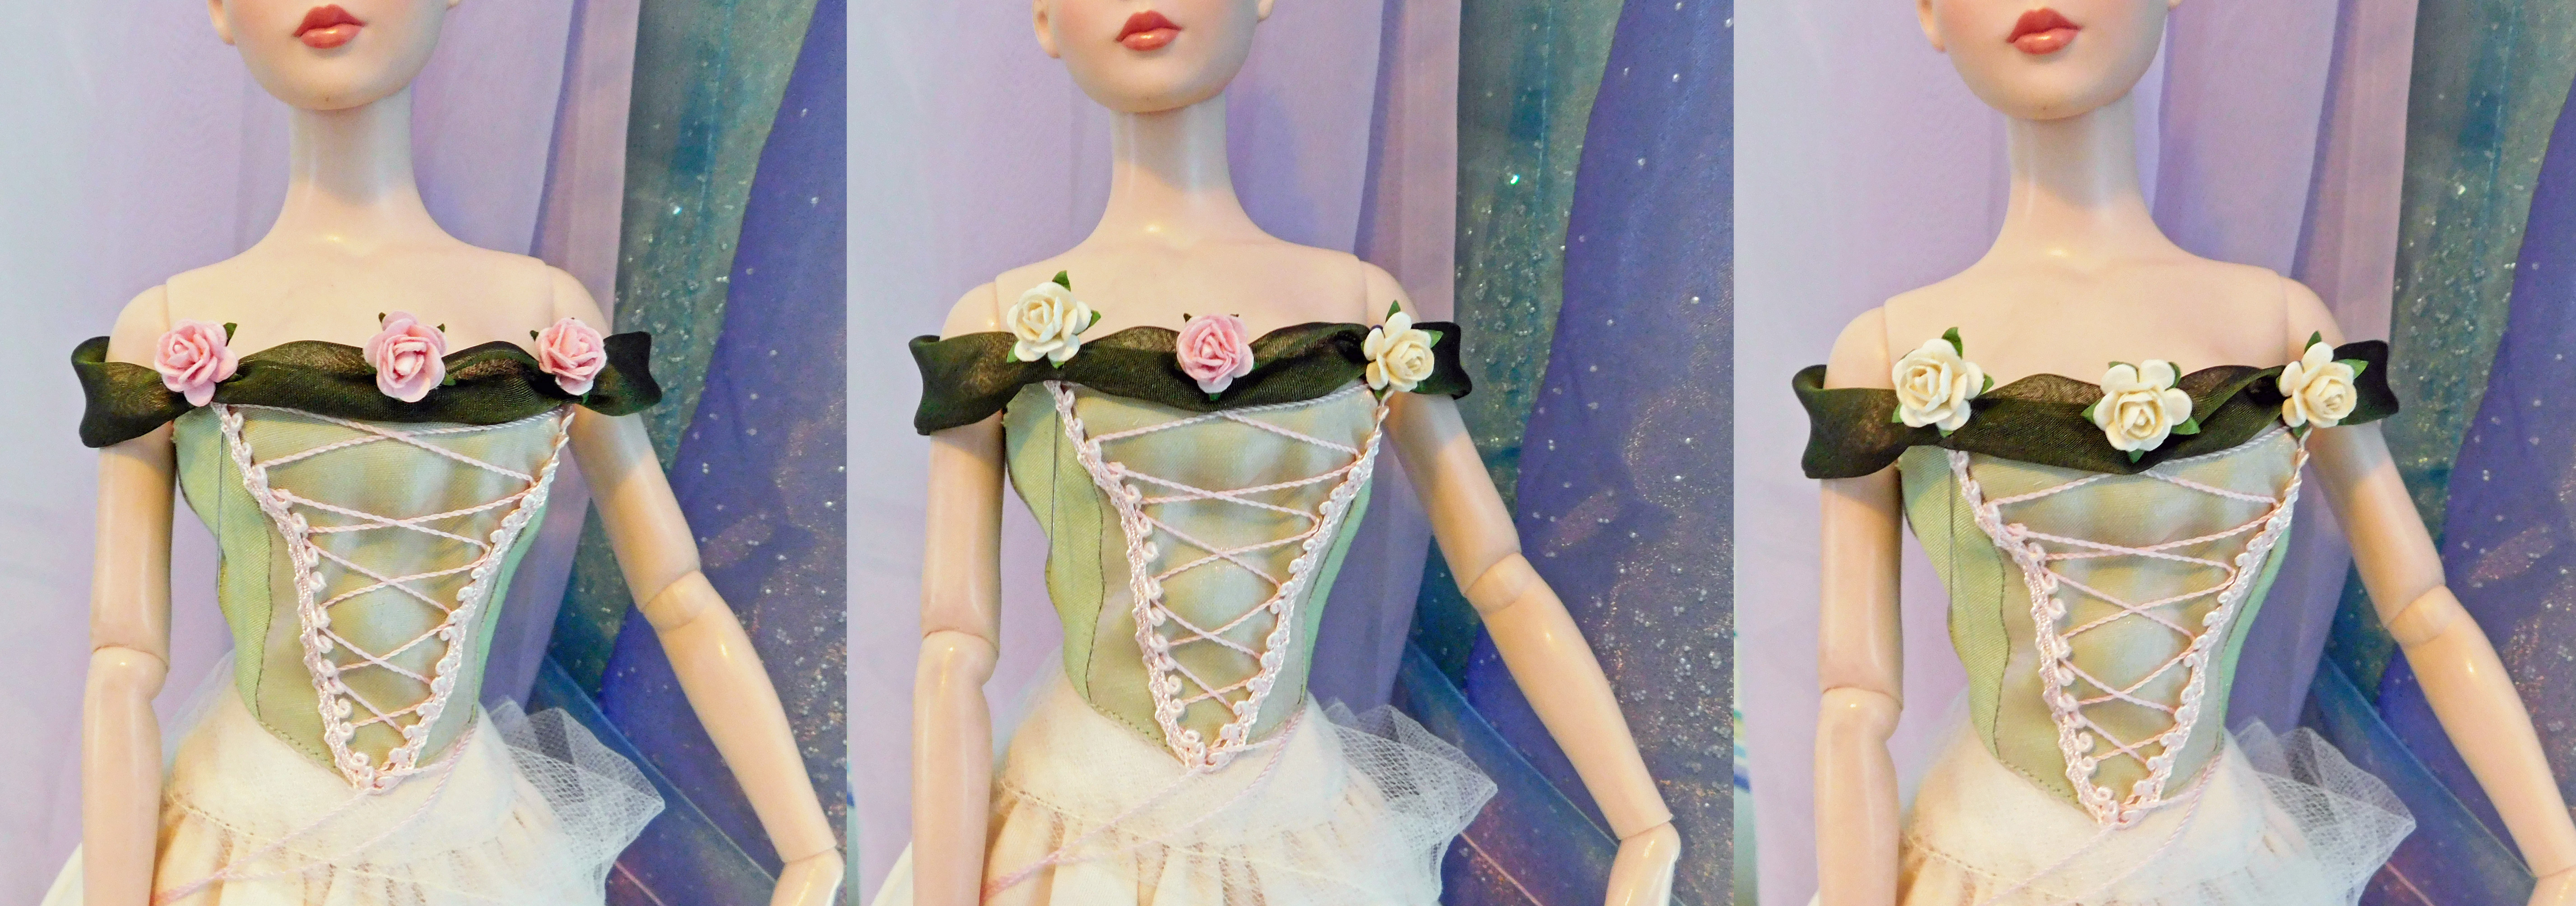
Bodice with Floral Variations
Because the miniature roses are a bit stiff and have sharp wire for their stems, the chance of them snagging the delicate silk chiffon was high, so I saved the flowers for the last step, after sewing hooks and thread bars onto the back closure.
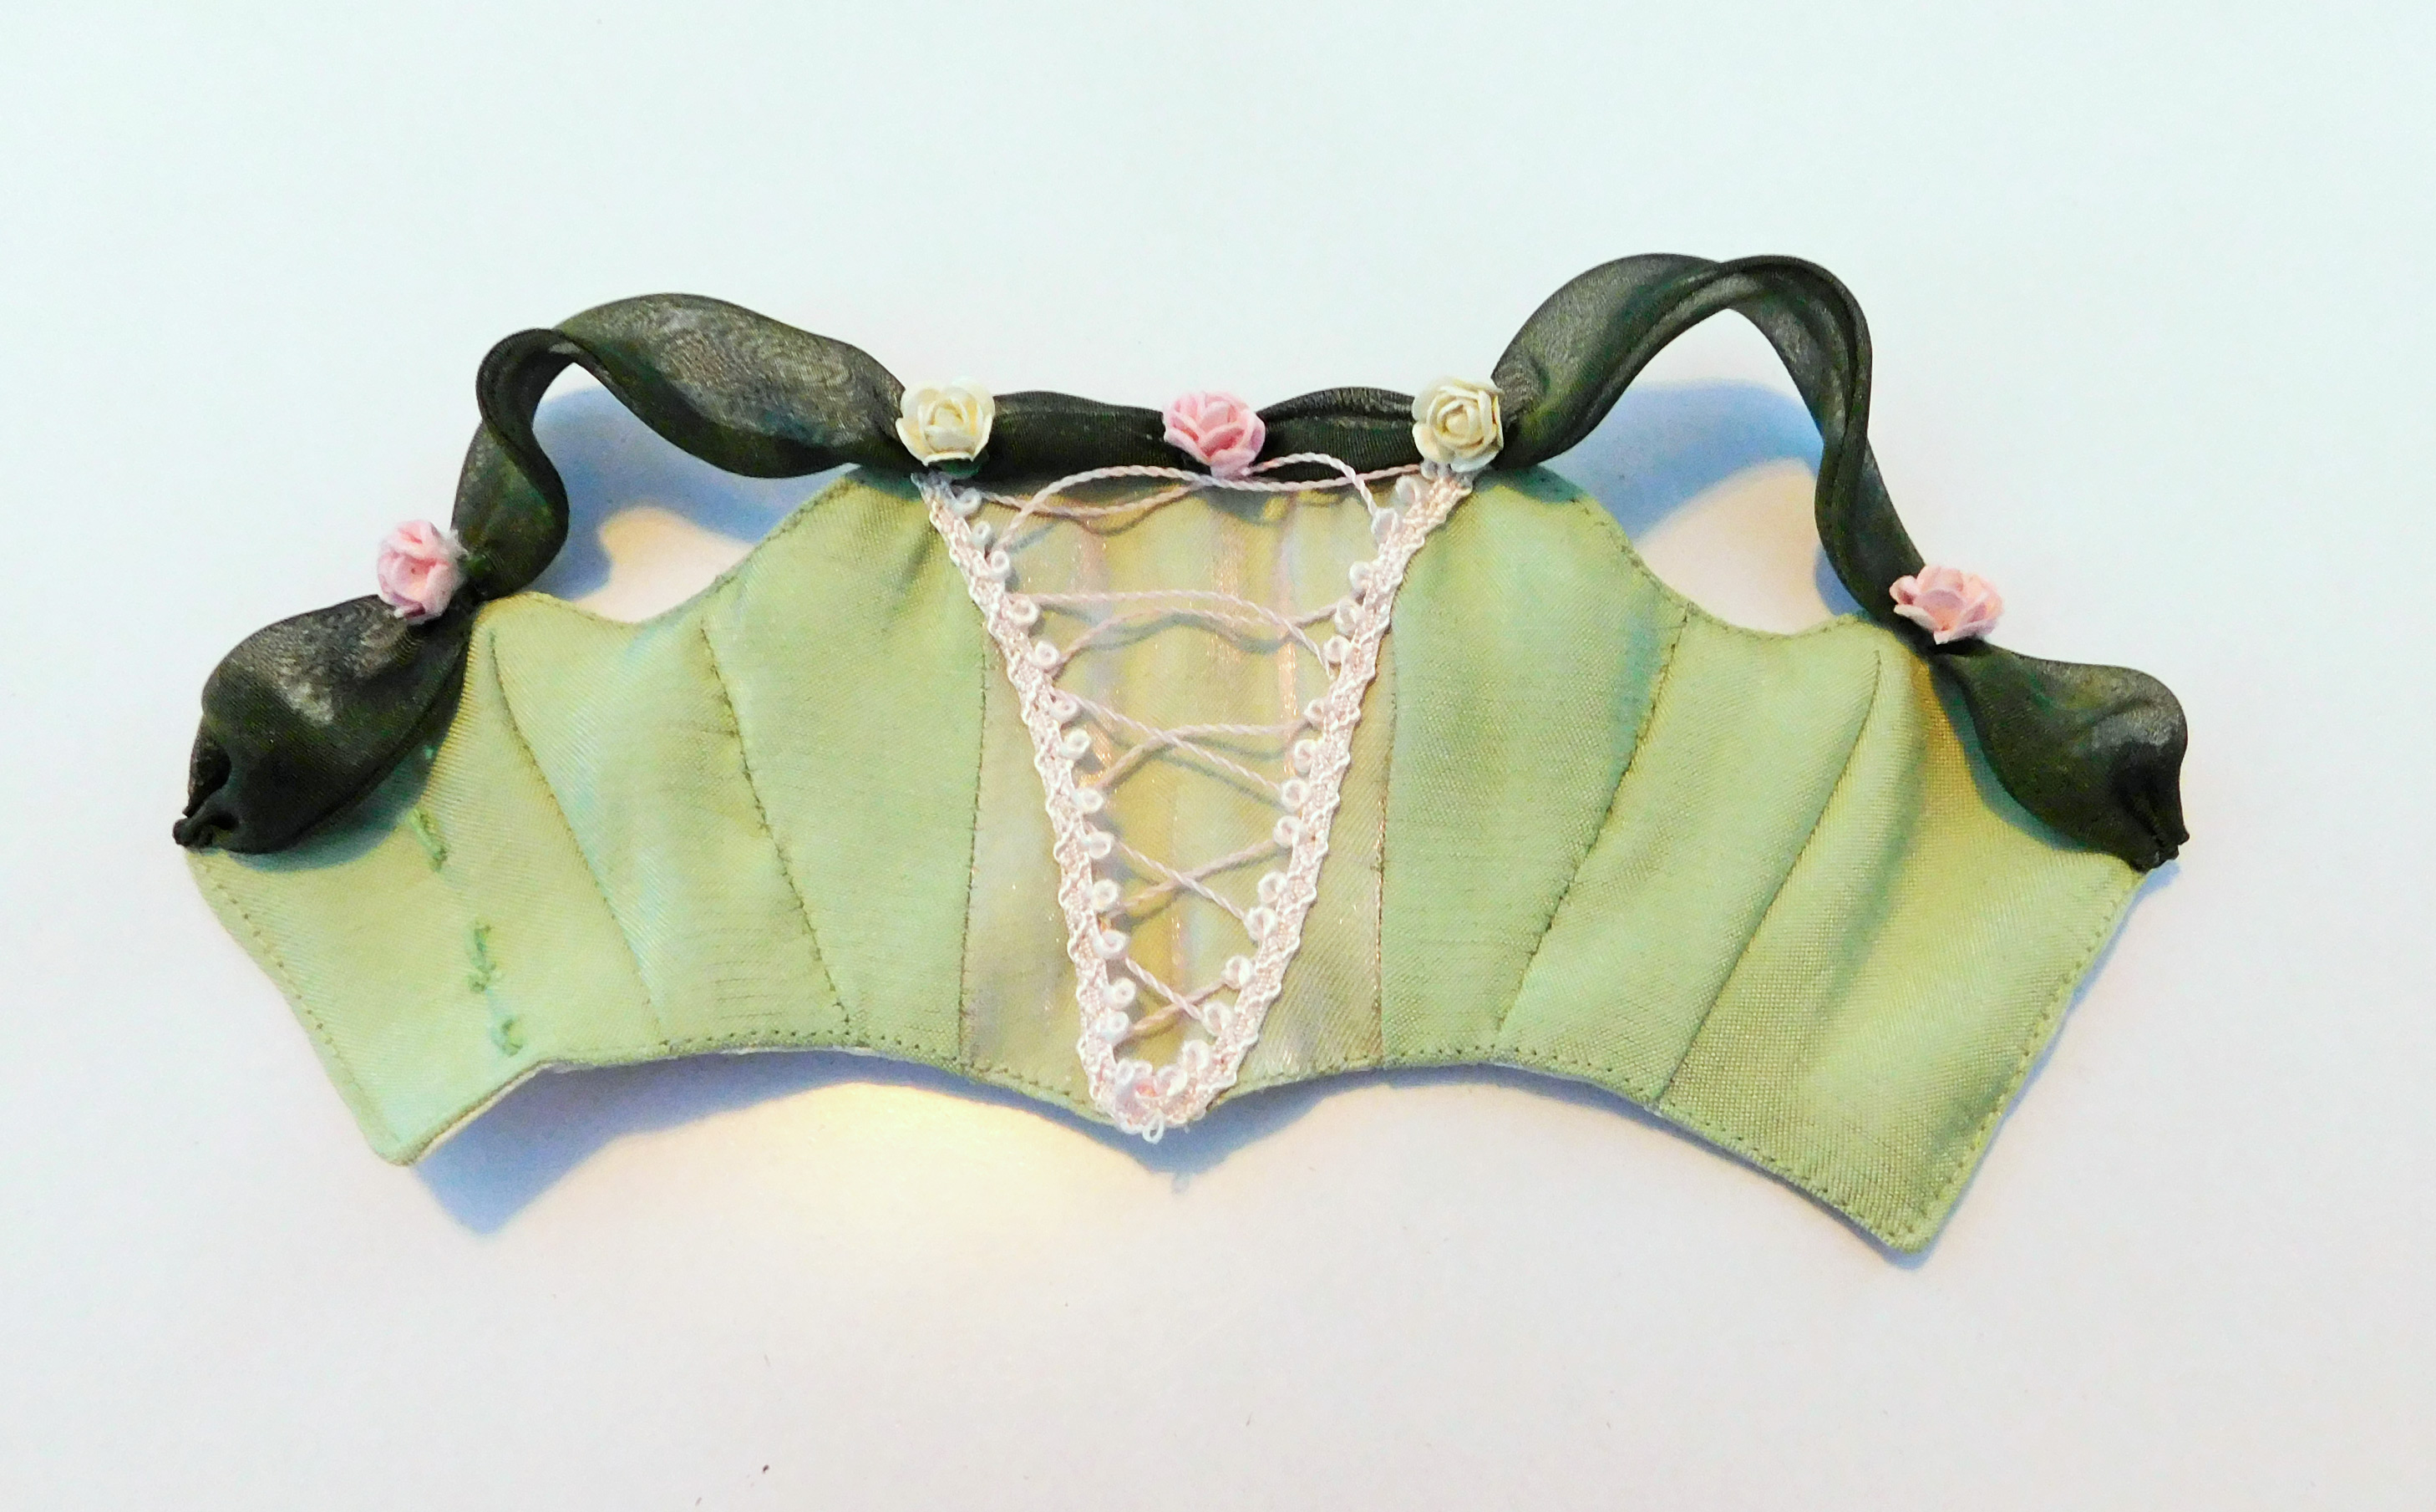
Finished Bodice
Skirt Construction & Embellishment, Part II
Time to finish the skirt! Once I’d obtained matching thread, I started sewing bands of ribbon onto the skirt. I was expecting difficulty, because ribbon is straight and the skirt is round, but to my surprise, there was no rippling or puckering.
Skirt with Ribbon Trim
When I went to assemble the skirt layers, I discovered that the overskirt had warped. The center-back edges, which had been straight, were now slanted diagonally. I had to compensate for this when sewing the center-back seam, because otherwise, the ribbons wouldn’t line up.
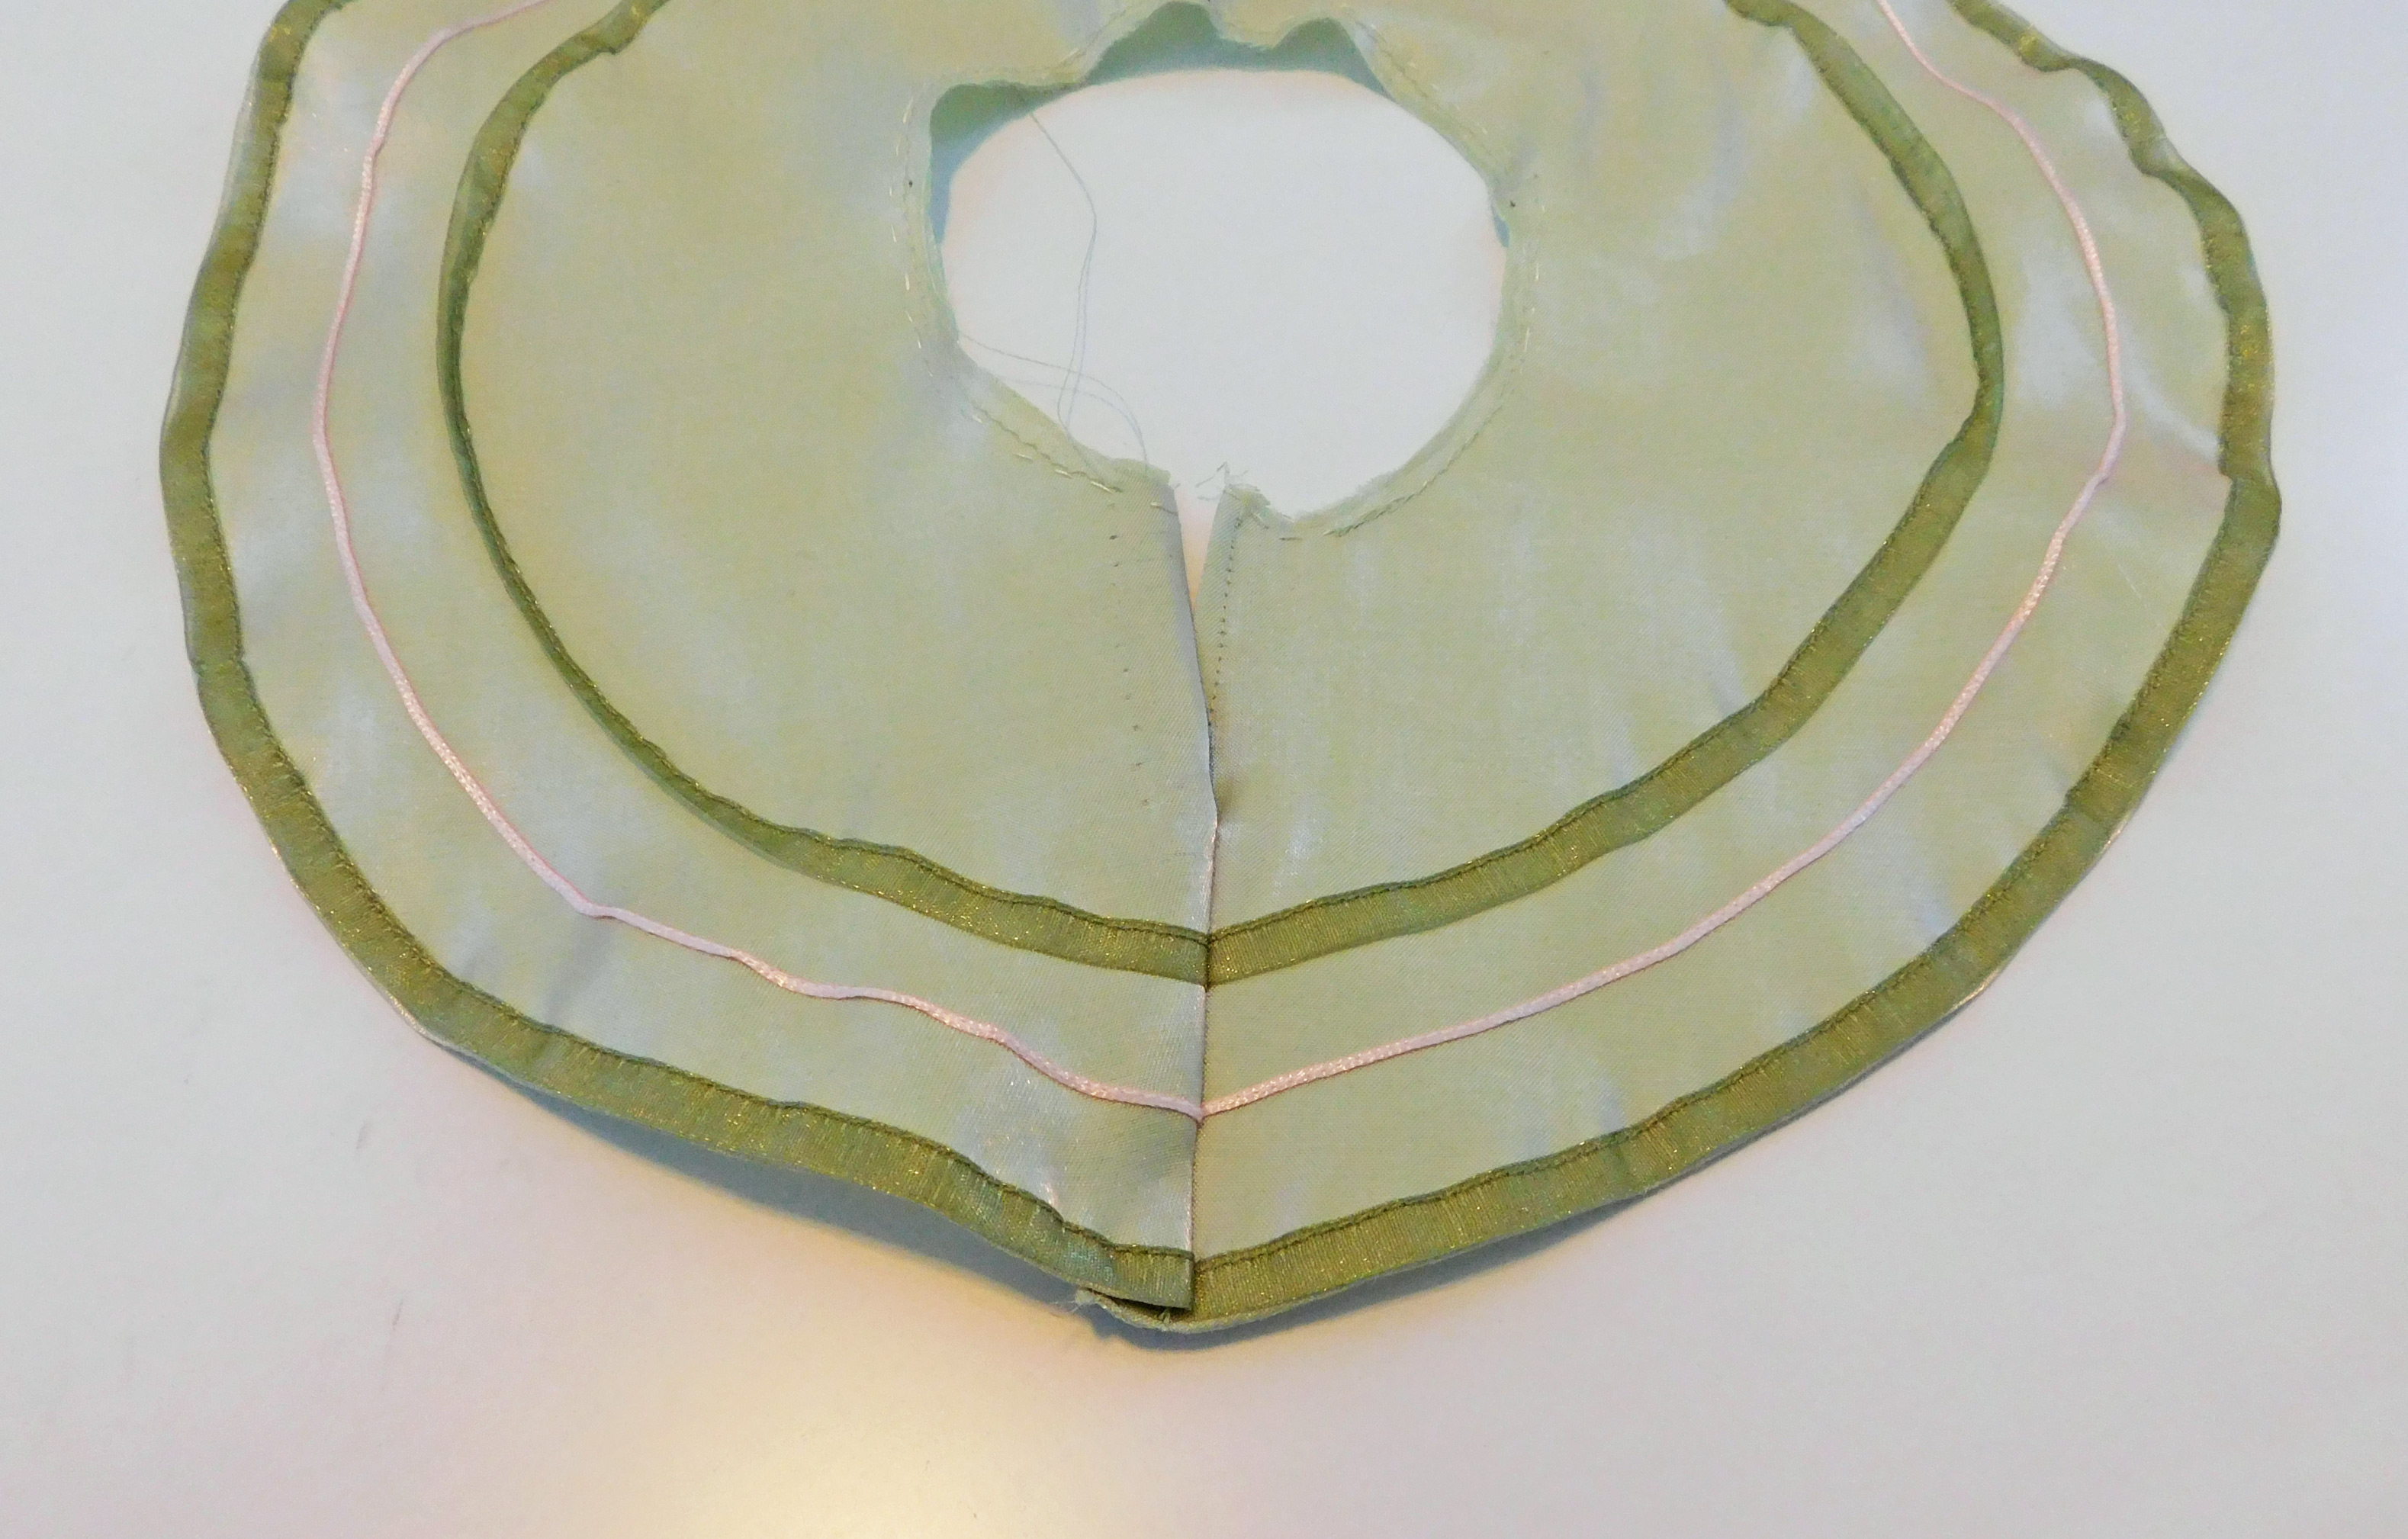
Skirt’s Center-Back Seam
Finally, it was time to assemble the whole skirt. I gathered and basted each layer onto the yoke, then sewed it. To my dismay, even with careful basting, the outer skirt ended up with extremely uneven gathering. Since it was such a pain to gather, baste, sew, and press three layers of skirt to the yoke, I wasn’t about to try and redo it!

Finished Skirt
Sash Construction
The final aspect of this ballet costume is the pleated sash that drapes asymmetrically around the hips, with a large bow at the back. I did a lot of hand-sewing—gathering various parts, attaching the bow to the sash, and so forth. Even though the real sash has pleated folds across its length, I wasn’t able to achieve this in miniature, so I gathered it vertically in several places, which I planned on concealing with miniature flowers.
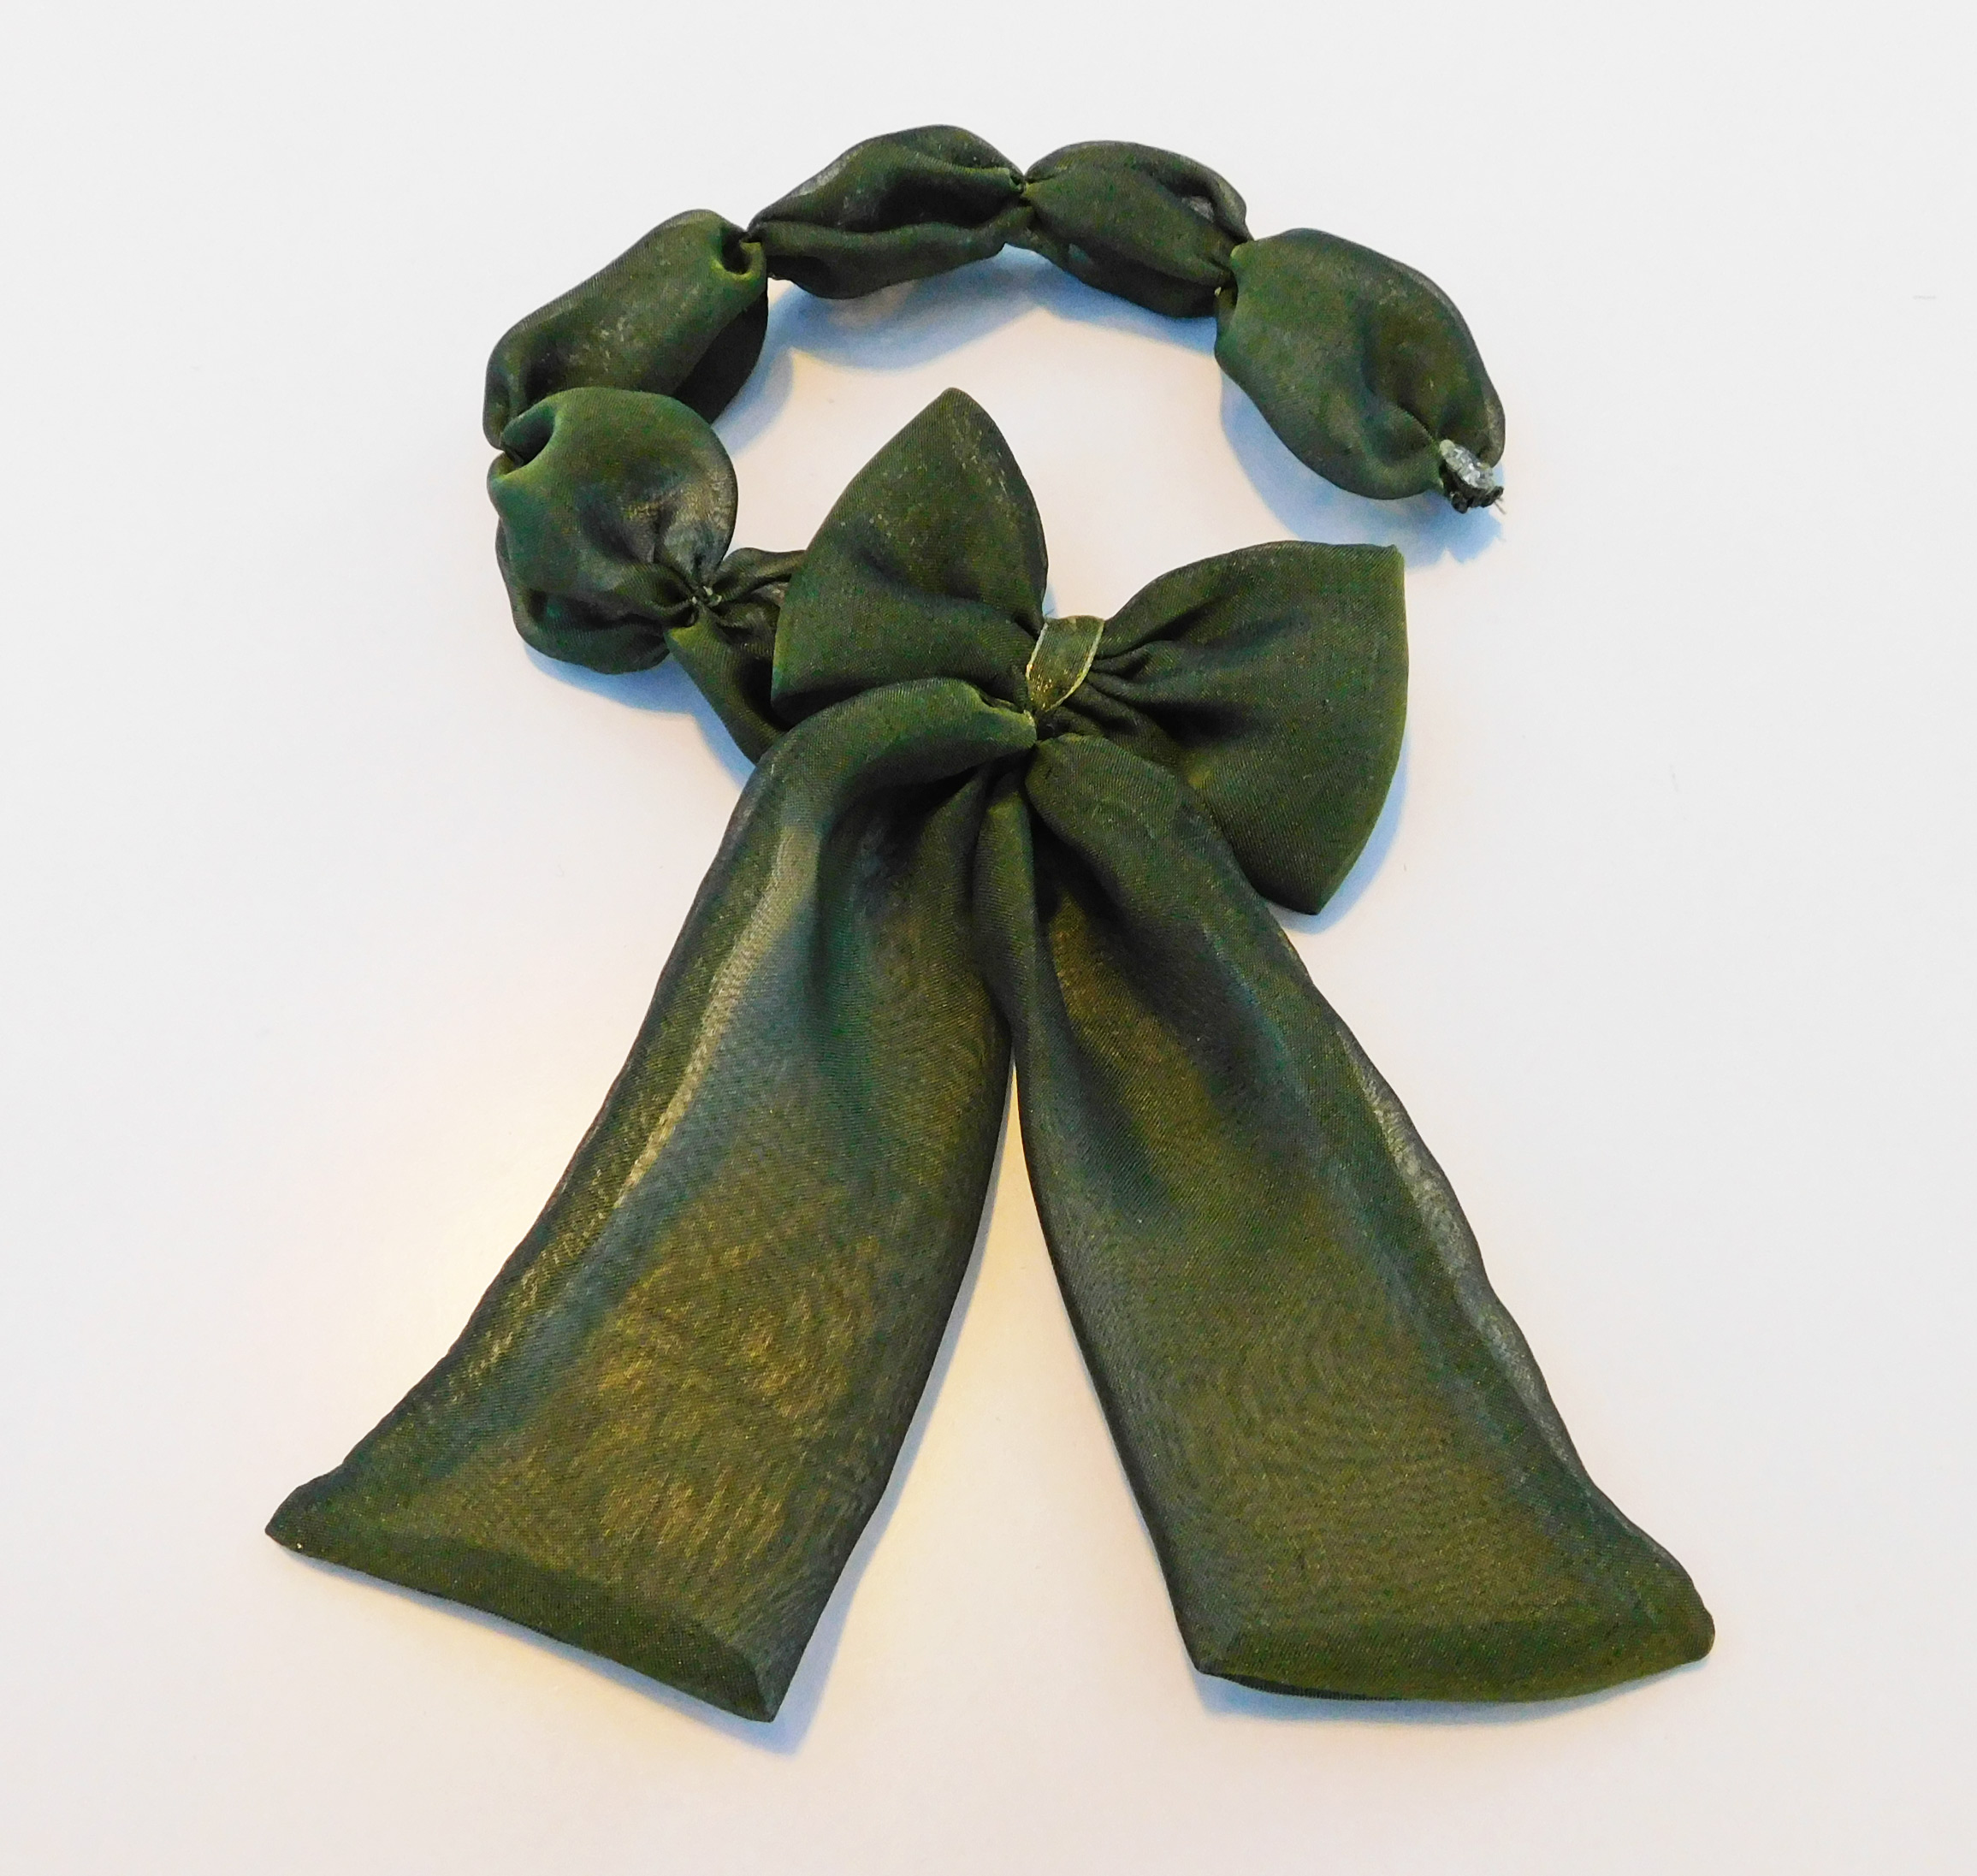
Sash & Bow
Once the sash was assembled, I carefully snipped the stems off a few of my miniature roses and glued them to the silk chiffon.
Unfortunately, when I fastened the sash around the skirt, I found that the roses were too big. They looked oversized for the scale of the doll. The glue hadn’t fully set, so I very, very carefully peeled each flower off, then removed the leaves and outer layer of petals to make the roses smaller. In the photo below, you can see a comparison of the whole roses (top) versus the stripped ones (bottom). The difference may look subtle, but reducing the scale makes a huge difference in the overall look of the costume.

Mini Roses, Whole & Stripped
Accessories
One of the reasons this project took so long was because I couldn’t find any doll-sized pointe shoes in pale pink. The only ones I could find were bright, vibrant colors that wouldn’t work at all. I’d resigned myself to the fact that I would probably never be able to make this costume, but every so often, I checked eBay, just in case. One day, I actually found a pair! The price was reasonable and the color was perfect, so I snatched them up.
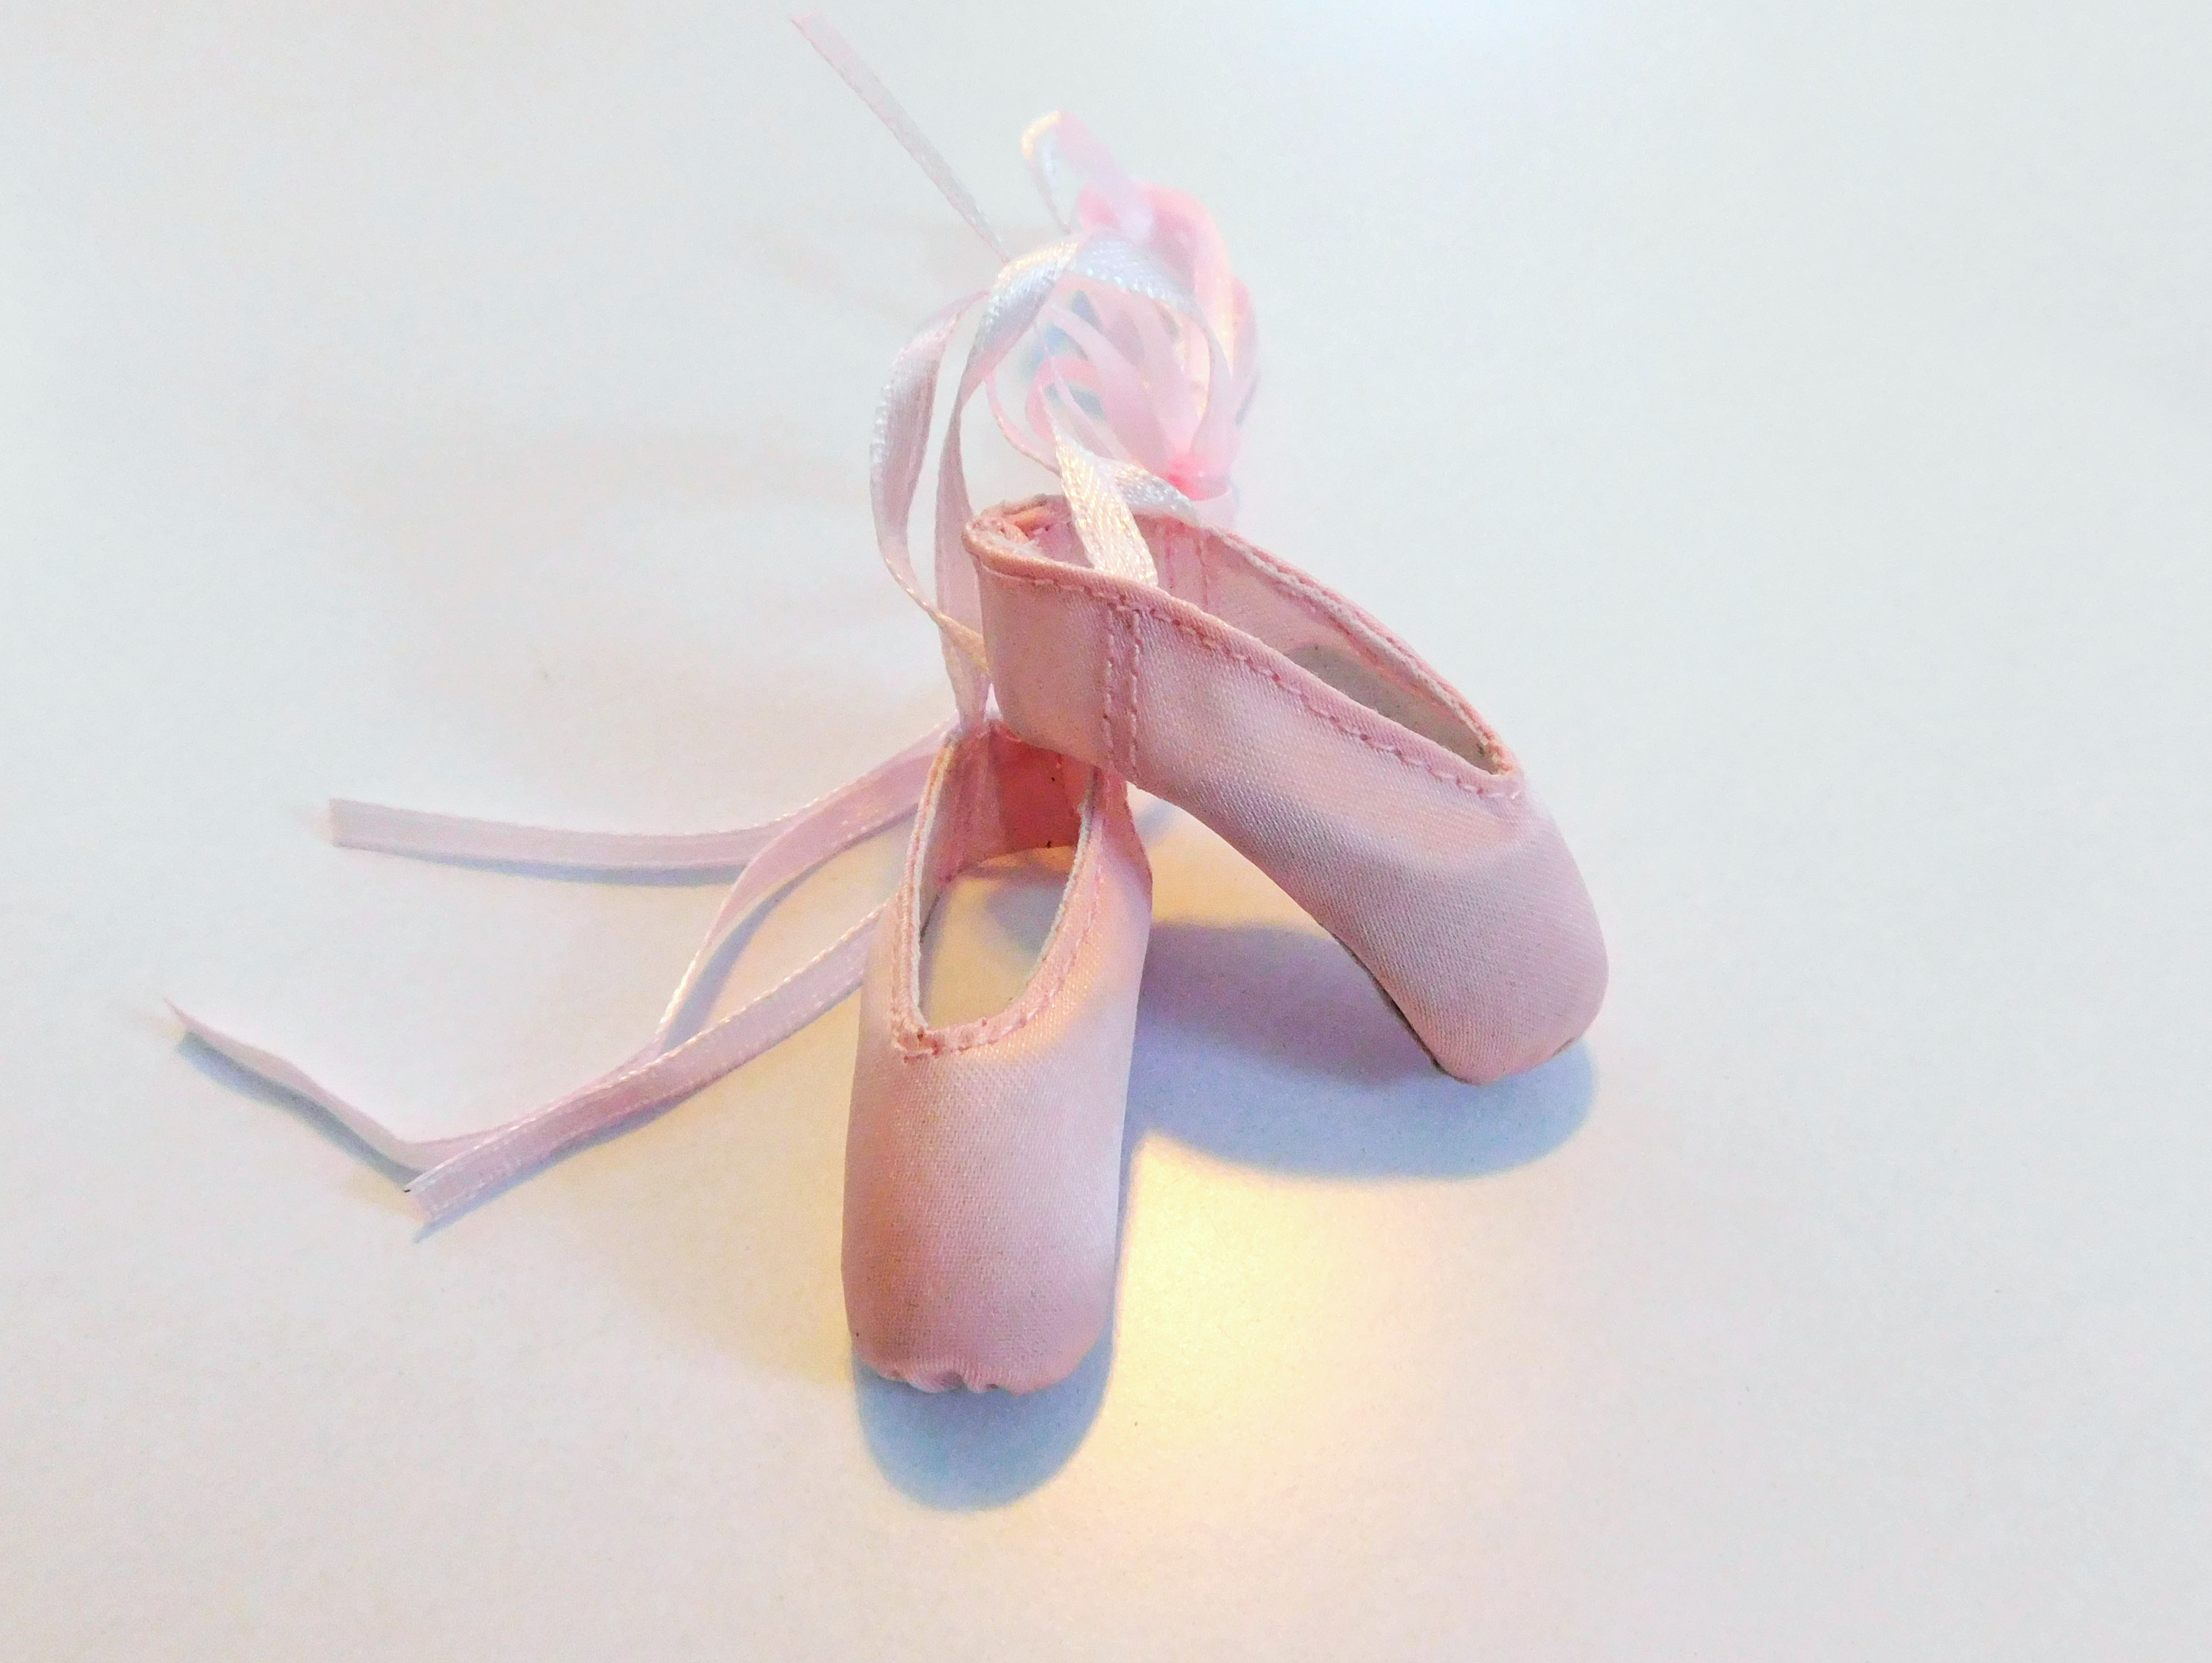
Doll-Sized Pointe Shoes
I’ve made doll-sized bridal wreaths before, so the headpiece was fairly easy. I just had to choose which color of miniature roses to use, remove the leaves and outer petals, and then twist their stems together to form a half-circle that fits over the doll’s wig.

Floral Headpiece
Next, I had to make the large wreath, which serves as a prop during the ballet. I used a thin armature wire for the base, then wove the flowers around it. Rather than using all one color, I alternated between white, pink, ivory, and pale yellow. The result is a bit more uniform than I would’ve liked, probably because each flower is the same size. If I had to do it over again, I’d strip a few of the flowers, making them smaller, for more variety.
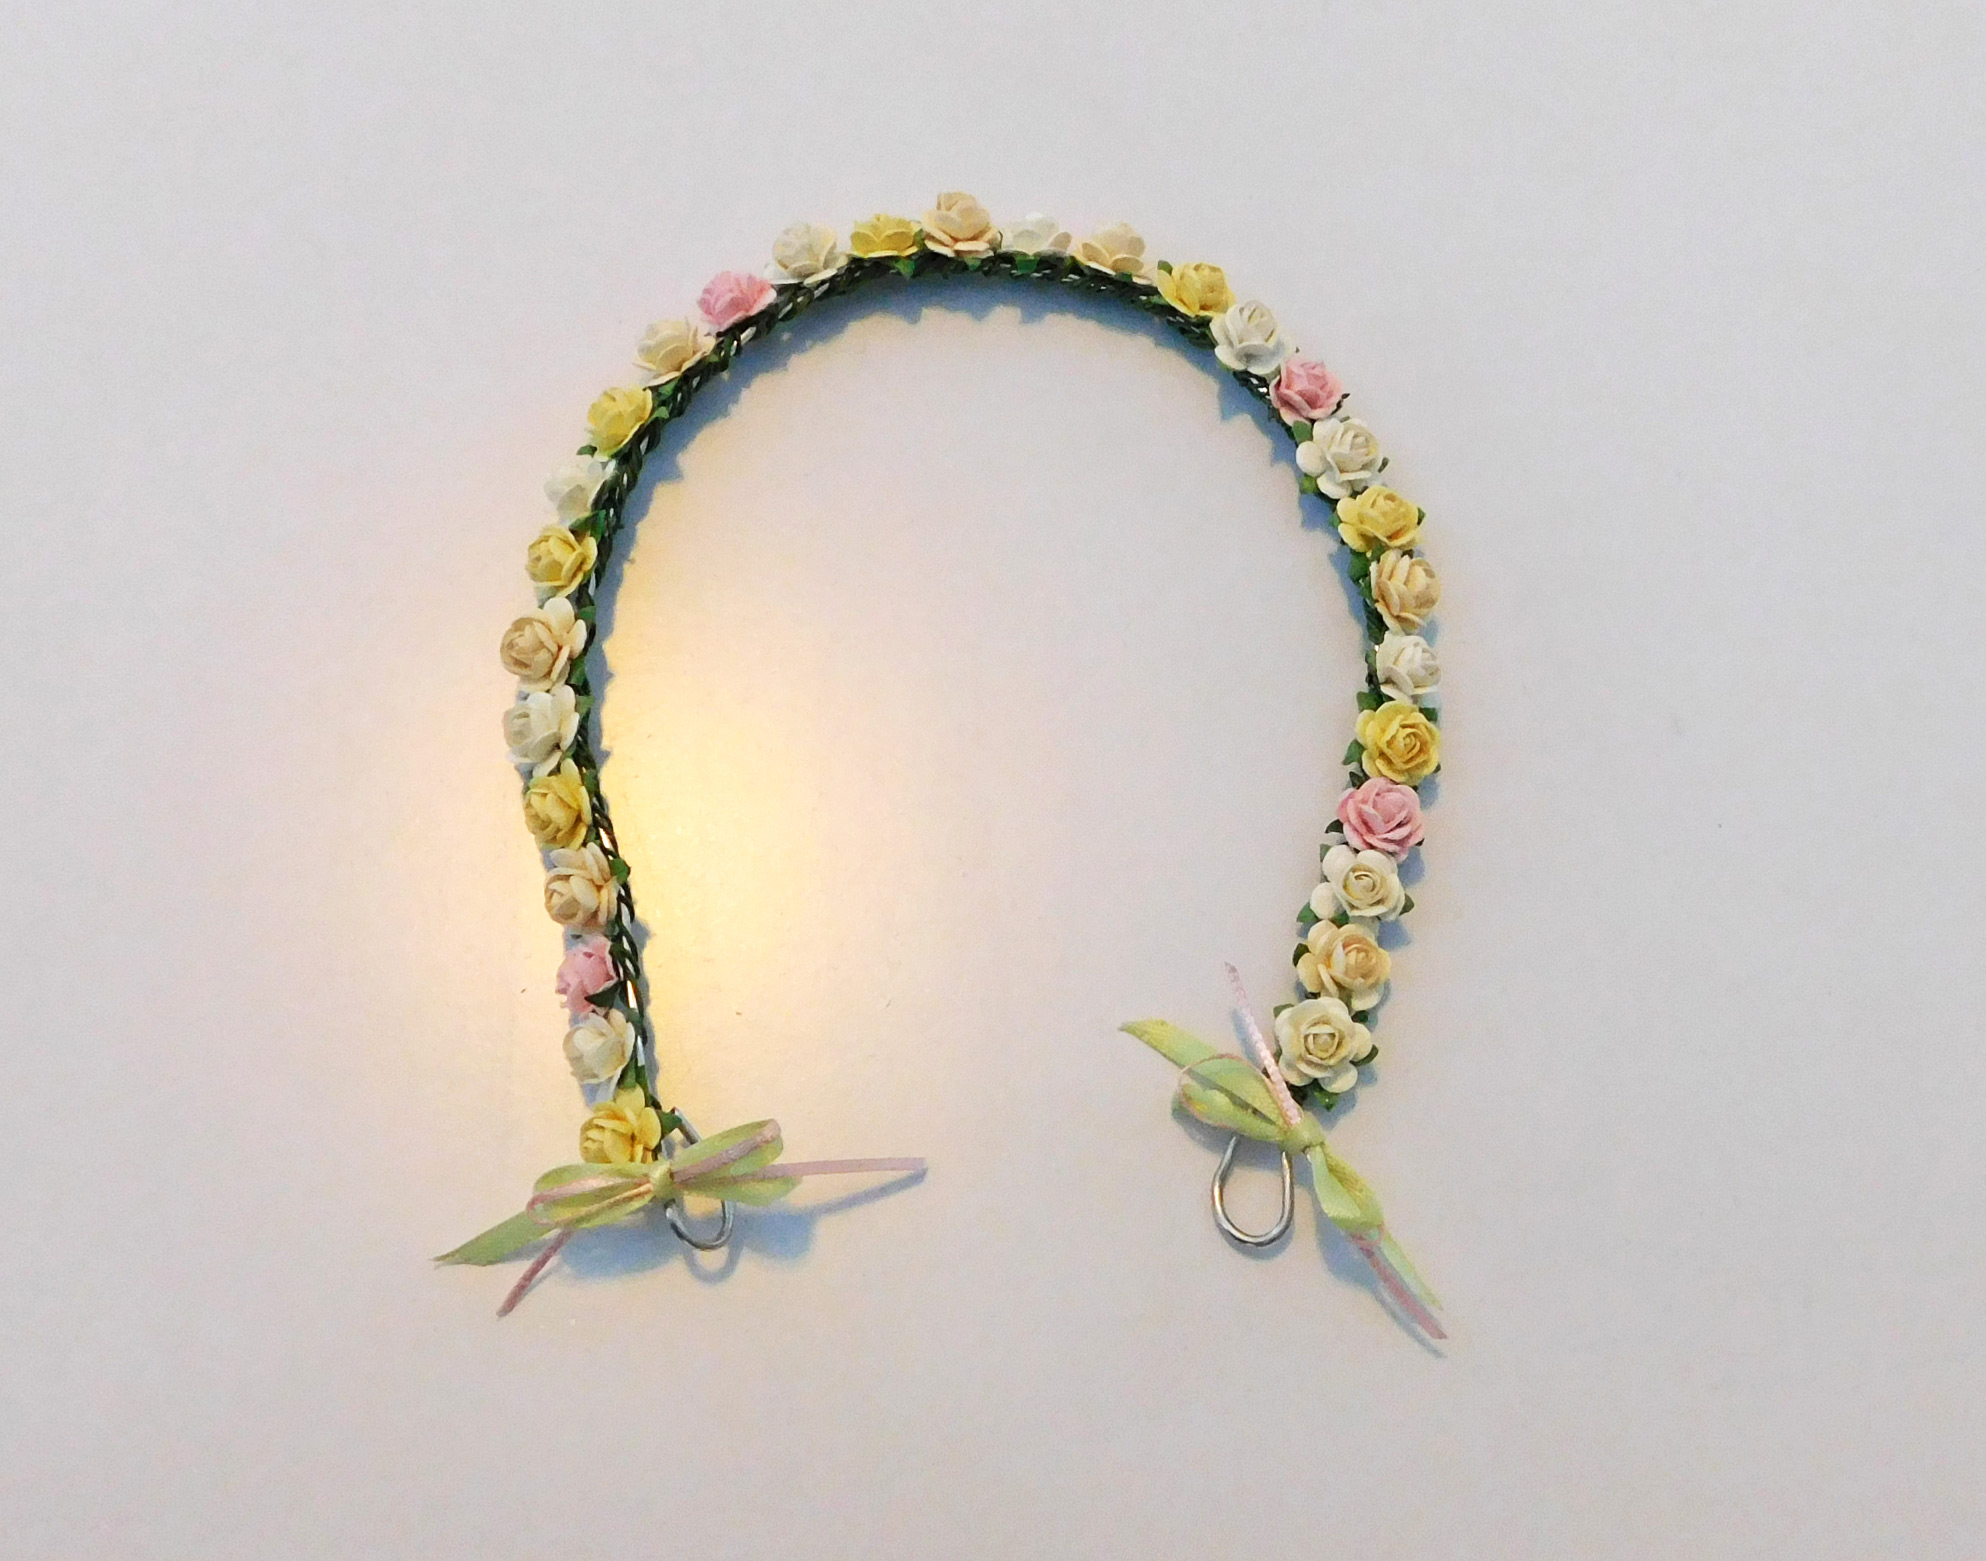
Floral Wreath
Conclusion
This project has been a long time coming. I started planning it several years ago, so to finally see it come to fruition has been amazing! There are things I would do differently, in hindsight, but isn’t that always the case? Overall, I’m thrilled with this ballet outfit and pleased to add it to my collection of doll-sized costumes from The Phantom of the Opera.
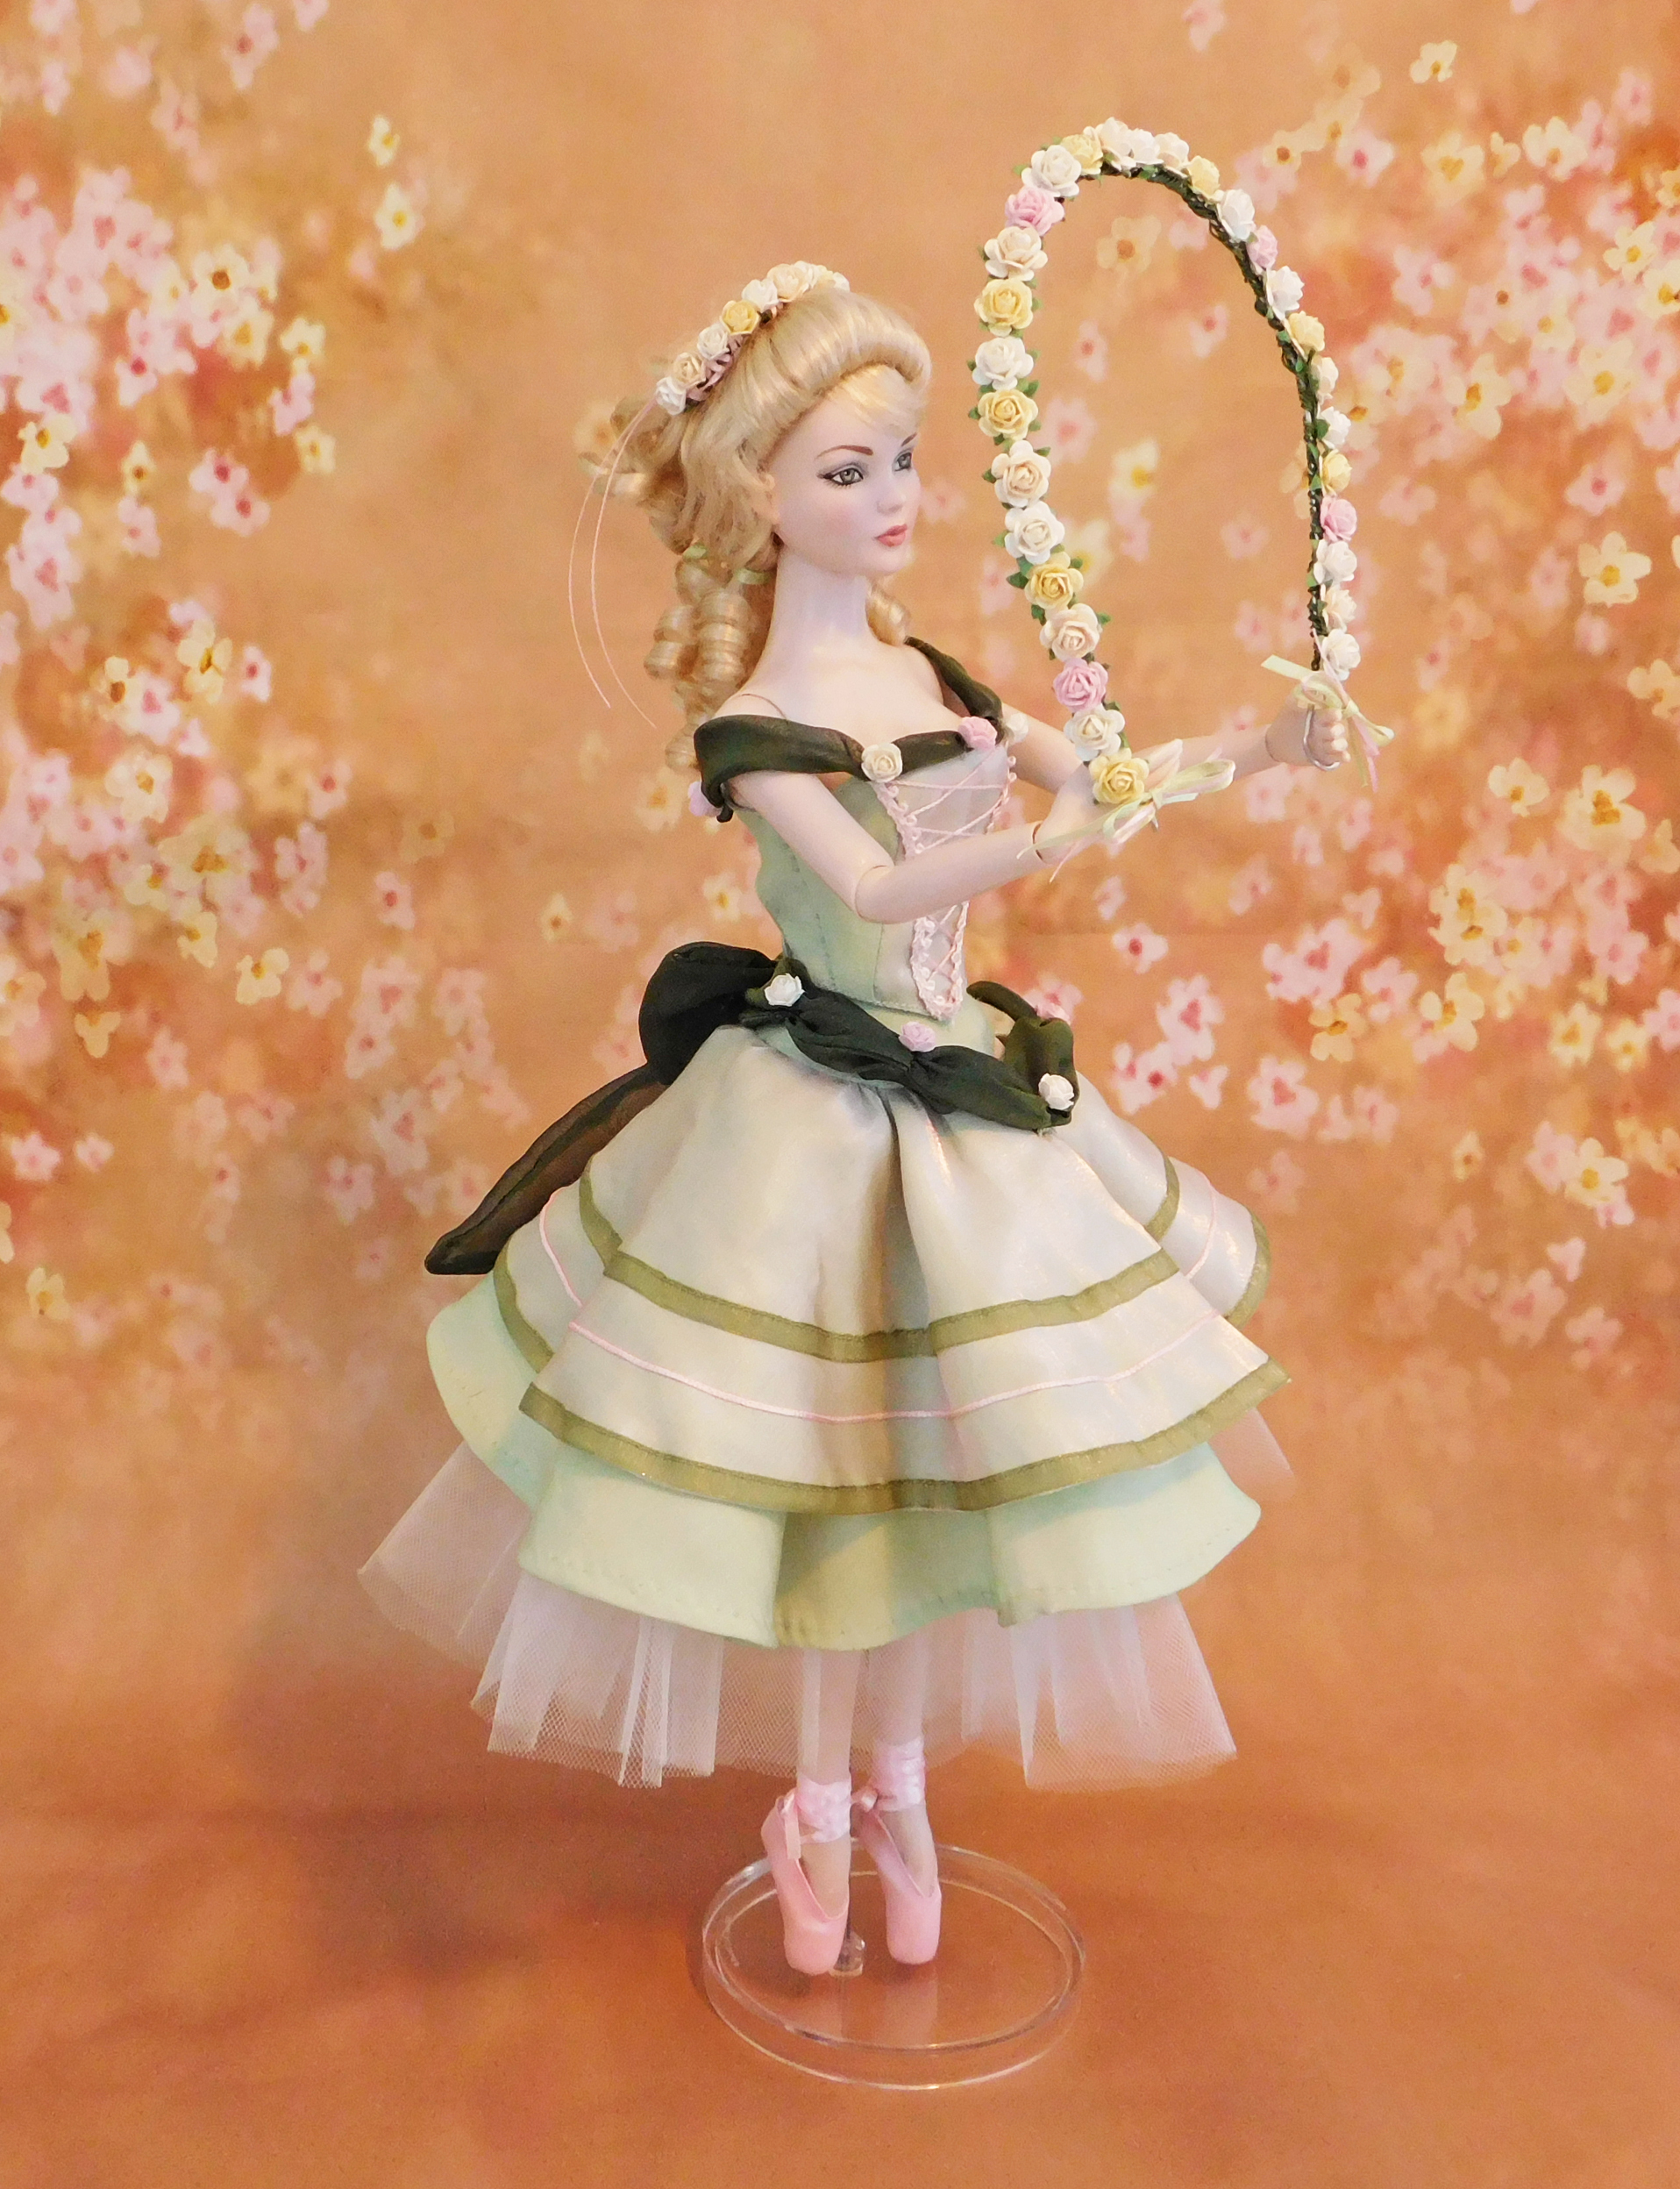
Finished Il Muto Ballet Costume
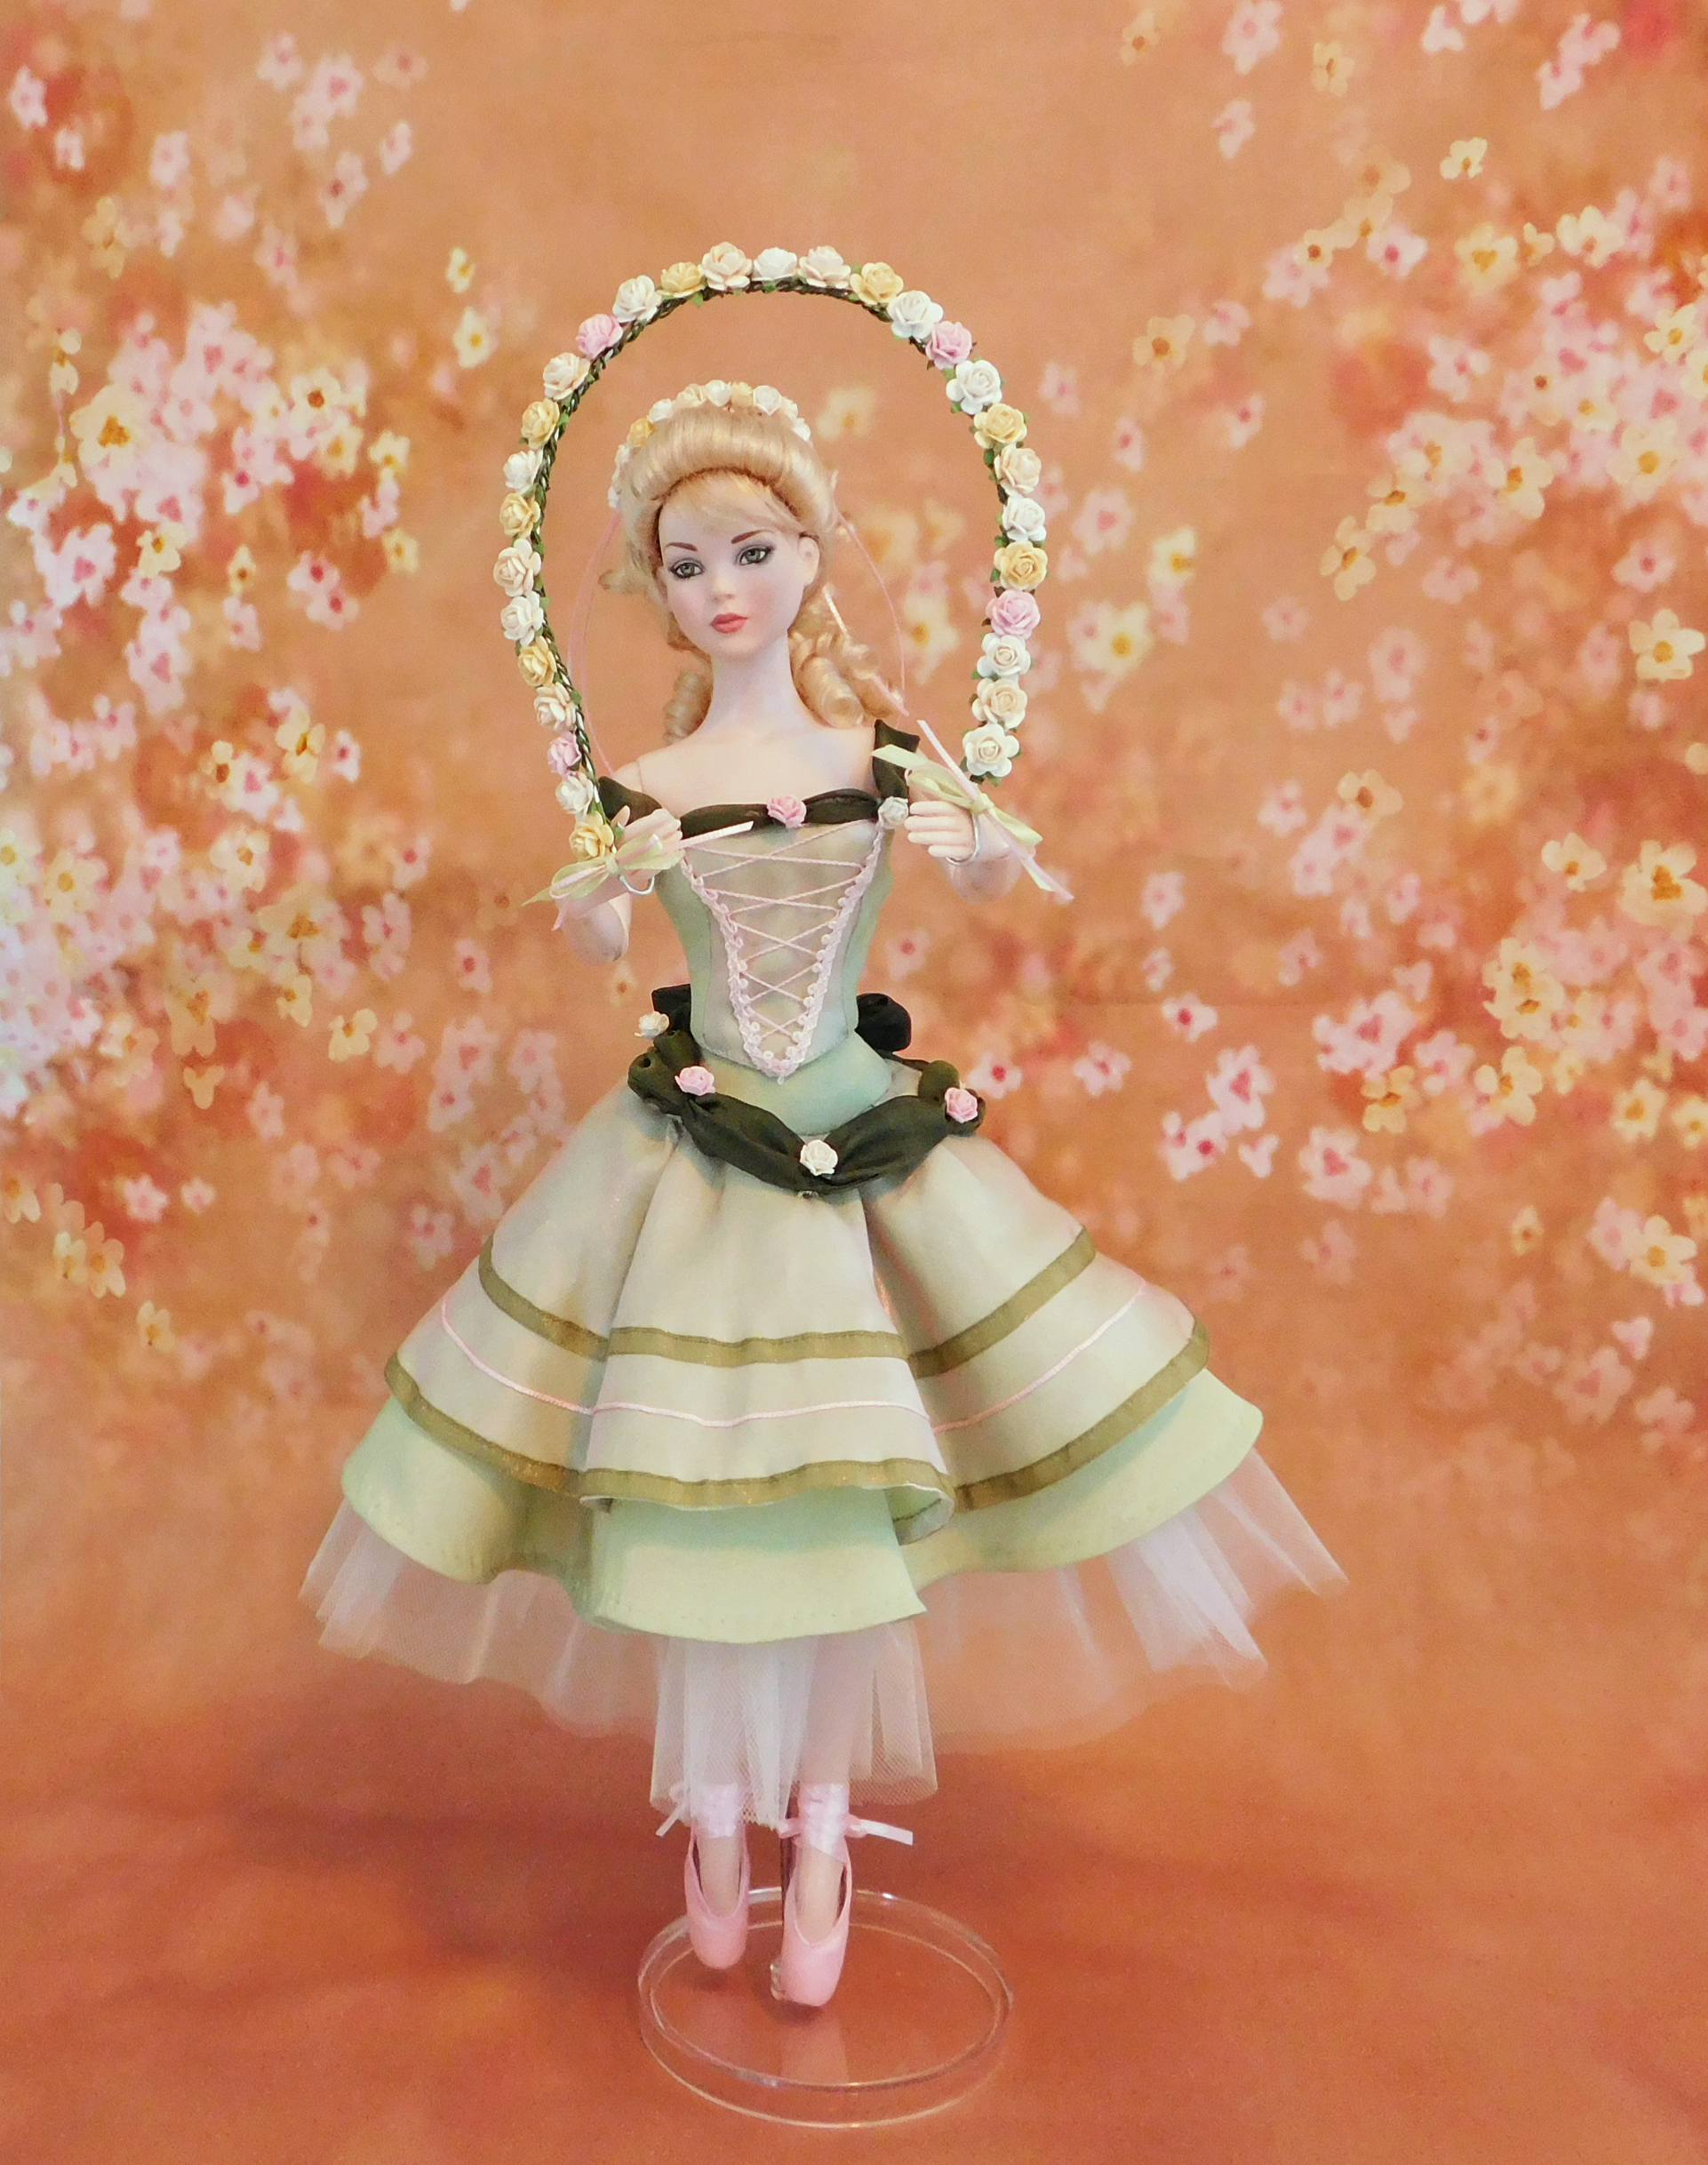
Il Muto Ballet Costume (Front)
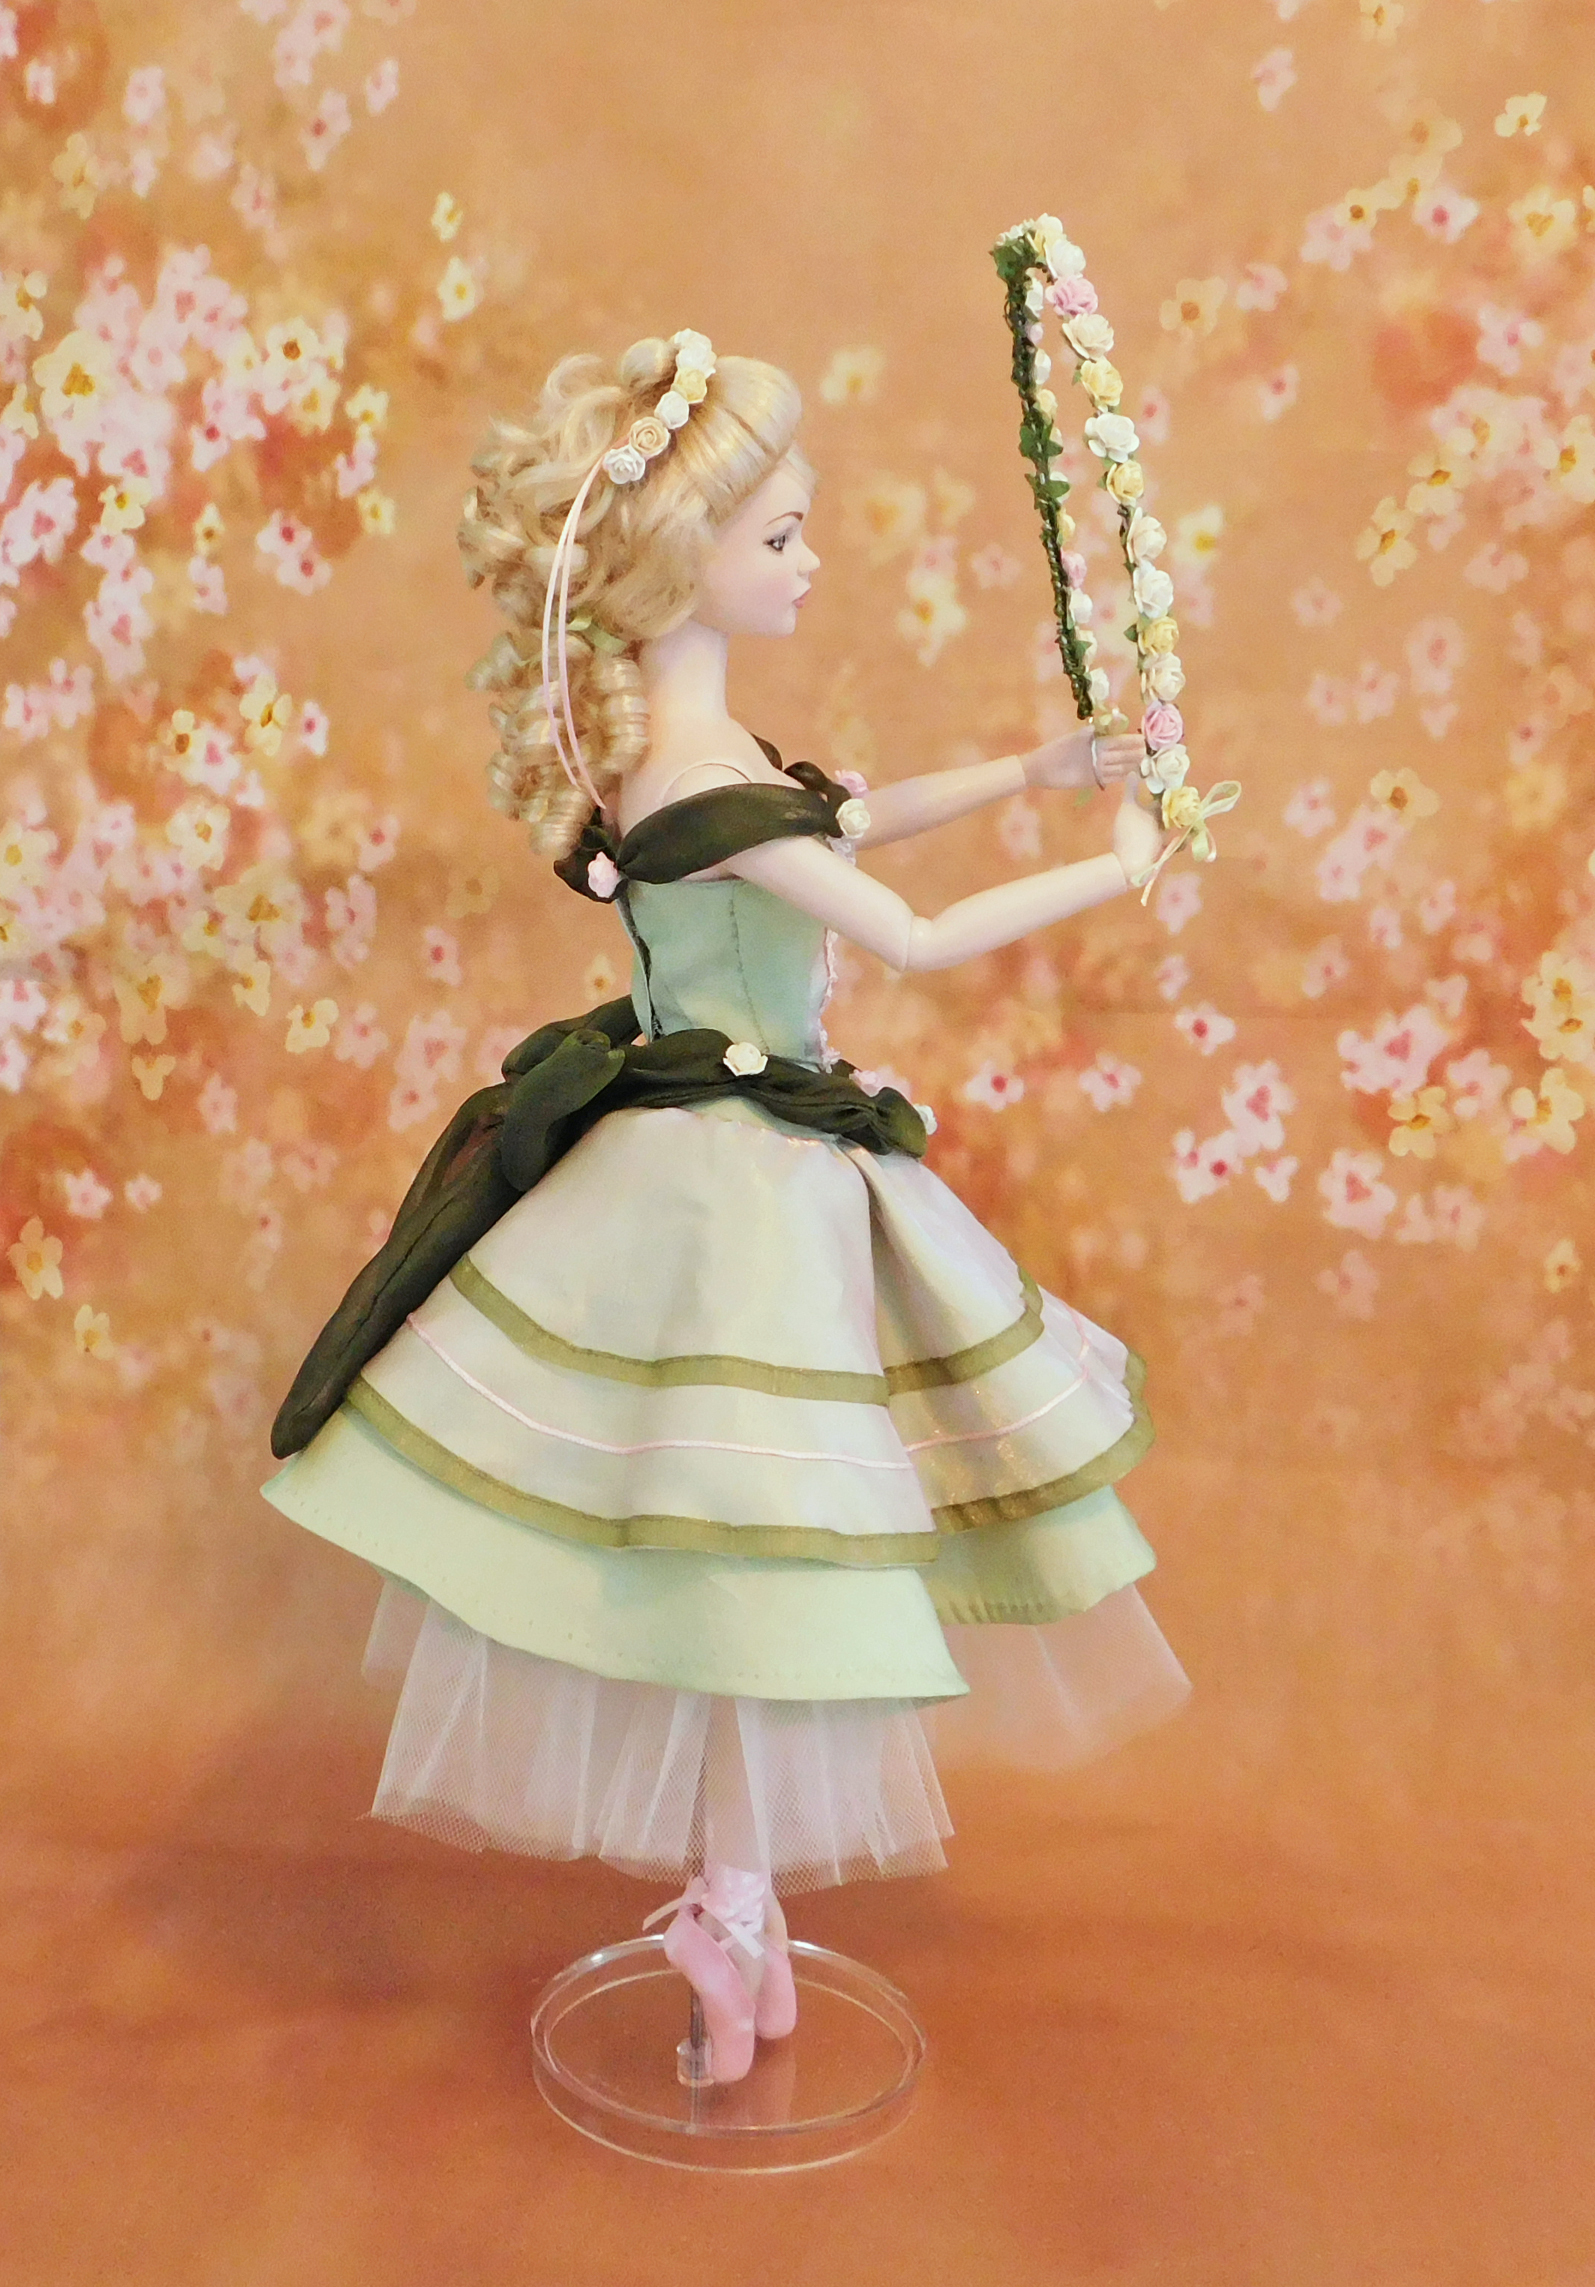
Il Muto Ballet Costume (Side)
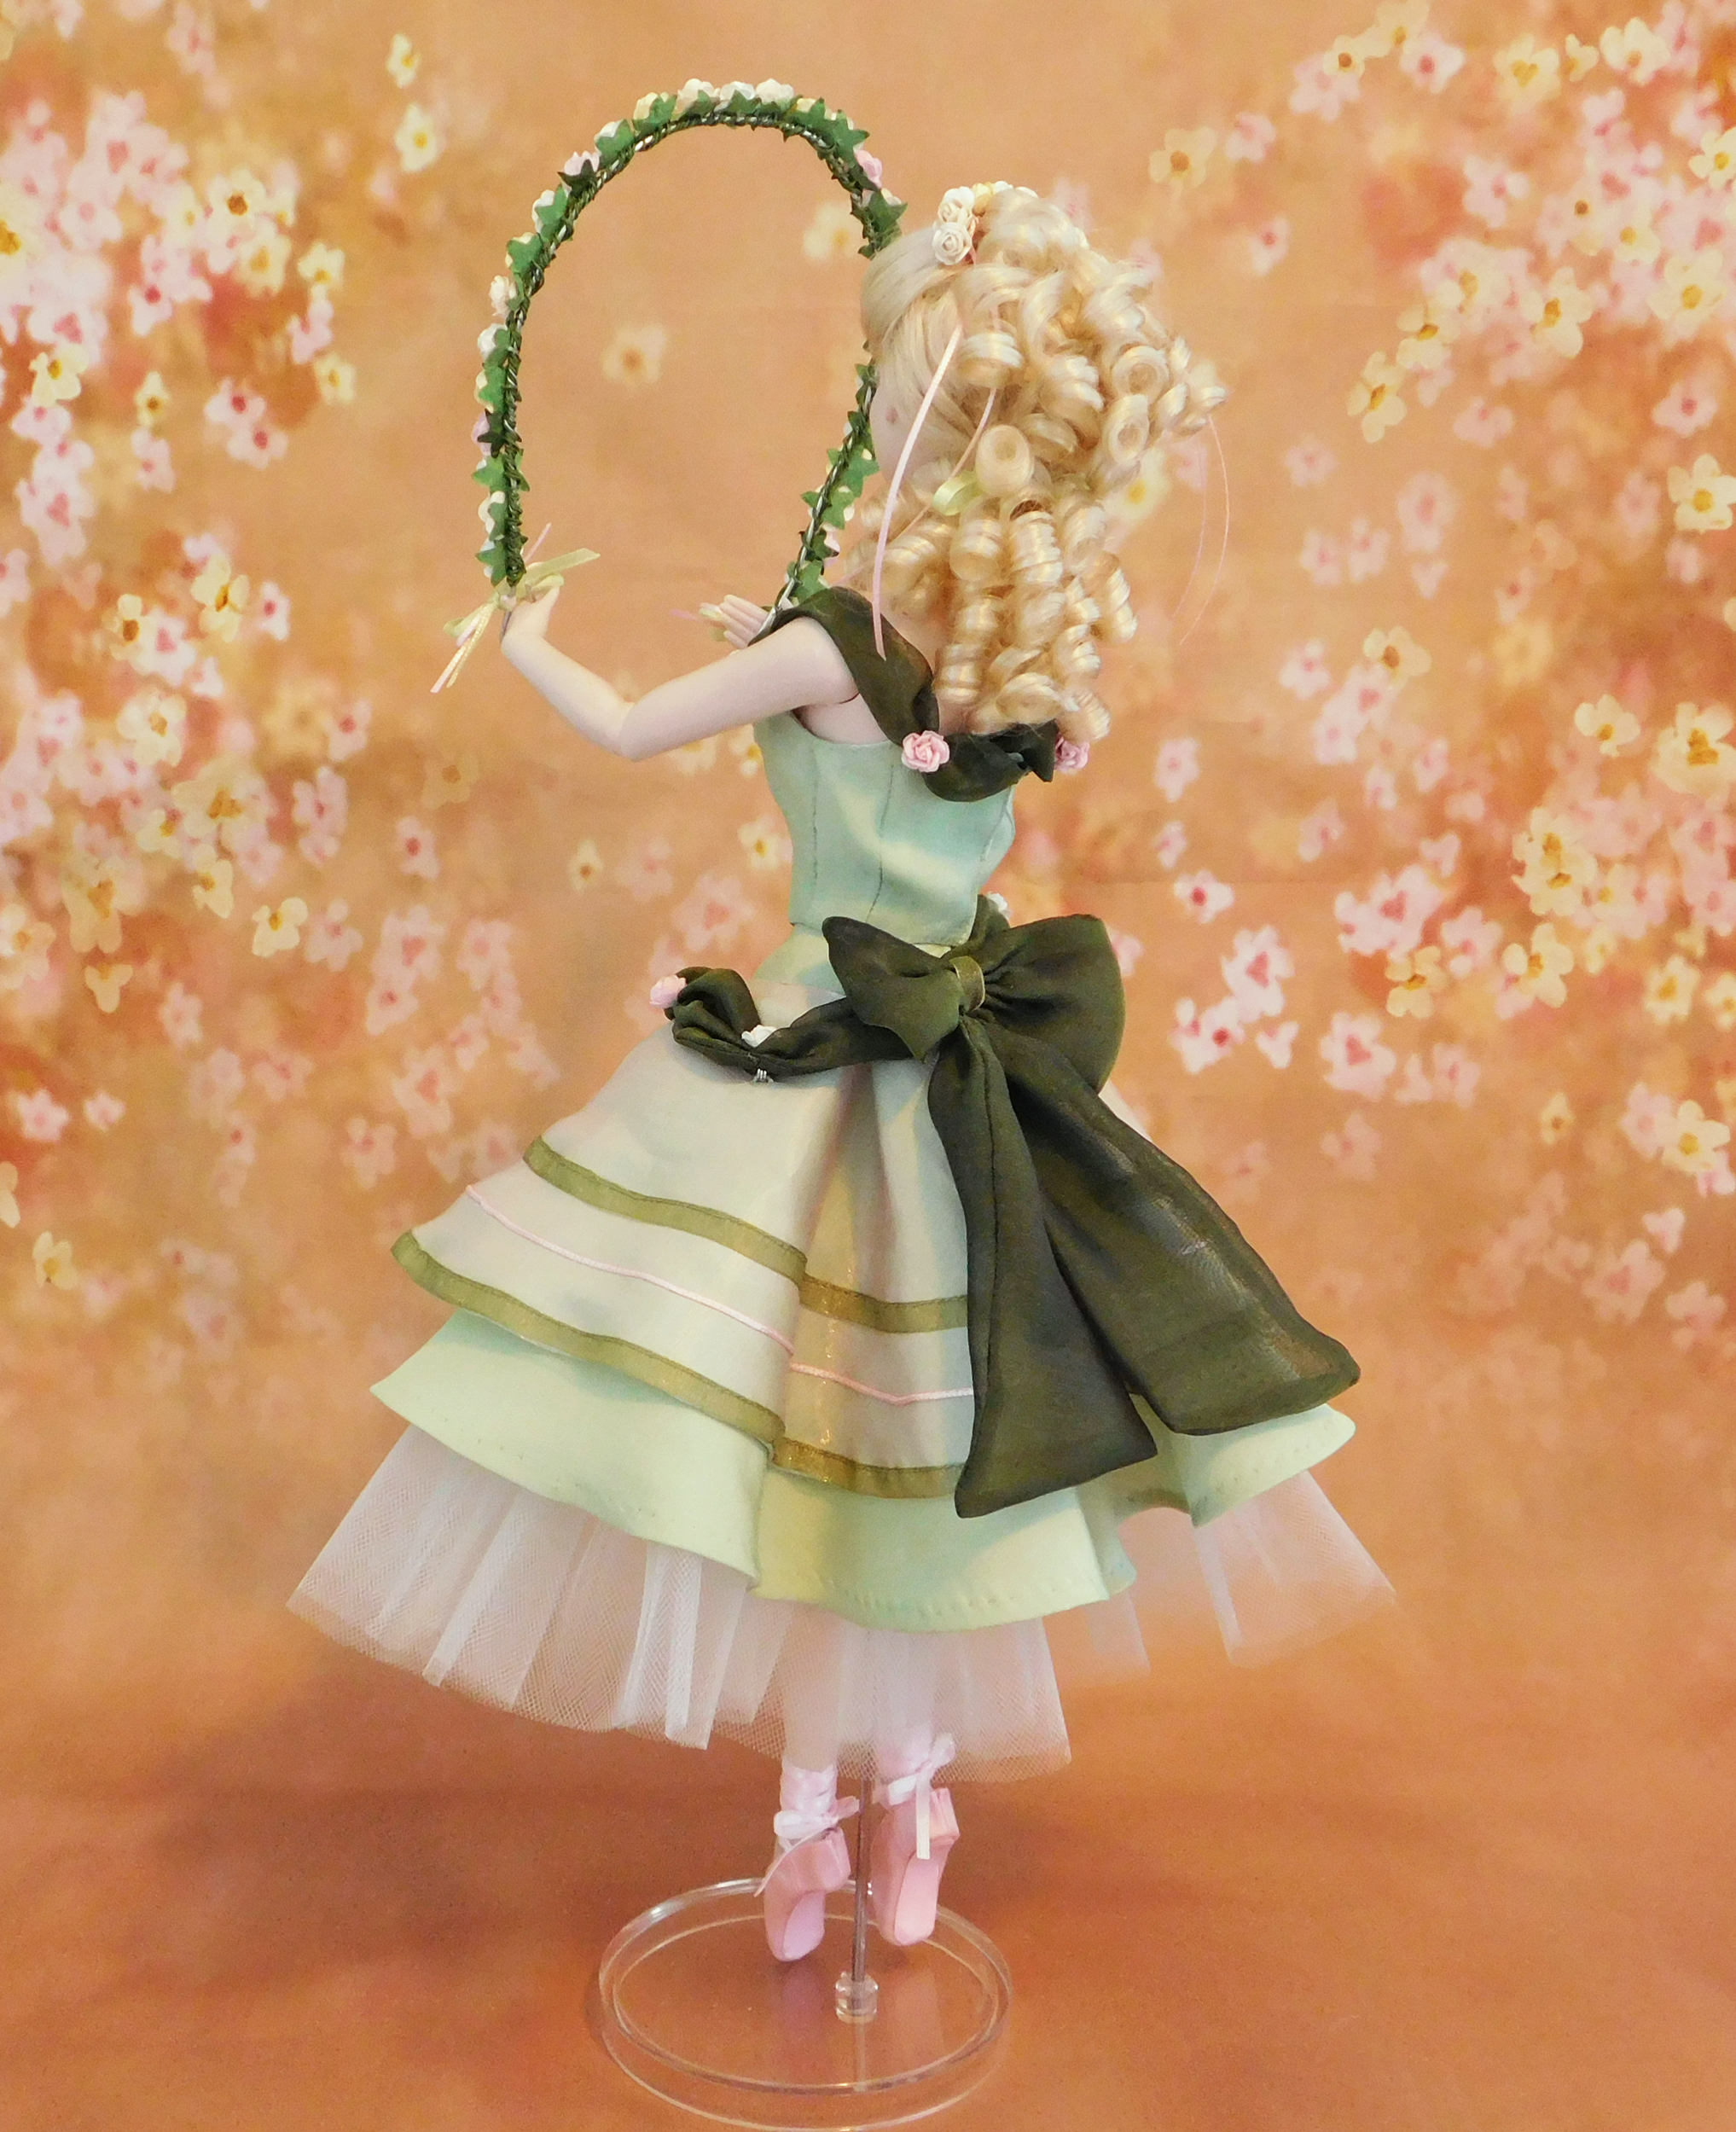
Il Muto Ballet Costume (Back)

Il Muto Ballet Costume
~~*~~
Looking for more? Try our Sewing Diaries. You might also enjoy our sewing Tutorials and Articles.