
by Lisha Vidler
(This article was first published at Your Wardrobe Unlock’d.)
Unless your garment is fully lined, it’s important to finish the seam allowances so the raw edges don’t fray. Unfortunately, most patterns omit this vital step, leaving many novice dressmakers in the dark. Let’s take a look at seven different techniques for neatly finishing your seams. These range from quick-and-easy beginner’s techniques to advanced couture methods, so there’s something for everyone, regardless of skill level.
(Click any photo to view the full-sized image.)
Seven Seam Finishes:
- French Seams
- Mock-French Seams
- Flat-Felled Seams
- Pinked Edges
- Zigzagged Edges
- Overlocked Edges
- Hong Kong Finish
#1. French Seams
This technique must be planned for ahead of time, since it requires sewing the seams in a different way than you normally would. It’s excellent for fine or sheer fabrics, such as voile, batiste, chiffon, organza, etc. It does not work well for curved seams, however, as you will be unable to clip or notch the curves. Feel free to adjust the size of the seam allowances for a finer seam, if you’re using an extremely lightweight fabric.
French Seam
To sew a French seam:
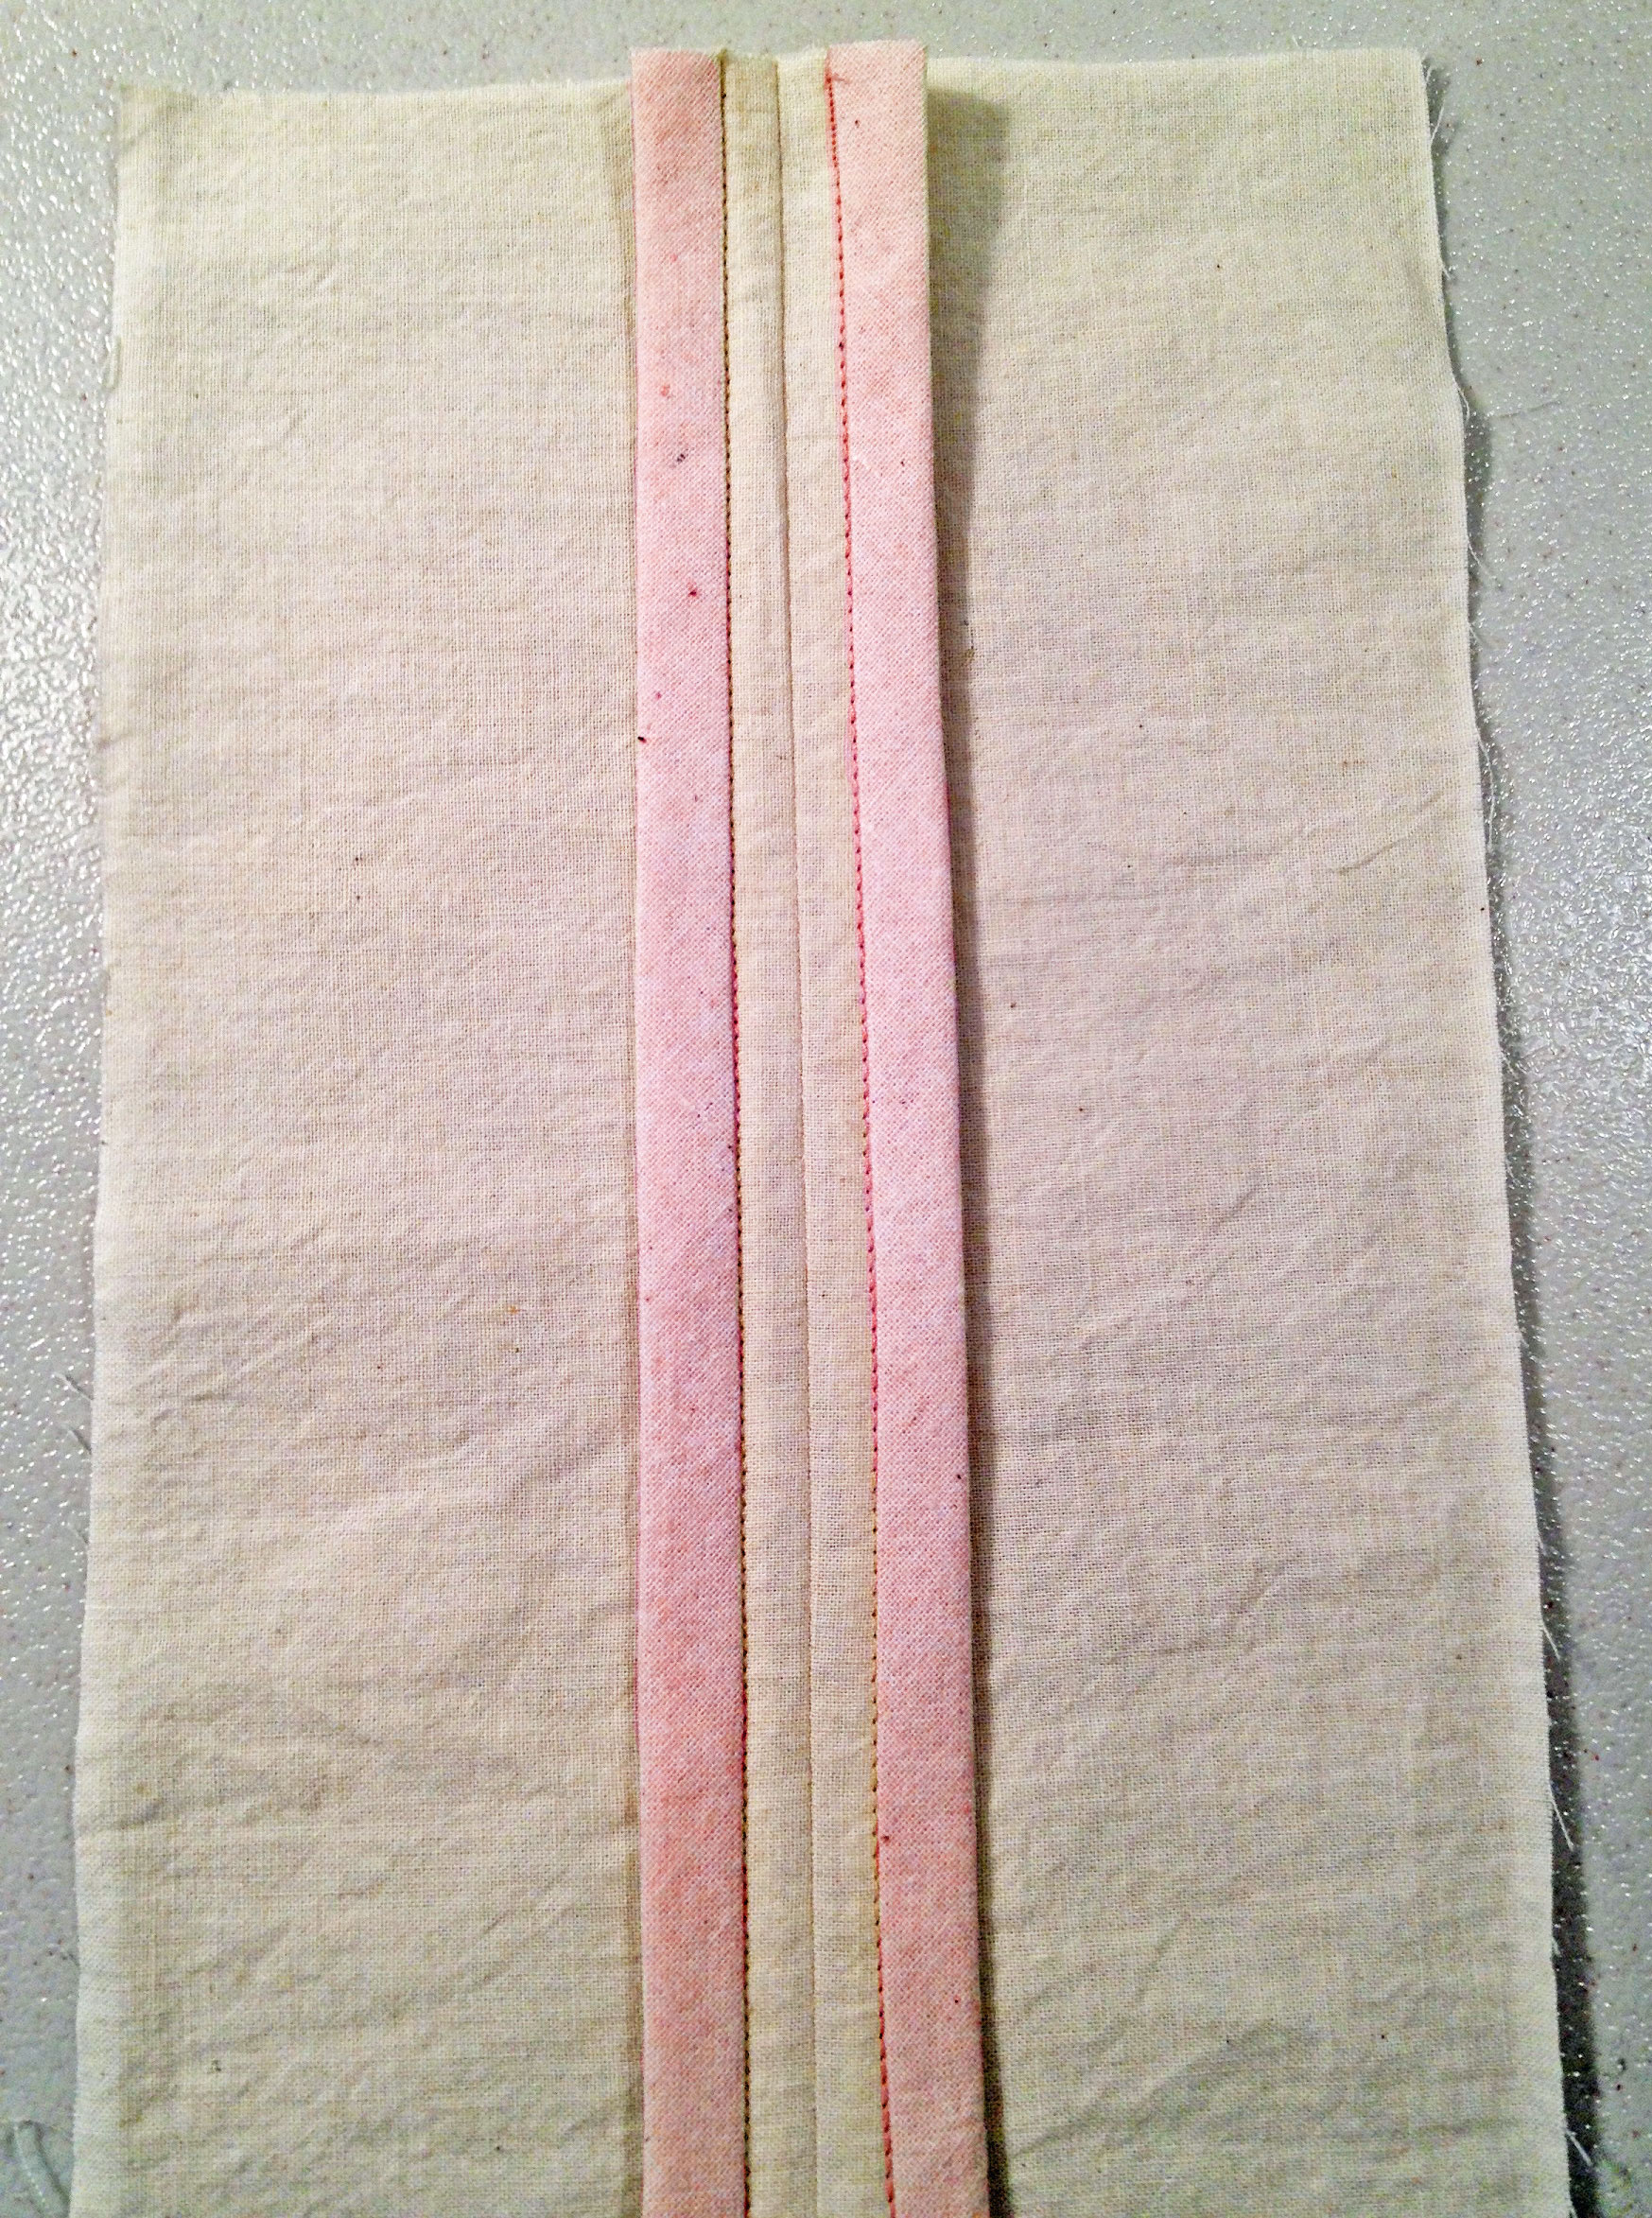
Place the fabric with wrong sides together. (This is the opposite of how you would normally sew a seam.)
Sew a 1/4″ seam. If you have one, you may use a 1/4″ quilter’s foot.
Sew a Narrow Seam, Wrong Sides Together
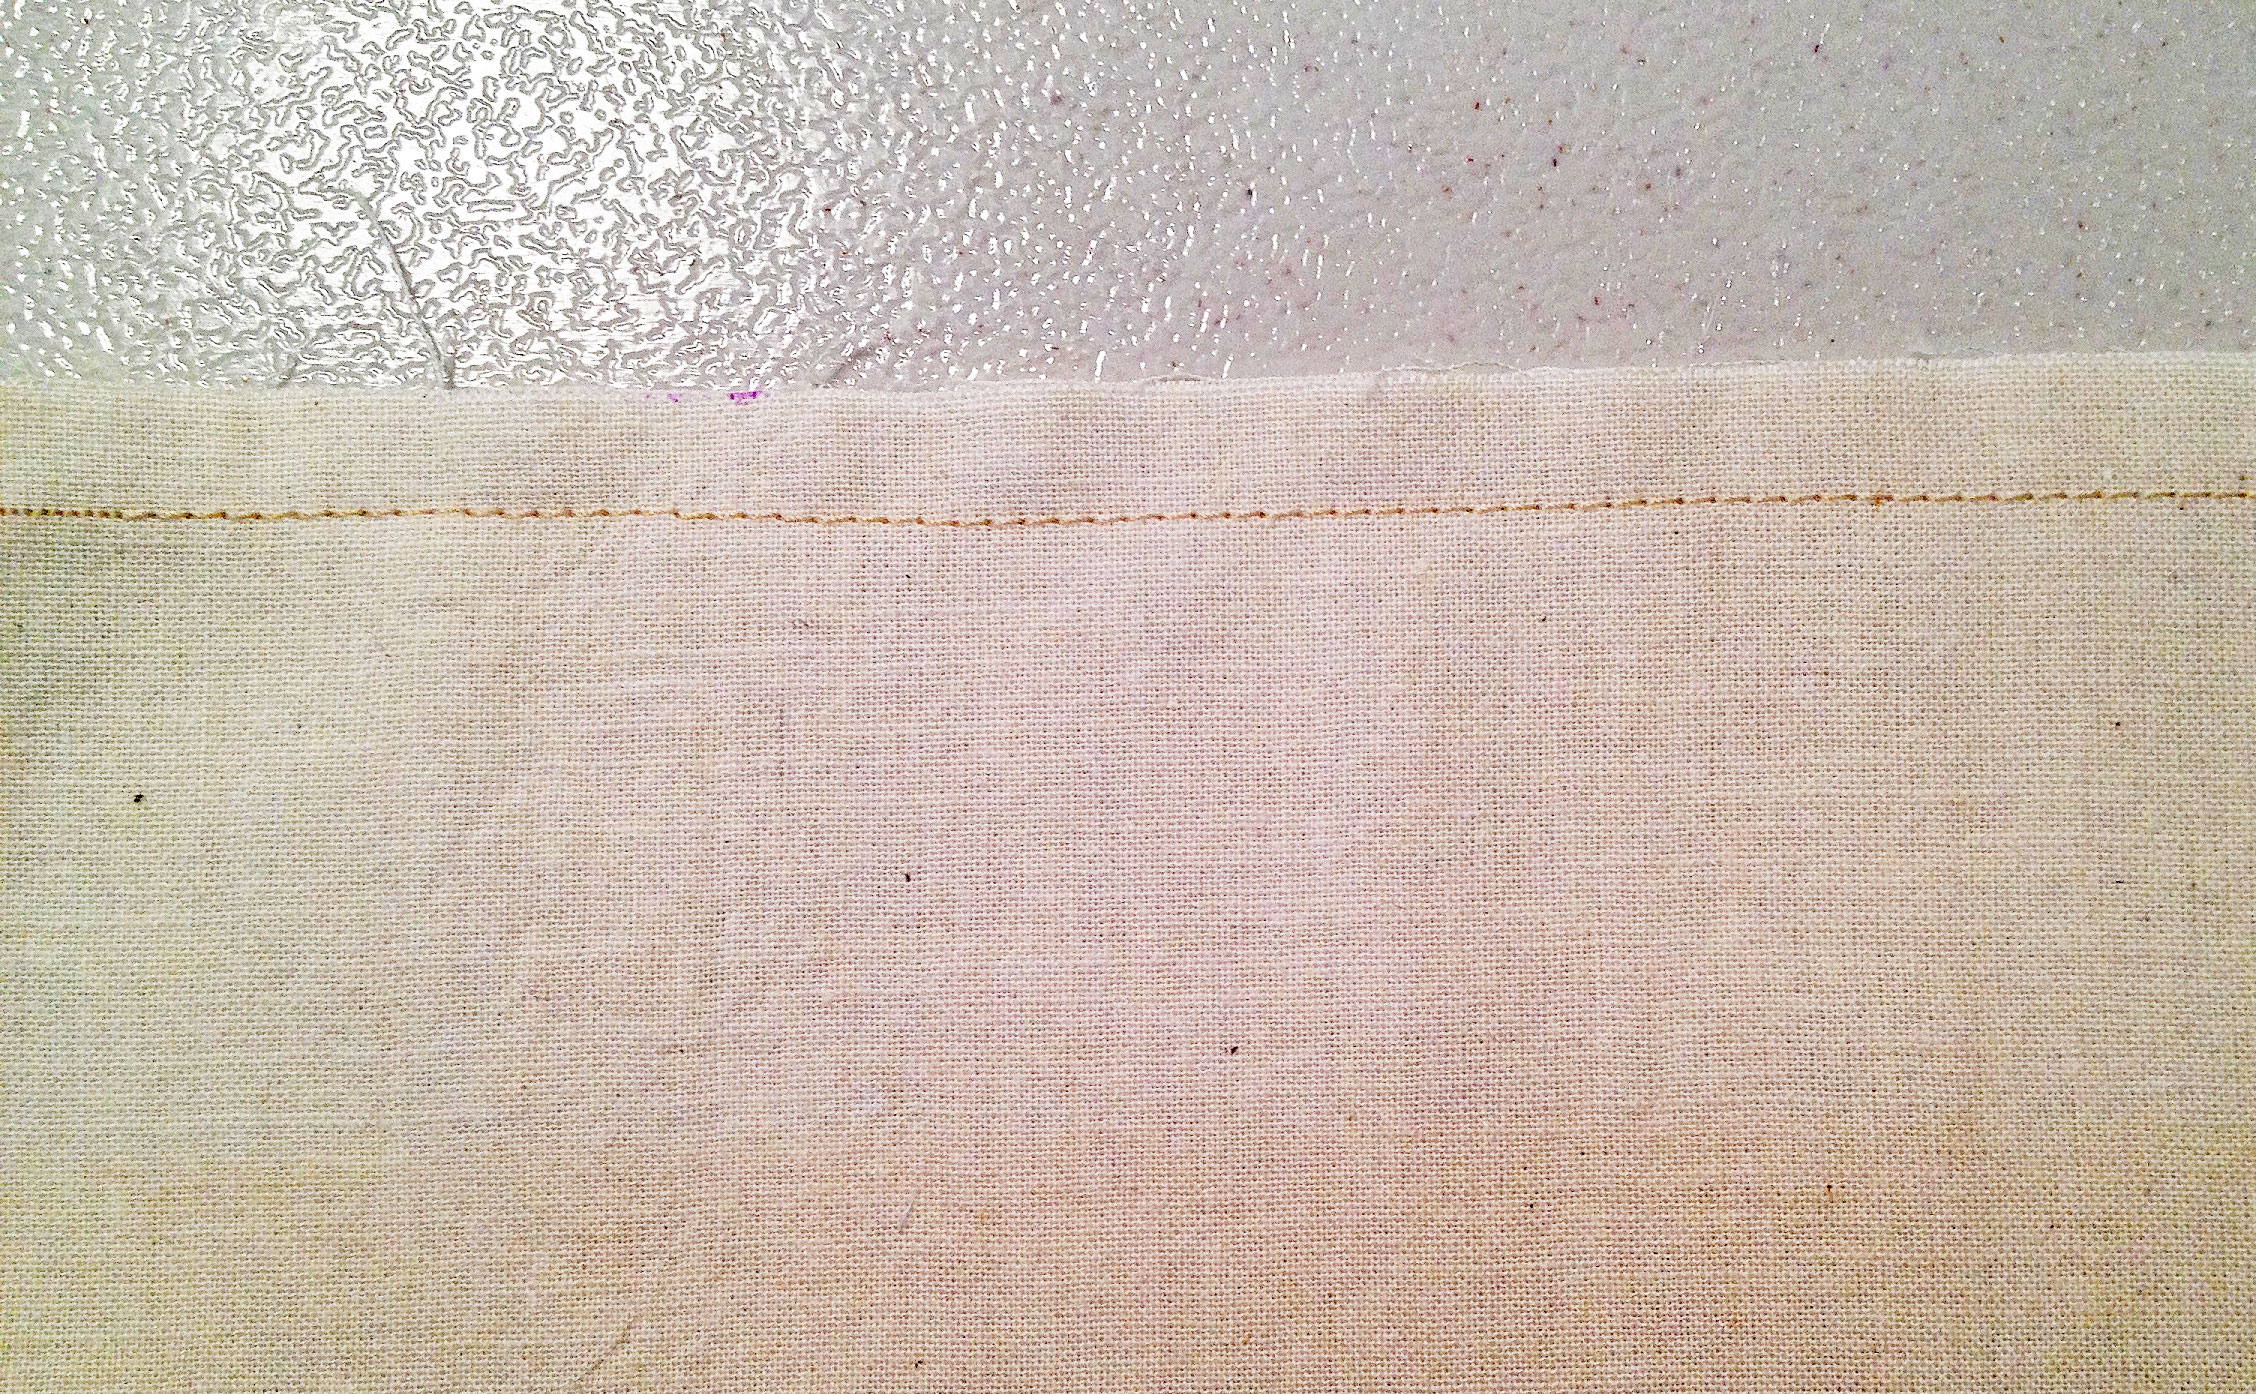
Press the seam allowance flat to meld the stitches, then press it open to flatten the seam. To ensure a truly flat seam, press from both sides of the fabric.

Press the Seam Open
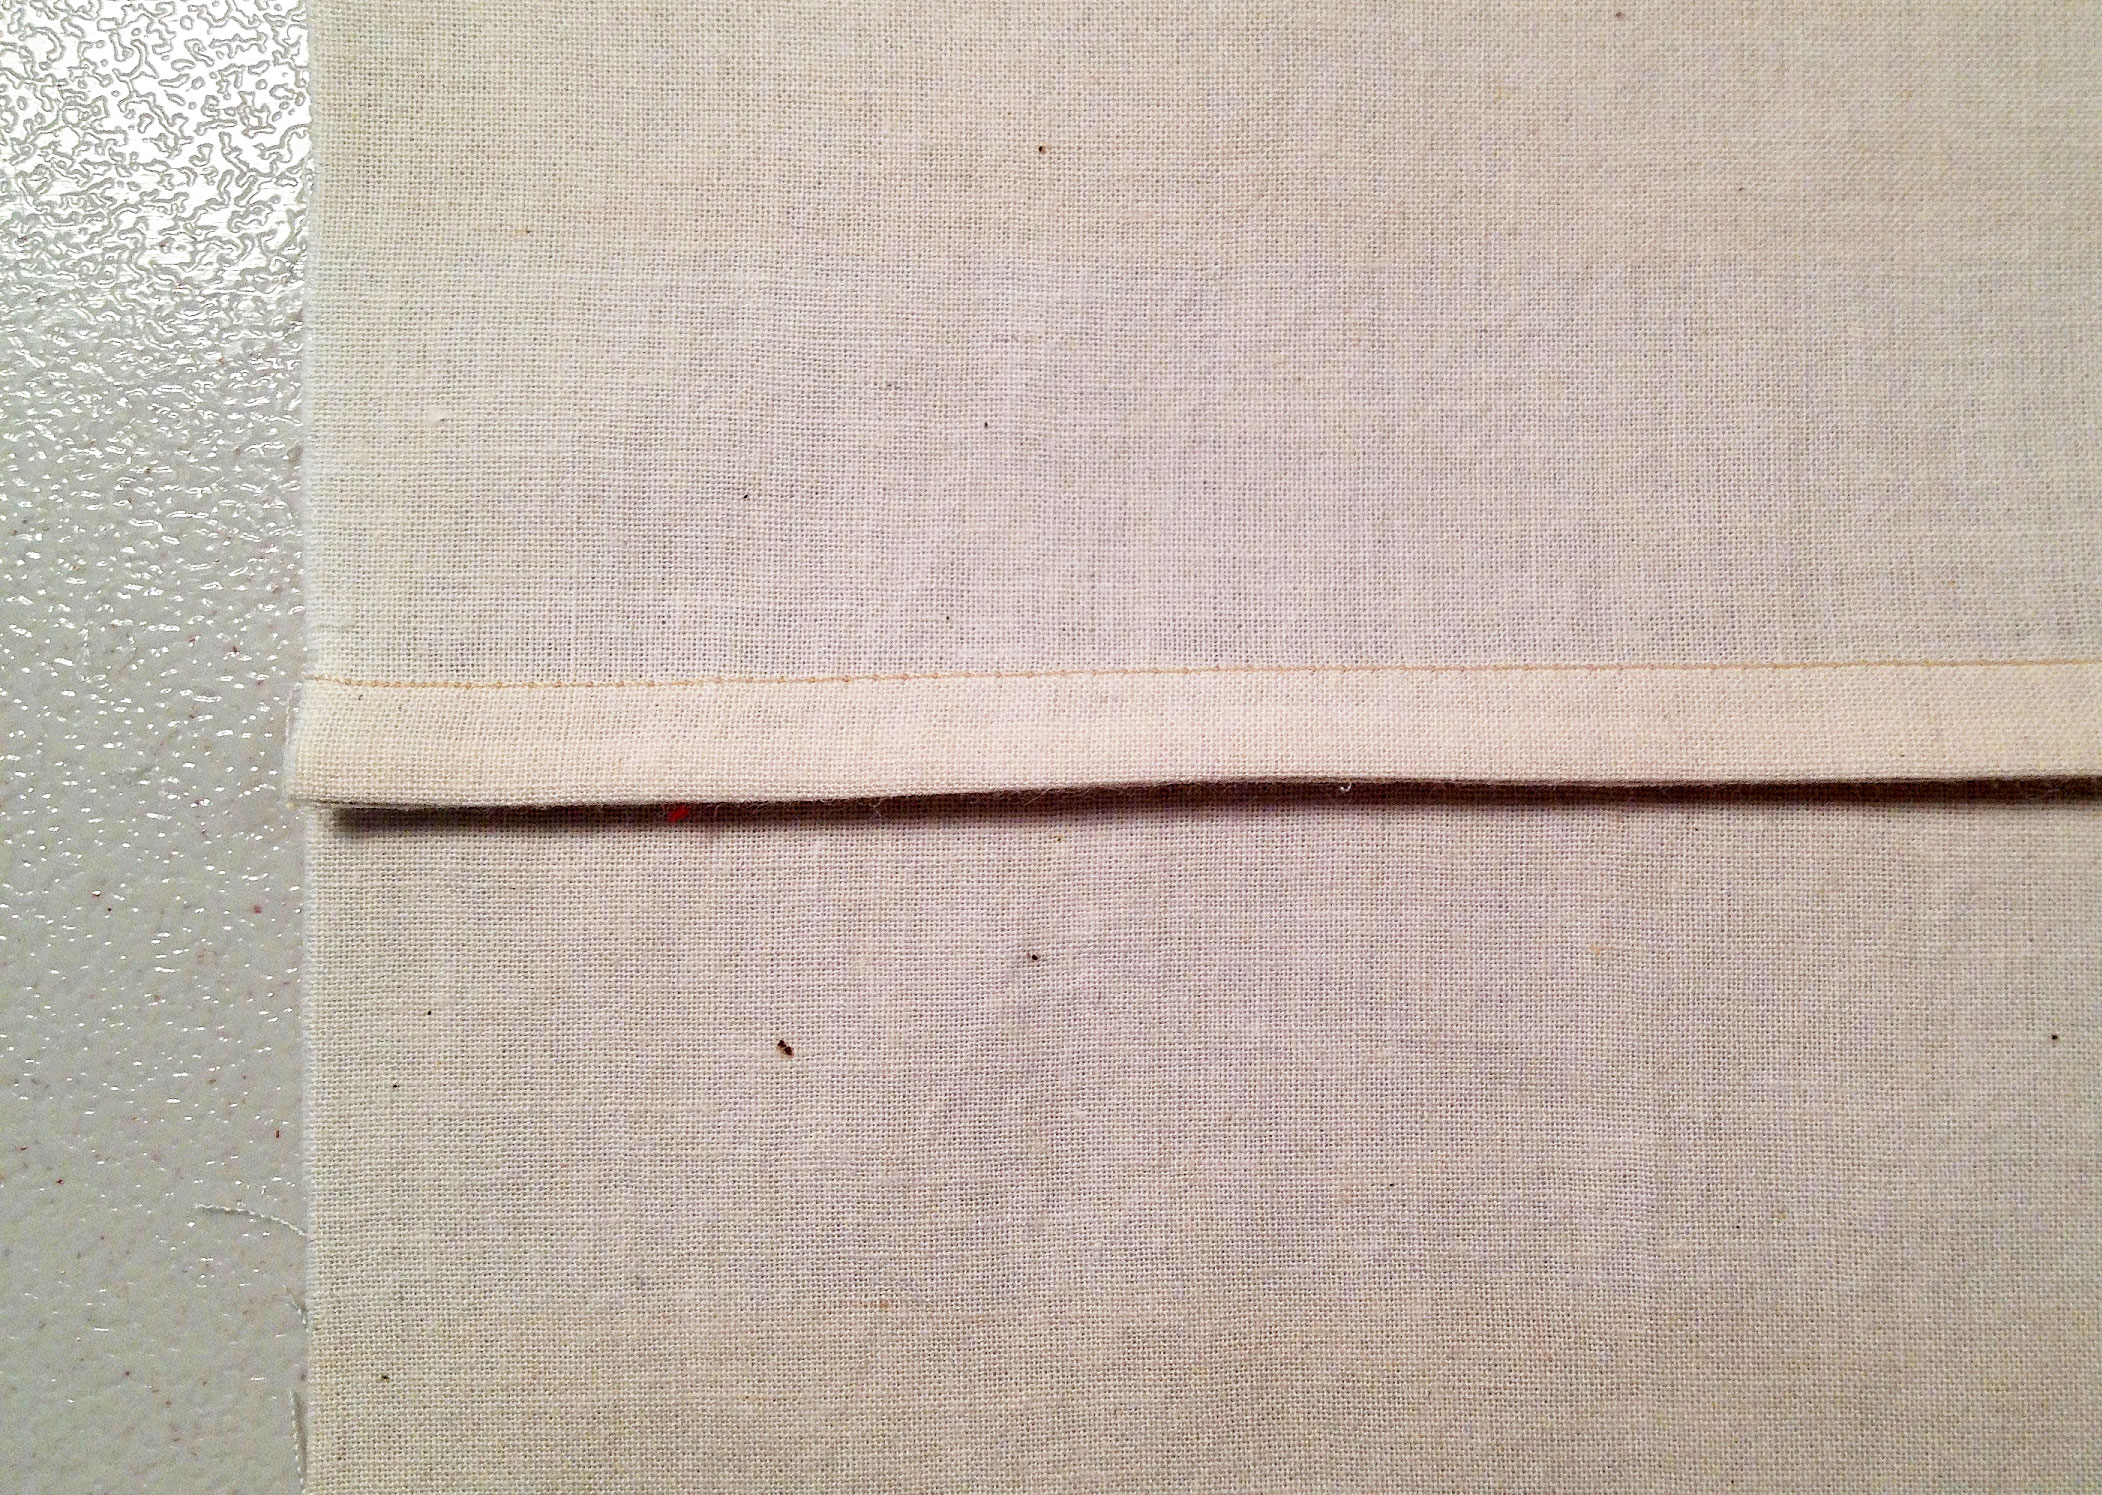
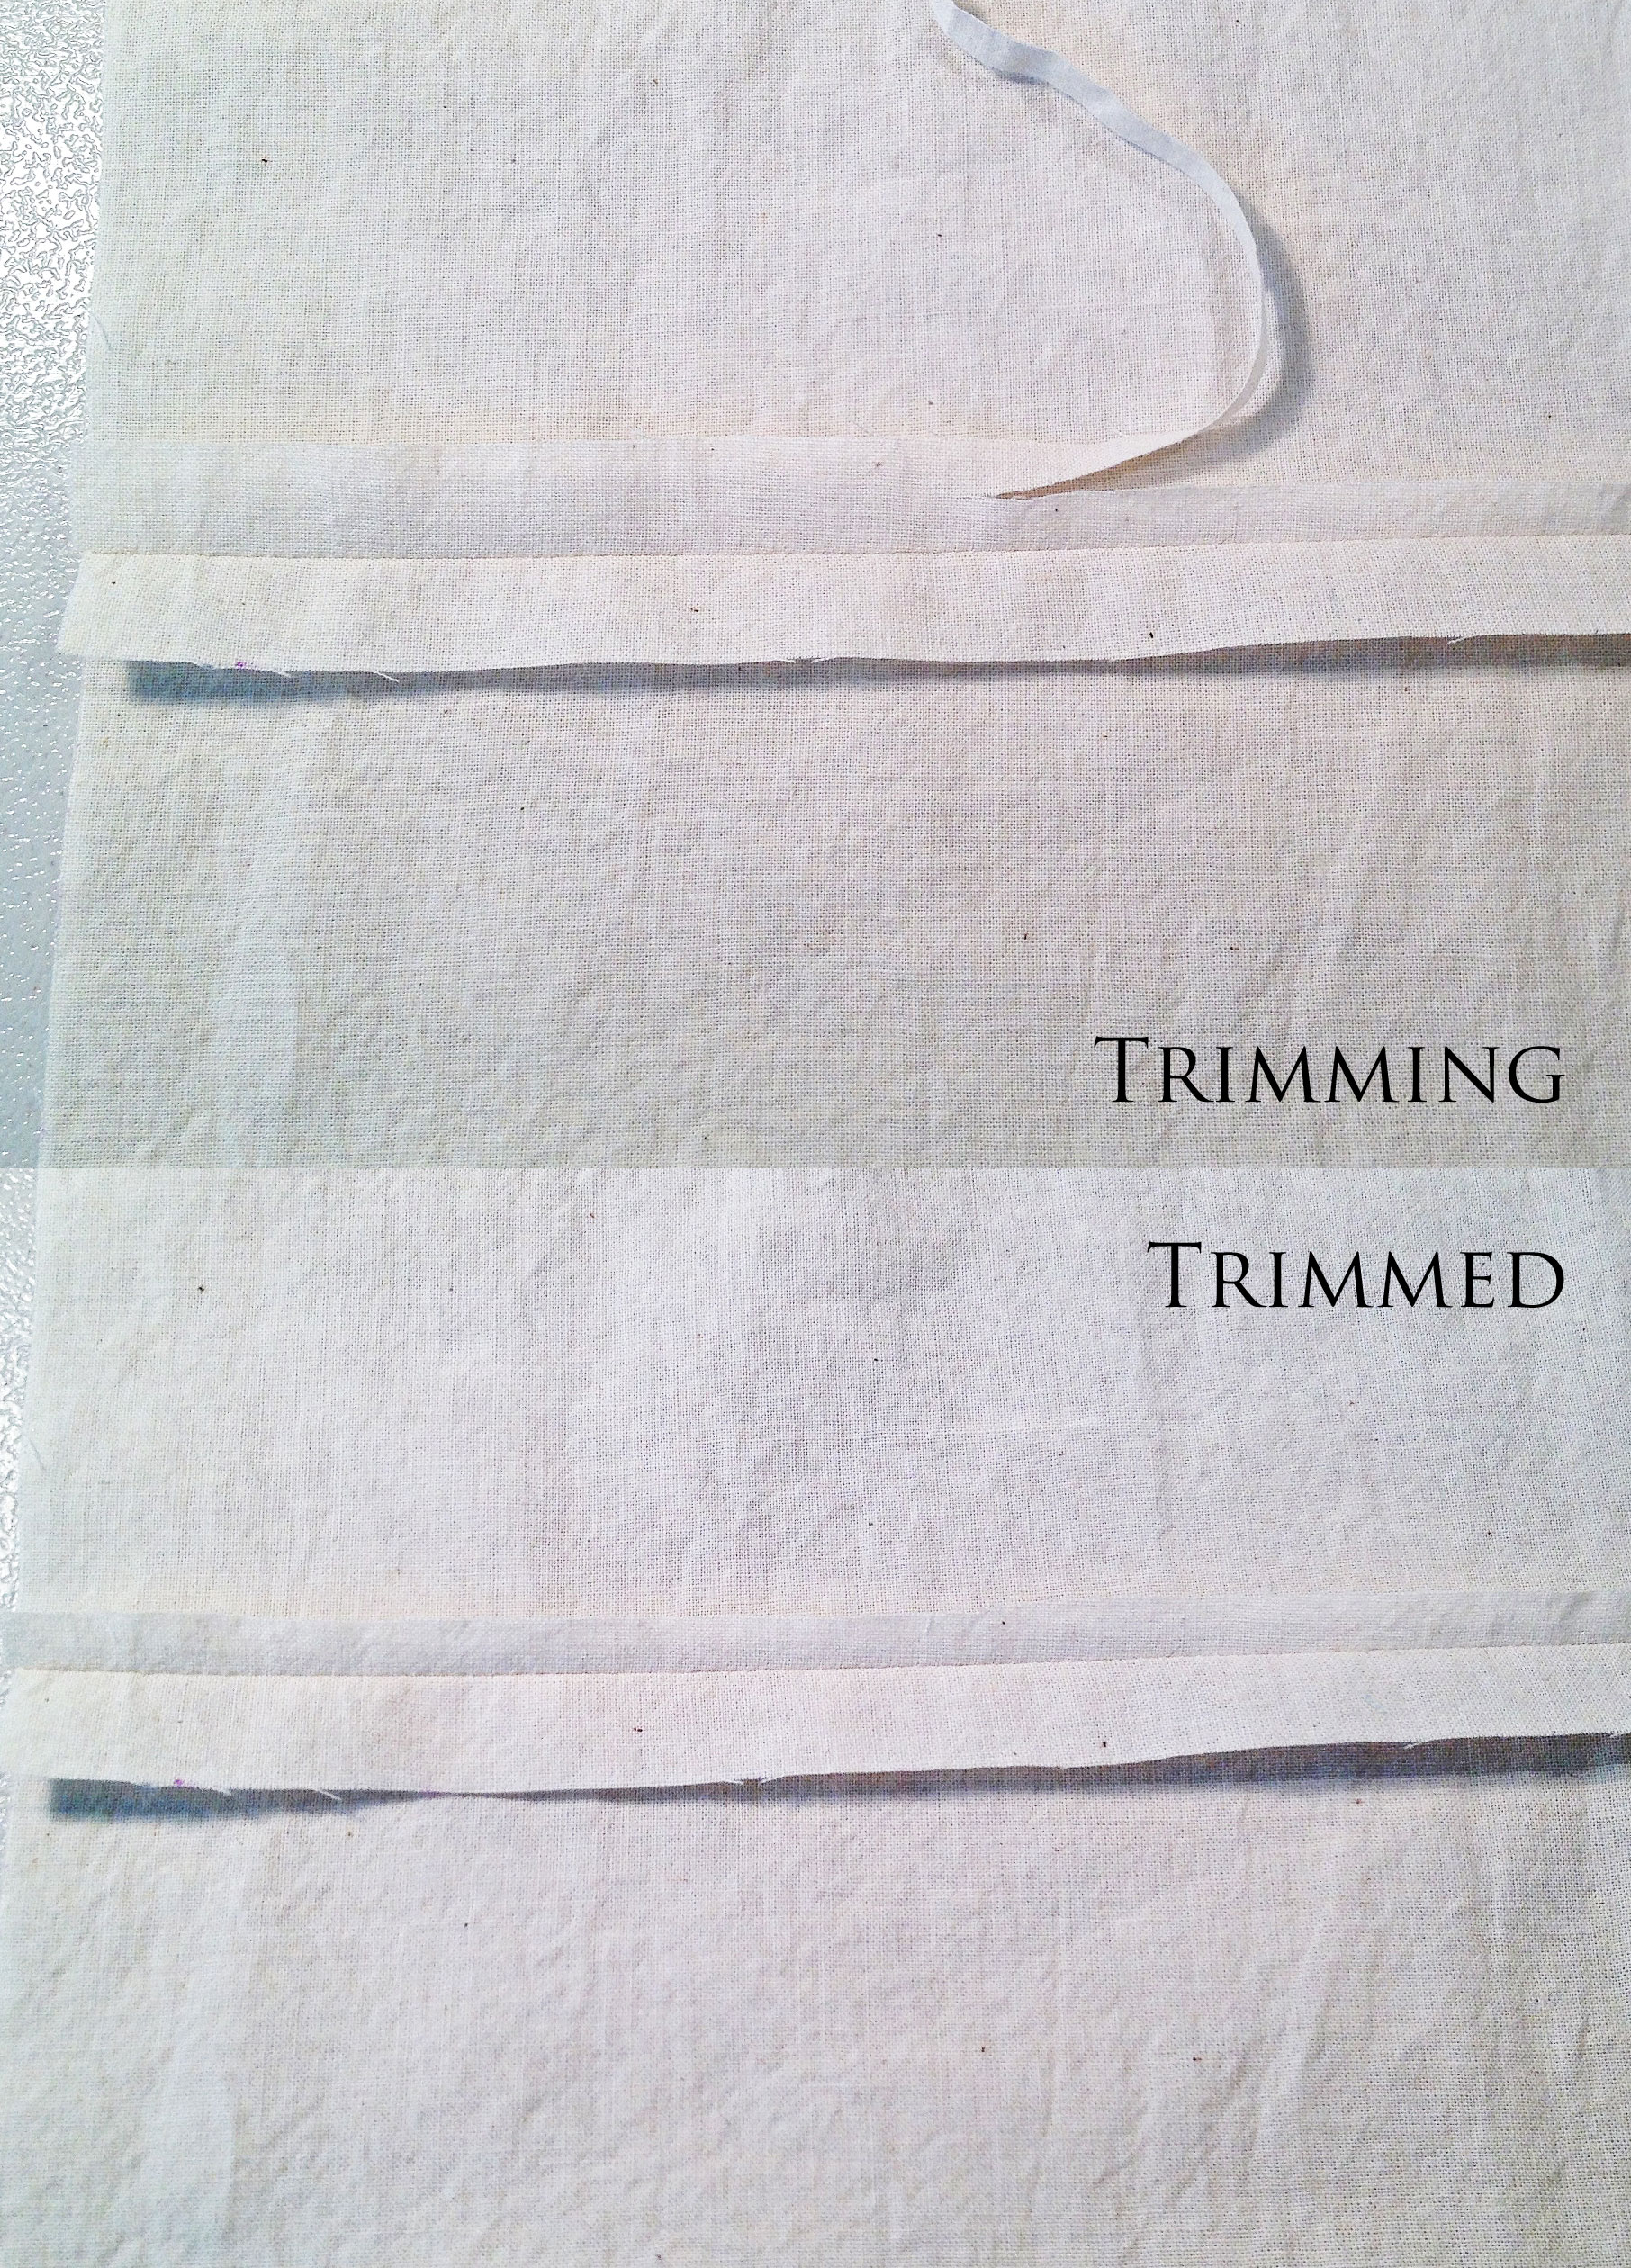
Trim both edges of the seam allowance to 1/8″.

Trim the Seam Allowances
Fold the fabric with right sides together and press the sewn edge flat. It can help if you scrape the edge with your fingernail before pressing.
Sew the seam with a 1/4″ seam allowance, encasing the raw edges.
Sew the Second Seam
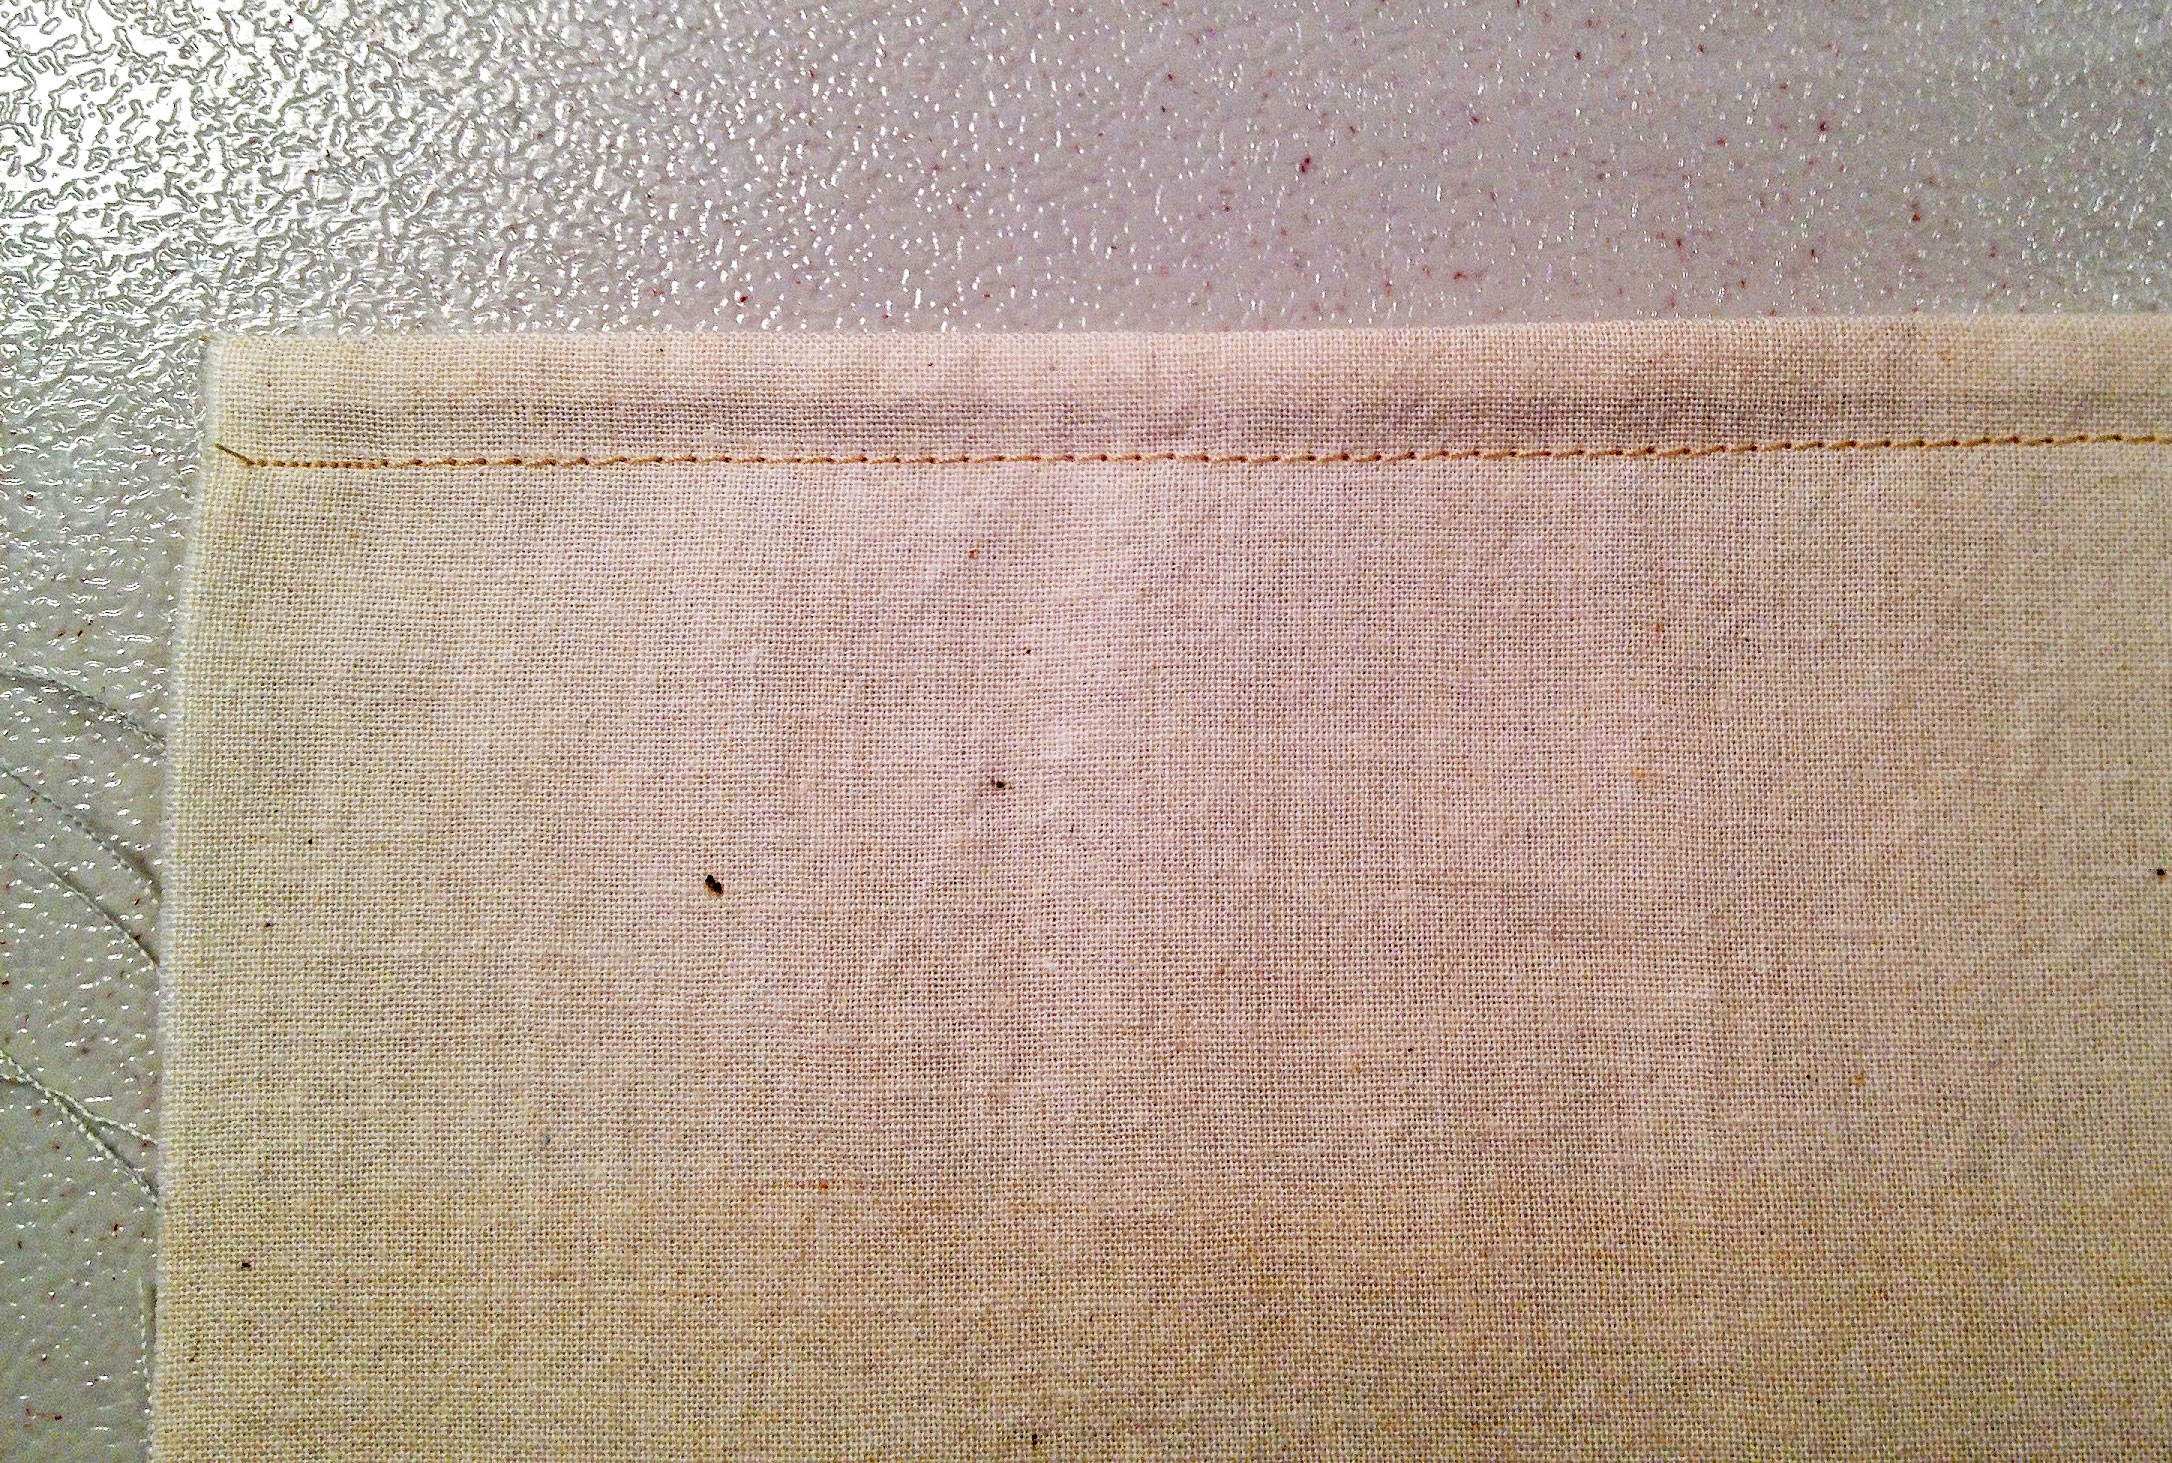
Press the seam allowance flat to meld the stitches, then press it to one side. Press again from the right side of the fabric to flatten the seam. And there you go! A French seam.

Finished French Seam
#2. Mock-French Seams
This technique resembles a French seam, except it can be completed after a regular seam has already been sewn. Careful pressing is necessary to achieve good results. Like the French seam, it’s best not to use this method with curved seams, although it can be done if you’re stubborn (like me!), provided you don’t mind clips or notches in the middle of your finished seam.

Mock French Seam
Place the fabric with right sides together. Sew the seam using whatever seam allowance your pattern calls for. (5/8″ is standard in commercial patterns, while 1/2″ is common in many historical costuming patterns. Doll patterns usually use 1/4″ seam allowances, which can make a mock French seam tricky, but not impossible.)
Press the seam allowance flat to meld the stitches, then press it open to flatten the seam. For a truly flat seam, press from both sides of the fabric.

Pressed Seam Allowance
Clip or notch any curves. If desired, dab a small amount of Fray Check along the edges of each clip or notch to prevent fraying.
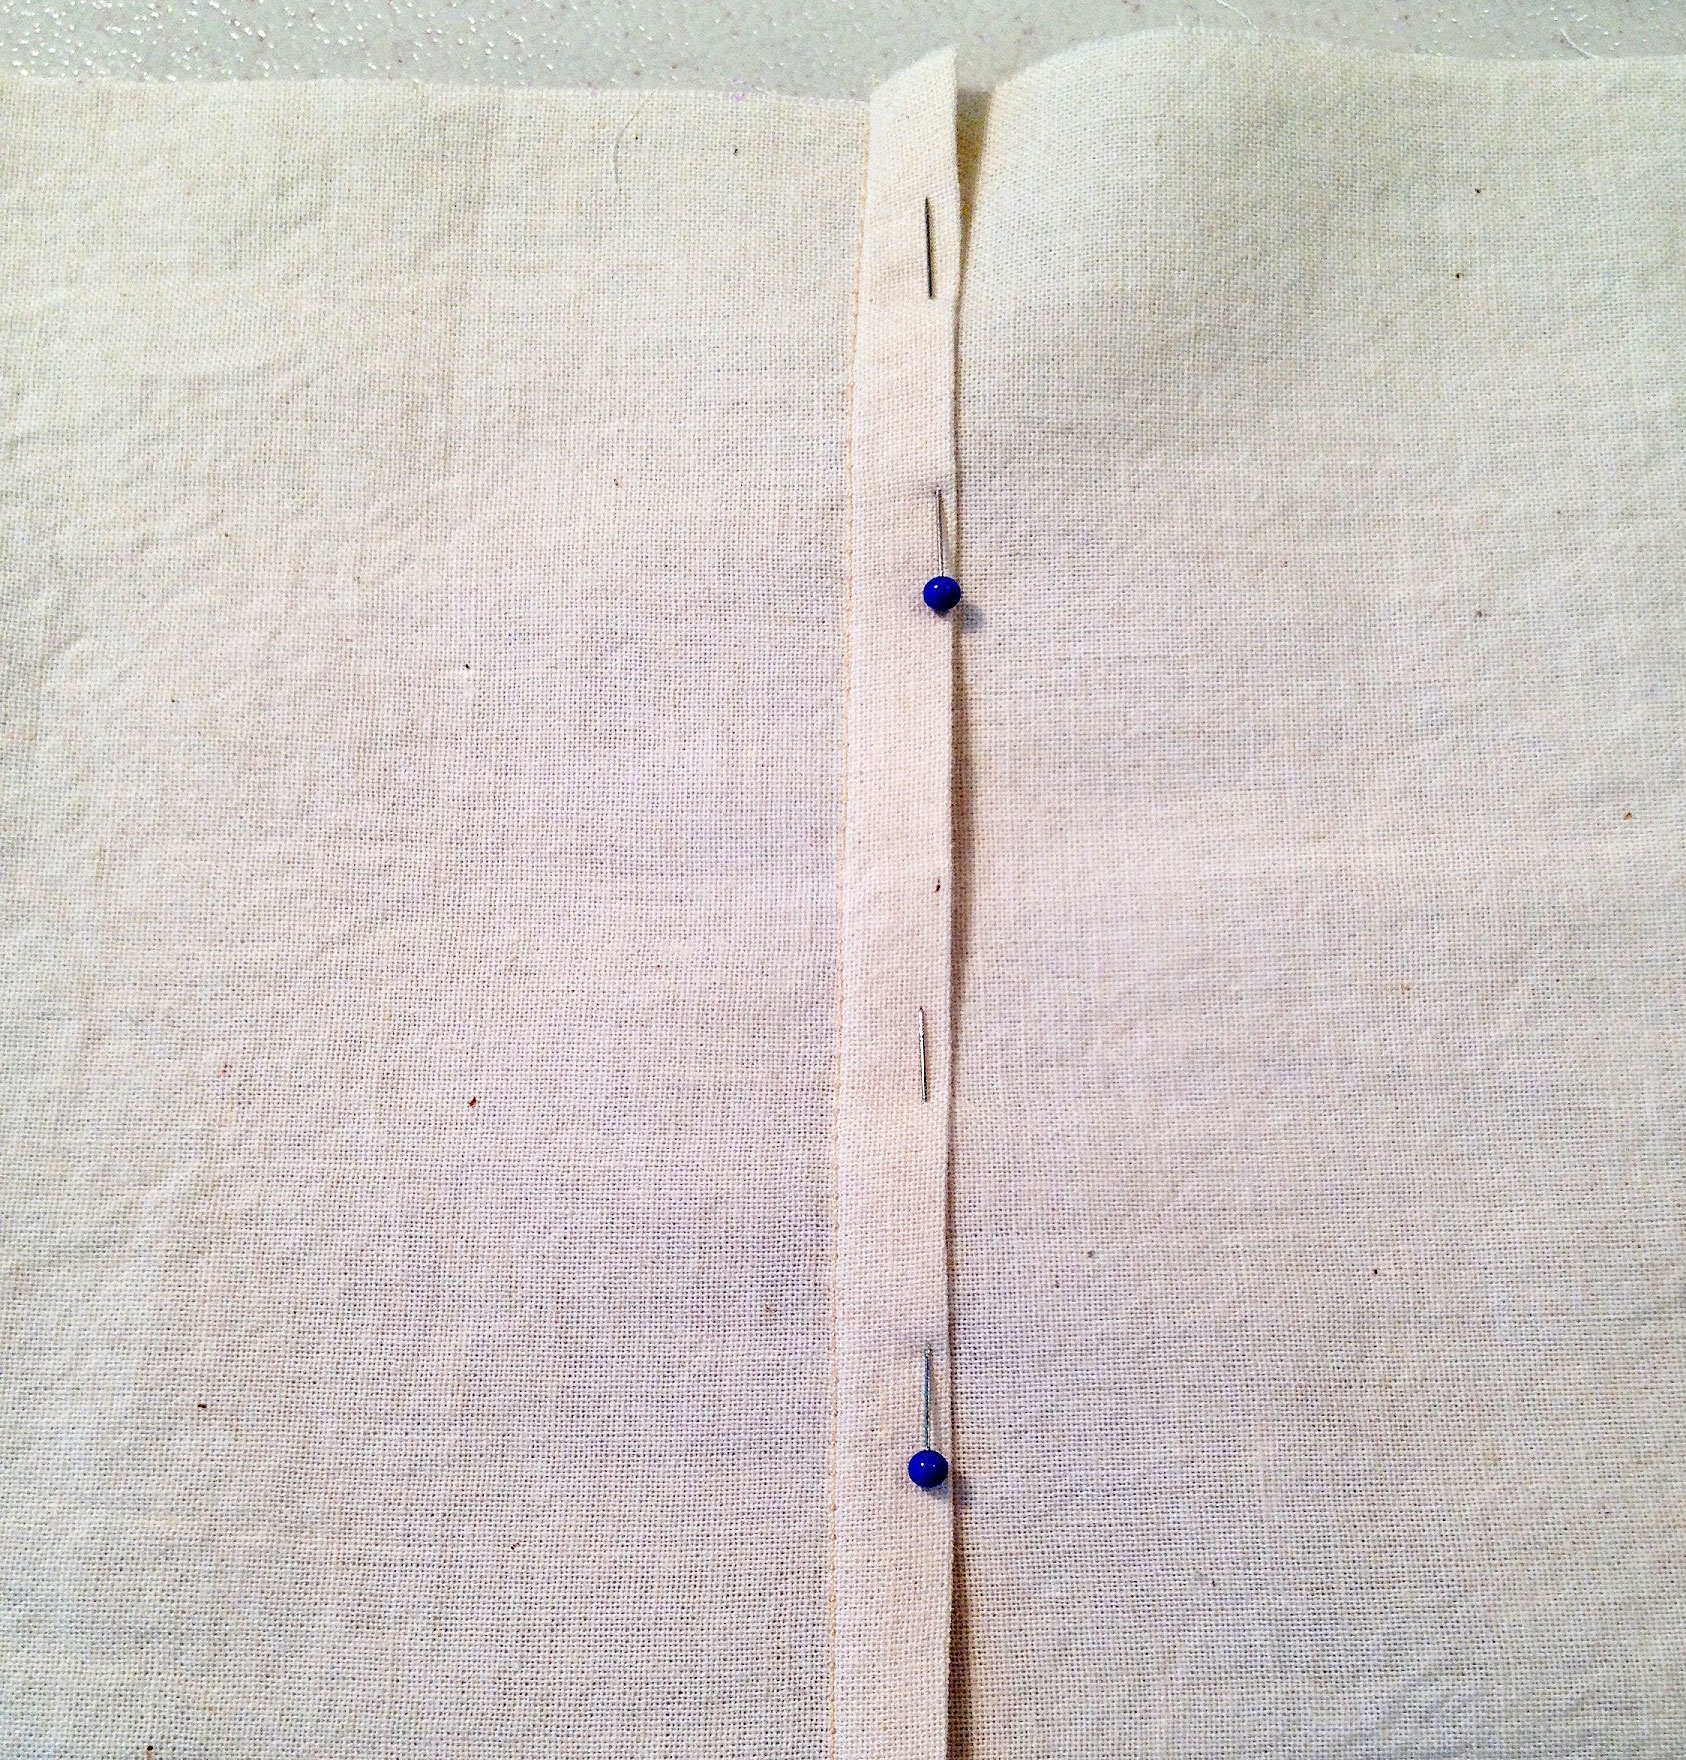
Fold the edges of the seam allowance inward, so the raw edges touch the inside of the seam. Press, then pin the folded edges together.
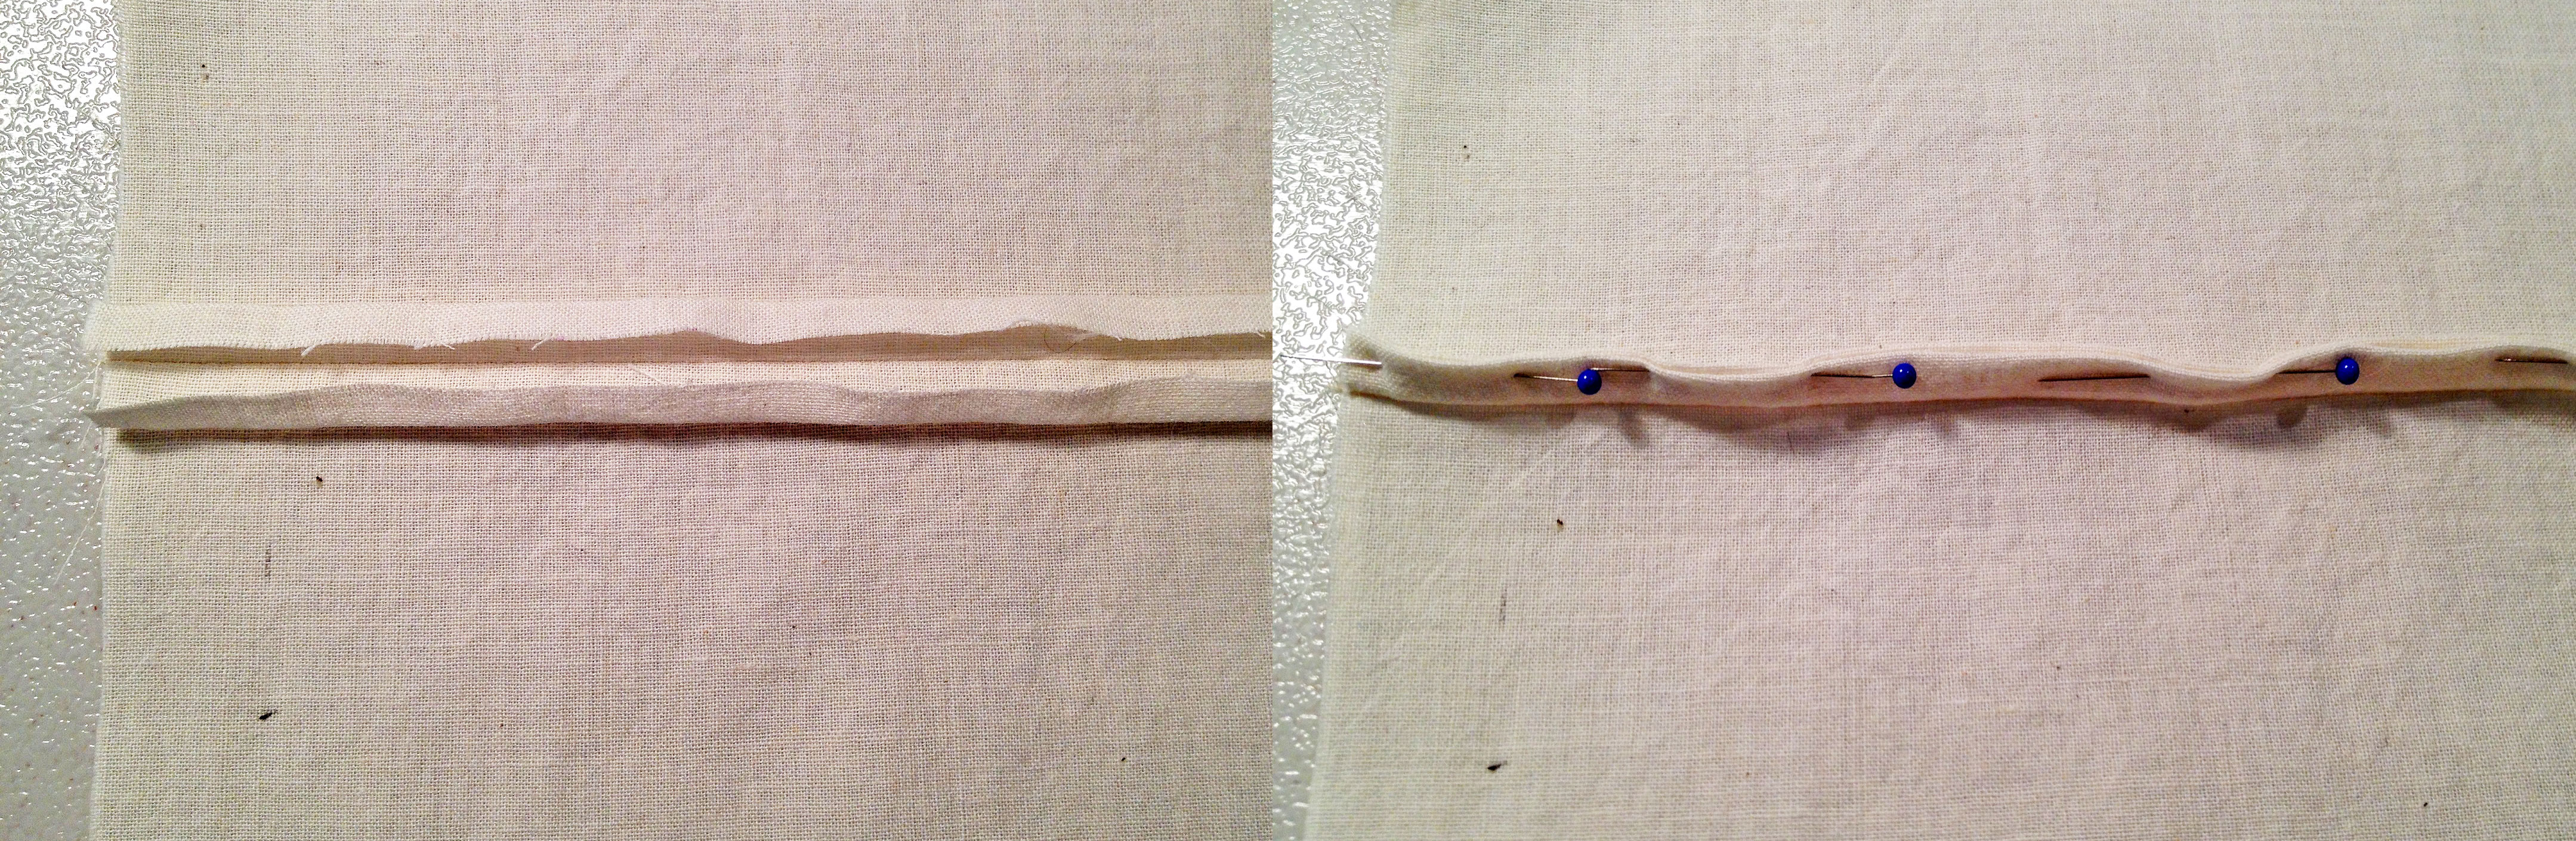
Pressed & Pinned Seam Allowance
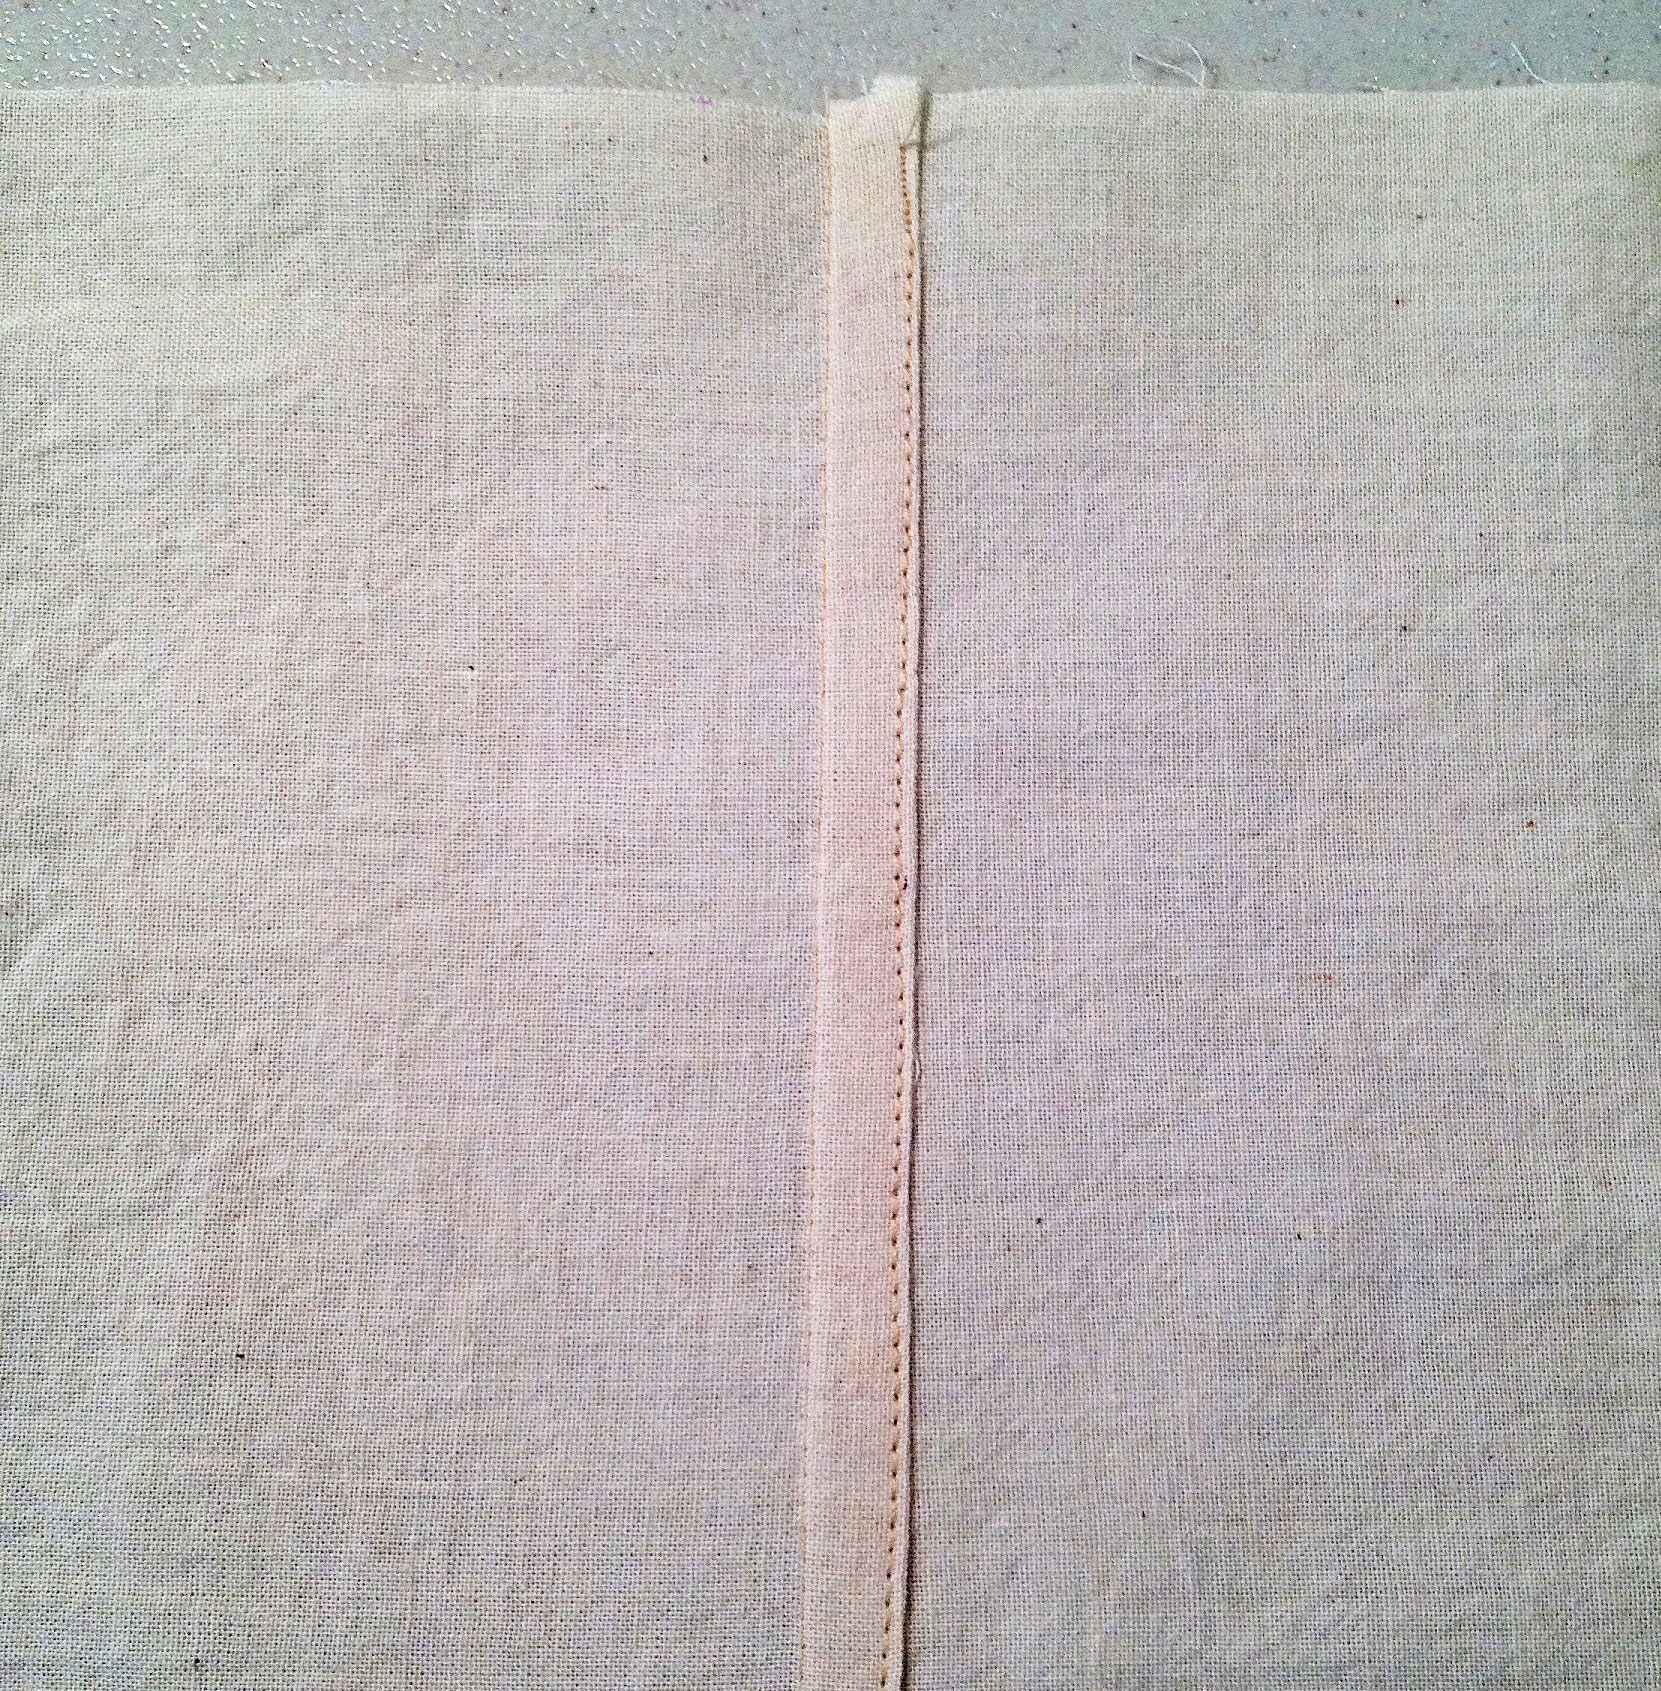
Sew as close to the folded edge as possible.
Press flat to meld the stitching, then press the finished seam to one side. And there you have a mock French seam.

Finished Mock French Seam
#3. Flat-Felled Seams
This technique provides a sturdy, enclosed seam, similar to what you might see on a pair of jeans. Careful pressing is vital to achieving a smooth seam. It’s excellent for straight seams that are under stress, or fabric that tends to fray. I wouldn’t recommend trying this method with curved seams. For a discreet finish, choose thread that matches your fabric. If you’d prefer the stitching to stand out, use contrasting thread.

Flat-Felled Seam
Place the fabric with right sides together and sew the seam with whatever seam allowance your pattern calls for.
Press the seam allowance flat to meld the stitches, then press it open. Pressing from both sides will ensure a perfectly flat seam.

Pressed Seam Allowance
Decide which way you want the seam to go—with the stitching to the left or right. It’s a detail no one will notice, but if you’re finishing more than one seam, you’ll want to make sure they face the same way.
Trim one side of the seam allowance to 1/4″. If you want the stitching to the left of the seam, trim the left side. If you’d rather have the stitching to the right, trim the right side.
Trimmed Seam Allowance
Fold the longer edge of the seam allowance toward the middle of the seam (about 1/4″) and press.

Pressed Seam Allowance
Fold the seam allowance to one side, with the folded edge overlapping the trimmed edge. Press. To ensure a truly flat seam, press from the other side, as well. Pin the folded seam allowance in place.
Pinned Seam Allowance
Topstitch along the folded edge of the seam allowance, sewing as close to the edge as you can. Press the finished seam flat to meld the stitches.
Finished Flat-Felled Seam
-
Tip
It’s common for the layers of fabric to wrinkle as you sew. To prevent puckering, don’t skip the pressing. Use your fingers to flatten and smooth the top of the seam allowance as you topstitch. Gently tug on the bottom layer of fabric, pulling it perpendicular to the seamline. Remember to keep your topstitching as straight as possible, since it will be visible from the right side of the garment.
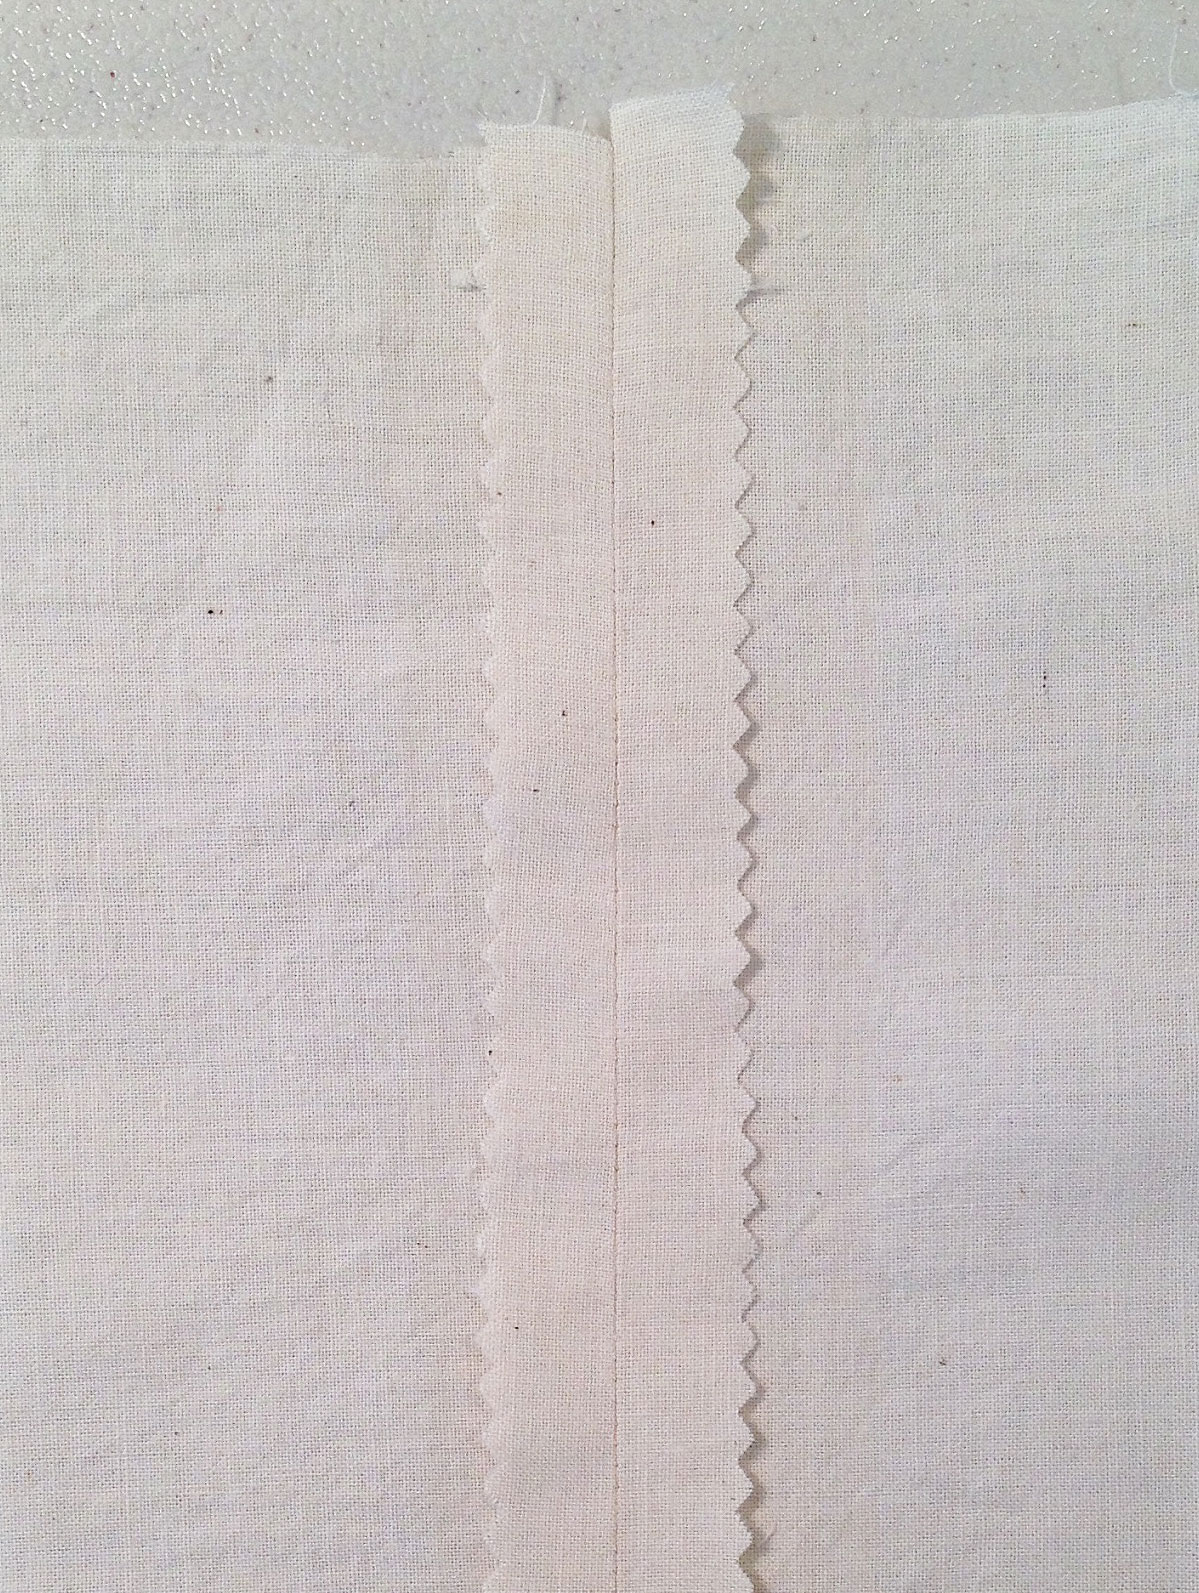
#4. Pinked Edges
This is the quickest and easiest method of seam finishing, but there are a few caveats. Don’t use pinking shears to cut bias (diagonal or curved) seams, as fraying will occur. If your fabric is especially prone to fraying, pinking might not be enough to keep the edges clean. If your garment will be washed, pinking usually won’t be enough to keep the seam allowances from fraying.

Pinked Seam Allowances
-
Tip
Don’t purchase cheap pinking shears, as they will be extremely difficult to cut with. Spend a little extra and get a high-quality pair. I prefer the spring-loaded kind, as they’re much easier to use. For best results, they need to be cleaned and oiled occasionally. If they become dull, take them to a sewing machine repair shop for sharpening.
When cutting along a pre-drawn edge, line up the zigzags so the inner notch touches the cutting line.
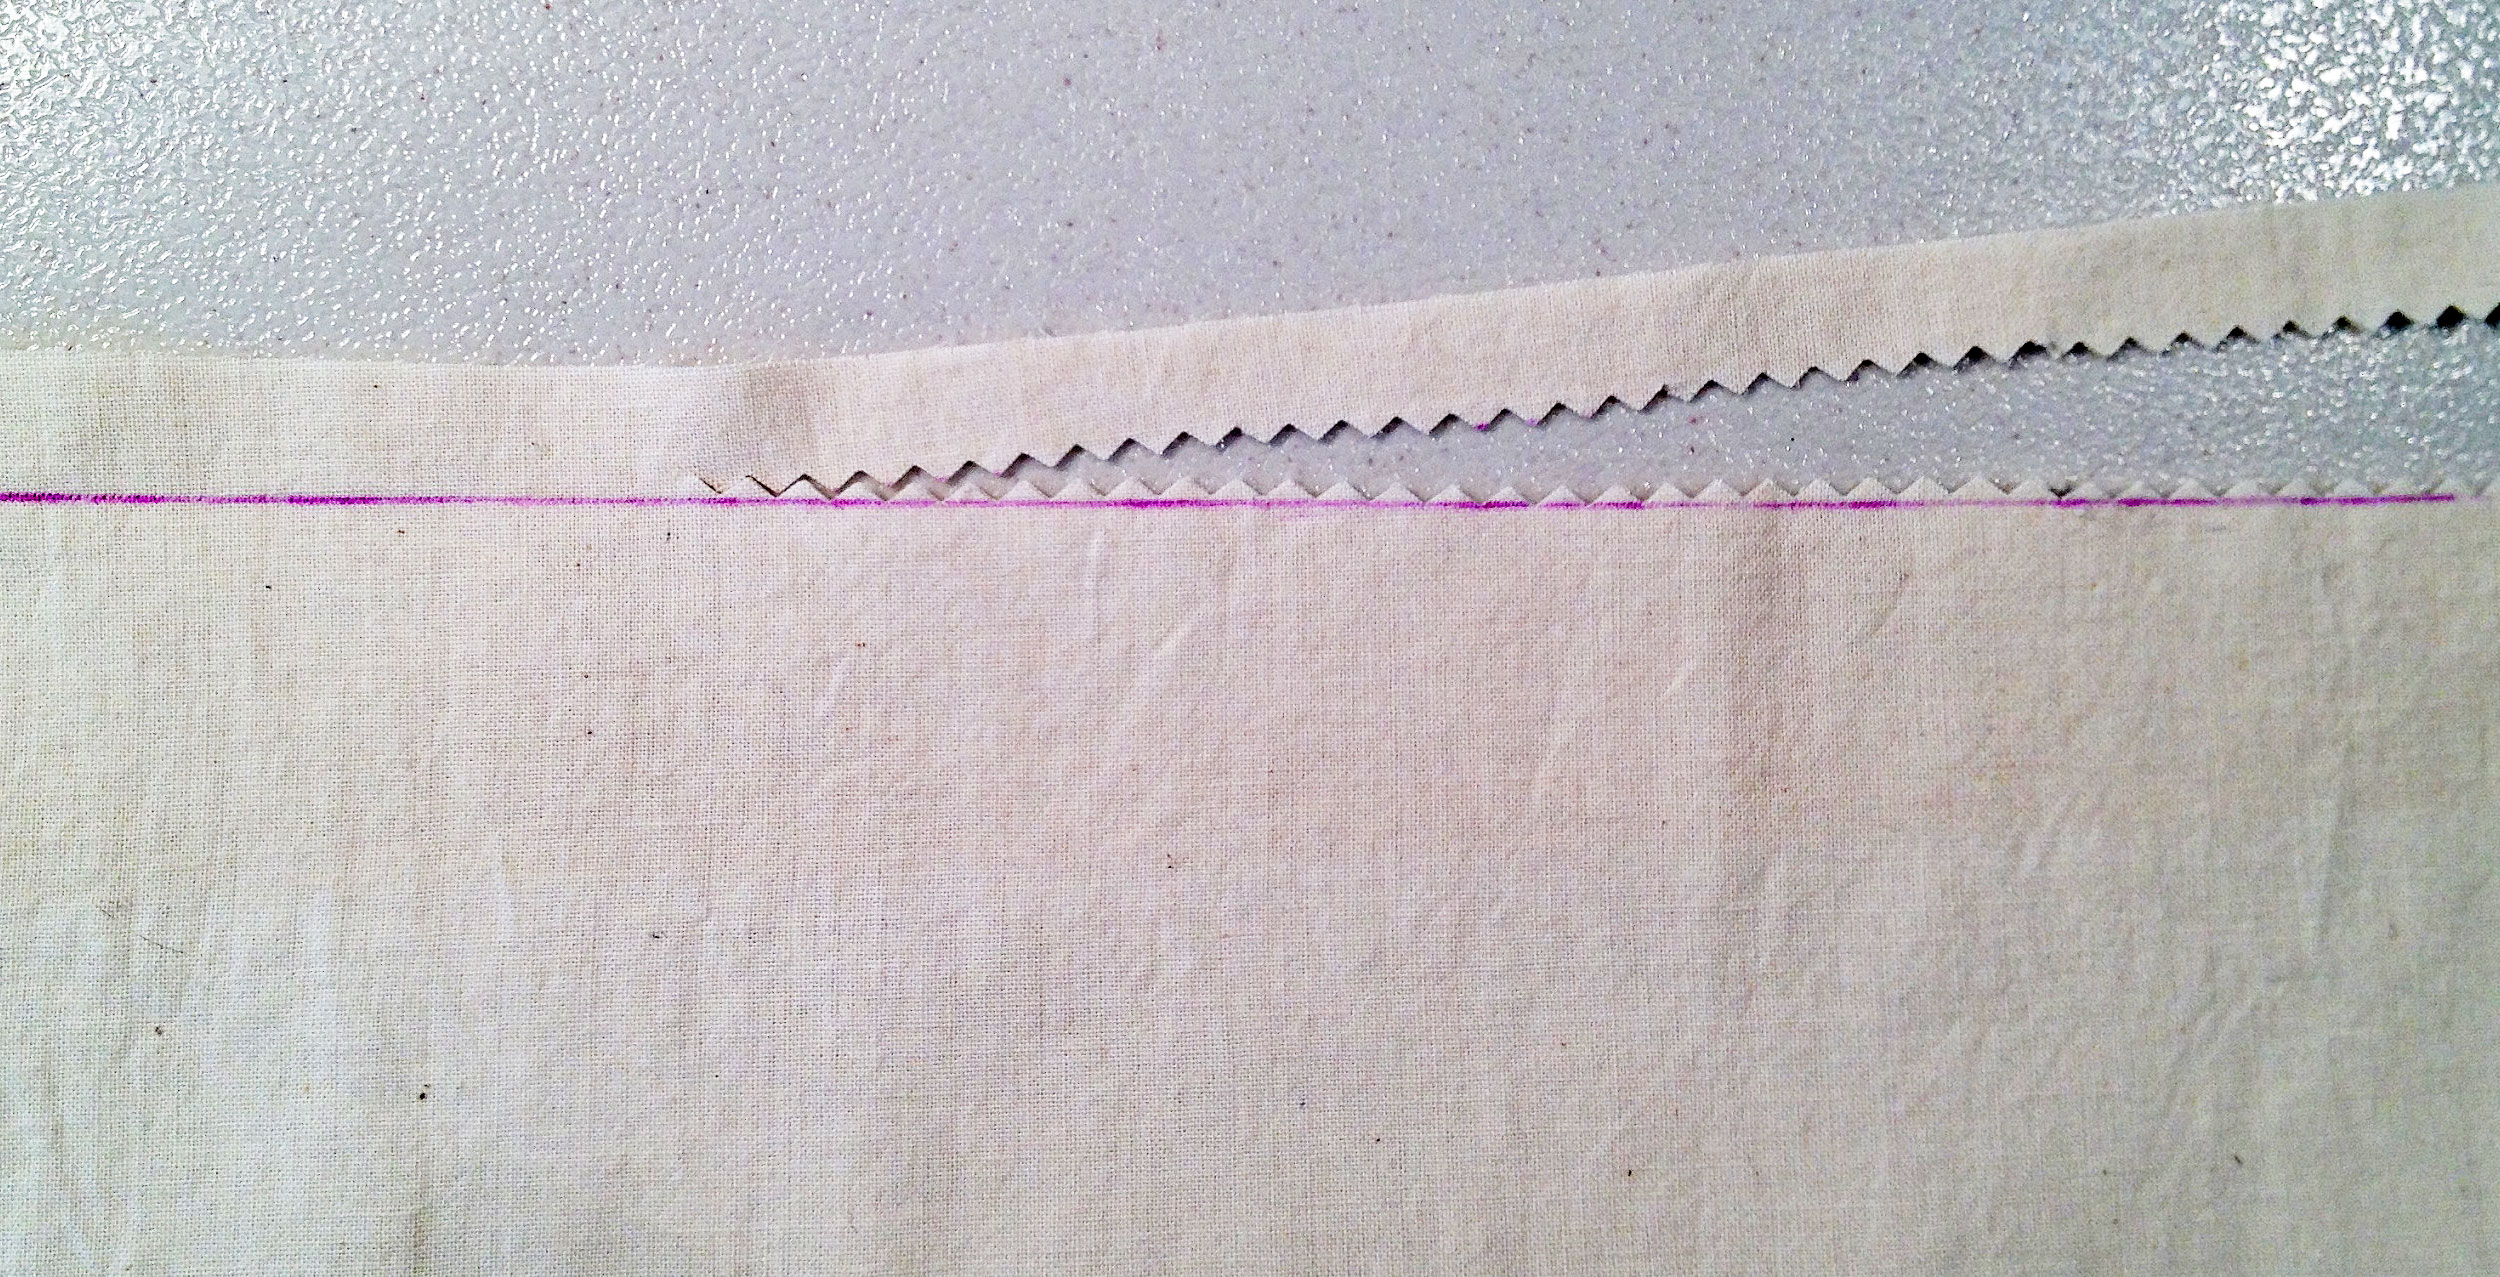
Cutting Pattern With Pinking Shears
If you feel the need, mark the stitching line prior to sewing. Measure from the inner notch of the zigzags, marking whatever seam allowance your pattern calls for.
Place the fabric with right sides together and stitch your seam.
Press the seam allowance flat to meld the stitching, then press it open. For a truly flat seam, press from both sides of the fabric.
Clip or notch any curves.
Pressed Seam Allowance
For added security, you can stitch about 1/8″ from the edge of your pinked fabric, using a reduced stitch length. Press the edges of the fabric flat to meld the stitching.

Stitching the Seam Allowances
Stitched Seam Allowances
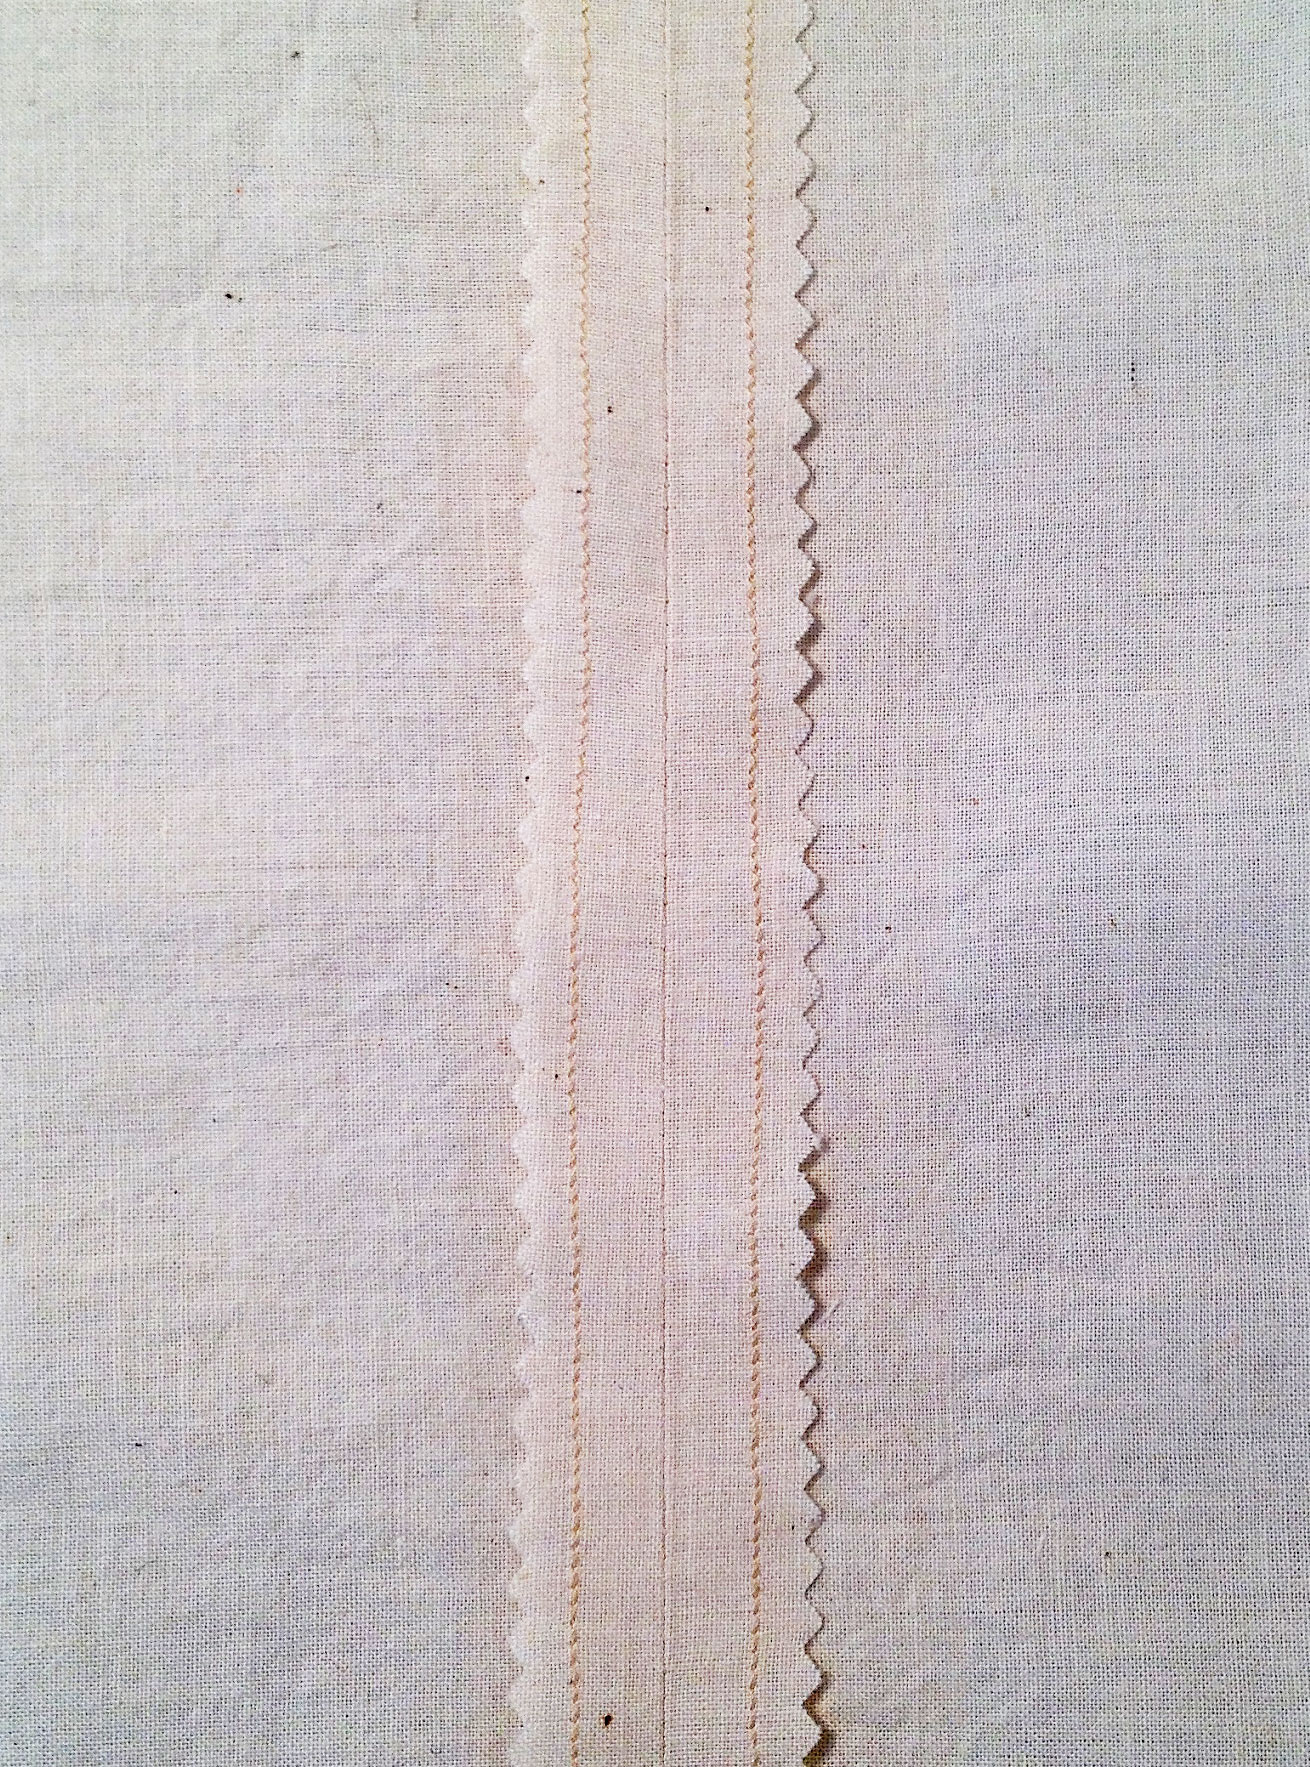
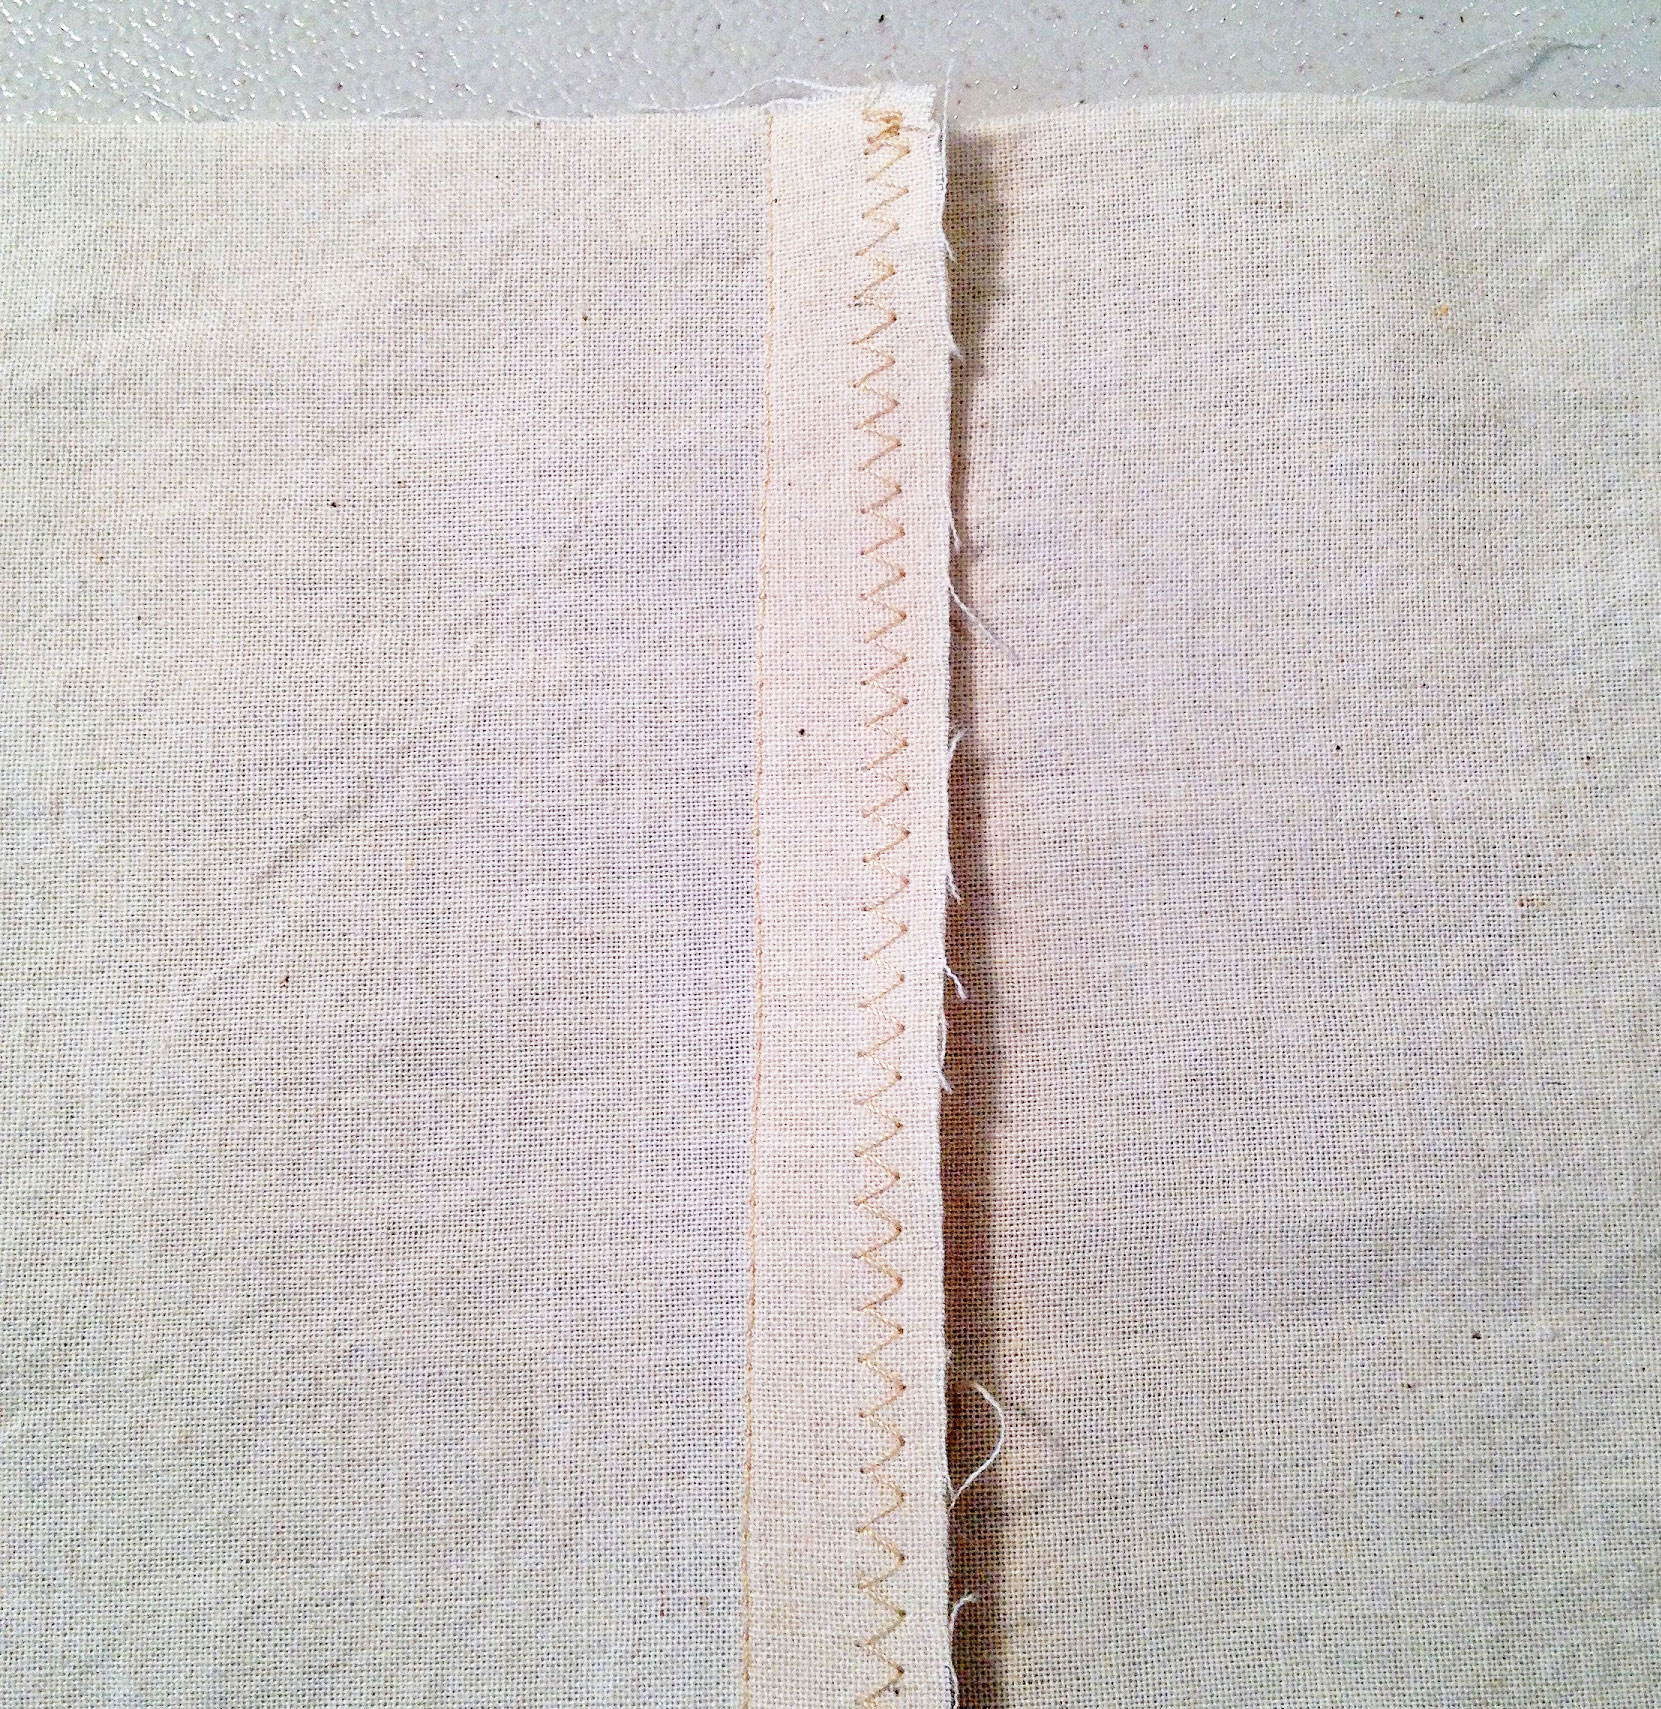
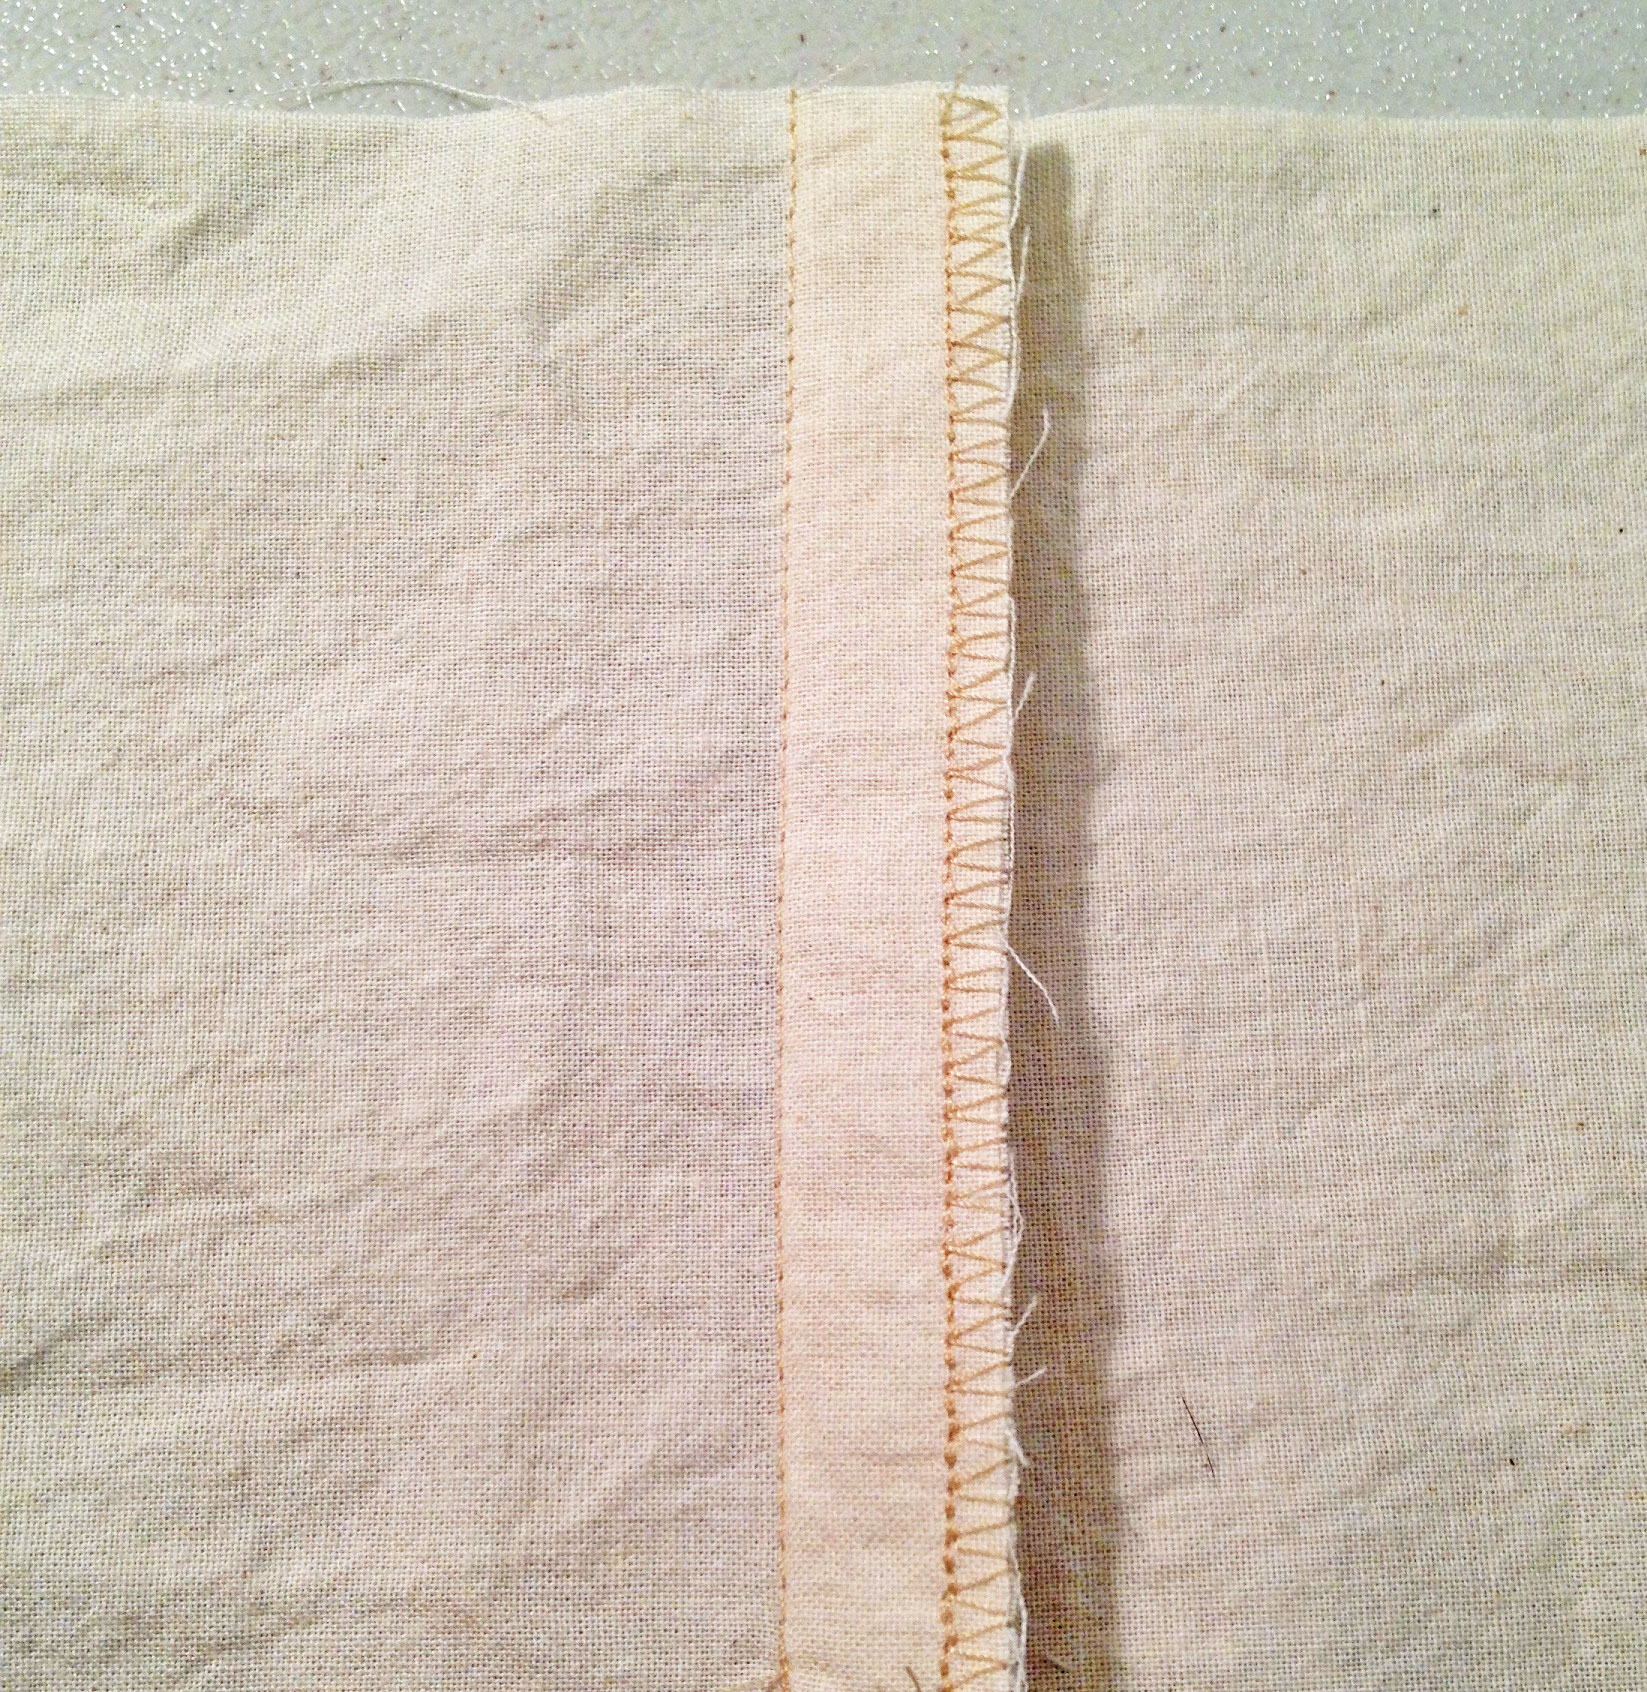
#5. Zigzagged Edges
This is another simple technique, but let’s be honest—it has a tendency to look a little sloppy. Only use this method if you’re in a hurry and don’t have time for anything better.
Do a few samples first, to determine the stitch length and width that will look best on your fabric. If the fabric puckers or tunnels beneath the zigzag stitching, use some kind of stabilizer to support the fabric.
Place the fabric with right sides together and sew your seam using whatever seam allowance your pattern calls for.
Press the seam allowance flat to meld the stitching, then press it open. For a truly flat seam, press from both sides of the fabric.

Pressed Seam Allowances
Clip or notch any curves.
Set your machine to zigzag, using the settings you decided on earlier.
There are two ways you can proceed.
You can zigzag each seam allowance separately, which is best if you want open seams. (Note, however, that lightweight fabrics may be too thin to sew in this manner, at least without stabilization.) Stitch between 1/8″ and 1/4″ from the edge. Afterwards, trim the seam allowance close to the zigzag stitching.
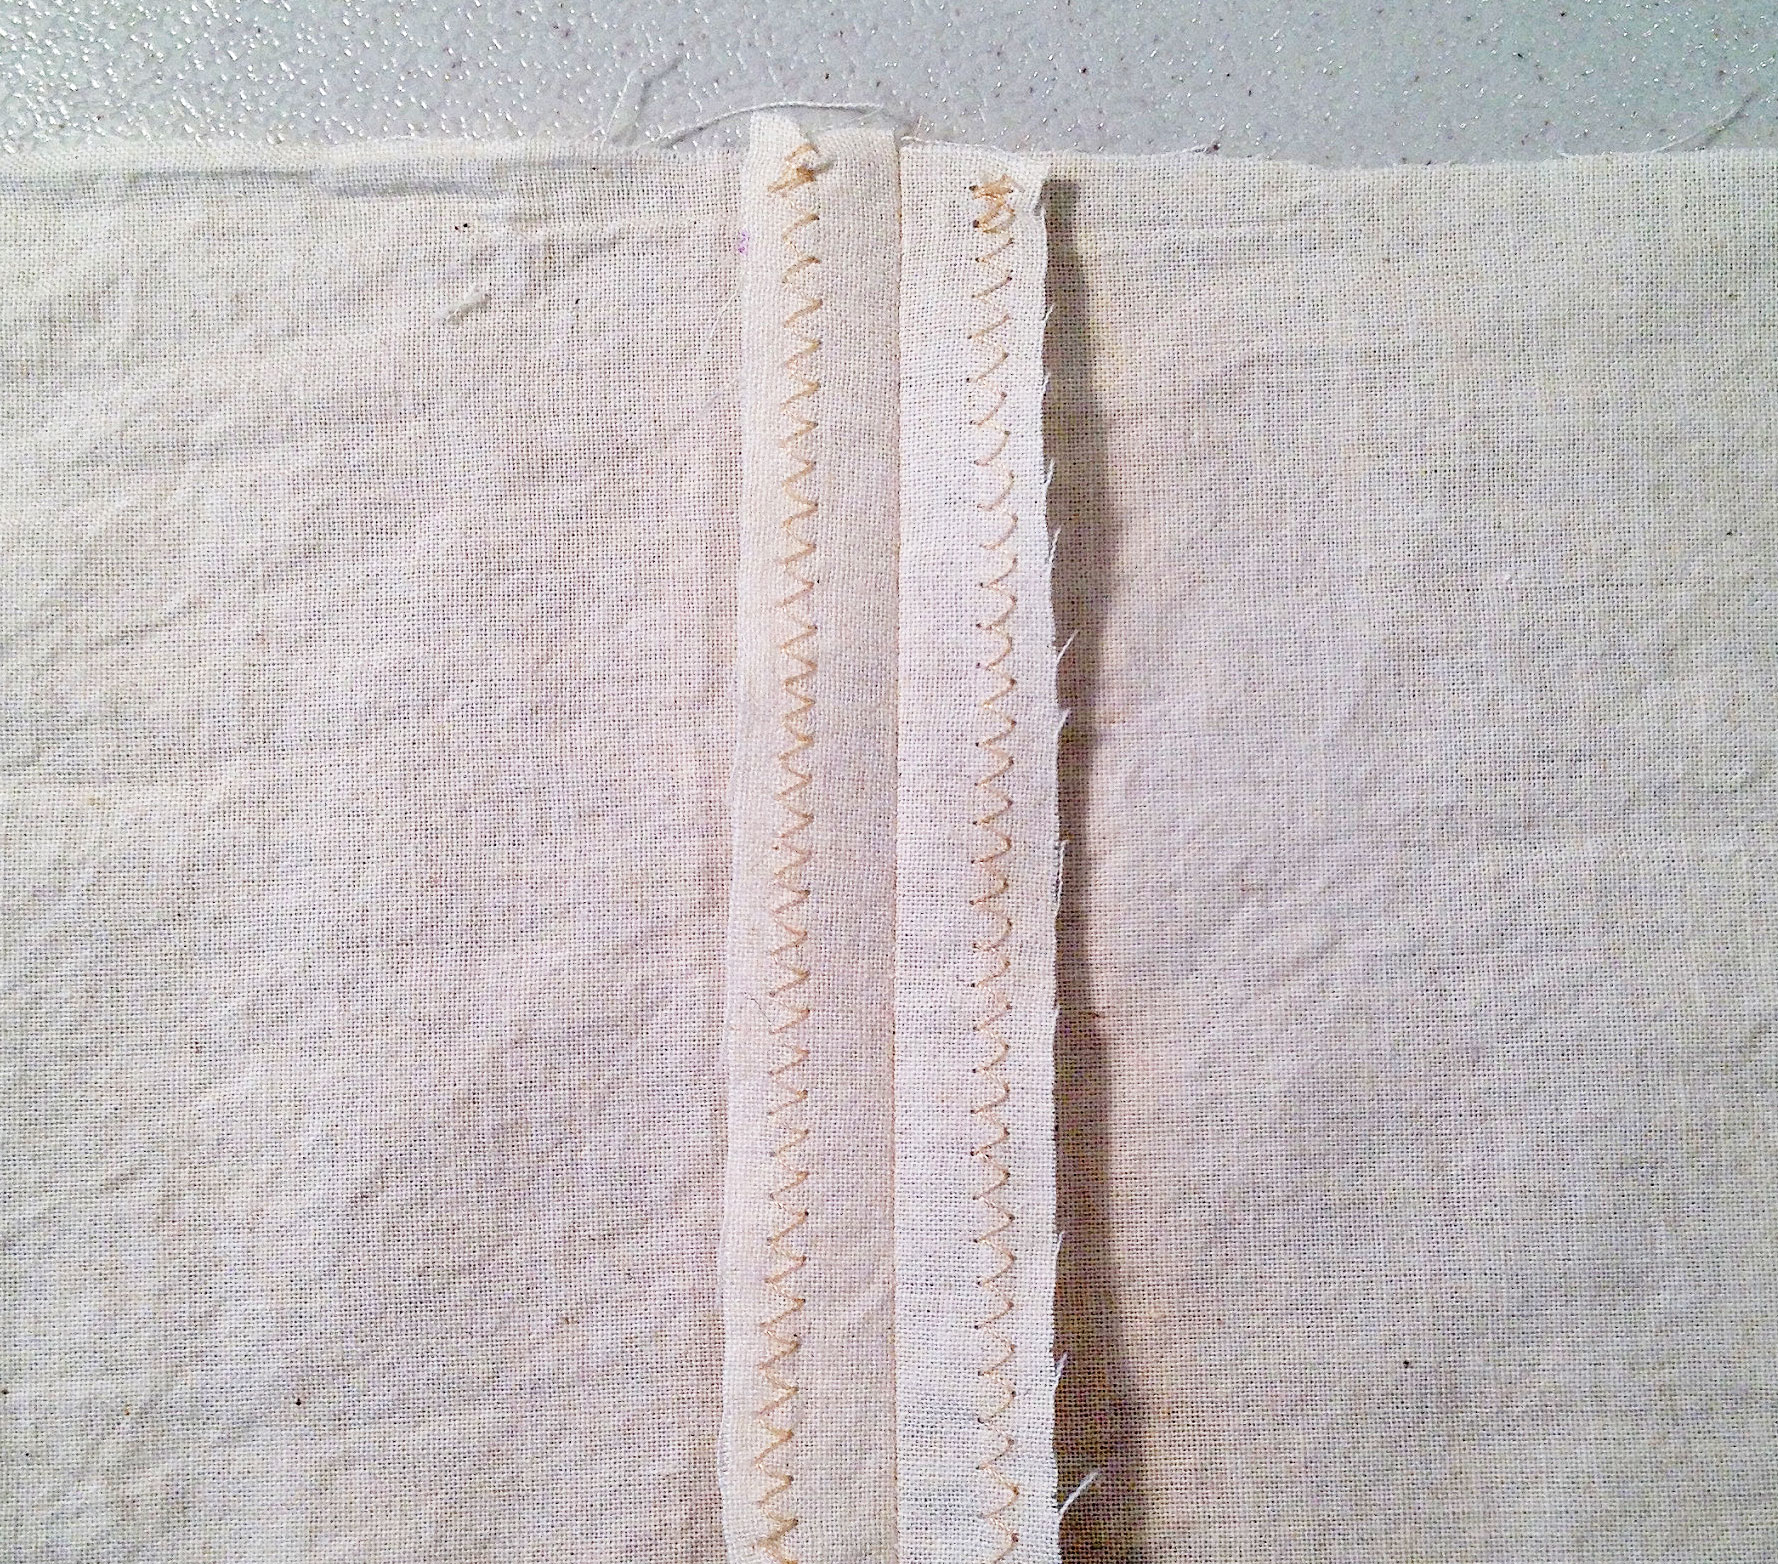
Open Seam Allowances, Zigzagged
Or, if you’d rather press the seam allowances to one side, zigzag both layers together, as one, along the edge. You may trim the seam allowances to 1/4″ before stitching, or you may stitch between 1/8″ and 1/4″ from the edge and trim close to the stitching afterwards.
Closed Seam Allowances, Zigzagged
Either way, press the seam allowances flat to meld the stitching. If you used the second method, after pressing flat, press the seam allowances to one side.
#6. Overlocked Edges
This method most resembles serging—the finish used on store-bought garments. It can be used with either straight or curved seams. You’ll need an overlock foot, which can be purchased for around $10. Technically, you can overlock without a specialty presser foot, but the results will be unsatisfactory.
Overlocking
Place your fabric with right sides together and sew your seam using whatever seam allowance your pattern calls for.
Press the seam allowance flat to meld the stitching, then press it open. For a truly flat seam, press from both sides of the fabric.
Unless you want to leave room for future alterations, trim your seam allowances to 1/4″. (The illustrations show a 5/8″ seam allowance, untrimmed.)
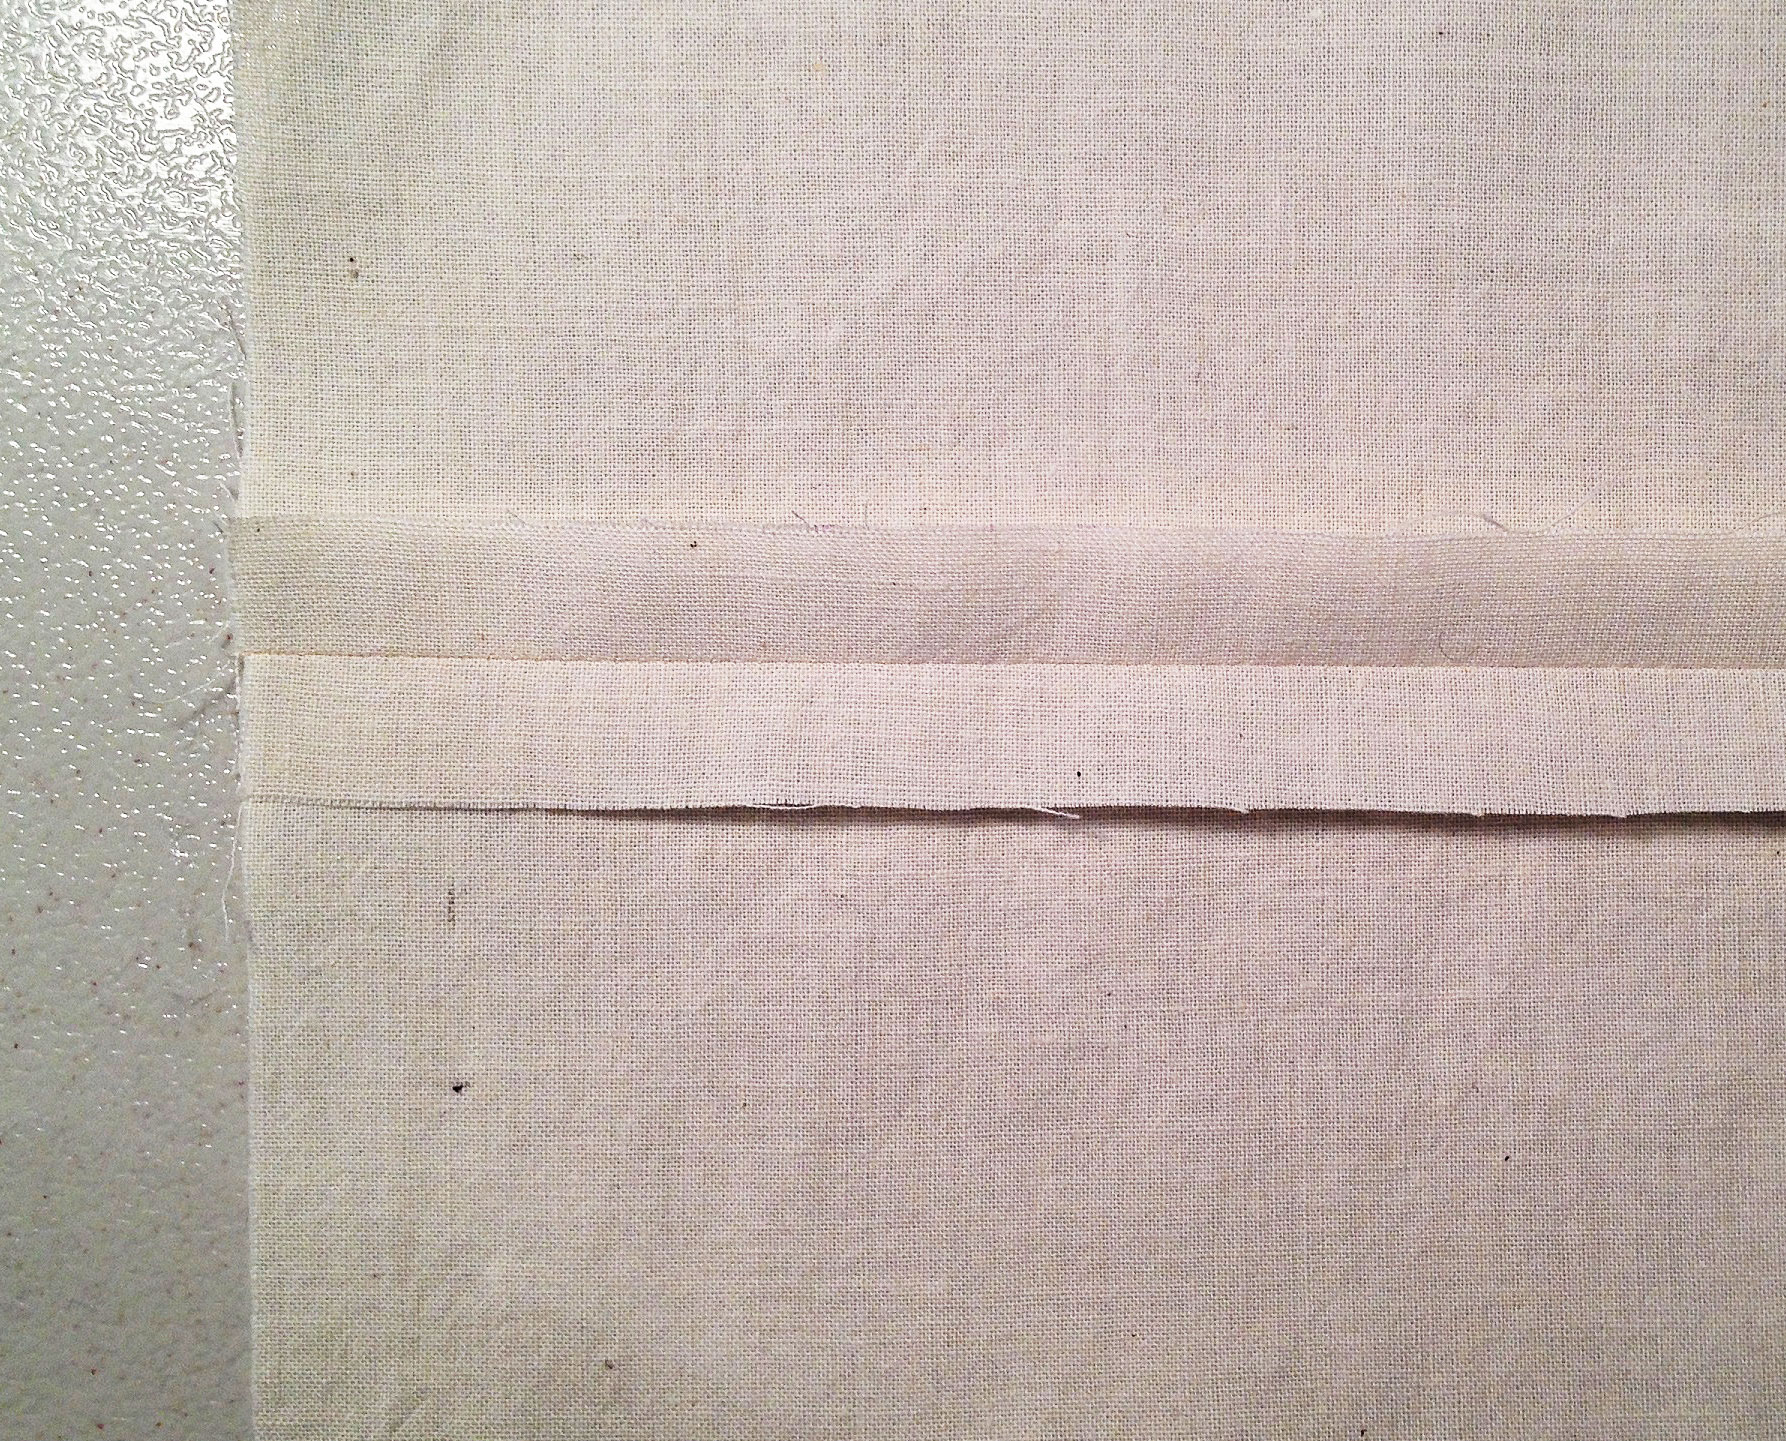
Pressed Seam Allowances
There are two ways you can proceed.
First, you can overlock each seam allowance separately, which is best if you want open seams. Note, however, that thin fabrics aren’t stable enough to withstand the overlocking. They may buckle or get drawn into the feed dogs.

Open Seam Allowances, Overlocked
Or, if you’d rather press the seam allowances to one side, go ahead and do so, then overlock the layers together, as one, along the edge.

Closed Seam Allowances, Overlocked
-
Tip
When you finish overlocking a seam, don’t pull the fabric to one side in order to cut the threads. As you overlock, the thread zigzags over a stabilizing bar that runs down the middle of the presser foot. If you pull to the side, the thread will catch on this bar and may distort or even tear the fabric. Instead, pull the fabric straight away from you, toward the back of your sewing machine, which will free it from the bar.
#7. Hong Kong Finish
This is a couture finish, often used on high-end garments. There are several ways of adding Hong Kong binding—this is my preferred method. It does add a little bulk, so it may not be appropriate for all fabrics.
You’ll need plenty of bias strips for this technique. It’s fun to use a contrasting fabric for the bias strips, especially one with stripes. If you’d prefer a more discreet seam finishing, use a fabric that matches or blends with your main fabric. Always try to pick a fabric that’s lightweight, in order to reduce the bulk. Potential fabrics include silk habotai and cotton voile.
It helps to have a 1/4″ quilter’s foot and a stitch-in-the-ditch or edge-joining foot. These will make your job easier, but they aren’t strictly necessary.
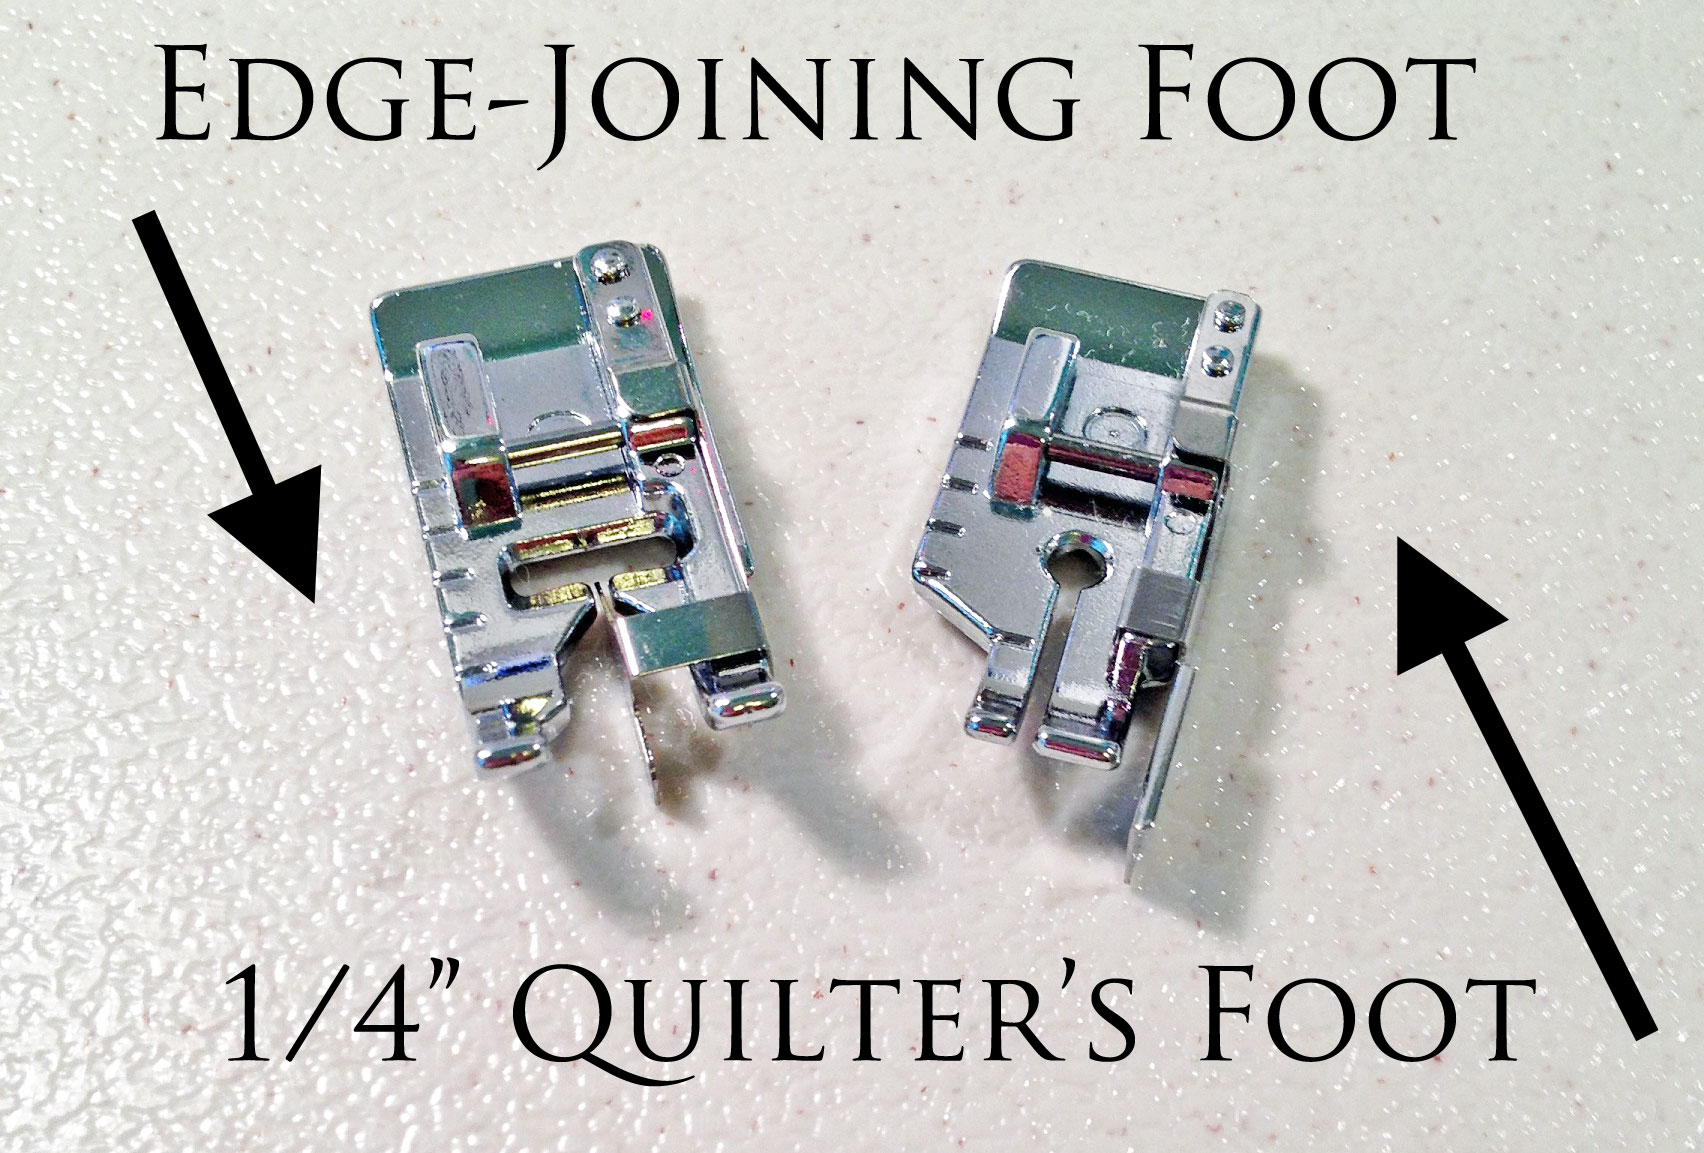
Presser Feet
Place your fabric with right sides together and sew your seam using whatever seam allowance your pattern calls for.
Press the seam allowance flat to meld the stitching, then press it open. For a truly flat seam, press from both sides of the fabric.
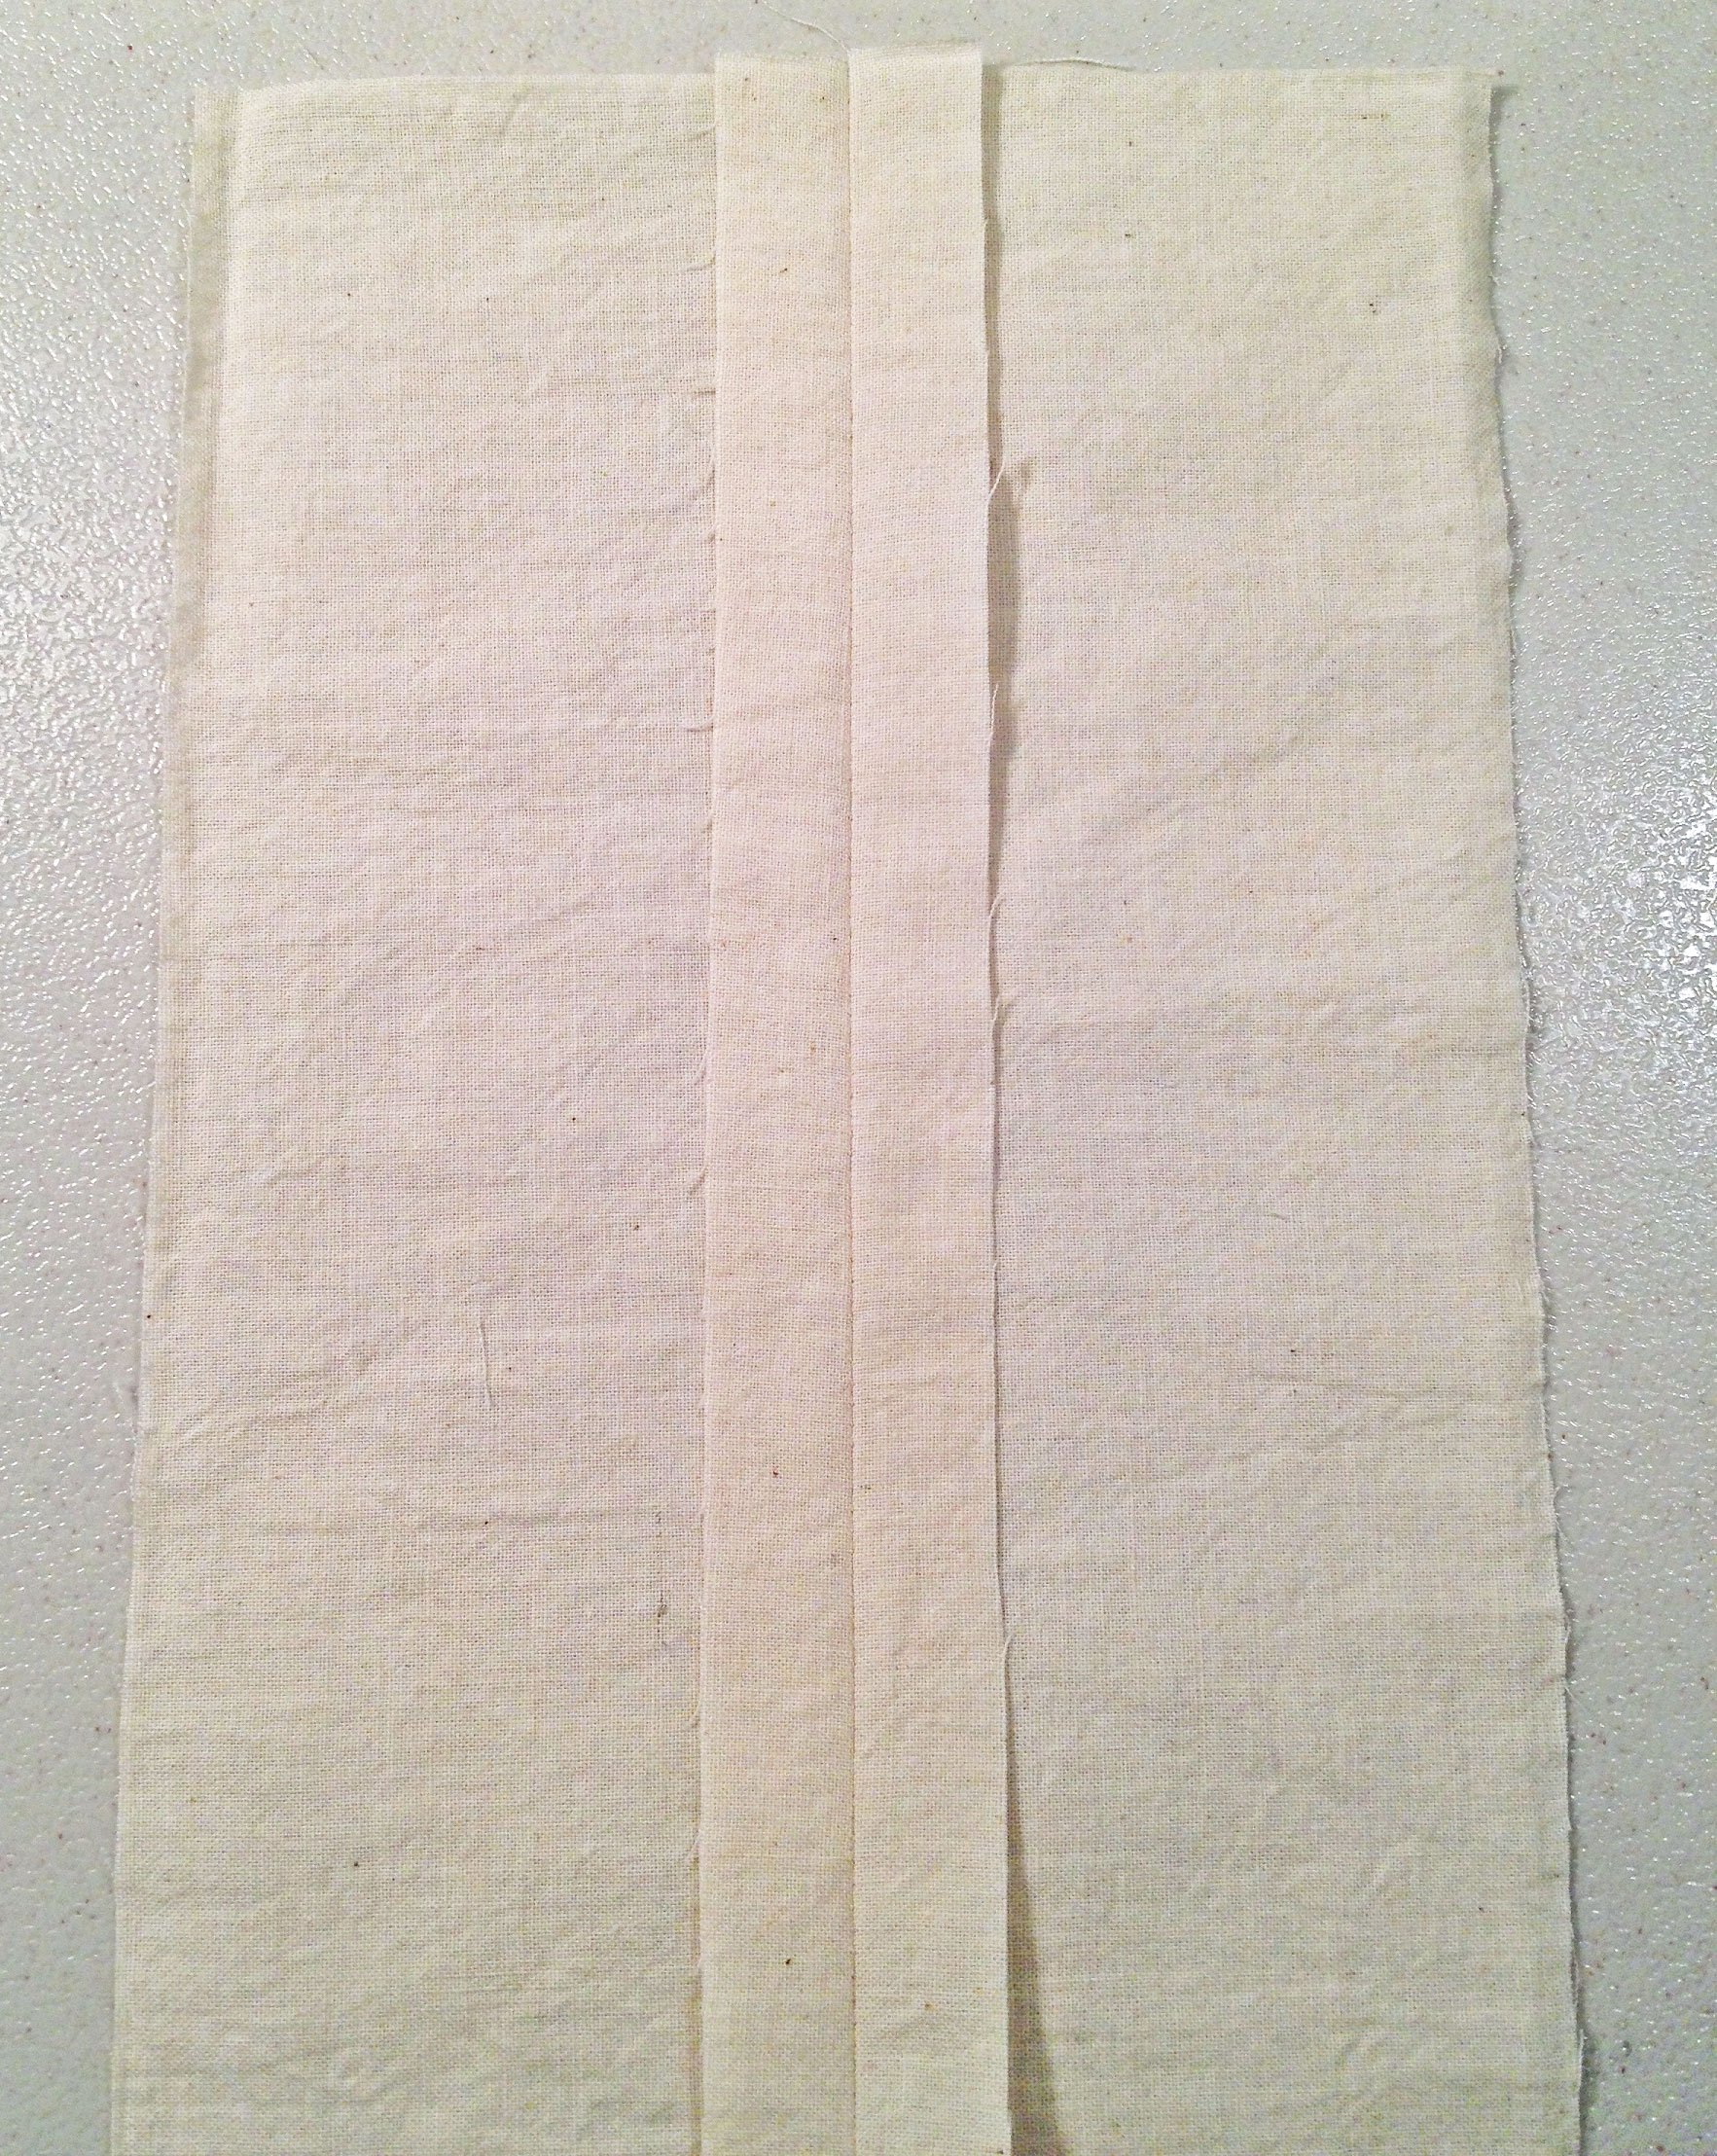
Pressed Seam Allowances
Cut a bias strip that’s double the width of your seam allowance and at least an inch longer than the seam to be bound.
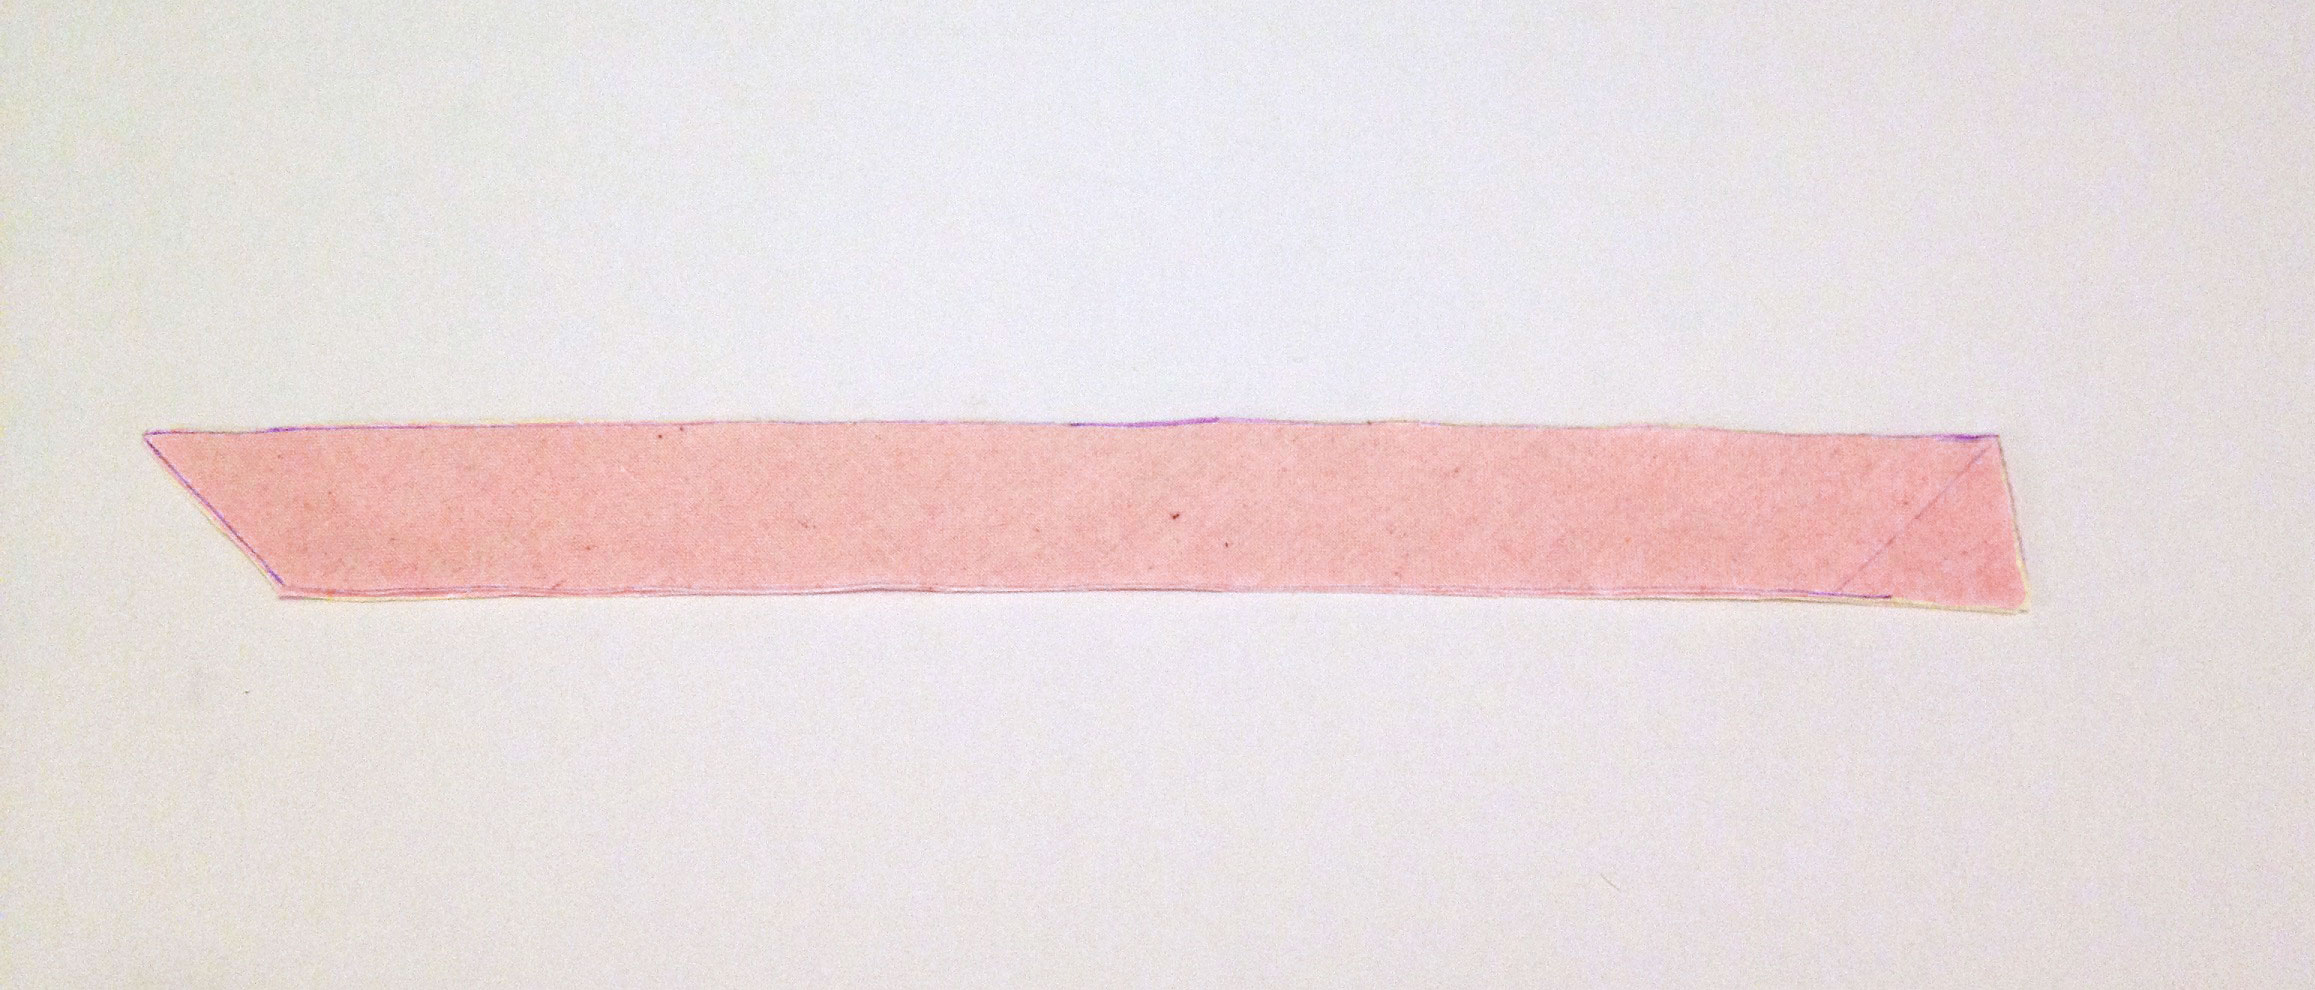
Bias Strip
Place the bias strip along one edge of the seam allowance, with right sides together, and pin. (Note that you’re only pinning through the seam allowance, not through the main garment.)
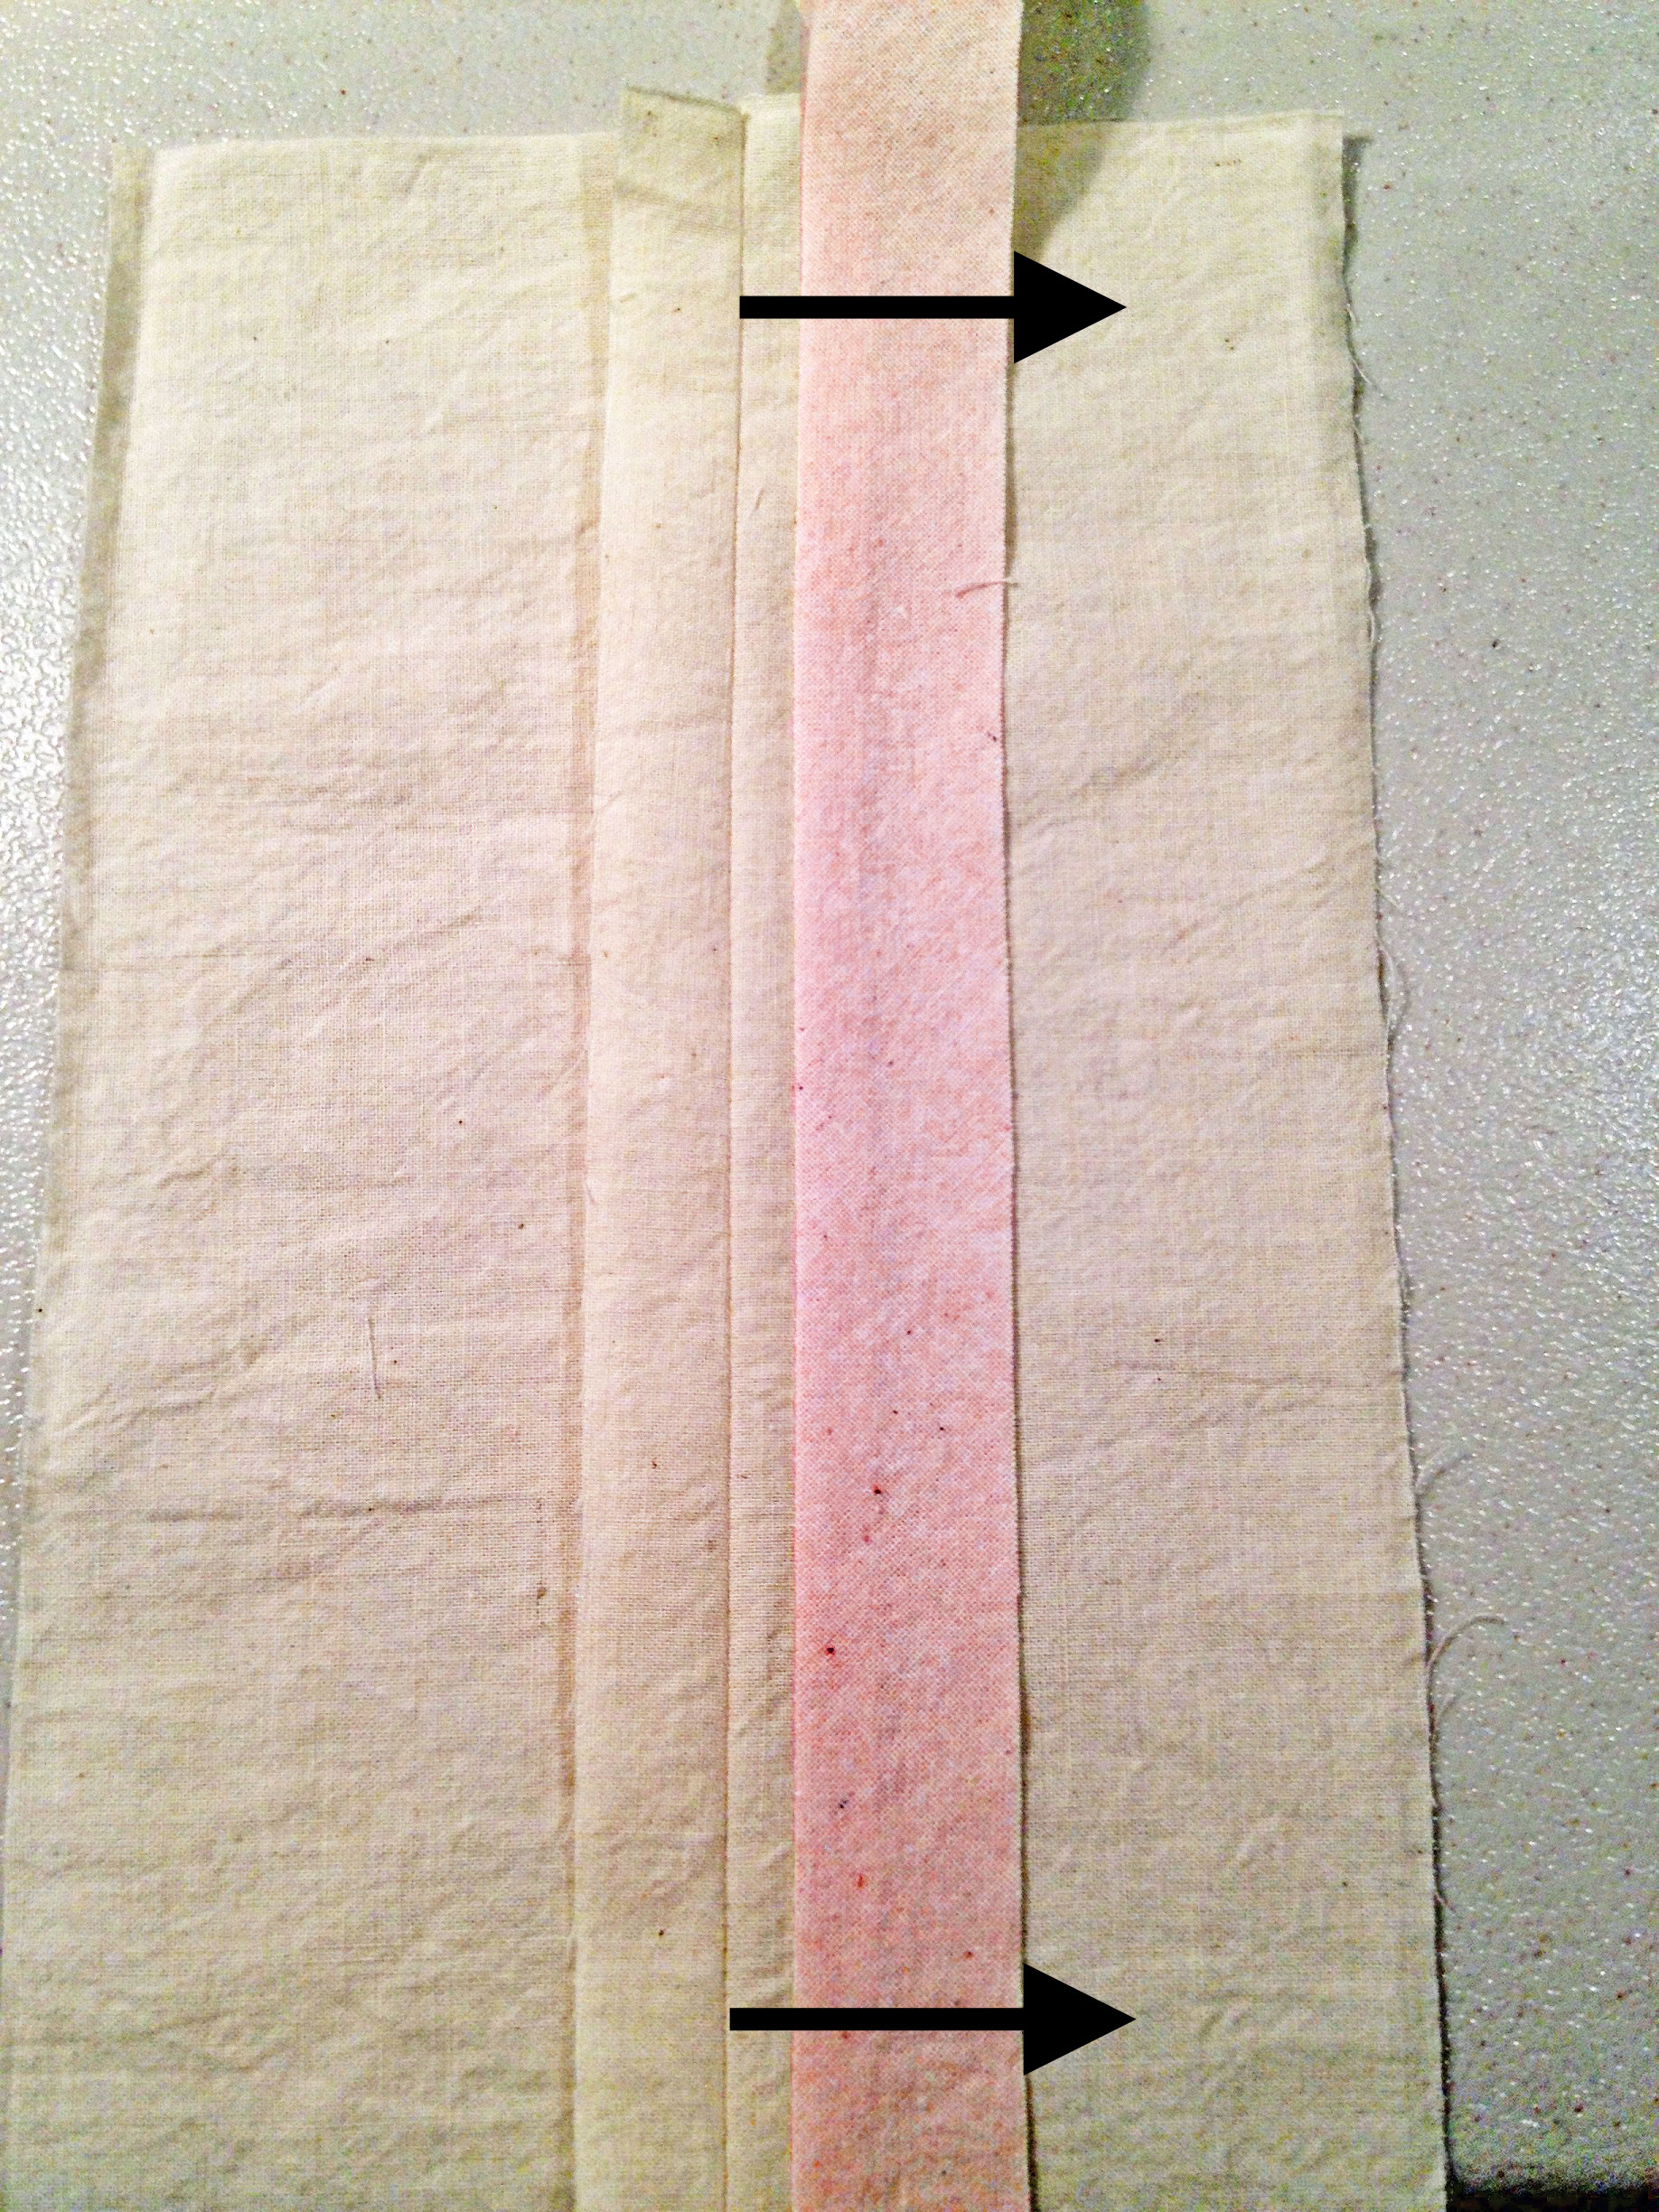
Using a 1/4″ quilter’s foot, if you have one, sew the bias strip to the seam allowance. If you don’t have one, just sew 1/4″ from the edge with your normal presser foot.
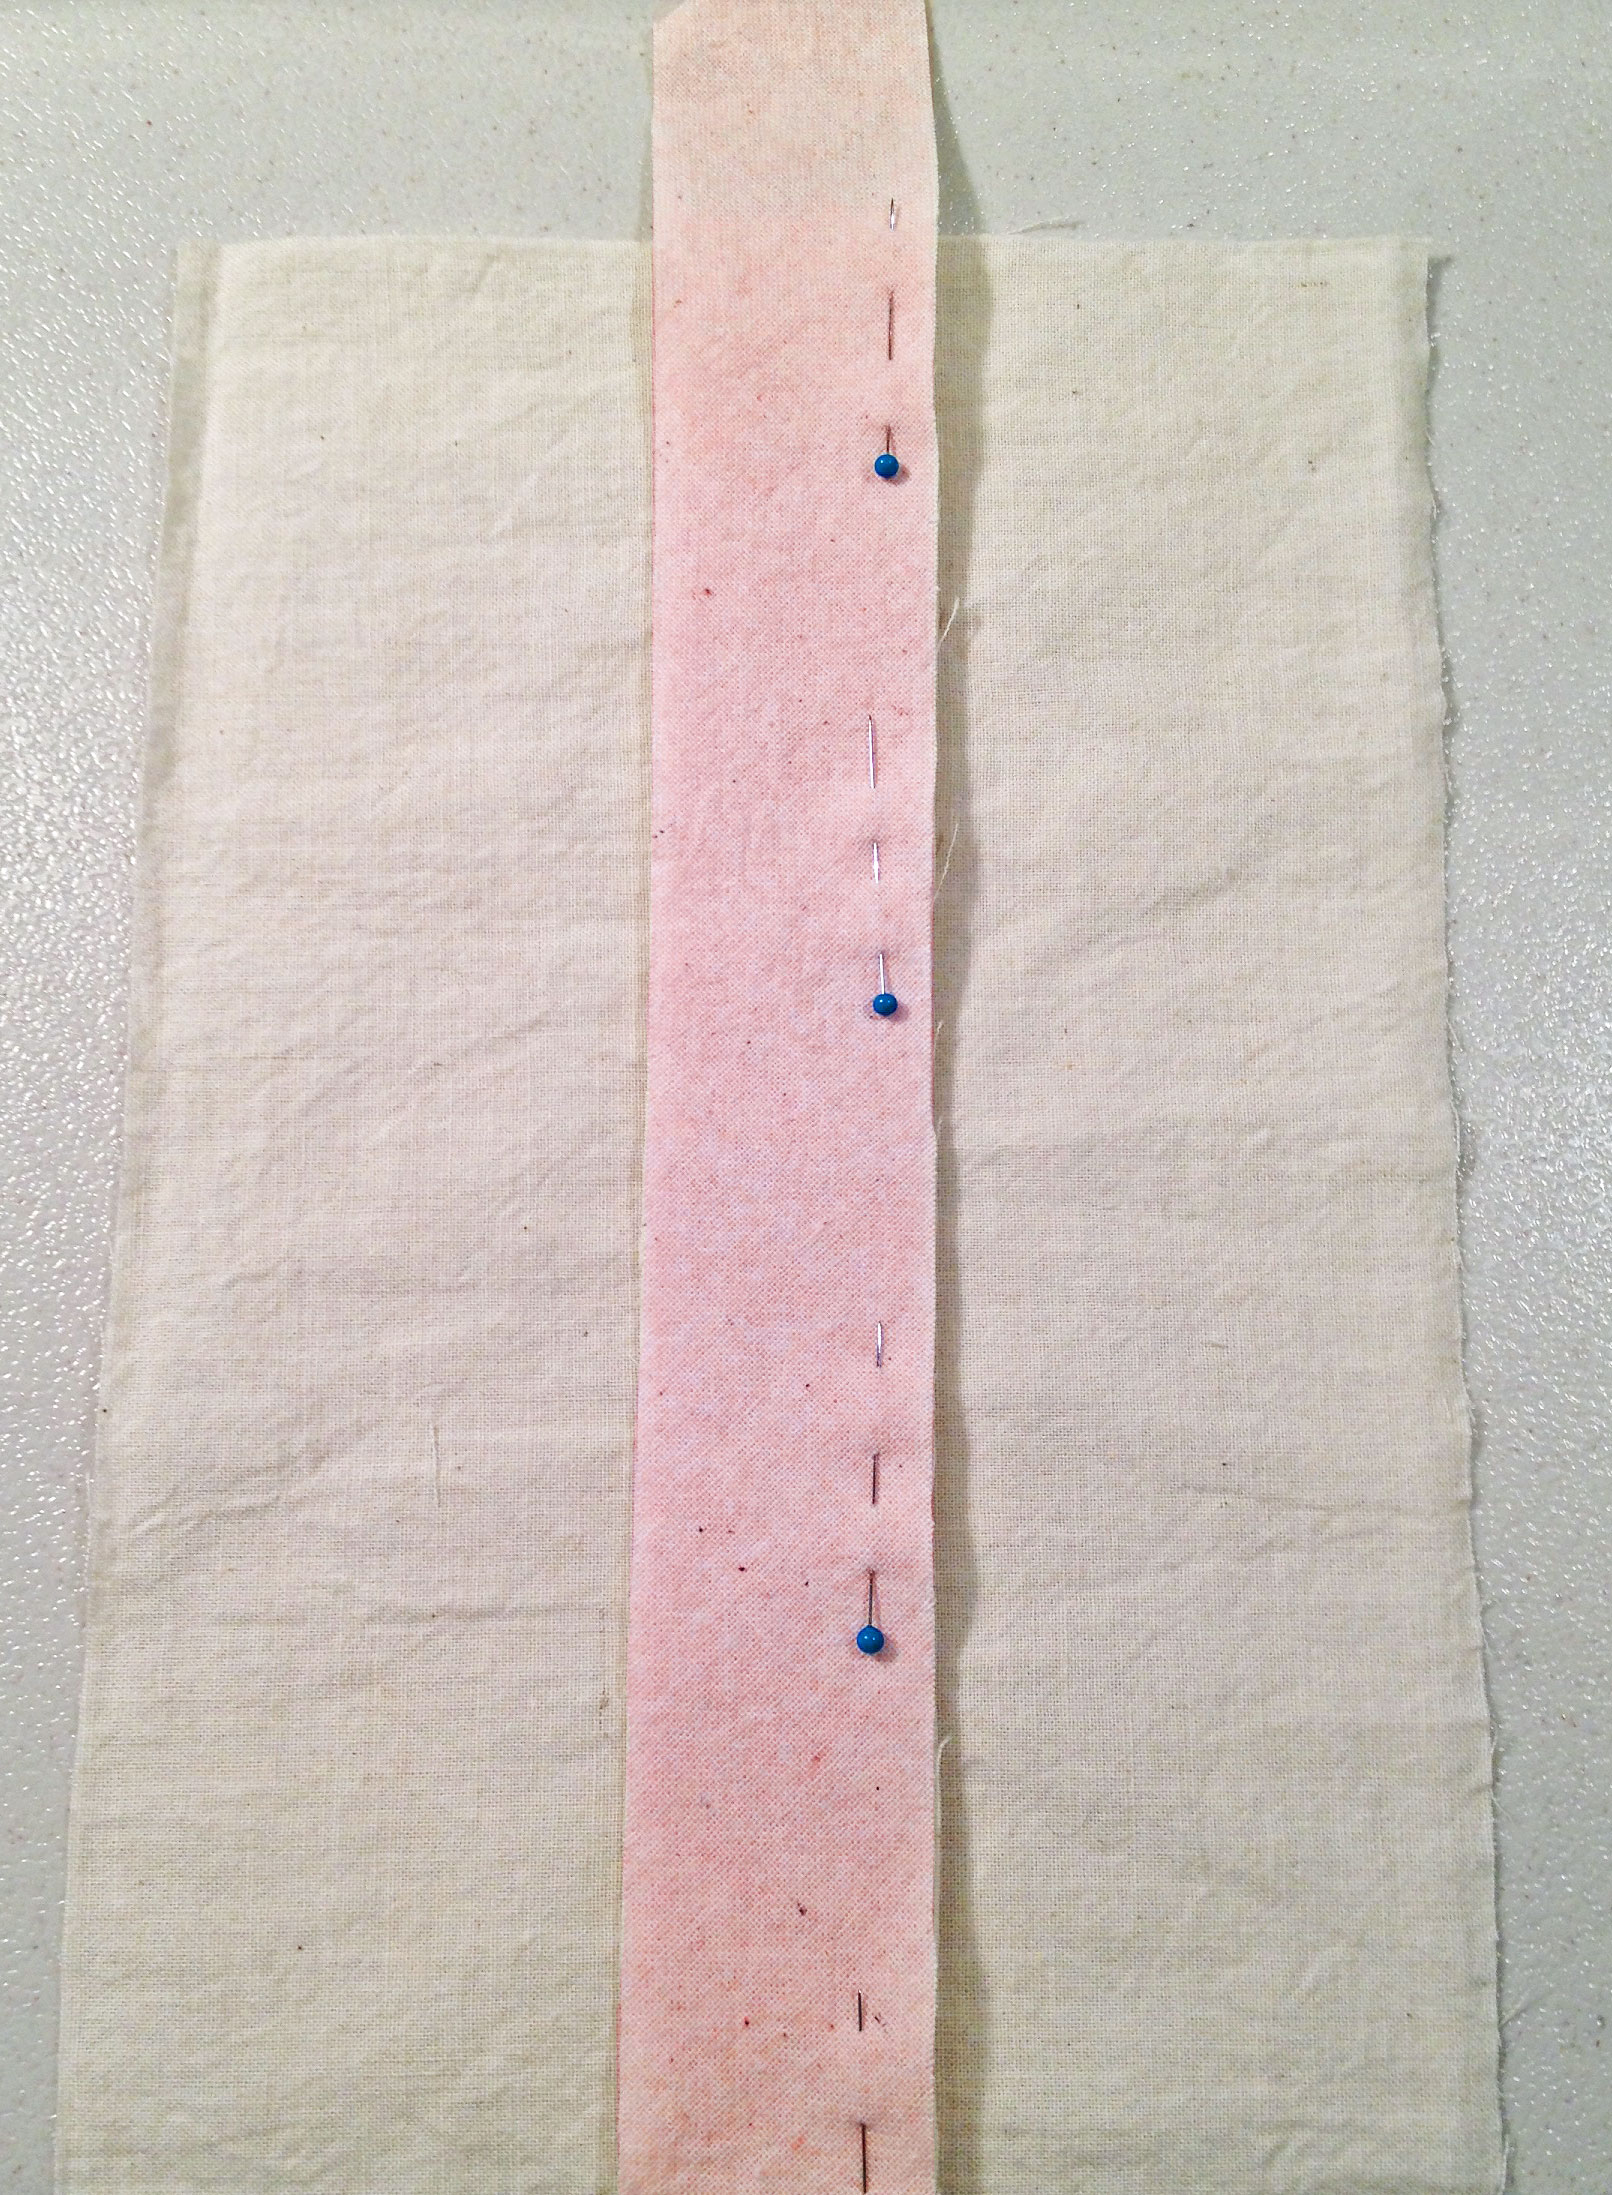
Pinned Bias Strip
Press the seam flat to meld the stitches, then press the bias strip away from the seam allowance.
Pressed Bias Strip
Fold the bias strip over the raw edge of the seam allowance and press it under, so it encloses the raw edge. Pin from the “right” side, the side that has the finished seam, not the raw edge.
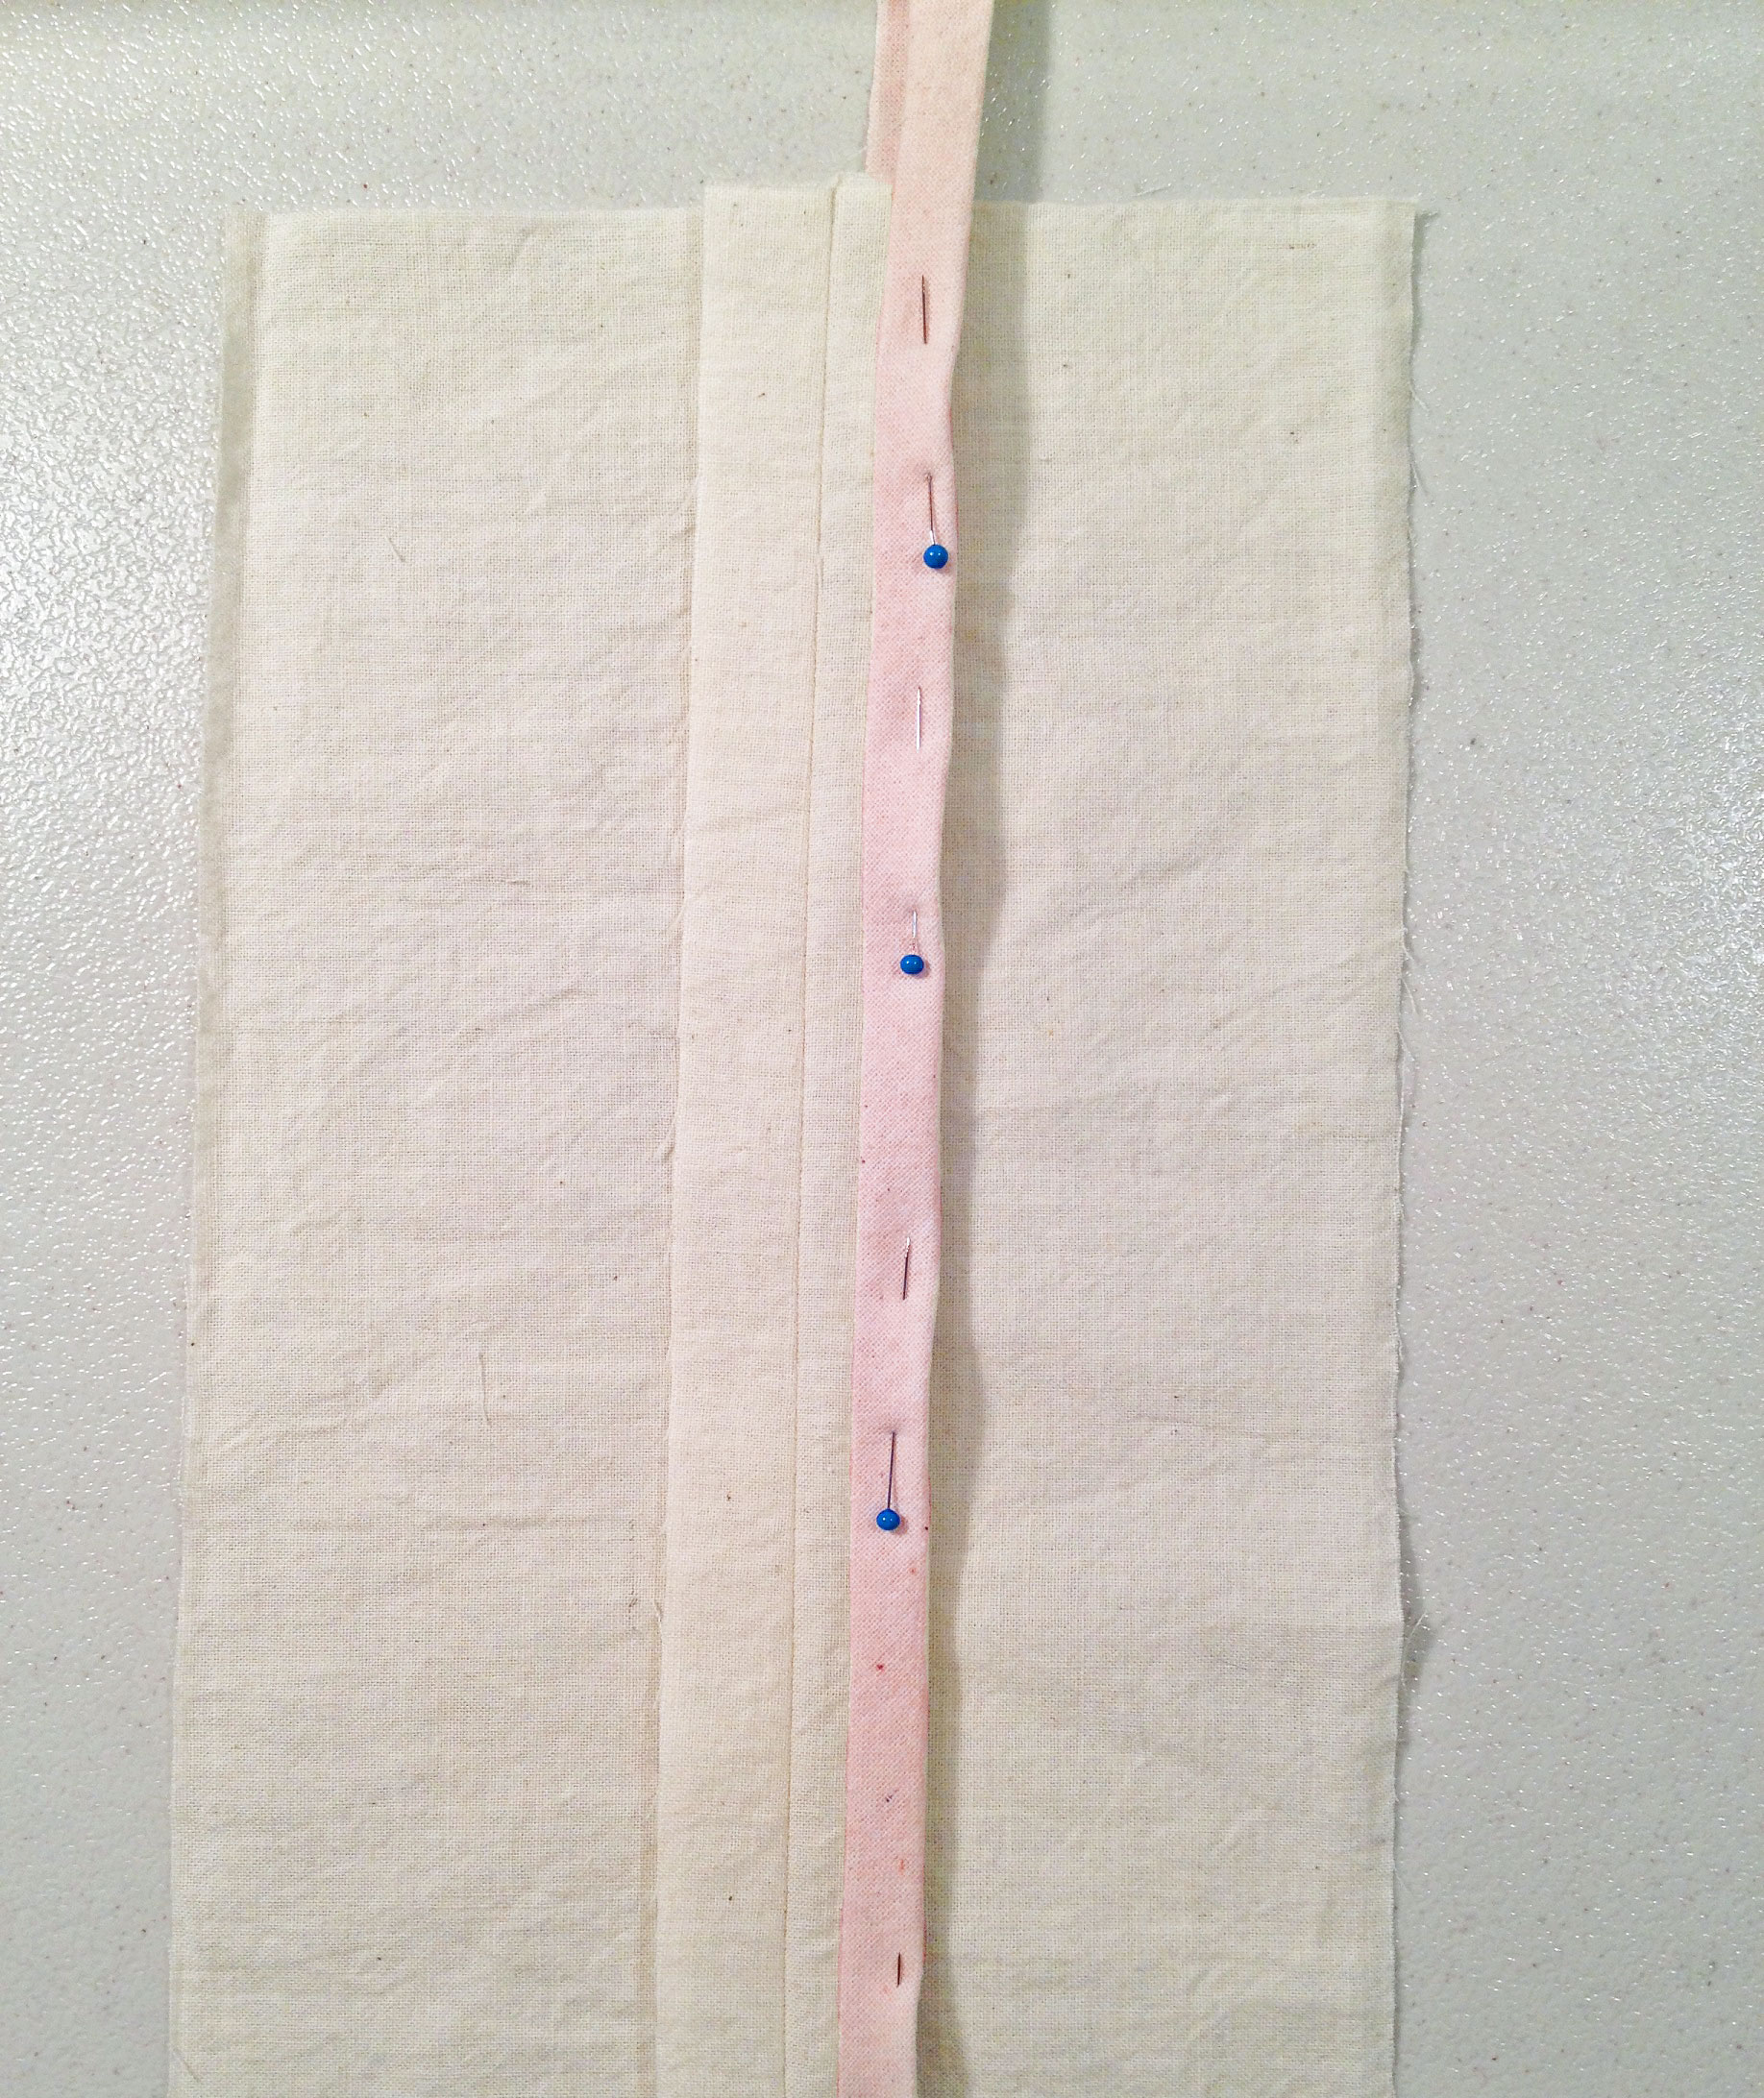
Enclosed Seam Allowance
Use a stitch-in-the-ditch foot, if you have one, to sew along the crease of the seam allowance, where the bias strip joins the seam allowance. You’ll be stitching through four layers of fabric. Sew slowly and carefully, staying right in the crease, making sure you catch the under layer of the bias strip in the stitching.

Stitch-in-the-Ditch (Top View)

Stitch-in-the-Ditch (Bottom View)
Trim any excess fabric.
Press the seam allowance flat to meld the stitches and get a crisp, clean finish.
Repeat the above steps to enclose the other side of the seam allowance.
Finished Hong Kong Binding
Conclusion
As you can see, there are many different ways of finishing your seam allowances, each with its own advantages and disadvantages. Try making samples of the various techniques and keep them on hand to refer to when beginning a new project. Always choose the method that will work best with your fabric and the kind of seams you’re planning to sew.
With a little time and practice, you’ll soon be producing beautifully finished garments!
6 Responses to Basics: Seven Seam Finishes