by Lisha Vidler
How many times have you labored over a new pattern, only to discover that it doesn’t fit? The bust is too tight, the waist is too long, the arms bind, and there are peculiar wrinkles across the back. What a waste of time and materials! It’s happened to me more times than I care to admit.
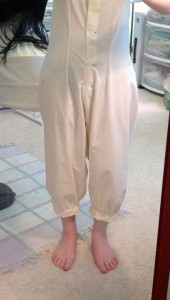
In the example below, these Victorian combinations were supposed to be knee-length. As you can see, I failed to take my petite stature into consideration and ended up with a garment that was ridiculously long. I didn’t realize my mistake until I’d finished sewing the entire thing.
A few years ago, I nearly gave up sewing altogether because of the fact that every time I made something new, it didn’t fit. Then I learned something that every dressmaker ought to know. The secret to perfectly fitting clothes? Sew a mockup.
It saves time, frustration, wasted materials, and best of all, it preserves your sanity. Why should you toil for hours, taking the risk that the final garment won’t fit? It doesn’t make sense and it certainly isn’t practical.
The Uses of a Mockup
What is a mockup? In couture houses, it’s called a toile. In the garment industry, it’s known as a muslin. Basically, it’s a test version of whatever you’re sewing. Fashion designers are familiar with muslins; they may go through several in their quest for an innovative design. Couturiers use toiles to perfect the fit before sewing the final garment. If the professionals use them, why shouldn’t the rest of us?
A mockup is essential if you’re fitting someone long-distance. You can send them a muslin, have them try it on and take photos, mark any changes that need to be made, and then send it back. This can be repeated as often as necessary to achieve a perfectly fitted garment.
For those of us who are sewing for ourselves, mockups are equally as vital. It will save time in the long run, because you won’t have to alter your garment after it’s already been made. You know how it is: for every adjustment you make, a wrinkle appears somewhere else, requiring more tucks and hastily added darts to make the thing fit. All the while, you’re desperately trying to conceal your alterations, so no one will notice how badly you messed up.
And what if your garment ends up too small? There’s only so much seam allowance to be let out.
Can you see how a mockup will save you frustration? You can add or subtract from any part of your garment without risking your expensive fabric. No more having to rummage through your scraps, hoping and praying for a piece big enough to cut a new sleeve after you discover your pattern is too small across the bicep. No more slashing your darts or clipping your seams and then realizing you need to let them out. You’ll make all of your mistakes ahead of time, with your muslin.
Mockup Fabrics
What kind of fabric can you use for your mockup? It’s best to use something cheap enough that you won’t cringe every time you have to make an alteration, or even if you must toss the whole thing and start fresh. That doesn’t mean you can use just any bargain fabric, though.
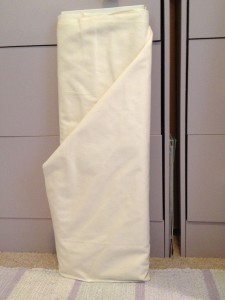
Try to match the weight and drape with the fabric you’ll be using for your final garment. For a coat or heavy jacket, look for twill, duck, or something that will drape the same as your fabric. For a summer dress, find something thin and airy, such as batiste or broadcloth. Stock up on suitable fabric when it hits the clearance aisle of your local fabric store. Unbleached muslin often goes on sale for less than $1.50/yd. Another option is bed sheets, which you can find at thrift shops, garage sales, or discount stores.
Making a Mockup
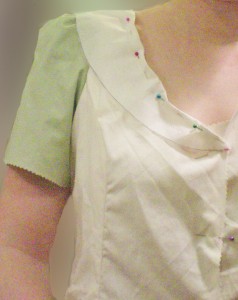
To begin, tissue fit your pattern. Carefully pin the edges of the pattern together at the seam allowance and slip it on over your undergarments. Since it’s the tissue pattern, you won’t have both sides of the garment, but you can still determine the basic fit.
If there’s any changes that you traditionally make to a pattern, do so after verifying that they’ll be necessary. (Sometimes a pattern will surprise you and you won’t need to make your usual alterations.) For example, if you have a large bust, you might typically need to make a full-bust adjustment. If you have sloped shoulders, you might always adjust the slant of the shoulder seam. Get those alterations out of the way, and then you can see what else needs to be done.
Make certain that the center front meets the center of your body, that the waistline is at your waist (right where the dip appears when you bend to one side), and that the bust marker (a circle with a cross through it) hits at the center of your bust. Make note of whatever changes are necessary at this point, such as extending the side seam, raising the bust, or lengthening the waist. If you think you might forget, write down exactly what adjustments need to be made.
Before you cut your mockup fabric, choose carefully which pattern pieces to use. Keep in mind that you only need to verify the fit. This means you can omit facings and linings and any purely decorative pieces. To illustrate, a form-fitting dress will require that you sew the bodice and the skirt, since you’ll need to fit the hips and derriere. However, a full-skirted dress requires no fitting from the waist down. Therefore, you can just make the bodice—so long as you keep in mind that the weight of the skirt will affect the hang of the top.
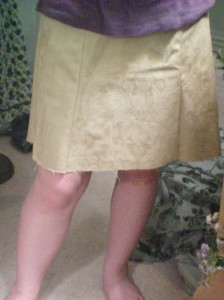
In the example below, the skirt had a flounce around the hem that I omitted, because it didn’t affect the fit.
Sizing
Check your pattern size carefully and don’t be alarmed if it’s much larger than what you expect. Most people do not wear the same size in a commercial pattern as they do in ready-to-wear clothing. I typically wear a size 6, yet I make my patterns in a size 12! This is normal.
Here’s a tip: when you measure to determine your size, do not use your across-the-bust measurement, as the pattern suggests. This will result in a pattern that fits in the bust, but is too large everywhere else. Instead, measure above your bust, just under your arms. You may have to enlarge the bust of your pattern, but doing that is much easier than having to alter the shoulders and upper chest.
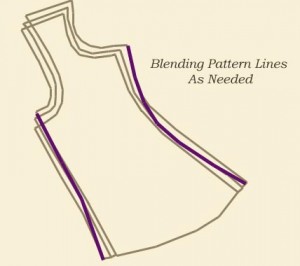
If your bust, waist, or hips are different from the sizes given on the envelope, you might want to grade your sizes to match your body. For instance, if you have proportionally bigger hips, you might need a size twelve hips, but a size ten waist and bust. Figure out which sizes you need for each body part, then draw a line to smoothly connect the different sizes. You can skip this step if you’re lucky enough to match the pattern’s proportions.
Never cut your pattern along your size line, because then you’ll be unable to use any of the larger sizes and will have to buy a new pattern if you need a different size. You have two alternatives. First, you can trace the entire pattern in the size you need onto a fresh sheet of tissue paper or pattern material, such as Pattern Ease.
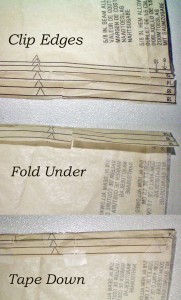
Or, once your sizes are determined, you might fold the excess pattern out of the way. To do this, take small clips along the edge of the pattern, right up to your size line. You’ll need more clips along curves, fewer along straight edges. Fold the extra tissue underneath the pattern and use small pieces of tape to secure the pattern every so often. This ensures that your pattern is exactly the size you want, but keeps the other sizes readily accessible.
Cutting Your Mockup
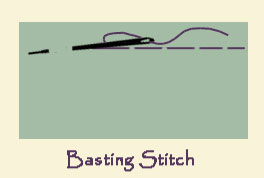
Pre-wash your mockup fabric and make sure it’s wrinkle-free. Check that your grain is straight, then pin the pattern pieces and cut them as you normally would. Add all of the necessary marks, notches, and dots. Assemble the pieces using a basting stitch. This will be the longest stitch your machine allows, or if you’re hand sewing, running stitches that are about half an inch long. You want to use a basting stitch so that you can easily make any necessary changes.
Fitting Your Mockup
When making adjustments, start at the top and work your way down. First check the fit of the shoulders. The end of the shoulder should be right at the dip that appears when you raise your arm, or about half an inch from the outer edge of your shoulder. (Don’t forget about your seam allowance, though—you don’t want to trim your shoulder seam and then realize you accidentally cut away your seam allowance!) The armscye should curve smoothly around your shoulder, with about half an inch of ease at the underarm. It seems counter-intuitive, but if the armscye is too wide, you risk losing range-of-motion.
The garment should skim your body without wrinkling, gaping, or pulling. Minor furrows that appear only when you move are fine, but any obvious folds or wrinkles indicate a fitting issue. Most fitting wrinkles form lines that point back to the source of the problem, so pay attention and these will help you solve the mystery of what doesn’t fit.
Be cautious of over-fitting! The garment should fit well, but this doesn’t necessarily mean snug. For modern garments, you want a smooth, comfortable fit. If you’re making a corseted evening gown, or a Victorian bodice, on the other hand, you’ll want a skintight fit.
-
Tip: I highly recommend that you invest in a book on fitting, such as Fit For Real People. Everyone’s shape is different, so learn to fit your own body with all it’s quirks and peculiarities. Your clothes will feel more comfortable and you’ll look fantastic!
Alterations
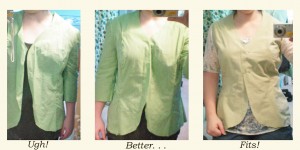
If your mockup is too large or too small, you may find that you simply need to go up or down a size. Or you may find that everything fits well except the bust, or hips, or shoulders, in which case you’ll need to make individualized adjustments. Consult your fitting book on what alterations need to be made. If you’re lucky, you may be able to get away with simply letting out or taking in a seam.
If you have an area that is too tight, clip the basting stitches at the nearest seam. Allow the fabric to spread naturally and add tissue paper to fill the gap. If it fits once you’ve opened the seam a little, measure the new space, divide by two, and add that much to the seam allowance on either side of the seam, tapering it to blend into the original seam.
If you have an area that is too loose, pinch the excess fabric into a dart. (Try to do this at a seam, if possible.) Taper the dart carefully, so that it’s not obvious. Pin the dart and check your fit. If it seems to have worked, take a corresponding dart out of your pattern. Eliminating this excess fabric now, before cutting your pattern, ensures that you don’t need to put a dart in the finished garment. Darts in patterns rarely show, while darts in finished garments can be all too obvious.
If there is a great deal of excess fabric, you might need to go down a size or two. Trim your mockup to the next size down and see if that makes a difference.
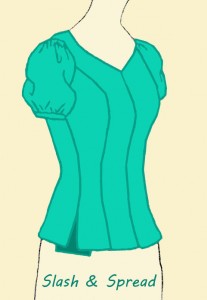
If your issue is more complicated, such as wrinkles that you can’t figure out the cause of, consult a book on fitting. Sometimes the solution isn’t obvious. You may need to slash and pivot your pattern pieces, or use other ways of fitting your pattern.
Copying Your New Pattern
Once you’ve made all the necessary changes, you’ll need to transfer these changes to your pattern. You have three choices:
- Transfer your alterations to your original pattern one at a time, drawing new lines with a pen.
- Trace your mockup onto fresh pattern material.
- Use your mockup as your new pattern, after picking the seams apart and pressing it flat.
I prefer a combination of methods. First, I trace my original pattern onto a sturdier pattern material, such as Pattern-Ease. I’ll make my changes one at a time onto this pattern, folding and pinning, or taping the material to accommodate the alterations. Once that’s done, I trace a new pattern. This allows me to keep the original pattern intact, in case I need to refer to it in the future, and it gives me a pristine pattern to use in making my newly-fitted garment.
Another benefit to tracing your new pattern is that you can use it over and over. This is called a “Tried and True” pattern, or TnT. You can make adjustments to the design, such as adding pockets, altering the shape of the neckline, changing the sleeve or hem length, and so on, to achieve a different look without the hassle of fitting a brand new pattern.
Make sure to label your new pattern. On each piece, write the original pattern brand, number, and size, along with a notation that indicates you’ve altered it to fit. That way, you’ll always know which pattern it is, and you won’t confuse an altered commercial pattern with one that you’ve drafted yourself.
Second Mockup
Now that you’ve successfully fit your pattern, it’s time to make a second mockup. Consider this your safety net. After all, you want to be certain that your changes will work, don’t you? There’s nothing worse than finally cutting your good fabric, only to realize that your alterations weren’t quite right!
In Summary
-
Tissue fit.
-
Make any changes you always need to make (e.g.: full-bust adjustment, sloping shoulders, swayback, etc.)
-
Check your size and either trace your pattern or fold excess tissue out of the way.
-
Cut your mockup, baste it together, and try it on.
-
Make any necessary changes to guarantee a good fit.
-
Don’t over-fit!
-
Copy your new pattern.
-
Make a second mockup, just to be sure.
-
Cut your final, well-fitted garment.
Truly, a mockup is not a luxury or a waste of energy—it’s a necessity for all dressmakers. It saves disappointment and frustration, and it ensures a perfect fit, every time!
~~*~~
Do you use a mockup every time you sew? What tips and tricks do you use to make mocking-up easier?

Thank you for your article on a making a toile. Just one question: once you have basted the toile and found the proper fit, do you then “unbaste” the muslin to make the copy?
You can do that, yes. However, I prefer to copy the changes over to my pattern, so I have a permanent record of the alterations I’ve made. See, if you use the muslin mockup as your pattern, it’s not really reusable. It’s a one-time deal, since the fabric is easily distorted. It’s harder to use fabric as a pattern, too. There’s a reason pattern companies use tissue or thin paper for their patterns! I’ve found that, instead of using the mockup as my pattern, it’s easier to transfer all the alterations to a traced copy of the original pattern. (That way, you don’t ruin the original with all your alterations.) Hope this answers your question!
Pingback: Hello. I am going to cosplay Olivier Armstrong from FMA brotherhood and was wondering how would I create a pattern for the military outfit and what type of fabric should I use. ~Thank you |
I love this article. The fact that you posted pictures to illustrate just how horribly wrong it can go by following the pattern exactly how we were taught. I totally feel your frustration. I most definitely will be following your advice. Having 3 kids and a busy household I mistakenly thought I would save time by going straight to cutting out!! For someone who went to college to study patterns and textiles I should have known better! Thanks for this page. I’m saving it to remind me that there’s no rushing a well fitted garment.
Pingback: Improving Theatrical Costumes, Part 2 – Your Ward
Pingback: Improving Theatrical Costumes, Part 2 | Foundations Revealed
Pingback: 10 Tips for Better Costuming | Foundations Revealed
Really pleased to find this website with so much useful information on fitting a pattern. I have made my own skirt pattern without unpicking the original skirt…tricky. I couldn’t remember what they called a mock up fabric so thank you for the information. I will now use an old cotton bedsheet to make my toile saving myself the expense of buying cheap fabric. Good advice on choosing a pattern size too as that is new information and explains why I have had problems with shop bought patterns. Am saving this link for other articles. Thank you.
Pingback: Why Patternmaking Won't Exist In The Future | Tukatech-Fashion Technology Design Software
Wonderful write up and information although I do have a few follow up questions. I’ve tried all kinds of muslins and have these questions that I am hoping you can help me with as I have not been able to find an answer.
(1) Is it okay to use preshrunk permanent press 100% cotton muslin such as the 107″ Hanes Fabrics Premier Quality Wide Cotton Muslin Preshrunk Perm Press Unbleached”? Or will this fabric cause false fitting readings of the tested sample?
(2) Does it matter if you use bleached or unbleached? Again, don’t want false fitting symptoms.
Thank you for your help.
Muslin is the popular go-to, since it’s versatile, easy to find, and relatively cheap, but it’s important to use a fabric that’s similar to your final fabric. if you’re making something heavy, like a coat, use a heavier mockup fabric. If your final fabric has some stretch to it, make sure your mockup does, too. That will give you the most accurate fit. I can’t think of any reason why preshrunk or bleached muslin would work differently than regular unbleached muslin. I often use cotton or cotton/poly blend flat sheets for mockup fabric, since they’re cheaply available at most thrift stores.
The only time I’ve had trouble with muslin is when making custom doll clothes. Muslin tends to stretch a tiny bit, just enough to throw the fit off by an eighth or quarter of an inch. For regular clothing, that isn’t a problem, but when you’re sewing for a 16-inch doll, it can drastically alter the fit!
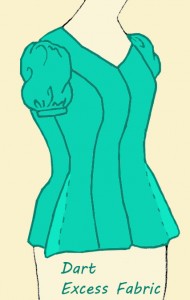
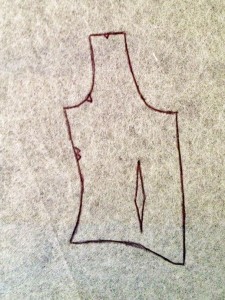
My muslin is perfect except I have found that I need to remove a bit of excess fabric where I could place a French dart. Can I just pinch that little bit out (it really is a miniscule amount of fabric) and use the muslin as the pattern? I deplore making darts!
It depends on how big the pinch-out is. If it’s tiny, you may be able to do that. But if it’s bigger, you may have issues with warping or distortion.