
by Lisha Vidler
(Click on any image to view it full-size.)
In this two-part tutorial, we’re making a custom crazy-quilted book cover. First, we created a pattern and made a mockup to ensure a perfect fit. Then, we designed the layout of the crazy-quilt cover. Now it’s time to start quilting!
Step #5: Quilting
5A. Cut the Main Pattern Pieces
Using your pattern, cut out the pieces you’ll need for the book cover: outer layer, lining, pockets, and the optional button tab. The outer layer should be of muslin. Everything else should coordinate with the scraps you’ll be using for your crazy-quilt.
5B. Draw Your Foundation
There are several methods that can be used for crazy-quilting. Some embrace the random, pieced-together approach, but I prefer a technique called “foundation piecing.” For this to work, you must draw your quilting design directly on the muslin base, using a chalk pencil or fabric pen. You’ll sew pieces onto the muslin one at a time, like assembling a puzzle.
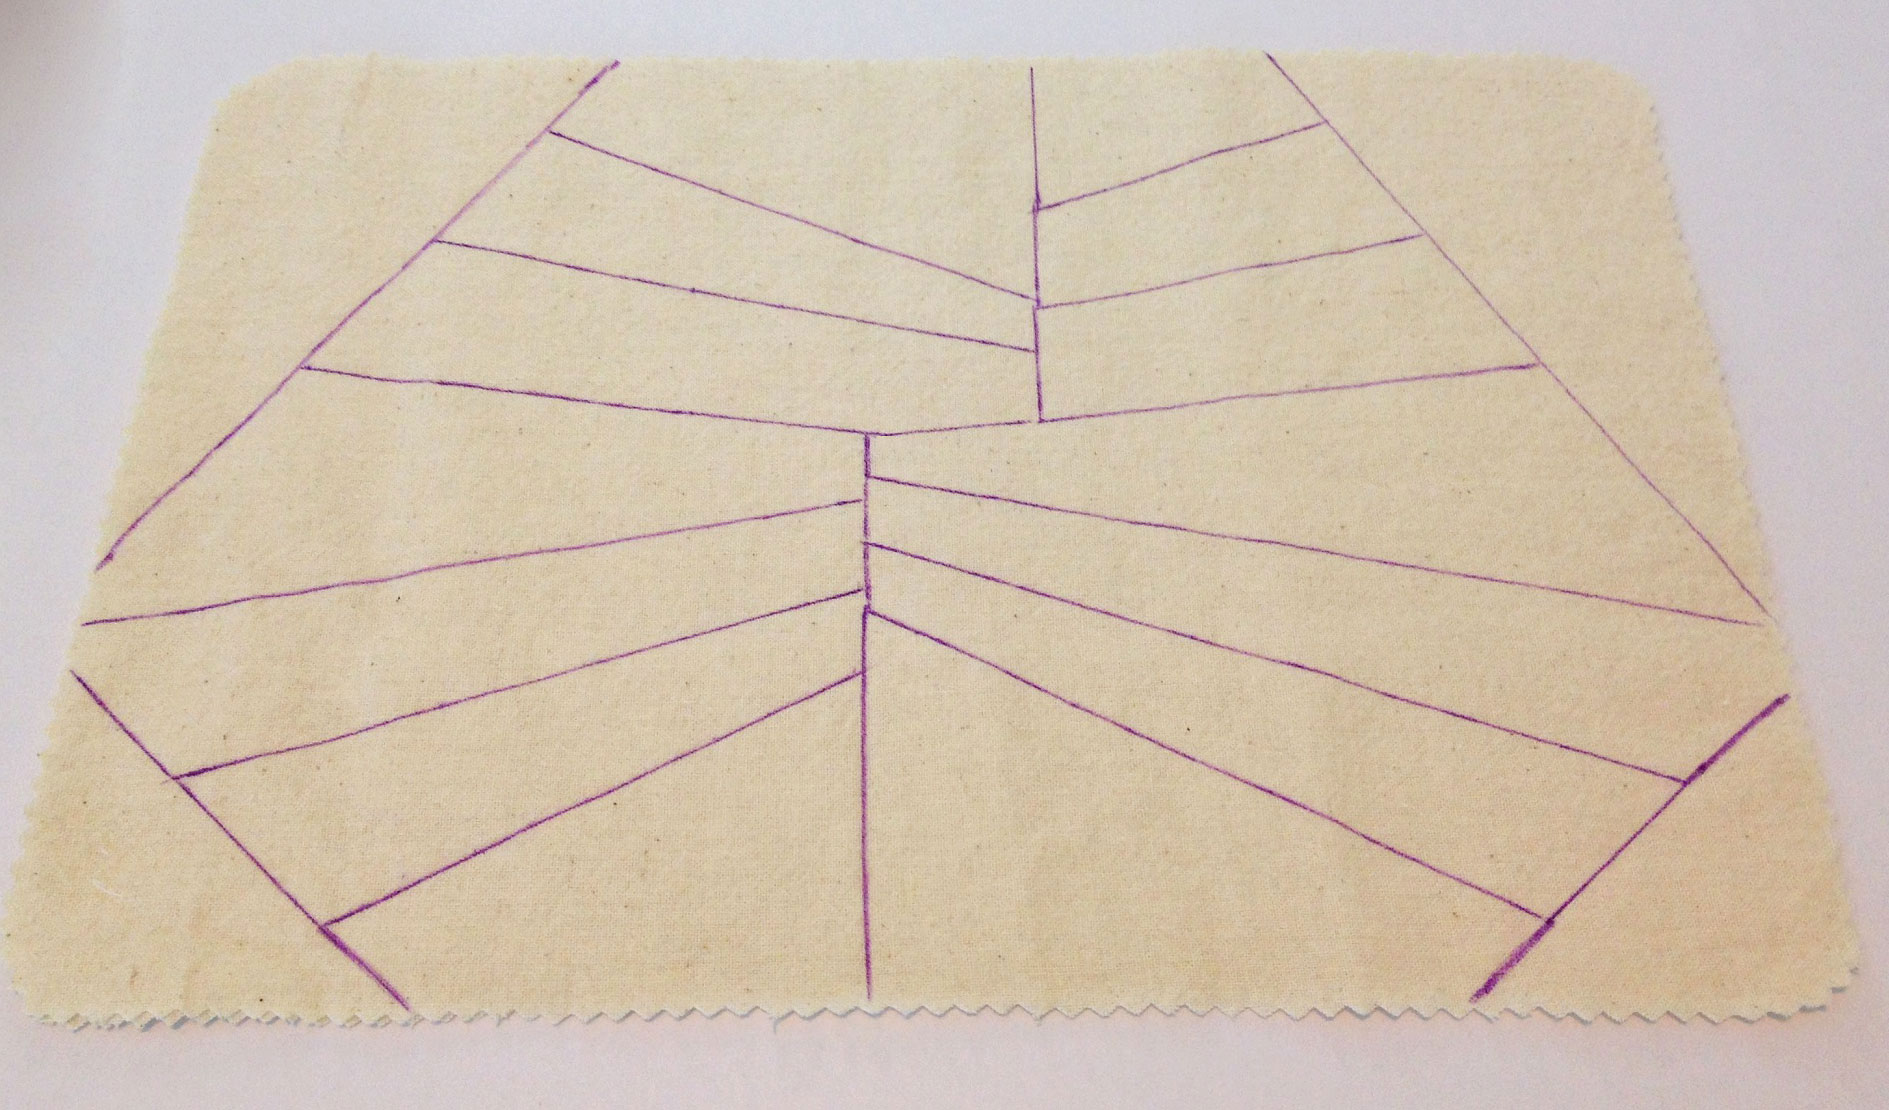
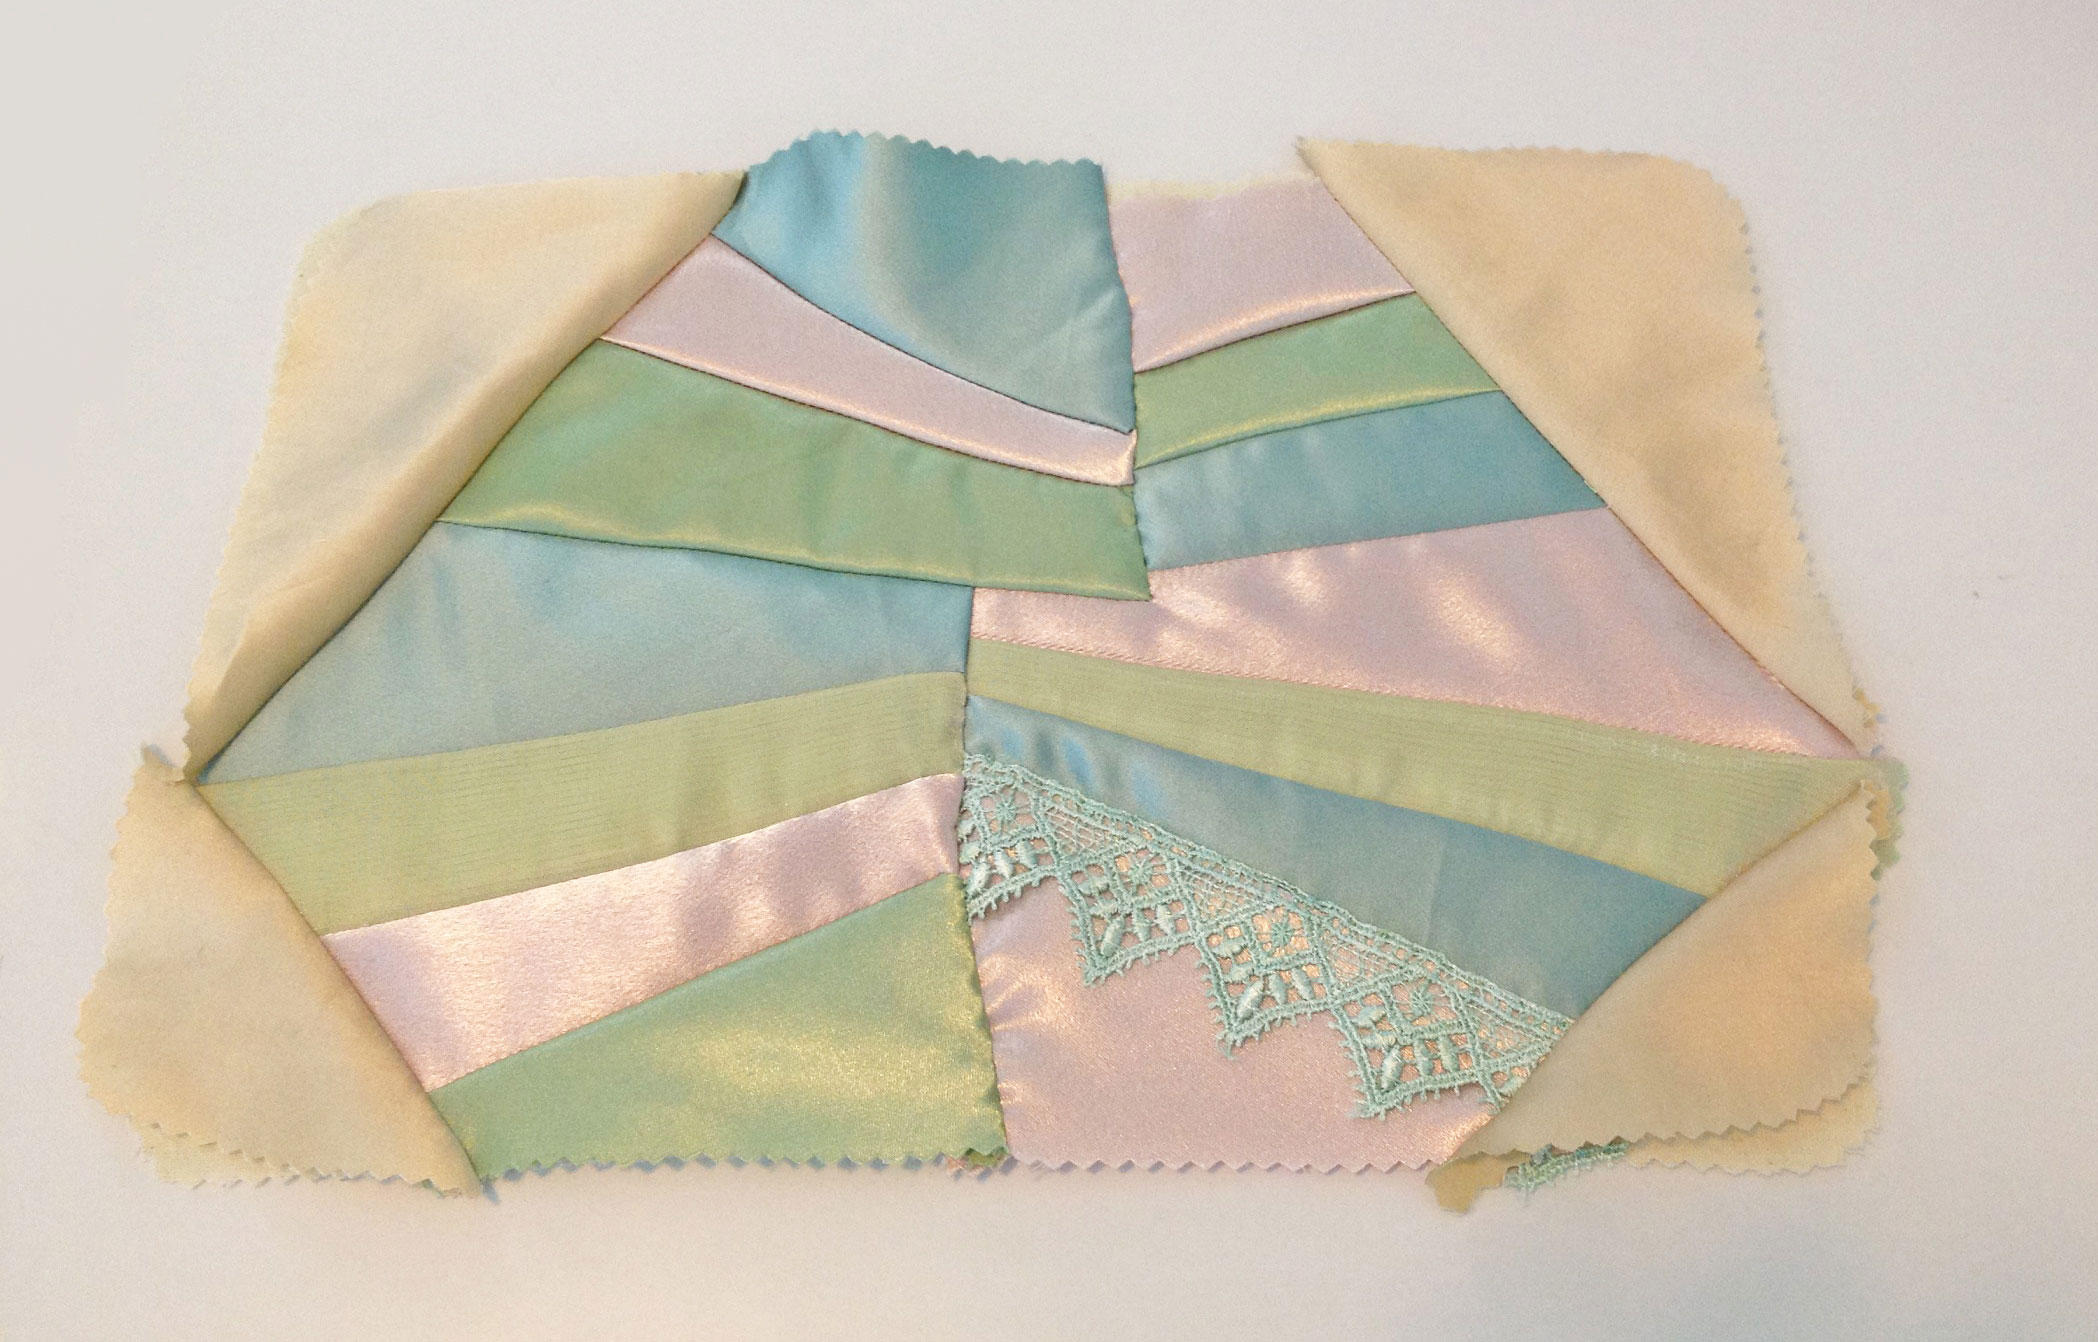
5B: Design Layout on Muslin Base
|
Flaw Alert! Notice how, in the above photo, there are several seam junctures that result in straight lines? This is due to the previously mentioned flaw in my design, where I drew the front and back separately, instead of planning one cohesive panel for the entire cover. Straight seams like these attract the eye and should be avoided. |
5C. Create a Template Pattern
There are different ways of copying your crazy-quilt design to your fabric, but creating templates worked best for me.
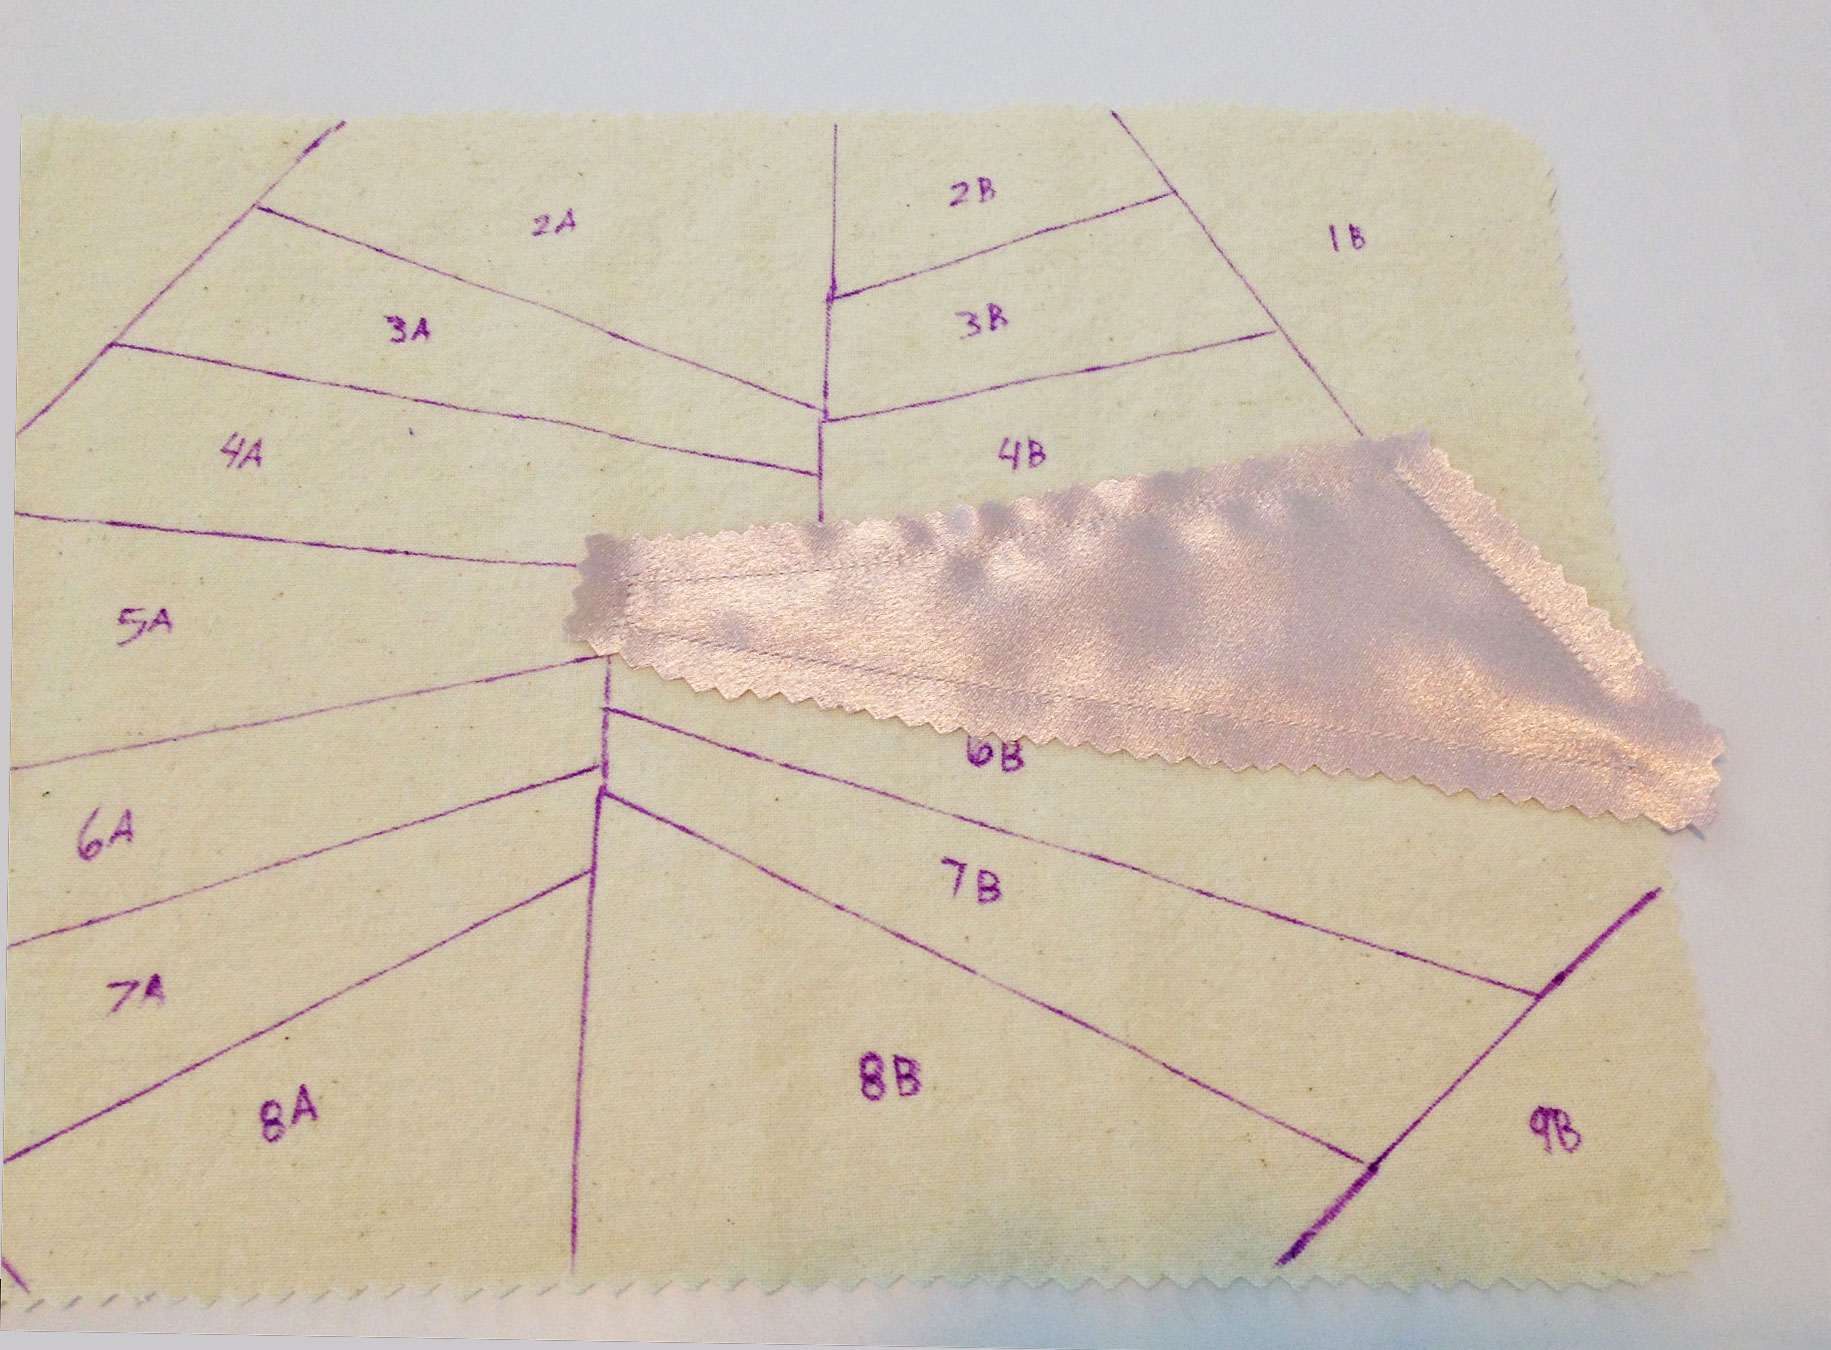
Take your muslin base and number each section, working from top to bottom, going clockwise. (If it helps you keep track, you can use a number/letter combination, as I did—A for front and B for back.) Also, refer to your design sketch and label each piece with the color fabric you want that section to be. This is your sewing guide.
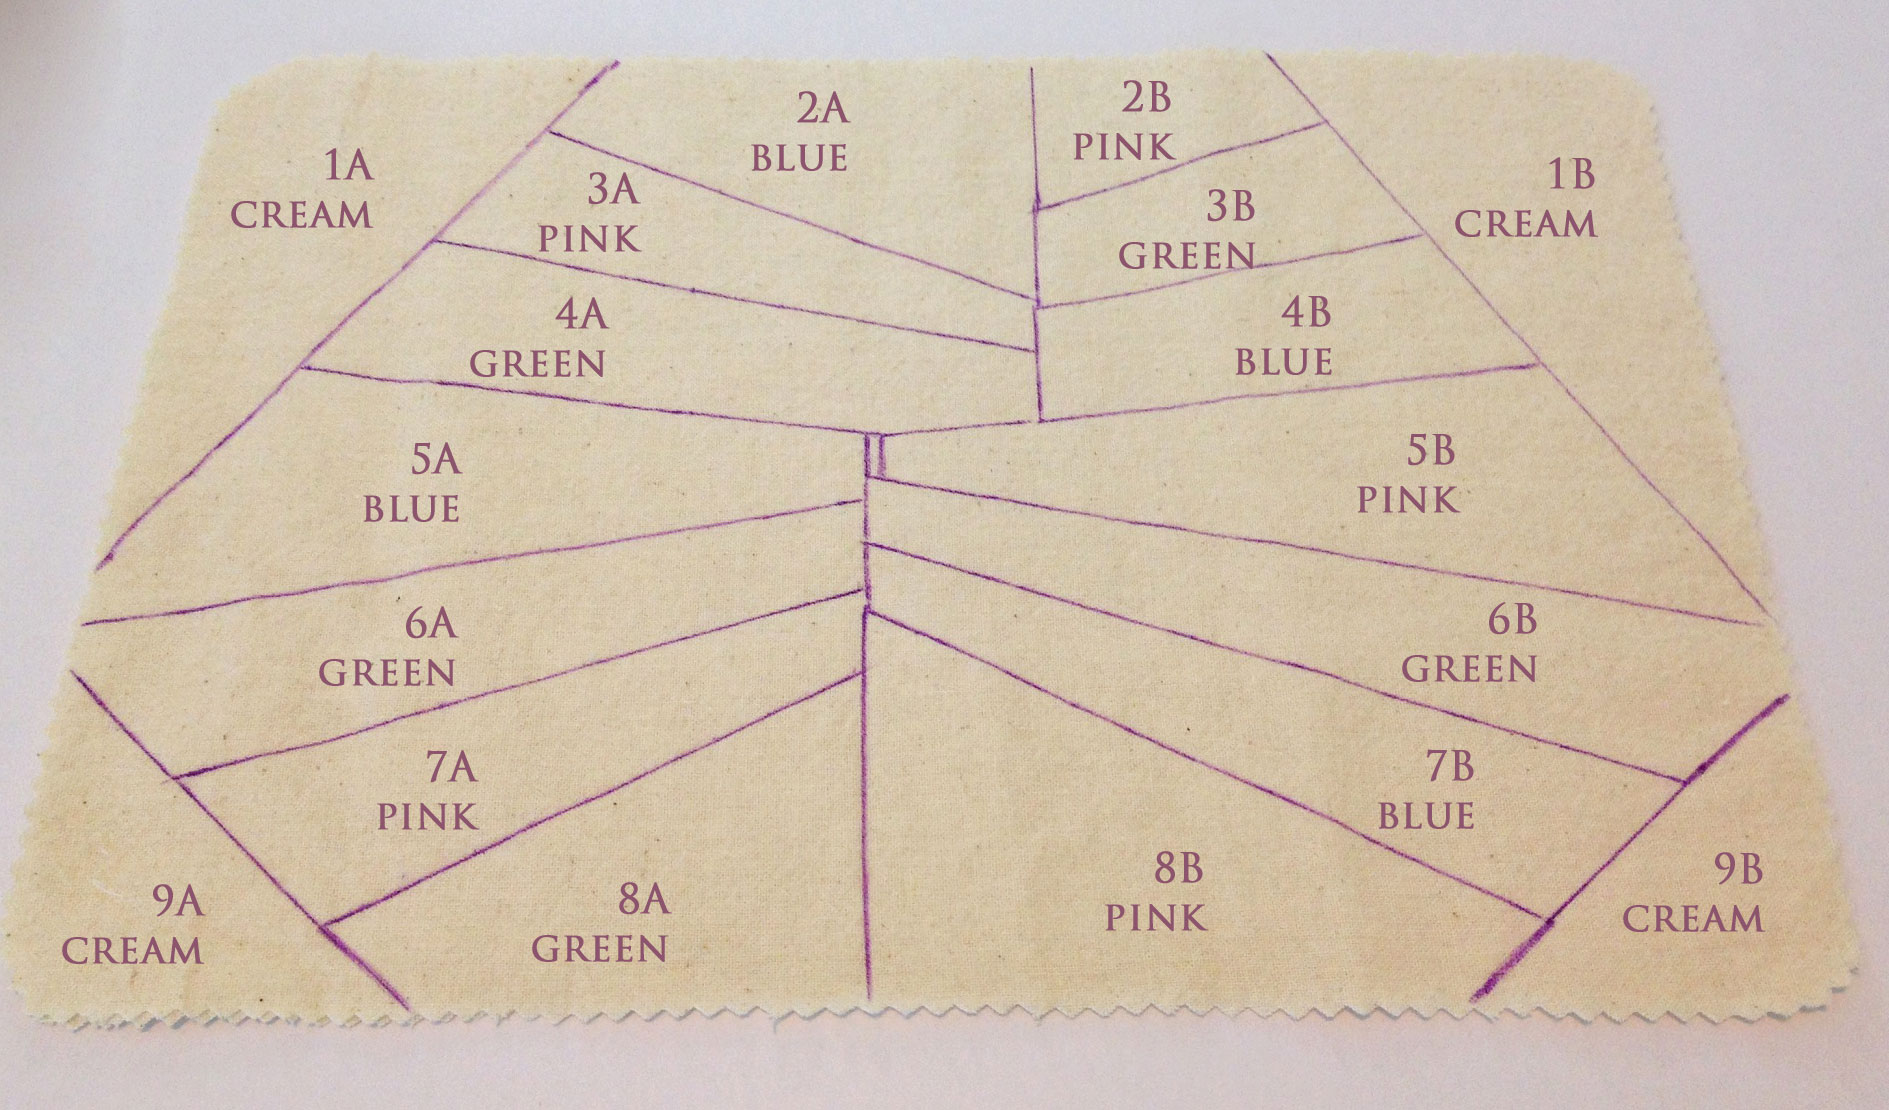
5C: Labeling the Muslin Base
To create your pattern templates, place a sheet of Swedish tracing paper over your muslin base and trace the entire design. Label each piece with its number and color. Cut the patchwork design apart. These pieces are your pattern templates.
Use the pattern templates to cut out the different fabrics that will make up your crazy-quilt cover. Important! Don’t cut the fabric directly on the lines of your templates. Add a ¼” seam allowance around the edges of each piece before you cut it out.
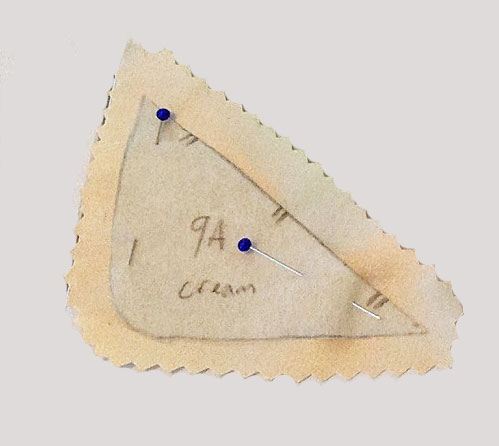
5C: Pattern Piece With 1/4″ Seam Allowance
Once you’ve cut all your pieces, you can reassemble them, using the numbers as a guide. They should fit back together like a puzzle.
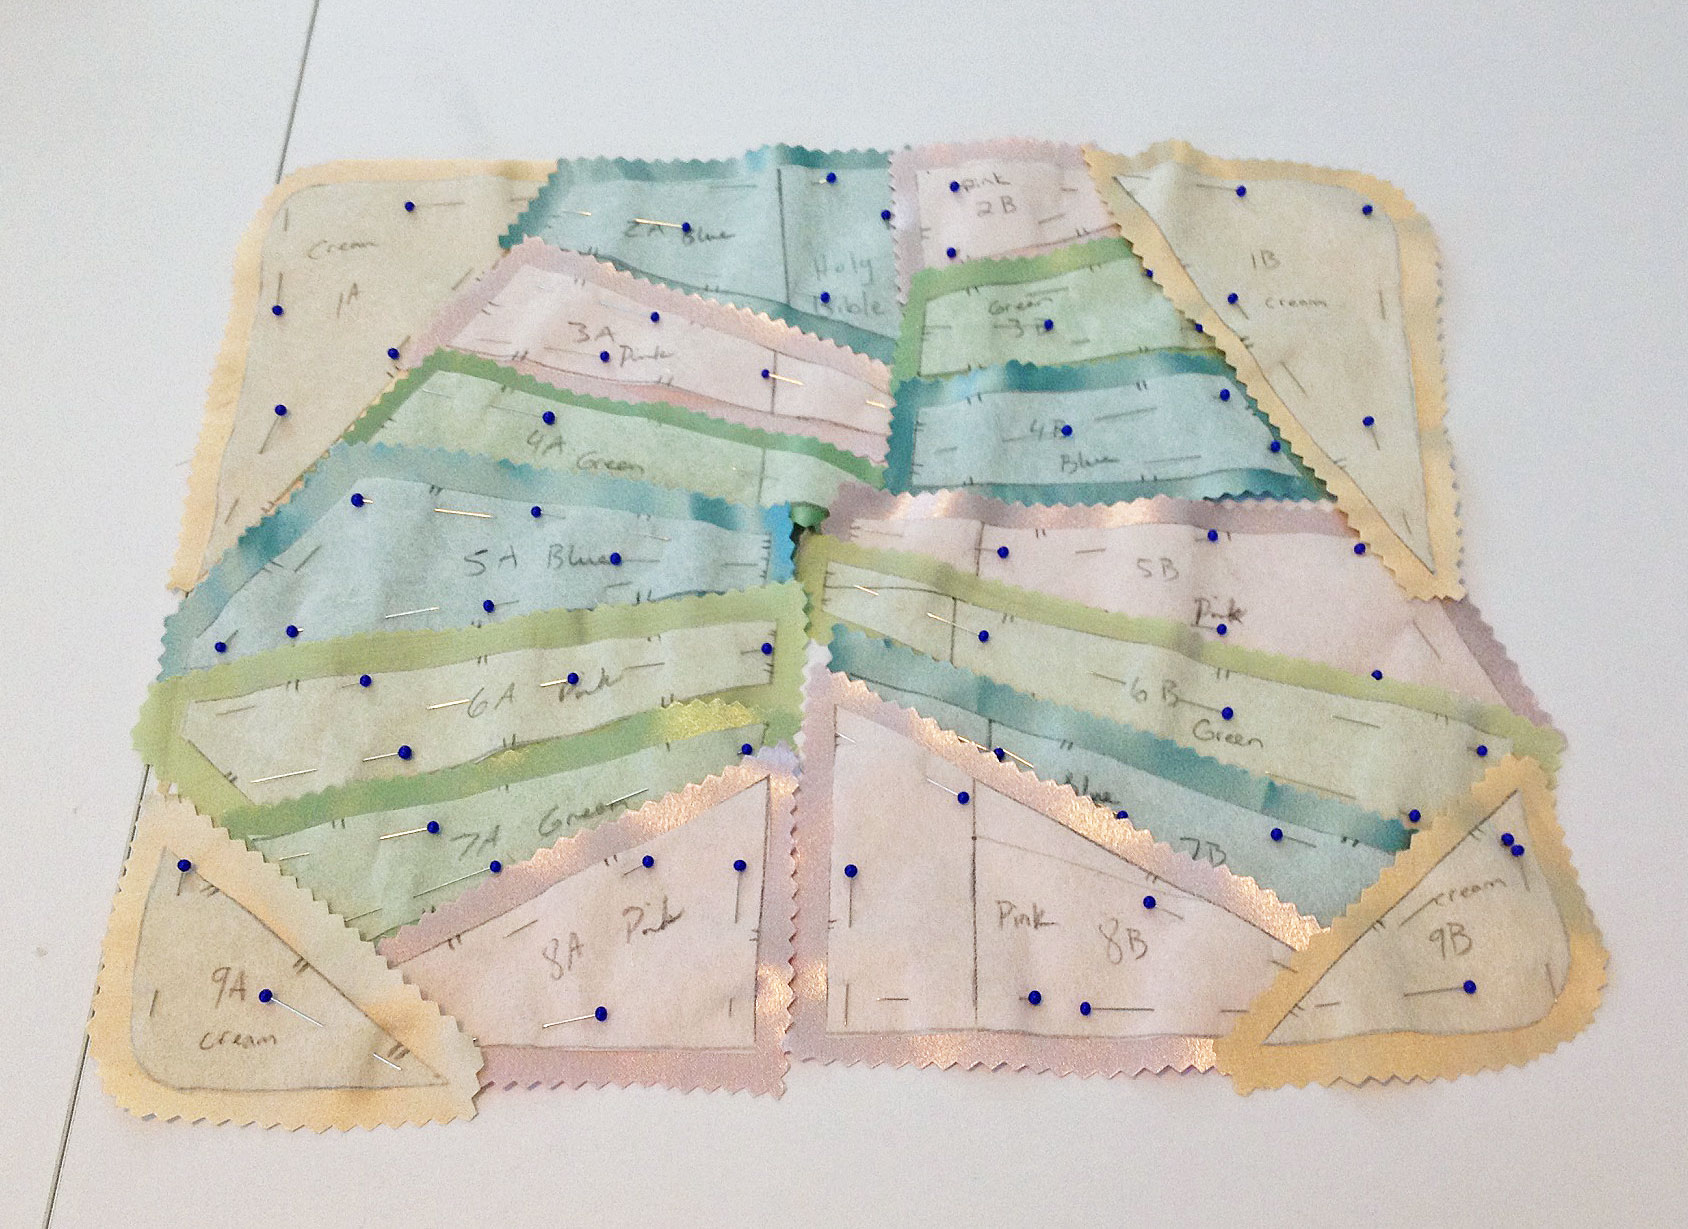
5C: Patchwork Pattern, Reassembled
-
Note: The numbering system is there to help you place each pattern piece in the right location—it’s not the order in which you sew the pieces.
5D: Sew the Crazy-Quilt
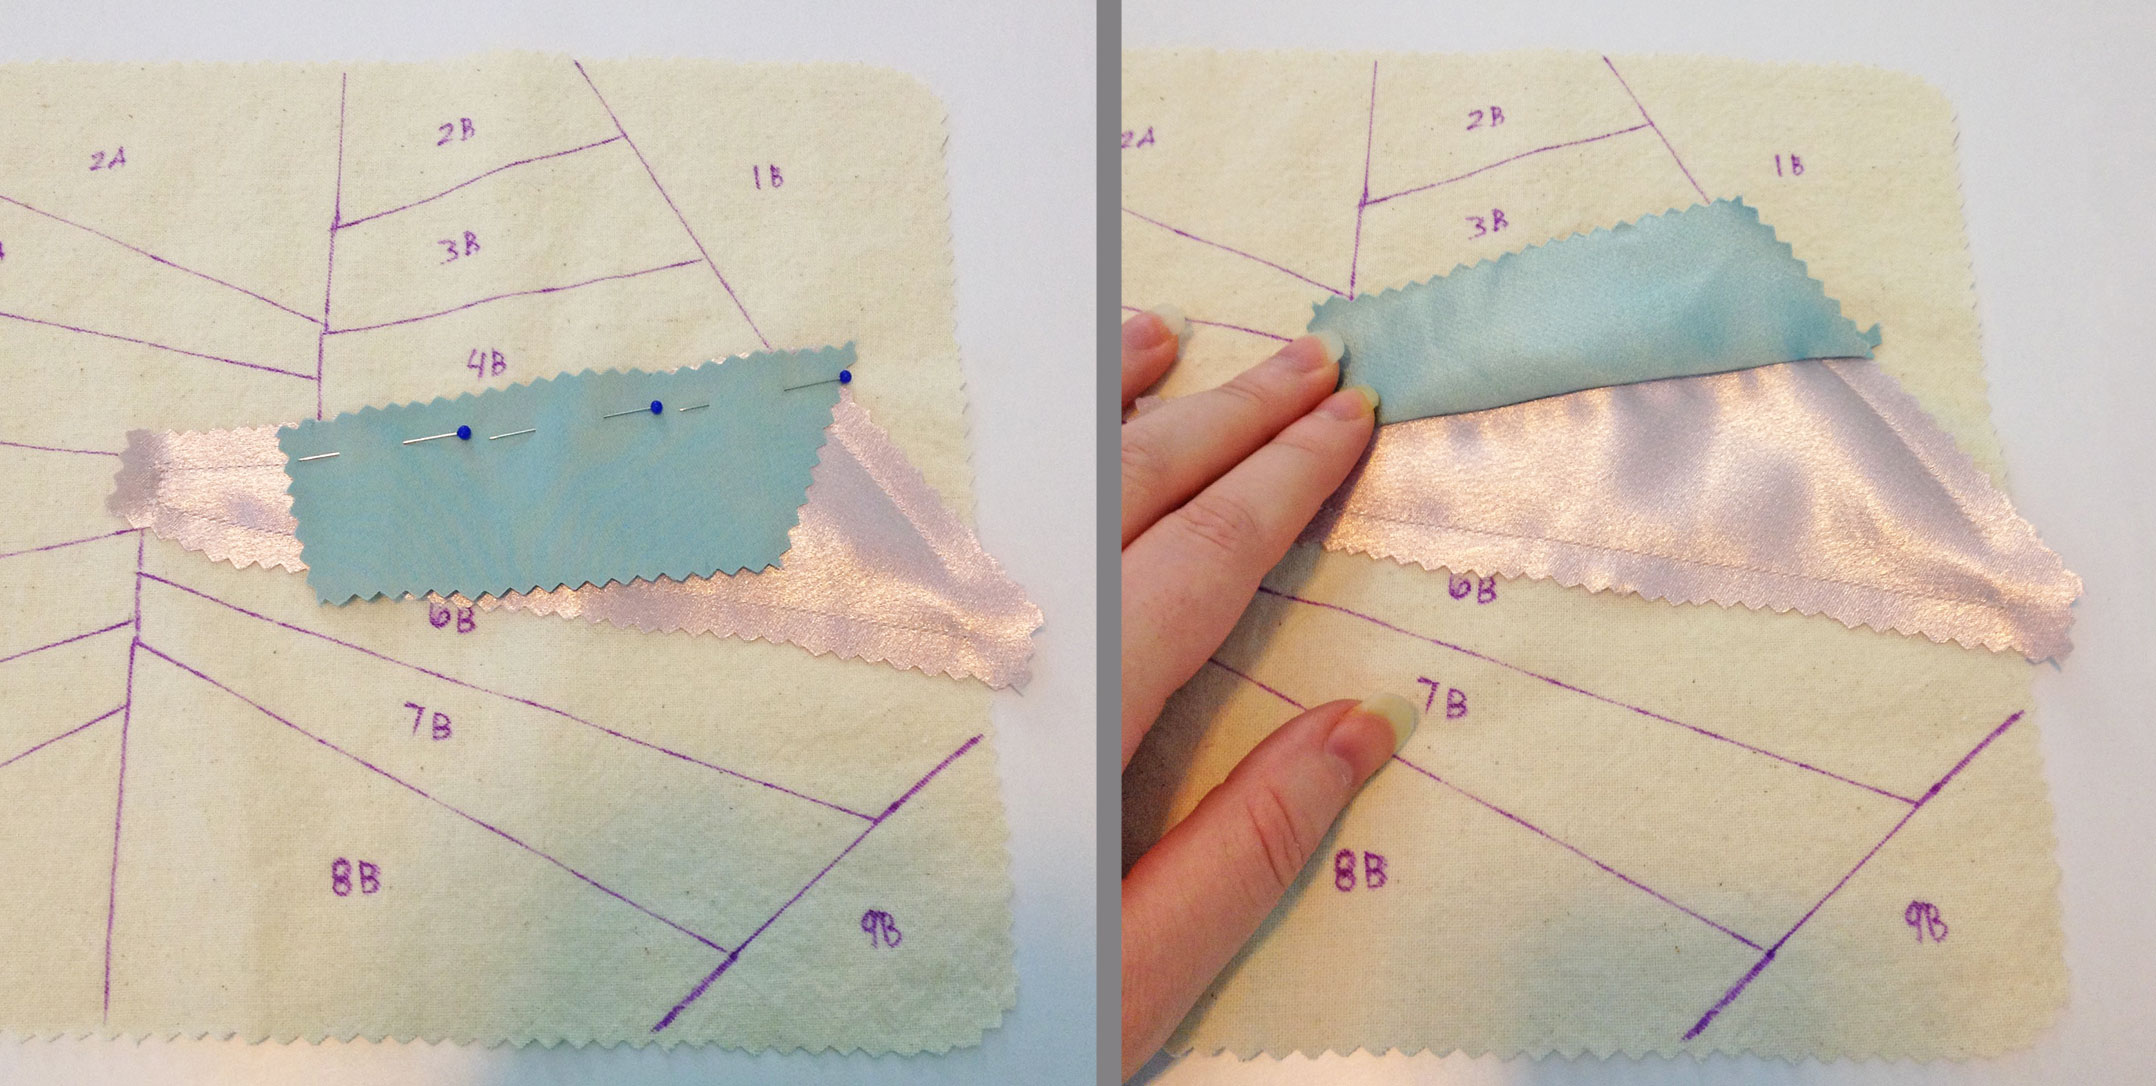
Take a piece from the middle of the quilt and pin it to its corresponding place on the muslin, right-side up. Topstitch ¼” from the edge. (It works best if you do not sew all the way around in one continuous seam, as this goes against the fabric’s grain and may cause distortion. Instead, sew the sides first, then the top and bottom edges. It helps if you practice directional stitching—basically, sewing from the widest point to the narrowest.)
Once the piece is sewn, press it flat. If the fabric is delicate or heat sensitive, use a pressing cloth.
5D: Sewing the First Piece
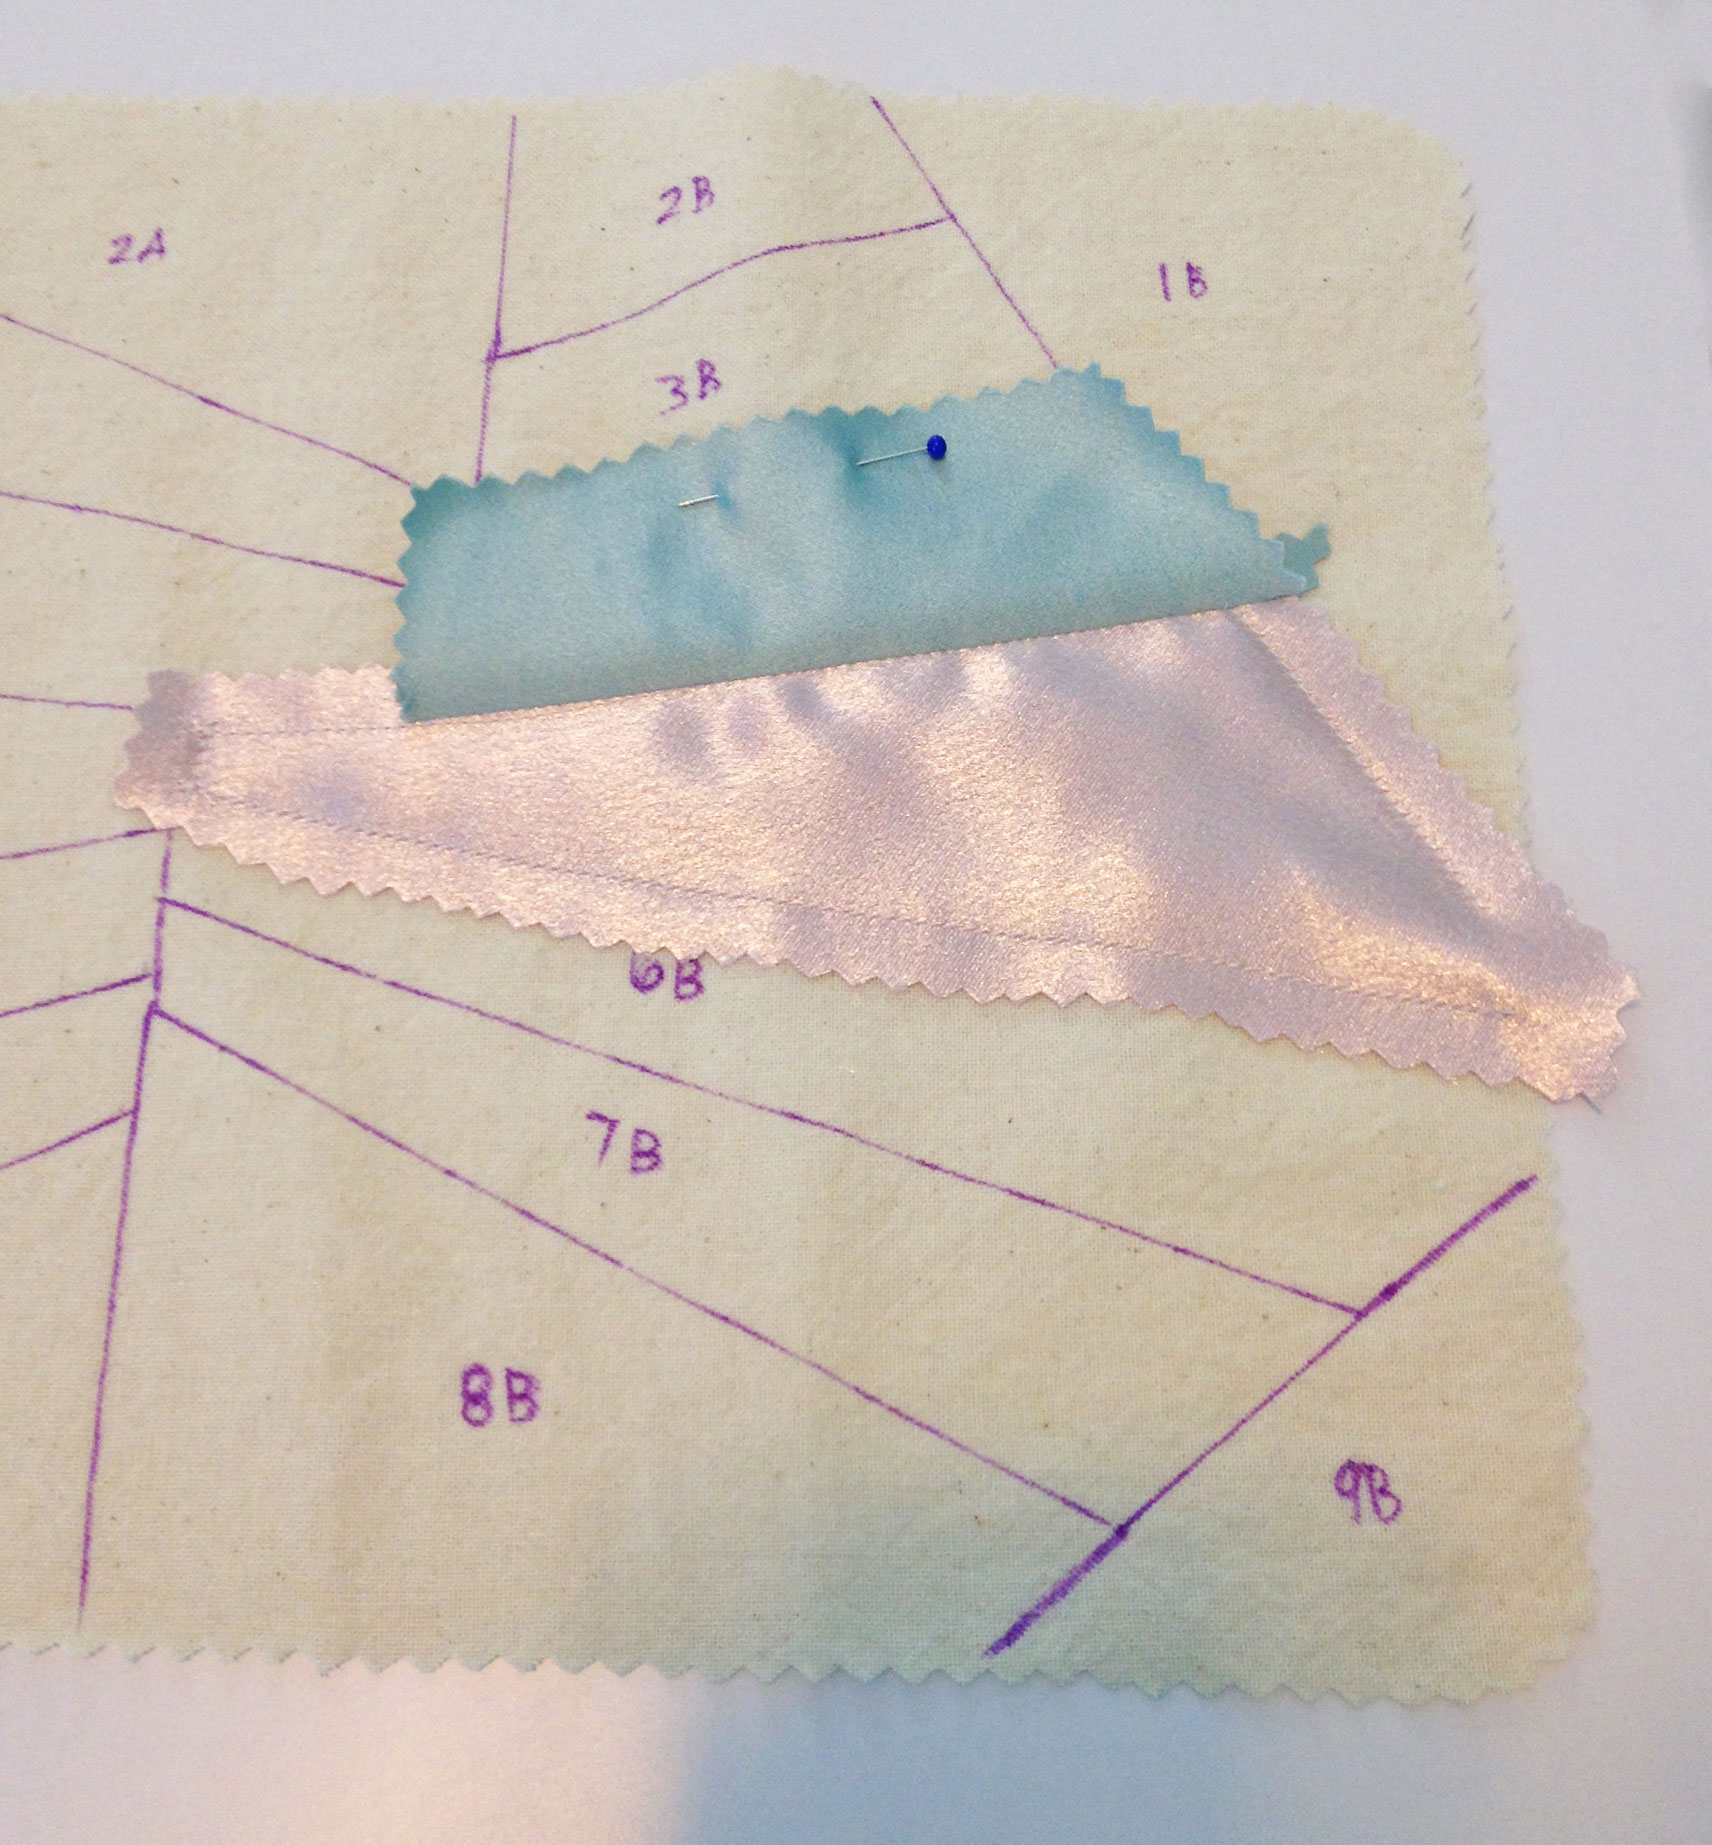
Take the next piece and pin it on top of the first piece, right sides together. Make sure the piece is angled properly, so that when it’s flipped right-side up, it matches the segment drawn on the muslin.
5D: Pinning the Second Piece
Sew the second piece to the first, stitching through all three layers, including the muslin. Press the seam allowance flat to meld the stitches, then flip the second piece right-side up and press it again, making sure it lies completely flat. If it won’t stay flat, temporarily pin it.
5D: The Second Piece, Pinned Up
Repeat this process, adding pieces on either side. Make sure to press carefully after sewing each new section, ensuring that each piece lies flat and smooth.
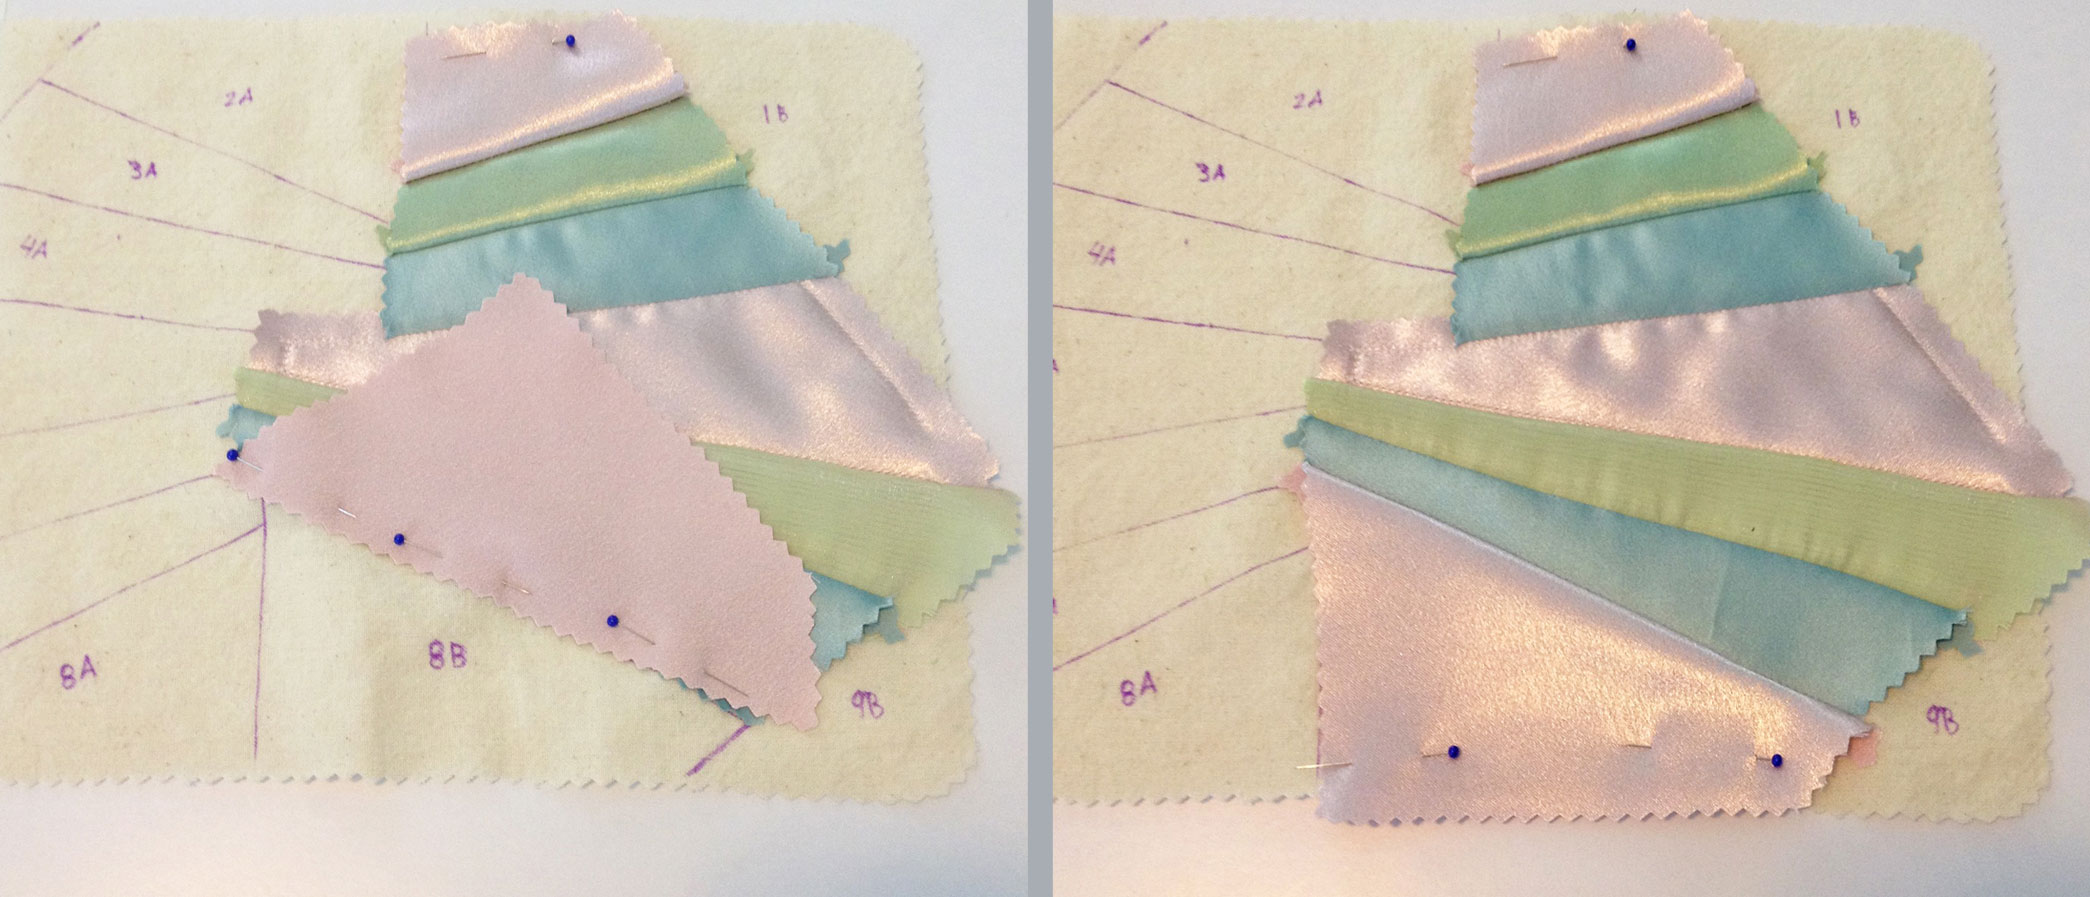
5D: Sewing Additional Pieces
-
Plan Ahead!
If you want to add a lace overlay to any part of your crazy-quilt, plan ahead to figure out where it will go. That way, you can sew the edges of the lace into the seam allowances. If you neglect to sort this out ahead of time, you’ll have to fold the raw ends under and topstitch or slipstitch, which isn’t as clean a finish.

Lace Stitched Into the Seam Allowances

5E. Finish the Crazy-Quilt
Once all the patchwork pieces are sewn, you should have something that looks like the sample below. The edges will be loose, but you’ll take care of that shortly.
5E: Finished Crazy-Quilt, Before Pressing
Using a pressing cloth, press the quilted panel flat.
Flip the panel upside-down and check the edges. Do any of the quilted fabric pieces extend past the edges of the muslin? They may have stretched or shifted. Keep this in mind, but don’t trim anything just yet.
Hand baste around the edges of the panel, sewing through all layers, ½” from the edge of the muslin. This secures the edges and also serves as a guide for embellishing, later.

5E: Basting the Edges
Now, trim any excess fabric, using the edge of the muslin base as your guide.

5E: Trimming Excess Fabric
If your fabrics are prone to fraying, you might want to overcast the outer edges of the quilted panel. This can be done by hand, but many sewing machines have an overlock stitch. For best results, use an overlock foot (aka overedge foot). Test the stitch to be sure it’s no more than 3/16″ wide, otherwise the stitching may show after you assemble the book cover.
You now have a crazy-quilt that’s ready for embellishment!
Step #6: Embellishment
For many, this is the best part of crazy-quilting—adding depth and character to your quilt, making it come alive. There is such a thing as going too far, however! Consider each element carefully, making sure it will enhance the overall look, instead of overpowering it. If you’re uncertain, hold off. You can always add more details later, but it’s difficult to remove embellishments once they’ve been added.
-
Plan Ahead!
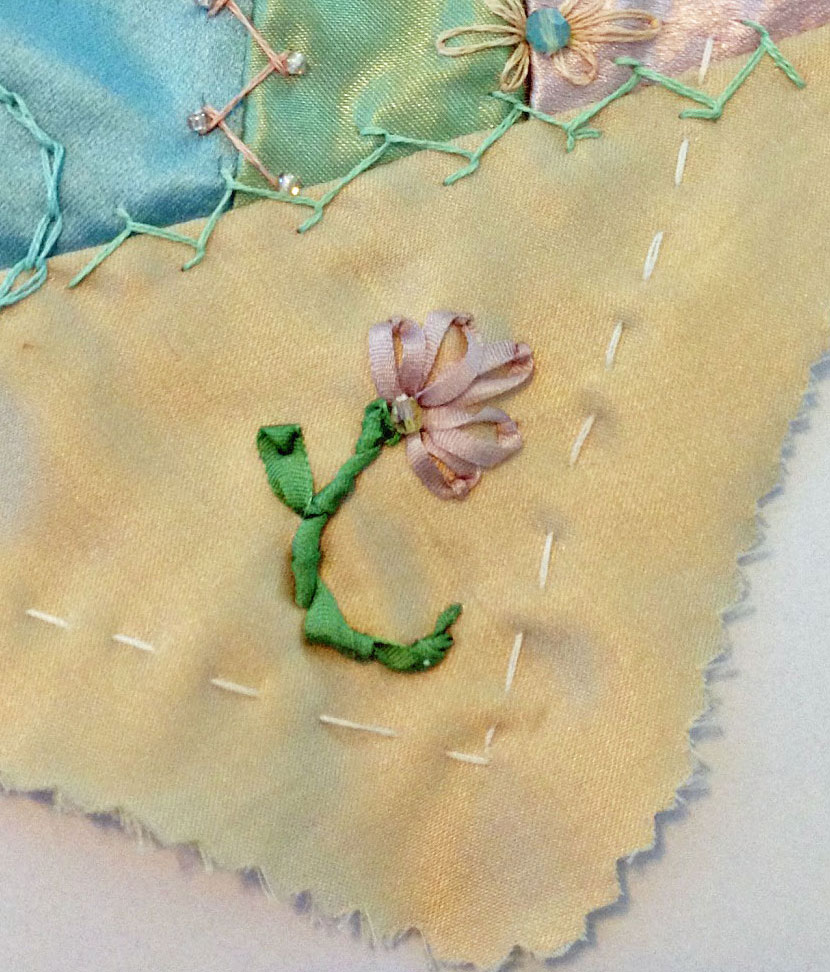
Are you using a button flap? If so, you have two options for fastening it: a button and loop, or a large snap. Either way, you’ll need to plan ahead and incorporate the fastener into your cover design. Go ahead and add the loop now, if you’re using one. I neglected to do this with my Bible cover and accidentally embroidered a silk ribbon rose right where the fastener needed to go. As a result, I had to leave off the button flap.
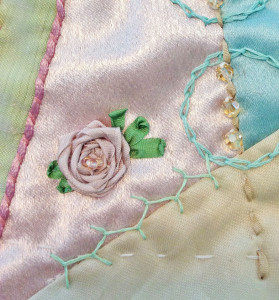
Oops! (A Pretty Mistake)

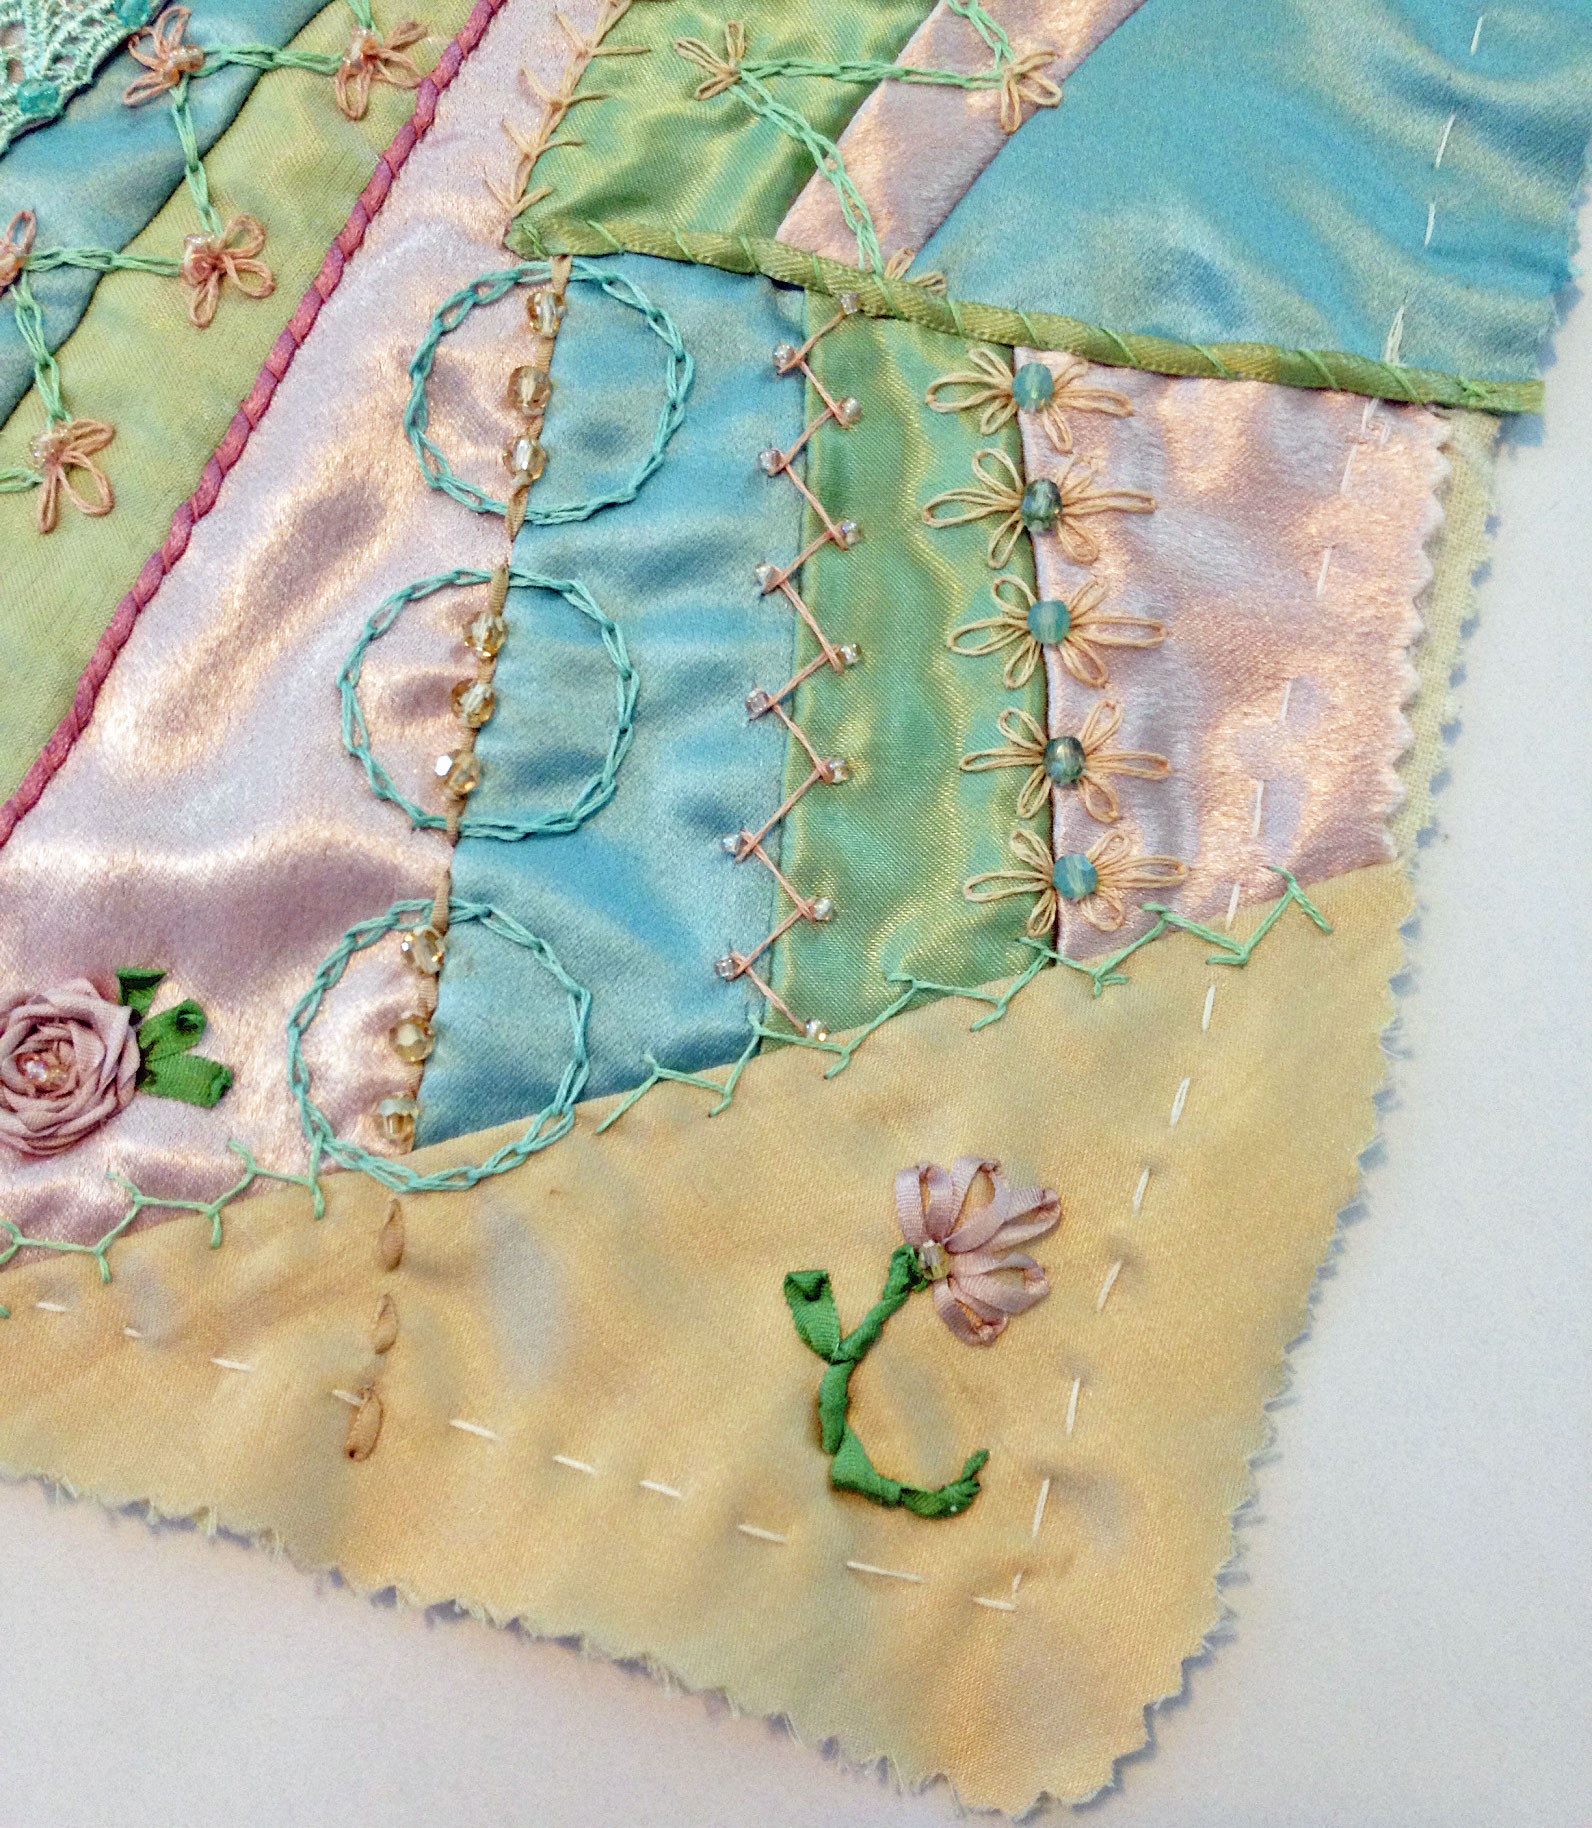
Remember how you basted around the edges of the crazy-quilted cover? Make sure to stop any three-dimensional embellishments when you reach the basted border. Any silk ribbon embroidery, beading, buttons, charms, and so forth, must not extend past the ½” basting line or they might get caught in the seam when you assemble the book cover.
Flat embellishments, on the other hand, such as ribbon or traditional embroidery, should extend all the way to the fabric’s edge. That way, their ends will be hidden in the seam.
You have plenty of choices when it comes to embellishing. Just to name a few:
- Hand-Dyed Lace
- Couched Ribbon
- Traditional Embroidery
- Silk Ribbon Embroidery
- Seed Bead Accents
6A. Hand-Dyed Lace
For an exquisite touch, try hand-dyeing a length of Venetian lace to go with your fabrics. (Directions can be found in the tutorial: Hand-Dyed Lace, Part I & Part II.) It can be difficult to get an exact match when hand-dyeing, especially since colors often shift as the lace dries. Instead, aim for something that’s similar enough to coordinate, without being identical.
In the example below, even though neither of the lace samples match the fabrics, either would look good paired in a crazy-quilt.

6A: Hand-Dyed Venetian Lace
6B. Couched Ribbon
A pretty option is to cover a seam with narrow ribbon (1/8″ or 1/16″) and couch it down. (Couching is where the stitches pass over the ribbon, instead of going through it.) Match the couching thread as close as you can to the ribbon color. For a decorative look, slant the stitches diagonally.
In the example below, the dark pink ribbon has been couched with small, diagonal stitches.
6B: Couched Ribbon
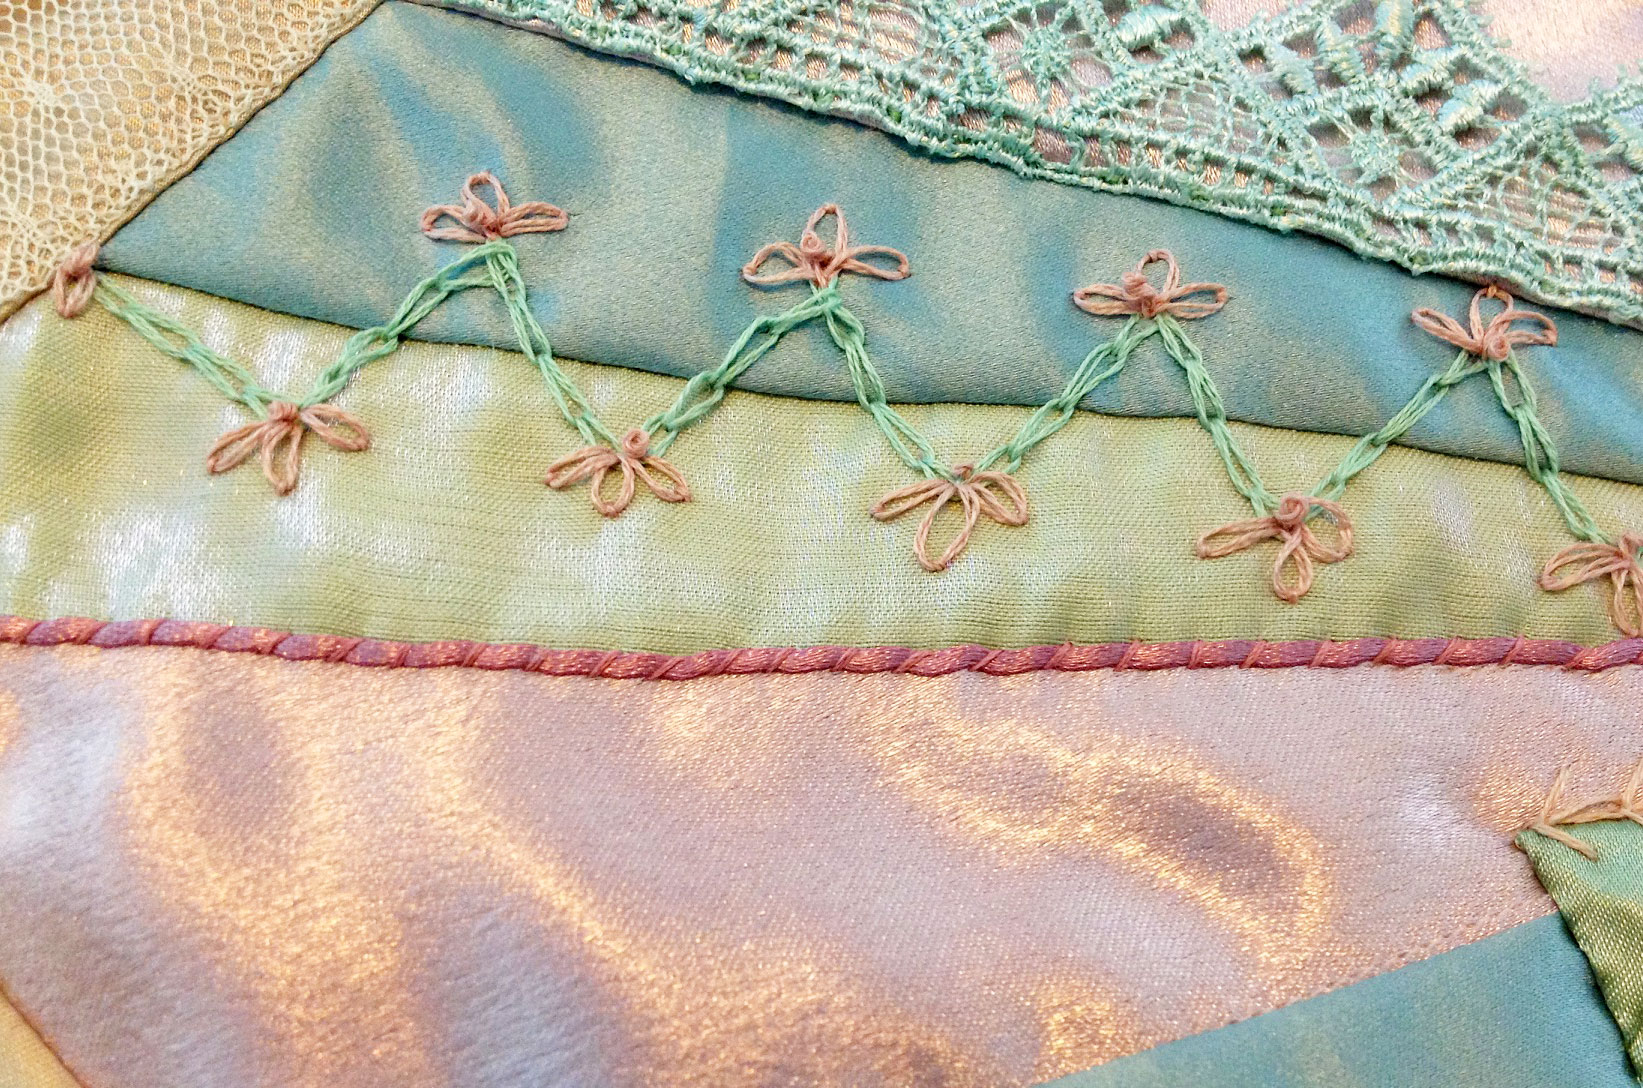
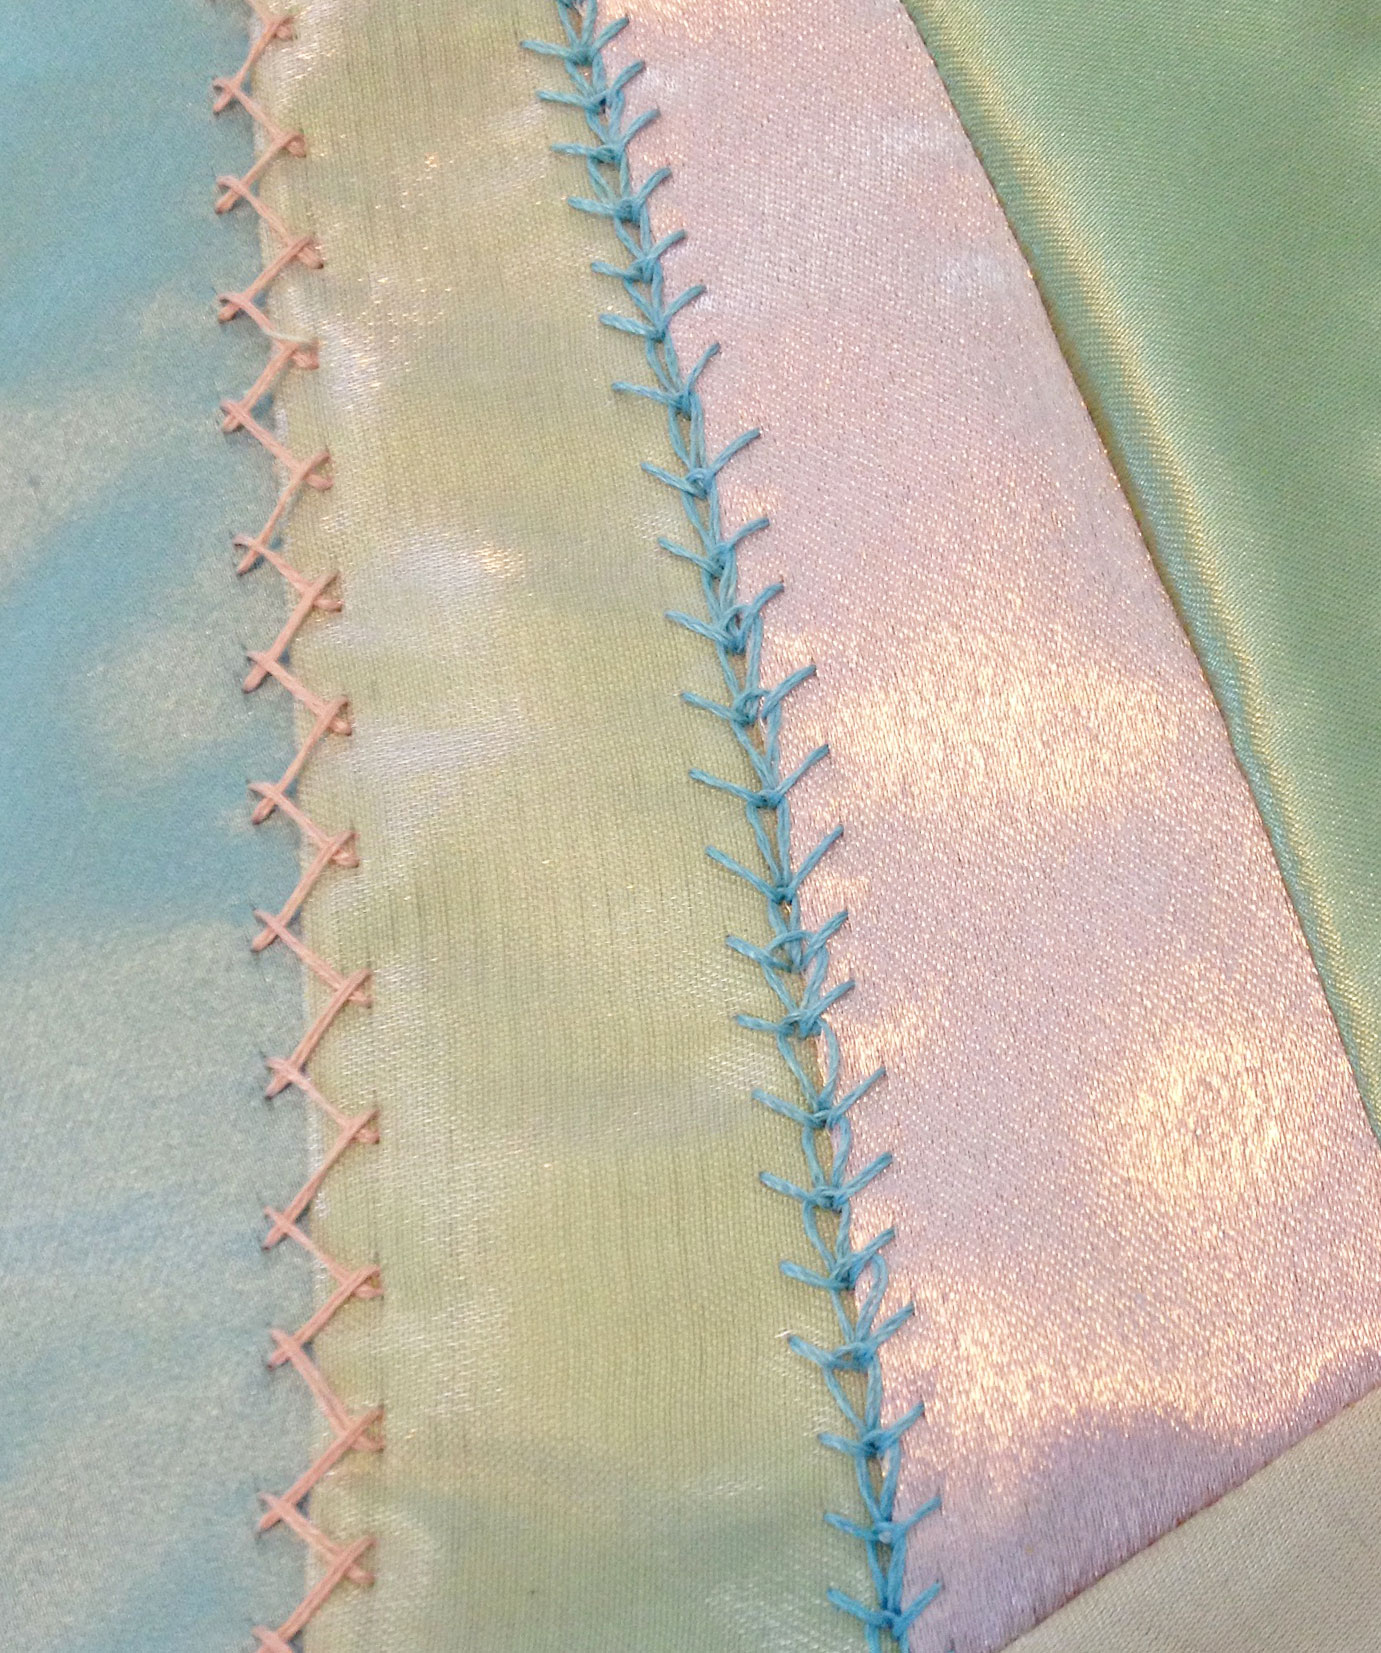
6C. Traditional Embroidery
Embroidery of all kinds is often used on crazy-quilts. It’s extremely common to see a row of decorative stitching along the seams joining two fabrics together. Try feather-stitching, buttonhole stitching, or herringbone stitching—or any stitch that can be worked in a straight column or row.
6C: Embroidery Stitches
-
Tip: If you’re using an embroidery stitch for the first time, it’s best to practice on scrap fabric to get the hang of it.
You might also use embroidery to fill in the spaces between seams—perhaps creating a wide zigzag of flowers, parallel rows of fancy stitches, or maybe chain-stitched circles with flowers inside.

6C: Floral Zigzag In-Progress
Under normal circumstances, you might use a small embroidery hoop to keep the fabric taut while you work your stitches. That isn’t a good idea for this project, however, as you’ll be working a lot of stitches close together, in a fairly small space. Not to worry, though! Because the quilted panel is reenforced with a muslin backing, you should find that it’s sturdy enough on its own. Just use your fingers to pull the fabric taut while you embroider.
6D. Silk Ribbon Embroidery
Using silk ribbon to embroider produces an elegant three-dimensional embellishment. You could work it in the same way as traditional embroidery—using the thinnest ribbon to create decorative lines along the seams. Or you might fill in a section with silk ribbon flowers or vines. (For directions, see: The Art of Silk Ribbon Embroidery, Part I & Part II.)
6D: Lazy Daisy Floral Motif
6E. Seed Bead Accents
For a touch of sparkle, add seed beads or small crystals to your embroidery motifs. Just remember—this is a book cover, so don’t use anything that might be uncomfortable when you hold the book, such as sharply faceted crystals or large beads. Likewise, be careful where you place the beads, so they won’t get damaged when the book is handled.
6E: Seed Beads & Swarovski Crystals
6F. Pulling It All Together
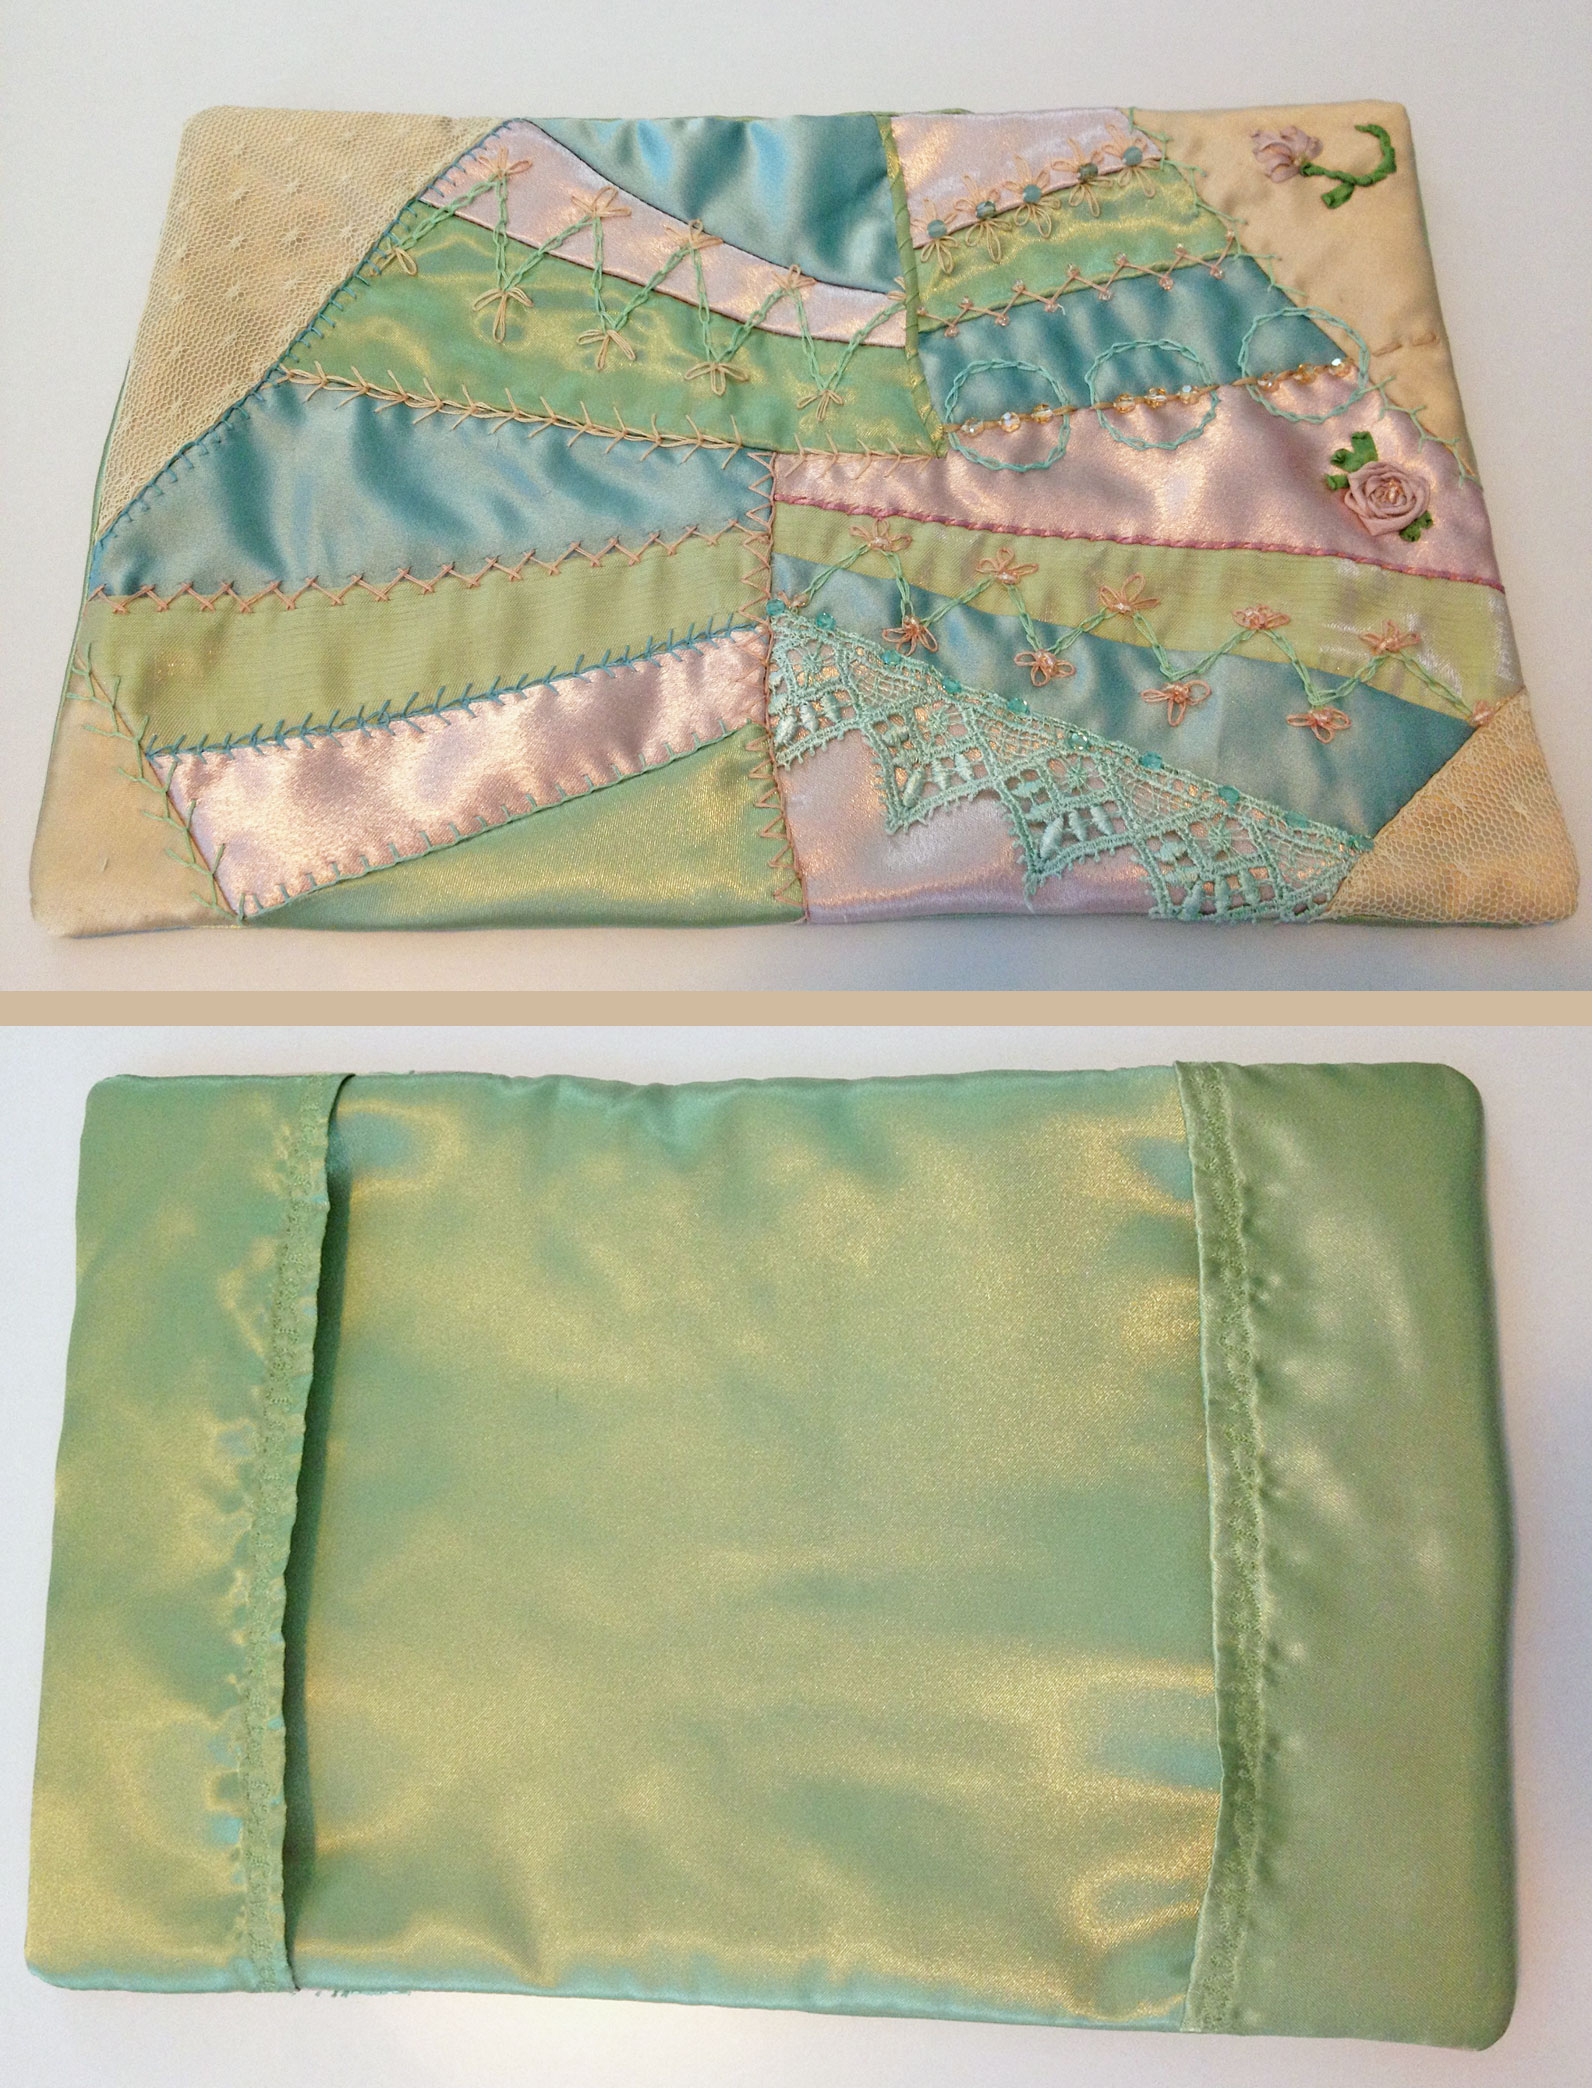
Since my book cover is going to a friend who will use it often, I wanted it to be comfortable to hold while reading. This meant limiting the embellishments on the back and spine. At the same time, I wanted it to look cohesive. After some consideration, I decided to use simple embroidery to accent the seamlines on the back and spine, with more detailed embroidery and beading on the front.
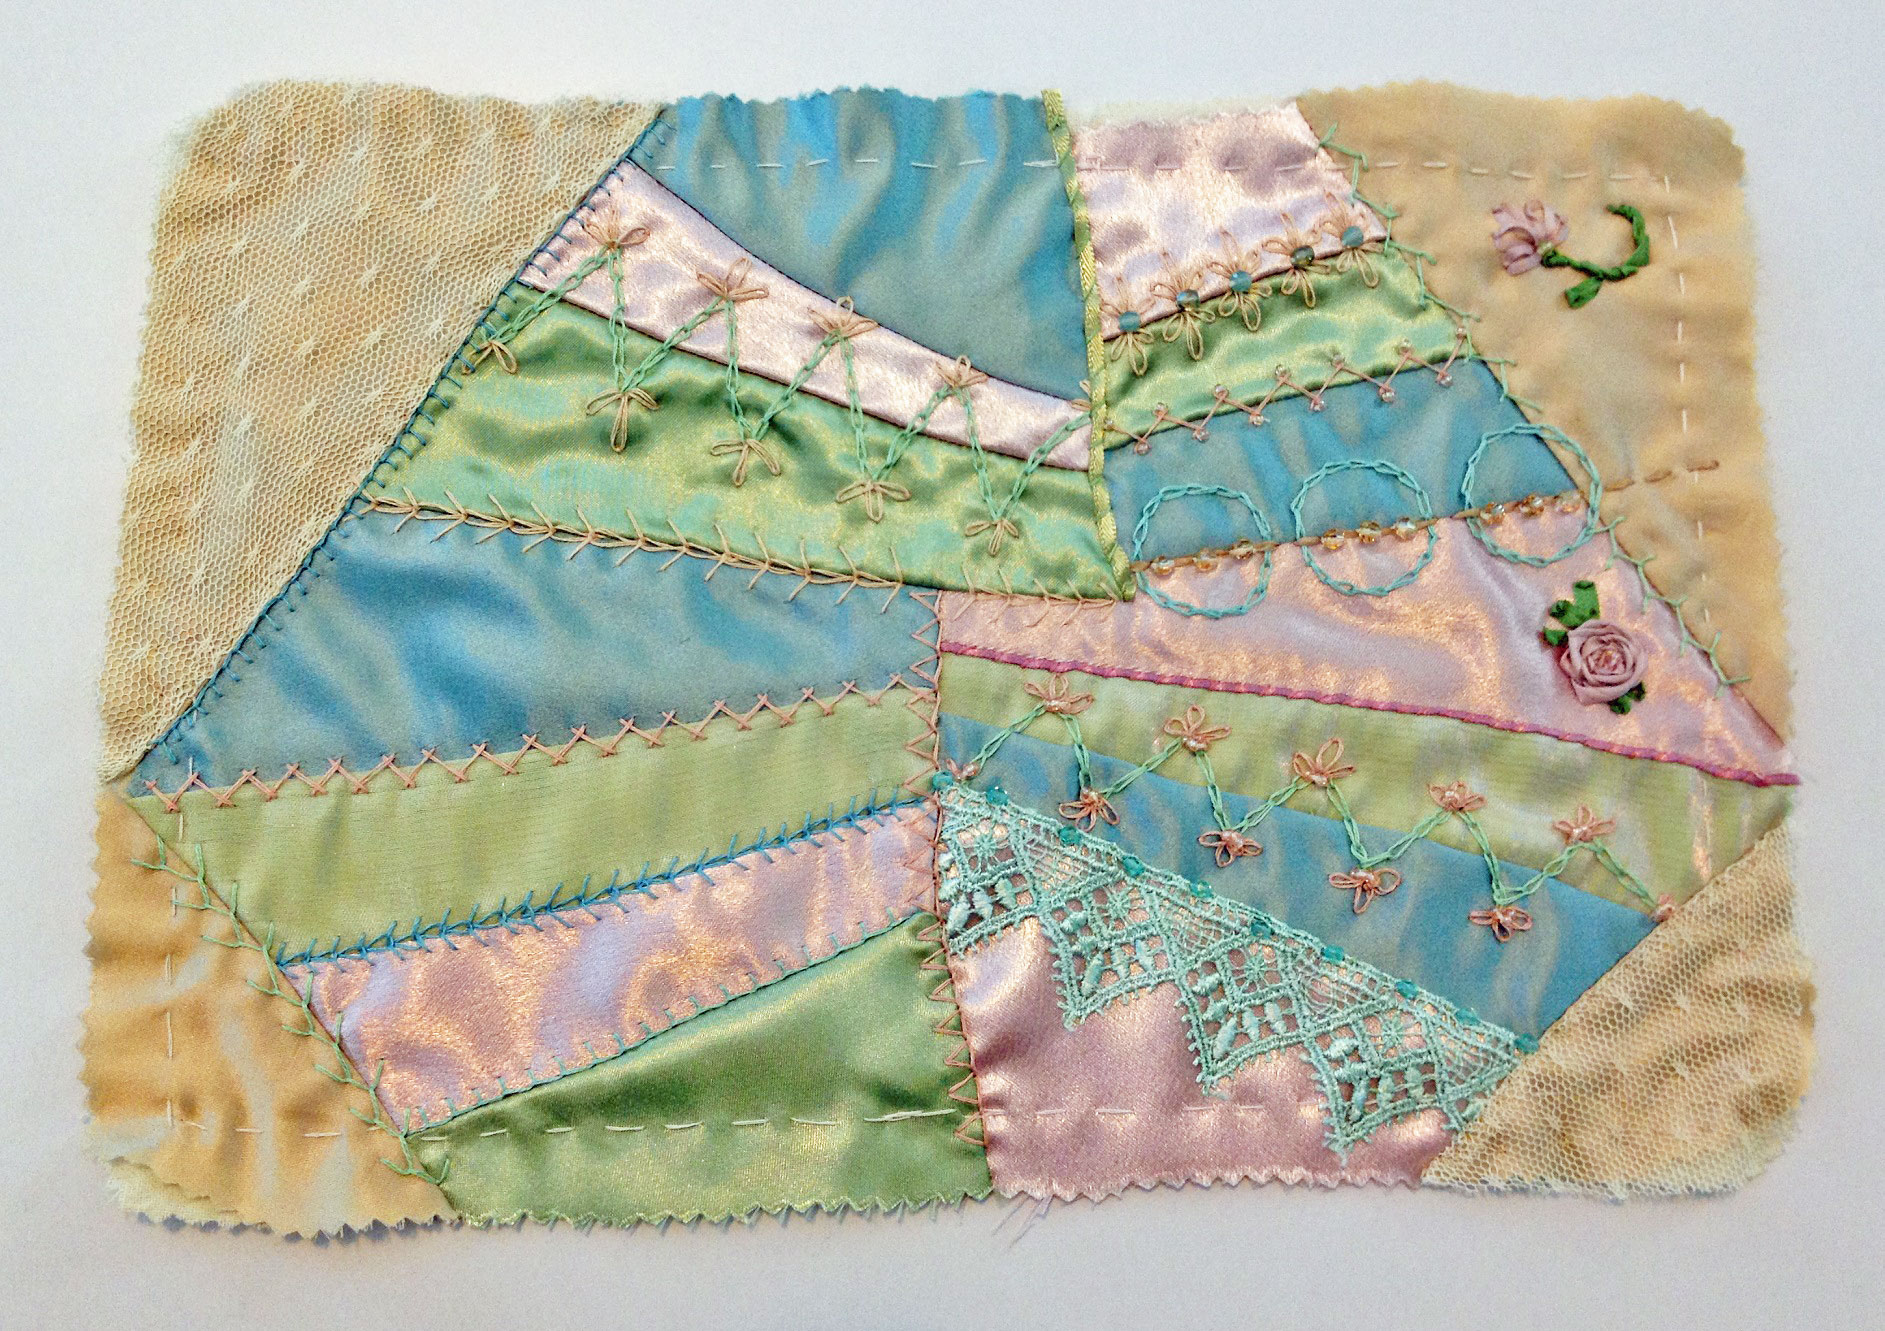
6F: Quilted & Embellished Panel
Step #7: Construction
To assemble the finished book cover, you’re going to follow the same steps as you did for the mockup.
7A. Hem the Pockets
Remember, the hem must be topstitched. The easiest way to do this is to press the outer edge of the pockets under by ¼” twice, then baste along the folded edge, so the stitches are visible from the right side of the pocket. This gives you a guide to follow while you’re topstitching. Another option is to mark the edge of the hem on the right side of the pocket with a chalk pencil or fabric pen.
Note: If the fabric print or decorative stitching is directional, make sure the pockets mirror each other.
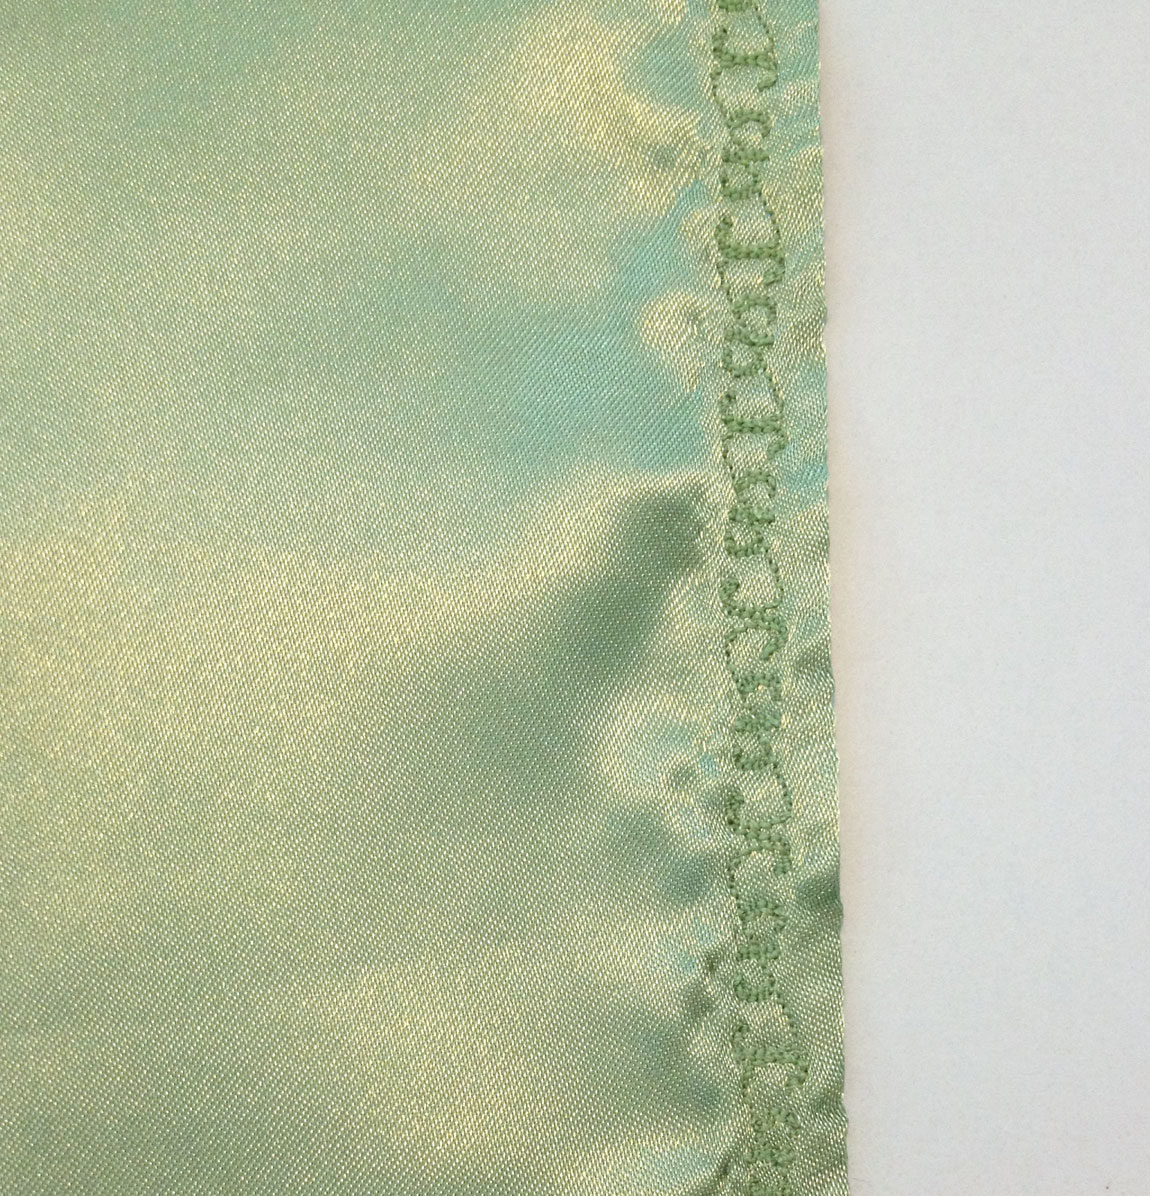
7A: Decorative Hem Stitch
7B. Assemble the Layers
- Place the crazy-quilted cover on the bottom, right-side up. (The back of the cover should be on your left.)
- Place the button tab, straps, or ties next, right-side down, facing inwards.
- Place the pockets next, right-side down, with the hemmed edges facing inwards.
- Place the lining on top, right-side down.
7C. Sew the Edges
Pin or baste around the edges, leaving a 3″ gap on the bottom edge. Sew, backstiching at the beginning and end. Press the seam allowances flat. Notch or trim the corners, depending on whether they’re rounded or squared. Remove any basting stitches. Flip the cover right-side out. Press the edges carefully, making sure you don’t crush or melt any of your embellishments. Slipstitch the gap closed with matching waxed thread.
7C: Sewn Cover, Inside & Out
7D. Button Tab
If you included a button tab, it’s time to make it functional.
For a button and loop, sew a large button onto the outside of the button flap. The loop should have been placed on the cover during the embellishment stage. If you’re using large snaps, instead, go ahead and sew them onto both the button tab and the front cover.
Unfortunately, I accidentally embroidered over the spot where my button tab would have fastened, so I have no photos of this step to share with you.
7E. Custom Label
If you’d like, you can sew a custom label to the back pocket. I bought some lovely ribbon tags from Tagtopia, an Etsy shop. They have my initials printed on the front and the name of my website on the back. Perfect for identifying my custom creations!

7E: Personalized Label
And that’s it! Your book cover is complete.
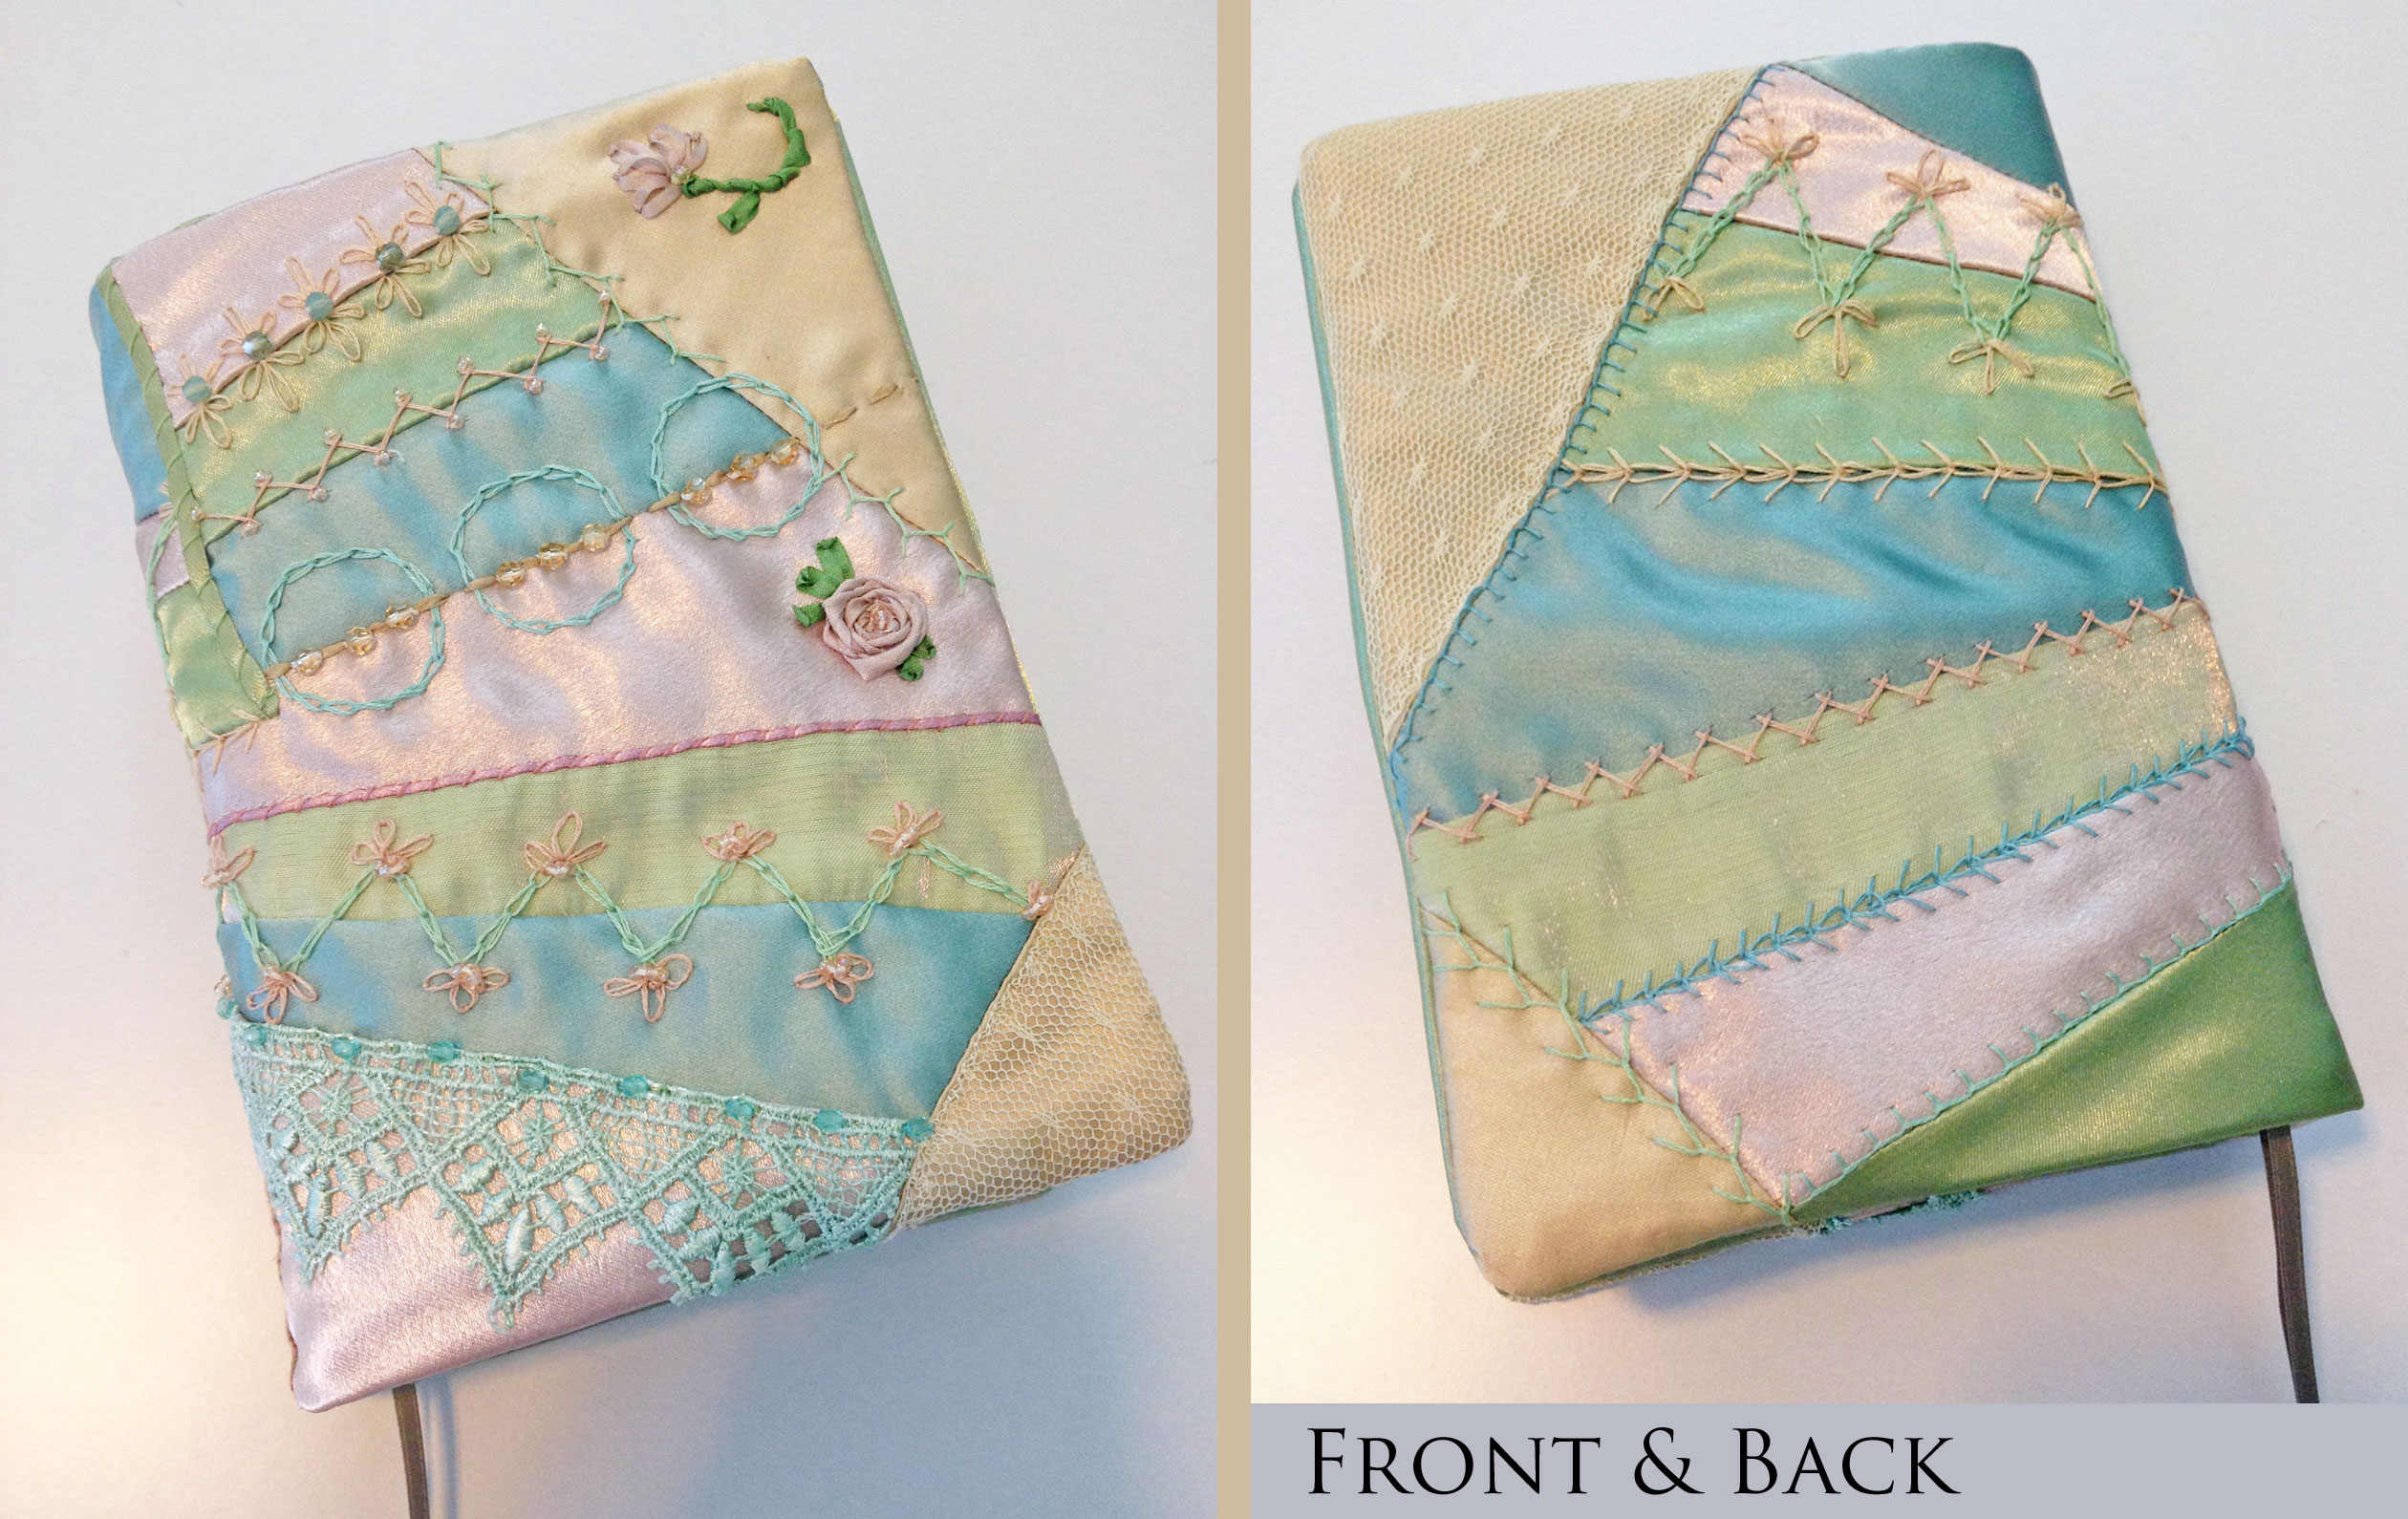
Finished Book Cover, Front & Back

Closeup of Beaded Embroidery