by Lisha Vidler
This tutorial first appeared at Foundations Revealed. Click on any picture to see a larger image.
In the first part of this article, we gathered our materials and figured out what colors to use in dyeing our lace. Now let’s get busy!
Getting Started
When you’re ready, choose an area that’s well-lit and ventilated (i.e.: not in a closet) and be sure to keep any pets away. You don’t want your cat jumping up on the table and landing on your freshly mixed palette of dye. (Ask me how I know. . . .)
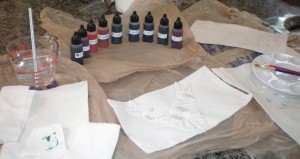
Set up your workspace with everything you need: a roll of paper towels, a cup of water, a straw or eyedropper, toothpicks, your palette and brushes, and your dye bottles. I work right-handed, so I put the water to my left, the dyes at the top of my workspace, and the palette to my right. A folded paper towel goes in the middle, upon which to work.
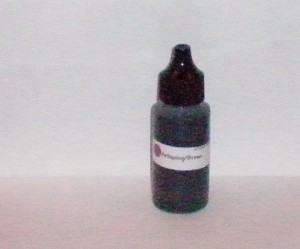
Many liquid dyes will need to be shaken first. Here’s a tip: don’t tilt the bottle upside down when you shake it. This will cause dye to leak into the cap. Instead, hold the bottle upright and shake gently but firmly. You might try rolling it between your hands, too. If, despite your best efforts, the dye leaks, wipe the dropper with a paper towel.
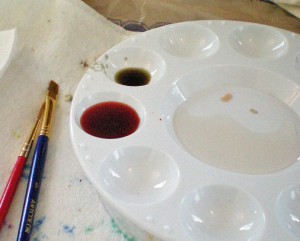
Choose which color to begin with and squeeze a drop or two into your palette. Add several drops of water and stir until the dye is thoroughly blended. To see the color, dip a wet paintbrush in the dye and dab a small amount onto a paper towel. If you only need to adjust it slightly, add a single drop of dye to the palette cup beside your main color and use a toothpick or plastic knife to transfer a small amount of dye at a time. Mix well and test the color frequently. Be aware that with this kind of fine-tuning, it can be impossible to replicate your color, so only do this if you have a very small amount of lace to dye and won’t need to mix more. For larger amounts, add a full drop of color at a time.
When you’re satisfied with the color, write down how many drops of each dye were used, along with how many drops of water, so you can make a fair attempt at replicating the color.
If you’ll be working with a large amount of lace, go ahead and use several drops of dye and fill the palette cup full. You might even fill two cups with the same color. Otherwise, you risk being unable to replicate the color once you’ve run out. Even if you mix the new batch using the same ratio of dye and water, you’ll more than likely have a noticeable color variance.
The problem of slightly different dye lots can be minimized, provided the colors are similar enough. Just mix a fresh batch of the new dye—making sure you have plenty of it, this time—and paint over the older areas that look different. They will not look 100% identical to the other areas, but doing this will lessen the discrepancy between colors.
Watercolor Ombré Dyeing
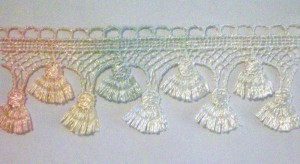
Our first method of dyeing produces a piece of lace that looks like it’s been painted with watercolors. The colors can be as strong or as pale as you like, but the goal is to let them blend together. You can do this with a broad paintbrush, creating a sort of tie-dye or ombré effect, or you can use a smaller brush for more precise control.
Begin by dipping your lace or applique in water. Wrap the wet lace in a towel and press on it to remove excess water. The wetter your lace, the more the dye will spread, so if you want a true ombré effect, start with lace that’s more damp.
Set the lace on your work surface and prepare your dyes. Wet your brush and dip it in the dye, then gently touch the brush to the lace. Color should instantly spread out from where you touched, staining the lace. This is because wet lace easily absorbs dye.
Note: If you are right-handed, start at the left and work toward the right, so as not to rest your hand against lace you’ve already dyed. If you’re left-handed, do the opposite—start on the right and work left.
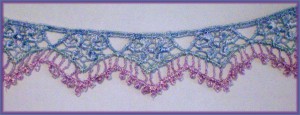
You need to work quickly, before the lace dries, so go ahead and “paint” the lace. Don’t worry if the colors bleed together—that’s the goal of this technique. Because of this effect, it looks best with colors that are close to each other on the color wheel, such as lavender with blue, blue with green, yellow with orange, etc.
Antiquing
Instead of working with genuine antique lace, which might be too fragile to sew, you can artificially age your lace. The dye kit I bought comes with a sepia-toned dye that can be used for this purpose. I wasn’t thrilled with the color it provided, so the next time I age my lace I’ll mix my own blend.
If you want to create your own antiquing dye, it will take some experimenting. Start with yellow or orange and add a little green or blue. The colors will muddy each other, resulting in brown. Add more red or orange if it’s too cool, and more green or blue if it’s too warm. Be sure and test the colors—don’t just rely on what you see in the palette.
When dyeing a smaller amount, use a wide paintbrush to apply the dye. If you have a large batch of lace to dye, add water and dye to a small glass bowl and soak the lace. If you’re going for a spotty, stained look, you can splatter more concentrated dye onto the lace using an old toothbrush. You can also add darker areas using a liner brush.
Some have even applied the antiquing tint to an already-dyed lace to make it look older and worn out. If you try this, always test a sample first, to be sure you’ll like the results. Also, wait until your first layer of dye has already set, so you can rinse the sepia dye out if you don’t like it.
Colorful Appliques
If dyed with care, these will appear like detailed embroidery from a distance. A proper job takes time, so have patience.
If you don’t mind the colors bleeding together, go ahead and wet the applique, then use a towel or several layers of paper towels to blot excess water away. If you want a more precise effect, don’t wet your lace first. Just be aware that the color will not be absorbed as easily, since it’s the water that spreads the dye.
Paint the lighter areas first. Gradually add layers of color until the applique looks as rich and vibrant as you desire. Remember that you can always add more color for a darker shade, but it’s difficult to remove the dye once it’s dried, so start light and layer the color on. You must have patience for this process, but the end results are worth it.
If you’re painting more than one applique, consider working with larger amounts of dye, so you don’t risk running out halfway through your project. You don’t want to end up with two appliques whose colors are noticeably different.
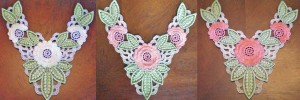
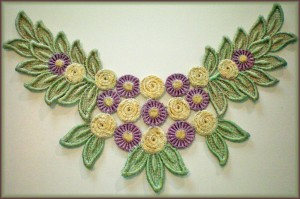
One method is to paint the appliques in an assembly line. For instance, paint the green leaves first on both pieces. Then do the yellow flowers on both, then the pink flowers, and so on. This ensures that your colors are consistent on both appliques.
Finishing Up
When you’re done, wait for the lace to dry. This can take several hours. You might notice a lightening of the colors, which is to be expected. If the colors end up too pale for your liking, apply another layer or two of dye.
When the lace is dry and you’re happy with the results, you can permanently set the dye by pressing the lace. Use a warm iron and test it on a scrap of lace first, just to be sure the lace won’t melt. If you’re concerned about how the lace will react to the heat, use a pressing cloth. Flip the lace over and press from the wrong side. Pressing the lace ensures that the colors won’t bleed if the lace gets wet, plus it helps restore some of the lace’s natural sheen.
FAQ—Frequently Asked Questions
- Can I dye ivory lace? Or must it be white?
You can dye any pale lace. The colors may not be as accurate if you use an ecru lace instead of white, but they will still look good.
- My lace won’t absorb the color. What’s wrong?
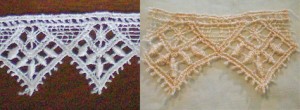
Check the fiber content of your lace. Some dyes are made only for rayon lace. Synthetic dyes, such as polyester or nylon, will not absorb natural-fiber dyes. When I tried dyeing a piece of synthetic lace, it felt like it actively resisted being dyed. After an hour, I’d only managed to dye two inches of lace, because I kept having to go over the same areas, trying to get them to absorb the color. In addition, the colors were pale and washed out. It had none of the vibrancy that the rayon lace possessed after being dyed. See the difference?
- My colors are running together. Why?
If your lace is very wet, the dyes will bleed and run together. The wet fibers act like a wick, soaking up the dye. If you’re unhappy with the bleeding, carefully rinse the dye out, then wrap the lace in a thick layer of paper towels and squeeze gently. Switch to a fresh layer of paper towels and repeat. This should remove any excess water and allow you to paint the lace without undue bleeding.
Another trick is to make allowance for the bleeding and avoid painting to the edges of your lace. If you know you want a certain part of the lace to be pink, don’t paint right up to that section with green dye. The two colors may overlap, resulting in discoloration. Instead, pay attention to how far your dye bleeds and stop painting that distance from where you want to change colors. If necessary, you can touch up any undyed spots when the lace is dry and you have more control over the dye.
- I dyed my lace the wrong color! What can I do?
If it hasn’t yet dried, try rinsing the dye out in a bowl of water and starting fresh. If the dye has stained the lace, you can try painting over it and see how it looks. The new colors may not be as pure, but it should look okay.
If your lace has already dried, you won’t be able to drastically change the color, but you may be able to shift it somewhat. Remember, dye is not opaque, so the original color will show through. You can alter the color by layering on new dye, but it’s a subtle process and will only work when the colors are close to each other on the color wheel. If you accidentally used yellow-green instead of green, you might compensate by adding a layer of blue-green. If, however, you painted your lace purple instead of green, adding green will only muddy the color.
It’s always a good idea to buy extra lace, so you’ll have a second chance when you irredeemably mess up. Extra lace also allows you to practice your painting technique and get your colors figured out ahead of time.
- I want to dye my lace to match my fabric—help!
This can be tricky, especially since dye lightens as it dries. Mix up a batch of dye that’s as close in color as you can get it and paint a small section of lace. Wait for it to dry thoroughly and then compare it to your fabric. If the color is obviously off, adjust your dye accordingly and try again. You may have to keep experimenting for awhile, until you find a batch of dye you’re happy with. Make sure you write down how many drops of each dye you used in each batch, so that once you find one that works, you don’t forget how to mix it.
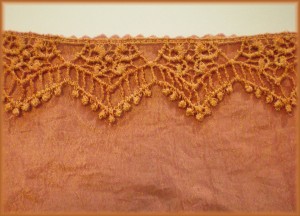
When you have a sample you like, take a picture of it alongside your fabric. A photograph can be a keener judge of how well the color matches. In the sample below, the colors looked close when I examined them myself, but the photograph shows that the lace is a touch too yellow. If I tried another batch of dye, I would need to add more red to the mixture.
Conclusion
As you can see, lace-dyeing is an art, but it’s not as complicated as it seems. It’s also quite addictive. The next time you have a project that calls for a special trim, why not try dyeing lace to match? If you’re into home decorating, you can embellish lampshades and curtain tie-backs, or place a row of edging lace on curtains or throw pillows. Dressmakers—imagine an evening gown trimmed with matching lace, or with an overlay of contrasting lace. If you’re a historical costumer, consider using floral appliques down the front of a stomacher. Or, add rows of custom-dyed lace to the edges of your corset.
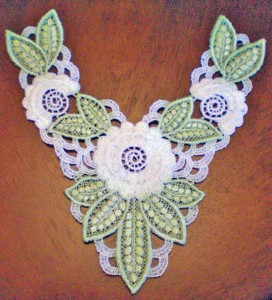
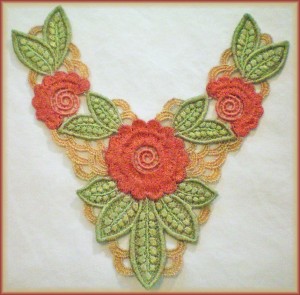
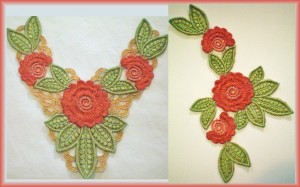
You can even cut apart some kinds of Venise lace, which allows you to fit the lace to your garment. Look at the applique below. By removing the gold links, tilting the applique, and moving one of the flowers to a different location, it became a while new applique.
The alternatives are endless and your results are sure to be showstopping!
~~*~~
Have you ever tried hand-dyeing lace or lace appliques? What did you enjoy most about it? Do you have any tips you’d like to share?

4 Responses to Hand-Dyed Lace, Part II