by Lisha Vidler
(Click any illustration to view the full-sized version.)
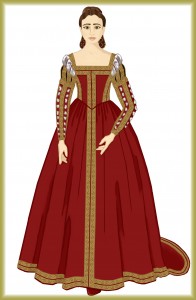
Awhile back, Yesterday’s Thimble published an article on how to draw your own fashion sketches (Croquis: Fashion Sketches, Part I and Part II). It covered how to pose and sketch your figure, and how to add clothing, hair, and facial features. The topic of coloring your fashion sketches was only briefly touched upon, so let’s explore this subject in more detail. In this two-part article, we’re going to demonstrate how to color your croquis digitally.
Note: All demonstrations in this article use Photoshop Elements.
Digital Coloring
Learning to draw digitally requires an investment in both time and materials, but once you become skilled, your drawings will look quite professional. You’ll need the following supplies:
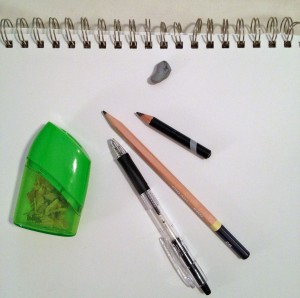
- Sketchpad
- Pencils (both soft and hard)
- Pencil Sharpener
- Kneaded Eraser
- Black Ballpoint Pen (optional)
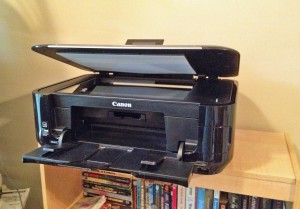
- Digital Scanner
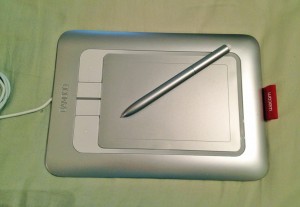
- Graphics Tablet and Stylus
- Graphics Program, such as Photoshop or Paint Shop Pro
To make your base sketch, you’ll use an artist’s sketchpad. For some drawings, simple copier paper will do, but if you’re making a croquis of high quality, you’ll need to use good drawing paper. You’ll want at least two graphite pencils, hard and soft. Use the soft pencil for outlining and rough details, while the hard pencil will come in handy for tightening up your sketch and adding intricate details.
Use a kneaded eraser to get rid of any stray lines you don’t want. These work better than standard pink erasers, as they are softer and won’t rip your paper. You can break them into small pieces, which are easier to hold, and you can mold the eraser into a tiny, sharp point, which will reach into the smallest areas.
The pen can be used to outline your drawing when you’re finished. Some scanners have a feature that automatically darkens any faded lines, in which case it’s okay to skip the inking and just scan the pencil sketch. But if you don’t have this feature, you’ll notice that your pencil lines will fade considerably when scanned. In this case, you’ll need to ink the drawing before scanning it. Use a black, fine-tipped pen (I prefer ballpoint) and simply draw over the lines you wish to be seen.
A scanner is essential to digitize your drawing. These days, many ink jet printers come with a built-in scanner and can be purchased for as low as $50.
Strictly speaking, you don’t need a graphics tablet, but it will make your job easier, especially if you plan to do a lot of drawing on the computer. Trying to draw with a mouse or touch-pad is awkward and can strain your wrist, arm, shoulder, and neck. The tablet, on the other hand, allows you to hold a stylus and draw with a natural motion, just as you would with a sketchpad and pencil.
A large, expensive tablet isn’t necessary. You can buy an entry-level device for as low as $65 and it will do just fine.
In order to color your scanned image, you’ll also need an advanced drawing program. I use Photoshop Elements, which was included for free with my graphics tablet, but you can use any graphics program you like, provided it has the ability to use layers.
Getting Started
Sketch your croquis. Keep the drawing simple—you don’t need to add shadows and highlights, since this will be done digitally.
Scan the drawing with a resolution of at least 150 dpi. If you intend to do a lot of detail work, use 300 dpi. Keep the drawing scaled at 100%, unless you want to resize it. If your drawing is rather small, you can enlarge it during the scanning process. Conversely, you can shrink an image, although I don’t recommend doing so. It’s easier to add fine details to a larger drawing than a small one.
In order to get a good scan, your drawing needs to be absolutely flat. In other words, don’t scan the drawing while it’s still in your sketchpad. If your sketchpad is spiral bound, the metal rings will hold the drawing away from the scanner’s surface, causing unwanted shadows. Even if it’s flat-bound, the thickness of the pad will lift the scanner’s lid, causing light to leak into the scanner. For the best results, remove your drawing from the sketchpad first, then scan it.
-
Tip: As you work, save your image frequently as a new file. This allows you to make changes to the image without worrying about undoing your work if you don’t like the results. You can simply go back to a previously saved version and start over. Create a folder to hold all of these image files, so they don’t clutter up your desktop.
Once you have a good scan, save it as a high quality .jpg file. Give it a name that indicates it’s your raw scan, such as “Croquis_Scan_1.jpg.” Close the scanned image and open the saved file.
Cleaning Up the Background
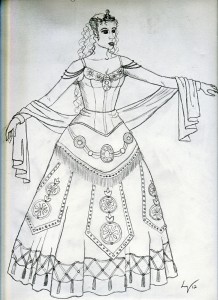
Your first task will be to clean up the scanned drawing. It will likely have shadows around the edges and you’ll be able to see the texture of the paper.
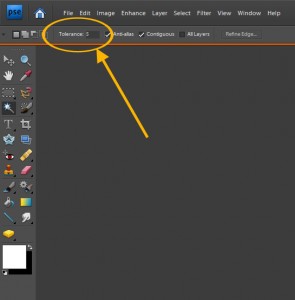
There are two ways of cleaning up your drawing’s background. If your image is fairly simple and the drawing’s outline is dark, you can use the magic wand to select the background. If the magic wand highlights a great many tiny patches, you’ll need to adjust the tolerance to a higher number. This will keep it from latching on to every minute color change, such as the texture of the paper. Raise the number until you get a clean selection of the background.
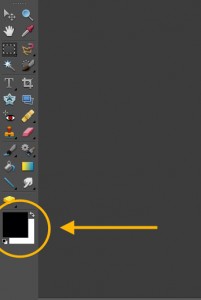
When you hit delete, everything that’s selected will be erased, replaced with the current background color. It’s a good idea to change the background to white, at least to start with. Look for two colored squares that overlap each other. The top square (aka: foreground) represents the active color, while the one behind it (aka: background) represents the color you’ll get if you use the eraser or the delete key. If you click on either of these boxes, a window will open that permits you to choose what color you want to use. Click on the second box and change the background color to pure white.
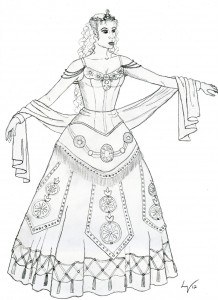
Hit the delete key and everything that’s selected will be erased, turning white. If there are patches that didn’t get deleted, you can either select them and hit delete again, or you can go in and manually erase them. If you accidentally delete part of the drawing you wanted to keep, hit Ctrl-Z to undo the deletion.
The second method of deleting the background is useful if you can’t get a clean selection with the magic wand. You’ll need to use the paintbrush to paint over the background with solid white. Use a large brush and paint the open areas first. Then use a smaller brush and zoom in, painting close to the image. Clean up the entire background, erasing the texture of the paper and any stray lines you don’t want. Don’t overlook the gaps, such as between the model’s arm and her body.
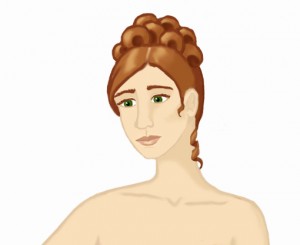
When you’re done, clean up the rest of the drawing as best you can, erasing the paper texture from the limbs of the model and her clothing. This will give you a clean image to begin coloring.
The Five Steps
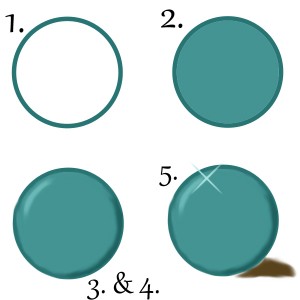
Basically, there are five steps to coloring a croquis:
- Outlining
- Color flatting
- Adding shadows
- Adding highlights
- Adding texture and details
There are three different ways you might choose to color your croquis. First, you might focus on one section at a time, completing each area before moving on to the next. For example, outline all of the visible skin, then fill in the color, add shadows and highlights, etc. Once you’re done, move on to another section of the drawing, such as the skirt or bodice, and color it from start to finish.
The second option is to focus on each step, first outlining the entire drawing, then filling in all of the color, then adding all of the shadows and highlights, etc.
The third option is a hybrid approach. Personally, I like to work in sections, but I don’t finish the entire section before moving on. I’ll outline and fill in the color, and perhaps add some shadows, then I’ll move on to the next area, outlining and coloring it. Once the entire drawing is colored, I’ll go back and start placing more shadows and highlights, as well as texture and details. This approach allows me to move around, so I don’t get bored or overwhelmed.
Step 1: Outlining Your Drawing
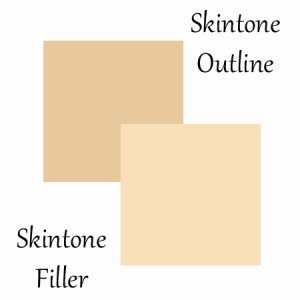
It’s easiest to outline your drawing with the line tool, rather than the paintbrush. Choose a color somewhat darker than the main color you’ll be using. For example, when outlining the model’s arms, choose the color you want to fill in her body with, then go a few shades darker for the outline.
Use a line that’s narrow enough to be subtle, yet wide enough to be seen clearly. The exact width will depend on the size and resolution of your drawing. I generally use a thicker line for outlining limbs and garments, and a thinner line for outlining the face and features.
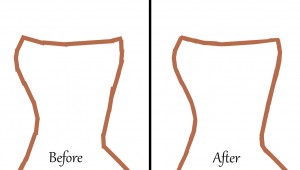
The trick to getting smooth outlines is to overlap each line with the one before it. Be sure to keep the lines short, especially around curves. You’ll probably end up with some jagged edges that need to be cleaned up. Use your background color to draw lines that just cover the rough edges, hiding them from view, or if you’ve a steady hand, use the eraser tool to smooth things out.
In Photoshop Elements, every line you draw is saved as its own layer. After your outline is complete, you’ll need to merge these layers. I find it useful to save the outline as its own separate layer, rather than merging it with the background. To do this, make the background invisible by clicking the eye symbol next to the layer box, then merge the rest of the layers by clicking Layer > Merge Visible. Click the eye symbol again to make the background visible once more. Now you should have two layers: the background and the colored outline.
~~*~~
Now that you know how to prepare a drawing for digital coloring and have completed the first step of outlining, you’ll need to add color, as well as shadows, highlights, and details. We’ll explore these steps in the second half of this article.

Pingback: Fashion Sketches: Drawing Flats – Your Ward
Pingback: Fashion Sketches: Drawing Flats | Foundations Revealed