by Lisha Vidler
(Click on any illustration to view a larger version.)
If you’ve never heard of a crazy quilt, it’s an amazing phenomenon that gained popularity during the Victorian era, when nothing ever went to waste. Basically, you take a few scraps of fabric and stitch them together in a random patchwork pattern. Then, you add embellishments: a row of embroidery stitches along the seam of two fabrics, or a patch of silk ribbon roses. A length of ribbon, a row of buttons, or a scattering of seed beads.
Today, we’re going to make a miniature crazy quilt and turn it into a pincushion, as taught by Ivory Blush Roses.
Inspiration
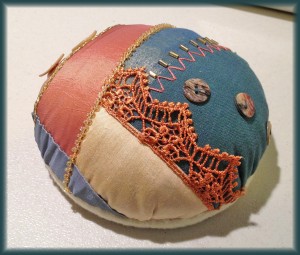
Some people have clever imaginations. Who would look at leftover scraps of fabric and an old CD and see the potential for something beautiful? The author of the blog Ivory Rose Blushes, for one. She stitches together small pieces of fabric to create a crazy quilt, and then sews it into a gorgeous pincushion, using a CD as the base. I’ve admired her work for years and when I found a package of blank CD-ROMs at the dollar store, I decided it was time to follow through and make a few of these pincushions.
I’m not planning to infringe upon Ivory Blush Roses’ pincushion tutorial. Since her tutorial doesn’t go into detail about how to make the crazy quilt itself, the first part of this article will discuss how to sew a miniature crazy quilt. The second part will include a diary showing how I took my crazy quilts and turned them into pincushions, using Ivory Blush Roses’ tutorial.
Materials
- Scraps of Fabric
- 2 Pieces of Muslin, 9″ x 9″
- Felt, 8″ x 8″
- Embellishments—Ribbon, Braid, Seed Beads, Buttons, etc.
- Fiberfill
- 2 blank CDs
- Nylon Jewelry Thread
- Large Needle
You’ll need a variety of fabric scraps to make your crazy quilt. Muslin makes a good stabilizing base. You’ll need two pieces, because the felt you’ll use for the base of your pincushion can be semi-sheer and therefore needs to be lined. For best results, stuff your pincushion with poly fiberfill.
The CDs can be old ones that you no longer use or blank CDs from the dollar store. You’ll need two—they’ll be sandwiched together to form a stable base for the pincushion. To gather the fabric, you’ll need an extremely strong thread. I used nylon jewelry-making thread, but you could also use buttonhole twist or heavy-duty quilting thread. Likewise, you’ll need a very large needle.
Choosing Your Fabrics
To make your crazy quilt, you’ll need a selection of fabric scraps. Decide now whether your pincushion will be purely decorative or functional. If you want to use it to hold pins, don’t choose delicate fabrics that will be damaged by pinholes.
There are three aspects to consider when choosing fabrics: color, texture, and print. These must be kept in balance or your crazy quilt will look random and chaotic, instead of harmonious.
- Texture: It’s important to vary the texture of your fabrics. If they are all alike, your crazy quilt won’t have much appeal. Mix shiny with matte, rough with smooth, and so forth. For a luxurious pincushion, consider taffeta with satin and velvet. For something more casual, try a quilting cotton with corduroy and twill. Don’t forget to look at the wrong side of your fabric. Sometimes you’ll find exactly what you need when you flip over a crepe-backed satin or a double-faced silk.
- Print: The pattern on your fabric is another factor to consider. Don’t let the variety of available prints intimidate you. Place a few fabrics side by side and see which ones look good together. You don’t have to use prints, but if you do, remember to use some solids to balance things out.
- Color: Your colors should coordinate in a way that’s pleasing to the eye. There are several types of color schemes you can consider.
For a subtle look, go with a monochromatic scheme—using various shades of the same color. The greater the contrast between light and dark, the more zing you’ll have. A variety of medium red fabrics will look plain compared to a dark red paired with a diluted pink, for instance, or brown combined with orange and peach.
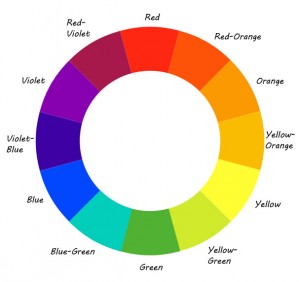
For a combination that’s vibrant, yet harmonious, try an analogous scheme—using three colors that are adjacent on the color wheel, such as blue, blue-green, and green. For something with even more pop, choose a primary color and two additional secondary colors from either side: orange with red and yellow, for instance, or blue with purple and green.
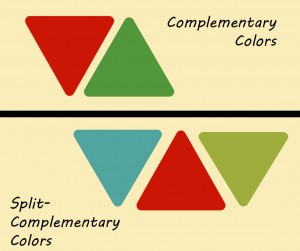
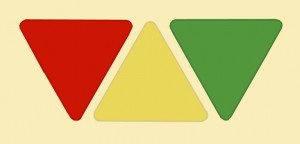
If you want colors that will really stand out when placed together, try a complementary scheme—colors that are opposite each other on the color wheel: red with green, or purple with yellow. Split-complementary colors are almost as vibrant. Choose a color and find its opposite on the color wheel, then look at the colors on either side. For example, if you start with red, green is its complementary color. Skip to one side and you’ll find blue-green. On the other side is yellow-green. Either will look striking with red.
Another scheme you might try is triadic—that is, three colors equally spaced around the color wheel, such as red with blue and yellow, or violet with orange and green. These colors will be quite bold, so use discretion.
If your main colors are especially vibrant, use a neutral to balance them out. Neutral doesn’t necessarily mean black, white, or beige. It can be any color that is soothing to the eye when contrasted with a bright color. If you’re working with red and green, consider adding some gold to provide a soothing influence.
Make sure you balance your colors appropriately, not only in hue, but in saturation, as well. You don’t want them to all be vivid and bright, for that will overwhelm the visual senses. Use one or two bold colors and let the rest be muted.
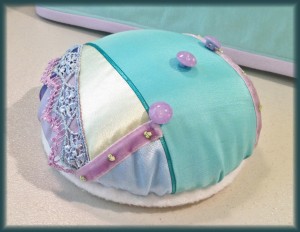
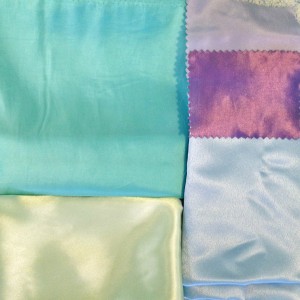
The combination of color, texture, and print will make your crazy quilt unique. Remember—nothing is set in stone until you’ve started sewing, and even then, you can make changes. That’s what a seam ripper is for! Lay out your fabrics and see which combinations appeal to you. Don’t be afraid to experiment with colors you might not normally use. In the example below, I paired a light green satin with an aqua taffeta, a blue crepe-backed satin, and two swatches of iridescent lavender and purple taffeta. It’s basically an analogous scheme, with the exception of the purple, which adds emphasis to the more subtle colors.
Trims & Embellishments
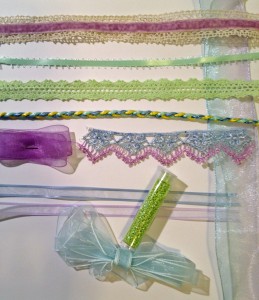
Look through your stash for any trims that coordinate with the fabrics you’ve chosen. Keep an open mind and grab anything that might be used in a decorative fashion. You’ll decide how to apply them later.
If you enjoy lace dyeing, you might dye a bit of lace to coordinate with your fabrics. (For directions, see the tutorial, Hand Dyed Lace, Part I and Part II.) It’s common in crazy-quilting to embroider along the seams where two fabrics meet, so consider adding a buttonhole stitch, catch-stitch, or feather stitch along the seam. You can add clusters of beads to a ribbon. Keep an eye out for unexpected treasures, such as the reverse side of a button or ribbon. The first pincushion I made, I flipped over a set of mother-of-pearl buttons to discover a rich blend of brown, copper, and teal, which matched my fabrics exactly.
Designing Your Quilt
Now you need to figure out the design for your quilt. I used Photoshop Elements to help me with this. If you don’t have Photoshop or something similar, you can use Windows’ Paint, but it won’t permit you to add fancier details, like lace and embroidery. You can always sketch your design freehand, but it’s much easier to alter the colors on the computer.
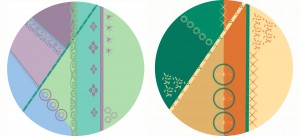
Draw a circle and divide it randomly with diagonal lines. Use the paint bucket feature to fill in each shape. If you don’t like the combination, change it around until you’re satisfied.
If you have a more advanced painting program, decorate your sketch. Consider the materials you have on hand, such as ribbon, lace, and buttons. Add thick colored lines to indicate ribbons. Add dots or dashes to represent beading. Solid circles can stand in for buttons. If your program has custom paintbrushes, you can add more realistic embroidery patterns, or even lace.
The sketch you draw will serve as a guide for your design. You don’t have to stick to it precisely, but it helps to have something to refer to when you get lost or overwhelmed.
Now that you have your fabrics and your design, you can start quilting. In the second half of this article, you’ll learn how to piece the crazy quilt together and embellish it. Then you can follow along as I use Ivory Blush Roses’ tutorial to turn my crazy quilt into a pincushion.





Pingback: Crazy Quilt Pincushions | Yesterday's Thimble