by Lisha Vidler
In the first half of this article, we discussed how to choose appropriate fabrics and trims to make your crazy quilt. Now let’s put everything together and see what we come up with.
Quilting Your Design
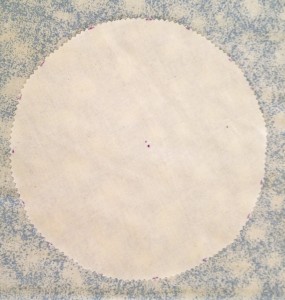
Your fabrics must be sewn to a base. Muslin works well for this. Cut a circle that’s nine inches in diameter.
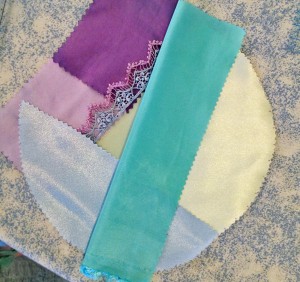
Lay out your fabric scraps to get an idea of how it’s going to look. Decide in what order you’re going to sew the pieces down. Plan ahead for any trims that will need their edges hidden in a seam. If any of your fabrics are sheer, line them before you begin. Once you have the pieces laid out, take a photo, so you’ll remember the design as you’re stitching the layers together.
Because you’re working with angles and small pieces of fabric, you’ll need to use a combination of methods to create your quilt. The first layer of fabric will have its edges covered by subsequent layers, so it’s fine to simply lay it on the base and stitch it down.
For pieces that need finished edges, you have two options. First, you can lay the fabric wrong side up and stitch 1/2″ from the edge, then flip it over and press it flat. (This is the method I use most often.) Or you can press the seam allowance under, place the fabric so it overlaps another piece, and edgestitch it down. Use whichever method seems easiest for the piece you’re working with.
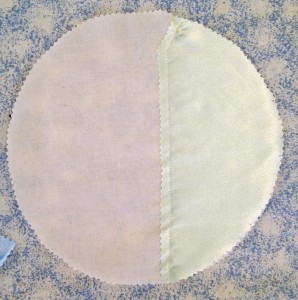
I didn’t document the assembly of my first pincushion, but for the second, I began with a light green satin. I could have sewn it to the aqua taffeta, then placed both pieces onto the base, but I chose a more layered approach and sewed the satin directly to the muslin.
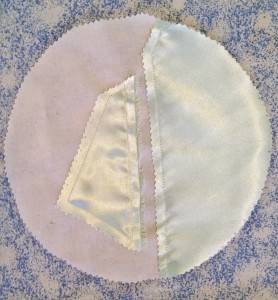
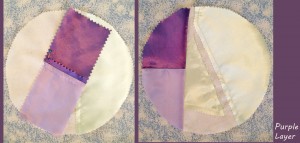
Next, I placed a small triangle of green satin off to the side and stitched it to the base. When sewing a piece down on all sides, be sure and smooth the fabric out, so you don’t end up with wrinkles or bulges.
For the next piece, I took two swatches of purple taffeta and sewed them together, creating a long rectangle. I placed the taffeta wrong side up on the muslin and stitched it down, then folded it over, pressed it flat, then trimmed the edges, as illustrated.
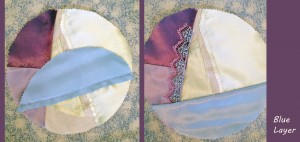
Using the same technique, I added a half-circle of blue satin. Once it was done, I realized I needed the Venetian lace to vanish under blue satin, so I carefully unpicked a small section and tucked the lace into the seam, then restitched it, anchoring the lace in place.
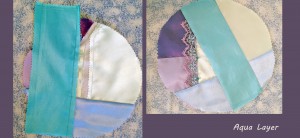
The final layer was a rectangle of aqua taffeta. I needed it to cover the edge of the triangular green satin and the Venetian lace, which meant sewing it at a slight angle. Because of its position in the center of the quilt, and being the final piece, I had to sew both edges down. For the first seam, I used the standard technique: stitching it right sides together, flipping it over, and pressing it flat. For the final edge, I pressed the seam allowance under, then edgestitched along the pressed edge.
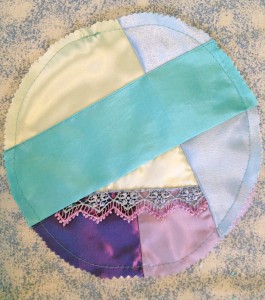
Once all your pieces are sewn, trim the fabric to the edge of your muslin circle. Sew a basting stitch approximately 3/4″ from the edge of the circle. This will anchor your fabrics and serve as a guide for when you add embellishments. When you turn the circle into a pincushion, everything past the basting stitch will be hidden, so there’s no need to extend your trim much beyond that point.
Note: In the illustration below, my basting stitches are too close to the edge. I had to compensate for this when I finished the pincushion.
Time to Embellish
This is my favorite part! Add whatever bits and pieces you want to decorate your pincushion with. Hand sewing works best, especially for narrow or delicate trims. Stitch all the way through the muslin base. If you’d like a neat finish, extend the trim just beyond your basting stitches, so the ends will be hidden.
If you’re unsure how to decorate your pincushion, here are a few suggestions to get you started.
- Flat ribbon
- Knotted ribbon
- Decorative braid
- Satin cord
- Clusters of seed beads
- Rows of bugle beads
- Buttonhole stitches
- Feather-stitches
- Catch-stitches
- Chain-stitch circles
- Lazy-daisy flowers
- Clusters of French knots
- Rows of flat lace
- Silk ribbon flowers
- Venetian lace appliques
- Buttons
Place each potential trim on your circle and compare it with other possibilities, so you can make the best decision. Not every trim will look appropriate. For example, I had a length of green crocheted lace that I thought would be perfect for my pincushion. The color matched exactly, but I found that the style of lace clashed with the fabrics used. It was crocheted lace, which gave off a homemade or shabby chic vibe, while the fabrics I used were more sophisticated. It didn’t look right, so I put the lace away and examined my other options.
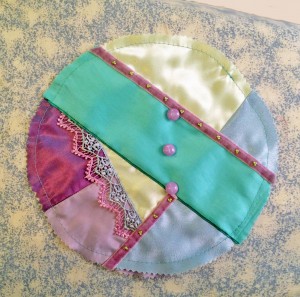
Here’s my circle once I finished embellishing it. I used a sample of Venetian lace that had been hand-dyed blue and lavender, along with purple velvet ribbon, iridescent lavender buttons, and clusters of lime green seed beads. I wanted something more complex, but I didn’t have many trims in my stash that matched these colors.
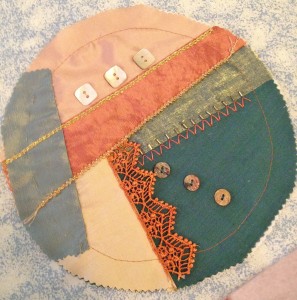
Here’s the first pincushion I made, just after I finished embellishing the circle. It’s a bit more detailed, with beaded rope, gold braid, dyed lace, a row of embroidery, a row of bugle beads, and two rows of different buttons.
Constructing My Pincushion
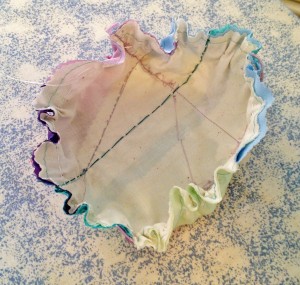
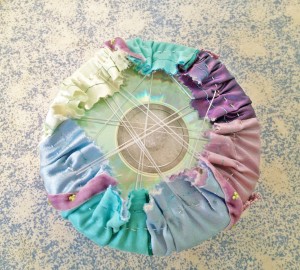
Once the crazy quilt circle was finished, I gathered about 3/4″ from the edge, following the directions given in the tutorial at Ivory Blush Roses. The gathering stitches needed to be strong, so I used a length of nylon jewelry-making thread. I cut a double length long enough to go around the circle, plus an extra twelve inches or so. First, I anchored the thread by backstitching, then I sewed a running stitch all around the circle. It’s important to keep the stitches small, no larger than 1/8″. Otherwise, the finished pincushion will be very ripply. Once I finished, I didn’t tie off the thread, but pulled it until the circle formed a rounded cup.
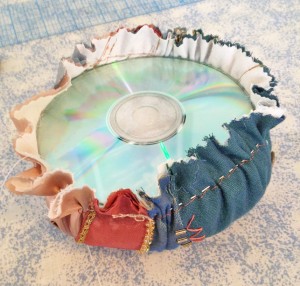
The circle must be stuffed with fiberfill. I took the first CD and pressed it down over the stuffing, then pulled the gathering thread tight, until the edges curled over the CD, holding it in place. Since the pincushion needs to be as firm as possible, I used a chopstick to stuff more fiberfill through the CD’s spindle hole. When I couldn’t fit any more stuffing into the pincushion, I cinched the gathers as tight as I could and knotted the thread—but I still didn’t cut it.
The next step is to sew across the bottom of the pincushion, creating a crisscrossed web of thread to hold the gathered fabric secure. First, I passed the thread back and forth one direction, then I rotated the pincushion and started crossing the thread the other way. When I ran out of thread, I knotted it off and started with a freshly threaded needle, continuing to rotate the pincushion and pass the thread back and forth across the bottom.
Fashioning the Base
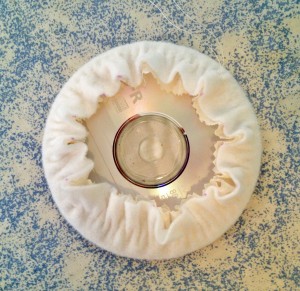
To make the base of the pincushion, I needed a circle of felt in a coordinating color. For the first pincushion (gold/copper/teal) I used a warm ivory. For the second pincushion (aqua/green/lavender), I chose white felt. Because my felt was somewhat sheer, I lined it with muslin, so the CD wouldn’t show through. I cut both the muslin and the felt into a circle about 8″ in diameter, large enough that I could gather the edges around the second CD.
I repeated the webbing technique to secure the gathered edges around the CD. Finally, I placed the base against the bottom of the pincushion, with the webbed edges together, and used a slipstitch to sew them together.
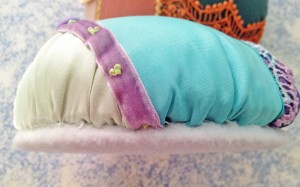
According to the tutorial, you can cover the base’s edge with ribbon if your stitches show. On my first pincushion, the stitches were invisible. They showed a little on the second pincushion, but I didn’t have a suitable trim to use to hide them. If I ever find anything in the future, I’ll be sure and cover that edge.
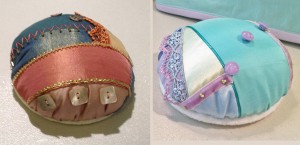
I now have two crazy quilt pincushions. The gold/copper/teal one is my favorite, because it’s more embellished. I made the second pincushion because I wanted one to coordinate with my sewing room. Neither is embellished with as much detail as Ivory Blush Roses’ pincushions, but even so, I’m pleased with how they turned out.

Pingback: Crazy Quilt Pincushions | Yesterday's Thimble