Tuesday’s Tips & Tricks: Reducing Bulk
When you sew, it’s important to reduce bulk wherever possible. Doing so will make your corners crisp and sharp; it will enable your curves to lie flat, without wrinkling or bulging; it will give you a better looking garment. So, how do you go about reducing bulk?
- Grade seam allowances
- Trim seam allowance
- Trim sewn corners
- Clip and notch curved seams
- Avoid backstitching
Grade Seam Allowances
When your seam allowance is pressed to one side, the edges create a ridge that can often be seen from the right side of the fabric. The solution is to trim one of the seam allowances shorter than the other. It will also help if you pink the edges.
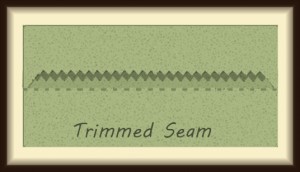
Trim Seam Allowances
Whether you press your seam open or to one side, you can reduce bulk by trimming the edges. Simply clip the edges diagonally.
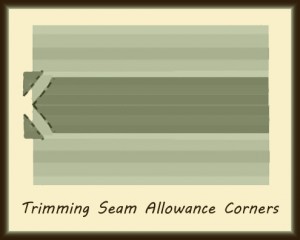
Trim Sewn Corners
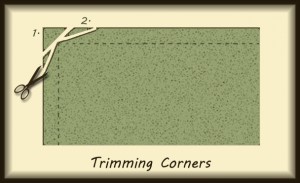
Anytime you sew a corner, where you pivot the needle and continue sewing in a different direction, you need to trim the excess fabric. Otherwise, all that fabric will bunch up in the corner when you flip the garment right side out. Reinforce the corner, either by stitching with a shorter stitch length, or by sewing the seam twice. Then:
- Cut straight across the tip of the corner, a scant distance from the seam.
- Cut diagonally toward the tip of the corner on both sides.
If your fabric is delicate or frays easily, add a fabric glue (like Fray Check) to the tip of the corner, just to be safe. Test it first, to be sure it won’t discolor your fabric. When you’re done, flip the corner right side out and use the tip of a chopstick or a corner turner to poke the corner into shape.
Clip & Notch Curved Seams
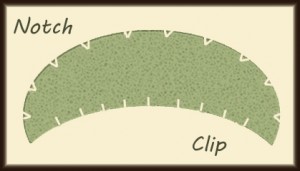
Anytime you have a curved seam, it will ripple when it’s turned right side out, unless the seam allowance has been clipped or notched. What’s the difference between the two? Clipping is done on inner curves, such as on a neckline. Cut into the seam allowance, making small clips, which will spread open when the fabric is turned, allowing it to lie smoothly. Notching is done on outer curves, such as the outer edge of a collar. Cut small triangles into the seam allowance. These will allow the curved seam to lie flat once it’s turned.
Tips:
- Place the clips or notches between a quarter of an inch and one inch apart, depending on how curved your fabric is. The more severe the curve, the closer together the cuts need to be.
- Cut your clips diagonally, instead of straight. This will reduce fraying.
- Clip as close to the seam allowance as possible. If necessary, add a drop of Fray Check to the tip of the cut, so it won’t create a hole in your seam.
- Don’t clip both edges of the seam allowance directly opposite each other. It may save time to cut through both layers, but having the cuts opposite each other creates a weak point in your seam. It’s better to cut clips and notches that stagger.
Avoid Backstitching
We’re all taught to backstitch whenever we begin and end a seam, but is it really necessary? You may have noticed that when you hit “reverse” on your sewing machine, it creates a thick spot that refuses to press flat. This is especially true when you’re working with delicate or lightweight fabrics. Sewing the seam multiple times in one spot creates a layer of thread that’s thicker than your fabric.
There’s a way to avoid this that’s used by those who sew couture garments. Instead of backstitching at the start and end of each seam, reduce your stitch length. Sew between half an inch and one inch using the smallest stitch length you have, then stop and return your stitch length to normal. When you near the end of your seam, stop and reduce the stitch length again and sew off the edge of your fabric. The smaller stitch length should hold the ends of your seam secure.
If you notice that the seams unravel, try pulling the ends of the thread to one side of the fabric and tying them in a knot. Alternatively, you can backstitch a single stitch at the beginning and end of each seam, while using the smaller stitch length. Either method should add a little security to the seam, without adding bulk.
~~*~~
What additional methods do you use for reducing bulk when you sew?

