Tuesday’s Tips & Tricks: Pattern Marking
If you’re new to sewing, you may have wondered about the various dots, circles, lines, and triangles that are scattered across your pattern pieces. These symbols are there to aid you, so it’s important to learn what they are and how to use them.
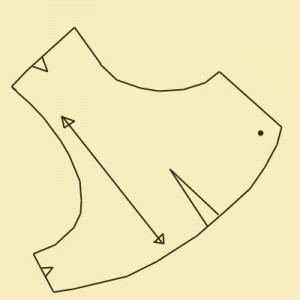
- Little triangles are known as notches and they serve to help you line different pattern pieces up with each other.
- Large, narrow triangles mark the darts, where you fold the fabric to shape it, such as at the bust.
- Dots and circles typically mark where something is to go, such as a pocket, zipper, or buttons.
- Short lines can mark where the waist or center front is, to help you fit the garment.
- The long line with a triangle at either end is there to show you the grainline, or how to align the pattern piece with the grain of the fabric. (For more information on grainlines, please see the Tutorial From Homemade to Couture: 12 Tips to Improve Your Sewing.)
Marking Methods
When you’ve cut your pattern out, the first thing you’ll want to do is mark the notches, dots, and circles. There are a number of ways to do this.
Some use tailor’s tacks, which is where you baste the marks with unknotted thread, and then clip the thread between the layers of fabric, leaving bits of thread to mark each symbol. The obvious advantage to this method is that the marks are not permanent. They should not stain your fabric, and they can be removed easily. On the other hand, it can take time to stitch all the markings, it’s easy to accidentally pull the threads out, and it can be harder to tell which threads represent which markings.
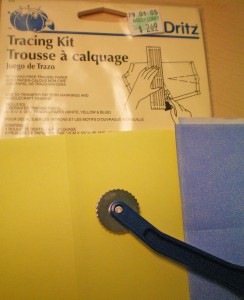
Others use dressmaker’s carbon and a marking wheel. The colored paper is like old-fashioned carbon; when you run over the marks with a serrated wheel, it leaves dots on your fabric. This is a quick and easy method, but be careful—the dots might not wash out. Also, it tends to puncture your pattern pieces, leaving behind little holes that can easily turn into large tears in the fragile tissue.
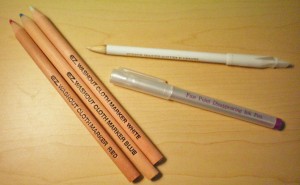
Another method is to draw the marks on your fabric. You can use tailor’s chalk or a chalk pencil, which easily brushes off of most fabrics. Or you can use a pen with ink that either washes out or fades with time. I prefer the last option. If your garment can be washed, using a water-soluble pen is a good idea, since a pen with air-soluble ink will fade within a day or two—utterly useless if you need to set your project aside for awhile. Typically, a water-soluble pen has blue ink, and an air-soluble pen has purple ink.
Some swear by children’s washable markers, but I haven’t tried these. For dark fabrics, where my marking pens might not show up, I use a white chalk pencil.
-
Note: Always test your method before marking your fabric to be sure it will come out! Be aware that the heat from an iron will make most markings permanent—so be certain that you remove all markings before pressing your seams! Also, be sure to rinse your marked fabric with plain water before washing with detergent, as some laundry soaps will not remove the ink, but will turn it brown and leave a permanent mark.
How to Mark
To mark your fabric using pen, pencil, or chalk, you’ll need to be precise. Keep your pencil sharpened and replace your pen as soon as it begins to dry out.
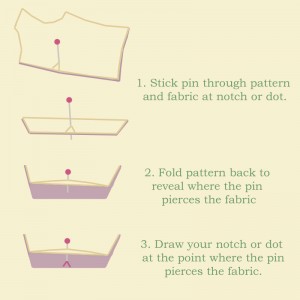
The best method I’ve found for marking is to stab a pin through the pattern and fabric at the notch, dot, or circle. You want to mark the wrong side of the fabric, so be sure the pin goes through all layers, then carefully fold back the tissue (and fabric, if necessary) to reveal the wrong side of the fabric. Using your pin as a guide, draw the triangle or circle. Ink may bleed through to the other side—this is normal. Draw the markings on both layers of fabric. Be sure to draw them accurately, as any shift in location could have a drastic effect on your finished garment.
~~*~~
Have you tried different methods of marking? Which do you prefer, and why?


