A Tutorial
by Lisha Vidler
Time to Complete: 30 minutes
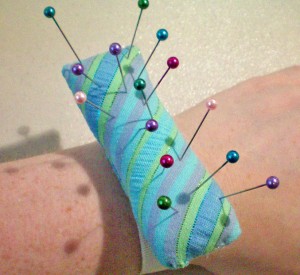
This is a very quick and easy pincushion that straps onto your wrist with an elastic band. I forgot to check the clock while sewing it, but it probably took about 20 or 30 minutes.
I decided to make this pincushion because, for lack of a better place to keep them while sewing, I’m always sticking my pins in my mouth. I never thought much about it, until I read the story of a seamstress who accidentally swallowed a mouthful of pins. Immediately, I tried to break myself of the habit, but it’s difficult when I have nowhere to keep the pins handy. I need them right at hand while I’m working, and reaching for the pincushion every few seconds while I’m laying out a pattern just isn’t practical.
I bought a bright red wrist pincushion from Hancock Fabrics, but it’s uncomfortable and ugly, and did I mention that it’s bright red? The first thing I did was replace the plastic wrist clip with an elastic band. That helped, but it was still a bright tomato red. I finally decided to make my own, using a pretty fabric from my stash.
Materials
- Fabric Scraps: about 1/8 yard
- 1” Elastic: Enough to span your wrist snugly but not tight (7” or 8”)
- Polyfill® Stuffing
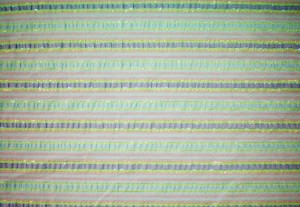
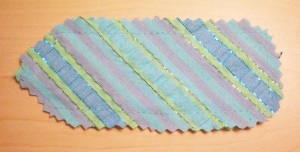
I used a sturdy waistband elastic, which works perfectly. It’s wide enough to hold the pincushion stable, without slipping or twisting. For the fabric, I used scraps leftover from my Quilted Patchwork Pillow: a plaid seersucker in shades of aqua, lavender, green, and blue. For the stuffing, I used regular poly-stuffing material.
Construction
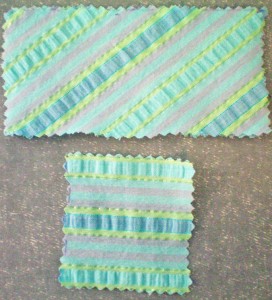
Step #1. You’re going to cut three rectangles total. Two will be identical, approximately 2.5” x 4.5”. This will be your pincushion’s body. Then you’ll cut a square, approximately 2.5” x 2.5”. This will be your strap holder.
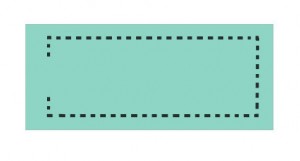
Step #2. Place your two large rectangles on top of each other, right sides together and stitch most of the way around. Begin and finish on one of the narrow sides. Don’t leave the whole narrow side open, but stitch a short way past either corner. (See illustration) This strengthens the side seam and makes it easier to hand stitch the opening closed.
Step #3. Grade your seam allowance and trim your corners. Be sure and leave the open end’s seam allowance full length, to make it easier to turn it in and stitch closed, when the time comes.
Step #4. Flip your pincushion right side out and use a corner turner or chopstick to gently poke the corners out. Then, press it.
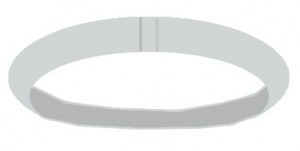
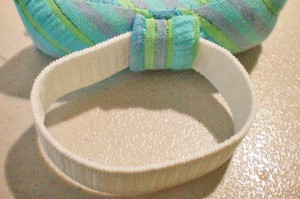
Step #5. Take your elastic and double check the length. You want it to fit snugly around your wrist, but not tight. You don’t want the elastic to be stretched while it’s around your wrist or it will become uncomfortable. Cut it with about 1/2” extra length. Form a loop with the elastic, overlapping the edges by about 1/4” and stitch the edges together, either by hand or by machine.
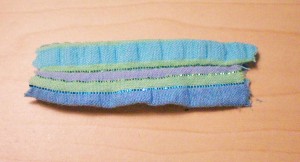
Step #6. Take your smaller piece of fabric (the square) and fold it in half. Stitch, then press the seam open. Trim the seam allowance. Flip the piece right side out and press it flat, with the seam running down the center.
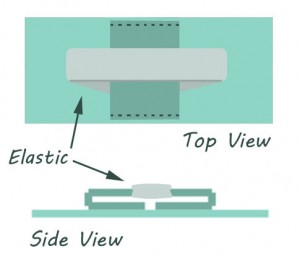
Step #7. Fold the piece in thirds, with the raw edges in the center, so that it’s the same length as your pincushion is wide. Flip it so the folded edges are underneath and hand sew one edge to the underside of your pincushion. Use a slip-stitch (so your stitches are invisible) and sew along the folded edge, taking care to only stitch through the bottom layer of the pincushion. After you’ve sewn one edge, slide the elastic wrist loop in place, then sew the second edge down.
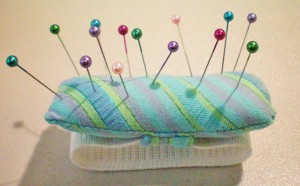
Step #8. Now it’s time to stuff your pincushion. Take a small amount of Polyfill and gently work it through the opening at the end of the pincushion. Use the blunt end of a pencil or chopstick to pack the stuffing in. You want it firmly packed, so the pincushion is quite stiff. Roll it between your hands and squeeze it to smooth out any lumps.
Step #9. Once you’ve added enough stuffing, you need to hand sew the opening closed. Use tiny slip-stitches and be sure to hide your knots on the inside, where they won’t be seen.
If you like, you can add ribbon, braid, or rat-tail to the outer edges. Hand sew the trim over the seam, taking care at the corners.
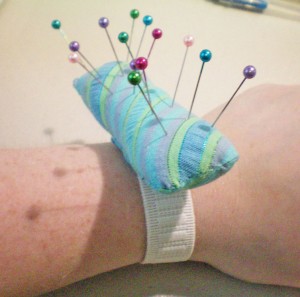
To use the pincushion, simply slide it over your hand and onto your wrist. If your elastic is the right size, it should stay in place without sliding about. Add pins, and you’re ready to go!

Pingback: New Wrist Pincushion | Yesterday's Thimble