
by Lisha Vidler
This article first appeared at Foundations Revealed
Please click on any photo to view it full-sized.
In the first half of this article, you learned how to get started with silk ribbon embroidery. I showed you a few basic stitches, but now let’s study some more advanced techniques!
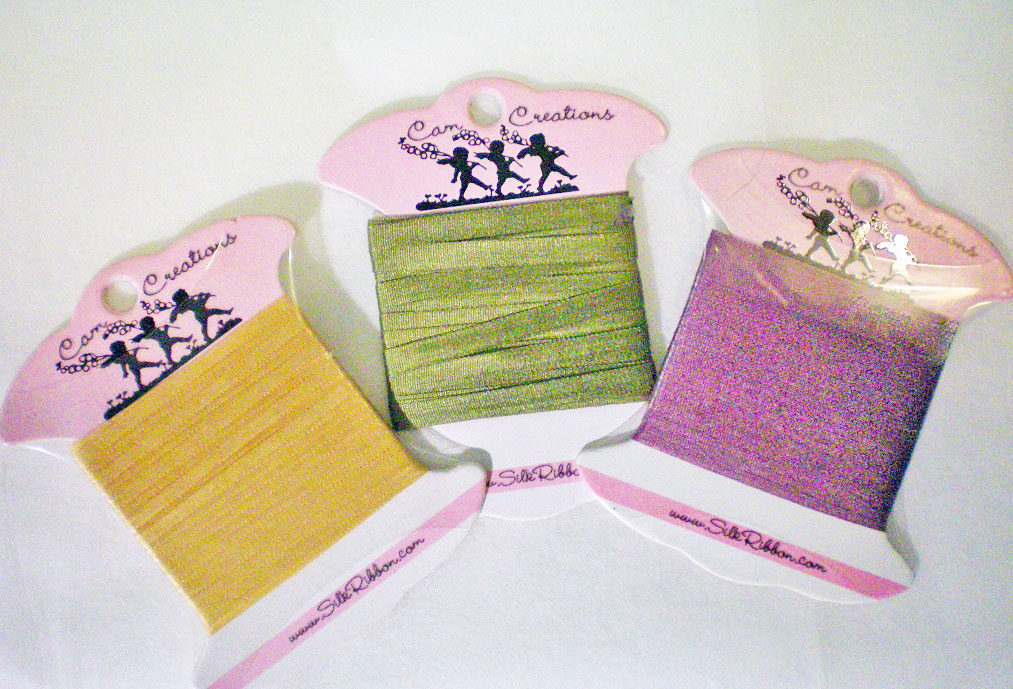
Spools of Silk Ribbon
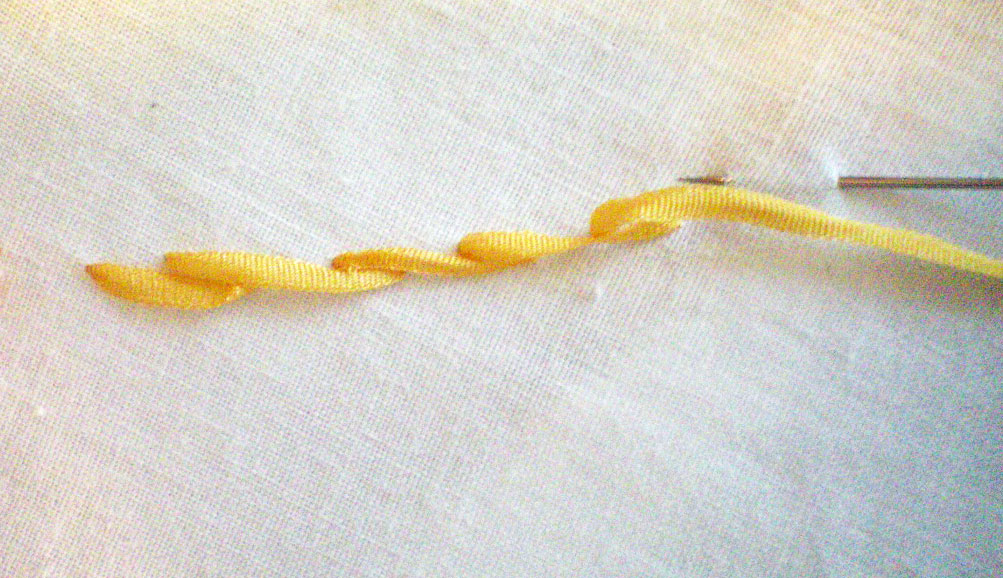
- Overcast Running Stitch
This is a good three-dimensional stitch for stems, borders, and monograms. It’s worked over the basic running stitch and produces a twisted rope. Make your running stitch first, then wrap the ribbon diagonally over the first stitch and under the second stitch. Repeat, wrapping the ribbon over and under, spiraling in the same direction, until you’ve covered the entire length. For a thicker stitch, wrap the ribbon around each running stitch more than once.
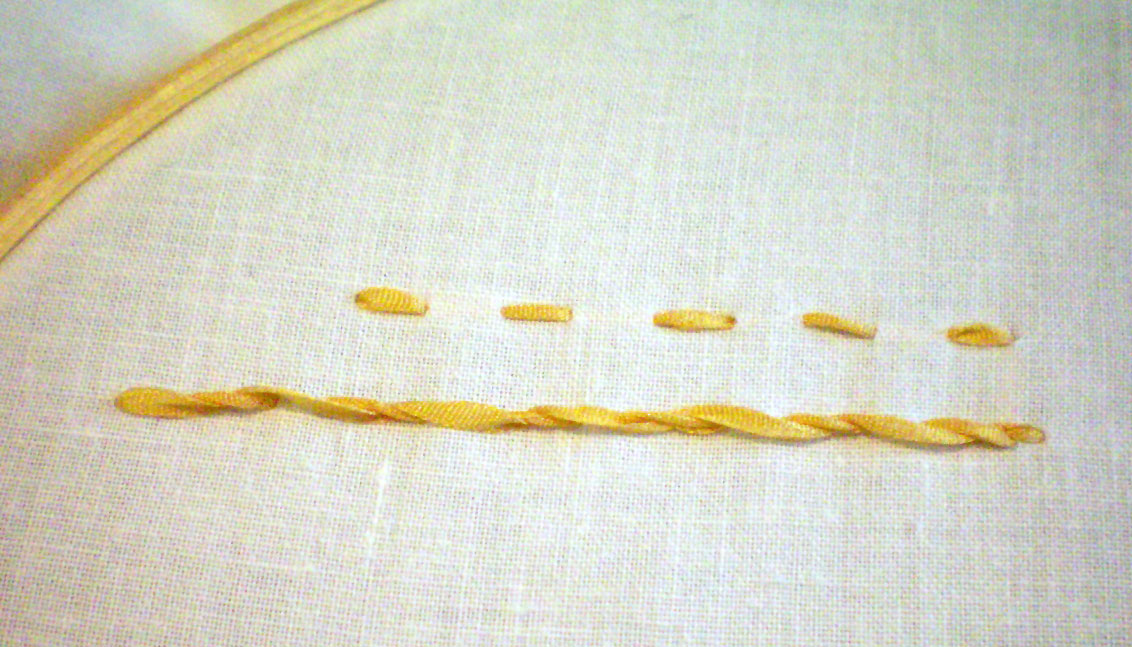
Overcast Running Stitch
- Backstitch
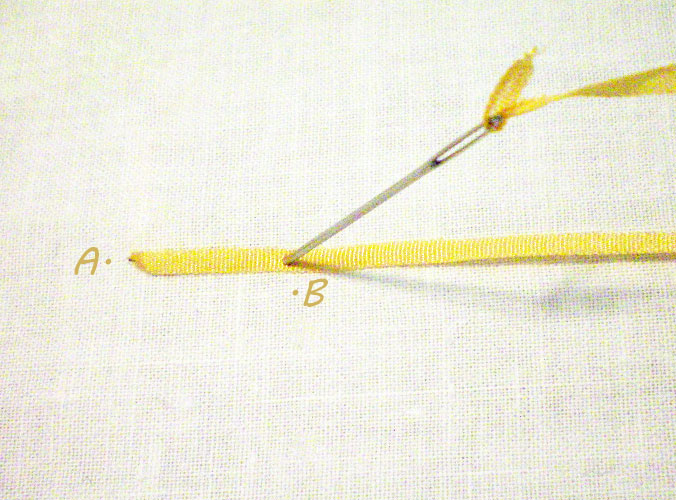
While not often used in ribbon embroidery, the backstitch is good to know. It’s excellent for creating lines, such as for borders, vines, and stems. To work the backstitch, you can either go from right to left, or from left to right. Draw the needle up at point A, then go a short distance behind to point B. Bring the needle to the underside of the fabric and go a distance equal to double the length between A and B, bringing the needle up at point C.
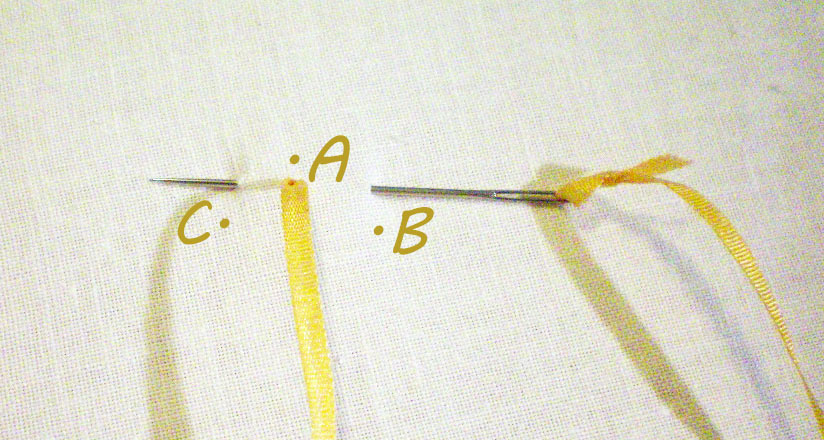
Backstitch In Progress
Go back to point A and stab the fabric, bringing your thread under the fabric again. Repeat, forming a line.
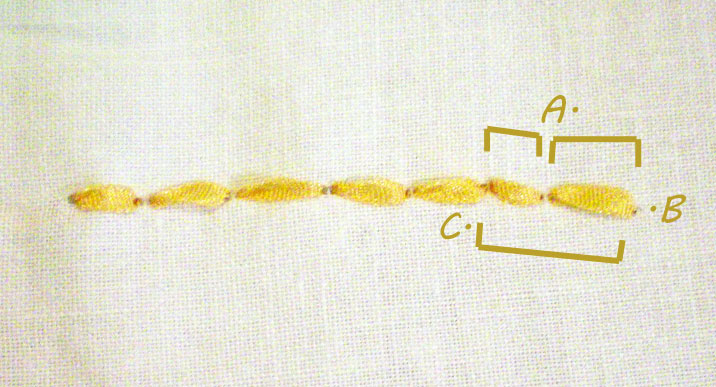
Completed Backstitch
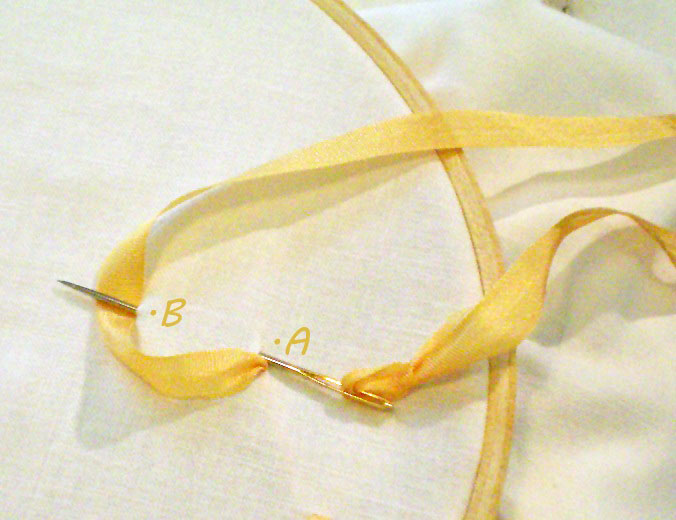
- Stem Stitch
This one is excellent for making curving flower stems, vines, and borders, as well as for outlining shapes. To create the stem stitch, first determine where your line will go. Bring your needle up at point A and pierce the fabric at point B, about a quarter of an inch away. Don’t pull your ribbon through yet. Angle your needle back toward point A and bring it up halfway between the two points, at point C.

Stem Stitch In Progress
Now pull your ribbon through. Point C becomes point A for the next stitch. Repeat, curving the stitches as necessary to create your line.
Completed Stem Stitch
- Fly Stitch
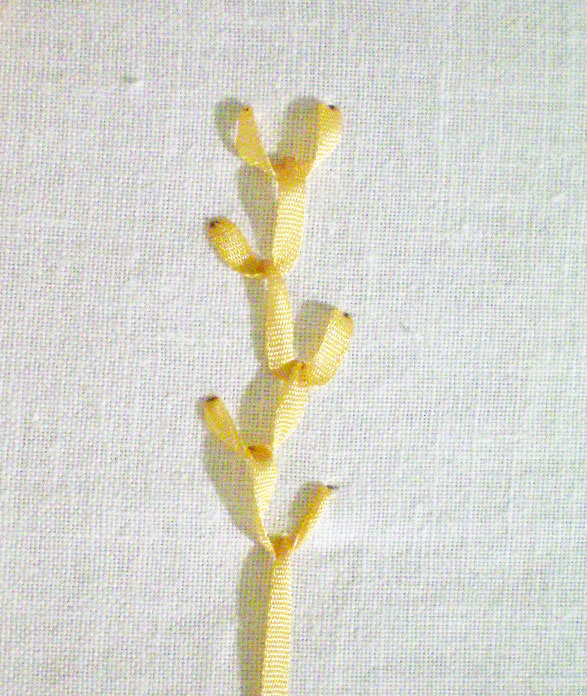
This stitch can be used for small clusters of leaves, a flock of birds, or just for decoration. Bring the needle up at point A and pull the ribbon through. Go a short distance sideways and stab the fabric at point B. Take a short diagonal stitch from point B to point C, leaving a loose tail of ribbon that slides under the needle.
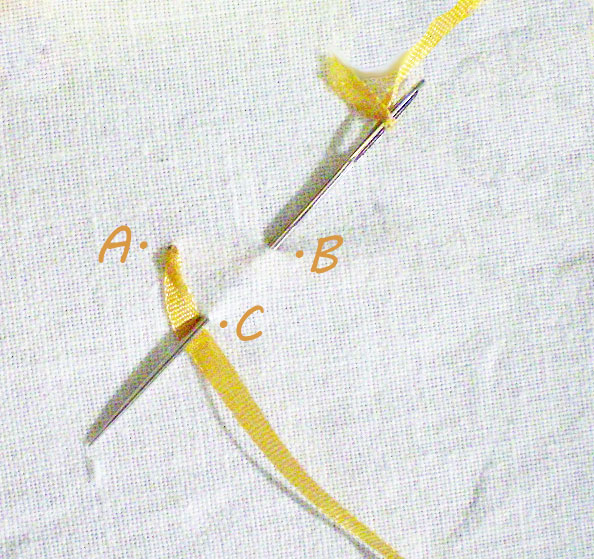
Beginning the Fly Stitch
Pull the ribbon through and tack it down by stabbing the fabric at point D. This forms a V shaped stitch.
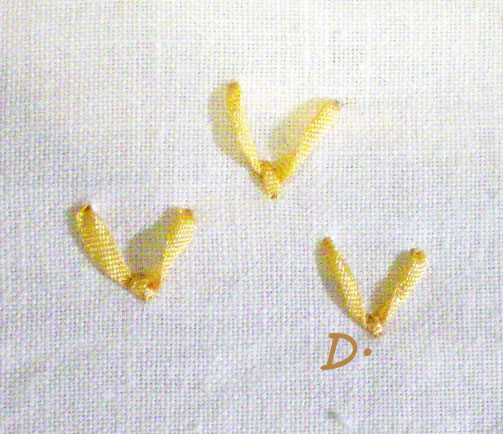
Completed Fly Stitch
- French Knot
This stitch creates a round knot that works well for stamens and flower buds, as well as decorative motifs. To work the French knot, bring the ribbon up at point A and wrap the ribbon around the needle twice (or more for a thicker knot).
Starting a French Knot
Stab the fabric just beside point A and pull the ribbon through to the underside of the fabric. To help the ribbon stay coiled, place a finger against the wrapped ribbon as you pull the needle through. Don’t pull the ribbon through too tightly, as this will create a very flat knot.
Completed French Knot
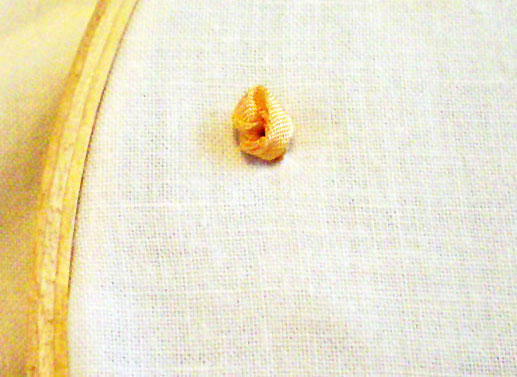
- Colonial Knot
This is similar to the French knot, but makes lovely miniature roses. Instead of looping the ribbon around the needle, you wrap it in a figure-eight pattern.
- Bring your ribbon up at point A. Hold your needle parallel to the surface of the fabric, then take the ribbon a few inches from where it comes up out of the fabric and wrap it around the needle from the front (left) to the back (right).
- Bring the ribbon under the needle toward you, then bring it up to the left and cross over the ribbon.
- Wrap the ribbon around the back of the needle and bring it toward you from underneath the needle. Pull it to the right, forming a figure eight.
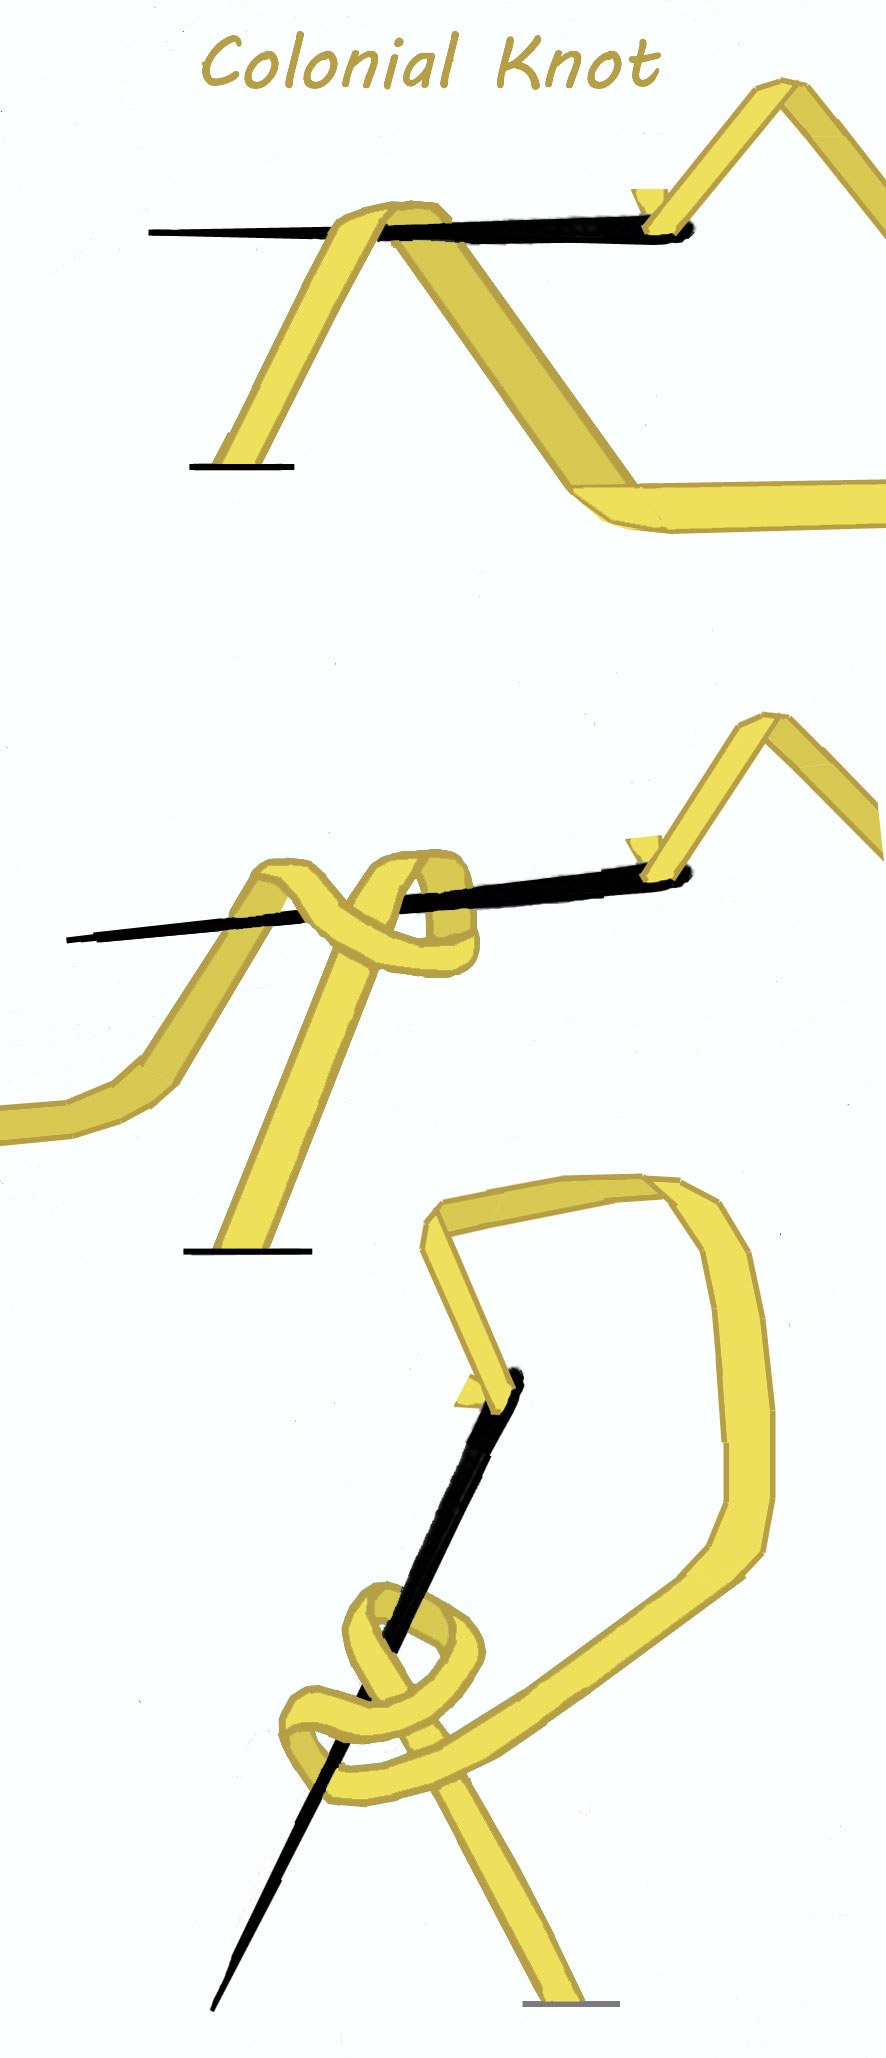
Colonial Knot In Progress
- While holding the ribbon taut, pierce the fabric just beside point A. Slide the knot down to the surface of the fabric and hold the ribbon down while you pull the needle through to the underside of the fabric. This completes the knot.
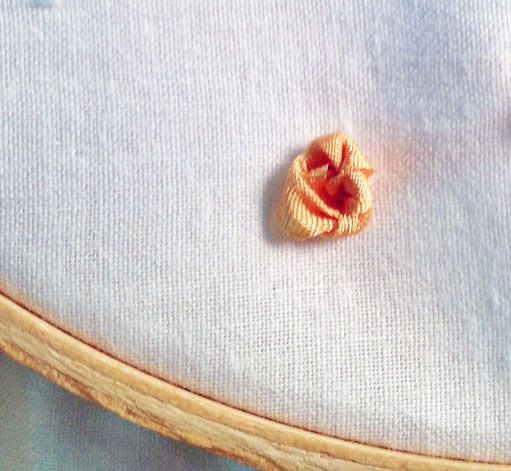
Completed Colonial Knot
For a closer look at this stitch, view Honey Bee’s video tutorial.
- Feather Stitch
This stitch is typically repeated to form a chain. It’s often used to cover seams in crazy-quilting or heirloom sewing, and it can also be used as a decorative border. Begin just as you would the fly stitch: come up at point A, go a short distance to the right, and take a diagonal stitch from point B to point C, while leaving a loose tail of ribbon under the needle.

Starting the Feather Stitch
Draw the ribbon through, but instead of tacking the ribbon down, you’re going to take a short diagonal stitch over to the left, from the new point B to the new point C. Draw the ribbon under the needle and pull through.
Continuing the Feather Stitch
Repeat, moving the stitches from left to right.
Completed Feather Stitch
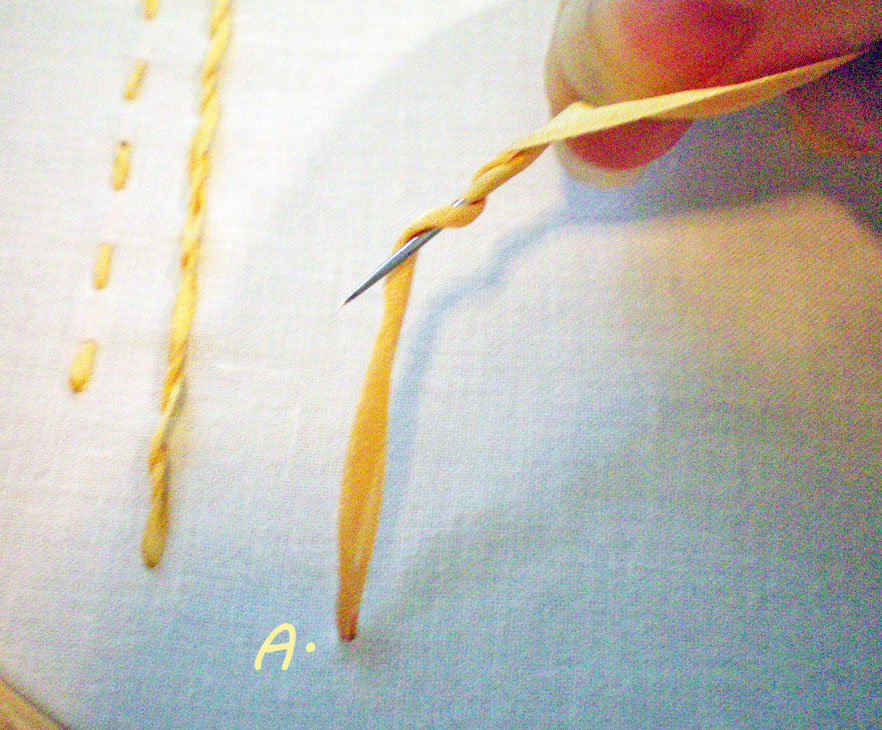
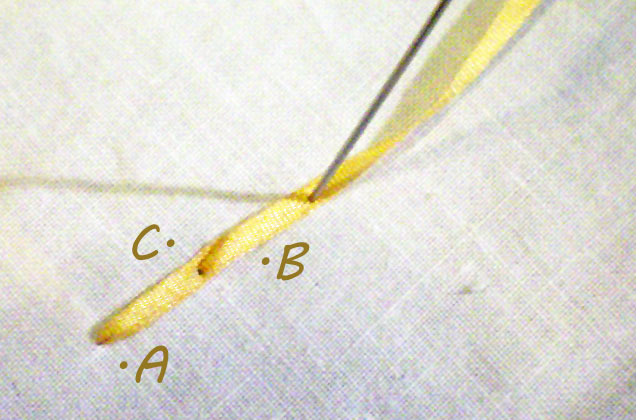
- Split Stitch
This is not a common ribbon embroidery stitch, but it makes an excellent solid line, good for stems or borders. Bring the needle up at point A and pull the ribbon through. Lay the ribbon flat against the fabric and pierce it at point B, as if doing a ribbon stitch.
Starting the Split Stitch
On the underside of the fabric, go to the left and bring the needle up at point C. This now becomes point A for the next stitch.
Continuing the Split Stitch
Repeat, forming a line. You can curve the line somewhat, but tight curves will end up with jagged edges.

Completed Split Stitch
- Lazy Daisy
This is a fun stitch that creates quick and easy flowers. Bring your needle up at point A, then create a loop as big as you’d like your flower petal to be. Stab the fabric just beside point A and bring your needle back up at point B, which is where the tip of your flower petal will be.
Starting the Lazy Daisy Stitch
Take a small stitch over the ribbon at point B to hold the loop in place. This is one lazy daisy stitch.
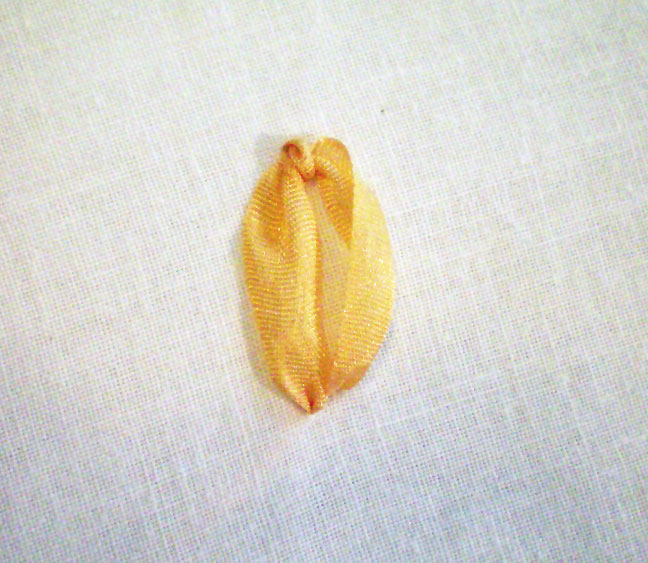
Completed Lazy Daisy Stitch
If worked in a circle, this stitch will create a stylized flower. For more natural-looking flowers, make a half-circle or quarter-circle, as if you’re seeing the flower from the side. Looser stitches will result in more realistic-looking petals.
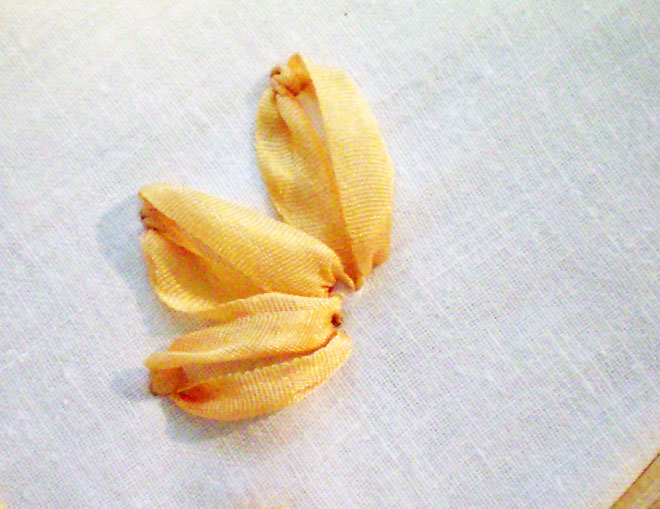
Lazy Daisy Flower Petals
- Spiderweb Rose
This is a good way to produce a startlingly realistic rose. Use a tapestry needle for the ribbon, regardless of your fabric type, as you’ll be pulling your ribbon under a skeleton of thread and you don’t want the needle to catch on the threads.
First, mark a circle on your fabric, using a flat button or coin as a guide. The finished rose will be slightly larger than the circle.
Thread a regular embroidery needle with floss that closely matches the color of your ribbon. You can either double-knot the end, or leave a 3″ tail under the fabric when you begin. (I prefer the knot, but many embroidery enthusiasts prefer the traditional method of leaving a tail.)
Bring the needle up at the center of the circle and stitch five wheel spokes that stretch from the center point to the outer edges of the circle. Try to keep them an equal distance apart, but for this, perfection isn’t necessary. Either knot the embroidery thread on the underside to secure it, or leave another 3″ tail underneath the fabric. (Weave both tails into the stitches on the underside of the fabric, so they won’t come loose.)
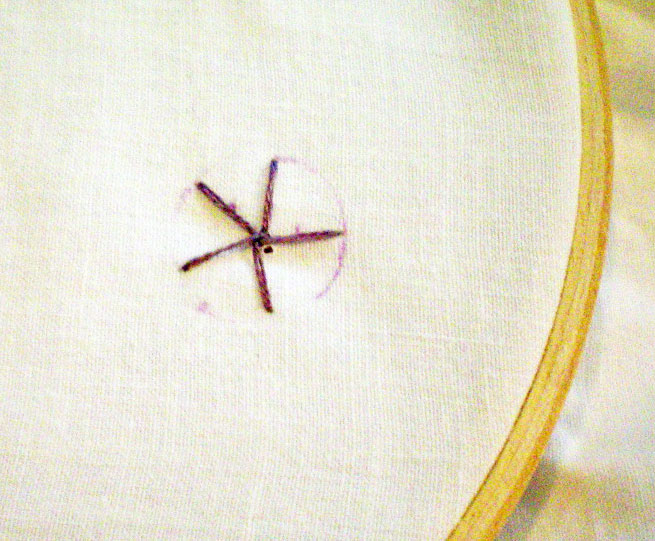
Spiderweb Rose In Progress: Wheel Spokes
Bring your ribbon up at the center of the circle, between two spokes. Twist the ribbon repeatedly, until it’s loosely kinked. Skip the first spoke and pull your ribbon under the second spoke. Skip the third spoke and go under the fourth. Continue around the circle, spiraling outward, sliding the ribbon under every other spoke. Don’t pull the ribbon too snug or it won’t form petals. Make sure you keep it twisted.
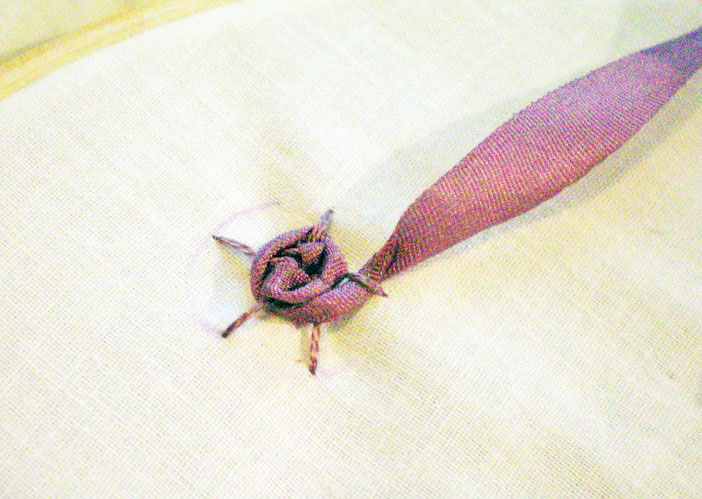
Spiderweb Rose In Progress: Going Around the Spokes
Continue until you can no longer see the thread spokes. Stab the fabric just under the edge of the rose and draw your ribbon to the underside to finish.
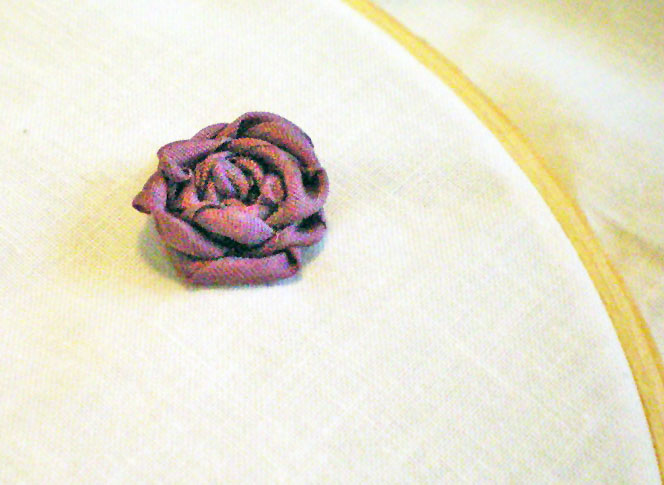
Completed Spiderweb Rose
There are many more stitches, of course, but with these basics you can create a garden full of embroidered flowers, leaves, and vines.
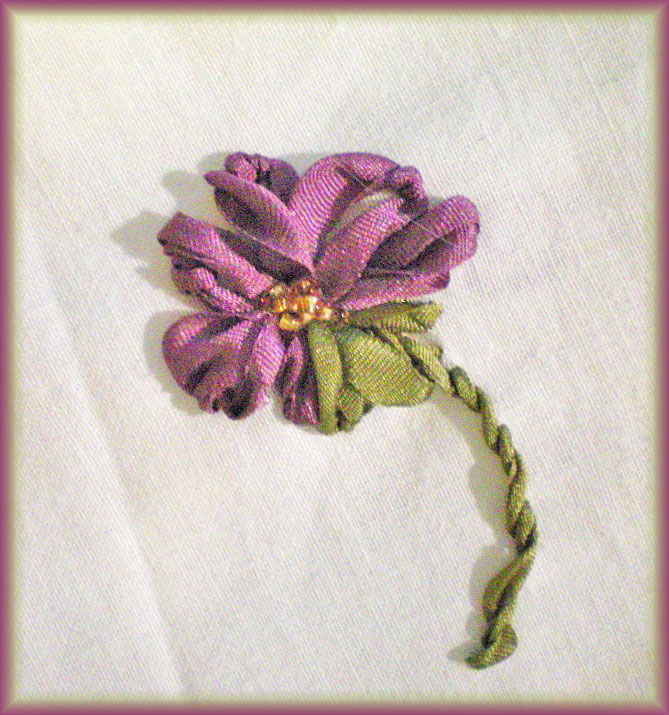
Adding Detail Work
When you’ve finished embroidering with ribbon, you might add details to your work with embroidery floss. Consider placing tiny thorns on your rose stems, or embroidering a miniature butterfly, ladybug, or dragonfly perched on a leaf.

Rose with Thorns
You might also add a bit of three-dimensional sparkle with beads. Try using yellow seed beads as flower stamens, or transparent crystals as dewdrops on a rose petal. You could enhance a border design with beads, as well.
Lazy Daisy Flower With Beaded Center
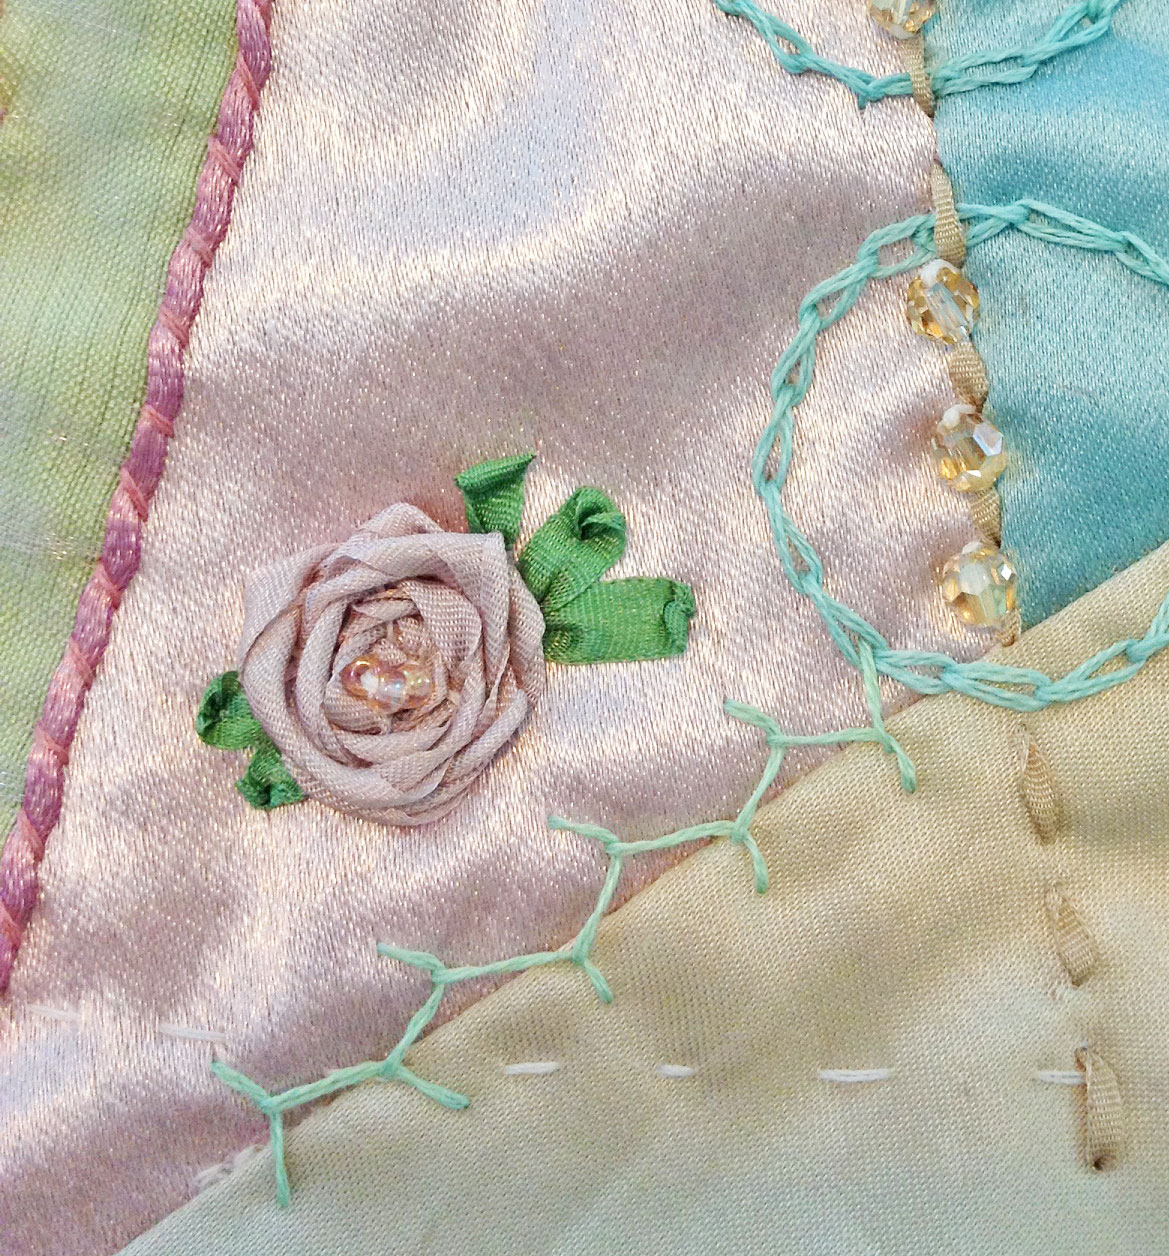
Spiderweb Rose With Beaded Center
You can even embellish your embroidery ribbon with fabric paint, creating variegated flower petals, or leaves with delicate veins on them. The possibilities for enhancing your embroidery work are limitless!
Tips for Silk Ribbon Embroidery
- Buy more ribbon than you think you’ll need. It’s better to have extra when you’re finished than to run out before you’re done with your project.
- When in doubt, use a bigger needle. Too-small needles tend to damage the ribbon, causing runs. Bigger needles allow the silk to pass through the fabric without snagging.
- Don’t worry overmuch about runs, should they occur. Chances are they won’t show in your finished work. If they do, switch to a bigger needle, cut a new length of ribbon, and start over.
- Try to maintain an even tension while working your stitches. Don’t pull the ribbon too tight or you may damage it.
- Twisted ribbon will distort your stitches, so use your finger or a blunt needle to keep the ribbon straight as you make each stitch.
- Always pull the ribbon in the direction the stitch will lie when it’s finished.
- Use a blunt tapestry needle to manipulate your ribbon as you form each stitch. It gives you more control over how the stitches appear.
- Work in small sections at a time and don’t carry your ribbon over long distances on the back of your work. When you complete one area, cut your ribbon and finish it neatly, then start fresh with a new length of silk ribbon.
- Keep your length of ribbon short, no longer than 12-14″. This will cut down on the wear that occurs when the ribbon is pulled through the fabric with each stitch. Also, shorter lengths will not tangle as easily.
- Be careful to avoid catching the ribbon on the underside of your fabric with your needle. Piercing it unnecessarily can damage the silk ribbon. It can also make it difficult to undo your stitches, should you notice a mistake and want to start over.
- Cut your ribbon on the diagonal. If you have trouble with the ends fraying, dab a little Fray Check to seal the ends of the ribbon.
-
Books You Might Enjoy - A-Z of Silk Ribbon Flowers by Ann Cox
- Embroidered Alphabets: With Ribbon Embroidery by Di van Niekerk
- Embroidery & Crazy Quilt Stitch Tool by Judith Baker Montano
(Yesterday’s Thimble is a participant in the Amazon Services LLC Associates Program. Basically, this means if you click a link to an item that Amazon sells, and then buy it, I earn a small fee that helps support this website.)
Conclusion
As you’ve learned, silk ribbon embroidery is a fun and easy way to embellish any number of garments, historical costumes, or home décor items. It’s also quite addictive!
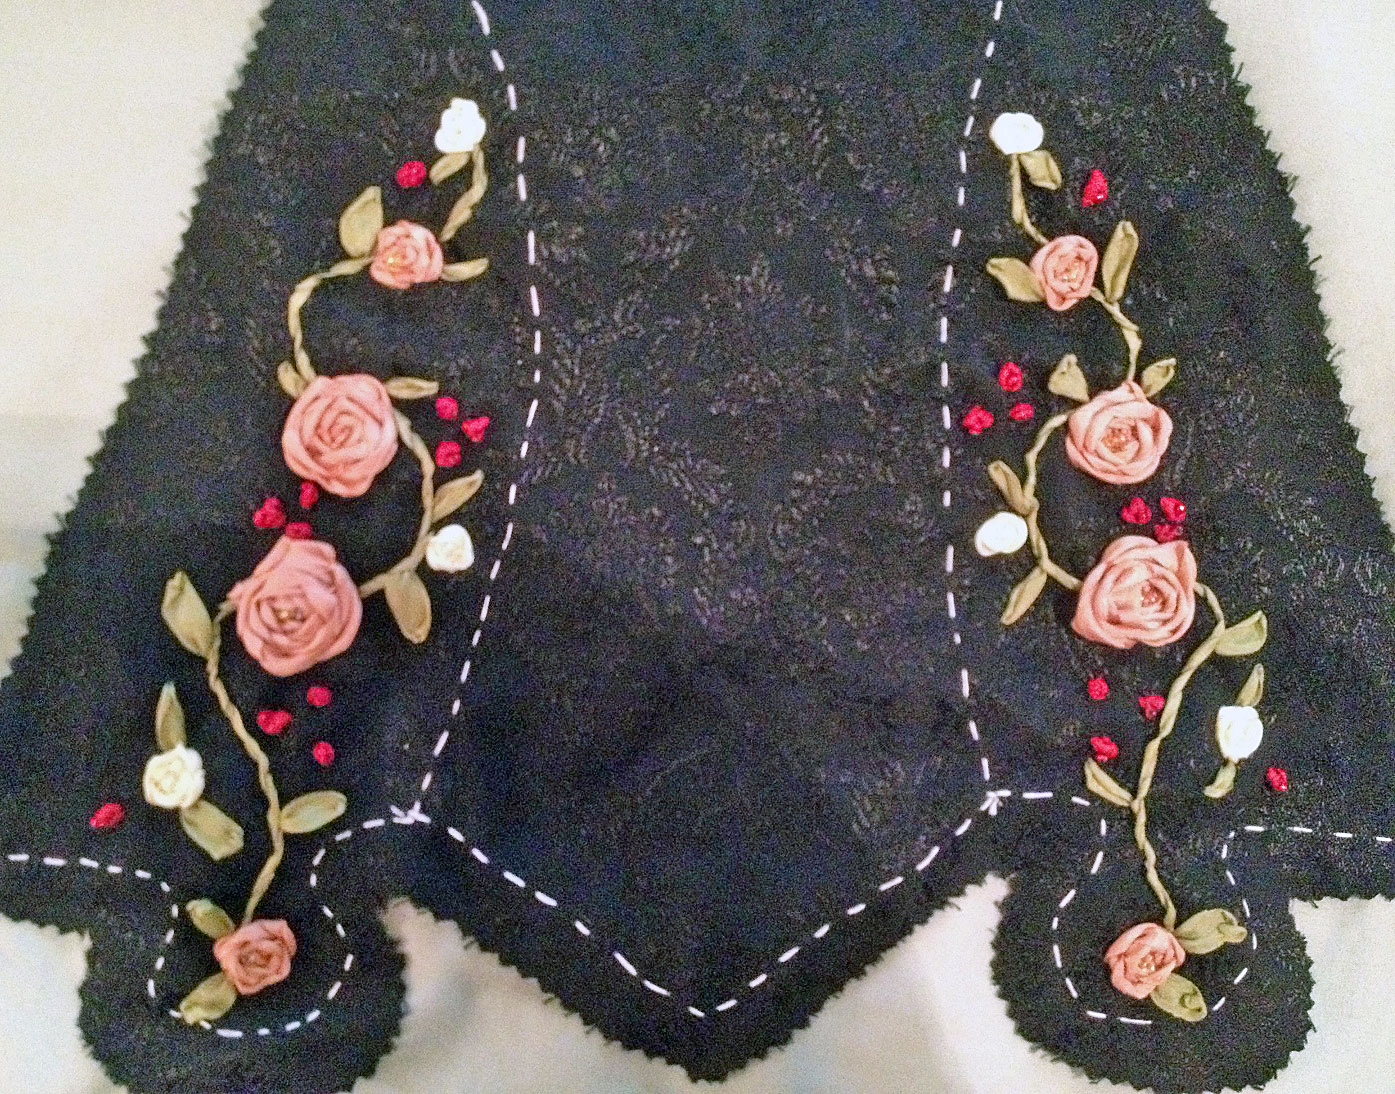
Don’t forget that you can combine the stitches you’ve learned, and don’t be afraid to mix colors! I used a lot of different stitches and ribbon colors in creating this 18th century stomacher (below).
18th Century Embroidered Stomacher (In Progress)
Have fun embroidering!
Pingback: 16 Sunflower Ribbon Embroidery Tutorials – Needle Work