by Lisha Vidler
For those who haven’t yet discovered the wonders of a ruffler foot attachment, I highly recommend you get one. While it looks complicated—and in truth, it is a bit fiddly—once you master its quirks, it’s an amazing tool to have.
The ruffler foot can be used to gather a strip of fabric, or it can be used to gather and sew a ruffle to another piece of fabric at the same time. It can produce plain gathers or small pleats. You can adjust how large each gather or pleat is and how close together they are.
Attaching Your Foot
It needs to be oiled, so before we begin, dab a tiny bit of oil where the directions indicate, typically at the top gear and where the metal rubs against itself at the side bottom. Blot any excess oil, so you don’t get stains on your good fabric.
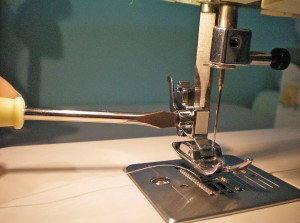
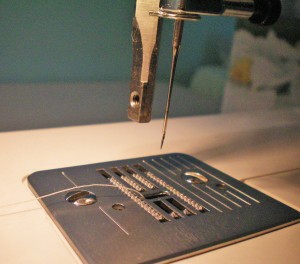
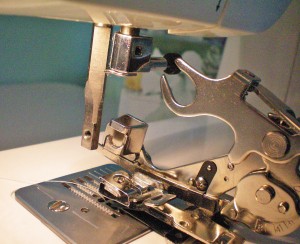
Next, you’ll need to attach the foot to your sewing machine. Unlike most presser feet, this one doesn’t simply snap in place. You’ll have to remove your entire presser foot assembly by unscrewing it.
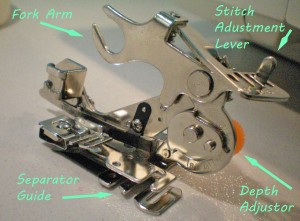
See the curved “fork” on the ruffler foot? That slips over the screw shaft that holds the needle in place. The notched “box” fits over the presser foot shaft. Once it’s in place, put the presser foot screw back in place to hold it secure.
How Your Foot Works
Basically, the foot works by mechanically pushing a bit of fabric forward, forming a small pleat as it goes under the needle. It can do this rapidly, forming a series of gathers, or it can do it slowly, forming narrow pleats.
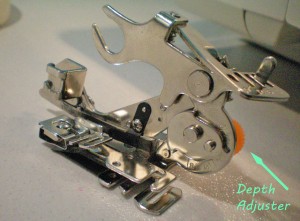
You can determine how deeply these folds are pushed (and therefore whether they resemble gathers or pleats) by using the depth adjuster. This is controlled by a screw. The higher the number, the deeper the pleats will be. When it’s turned to 8, you’ll sew the widest pleats the foot is capable of and when it’s turned to 0, the fabric won’t be pleated at all.
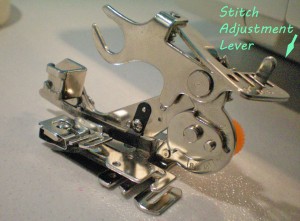
To adjust the fullness, you’ll use the lever at the top, which controls how many stitches get sewn between each pleat. These are numbered, so you can choose between 1, 6, and 12 stitches per pleat. When it’s set to the star symbol, it won’t sew any pleats at all. You can further adjust your fullness by altering your stitch length. Shorter stitches mean a fuller ruffle. It gathers at every stitch, so if your stitches are long, there will be more space between each one.
Tips
- When you cut your fabric for the ruffle, give yourself at least an inch extra at the beginning. It’s difficult to feed the fabric into the ruffler, so it’s extremely useful to have an extra bit of fabric to grip while you’re working the fabric between the blades. An inch should be plenty, and you can trim it off once the ruffle is complete.
- Do a test ruffle first, to determine what settings to use. Measure a set length, say 11 inches. 10 inches is an easy number to divide or multiply to find your final length, plus you’ll need an inch to grip. Measure your finished sample ruffle (minus the extra inch) to see how much it’s been gathered. In this way, you can determine how much fabric you’ll need to get the final effect you prefer. For example, if your fabric was 10 inches long, and your finished ruffle is 5 inches, that means you’ve achieved a ratio of 2:1. With those settings, you’ll need twice as much fabric as your finished ruffle.
- If you only have a certain amount of fabric and need to make sure it’s gathered to size, you’ll have to experiment with the settings and make several test ruffles until you find a combination that provides the ruffle length you need. This can be extremely tricky.
- You’ll want to adjust your machine’s tension settings and stitch length, as well as adjusting the attachment foot itself. Play around with it to find the best combination for your fabric.
- Don’t forget to put your presser foot down before you begin! This may sound obvious, but once the ruffler foot is attached, it barely moves when you shift the presser foot up and down. Because of this, it’s very easy to forget and try to sew with the presser foot up, but this will cause problems. If you’re having difficulty getting it to gather—check your presser foot lever to make sure it’s down.
- It takes time to get used to how the ruffler works. Don’t give up if you have difficulty! You’ll soon figure it out and be creating yards and yards of delicious ruffles.
~~*~~
Have you used a ruffler attachment foot? Did you find it more of a help or a hindrance to creating ruffles?

Pingback: Basic Fabric Manipulation – Part I – Your Ward
Pingback: A Plethora of Presser Feet – Your Ward
Pingback: Basic Fabric Manipulation – Part I | Foundations Revealed
Pingback: Basic Fabric Manipulation – Part II | Foundations Revealed
Pingback: A Plethora of Presser Feet | Foundations Revealed