by Lisha Vidler
Do you take the time to pre-wash your fabrics and trims? For years, I always waited until I was done sewing and then washed the finished garment, but the results were unsatisfactory. I learned there are three good reasons to pre-wash.
1. New fabrics contain dye and sizing. Sizing is a chemical that stiffens the fabric, which means you can’t know the fabric’s true drape and hand until after you’ve washed it. Often, it will soften and become more fluid after washing. Excess dyes can bleed when the fabric gets damp, staining adjacent fabrics. Even when dry, color can rub off on your skin or other fabrics, and if you’re sewing for dolls, it can stain the doll’s vinyl. If you’re sensitive to chemicals, dye and sizing can irritate your skin unless you wash them out before working with your fabric.
2. Fabrics tend to shrink when they’re washed. Loosely woven fabrics, such as corduroy, flannel, and denim, are especially prone to the fibers tightening during the washing process. If you wait until after your garment is sewn and then wash it, you may find that it’s a bit too small or too short. Loosely woven fabrics should be washed and dried at least three times before being sewn, but regular fabrics will suffice with a single washing.
3. It’s important to rinse away all of the loose fibers that cling to new fabric. When you hand wash your fabric, you’ll notice that the water becomes filled with particles and bits of fuzz. If you use the fabric without washing it first, all of that debris could end up inside your sewing machine. This is not a good thing, as it can clog your motor and other sensitive areas.
Pre-washing might feel like a waste of time, but in actuality, you’re saving yourself a great deal of trouble.
Is it Washable?
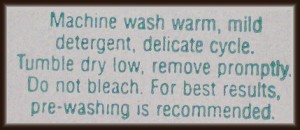
Unfortunately, not all fabrics can be washed. Check the care label on the bolt of fabric before you buy it. If you have a large stash of fabric, take a photo of the care label before you have your fabric cut. Keep the photo with a swatch of the fabric in a small binder or notebook, so you can keep track.
Cotton, linen, polyester, and other sturdy fabrics can usually go through the washing machine and dryer. (The exception would be taffeta and other formal fabrics, which usually require dry cleaning.) I always use a delicate cycle and low heat, just to be safe. Fragile fabrics, such as silk and rayon, might need to be hand washed or dry cleaned. With some fabrics, any trauma—such as the act of swishing the wet fabric around, or wringing the water out when you’re finished—can break the fibers on the surface of the fabric, causing the appearance of tiny, permanent wrinkles. This is why it’s important to test-wash the fabric, so you can determine the best course of action.
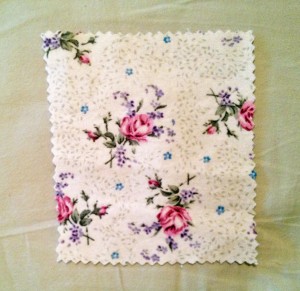
Cut two identical swatches, at least 4″ x 4″. Wash and dry one of them, using a mesh lingerie bag so it won’t get lost in the washing machine, then compare the two swatches. If it hasn’t altered in appearance, you’re probably safe with washing it. Some fabrics will shrink or change textures, but this doesn’t mean you can’t wash them. If you like the way it looks, go right ahead! If you don’t like how your swatch turned out, cut a new swatch and hand wash it. If you still dislike the results, have the material (and the finished garment) dry cleaned.
Machine Washing
If you’re certain your fabric can go through the washer and dryer, toss it in—by itself, in case the dye bleeds. Avoid using bleach or fabric softener, unless the care instructions specify that it’s safe. If you’re unsure whether to use a regular cycle or the gentle cycle, go with the latter. The gentle cycle uses a much milder agitation and a slower spin cycle, which means your fabric doesn’t get wrung out, in effect. It prolongs the life of your fabric and garment, especially if your materials are delicate.
Whether you use the dryer will depend on how sturdy your fabric is. Heat can damage or shrink many fabrics, so use the lowest setting. If necessary, hang your fabric to drip dry.
-
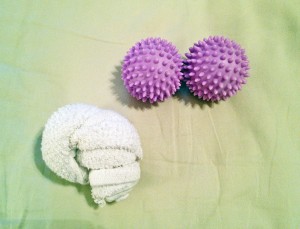
Tip: If you’ve washed several yards of fabric and need to put it through the dryer, it will often twist up into a rope as it dries. The solution is to place something in the dryer with it, something that will bounce around, keeping the fabric tumbling. You can buy “dryer balls” which are hard plastic or rubber balls covered in bumps, but they can be extremely loud as they tumble. For a quieter alternative, I use two pairs of my husband’s athletic socks. Take each sock and knot it twice, so it forms a tight ball. Toss all four in the dryer with the wet fabric. (Knotted up hand towels can work, too.)
Hand Washing
If you’ve never washed anything by hand, it can be an intimidating prospect. Don’t worry, you won’t need an old-fashioned washboard! All that’s required is a sink, a small amount of detergent, and some water.
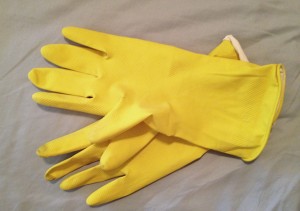
Note: Laundry detergents can irritate your skin, so you might want to wear a pair of rubber dishwashing gloves or disposable latex gloves. If you don’t, and you find your hands drying out afterward, moisturize with hand lotion.
Resist the urge to dump all your fabrics in the sink together. White and off-white fabrics are usually safe, but dark or bright fabrics are likely to bleed excess dye, which can stain other fabrics. Unless the colors are identical, be cautious and only wash one piece of fabric at a time.
If you’re washing a yard or less of material, or else ribbon, trim, lace, or a zipper, it’s easiest to use the sink. If you have a large amount of fabric to wash and you don’t want to risk the washing machine, use the bathtub.
- Fill the sink with lukewarm water. Hot water may cause additional shrinking, so use it with caution.
- Add a pinch of mild detergent or soap. Swish it around to help it dissolve.
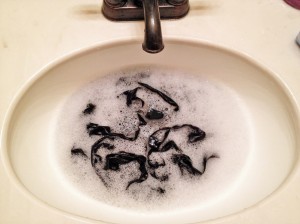
- Drop your fabric in and gently agitate the water with your hands. The detergent should foam up.
- If you notice the water darkening or changing color, pull the fabric out and see if the water remains colored. Sometimes water will take on the hue of the fabric as an optical illusion, but if it’s still tinted once you remove the fabric, this means excess dye is rinsing out into the water. (Note that the dye may not be the same color as the fabric itself. For instance, black fabric may produce green, brown, or purple water. Green fabric may produce orange water. It all depends on which combination of dyes they used to obtain that specific color of fabric.) You’ll need to rinse the fabric several times to get all the dye out.
|
Bleeding Fabric If a great deal of dye stains the water, so much that the fabric appears to be bleeding, you’ll need to take the extra step of rinsing the fabric with white vinegar after you’ve rinsed the soap out. Add a small amount of vinegar to the water and let the fabric soak for a few minutes. When you’re done, rinse thoroughly. Vinegar is an acid and you don’t want any to remain on your fabric. If the dye continues to bleed, you’ll need to accept that it will stain adjacent fabrics and either take special precautions or else discard it and use something else. |
- After agitating the water for a minute or two, lift the fabric out and drain the water. Rinse all the soap out of the sink and refill it with fresh water.
- Drop the fabric into the clean water and agitate again, this time with the goal of rinsing all the soap out. Empty the sink and add fresh water as needed, until the water runs clear.
- When you’re finished, you’ll need to remove excess water from the fabric. If it’s a sturdy enough material, like quilting cotton, you can wring the fabric out, but be gentle! For lengths of ribbon, lace, or trim, try this: hold it up over the sink and grip the material between your index and middle finger, as if cutting the ribbon with your fingers. Pinch the ribbon between your fingers and slide them down, sluicing the water out of the material.
- Lay fabric or trims flat to dry, drape them over a hanger, or clip them to a skirt hanger. If the material is dripping wet, hang it over the bathtub or place a towel beneath it, so it won’t ruin your floor. Long lengths of fabric can be draped over several hangers and hung from a tension rod.
Pressing Your Fabric
Once your fabric is dry, you can press it to remove wrinkles and soften it. It’s fine to spritz fabric with water as you press it, but never press still-wet fabric or trims to try and speed up the drying process. They may shrink considerably! If you must take this approach, always test a small sample first.
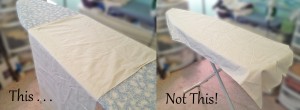
To press a long length of fabric, it’s generally easiest to lay it crosswise on your ironing board, not lengthwise. This gives you more control over the area you’re pressing and isn’t as overwhelming.
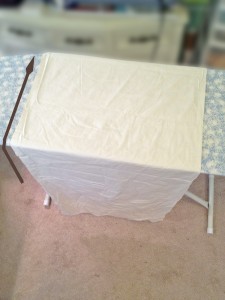
Start with the bulk of the fabric hanging off the front of the ironing board. Once you’ve pressed a section of fabric, slide it away from you, so it hangs off the back side of the ironing board.
If you have a lot of yardage, it may pile up on the floor behind the ironing board. This can cause some minor wrinkling, but a quick press when you’re finished with the bulk of the ironing should suffice. If your fabric is too-easily wrinkled and it becomes a major problem, place your ironing board in front of a table. As you finish pressing each section, smooth it over the table so it won’t get wrinkled.
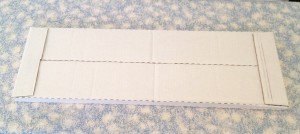
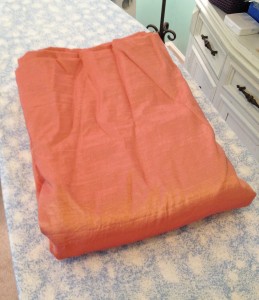
Now, what to do with your neatly pressed length of fabric? If you’re not going to sew it right away, fold it in half lengthwise, with the selvedges together. This is how it comes on the bolt. If you have an empty cardboard bolt, wrap the fabric around it. You can ask for these at your local fabric store. They’re usually more than willing to give you a few empty bolts, since they’re just going to throw them away.
If you don’t have a bolt to use, simply fold the fabric up. The fewer folds you use, the better, as you’ll have to press the wrinkles out when you’re ready to use the fabric.
Make a habit of pre-washing every piece of fabric you buy, before adding it to your stash. That way, you won’t have to wonder, “Did I already wash this fabric?” Also, it will mean that your fabric is ready to go, whenever you’re in the mood to sew.
~~*~~
What tips and tricks do you use for pre-washing your fabrics and trims?



Pingback: Pre-Washing Fabric & Trims | Yesterday's Thimble
Pingback: Sewing With Black Fabric | Yesterday's Thimble