by Lisha Vidler
(This article first appeared at Foundations Revealed.)
For pregnant women and nursing mothers, historic reenactment presents a special challenge. Extant maternity garments are rare. Especially difficult to find are corsets intended for pregnancy or nursing. This article will guide you through the process of designing and creating your own nursing corset from the Victorian era.
Historic Examples
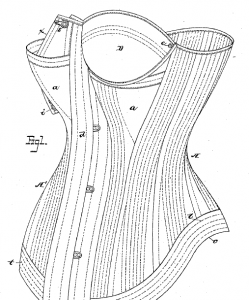
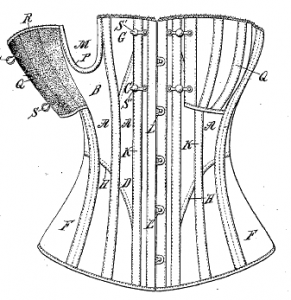
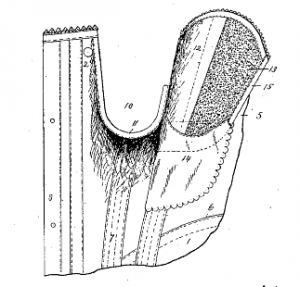
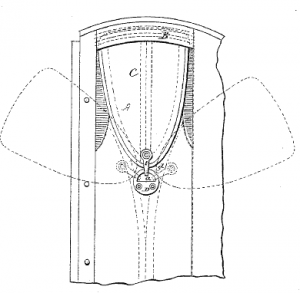
Before we create our own nursing corset, we should examine the efforts of those who have already done so. Google allows us to browse patent records, so let’s take a look at historic examples. These will provide both inspiration and direction.
In 1866, Samuel M. Perry invented a hinged busk that could fold down for a nursing mother’s convenience. This is perhaps the most innovative of the patents, but it lacks practicability. It would require a woman to undo her bodice completely in order to access the fold-down front of her corset. There is no way to be discreet with a corset like this.
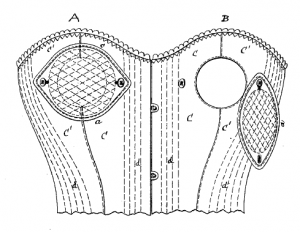
In 1878, Henry Strauss patented his idea for a nursing corset with round cutouts to give access to the breasts. While this concept would require less undressing, it appears as though it might be rather uncomfortable while nursing.
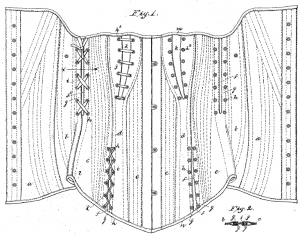
In 1883, G. H. Williams invented a corset with slitted bust panels. This would be a good concept, save that the slits lace closed. What mother has time to fiddle with laces while soothing a hungry baby? And then to lace her corset back up again when she’s through nursing? Quite impractical.
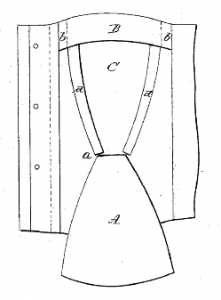
In 1883, Isaac Strouse patented a nursing corset with fold-down bust flaps. This is the most convenient of the lot, being practical and offering discreet, easy access. It could be adapted for modern use easily enough, though what type of fastener he used is not apparent.
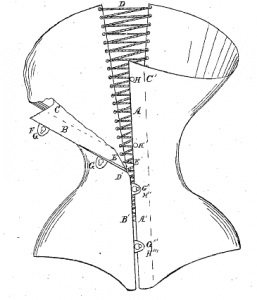
In 1886, J.C. Tallman invented a nursing corset with a pivoting flap. This would perhaps be the easiest with which to gain access, though more difficult to copy at home.
In 1886, Byron Baldwin patented another variation on the nursing flap, one which appears easy to use and convenient.
In 1888, G. A. Close patented a nursing corset with a waterproof flap. While similar to others we’ve viewed, this one is unique in that it offers protection against leaking milk.
In 1889, Lewis Schiele invented a nursing corset with a swinging hinge flap. This would offer easy access, but like the other pivoting flap, would be difficult to produce at home.
Many of these were no doubt welcomed by women of the time. Others seem less practical. Our goal is to create a corset both fashionable and comfortable, which can be used with ease by a nursing mother.
Designing a Corset
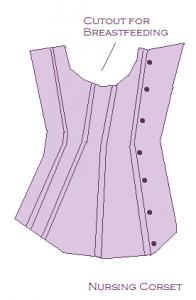
After looking at several historic ways of making a nursing corset, it appears as though utilizing a bust flap will be the easiest and most practical method. While I like Isaac Strouse’s bust flap, we’re going to use our own design. We’ll make a rounded cutout to allow comfortable access to the breast, and cover it with a buttoning flap. Ideally, the cutout will be just large enough for the front half of the breast to fit through it, so that the breast will remain supported.
We might as well make this corset both pretty and practical, so we’ll be using a sturdy lavender sateen for the fabric. The bust flaps will be corded, a historic technique that lends support, as well as aesthetic appeal. Decorative embroidery will provide a feminine touch.
You may use any corset pattern that works for you, or you can draft your own corset using the process described in Cathy Hay’s free article: Draft Your Own Corset, as found at Your Wardrobe Unlock’d. The corset must fit well, especially in the bust. For this demonstration, we’ll be using a modified version of TV110, a basic Victorian corset pattern available from Truly Victorian.
Mockup
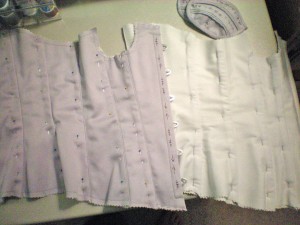
First, you’ll want to make a mockup. To ensure a proper fit, make the mockup all the way with a busk and boning. Once it fits well, try the mockup on to determine the bust flap placement. Draw a rounded shape on your mockup, a little smaller then each breast. It must be wide enough for the baby to have easy access, but small enough that the breast will not lose support. Therefore, cut a small opening to begin with and enlarge it as necessary. Keep a seam allowance in mind. The edges will be bound with bias tape, so a half-inch will be sufficient.
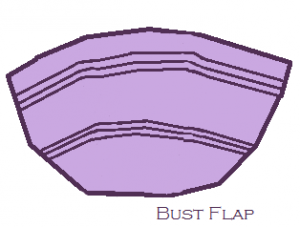
Your bust flaps will be attached to the corset over the cutouts. They needn’t be exactly the same as the cutout, so choose a configuration that appeals to you. I’ve used a rounded cup shape, but I’ve also seen elongated triangles and perfectly round flaps. Regardless of the shape of the flap, the top edge of should match the top edge of the corset. Keeping that limitation in mind, play around until you find something that works for you. Try different shapes and angle them for different looks.
After using the corset pattern to draw the top edge, draw the rest of the bust flap on muslin, making sure it’s larger than your bust cutout. Again, keep a half-inch seam allowance in mind. If you’re going to add pintucks or cording, you’ll need to make your flap a little bigger to allow for the fabric these embellishments will take. Cut out the fabric and pin the flap to your mockup to ensure that you like the look of it.
Assembling Your Corset
Once your mockup is satisfactory, you’re ready to begin your corset. Cut out your main fabric, your interlining, and your lining. The main fabric can be coutil, brocade, sateen, silk habotai, or any decorative fabric that’s not going to ravel at the seams. The interlining must be firm and strong, such as coutil or twill. The lining can be lightweight and soft, such as batiste or broadcloth. You want to stick with natural materials or else your corset will get hot and uncomfortable when you wear it.
For this demonstration, we’re using a sateen twill for the main fabric, standard twill for the interlining, and cotton batiste for the lining.
Begin by sewing the left side’s center front seam. This is the side for the knobbed half of the busk. The right side is for the busk’s latching holes. You’ll need to mark carefully where the latches will protrude from the seam and then sew intermittently, leaving spaces for the busk to poke out. Once these seams are finished, turn the fabric right side out and press. If you’re going to embroider the corset, now is the time to do so—before you’ve sewn the busk into the corset.
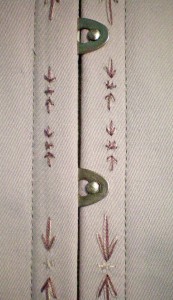
Insert the busk temporarily and mark the edges and where the knobs and latches will be, so that you can embroider around them.
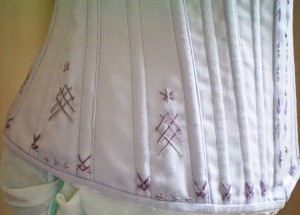
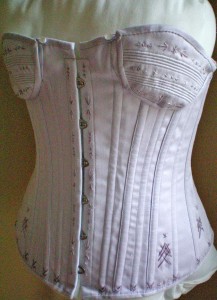
I chose a two-tone embroidery pattern based on the decoration of an extant corset found at Lara’s Corsets. Regular embroidery floss works just fine. Be sure to secure the ends well by leaving a long tail and working over it. You can use tiny back stitches, but don’t use knots; the fabric is taut over the busk, so any bumps will show.
Once your embroidery is complete, go ahead and sew your busk in place. Finish assembling your corset using your preferred method. I like the directions given with Truly Victorian’s pattern, but there are several correct ways of sewing a corset. Read the book The Basics of Corset Building by Linda Sparks for other options.
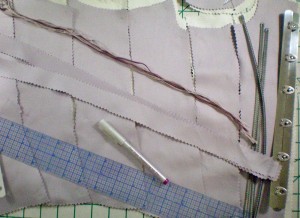
Once your corset is sewn together, you’ll want to add boning channels. If you’re going to embroider the boning channels, do once they’re sewn, but before you add the boning. For this, you’ll need to learn how to stitch without access to the other side of the fabric. Since the corset is already assembled, you can’t push the needle through from the underside of the fabric. You’ll need to insert your needle at an angle and bring it back up with every stitch. There’s a knack to it, but it’s easy once you’ve figured out how.
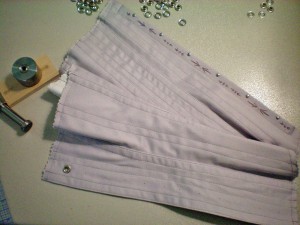
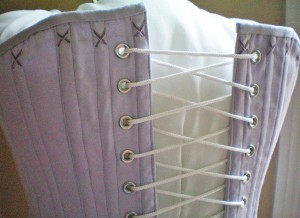
Next, you should add grommets to your corset. There are several methods, but I prefer to use a small metal die, available as part of an inexpensive kit, along with a rubber mallet to pound the grommets in place. Be sure to place boning on either side of the grommets, as this will keep your corset from buckling when you lace it up.
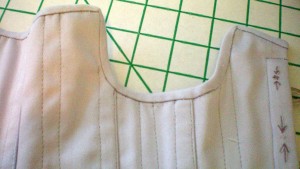
Once your corset is fully assembled with grommets and boning, bind the edges with bias tape. Matching binding looks beautiful, and is easy to make. I use an inexpensive bias tape maker—a small metal device shaped rather like a flat funnel. You feed the strip of fabric in one end and when you pull it out the other end, it’s folded into shape. Press the folded fabric as you pull it out from the device and you’ll have perfect bias tape. You’ll need to fold the tape in half lengthwise and press it a second time before you bind the edges of your corset.
For flawless binding every time, check out Cathy Hay’s guide to bias binding, Don’t Let The Binding Get You Down, at Your Wardrobe Unlock’d. Be sure and ease the binding around the curves of the bust cutouts.
Flossing
The next step is to add flossing. This adds a lovely decorative touch, but it also serves to secure the boning within the channels, preventing it from shifting around. For an excellent guide to corset flossing, check out Christina Claridge’s article, The Basics of Flossing, at Foundations Revealed.
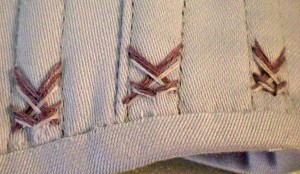
I chose to use a two-toned flossing pattern that coordinates with the embroidery. It took two passes to do each motif, because each one uses two colors. The two-tone design adds interest to the corset, but if you’d like to save time, just use one color. I repeated the flossing on the inside of the corset using plain ivory thread.
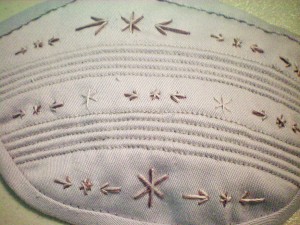
Now you will want to do any other embroidery you have planned. I made a design inspired by the flossing pattern and placed it in the larger spaces between boning channels. At the bottom of every panel, I made a star and arrow design.
Bust Flaps
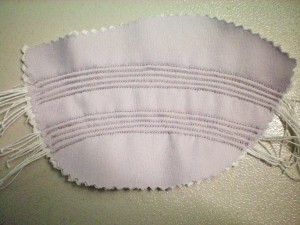
After the rest of the corset is done, start the bust flaps. Cut out your fabric, interlining, and lining. Stack the fabric and lining with wrong sides together and sandwich the interlining in between. Baste the edges. Make the pieces a little larger than you need, to allow for the space the cording will take up. Stitch cording channels across the cups, arching slightly to accommodate the natural curve of the bust flap. I made two sections of cording, comprised of four rows each.
For the cording, I used ordinary pearl cotton crochet thread. After sewing the channels, use a blunt tapestry needle to thread the crochet thread through. You may need more or less strands, depending on the size of your thread. I wanted really bold, three-dimensional channels, so I used five strands of thread per channel.
Once the cording is finished, trim the excess thread and stitch along the outer edges of the bust flaps to secure the cords in place. If you want to add embroidery to the bust flaps, do so now. Then sew bias binding to the edges. The corners can be tricky, but the aforementioned article by Cathy Hay helped me tremendously.
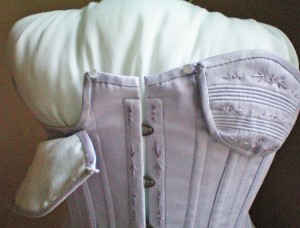
Once the flaps are complete, you need to attach them to the corset. Place them over the cutouts and adjust them until you have the angle just as you like. Make sure the top edge aligns with the top of the corset, so that it appears to be a continuation of the corset and not something you tacked on as an afterthought. Using a ladder or slip stitch, sew along the middle of the bottom edge. Sew only a small area—wide enough that the flap is secure, but narrow enough that the flap can fold down easily.
Sew a small pair of shank buttons directly to the corset, one on each side of the bust flap. Add loops to the top corners of the flaps. These can be of narrow ribbon, elastic cord, or thread. Make them only slightly larger than the buttons and be sure to secure them well.
Milk Guards
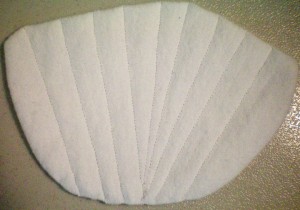
For the final step, we’re going to make a set of quilted flannel pads to absorb any milk that might leak. They will be the same shape as the bust flaps, but somewhat smaller. Cut each of these pads out of three layers of white flannel. Subtract the seam allowance from the third layer, so that it’s half an inch smaller all around. Place the two larger layers right sides together and sew around the edges, leaving a gap of about an inch. Flip right side out, then insert the third layer inside and smooth it out. Hand stitch the seam closed, then press the pad flat. Repeat with the second pad, so you have a matched pair.
Quilt the pads in whatever design you like. I chose vertical lines that slant diagonally, giving the effect of a seashell, but you could do horizontal lines, a crosshatching, or any design that succeeds in quilting the three layers together.
I found that the milk guards stayed in place fairly well on their own, but if you’d like to secure them, add ribbon ties, snaps, or buttons. These pads can be removed and laundered as often as necessary to keep the corset clean.
Conclusion
As you can see, it isn’t difficult to alter an existing corset pattern to accommodate a nursing mother. The finished corset is functional, stylish, discreet, and easy to use.

