by Lisha Vidler
| Please Note: Every sewing machine is different. This guide was written using a modern Singer Stylist. Other brands, and especially vintage models, may be threaded differently. |
(Please click on any picture to view the full-sized image.)
Anatomy of a Sewing Machine
Most sewing machines follow the same basic steps for threading. Some have a painted guide to help you along. If you have any doubt at all, consult the manual that came with your sewing machine.
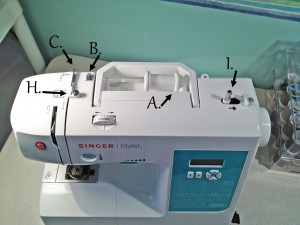
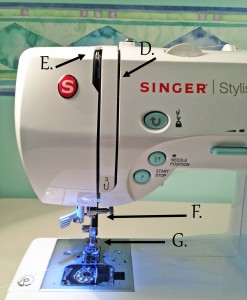
There is always a spindle (A), to hold the thread. There is usually a tension guide (B) and a thread guide (C), sometimes more than one. The thread usually passes down through the tension disks, which are hidden in the front of the machine (D). Then, the thread goes through the take-up lever (E) At the base of the needle, there’s usually another thread guide (F). The last step is for the thread to go through the eye of the needle (G). There’s also a tension guide for bobbin winding (H), along with the bobbin spindle (I).
Threading the Top Thread
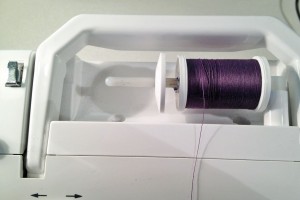
To get started, place a spool of thread on the spindle.
|
A Note on Horizontal Spindles If your sewing machine has a horizontal spindle, you’ll need to place a cap over the end to prevent the spool of thread from working its way loose. Also, if you’re using an older style spool that has a notch on the top edge to hold the thread, you’ll need to flip the spool, making sure the notch faces to the right (away from the direction the thread unwinds), so the thread won’t catch on it while the machine is running. |
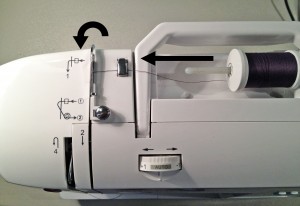
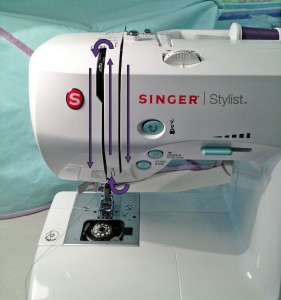
Pull a few inches of thread free, so you have something to work with. Pull the thread through the first tension guide, making sure it locks in place. Slip it under the thread guide. (On my machine, this is a hook facing the back of the machine.)
Now the thread is going to do a loop-de-loop. Pull it down through the tension disks, which are hidden in the slot at the front of your machine. Guide the thread under and around the bottom of the slot, then back up to the top of the machine. Here, it will pass through the eye of the take-up lever. Vintage machines may require you to thread the eye manually, but modern machines are set up so it automatically enters the eye. Simply guide the thread behind the lever and back down, gently pulling it toward you. Check to be sure it’s entered the eye of the lever.
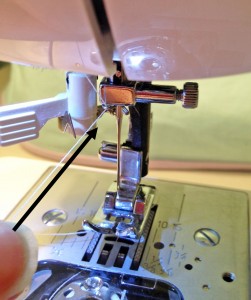
Now pull the thread down to the needle. There’s usually a thread guide at the base of the needle assembly. It may be a little hook, or a loop, or even a metal spiral, but there will be something to hold the thread at the top of the needle. On my machine, there is a hook, but you don’t actually loop the thread through the hook. You pull it behind the hook, where it catches in a small metal eye.
Threading the Needle
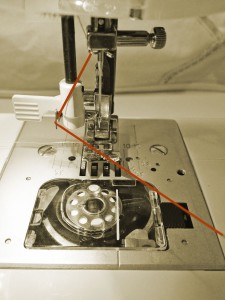
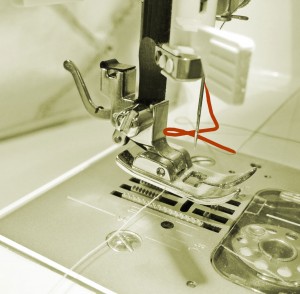
Now comes the interesting part: threading the needle. If you need to do it the old-fashioned way, look for a white square on the base of the presser foot, behind the needle. This aid isn’t always there, but it helps you see what you’re doing when you thread the needle. It also helps if you cut the thread at an angle and dampen the tip.
If you’re fortunate enough to have an auto-threader, you can use that instead. It takes some getting used to, but once you’re accustomed to how it works, you can thread a needle super-quick.
First, pull the needle threader down and push the tab back, rotating the needle hook toward the needle. If it won’t rotate, it means your needle isn’t in a fully upright position. Turn the hand-wheel toward you until the needle rises as far as it will go. Try again and the needle hook should easily rotate, entering the needle. Once it’s in place, hold the threader with your left hand to keep it in position.
Pull the thread to the left and catch it around the large metal hook on the needle threader. Keep the thread taut around that hook and bring it back toward the needle.
When the needle threader is in position, a micro-sized hook is inserted into the eye of the needle. You won’t be able to see it—it’s too small. But you will feel the thread catch when it’s hooked on.
Once the thread is hooked, slowly release the needle threader, allowing it to rotate back into its starting position. This will pull a loop of thread through the eye of the needle. Use a seam ripper (or your fingers) to pull the thread loop all the way through, behind the needle. Note: Do not pull the end of the thread toward you, as this will unthread the needle.
As I mentioned, using the auto-threader takes some practice, but once you catch on, it’s a hundred times faster and easier than trying to thread the needle manually.
Threading the Bobbin
Some sewing machines have a vertical front-loading bobbin. With these, the bobbin must be inserted into a bobbin case, which, in turn, is inserted into the front of the machine. Others have a horizontal top drop-in bobbin, where the bobbin is dropped into the machine. Check your manual to determine how to insert your bobbin properly.
|
A Note on Bobbins Every machine takes a specific size bobbin. There are two standard bobbin types, but some machines use a proprietary bobbin, which has to be special-ordered from the company. Never use the wrong size bobbin! It will not sew properly and may even damage your machine. |
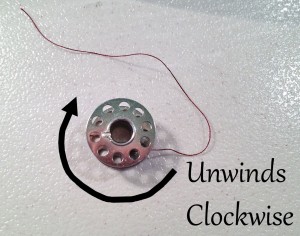
My machine uses a top drop-in bobbin, which is simple to use. First, you have to make sure the bobbin faces the right way. It must unwind clockwise. If the thread is unwinding counter-clockwise, flip the bobbin over.
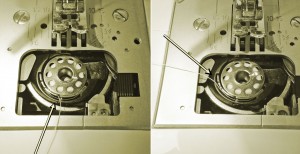
Open the cover and drop the bobbin in. There is a thin metal hook along the front of the bobbin casing. Latch the thread under that hook and pull it all the way to the left. You should hear a click or pop when the thread catches properly.
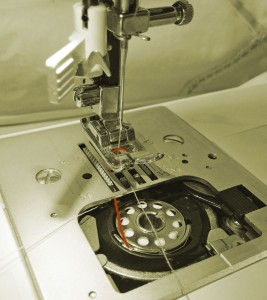
Don’t put the cover back on yet—you still need to draw the thread up. Grab the top thread (the one that’s threaded through your needle) and pull it forward. Hold onto it while you turn the hand wheel toward you. The needle should go down and come back up. When it comes up, it will bring the bobbin thread with it. You may need to use a seam ripper (or any slender tool) to pull the loop of thread out.
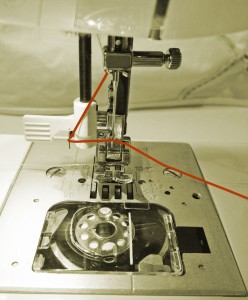
Place the bobbin cover back on and tuck both threads under the presser foot, toward the back of the machine. You’re ready to sew!
Bonus! Winding the Bobbin
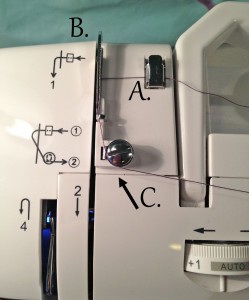
Winding a bobbin is another feature that’s slightly different on every machine. On my machine, the thread goes on the main spindle, then passes through the regular tension guide and thread guide (A & B). Then it takes its own path and wraps around a tension disk (C). It actually wraps around the tension disk one and a half times. (Note the diagram printed on the sewing machine, to the left of the bobbin’s tension disk, which illustrates the thread’s path.)
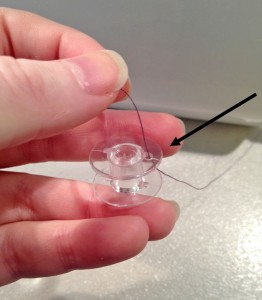
Once you’ve threaded the machine, grab your bobbin. Metal bobbins have holes all the way around the rim, so pick any hole and stick the thread through it from the inside out. Other bobbins have a single hole on each side of the bobbin’s rim. (Some also have a dip, which can look like the hole—don’t be fooled! You might spend several minutes trying to poke the thread through a tiny hole that isn’t actually a hole.) Stab the thread through the hole from the inside and pull it out a couple of inches.
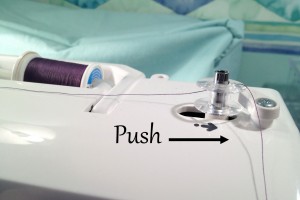
Snap the bobbin onto the bobbin spindle, making sure it’s secure. With most machines, you’ll need to push the loaded spindle to the right. When you do this, some machines automatically switch to “bobbin mode,” shutting off the needle so it won’t go up and down while you’re winding the bobbin. Other machines require you to manually shift the machine to bobbin mode. This usually involves the hand wheel. (Unscrewing the middle portion, or pressing the center in—something like that. Check your manual.)
Hold firmly onto the bobbin thread and gently press the foot pedal to get the bobbin started. Holding the thread prevents it from tangling as the bobbin winds. After a few seconds, stop and check whether the thread is firmly established. (Is it wrapped snugly around the bobbin?) If so, go ahead and trim the loose thread that you’ve been holding onto. If not, let it wind for another few seconds, then check again. Once your thread is trimmed, hit the foot pedal and let the bobbin fill.
You’ll need to keep an eye on the thread as it winds. The thread must rise and fall regularly, so it winds evenly around the bobbin, from top to bottom. If you notice the bobbin becoming thicker on the bottom, middle, or top of the spool, gently nudge the thread with your finger, lifting it so it winds evenly. (This isn’t always necessary, but older or cheaper machines may require you to help wind the bobbin.)
On many machines, the bobbin will have an auto-stop feature. It senses when the bobbin is full and will stutter to a halt. When this happens, take your foot off the pedal and stop winding. If your machine does not have an auto-stop, you’ll need to keep a close eye on the bobbin to make sure you don’t over-wind it.
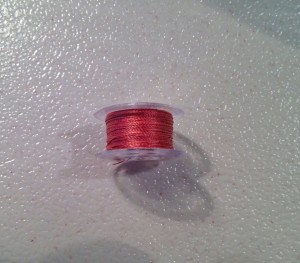
Once the bobbin is done, cut the thread, slide the spool back to the left, and remove it. Check that the thread has wound evenly and smoothly. There shouldn’t be any ripples or rough spots.
Tips
- Always use an empty spool to wind a new bobbin. Using a partially filled bobbin may seem economical, but it’s a bad idea. It may not wind evenly and the older thread may tangle in the machine.
- Plastic vs. Metal Spools. Each has its advantages and disadvantages. Plastic bobbin spools are less expensive than metal spools, but occasionally, plastic spools crack. Metal spools are sturdier, but heavier and more expensive.
- Don’t wind your bobbin too fast or you may stretch the thread. Modern “standard” thread is made of polyester and the friction of running through the tension disks at high speed may warm the thread, causing it to stretch as it winds around the bobbin.

Pingback: Basics: Threading Your Sewing Machine | Yesterday's Thimble
Pingback: Basic Sewing Machine Parts Every Beginners should Know and Their Functions – Site Title