by Lisha Vidler
Threading the Needle
Cut a length of thread that’s no longer than your arm, or between 18” and 24”. Trim one end diagonally, then dampen it by licking your fingers and pinching the end of the thread. This will help when you poke the thread through the eye of the needle.
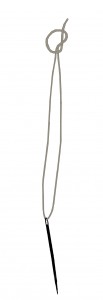
Push the tip of the thread through the eye. Pull it through, stopping halfway down the length of the thread, so the ends are even. Tie a double knot near the end of the thread. (See illustration.)
Waxing Your Thread
It’s always a good idea to wax your thread. This will strengthen it and make it less likely to kink or snarl as you’re sewing. You can usually find a small block of beeswax in the quilting or jewelry-making aisle of your local craft or fabric store.
Pull the thread across the top of the wax, so it cuts into the block. Repeat two or three times, reversing the direction you pull the thread each time for an even distribution of wax. When the thread feels slightly stiff and tacky, like dental floss, it has enough wax on it.
Fold the waxed thread into a length of scrap muslin and press it with a warm iron. This will melt the beeswax so it melds with the thread, making it softer and easier to work with.
Wearing a Thimble
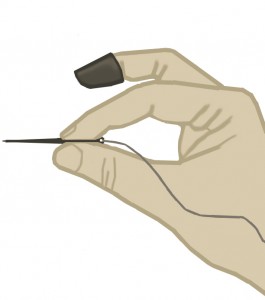
The wrong end of a needle can injure you, especially if you’re trying to push it through thick layers of fabric, so it’s a good idea to get into the habit of wearing a thimble whenever you hand sew.
You’re not limited to the old-fashioned metal kind—they now make thimbles out of a wide variety of materials, including rubber, leather, and elastic. There’s even an adhesive disk for those who don’t like the feel of a traditional thimble.
Normally, you’ll wear your thimble on the middle finger of the hand you use to push the needle through the fabric. If you find that you’re using your index finger instead, move the thimble over.
Getting Started
It helps to have something support the fabric, so sit with a thick pillow or lap desk on your lap. You’ll still need to hold the fabric as you sew, but having that support will ease the strain on your neck and shoulders. If you’re right-handed, hold the fabric with your left hand and use your right hand to maneuver the needle.
To begin, stab the fabric with your needle and pull the thread through until the knot touches the fabric. Wherever possible, try to hide the knot by bringing it up from underneath the seam allowance. If this isn’t possible, at least keep the knot on the wrong side of the fabric, where it won’t be seen. If you’re sewing two folded edges together, you may be able to “pop the knot”—that is, to tug gently until the knot passes through the fabric and is hidden between the layers. Be certain it won’t show once the garment is turned right side out, and be careful not to accidentally yank the knot through both layers of fabric. Avoid this technique if your material is delicate, as it may rip a hole in your fabric.
Anchor your thread by taking a couple of tiny backstiches at the beginning of the seam. Then proceed with your stitching. See the glossary (below) for descriptions of the most common hand stitches.
Finishing Up
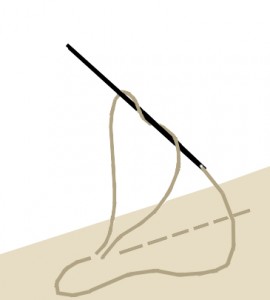
When you reach the end of your seam, sew a couple of backstitches to secure it. To knot the thread, take a small stitch, but don’t pull the thread all the way through. Instead, stick your finger into the thread loop and pull until the loop is about an inch long. Stick the needle into the loop and wrap it around the thread twice, then pull the needle through. (See illustration.) As you pull, the knot should automatically slide to the base of the thread.
Don’t cut the thread yet. You’ll want to hide the thread ends, if possible. If you’re working with layers, you might be able to sandwich the thread where it won’t be seen. To do this, slide the needle between the layers and bring it out about an inch away. Pull the thread taut and cut it near the fabric’s surface. The cut thread should disappear into the fabric.
If you’re not working with layers, just take a single stitch after you’ve knotted the thread, then cut it near the fabric’s surface.
Glossary of Stitches
Unless otherwise specified, sew from right to left if you’re right-handed and from left to right if you’re left-handed.
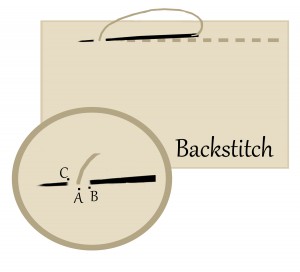
- Backstitch: A very secure stitch used for seams that might be under more strain. Bring the needle up at point A, then go behind your current stitch to point B and bring the needle out at point C, just past your current stitch.
- Basting Stitch: A long running stitch used to temporarily hold two pieces of fabric together. (See also: Running Stitch)
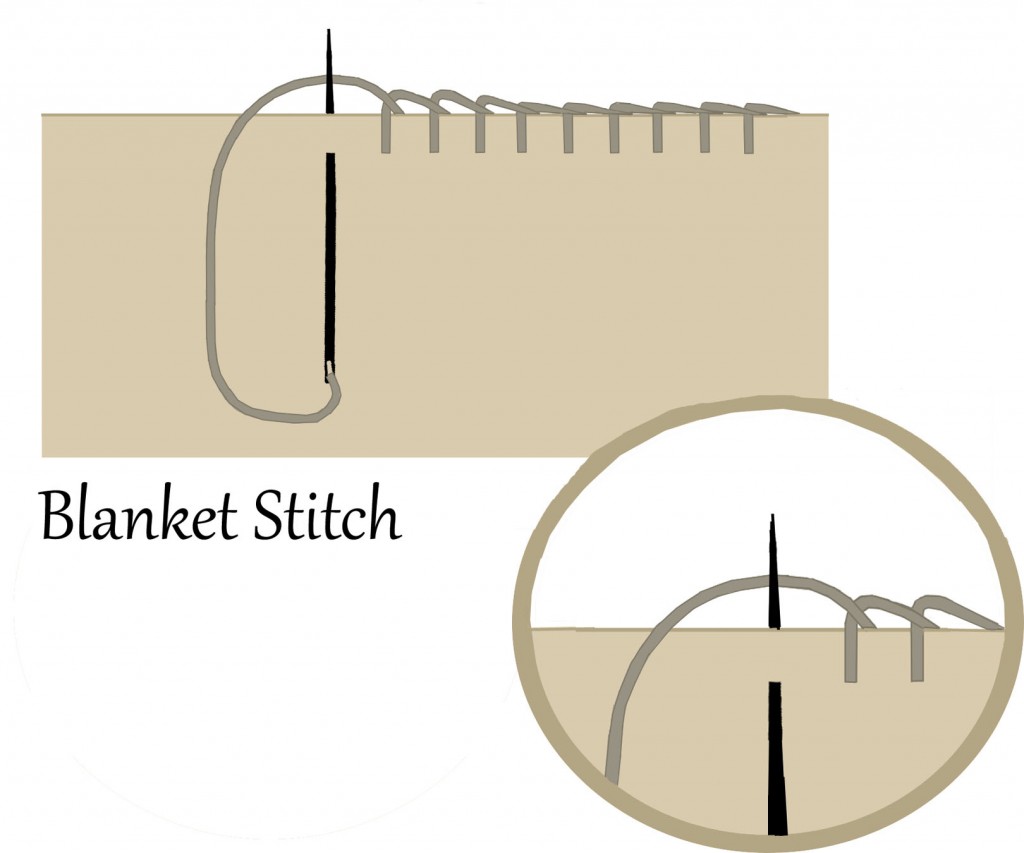
- Blanket Stitch: A stitch used to finish raw edges. It’s often confused with the buttonhole stitch, but the two are not the same. After anchoring your thread, stab the top of the fabric a short distance from the edge. As you push the needle through the fabric, loop the thread from the previous stitch under the needle. (See also: Buttonhole Stitch)
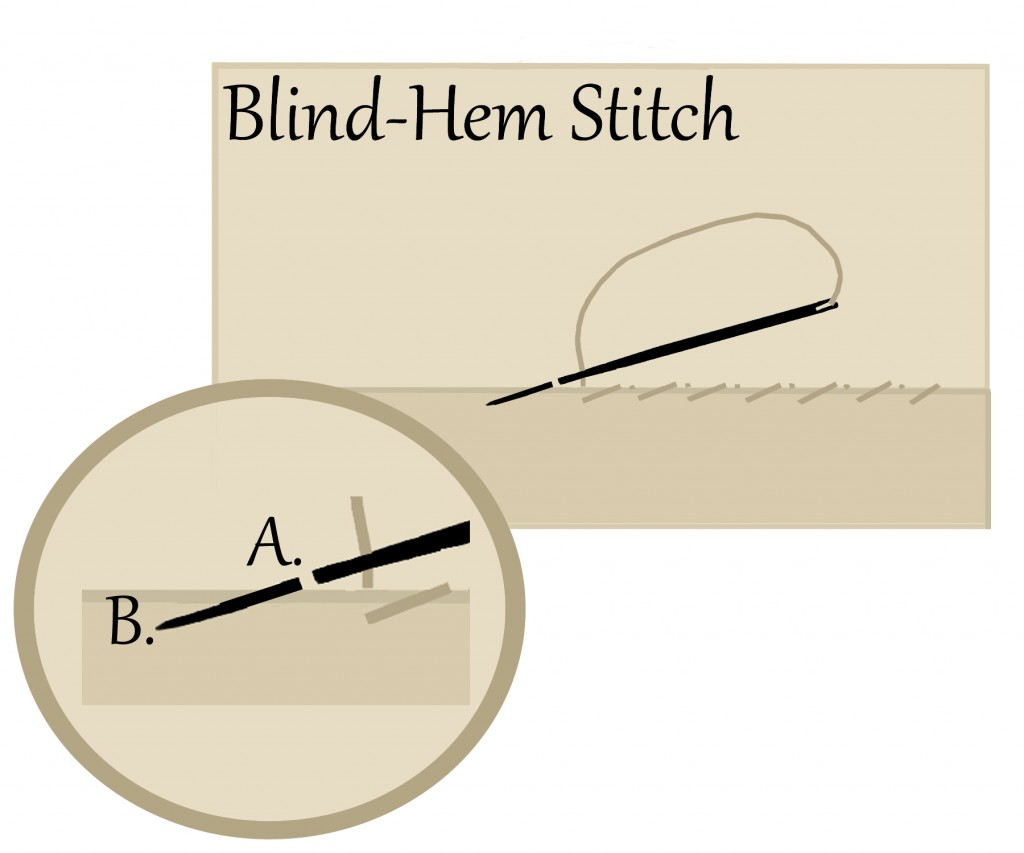
- Blind-Hem Stitch: A hemming stitch that’s nearly invisible from the right side of the fabric. After anchoring your thread in the folded edge of your hem, take a tiny stitch in the main fabric at point A, grabbing no more than one or two threads of the material. Make a diagonal stitch, bringing the needle down to the folded edge at point B. Go through the folded edge and bring the needle back up, repeating the process.
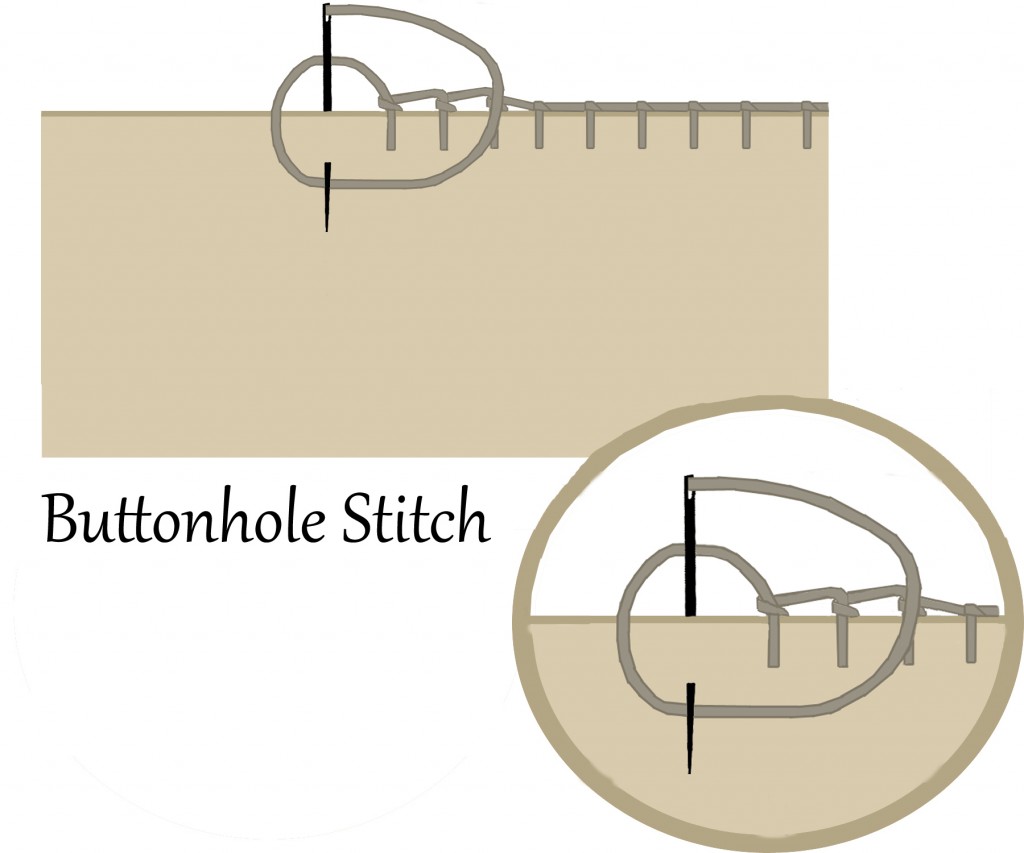
- Buttonhole Stitch: A stitch used to finish raw edges. It’s often confused with the blanket stitch, but the two are not the same. After anchoring your thread, stab the needle through the back side of the fabric, a short distance from the edge. Bring the thread around behind the needle, then slide it under the needle’s point. Draw the needle through the fabric, forming a knotted stitch at the edge. If you’re making a buttonhole, keep the stitches close together. (See also: Blanket Stitch)
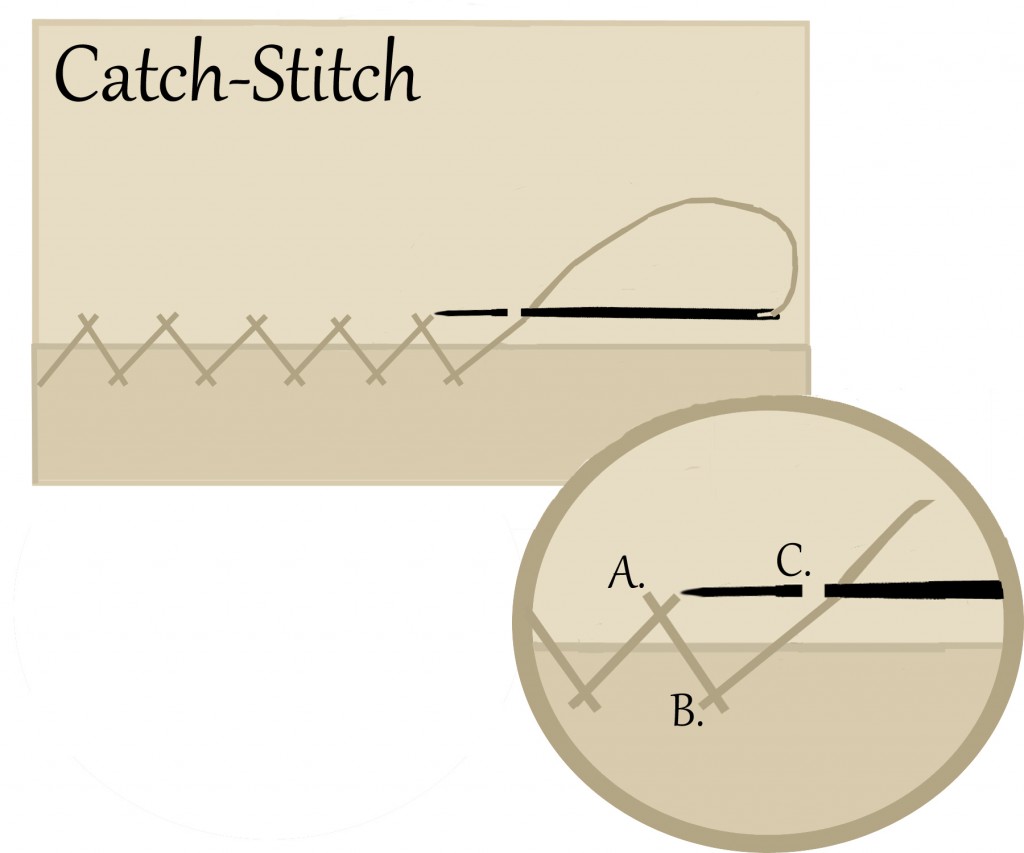
- Catch-Stitch: A hemming stitch. Working from left to right, anchor your thread in the fold of the hem, then go slightly above the folded edge to point A and take a tiny backwards stitch in the main fabric. Cross down and forwards to point B and take another backwards stitch in the hem. Repeat, moving back up to the main fabric and take a backwards stitch at point C.
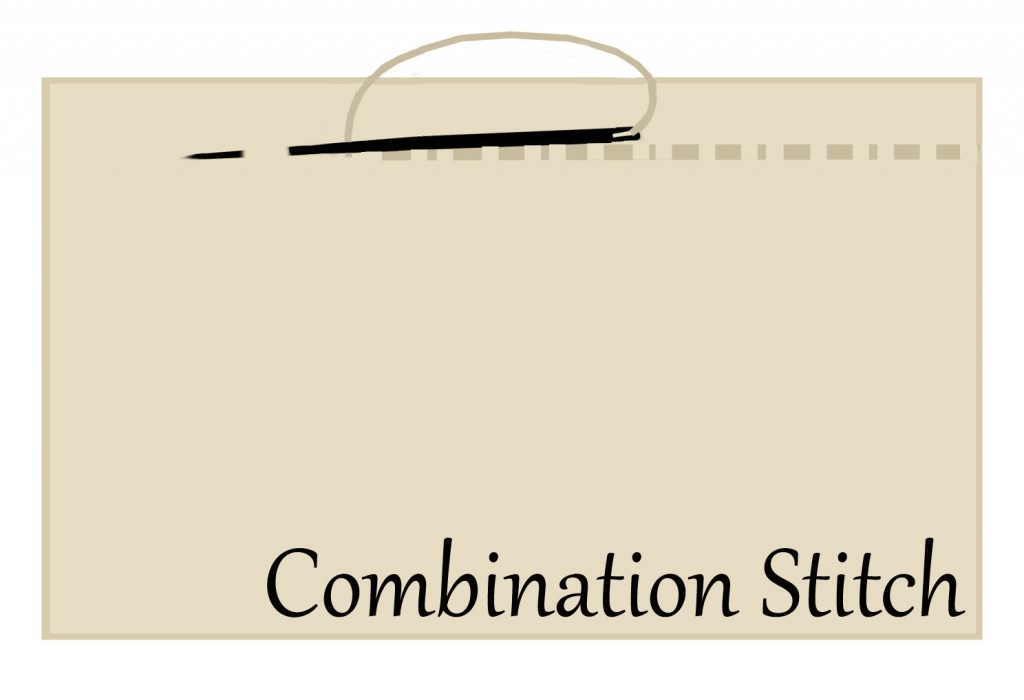
- Combination Stitch: A mixed stitch where you alternate between a running stitch and a backstitch. It’s good for seams that aren’t under a great deal of strain. Sew two or three small running stitches, then take a backstitch.
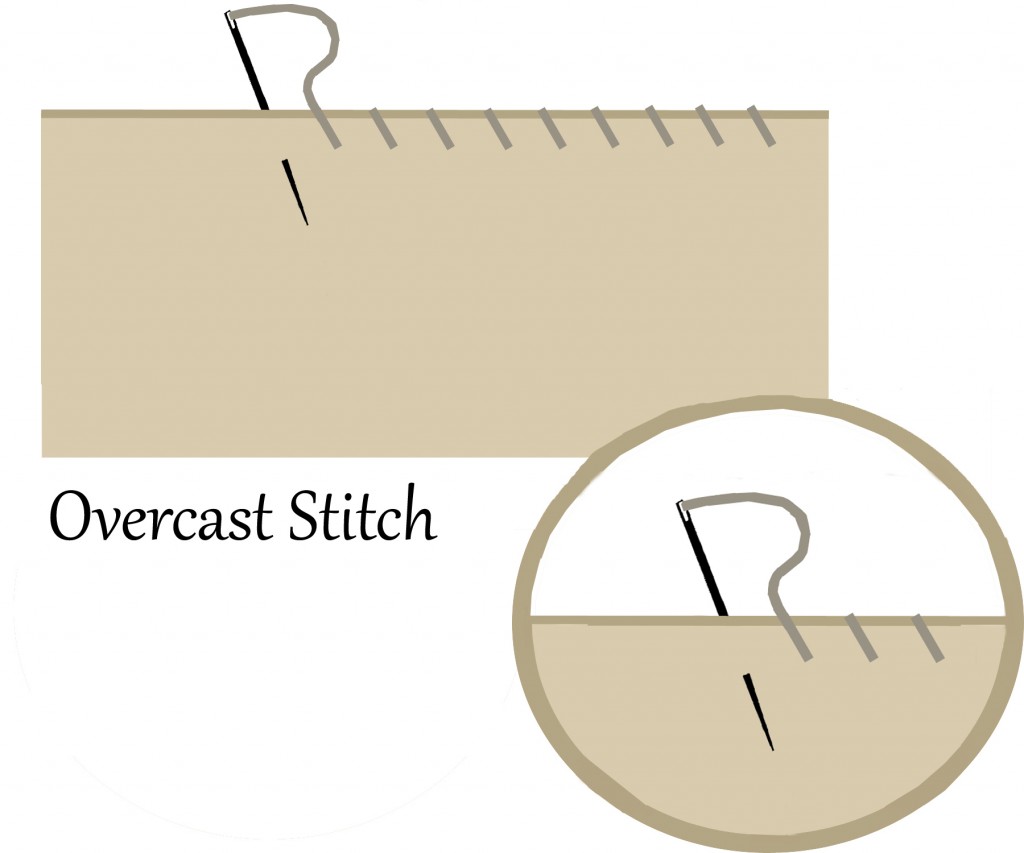
- Overcast Stitch: A basic stitch used to keep raw edges from fraying. Wrap the thread over the fabric’s edge and stab the fabric from behind, forming a diagonal stitch.
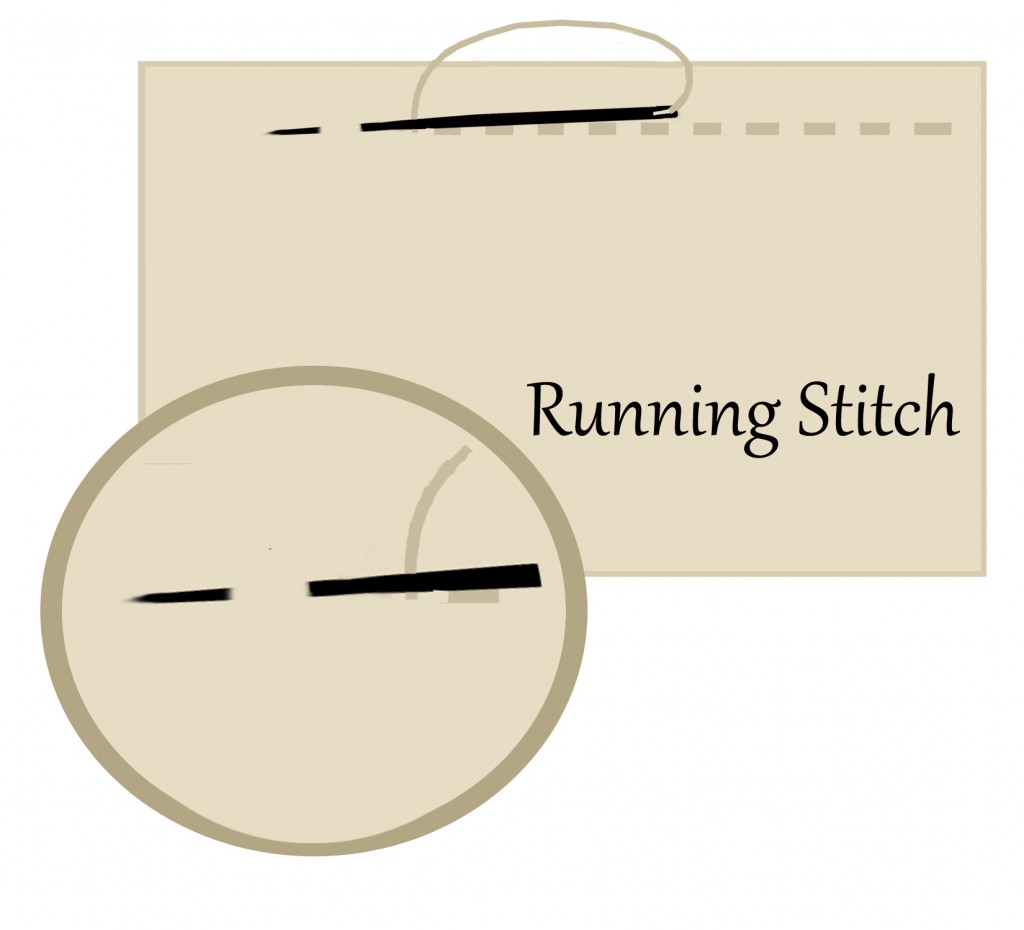
- Running Stitch: A basic stitch where you bring the needle in and out of the fabric, producing a dashed line. Useful for gathering and basting. The stitches can be of equal length or they can alternate with a small stitch on the front of the fabric and a longer stitch on the back.
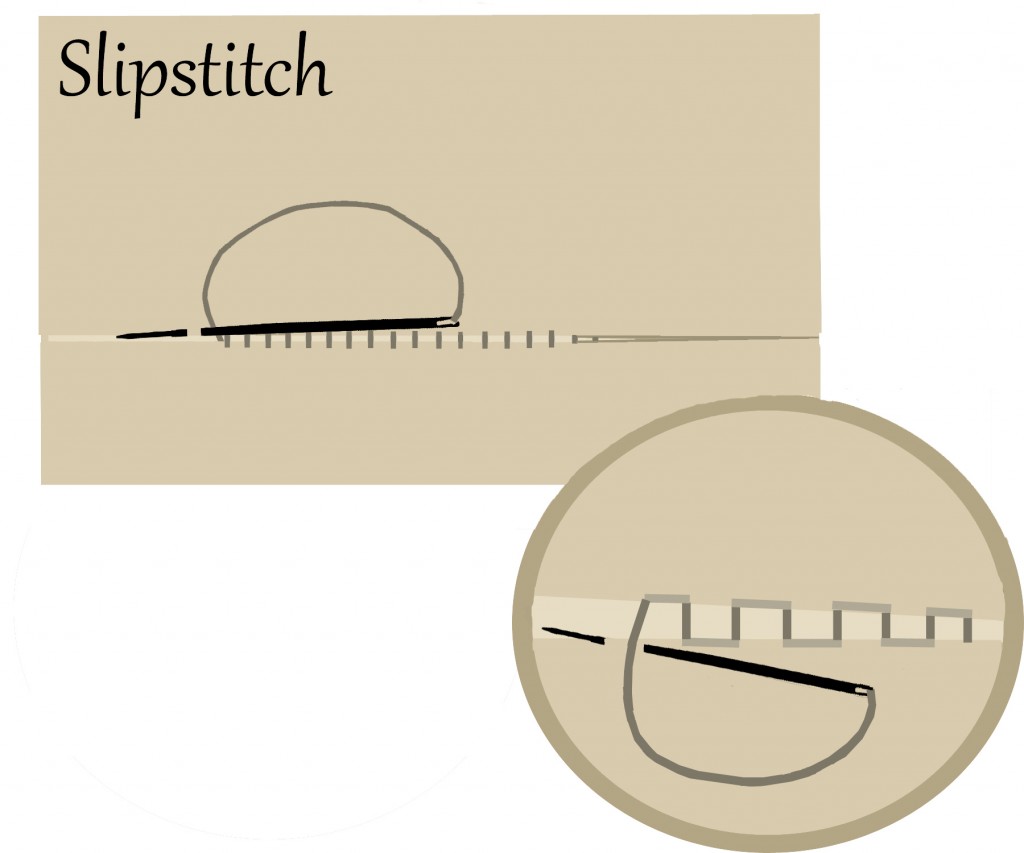
- Slipstitch (aka Ladder Stitch): An invisible stitch used to sew two folded edges together. Moving from right to left, take a small stitch out of one side of the folded edge, then move forward and take a small stitch out of the other side. Every so often, pull the thread taut, so that the fabric edges close and the stitches vanish.
- Whipstitch: Essentially the same as the overcast stitch, but used to hold two edges together, rather than a single edge. (See also: Overcast Stitch)
~~*~~
What do you usually use hand sewing for? Do you find it a challenge or an enjoyable task?

Pingback: Top 10 Sewing Basics - Top Inspired
Pingback: The Basics of Stitching – Make the World Spiffy