by Lisha Vidler
(This article first appeared at Your Wardrobe Unlock’d.)
Unheard of in modern times, the balayeuse was a common element of the Victorian woman’s wardrobe. But what exactly is a balayeuse? How does it work? And more importantly—how can you create one?
~~*~~
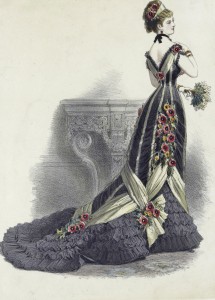
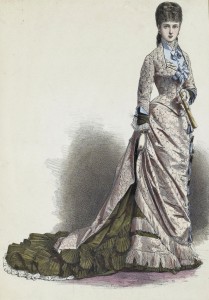
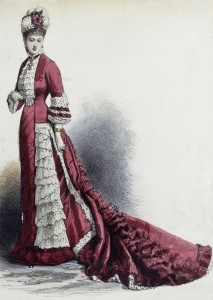
When you have a new trained gown, you can easily picture it trailing behind you as you make a grand entrance.
You also might cringe at the thought of yards of perfect silk taffeta tumbling behind you on the dusty floor. The Victorians also had this problem. Trained skirts were popular during much of the mid- to late-1800s; the streets were filthy and fashion editors complained bitterly about skirts dragging in the mud. What’s a girl to do?
One option is to lift your train up. They sold little devices that did just this. Called a skirt elevator, it clipped onto the fabric and, by means of a chain or cord, could be raised to temporarily lift your train, such as while crossing the road.
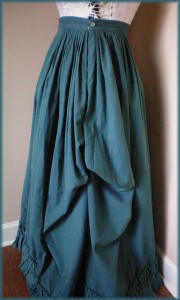
If you prefer to leave your skirt up, you can bustle it. This generally involves a sturdy loop and a reinforced button upon which to fasten it. Bustling can look pretty, but is not easily done up or taken down. Besides, why go to the trouble of making a trained gown if you’re just going to leave it bustled up all the time?
Some ladies sew a long loop of ribbon to their trains, and thus suspend their skirts from their wrists, especially while dancing. But this quickly grows tiring and it risks damaging delicate fabrics.
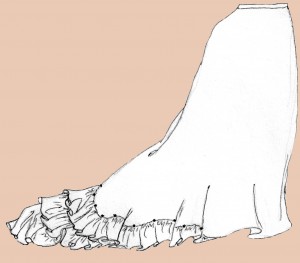
A lesser-known option is to allow your skirt to flow gracefully behind you, confidant in the knowledge that your balayeuse is keeping your gown clean. A literal translation of the French word is “sweeper”. Another term for it is dust ruffle. Basically, it’s a layered flounce that fastens to the underside of your train for the purpose of keeping your skirt up off the ground.
A balayeuse serves a double purpose. First, it drags on the ground beneath your dress, collecting dust and debris. This may sound disturbing, but it saves your gown from being soiled by that very same rubbish. In addition, some balayeuses add support to your train, keeping it full and spread out, instead of crumpling on itself as trains tend to do.
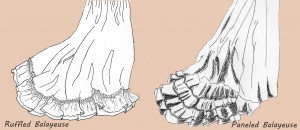
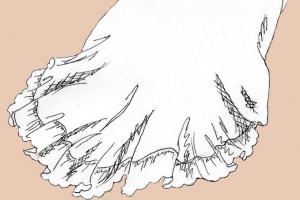
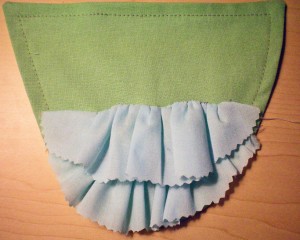
There are two basic styles of balayeuse. The first is a simple ruffle, which may be edged with lace. The flounce may be gathered or pleated, and it may consist of one or two tiers. The less common option is a wide, shaped panel that is layered with ruffles and/or lace and mounted upon the lining on the underside of the skirt’s train.
(Note: The image below shows the skirt inside out. Normally, the dust ruffle is not seen, but is attached to the underside of the skirt.)
“The best . . . way to fill out a train . . . is to support it with a balayeuse of coarse, stiff muslin, shaped to the size required. Upon this ruffles of the same are mounted.”
—Demorest’s Mirror of Fashions, May 1879 [1]
According to Harper’s Bazar and other sources, the balayeuse could be worn in lieu of a trained petticoat. [2] The petticoat would serve much the same purpose of adding support to the train and dusting the ground to keep the gown’s train clean. A petticoat, however, would be heavier and more difficult to clean. You might also add a balayeuse to your trained petticoat. I haven’t found any historic examples of this, but it makes sense if you’re using a trained petticoat that would be difficult to wash.
Just because it has a dirty job doesn’t mean a dust ruffle has to be utilitarian. In the Kyoto Fashion Institute there is an example of a fine lace balayeuse on a couture gown created by Charles Frederick Worth. [3] Balayeuses can be made of your dress fabric, sheer muslin and lace, more basic broadcloth, or even pre-gathered eyelet. Almost anything will work so long as it’s ruffled and easily removed.
“The single narrow balayeuse flounce added at the foot of the skirt will remain a favorite finish. At present it is laid in small box pleats, instead of the fine knife pleating used last year.”
—Harper’s Bazar, October 1880[1]
Now that we know what a balayeuse is, how do we make one? Let’s begin with the simplest kind.
Flounced Balayeuse
First, choose your materials. According to historic sources, the most popular balayeuses were either white or black, or made of your dress fabric. The benefits of black are obvious: it will hide a multitude of soiling, which, given the purpose of a balayeuse, is a definite plus. If you want to be practical, or if you’re portraying a citizen who must consider utility above all else, choose black.
White, on the other hand, is pure and definitely for the upper-classes. It shows the slightest stain, which means it must either be washed or replaced frequently—and that suggests wealth. Also, most undergarments are white, so if your balayeuse is seen, it will be assumed that it’s part of your petticoat. Who can resist the sensual allure of a glimpse of petticoat beneath the hem of a skirt?
Another aspect to consider is the color of your gown. A lighter gown will look better with a white balayeuse, while a dark gown might look better with a black one. Of course, any gown will look good with a matching balayeuse, but consider the nature of your fabric. You might not want a dust ruffle made of fragile silk, for example.
“One style consists of a white muslin flounce edged with narrow lace. . . . The most practical of all is a flounce of black muslin edged with white lace.”
—Harper’s Bazar, January 1878 [1]
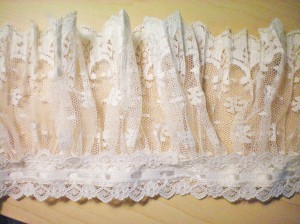
Lace or fabric? You can make your balayeuse out of either. Fabric is eminently more practical, being sturdier and easier to clean. On the other hand, lace is gorgeous and displays an abundance of taste. Do you want it to be practical or sinfully pretty? The choice is yours. You can always compromise and use eyelet, which has the advantage of being both hardy and decorative. Pre-gathered eyelet or lace has the benefit of being easier to use. It also requires less yardage, since it’s already been gathered. The downside is that it’s typically gathered with less material than you might desire.
Whatever you do, be sure and tailor your balayeuse’s material to your gown: while a ballgown might look stunning with a gathered lace ruffle, that same lace wouldn’t look right on a plain afternoon dress.
Decide if you want your ruffle to extend all the way around your skirt, or just across the back. Measure around the inside hem of your gown to determine the finished length. Think about whether you prefer a tightly gathered ruffle or a softer look; use twice the length for a less-gathered look and thrice the length for fuller gathers.
Next, choose how wide you want your ruffle to be. Six inches is a good width to start with. If you want a layered balayeuse, you might make the top ruffle narrower than the one underneath. For this demonstration, we’ll stick with a single 6″ ruffle. If you’re using fabric, cut a length of muslin or broadcloth long enough to gather to your skirt hem and seven inches wide. For a half-ruffle, you can taper it so that the ends don’t stop abruptly but gradually vanish.
Finish the bottom with a simple hem: turn the edge under 1/4 inch, then another 1/4 inch, and stitch. Gather the top edge.
Means of Gathering
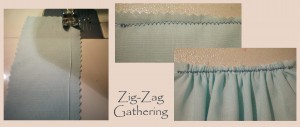
- Method #1: Lay a narrow cord along the edge, secure one end, and carefully zig-zag over it. Pull the cord to gather the ruffle.
-
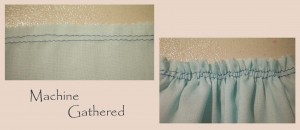
Method #2: Loosen the tension on your machine and stitch two rows 1/4” apart. For a very long row, break the rows into segments no longer than 18”. Back-stitch at the beginning of each row, to secure the stitching. Gently pull the bobbin thread to gather the fabric. Ease the gathers along the thread until they are even and neat. Secure the gathers by stitching to a stay—a length of twill tape works well, as does a cut-off selvedge, or grosgrain ribbon.
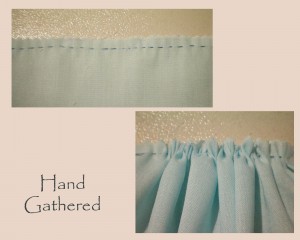
- Method #3: By hand, sew a running stitch along the edge of your fabric. Secure the thread first by back-stitching. Keep the stitches straight and even. Every so often, pull the fabric along the thread to gather it. Continue until you near the end of your thread. Back-stitch again, and knot your thread securely. Repeat until the entire length of ruffle is gathered.
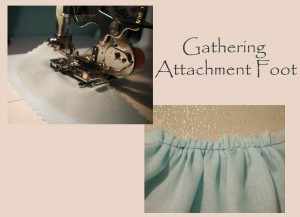
- Method #4: Use a gathering or ruffling attachment foot for your sewing machine. Set the foot to produce a ruffle that is gathered at least double. You may wish to do a sample, to be sure the ratio of gathering is adequate. When you’re ready, carefully feed the fabric into the gathering foot, allowing it to ruffle. Measure as you go, and stop when your ruffle is the length you need. (For more information, please see the tutorial, Using a Ruffler Foot Attachment.)
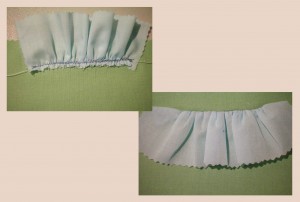
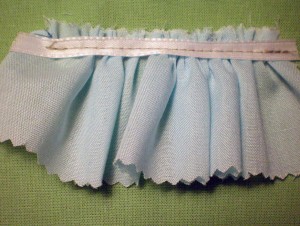
Once your ruffle is gathered, sew it to the lining of your skirt so that the finished edge will be half an inch from the skirt’s hem—unless you want it to show, in which case, line it up so that as much as you desire hangs past the hem. The raw edge will be hidden if you first pin it upside down, so that it flips down toward the hem. (If making a layered balayeuse, do this just for the top ruffle, as each ruffle will overlap the one beneath it, hiding the raw edges.)
Alternatively, hem both edges, gather it about an inch from the top edge, and then cover your gathering stitches with narrow twill tape or a ribbon. In this way, you can stitch the ruffle directly to the lining without worrying about flipping it first. Use short basting stitches (between 1/4″ and 1/2″ in length) so that it will be easy to remove for cleaning.
Paneled Balayeuse
For the second type of balayeuse, you’ll need at least a yard of thin muslin or broadcloth for your base, depending on the size of your train. If you’re making an evening gown, you might try silk habotai instead of muslin.
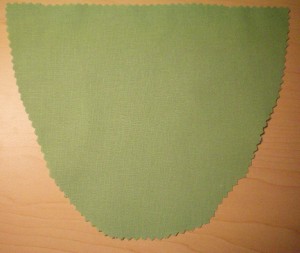
Lay out the back pieces of your skirt pattern and trace the lower half. You’ll want to include the entire train—everything that might touch the ground. Generally, this will result in a half-circle or cut-off oval panel. You may need to piece the fabric together, matching the seams of your skirt.
If you like, you can taper the ends for a more elegant crescent shape. Trim the hem allowance off and add a 1/2″ seam allowance to the edges. This should result in the panel ending 1/2″ from the hem of your skirt.
- Once you know the shape you need, cut out two layers of fabric. If you need to piece the fabric together, do so now.
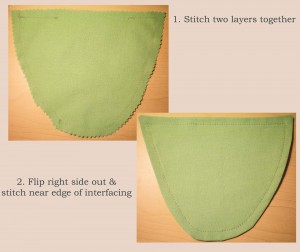
- Add a 1” strip of lightweight interfacing 1/2” from the edges of the top layer—this will provide stabilization for the fastenings.
- With right sides together, sew the layers together around the outer edge, leaving the top free.
- Flip right side out.
- Fold the top edges in and slip-stitch by hand. Machine stitch along the edge of the interfacing to reinforce it.
If you’re in a hurry, you may add Velcro or ribbon ties at intervals around the edges, but the better option is to button the balayeuse in place. Sew small or medium-sized buttons to the hem of your skirt, with matching buttonholes around the edge of your balayeuse. The upper edge, however, will require some tricky maneuvering to prevent the buttons’ stitches from showing. If you’re good at planning ahead, sew the buttons to your lining before you hem your skirt and lining together. If it’s too late, you have a few options.
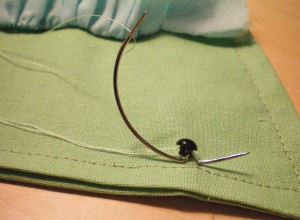
First, you may reverse things and hand sew buttonholes onto the skirt lining and attach your buttons onto the balayeuse. Your second option—though quite historically inaccurate—is to tack squares of Velcro to your skirt lining and balayeuse. Barring that, your third option is to sew ties to both your lining and balayeuse panel, using grosgrain ribbon or narrow twill tape. This will be difficult, as you’ll have to sew just through the lining and not your skirt. You might try using a curved needle to accomplish this, or glue them if you’re not concerned with accuracy. Just be careful that the glue doesn’t seep through your lining and onto your skirt!
Your fourth option—and by far the easiest—is to use a curved needle to sew ball buttons onto your balayeuse. Make your buttonholes small enough that the ball button will barely fit through and won’t easily pop back out due to the weight of the balayeuse pulling on it.
In order for your balayeuse to support your train, you’ll need to cover the panel with several rows of wide ruffles. You can make these of lace or washable fabric, such as muslin or broadcloth.
Measure the width of your panel and cut your fabric two or three times the length you need, depending on how full you want your ruffles to be. Cut your fabric twice as wide as necessary: for 6″ ruffles, cut your fabric 12″ wide. Fold in half, press, then gather the upper raw edge until the fabric is the right length to fit across your panel. Stitch the ruffles directly to the base panel. Be sure to overlap each ruffle, so that the hem of one covers the raw edge of the one beneath it. The uppermost ruffle should either have the top edge finished, or be stitched upside down, so that it will flip over to hide the raw edge. Align the bottom ruffle so that it ends just beyond the edge of the panel. You may choose to edge it with a narrow lace, just in case it shows.
Button it in place, and you have a finished balayeuse!
References:
- Quotes compiled from Fashions of the Gilded Age—Vol. I, page 142
- Victorian Fashions & Costumes From Harper’s Bazar: 1867-1898, page 122
- Fashion—Vol. II (Kyoto Costume Institute), page 266
~~*~~
Have you ever sewn a balayeuse? Which method did you use: paneled or flounced? Did your balayeuse work as intended?

Pingback: Rules for Ladies’ Trains: 1868 | Mrs Daffodil Digresses
Pingback: New Hampshire and the Easter Bonnet | Cow Hampshire