by Lisha Vidler
(Click on any image to view it full-sized.)
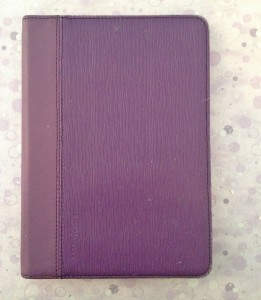
I own a Kindle Fire HD 7″, for which I have a sturdy faux-leather case, but the case is starting to look a bit worn: the color is rubbing off the edges and it’s got some dings and scratches, enough that I’m starting to feel embarrassed when I use it out in public. I looked into buying a new case, but since the new Kindle Fire came out, cases for the older Kindles are harder to find. Therefore, I decided to sew a cover for my case.
Inspiration & Design
I was inspired by the classic paper bag book-cover they teach you in grade school—basically a slipcover. It has pockets that slip over the front and back covers of my Kindle case, with a Velcro tab to keep it closed.
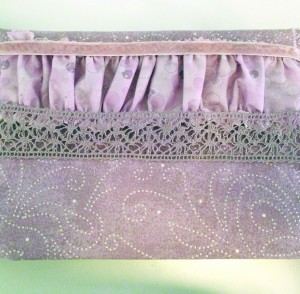
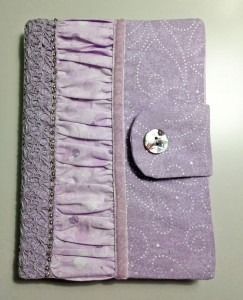
I decided that if I was going to the trouble of making the cover in the first place, I might as well make it pretty. I drew several quick sketches and picked my favorite. It has a gathered panel which is bracketed by cluny lace and velvet ribbon.
Pattern
- Kindle Cover—Self-Drafted
I found a couple of free patterns online for Kindle covers, but none of them were the style I wanted. Specifically, I wanted something to fit over my existing case. So, I drafted my own pattern.
Materials
- 1/4 yd Quilting Cotton, Lavender #1
- 1/4 yd Quilting Cotton, Lavender #2
- 1 yd Velvet Ribbon, Lavender
- 2 yds Cluny Lace, Lavender
- Seed Beads, Silver-Lined Lavender
- Button, Purple Mother-of-Pearl
- Velcro
I had two quilting cottons in my stash that were both lavender. I decided to make the main cover out of a lavender with stippled silver swirls, and for the lining and accents, I used a pinkish-lavender with a circle print. A wide cluny lace in dark lavender matched nicely, as did a lavender velvet ribbon, so I used them both.
Mockup
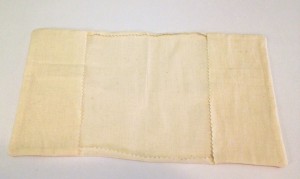
I made a quick mockup, just to see if my idea for the slipcover would work. It ended up too small, but the basic idea worked.
Construction
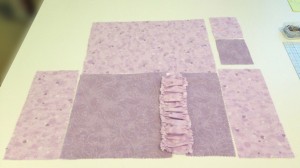
To begin, I cut a rectangle for the cover, then split it in two, so I could insert the gathered panel. I also cut the lining and cover flaps, along with the tab closure (which began as a rectangle, but later became rounded).
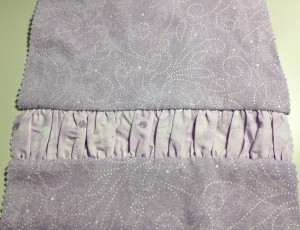
After gathering the contrasting panel along both edges, I sewed it between the two halves of the outer cover and pressed it carefully.
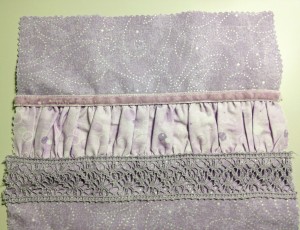
I stitched the lace and velvet ribbon on either side of the gathered panel. (Afterwards, I realized I’d forgotten to change the sewing machine’s tension back to normal after sewing the two rows of gathering. Oops!) I thought about adding seed beads or decorative buttons to embellish the lace, but decided to wait until the cover was done, just in case it didn’t fit properly and needed to be taken apart.
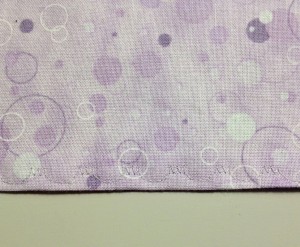
I hemmed the side pocket flaps with a decorative scallop stitch. The hem is more subtle than I would have liked, and not as secure, but it isn’t a seam that will be under strain, and I really wanted a touch of embellishment—even on the inside, where it wouldn’t be seen.
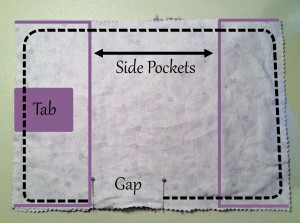
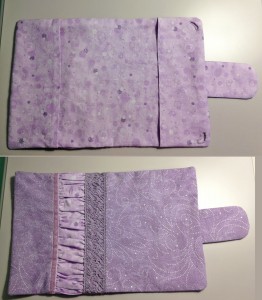
Assembling the cover (as a whole) took some thought. I’m not good at visualizing spatially—I usually have to pin items together to get an idea of how they’ll look when assembled. But this time, I had a hunch that I followed, and to my delight, it worked perfectly. Basically, I sandwiched the side panels and the closure tab between the main cover and the lining. After stacking the pieces in the right order, I stitched all the way around, rounding the corners and leaving a three inch gap through which to flip the cover right-side out.
When I first sewed the edge with the closure tab, I positioned the tab so it stuck out. But I forgot that the whole thing had to be flipped, which meant the tab had to be sewn facing inward. Once I realized my mistake, I unpicked the tab and repositioned it, then sewed it the right way, as in the diagram above.
I held my breath while turning the cover right-side out, but it worked exactly as I’d hoped. Finished edges all around, pockets on either side to keep the cover in place, and a tab that wraps around to close the cover.
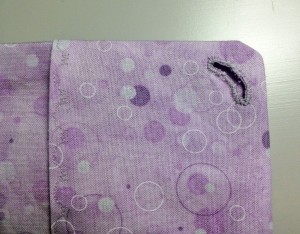
The next step was to sew curved buttonholes in the back inner pocket, so the plastic clips that hold the Kindle in place could poke through. Since my sewing machine can’t do curved buttonholes, I had to hand sew them. To my frustration, I accidentally made the first one 1/8” too short and had to redo it, which meant the edges stretched. That particular buttonhole now gapes. I really need to practice my hand-bound buttonhole technique, but overall, they didn’t turn out too bad.
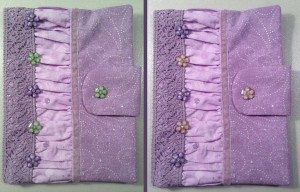
I wanted to embellish the front of the cover a little more, but I couldn’t decide what to do. Initially, I’d planned to embroider a monogram on the tab closure, but I wasn’t happy with any of my embroidery floss colors. They were either too pink or too bright to match my lavender fabrics. So, I played around with various combinations of buttons and some little rhinestone flowers I found in my stash.
I almost ended up choosing the pink and lavender flower combination. The problem was, these flowers weren’t buttons, they were flat-backed, so I would have had to glue them in place. This terrified me, because glue can’t be undone. If I messed up or didn’t like the finished cover, I wouldn’t be able to fix it.
In the end, I decided against both the flowers and the buttons, instead sewing clusters of lavender seed beads along the edge of the lace. I love how it turned out—sparkly, yet subtle.
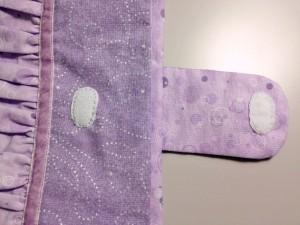
I added Velcro to the tab, so it would fasten securely. I hand-sewed the Velcro (using a backstitch), because the last time I machine-sewed Velcro to something, it was so hard on my sewing machine that the needle worked its way loose and fell out while I was sewing!
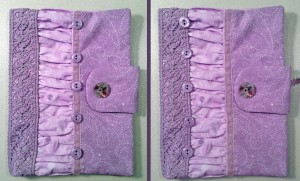
The final step was to sew a purple mother-of-pearl button to the front of the closure tab. I almost didn’t add the button, but it needed something extra on the tab.
Conclusion
This was a fun project that turned out great! It really stretched my creativity and spatial planning skills. In hindsight, the only thing I would have done differently is to add a buttonhole or cutout to the closing tab, for the charging cable. As it is now, I have to open the tab while the Kindle charges.
Despite that omission, I’m very pleased with my new cover. It’s certainly nicer than the plain faux-leather case I purchased for my Kindle! Of course, if it gets dirty or messed up, I’m going to be devastated, but I can always make another one when this one wears out. In fact, I’ve already had two requests for similar Kindle covers, so I guess I’m going to be making a couple more.



Pingback: Kindle Cover | Yesterday's Thimble