A Sewing Diary
by Lisha Vidler
(Click on any illustration to view it full-size.)
Pattern
-
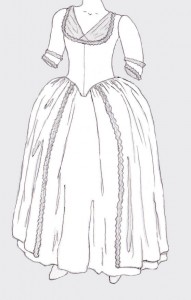
J.P. Ryan’s Robe á l’Anglaise
Inspiration & Materials
I always thought I was a Victorian girl . . . that is, until I fell in love with a polonaise style gown from the movie The Duchess. The gown in question was a yellow silk ballgown, but the style works equally well with common print fabrics. In fact, Fashion, the book from the Kyoto Costume Institute, has photos of several 18th century gowns that are striped or floral printed.
While perusing Fabric.com, I found a cream and gray floral fabric that just screamed, “Late 18th Century Polonaise!” After buying it, I did some research and found it wasn’t screaming after all, but rather whimpering in pain. Totally unsuitable. Then I found this.
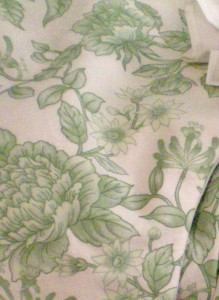
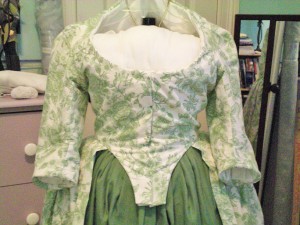
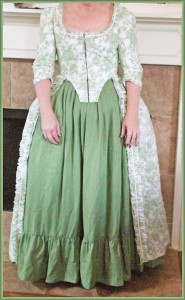
Green on ivory floral, very high-quality cotton, and best of all—similar in style to some of the reproduction and antique fabrics I’ve seen. I ordered five yards, fell in love with the fabric on sight, and decided to buy three more yards so that I could also make myself a modern summer dress as well.
Several weeks after I bought the green print cotton, I found a solid green Kona cotton at Fabric.com. Going by the photo (never a good idea!) it coordinated perfectly with the green print. So I took a leap of faith and ordered five yards. The color did match, but it was too vibrant. It drew too much attention away from the dress. Plus, it was a bit coarse, not at all like the soft cotton of the print. I relegated the Kona cotton to my mockup fabric bin, and by happy coincidence, found the perfect replacement fabric in my stash.
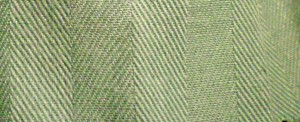
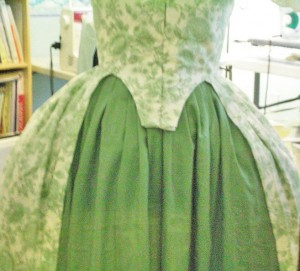
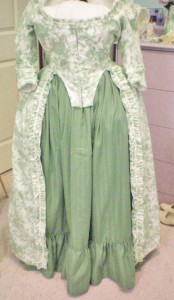
Actually, it was a tablecloth purchased several years ago at a thrift store, in like-new condition. The color is a sort of pea-soup green, and it has woven stripes. The color isn’t identical to the green of the dress fabric (it’s a bit darker), but it looks beautiful with it, and the stripes provide a lovely bit of interest.
Construction
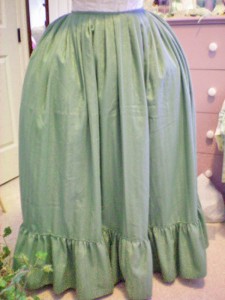
Amazingly enough, the tablecloth was exactly the right size, and I do mean exactly. I cut the material into two panels, front and back, and when I cut it to the right length, there were two long strips left over. Those strips became the ruffle, which is nice and wide, and goes halfway around the skirt. I would have preferred a full ruffle, but there simply was no more fabric. A half-ruffle is an historic method, however, so it’s all good. And besides, so long as I refrain from polonaising the gown (alas!), the back of the skirt is covered by the dress. (For more information on how I sewed the petticoat, please see the Sewing Diary: 18th Century Petticoats.)
The dress pattern went together with astonishing ease. The hardest time I had was my painstaking efforts to match the large floral pattern of the fabric. I succeeded, but the dress ended up too small across the back, so I had to let the three back seams out as far as possible, which ruined the matched seams. Then, the front was too big, so I had to fold the center front edges a bit wider than intended. Surprisingly, the front still appears to match. The floral pattern is large, so the edges are near enough to give the illusion of matching.
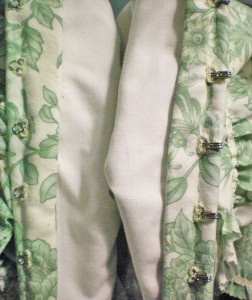
I added hooks and eyes down the center front; however, I didn’t sew them through all the layers of fabric, so there is some unfortunate gaping and pulling. The only solution to this is to either sew the hooks through all layers, which means the stitching would show, or to completely disassemble the bodice and resew the hooks through the lining and interlining together. I’m not keen on either idea. Either I will put up with the gaping, or I will find a way to stitch the hooks through all layers and then hide the stitching somehow, perhaps with a row of trim.
Originally, I wanted to add ruffles to the sleeves. First, I made a pleated pair of white cotton, but they looked too out of place. The pleating made the ruffles too stiff, and the white fabric stood out too much against the slightly off-white of the fabric’s background. Next, I tried ruffles out of white embroidered lace, similar to antique lace of the 18th century. They looked better than the cotton ruffle, but the white looked too stark. I happened to have the exact same lace in ivory, so I began a third set of ruffles.
Eventually, I decided that lace ruffles would be too fancy for a simple cotton day dress. In theory, I could have gotten away with it on the premise that cotton was a rare and expensive fabric back then, as was hand-made lace. It seemed reasonable to assume that a cotton dress might have lace ruffles. In the end, however, I decided against it. Instead, I cut a fourth set of ruffles out of ivory cotton, but when I basted them onto the dress, I discovered that I preferred the look of the sleeves without ruffles.
Embellishment
Once the dress was done and the hook and eyes sewn on, I turned my attention to decorating. The dress looked lovely as it was, but I knew it would look even better if I added some trim. And what’s an 18th century gown without loads of embellishment, after all?
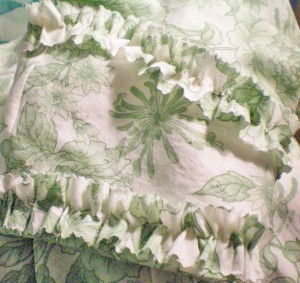
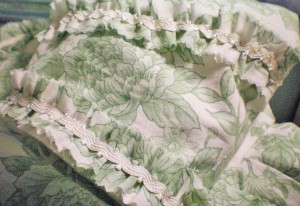
I cut several long, narrow strips of the floral fabric, pinked the edges, gathered them down the middle, and sewed them around the neckline, cuffs, and the front edges of the skirt. I actually put two ruffles around the sleeves, angled so that they are farther apart in the back, and closer in the front, to simulate cuffs.
I was surprised at what a difference the trim made. It looks amazing! For the self-ruffles, I added a row of ivory braid, ordered from Minidolls.com. This goes down the center of each ruffle to give a finished, layered look.
Conclusion
I must say, I am startled at how quickly this gown was made up. It only took me ten days from start to finish, compared to the months that my Victorian gowns tend to take. Of course, this is a very simple costume, without the elaborate draperies of the Early Bustle period. All the same, I am pleased with how easy the gown was, and I shall definitely make another.

7 Responses to 18th Century Robe á l’Anglaise