A Sewing Diary
by Lisha Vidler
(Click on any illustration to view the full-sized image.)
Patterns
- Self-drafted, using Katherine’s web page, An Easy, Authentic, Eighteenth Century Petticoat, and Rhonda McConnon’s web page, 18c New England Life: The Petticoat.
Inspiration & Materials
Two years ago, I wanted to make an eighteenth century costume, but the undergarments had to come first. Previously, I detailed my progress in making the 18th Century Stays. Now it’s time to show you the petticoats. It would seem that all skirts were called petticoats in the 1700s, regardless of whether they were meant to be seen or were an undergarment. We shall be making both: that is, a skirt beneath the skirt, intended for modesty and poof-factor, and an outer skirt, which, just to make things more confusing, is worn beneath the dress.
The under-petticoat shall be made of white sheet material—quite literally, a bed sheet. The outer-petticoat, or skirt, will be made of a tablecloth. It may sound bizarre, but you take fabric where you can find it! In this case, the damask-striped tablecloth happened to match the green print of my gown perfectly.
Construction
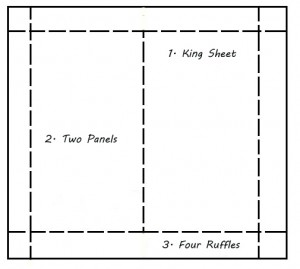
It didn’t take long to get the first petticoat ready for sewing. I simply tore a king-sized sheet in half, then tore about six inches off the bottom, creating two panels approximately 80″ x 40″ and four strips approximately 6″ x 40″.
Since I’m short, I really only need a length of 35″; the extra length is for the sides, since I’ll be wearing this petticoat over my pocket hoops. (Any time a skirt will go over a wide support garment, such as panniers or a bustle, you have to add extra length.) The strips will be sewn together into one long piece, then hemmed and gathered into a ruffle for the bottom of the petticoat.
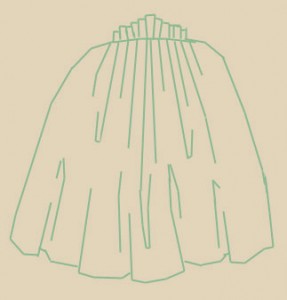
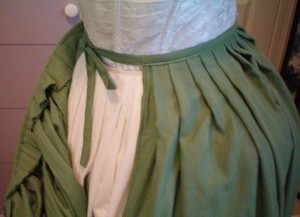
I sewed the two panels together, stopping about 12 inches from the top. The slits thus formed on either side provide access to the pocket area of the pocket hoops. I pressed the seams, then folded the raw edges under and stitched them down. This created a nice, finished seam that’s historically correct (save for the machine stitching). Since the hem would be hidden by the ruffle, I didn’t worry about making it invisible. I merely folded it twice about half an inch, and stitched it down. Finally, I pleated the top edge and basted it.
In my stash, I found some narrow bias tape, double-folded, less than a quarter of an inch wide, which I’d taken off some pre-gathered lace. Since I hadn’t any leftover sheet fabric to turn into bias tape, I used the tape for the waistband and ties. I basted it over the edge of the pleated waist, then stitched it with the machine, leaving about 18″ hanging off the edge, to be used as ties.
Then I realized that I was supposed to fold the petticoat at the waist to get an even hem over the pocket hoops, before attaching the waistband. Oops!
Hemming
To hem the petticoat, I draped it on my dress dummy over the pocket hoops. I tied a string around the waist and pulled the waist up at the front and back, leaving the sides longer.
After I marked where to fold the top edge, I basted along that line to hold the pleats steady. I then pressed it and pinned it in place, then basted the bias tape to the top edge, and sewed it.
Once the petticoat was done, I discovered that I’d made the waist too large. It ties shut, but the pleats wrap around towards the front and back, when they ought to stop midway around my waist. Not a huge problem, but something I want to keep in mind when making the skirts.
| Tip: The reason the waist ended up being too large is because I folded the waist down by several inches. The pleats weren’t kept perfectly straight—they unfolded a bit and so the skirt got wider the farther it got from the waist. To prevent this, press your pleats down as far as you intend to fold the waist and baste all the way across. This should ensure that your pleats don’t come unfolded, and—most importantly—that your waist stays the same measurement across. |
Now all that’s left is gathering the ruffle and sewing it in place.
Ruffles
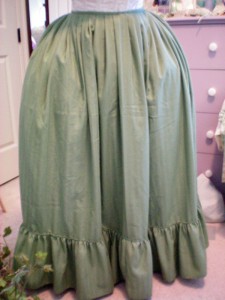
After gathering the ruffle with my brand-new ruffler attachment foot, I sewed the ruffle onto the second petticoat.
I changed my mind about adding a ruffle to the white petticoat. I gathered one using my new ruffler, but it ended up being the wrong length somehow, and I didn’t want to sit there and unpick eight yards worth of ruffle, just to gather it all over again. So, the green petticoat got a ruffle and the white petticoat did not.
My new ruffler is very temperamental, but when it’s in a good mood it does fantastic work. It creates a gathered ruffle in a matter of seconds, when it would take me at least half an hour, if not longer. I hereby sing the praises of whoever invented this brilliant device! (If you’re curious about how the ruffler foot works, please see the tutorial: Using a Ruffler Foot Attachment.)
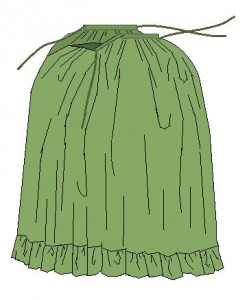
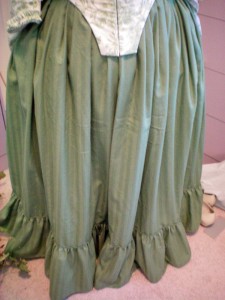
The second petticoat is made of a pea-green cotton, with a woven damask stripe. Like the sheet used for the first petticoat, the tablecloth was just the right size. All I had to do was cut it in half, then cut the bottom off (to be used for the ruffle), sew the two halves together (leaving the top nine inches open for pocket access), and pleat the waist onto a narrow bias band.
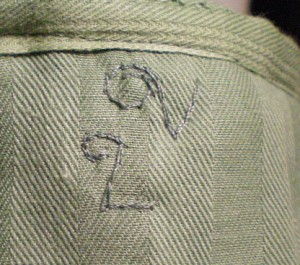
The back is slightly longer on both petticoats, to fit over the bum roll portion of the pocket hoops. This meant there had to be a definite back and front, and these were difficult to tell apart. Therefore, I embroidered my initials at the back waist.
Problem
I just discovered that the sides of the green petticoat aren’t long enough. The reason is, my dressform doesn’t have hips! Since the pocket hoops had no hips to keep them in place, they collapsed under the weight of the petticoats. This meant that the sides didn’t protrude as far, and so the careful fitting job I did isn’t valid. When I wear the pocket hoops, they cause the petticoat to be shorter on the sides. It wouldn’t matter so much if this was an under-petticoat, but it’s the skirt to my l’Anglaise gown, so the hem must be even. It should be a simple matter to undo the stitching on the last few inches of the waistband, shift the fabric down a bit, then restitch the waistband in place.
So now, the petticoats are done! If I have any regrets, it’s that I didn’t make the waist ties quite long enough. They work okay, but every time I tie them, they feel a bit too short. Other than that, I love these petticoats. The green one especially! I will wear it with my green and white Robe á l’Anglaise.
Behold, the finished petticoat!

Pingback: 18th Century Petticoats | Yesterday's Thimble
Pingback: 18th Century Undergarments II | Yesterday's Thimble
Pingback: The 5 Essential 18th Century Underthings – The Well Dressed Historian