A Sewing Diary
by Lisha Vidler
(Click on any illustration to view the image full-size.)
Made for the Double Period Project at Your Wardrobe Unlock’d.
Design Overview
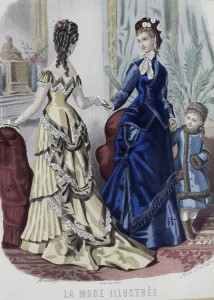
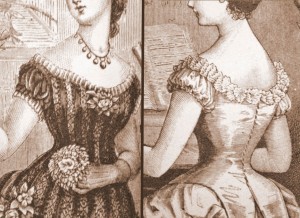
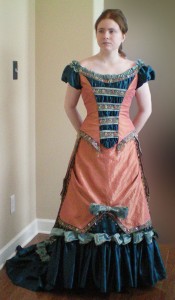
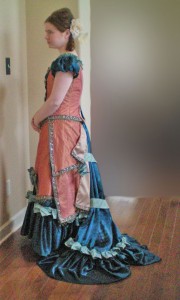
This is a ballgown from 1876, the beginning of the Natural Form period. As such, it is meant to be worn without a bustle. The design is original, yet historically accurate, with inspiration taken from multiple antique fashion plates. (To learn how I designed the gown, please see the article: Designing an Authentic Victorian Costume.)
Description
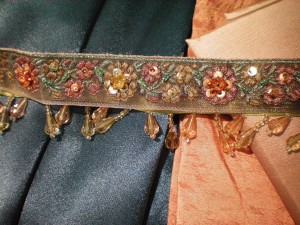
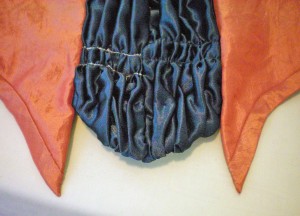
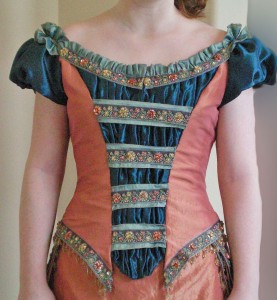
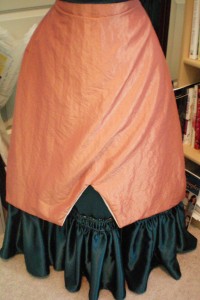
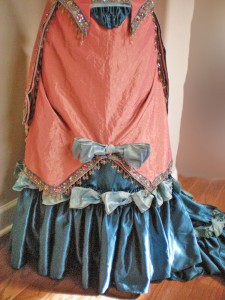
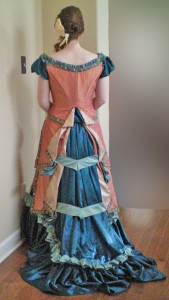
The skirt is made of dark teal charmeuse. It’s trained and has a shirred ruffle around the hem. The overskirt is made of shot copper taffeta. It’s plain in front, but has reveres of gold taffeta in the back, which are connected by swags across the back of the gown. The bodice is two-toned, made of copper taffeta with a shirred inset of teal charmeuse. It fastens in the front, which is an unusual choice—but not without precedent. The gown is trimmed with a shot aqua taffeta ribbon, a beaded fringe of pale gold and green, a tiny rope of gold seed beads, and a damask ribbon that’s beaded and sequined with copper, gold, and green, tying together all the colors of the gown.
Construction Diary: Skirt
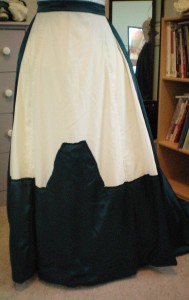
The skirt is lined for support. It’s Truly Victorian’s 1870s Trained Skirt Ensemble pattern, sewn with flat-felled seams. In order to save fabric, I used a historic technique and cut the hidden parts of the skirt from plain cotton.
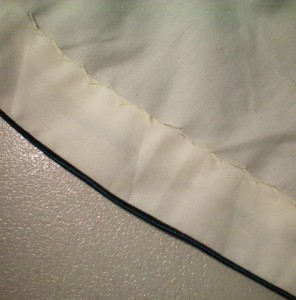
Hem: The easiest way to ensure a hem that doesn’t pucker is a hem facing. It’s cut using the bottom three inches of the skirt pattern. After stitching the facing to the hem, I trimmed the lining so it fit neatly underneath, then sewed the facing down using a catch-stitch.
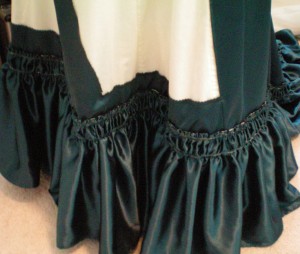
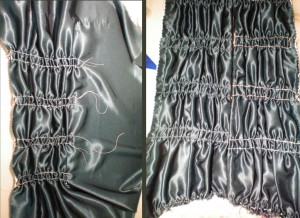
Hem Ruffle: I added a shirred ruffle to the bottom of the skirt. My design called for two rows of gathering just a few inches apart, so I couldn’t use my ruffler attachment foot. Instead, I gathered all eight yards the old fashioned way, using a machine basting stitch with loosened tension. It was dreadful, tedious work that took hours. Next time, I’ll try a different gathering method.
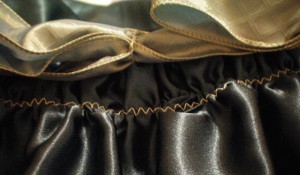
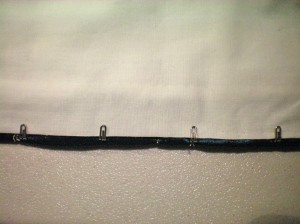
When I went to sew the ruffle to the skirt, I had a great deal of trouble with the satin sliding and shifting all over the place. The end result was an exceedingly crooked ruffle. The problem stemmed from the fact that the gathers were not secured to anything. They shifted and bunched up while I sewed the ruffle down, so I couldn’t focus on keeping the ruffle straight. I solved this problem by zigzagging the shirring to a twill tape stay. This secured the gathers, so I could concentrate on sewing the ruffle to the skirt.
Major Mistake: For some absurd reason, I used white thread and white twill tape. Both of these stand out against the dark teal of the ruffle. It would have been exceedingly difficult to redo it using darker twill tape and thread, so I opted to try and fix the mistake instead of redoing it. To prevent the twill tape from showing, I folded the upper edge down and hand stitched it—all four yards. Then, I had to figure out how to cover the white zig-zag stitching. In the end, I chose to cover the shirring with some of the aqua taffeta ribbon, which was just wide enough to cover the double row of white stitching.
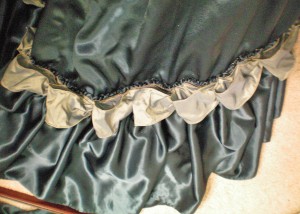
Embellishment: I folded the aqua taffeta ribbon into a series of loops, neatly tacked to one side like half-bows, all around the hem. My mistake turned out to be a blessing in disguise, because I love how the embellishment looks. Between the lining and the ruffle, however, the skirt is now quite heavy!
Construction Diary: Bodice
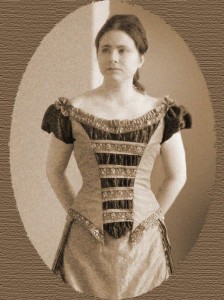
Since I decided to use Truly Victorian’s 1885 Cuirass Bodice instead of a ballgown bodice, I needed to make a number of significant changes to the pattern.
Alterations:
- Widening and lowering the neckline to create the typical just-barely-off-the-shoulder style popular for 1870s ballgowns.
- Altering the sleeves to be short and puffed.
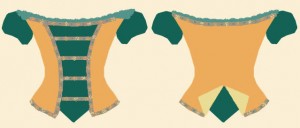
- Creating a shirred, pointed false-vest inset at the center front.
- Giving the bottom edge a more pronounced curve.
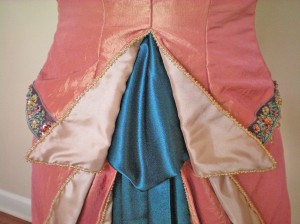
- Splitting the back tail and folding it into reveres, with a triangular panel underneath.
- The alterations I typically have to make in order to accommodate my broad back and sloping, forward shoulders.
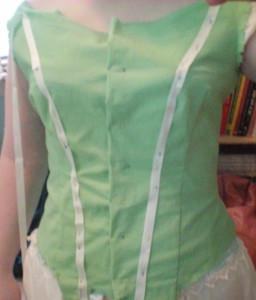
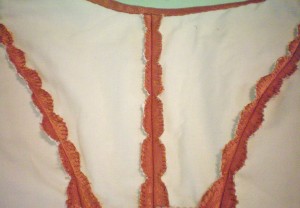
As you can see in the mockup below, I managed to sort out the alterations without much trouble. I pinned twill tape to the bodice front as a guide for the inset.
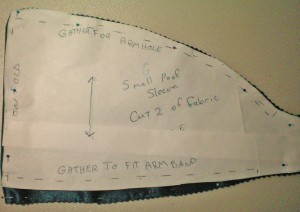
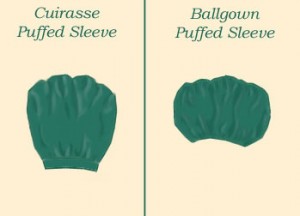
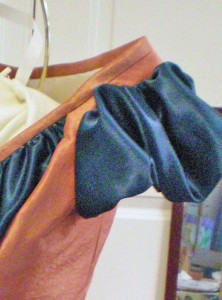
Sleeves: I found that I was not happy with the puffed sleeves that came with the Cuirasse bodice pattern. They were too long and not puffy enough, giving an entirely different silhouette than what I wanted. Therefore, I shortened the puffed sleeve pattern by about two inches, and used the advice given in Jean Hunnisett’s book: Period Costume For Stage and Screen: Patterns For Women’s Dress 1800-1909.
As per the instructions, I curved the bottom edge of the sleeve pattern. This gives it a rounder, more prominent puff. I made the lining deliberately shorter than the sleeve itself, which pulls the edges under and adds a bit of ballooning to the sleeve. The final product turned out exactly as I’d hoped.
Shirred Inset: In order to create the center front panel, I cut a wide rectangle of fabric and shirred it to fit the pattern piece. After pulling up the gathering stitches, I basted the edges, trimmed the fabric all around, and stitched everything securely.
When I went to make the second half of the bodice inset, I discovered that I’d accidentally cut two identical pieces instead of mirror imaging left and right. Fortunately, I had enough excess fabric to re-cut the piece.
Before sewing the inset to the rest of the bodice, I attached the hooks and eyes. Doing this before the bodice was assembled means that I could sew the hooks to the interlining but not the outer fabric, ensuring an invisible, yet solid anchor for the hooks. I then added the lining, using a historic technique that covers the hooks and eyes. As a result, the bodice does not gape and the hooks are neatly covered by the lining.
Fitting Blooper: When I pinned the bodice inset to the main bodice and then tried it on, I discovered that the bodice was several sizes too big. Much to my astonishment, I realized that when I designed the bodice, I somehow—impossibly—left out the bust darts! I distinctly remember considering the darts and working them into the design, but somehow they never made it into the final product.
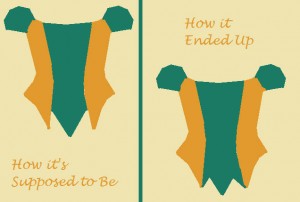
Then, I noticed another mistake I’d made. The bodice is designed to have a V at the center front, out of the shirred teal satin. It has another V on either side, out of the copper-gold taffeta. Somehow, it ended up with the side Vs being half out of the teal satin and half out of the copper-gold taffeta. It looks bizarre and I have no idea how it happened. Probably the same way that my darts mysteriously vanished!
My solution to both of these problems was the same: I took in the seam that connects the shirred inset to the bodice. I had to take it in by quite a lot, but the bodice now fits perfectly, with just enough ease for the boning.
Finishing: The edges of the bodice had to be finished, and that meant either hemming or binding them. It would have been difficult to hem the front and maintain the sharp points of the Vs, so I decided to try bias binding. I had to look up instructions online—Your Wardrobe Unlock’d has an article on bias binding that works beautifully every time—but even then, I still had trouble. After much aggravation, I finally I got it to work, and much to my relief, the points turned out perfectly.
When it came time to finish the interior, I decided to go the historic route and use clipped and rounded seams.
I boned the bodice using “artificial whalebone” . . . otherwise known as plastic cable ties. From what I’ve heard, they’re similar to real baleen (flexible and lightweight) with the added bonus of not being illegal. They’re a bit flimsy, so I doubled them up: two per seam. (Just to note: I would never use cable ties in a Victorian corset, as they are too flimsy to stand up to the rigors of corseting. For a bodice, however, they work just fine.)
Bertha: When deciding how, exactly, to make the bertha, I experimented with a few different ways.
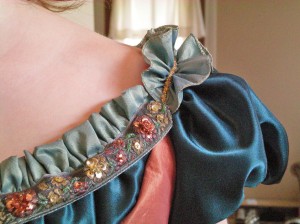
In the end, I combined my inspiration sources: I folded the taffeta ribbon in half lengthwise and gathered it along the front and back neckline, but then opened it up and let it ruffle across the tops of the sleeves. The full width of the ribbon fans out over the puffed sleeves. I had to choose how to cover the raw gathering stitches on the shoulder ruffle, which took a great deal of consideration. I decided to go with the same tiny, gold beaded rope that I used on the back of the overskirt.
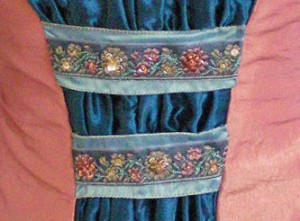
Embellishment: The Victorians were fond of their embellishments, so this ballgown has a lot of trim! I wanted to place bands of ribbon across the bodice inset, but I found that my shirring stitches were somewhat misaligned and the damask ribbon wasn’t wide enough to cover all of the stitching. To solve this problem, I chose to add a layer of shot taffeta ribbon behind the beaded ribbon. In addition to hiding my mistake, this provided some much-needed depth and nuance to the bodice’s decoration.
At first, I’d planned to edge the entire bodice with the damask ribbon, including down the sides of the vest inset. When I went to sew the ribbon on, however, I found that it was too much. Instead, I toned it down a little and edged only the hem and neckline with the damask ribbon. I added a narrow beaded rope to the edges of the vest inset. The hem also has the beaded fringe, so it coordinates with the overskirt.
The back of the bodice has a split tail of teal charmeuse, with gold taffeta reveres. These are trimmed with a tiny rope made of gold seed beads.
Construction Diary: Overskirt
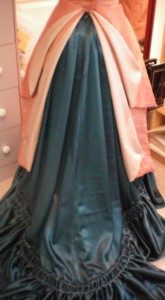
The overskirt went together surprisingly fast. I draped the entire thing by hand, creating my own pattern. The front apron extends to just below the skirt’s flounce, with an inverted V notch in the center. The sides of the front panel are pleated, causing the bottom edge to curve up slightly.
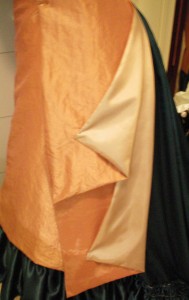
The side panels are comprised of two wedge-shaped layers, whose back corners fold into gold taffeta-lined reveres. The edges of the reveres are bound with copper-gold bias binding.
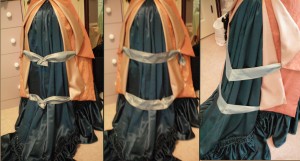
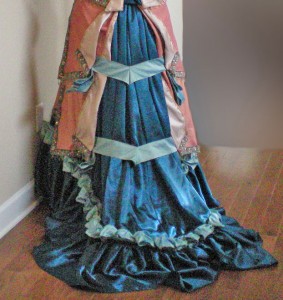
Swags: I tested several alternatives for the ribbon swags in the back. First, I tried them just draped across, but that looked much too plain. I then tried them with the centers tied into knots. This added interest, but didn’t really fit with the design of the gown. Finally, I tried them with the centers folded into miters, so that the swags angle downward into points. This suited the style of the gown best. I added loops of matching ribbon to the ends of the swags, to soften the tailored appearance and add femininity.
Embellishment: The back edges of the reveres are bound with copper-gold bias tape, which provides a finished appearance. They are also edged with a narrow rope of gold seed beads. The bottom and front edges are trimmed with sequined ribbon and beaded fringe.
The Finished Ballgown
Accompanying Project
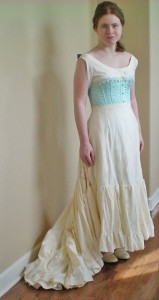
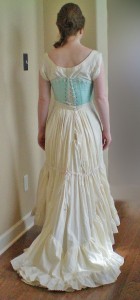
To accompany the ballgown, I made a corset of aqua silk, and a trained petticoat of ivory sateen, both of which are based on actual designs from the late 1870s.
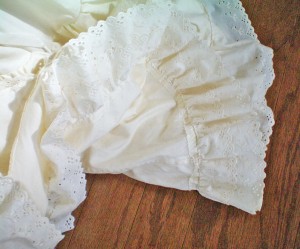
The petticoat has a double ruffle from the knees down, and a drawstring that cinches behind the knees. This controls the fullness of the skirt and provides support for the Natural Form style gown. It’s trimmed with an embroidered eyelet ruffle and has a matching eyelet balayeuse, or dust ruffle, basted to the underside. This helps protect the petticoat, keeping the trained skirt from getting dirty.
(For more information, please read the Tutorial: 1876 Trained Petticoat and the Sewing Diary: Aqua Silk Corset)
Closing Remarks
This project has taken me a full year to complete! I had many challenges along the way, as you’ve seen. I lost a lot of time due to a family emergency that required me to travel to California. When I returned, my bipolar disorder reared its head and sent me into a depressive tailspin from which I took nearly six months to recover. During that time, I was utterly unable to sew.
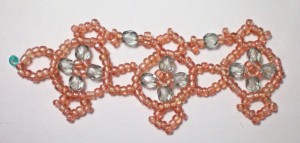
Just when I’d begun sewing again, another family emergency required me to return to California, and I was not able to get home again until just two weeks before the contest’s deadline. As a result, I had to give up on the matching shoes I’d planned to make, and the beaded necklace that I’d begun work on.
I’ve gained valuable experience in the construction of this gown and it’s been one amazing journey! Now the only question is, what should I sew next?

Pingback: 1876 Copper Ballgown | Yesterday's Thimble
Pingback: Lisha Vidler | Foundations Revealed