Tuesday’s Tips & Tricks: Needles and Thread
Threading a needle is one of the most basic skills a sewer needs to have. Here’s a few tips to help you out.
Thread
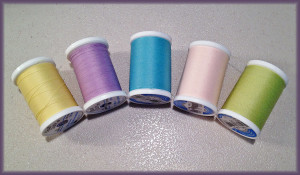
Thread comes in a rainbow of colors, but not all spools are alike. There are different types of thread for different purposes. Stick with an all-purpose thread, unless you’re doing something that requires a specific type of thread, such as embroidery or quilting.
Avoid “bargain” thread at all costs! It breaks easily, and it will deposit lint inside your sewing machine, which will have to be professionally cleaned out.
Cotton and cotton/poly thread used to be common, but these days, it’s hard to find. Actually, cotton thread really isn’t necessary unless you’re doing heirloom sewing or authentic historical costuming. Most of the time, 100% polyester thread will do nicely. If you’re working with silk, you might use silk or rayon thread.
When you’re ready to thread a needle, trim the end of your thread at an angle. Use small embroidery scissors, but make sure they’re sharp! Dull scissors will cause the end of the thread to fray, which makes it impossible to thread a needle.
A helpful trick is to thread the needle with the end of the thread that came off the spool first, not the end you just just cut. By doing this, you’re cooperating with the twist of the thread, which reduces tangling and knotting while you sew. However, some threads are twisted differently, so this doesn’t always work.
If you have trouble threading your needle, try dampening the end of your thread. Lick the tip of your index finger and thumb, then pinch the end of the thread with your damp fingers. Also, try holding the thread still and moving the eye of the needle onto the end of the thread, instead of trying to stick the thread through the eye of the needle. It’s a subtle difference, but it does help!
Needles
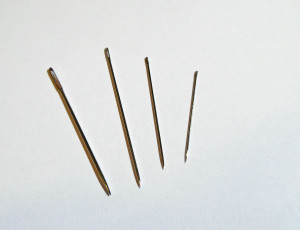
There are many kinds of needles for different purposes, and each type comes in a variety of sizes. Sharps are your all-purpose hand sewing needles. Betweens and quilting betweens are shorter, with a smaller eye. I prefer crewel needles, which are made for embroidery and therefore have a larger eye, intended for embroidery floss. I also love beading needles, which are long and very slender—perfect for sewing on doll-sized buttons, hooks and eyes, or snaps. If you choose a beading needle, avoid the “wide-eye” kind that are split down the middle for easy threading. They aren’t meant for sewing, so they’re blunt-tipped and will snag your fabric.
Choose the smallest size needle that will work with your thread. The thread must easily fit through the eye, but at the same time, a needle that’s too big will leave holes in your fabric. It’s a delicate balance.
One trick for threading a needle is to flip the needle over. Some needles have a slightly wider opening on one side, so if you can’t get the thread to go in, try the other side.
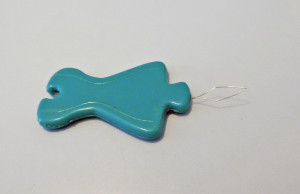
If you have a lot of trouble threading needles, try an inexpensive needle threader. Insert the thin wire loop into the eye of your needle, then stab your thread through the loop. Gently pull the wire back through the eye of your needle. It should pull the thread with it, thereby threading the needle for you. They can be used with machine needles, too, if your sewing machine doesn’t have an auto-threader.
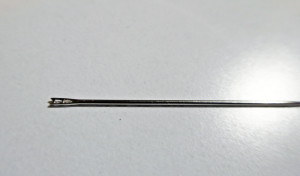
Also, check out self-threading needles. Instead of a traditional eye, these have a split opening, with a tiny hook at the end. Pull the thread through the split opening, and the hook will grab the thread and hold it while you sew. Be careful, though! Because of the hooked eye, you can’t slip a self-threading needle backwards through the fabric to undo a stitch. At least, not without risking damage to your fabric. Also, the sharp hook on the end is quite wide and could potentially leave holes. If you’re concerned, test the needle on a scrap of fabric, just to be sure it isn’t going to cause any problems.
~~*~~
Looking for more sewing tips? Check the Sewing Basics menu for a list of beginner-friendly articles.


One Response to Needles & Thread