A Sewing Diary
by Lisha Vidler
(Click on any illustration to view the full-sized image.)
Part I
This is the project that seduced me into historic costuming. I found many websites of dressmakers sewing replicas of costumes from film or TV, and decided I wanted in on the fun! I’ve had an obsessive love affair with The Phantom of the Opera for years, and when I had the chance to go and see Andrew Lloyd Webber’s show on tour, I decided to seize the chance to replicate one of the costumes. More than just a duplicate, I wanted my costume to be historically accurate. Like others before me, I kept notes every step of the way, so I could share the story of my adventure, both in sewing and in wearing the dress to see the show—and what an adventure it was!
June 19, 2005—Design
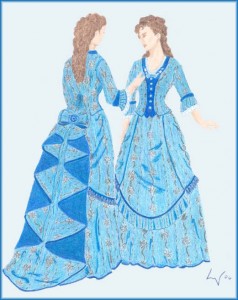
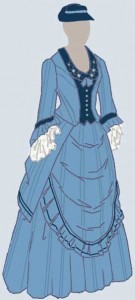
The so-called “Wishing” dress is the blue striped bustle gown that Christine wears in several scenes during the second act of The Phantom of the Opera. Most notably, she wears it while singing “Twisted Every Way” and, with the addition of a navy blue cloak and a red scarf, during the graveyard song: “Wishing You Were Somehow Here Again.”
There are several versions of this costume. Each major production—of which there are many, including a World Tour, a U.S. Tour, Broadway, London, Australia, Germany, Sweden, Spain, Korea, Japan, Canada, South Africa, and Brazil—creates its own costumes, each with subtle differences. I liked elements from several different ones, so I decided to mix and match the features I preferred, creating something unique.
Materials
The original dress is made from silk and velvet. The main fabric has a black and white striped floral design overlaid on blue silk. The color of the silk varies widely depending on the lighting. The actual hue is more of a turquoise blue, but sometimes it appears a slate gray-blue, a rich royal blue, or something in-between. The accent fabric is navy velvet. The lace and trims vary widely between productions.
In addition, there are several alternate versions of the dress which utilize different fabric. It’s surprisingly hard to find blue floral striped fabric, so I will go with something that replicates the spirit of the design, rather than copying it exactly. Most likely I will use cotton, since silk is out of my budget, but I will try to find something that’s historically accurate.
Features
Basically, the dress has three main parts: the bodice, the underskirt, and the overskirt.
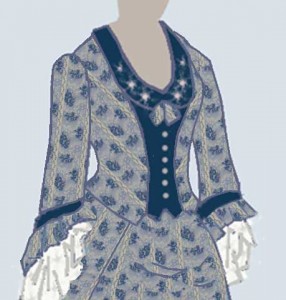
The bodice is very fitted, with elbow-length sleeves. The necklines vary between different V-shapes, with an occasional rounded square; I will do a modest rounded V. There is a velvet collar and faux vest insert, both trimmed with lace, ribbon, braid, and floral appliques. I plan to copy the basic bodice shape, with the vest inset. The bodice trim varies widely even within the same production, but I will follow the American version the closest. That is, I will have buttons down the front, and will put some kind of floral embroidery or applique on the collar, along with narrow lace and some kind of piping or braid along the edges.
For the sleeves, I prefer the Canadian version, which has rich, full cuffs of lace, as opposed to the others, which tend to skimp on the lace. Some have a layer of lace that is edged with blue, but I cannot find a suitable lace with which to replicate this.
The Australian version of the skirt is pleated, but most are simple gored skirts. The dress has a built-in petticoat, with a padded bustle and hoops that hold the back of the skirt out. Some skirts have a pronounced bustle, while others do not. I want to use historic undergarments, which means a separate bustle, petticoat, and corset. While I like the look of the pleated skirt, it takes three times as much fabric, so I doubt I’ll be able to afford it.
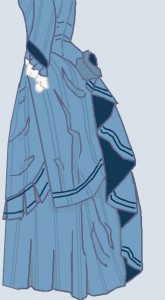
The overskirt is comprised of three parts. The front is an apron edged with a pleated ruffle. The European versions are made of two diagonal pieces stitched together down the middle, forming a chevron of stripes, while the others are made of one panel with vertical stripes. I prefer the latter. The sides drapes are triangular wedges that are pulled toward the back and decorated simply. The back drape is the most complicated, being a curved panel where the sides fold back on themselves forming the trademark waterfall effect.
February 10, 2006—Patterns
Today I ordered my patterns from Truly Victorian. After much discussion on their message board, I decided to go with an Early Bustle style rather than the more subdued Natural Form style. Both are accurate for the show, but the majority of the “Wishing” gowns have a pronounced bustle. I will use the 1881 Dinner Bodice, since it appears to need the least amount of modification. For the skirt, I will use the 1870s Underskirt, and I will draft my own overskirts. For petticoats, I will simply use the underskirt pattern, shortened by a few inches, along with the Petticoat Bustle. I will make the Combination to go underneath it all, and will use Simplicity #7215 for the corset.
Patterns:
I also ordered the “Clio” hat, in case I want to wear this outfit on its own, as a Victorian costume rather than a Phantom of the Opera costume. I have a long clip-on hairpiece that I will use to disguise my short, modern haircut.
February 17, 2006—Lace
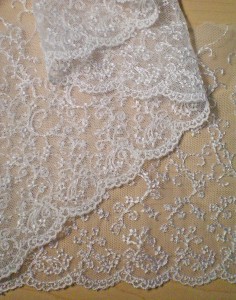
I found the perfect lace for the sleeve cuffs! It’s white, so very soft, embroidered with a delicate pattern, and it wasn’t cheap. It came in two versions: wide with one raw edge and one slightly scalloped edge, and narrow with both finished edges scalloped. The wide length will be perfect gathered and sewn to the sleeves. The narrow length will either be cut in half or folded and placed along the neckline. I never cared for the idea of lace lining the neck, until I saw this lace. It instantly changed my mind! It’s beautiful. They only had three yards left of the narrow lace, so I bought all of it. And I bought two yards of the wide lace.
February 23, 2006—Combinations & Corset
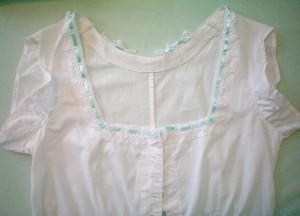
Today I had my mother help take my measurements. She convinced me to make a mockup of the combinations, to be sure they will fit before I cut my good muslin. I visited Hancock Fabrics and bought some small, pale aqua buttons for the combinations. I figured, the whole thing is going to be white, so why not have a small touch of color?
I have been working on the Simplicity corset. It fits well, and I’m ready to make the lacing holes.
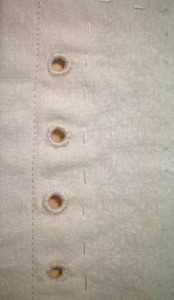
I’ve had quite the discussion online about whether to use grommets or to hand-bind the eyelets. Hand binding will be both pretty and authentic, but it obviously will not have the strength of a metal grommet, and it will be long, tedious work to hand bind 36 eyelets. On the other hand, the fabric store does not sell anything but cheap eyelets, which I’m told are prone to popping out. I would need to order the proper grommets—and a setting kit—online, and somehow find a rubber mallet to use. This seems like a lot of trouble, so I’m leaning towards hand binding. Fortunately, I happen to have a book on Victorian doll clothes that has a page on making hand-bound eyelets: Sewing Victorian Doll Clothes by Michelle Hamilton.
March 4, 2006—Corset & Eyelet Ruffle
I am three-fourths of the way through the eyelet-making. It’s taken a long time! At first, I only averaged three a day. Now I can do five or six.
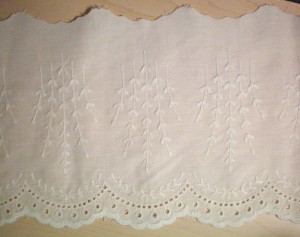
On eBay, I found a perfect embroidered ruffle to use in trimming my petticoat. It’s old-fashioned looking, it’s plenty wide enough, and comes with more than enough yardage. The only problem is, the description calls it ivory, which may not look good with my white muslin petticoat. I could make the petticoat ivory, but then I’d have to make the bustle ivory, and the combination ivory, and the corset ivory. . . . I’m obsessive about matching, you see. I want a set of matched undergarments, so they must all be the same color. However, I am so far along in making the corset that I’m not going to stop now and change fabric! White it will be, and I’ll figure out what to do with the ruffle material when it arrives.
March 21, 2006—Corset & Eyelet Ruffle
Bad news . . . I have to make a new corset. Nearly done with the Simplicity corset, and what do I find out? It’s from the wrong era! It’s a Civil War corset, from the 1860s, which is a very different silhouette from late Victorian. I need something longer and curvier and stronger. How aggravating!
Speaking of aggravation, my embroidered ruffle arrived. It’s not a pale ivory as the photo implied. It’s ecru, and a very dark, yellowish ecru at that. (It photographs much lighter than it appears in person!) It certainly won’t go with a white petticoat, and it will be difficult to find an ivory to match it. It is, however, quite pretty with all the embroidery.
Two months, three weeks to go, and I’ve nothing finished! Although, I did cut out the mockup for the combinations.
March 30, 2006—Eyelet & Antique Petticoat
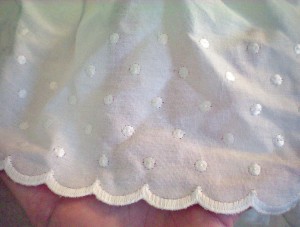
I’ve bought some eyelet for the bustle’s ruffled overlay. 15 yards of stiff cotton, embroidered with white dots, and having a scalloped edge.
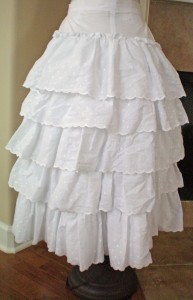
Unfortunately, it’s very cheap-looking up close. I suspect the seller made it herself on a sewing machine that has a few embroidery stitches. The fabric is quite stiff, with an obvious grainline. Before I washed it, it was stiff enough to use as the bustle itself! Now it’s softer, but still not as nice-looking as I’d hoped. I will use it for the bustle overlay: a panel covered with several tiers of ruffles, which serves to hide the hoop wire.
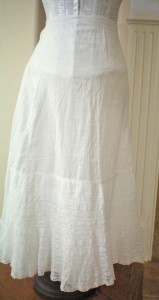
In other news, I’m looking at antique petticoats on eBay. I thought it might be easier than making my own, since I’m having such a hard time finding eyelet. I found one that I like. It’s made to wear with a small bustle. The waist is a bit small, and the seller is quite full of himself. He’s overcharging on shipping, with “non-negotiable” rates. And he charges $7 for insurance that only costs $1.30 from the post office! I’m hesitant to deal with him because of this, but the petticoat is so beautiful. . . .
April 7, 2006—Combinations & Corset
I’ve cut out the combinations and am ready to begin sewing. Finally, my first item of clothing for this project!
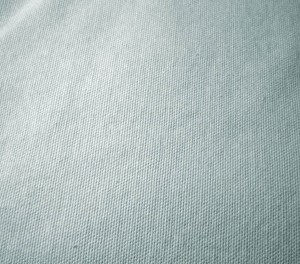
In planning for my new corset, I purchased three yards of twill on eBay for the interlining. I found some “seafoam” duck that might work for the outer layer. Historically, corsets frequently came in colors other than white, so I decided that I wanted one of pale aqua, to coordinate with the buttons on my combination. Now, I need a corset pattern . . . and a grommet setter . . . and boning.
May 25, 2006—Significant Update
Combinations
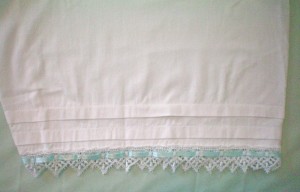
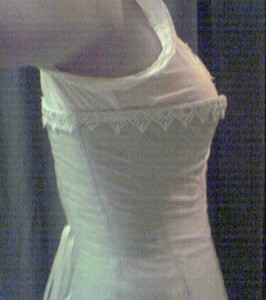
The combinations are finished! They look beautiful, with Venetian lace (a gift from my mother) around the neck and legs, an aqua ribbon threaded through it, and matching pale aqua buttons. I left the sleeves plain, because any more decoration would be overkill.
I found the pattern fairly easy to use, although on occasion the directions made assumptions that you already knew how to do certain things, and so some instructions were left out. I had to make a few guesses and interpretations, but overall it worked really well.
Petticoats
The bustle is nearly finished. I need to rinse the blue markings off (and stop using the water-soluble pen, unless I want to wash every single piece of clothing I make!) and sew the boning into the casings. The ruffled overlay is in the hands of my mother, because I simply don’t have the time to gather and sew five tiers of ruffles.
I adore my new antique petticoat. It’s definitely old, made of linen with cotton lace. The front is flat and smooth, but it’s fuller in the back, with several pleats taken at the back opening. The waistband is adjustable, with a drawstring so you can cinch it tighter or looser, as needed. I think it was meant for a much smaller bustle than mine, because it fits quite snugly over the bustle petticoat. (For a detailed description, please see the article Two Antique Petticoats) It’s sturdy and beautiful; I will wear it with joy.
Corset
We had a bit of a fiasco with the corset fabric, with the end result being that I ran out of time to make my own corset. Someone from the Truly Victorian message board graciously offered to sew a corset for me, for little more than the price of materials. She used the Laughing Moon “Dore” corset. It’s actually a bit big—it laces all the way closed—so after this is all done, I’ll come back and make my own corset.
What happened with the fabric was, the eBay vendor who sent me the twill either advertised it wrong or sent the wrong fabric. It was labeled just as “twill” but what arrived was a tan stretch fabric, much darker than it was advertised—and I definitely didn’t want a stretchy fabric for a corset! I exchanged the fabric for an off-white canvas instead, and that came with more aggravation. The seller tried to extort money out of me, claimed the mistake was my fault, and ended up sending me replacement fabric that was stained with red and blue streaks. It was all very annoying and ended with my first negative review on eBay. Shortly afterward, the vendor ceased to be an eBay seller.
Dress Fabric
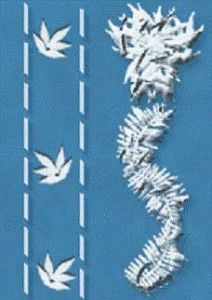
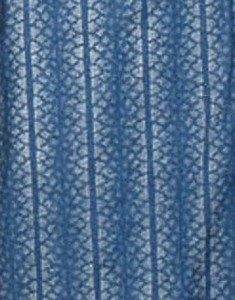
I bought the fabric for the dress! It’s a reproduction 1860s Civil War cotton. I bought 15 yards for a total of $75 plus shipping. The seller was wonderful! The fabric was discontinued, so the seller went out of her way to find more yardage for me, and when part of it was flawed, she sent me extra to make up for it. The fabric itself is not an exact match for the original “Wishing” gown fabric, but I believe it conveys the spirit of the design. It’s a dark blue that changes color depending on the light: sometimes navy blue, sometimes midnight blue, sometimes a dark country blue. It has no floral pattern, but clusters of ivory dots that form a lacy striped pattern.
My dear grandmother gave me some money to help with the dress; I’ll probably put it toward the rest of the items I need: lining for the overskirt, a solid dark blue material for the vest, collar, cuffs, and the waterfall train’s backing, as well as ribbon, braid, and fringe for trimming the dress. Since my dress will be cotton instead of silk, I won’t use velvet for the contrasting pieces, but most likely a solid blue cotton, like broadcloth. The striped fabric is such an unusual shade of blue, it’s going to be hard to find anything to match.
Now I must cut out the mockup of the skirt, which I will use as an extra petticoat. After that, I need to start planning the overskirt’s draperies. I’ll cut doll-sized versions first, to determine the general shape, and then then figure out how to make them full-sized.
June 18, 2006—Pivotal Update
One year has passed since the conception of this project. As of today, the costume is not quite finished, but I did wear it to see The Phantom of the Opera. Everything that could go wrong, did . . . and it was not quite the experience I’d hoped.
The show was performed in St. Louis, MO, a drive of about four hours from where I live. We planned to leave the morning of the show, spend the night afterwards, and then see the show again the following day—the matinée, with cheaper seats—and then drive home. Well, the day loomed ever closer, but the harder I’d work on the costume, the more that still remained to be done. It felt like trying to run underwater, struggling and straining, with few results and much frustration.
We had to leave on Friday morning. On Tuesday, I moved operations over to my mother’s house, so she could help me finish everything up. Wednesday, I returned to her house and stayed the night; both of us worked until 3 o’clock in the morning. Thursday, we stayed up until 4 a.m., despite having to leave early Friday morning to get to St. Louis.
Waterfall Drapery
We had a great deal of trouble with the waterfall drapes, because the tiny mockup version I had made was, evidently, not to scale with my height. I put my father to work on figuring out how to make it the right length and width for my size, while still maintaining the right shape to produce the waterfall folds. It took him awhile, but eventually he came up with a scale drawing that worked when cut out and folded. Translating that onto full-sized fabric proved more difficult.
The first problem was that I have never been good with math and so I misinterpreted the ratio he gave me, taking “3 centimeters = 1 inch” and somehow coming up with a final product that was 8 feet long. I didn’t realize the problem until Thursday, after I’d cut it out. It took some time, but I managed to recalculate and come up with something that was a little closer to being my size. Then I spent hours trying to make the folds come out properly, and failing. Finally, I got the idea to measure the paper model’s folds and size them up according to the ratio. I placed strands of yarn to mark where the folds should be on the fabric . . . and finally, the folds came out perfectly.
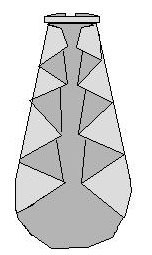
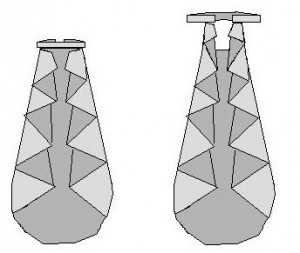
And yet, something was still wrong, for there was extra fabric at the top that shouldn’t have been there. In the diagram below, the image on the left is how the train should have looked once folded. The image on the right is how it actually appeared. In the end, I solved the problem by trimming the excess fabric off the top and reattaching the waistband.
The Bodice
The bodice took more time than anything. I’d never done a Victorian bodice before, so I had no idea what I was doing. Plus we ran into a few snags. Once at Mom’s house, I realized that the fabric I had for the interlining was not wide enough to use. Mom graciously sacrificed an old tablecloth to the cause—the only material we could find that was stiff enough to use as an interlining. (Shh! Don’t tell anyone, but my bodice is interlined with green and white plaid!)
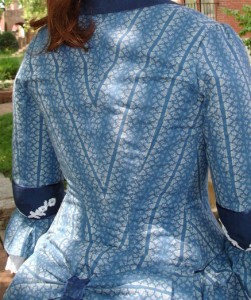
It took hours to cut out all the layers, because we had to get the stripes lined up right. That was a nightmare solved with tracing paper. It was tedious to trace all of the stripes onto the paper, but we needed to make sure that not only did the stripes match up at the seams, but that the pieces on either side were mirror images of each other. Each pattern piece had to be cut out one layer at a time. They had to be sewn together carefully, to maintain the alignment of the stripes. Every time I turned around, a new problem popped up in regard to the stripes.
When we left on Friday morning, the dress was still not finished!
To Be Continued in Part II. . . .

Pingback: All About Me, pt. I | Yesterday's Thimble
Pingback: The Elusive Waterfall Skirt, Part I – Your Ward
Pingback: Writing a Sewing Diary – Your Ward
Pingback: 10 Tips for Better Costuming – Your Ward
Pingback: 10 Tips for Better Costuming | Foundations Revealed
Pingback: The Elusive Waterfall Skirt, Part I | Foundations Revealed
Pingback: Writing a Sewing Diary | Foundations Revealed