
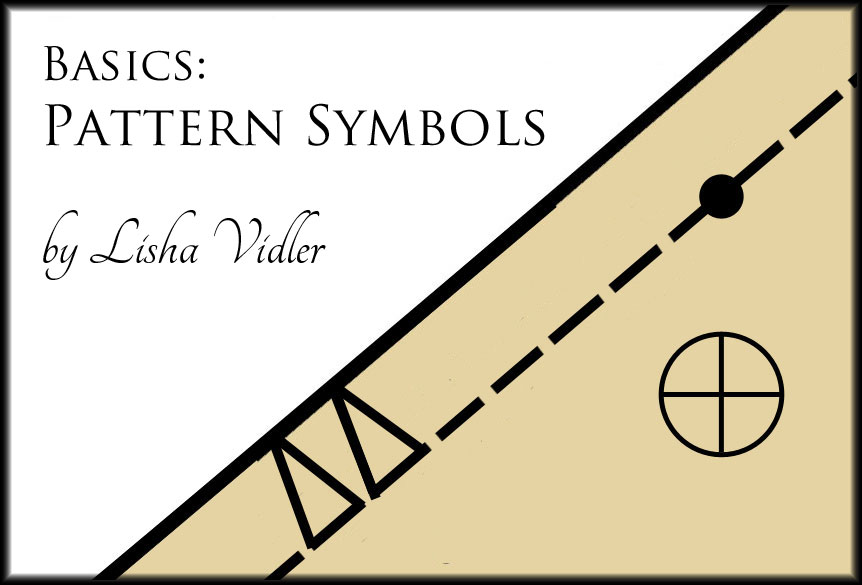
Commercial patterns can be hard to interpret, what with the triangles, circles, and arrows scattered all over the pattern pieces. What do these symbols mean? Let’s find out!
- Lines
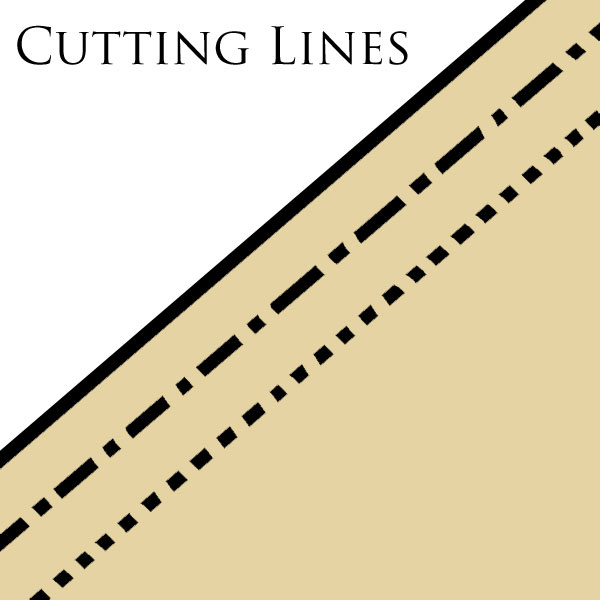
The outer edge of the pattern is where you’re supposed to cut. It’s usually marked with a solid black line. If the pattern is multi-sized, each size will have its own type of line—usually dashes of varying lengths.
Cutting Lines
|
Tip Cut as close to the black line as possible—but on the outside of the line, not the inside. In other words, make sure your cut pattern is still outlined in black! |
- Dashed Lines
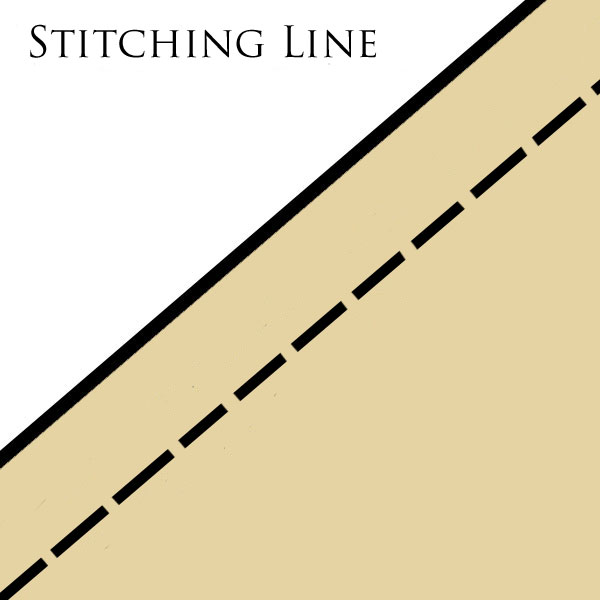
It’s rare for commercial patterns to mark the stitching line or seam allowance, but you’ll sometimes find this on vintage or independent patterns. The line will be narrow and dashed, always running parallel to the edge of the pattern. It tells you exactly where to sew, when you’re stitching two pieces together.
Stitching Lines
- Double Lines
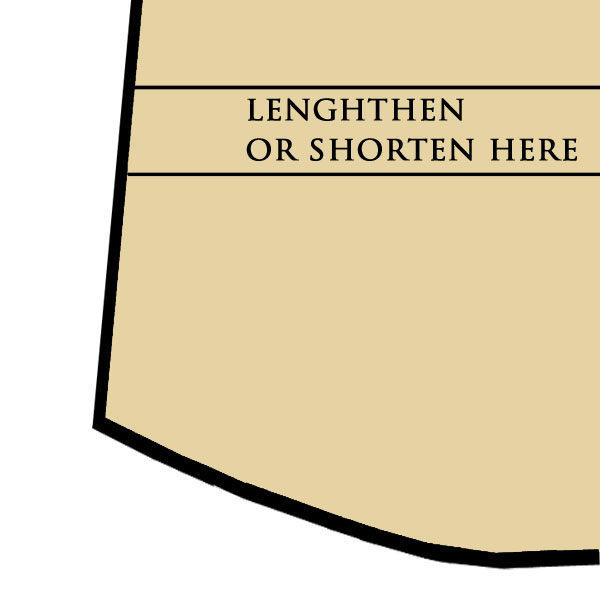
Many patterns have a set of double lines running across the width of the piece, usually marked, “Lengthen or Shorten Here.” If you need to shorten the pattern (for a petite size), or lengthen it (for a taller size), these lines mark the best place to do so. Fold along the lines to shorten the pattern, or cut between them and add extra tissue to lengthen the pattern.
Whether shortening or lengthening, you’ll probably need to redraw the outer cutting line, just to make sure it’s straight and accurate.
Double Lines
- Dashed-and-Dotted Lines
To mark the center front and center back of a garment, the pattern may have a dashed-and-dotted line. This is helpful when you’re fitting a pattern, as you’ll know exactly where the center front or back is meant to be. It may be labeled with “CB” for center back and “CF” for center front.
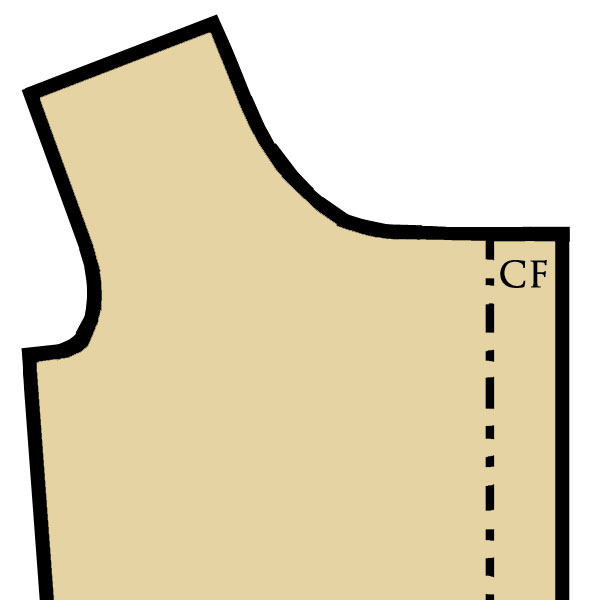
Dashed & Dotted Lines
- Dashed & Solid Lines
When a pattern shows a short dashed line beside a short solid line (or two short solid lines) with an arrow pointing from one to the other, it’s indicating where to fold pleats. Pinch and fold the fabric in the direction of the arrow, then pin or baste it in place.
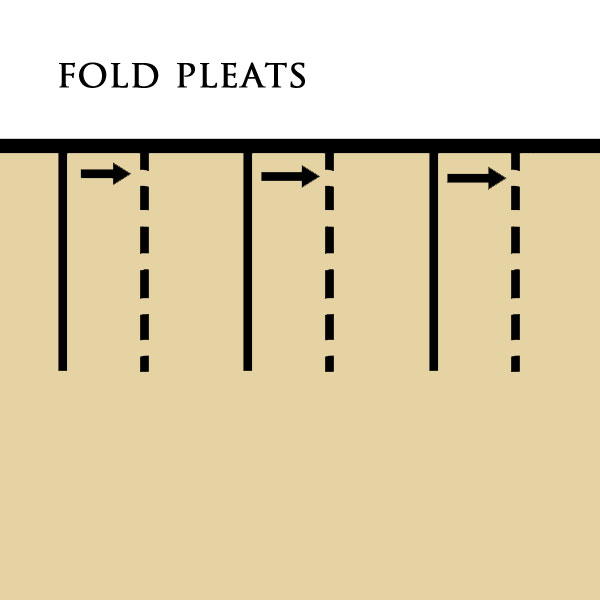
Pleat Folds
- Barred Lines
These look like extra-long capital I’s. Their purpose is to mark the placement of buttonholes.

Buttonhole Lines
- X’s
A small X marks where to place buttons.
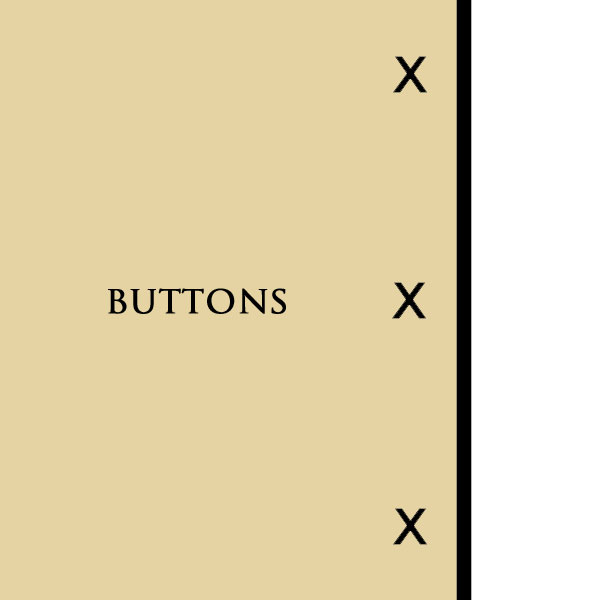
Button Placement
- Double-Headed Arrows
The long double-headed arrow running down the middle of the pattern is the grainline arrow. It shows you which direction the pattern should be oriented. The grain of the fabric should always run parallel to the grainline arrow.
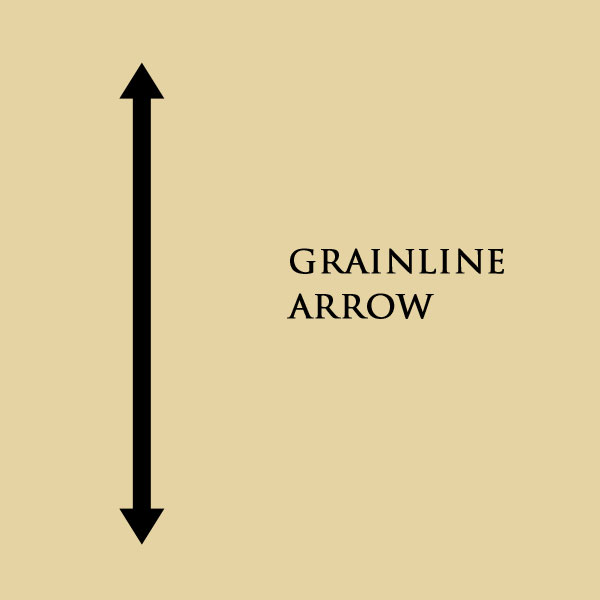
Grainline Arrow
|
Tip Make sure all the pattern pieces face the same way. This is especially vital if your fabric has stripes, plaids, or a directional print, where it would be obvious if one pattern piece was cut in a different direction. It’s also important if your fabric is stretchy, or if it’s napped, such as satin or velvet, where the fabric looks different depending on which way it’s facing. If you’re trying to match stripes or large prints, you’ll need to cut each piece as a single layer, instead of folding the fabric in half and cutting both layers at the same time. |
- Bent Double-Headed Arrows
Sometimes, there’s a double-headed arrow that’s bent at the ends, with the arrowheads pointing sideways. These arrows always point toward the edge of the pattern, which means that edge goes on the fold. Instead of placing the pattern piece somewhere in the middle of the fabric, place it right up against the folded edge. When the fabric is opened up, you’ll have one large piece.
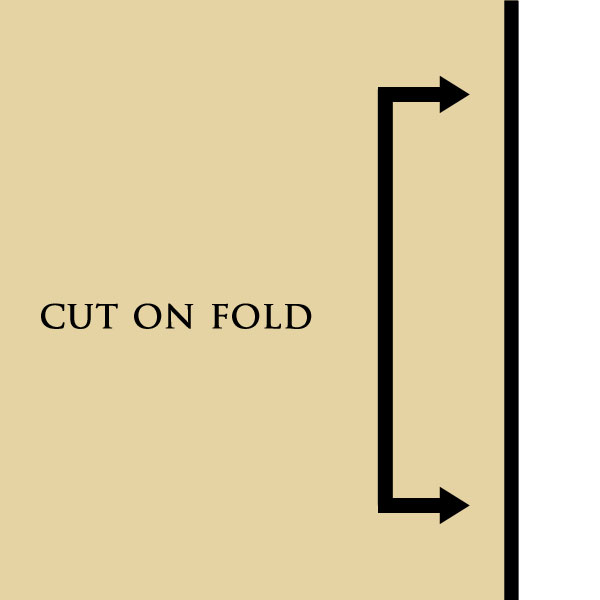
Fold Arrow
- Small Triangles (or Diamonds)
Most patterns have small triangles (or diamonds) placed every so often along the outer edges. Their appearance can vary—they might be solid or outlined, thick or thin, etc. Either way, they’re called notches, and they’re meant to be matched up. In other words, when you pin two pattern pieces together, the notches on each piece should line up with each other. If they don’t, you have a problem. There’s four possible explanations:
- #1. You’re trying to match up the wrong pattern pieces.
- #2. Your pattern pieces simply aren’t aligned properly.
- #3. Your fabric has stretched or distorted.
- #4. You didn’t copy the notches accurately.
Sometimes, there are clusters of two or three notches, or in very complex garments, four or more. The number of notches usually increases as you move toward the back of the garment. If a pattern has a triple-notch, that seam probably goes in the back, while the double-notches go on the sides, and the single notches go in front. Knowing this can help you tell the front from the back, which is useful if your pieces look similar and you forgot to label them.
So long as you always match corresponding notches together, you’ll be fine.
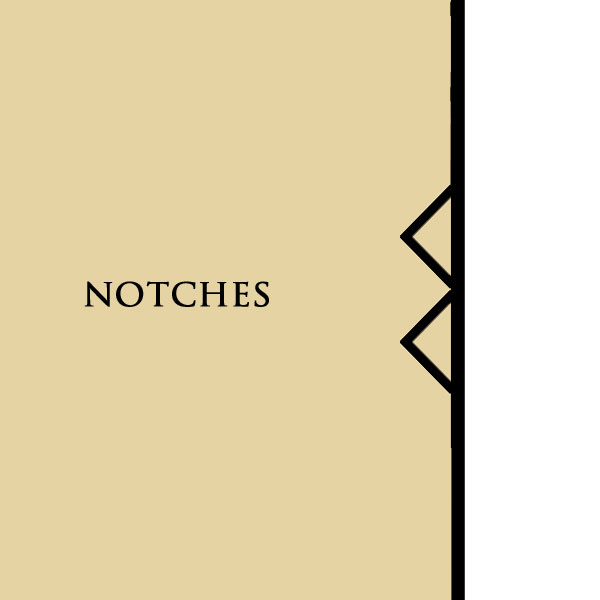
Notches
- Diamonds or Giant Triangles
If you see a large triangle that stretches from the bust to the waist, or a diamond that extends from the bust to the hips, it’s a dart. (Usually, the lines are dashed, but occasionally you’ll see one that’s drawn with solid lines.) Darts are sewn to add three-dimensionality to a garment, so it will fit the curves of your body.
Many darts are marked with dots at the tip and at the seam allowances. Some also have a thin, solid line running down the center, which shows you where to fold the fabric prior to sewing the dart. If there is no fold-line, fold the dart so the seam allowance dots line up, and then sew along the dashed lines.

Darts
- Crossed Circles
A circle with a cross or X through it is used to mark the center bust point—the apex of the bust, which generally falls at the middle of your breast. (About where your nipple is, provided you’re wearing a decent bra.) Sometimes, the same symbol is used to mark the waistline and hipline, too. Use these symbols to help you fit the pattern correctly.

X’d Circle
- Dots, Squares, Etc.
Dots, squares, and other small shapes are used as match points, much like notches, or they’re used to indicate where to start and stop sewing. For example, a dot halfway up the center back of a skirt pattern probably indicates where you should stop sewing to leave room for the zipper. The square on a sleeve head is going to line up with a corresponding square on the armscye, so you can attach the sleeve properly. Dots on the side of a pants pattern will indicate where the in-seam pockets go.
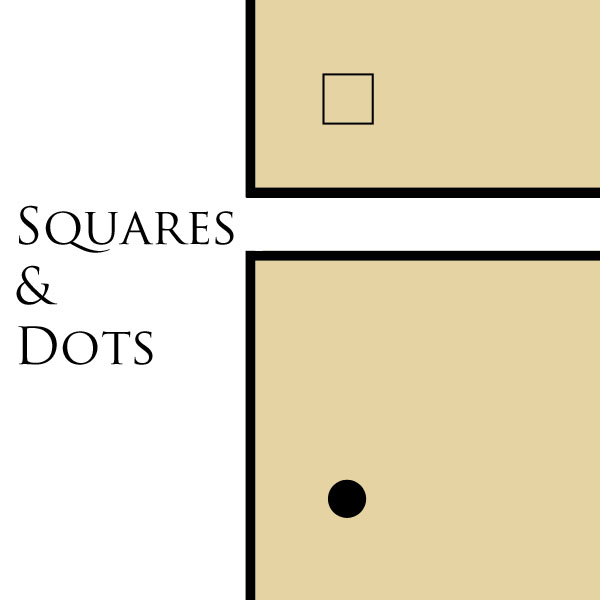
Dots & Squares
While these symbols are fairly universal, some independent patterns have their own unique symbols. If you aren’t sure what a symbol is for, check the pattern directions. There’s usually a key that will tell you what everything means.
~~*~~
Looking for more sewing advice? Try the Sewing Basics menu for a list of beginner-friendly articles. Also, check out the Tutorials, Articles, and Sewing Diaries.
10 Responses to Basics: Pattern Symbols