A Sewing Diary
by Lisha Vidler
(Click on any illustration to view the full-size image.)
Patterns
- Butterick 4254, modified
Inspiration & Materials
Until recently, I had little interest in costume from the 1700s. That all changed the moment I found the right fabric. To my dismay, I realized that before I could start on the dress, I would first have to create a set of 18th century undergarments. My discouragement came from the inevitable delay this would cause in the creation of my new dress. Nonetheless, the sooner I got started, the sooner I would finish, so I set out immediately and created a pair of stays.
I wasn’t too concerned with historical accuracy—only that it have the proper look. That is to say, I didn’t have the inclination to sew everything by hand, nor could I afford all-natural fabrics. Still, I did my best to find fabrics that at least looked authentic, and I chose a pattern that appeared to be the right shape.
Construction
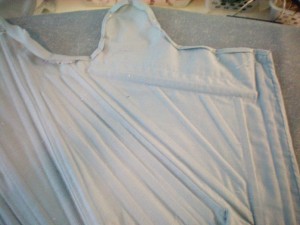
For the mockup, I chose from my stash a sturdy grayish-blue cotton that strongly resembled linen. It was a remnant, so I just managed to cut out the entire pattern, but had to do quite a lot of piecing for the bias binding.
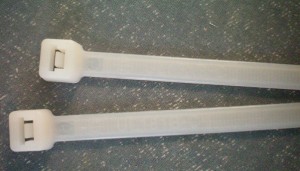
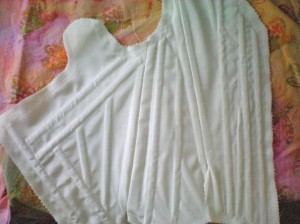
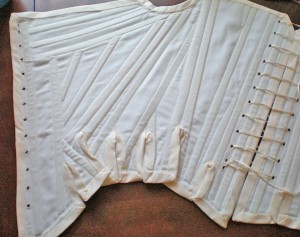
For the boning, I used heavy-duty cable ties—also known as duct ties—but soon discovered that I had only enough for little over half the stays. I was unable to find the exact same cable ties, and my new supply of cable ties were somewhat thinner, lighter in weight. Thanks to a healthy dose of obsessive compulsive behavior, I couldn’t bear the idea of my corset having different levels of support on either side. Thus, I only finished the first half to check for fit.
-
Tip: Instead of using regular cable ties, I used heavy-duty Duct Ties, as found in the air-conditioning department of my local hardware store. They are quite long, ¼” wide, and the perfect thickness for use as historic boning. Very sturdy! I call it “artificial whalebone.”
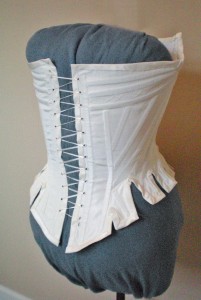
For my final version, I used a lovely pearl taffeta found in the remnant pile at a local home decorating fabric store. I couldn’t find any mention of whether 18th century stays had been made of taffeta, but stays were often made of silk, and they did use silk taffeta quite a lot back then, so I figured it would be okay.
Construction
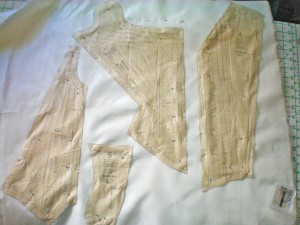
I’ve cut out all the pattern pieces, with some modifications. The back now has a V neckline, because the original back seemed awfully high. I also raised the front neckline by about an inch, to compensate for my 34-D bust. I’m using a tough canvas for the interlining. The lining is a fabric that used to be an eyelet-trimmed flat sheet, made of cotton or cotton blend, and incredibly soft to the touch.
-
Note: Traditionally, I use a size 14 pattern. I accidentally bought a smaller pattern, but it’s a good thing! Size 10 is almost too big! They must have added a lot of ease to this pattern.
Update—September 30, 2009
One half of the stays are nearly done. I installed the boning, and all that’s left is to add the bias binding. I did have a few hiccups along the way. . . . Like the three times that I unwittingly folded part of the stays under and sewed it to itself.
Mainly, that’s because it got awkward with all the boning in place, and it was very hard to maneuver through the sewing machine. Parts had to be folded out of the way . . . honestly, I didn’t mean to fold them directly under the path of the needle! And since it’s taffeta, all the stitching shows, even after you remove the thread.
Update—October 1, 2009
Once again, I accidentally sewed part of the stays to themselves. That’s getting really old! Right now I’m about a quarter of the way done with sewing the boning into the second half of the stays. The first set still needs bias binding, but I thought I’d wait and do both of them at the same time.
Update—October 2, 2009
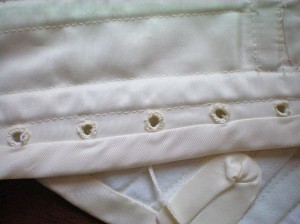
The stays are done, save for the binding. And the eyelets. I keep forgetting about the eyelets! I must be able to lace the stays (duh!). I plan to do them by hand.
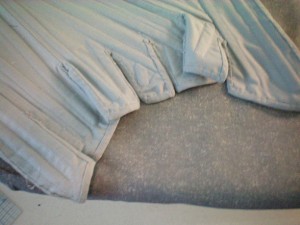
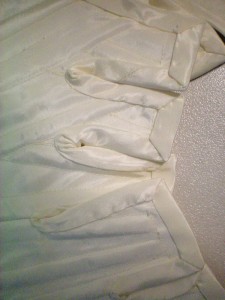
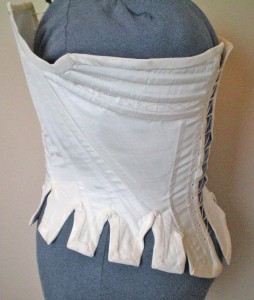
I really like how the bias tape looks; particularly, how the taffeta makes a crisp fold. It shouldn’t be too hard to attach it, except for the tabs. Those are more difficult, as I found when I bound the mockup stays. The only difference (besides the fabric: quilting cotton vs. taffeta) is that the taffeta binding is ½” wide, and the cotton binding was ¼” wide, and I’ve heard that wider binding is harder to attach. I guess we’ll find out.
Oh, and guess what else I did? When sewing the bias strips together, every other piece was sewn upside down, with the seam on the wrong side. I had to unpick the stitching, flip the bias tape the other way, then stitch it back together. It was—needless to say—quite annoying.
Update—October 3, 2009
The binding is about three-quarters done. It’s tedious work that hurts my neck and shoulders (all that slouching forward to see what I’m doing). So far, so good, though. I’m definitely appreciating the article on bias binding from Your Wardrobe Unlock’d. Without that, my binding would look a whole lot worse, as evidenced by my first attempt at binding the curved shoulder tabs. I did it my own way, and it came out looking uneven, bunched up, and quite terrible. I then redid it using the instructions from YWU, and behold! It looks fabulous. (Or at least, not terrible.)
If all goes well, I’ll have the binding finished tomorrow, and the hand sewn eyelets begun. I have no idea how long those will take. My hand sewing tends to be slow, so I’m not expecting a speedy job.
Update—October 6, 2009
I finished the binding and it turned out much better than I expected. Even the tabs look okay. I think they would look less wrinkled if I used a narrower binding, but it still looks fine.
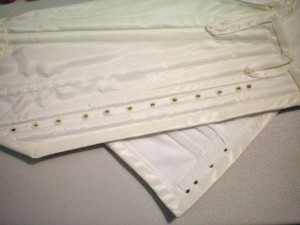
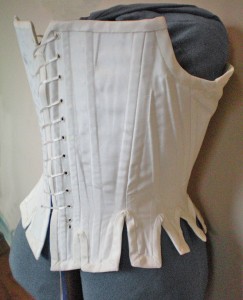
Also, I’ve finished half of the eyelets on one half of the stays.
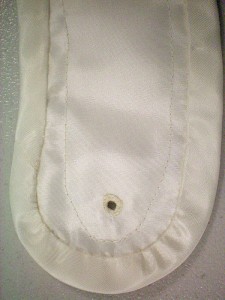
That means I’m a quarter of the way done with the eyelets. I’m having so much trouble with them! I can’t seem to get them uniformly round, or large enough. Sometimes they come out uneven, and I have to redo them. At this rate, the corset might be done by the end of the year. . . .
Update—October 9, 2009
Today I finished the eyelets. Hooray!
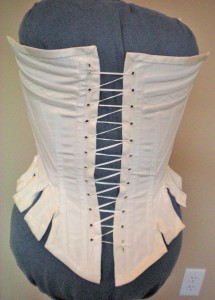
I strung some cotton crochet thread through the eyelets as temporary lacing, and tried the thing on properly, for the first time ever. As far as fit goes, it might actually be too big! Also, it’s a bit high in the armscye, but I think the stays are riding up, because when I tug the whole thing down, the armscye problem goes away. I’m not sure how to fix that sort of problem, but it might go away when the stays are properly laced.
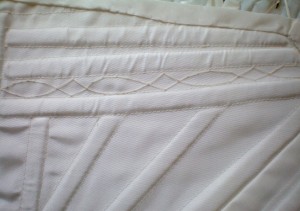
I decided that, as pretty as the pearl taffeta is, the stays needed some decoration. I took a page from the Kyoto Fashion book (specifically page 127), and copied the embroidery from a pair of 18th century stays. It fits perfectly in the space between the front horizontal boning channels. I used a shiny rayon thread in a champagne color, and I love the result. It’s subtle, just what I was going for.
Now that I know my corseted measurements, I can order the dress pattern and get started on the gown!
Update—October 14, 2009
After trying the stays on again, this time with a ribbon lace (instead of fragile crochet thread that kept breaking), I noticed that the shoulder straps are set much too wide for me. I know the proper look for the 1700s is a wide torso with shoulders thrust back, but it’s very uncomfortable. I wore the stays for about fifteen minutes and it resulted in a backache that lingered for four days!
It seems that the shoulder straps are the cause of all the things I dislike about these stays, so I chopped them off. I gave the top edge a nice shape, and now it looks similar to extant strapless stays. Perhaps they are too lower-class for my upper middle-class image, but who’s going to see them? They fit much better now, and I was impressed with how comfortable they are. I wore them for about half an hour, and had no back pain, no claustrophobia, no trouble breathing or moving around. I could have worn them for hours.
Now, onto the rest of my wardrobe!

Pingback: Corset and Stays | Yesterday's Thimble
Pingback: Taffeta | Yesterday's Thimble
Pingback: Writing a Sewing Diary – Your Ward
Pingback: Lisha Vidler | Foundations Revealed
Pingback: Writing a Sewing Diary | Foundations Revealed