This article was first published at Your Wardrobe Unlock’d.
Click any illustration to view the full-sized image.
Those who have volunteered to sew the costumes for an amateur theater production have one of the most important jobs. Costumes must establish the time frame for the play, and help provide characterization, but they also need to be a visual treat, luring the audience deeper into the story being told. It’s a daunting task, to say the least! If the costumes aren’t historically accurate, or if they’re ill-fitting, or have construction issues, the visual illusion will be shattered.
In this three-part series, we’re discussing ways of improving your amateur theater costumes. First, we looked at the importance of studying costume history, and we explored the value of using appropriate fabrics and trims. Finally, we stressed the need for historically accurate undergarments, including petticoats and corsets.
Now, let’s see what else might help you improve your theatrical costumes.
Patterns
When shopping for patterns, the first place people often look is the “Big 4,” otherwise known as Simplicity, Butterick, McCall’s, and Vogue. Unfortunately, while these patterns can be found easily and inexpensively, they tend to be historically inaccurate. They’re notoriously difficult to fit, too, since they come with unnecessary ease built in.
What alternatives do you have? Try looking for specialty patterns that are designed for historical costumers. You might have to pay a little more, but they’re available for almost every time period, and most of them are easy to fit, simple to sew, and will give you an accurate silhouette. They can be traced and used many times, too, so you’ll get your money’s worth.
For Victorian and Edwardian patterns (1830s-1910s), you cannot beat Truly Victorian. They carry a range of lovely patterns that are generally easy to sew. Some of the instructions assume prior sewing knowledge, but if you have any problems, there’s a message board where any number of experts will be happy to help you.
For Regency patterns (1800-1820s), try Sense & Sensibility. I haven’t used them personally, but I’ve heard they’re ideal for beginners.
For Rococo patterns (1700s-1790s), J.P. Ryan is excellent. The downside is that you only get one or two sizes per pattern, instead of a wide range. This makes them less suitable for theatrical costuming, unless all your actresses wear the same size, or unless you know how to grade patterns.
For Tudor and Elizabethan patterns (1500s-1600s), you could try Margo Anderson. I haven’t used them myself, but again, I’ve heard good things.
Don’t be fooled into believing the “Big 4” patterns will be easier to sew, simply because they’re more mainstream! I know from experience that they can be extremely frustrating to work with. Most of the specialty patterns are designed to be easy, and they’re much more likely to look historically accurate. If possible, give them a try.
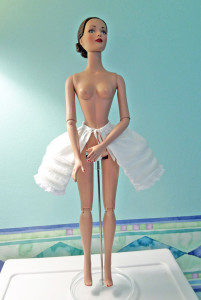
If you’re feeling adventurous, there are patterns included in the Period Costume for Stage and Screen books by Jean Hunnisett, as well as the Patterns of Fashion series by Janet Arnold. These patterns must be scaled up and adjusted to fit, so they’re not for the novice dressmaker. The good news is, you can scale them to any size, whether large or small. For example, I used one of Hunnisett’s patterns to make a pair of pocket hoops for a 16″ fashion doll. The author’s directions were sometimes confusing, but the pattern sewed up beautifully.
(Note: Yesterday’s Thimble is a participant in the Amazon Services LLC Associates Program. Basically, this means if you click a link to an item that Amazon sells, and then buy it, I earn a small fee that helps support this website.)
If you absolutely cannot afford specialty patterns, avoid any of the “Big 4” that are labeled as “Halloween” or “Costume.” Those will be less historically accurate than patterns from a fashion history line.
For example, Butterick has a “Making History” line that isn’t too bad. I made a pair of their 18th century stays using B4254. The stays had a great deal of ease, which meant I had to go down two sizes. Plus, I had to remove the shoulder straps in order to achieve a comfortable fit. But otherwise, they were quite decent.
Don’t assume any pattern is accurate. Research the era you’ll be sewing for and then look for patterns that provide the shapes and silhouettes you need. Most cheap patterns won’t have accurate seaming, closures, or support. For a theatrical production, that may be okay. It just depends on how historically accurate you need your costumes to be.
Visit The Great Pattern Review for critiques of different costume patterns. Seeing what other costumers think of the patterns you’re considering will help you make an educated decision.
Make a Mockup
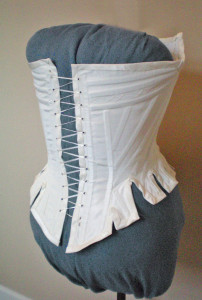
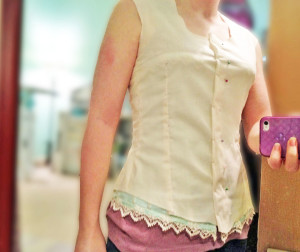
In order to save time and money, it’s important to sew a mockup of every new costume you make. You might think doing so wastes time, but it can be a lifesaver! It allows you to perfect the fit of the garment before you cut your good fabric. It also permits you to iron out any kinks in the construction process. Mistakes will be made on the mockup, not your actual costume.
Use an inexpensive fabric of a similar weight to your actual fabric. You don’t have to sew every detail, only enough to allow you to fit the costume and to ensure that all the elements will work the way you envision. Skip facings, linings, and hems. (For more information, see the article: Toiles, Muslins, & Mockups, Oh My!)
Keep in mind that most period costumes should be custom-fitted to each actress. However, if you’re making several variations of the same pattern, you might get away with just one mockup. It depends on whether subsequent versions need to be fitted to different actors or not. If the costumes are for the same person, you can skip additional mockups. If the pattern will be made for several different people, but it’s a simple design—a skirt with an elastic waist, for example—you shouldn’t need more than one initial mockup to check the sizing.
|
Budget Tip For mockup fabric, try using flat sheets purchased at the thrift store, or from a discount shop, like Walmart. Sheets are inexpensive and of a good weight for most mockups. You can also buy unbleached muslin when it goes on sale at your local fabric store. |
Perfect the Fit
Having costumes that fit properly will go a long way towards making your theatrical production look professional. Granted, sometimes emergencies arise and an understudy may be called in, leaving you with little time to fit the costume. But otherwise, do your best to ensure that each costume fits its intended wearer.
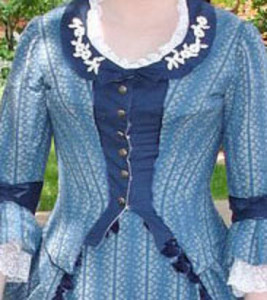
In particular, women’s bodices should usually be snug and well-fitted. Rococo and Victorian styles were not baggy!
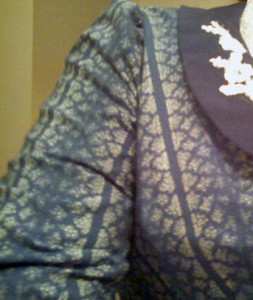
The most obvious sign of an ill-fitting bodice is wrinkles. Stress wrinkles indicate the bodice is too tight. Loose wrinkles, on the other hand, indicate that the bodice isn’t tight enough. Quite often, wrinkles will point directly to the area that needs alterations, so pay close attention to them.
Check the fit during a variety of movements to ensure that the wearer isn’t limited in what she can do while wearing the costume. There are tricks to getting the armscye and shoulder to fit properly. Get a book on fitting, such as Fit For Real People by Pati Palmer & Marta Alto, to help you make alterations to the pattern.
There are special features you can use to allow size adjustments for multiple wearers. Elastic waistbands, while not historical, are a flexible option. Hooks and eyes can provide ajustability to a skirt’s waistband or a bodice. Drawstring waistbands are another option. Velcro can permit a bodice to go up or down a size, and as a bonus, it also allows for the quick-changes that are often necessary during a performance.
Sew Fuller Skirts
Unless you’re depicting a period when skirts became narrow, such as the late Edwardian era, you should err on the side of having a fuller skirt—especially if the actress will be dancing. Have you seen someone twirl while wearing a slightly too-narrow skirt? Instead of spinning out, the skirt balloons as air gets trapped underneath. It isn’t a graceful look.
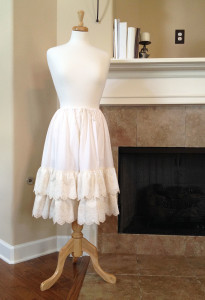
Have your actress try on the mockup and move around to determine if the skirt width is adequate. As discussed earlier, adding a petticoat beneath the skirt will help it look better, too.
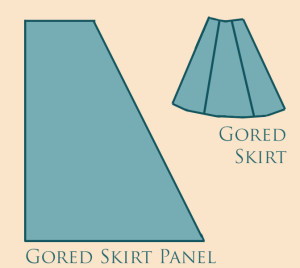
Generally speaking, from about the 14th century to the 19th century, skirts were made of rectangles that were gathered at the waist. This uses a lot of fabric! Later on, especially into the Edwarian era, gored skirts became popular. These are made of wedge-shaped pieces, narrower at the waist and wider at the hem—which saves fabric. Gored skirts often had extra panels at the center back, providing more fullness at the rear of the skirt.
Note that gored skirts won’t spin out gracefully while dancing, unless they’re very full—which may defeat the purpose of using a gored pattern.
Accurate Hem Lengths
A skirt that pools on the ground may look romantic, but it isn’t very practical. It also isn’t very accurate, historically speaking. Some 18th century skirts were short enough that a woman’s ankles showed. Most Victorian skirts were a discreet one or two inches off the ground, while walking dresses, made specifically for outdoor excursions, were an inch or two shorter than that.
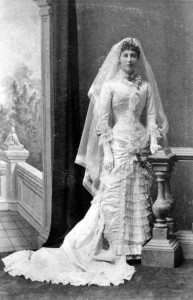
The obvious exception to this rule is trained skirts, which drag on the ground behind the wearer. But they only touch the floor in the back—never the front. In the wedding portrait below, you can see how the front of the skirt is hemmed a couple inches above the floor, while the back has a long train.
Tips
- To keep petticoats from showing, hem them two inches shorter than the skirt.
- Be sure and mark hems while the actress is wearing the same shoes she’ll be wearing for the performance.
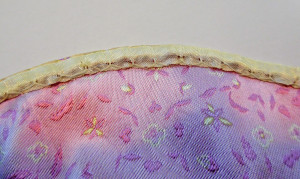
- If you accidentally cut a skirt too short, or if you need to let it down for someone taller, there are a couple of options you can consider. Instead of turning the hem up and stitching it, which requires several inches of fabric, you can either cut a mirror facing, or use seam binding, such as Hug Snug. Stitch the facing or binding to the right side of the hem, then press it to the wrong side. For a facing, press the top edge under by ¼”. For a binding, just press it flat. Hand-stitch to the skirt using a blind hem-stitch or a catch-stitch.
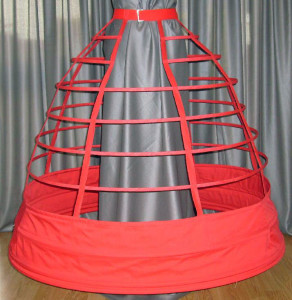
- If you’re making hoop skirts, be sure they aren’t too long. It’s all too easy to trip over hoop wires, especially while dancing! Keep the bottom hoop six to twelve inches off the ground. If you’re making a caged hoop skirt, enclose the lowest hoops in fabric (as seen below), so your actress won’t get her foot caught in the wires and stumble.
Secure Skirts
It’s a good idea to secure skirts so they won’t twist or come loose, especially if there will be dancing. Even professional theater productions have trouble with this from time to time. In Andrew Lloyd Webber’s The Phantom of the Opera, there’s one costume that includes a heavily embellished hoop skirt—it’s estimated to weigh between twenty-four and thirty-seven pounds! The actress must be very careful not to spin around, but to move slowly and carefully, so the skirt will move with her.
- Queen Elissa’s Skirt (Photobucket)
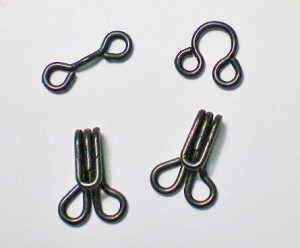
If your skirt is lightweight you can simply fasten the waistband with large hooks and bars. Be sure and sew them securely, so there’s no risk of one popping off under the strain.
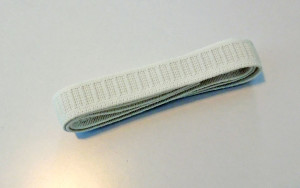
Even though we mentioned elastic waistbands earlier, they should be used as a last resort, only if one skirt must fit several actresses. If used, elastic should be at least an inch wide. Look for “no-roll” elastic that’s sturdy enough to stay in place despite the weight of the skirt. Make the waistband snug, but not so tight it’s uncomfortable.
Consider adding hooks to secure the lower edge of the bodice to the skirt’s waistband, as well. This will help prevent the skirt from twisting around, which is apt to happen while dancing. It will also keep skin and undergarments from showing at the waist when a dancer lifts her arms.
Stockings
On stage, stockings are infinitely better than bare legs. If you’re dressing an ensemble, it will lend continuity if you put members of the chorus in the same color stockings. Don’t use nude or suntan-colored pantyhose, it looks like bare legs from a distance.
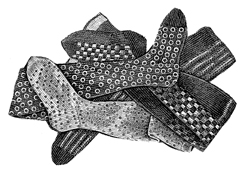
Historically speaking, women wore stockings of all colors and patterns. You can’t go wrong with plain white or black, but Victorian women also wore brightly colored stockings with stripes, checks, polka dots, zigzags, plaids, and other designs.
| Historical Note
Pantyhose wasn’t invented until the 1960s. Before that, women wore stockings that were fastened above or below the knee with tied garters, or held up with suspender belts. Suspender belts were much like today’s garter belts—a thin belt worn under the corset, with hanging straps that clipped onto the stockings. However, they didn’t become popular until the Victorian era. Regular garters were elastic bands or ribbons that tied around the leg to hold stockings up. You can make cheap and easy garters by sewing a length of elastic into a loop that fits snugly around the leg. For a prettier look, cover the elastic with fabric or lace. |
~~*~~
In the final installment of this series, we’ll look at a few final suggestions for improving your theatrical costumes.

